Physical Address
304 North Cardinal St.
Dorchester Center, MA 02124
On completion of this chapter, you should be able to:
Demonstrate how to take a patient history specific to a pelvic ultrasound examination
Discuss the indications and contraindications for transabdominal and transvaginal scans
Name the important muscles in the pelvic cavity
Describe the scan orientation for transabdominal and transvaginal ultrasonography
Describe both the sonographic technique for evaluating the uterus and adnexal area and their sonographic appearances
Discuss quantitative Doppler measurements
Ultrasonography is an important diagnostic tool for the evaluation of pelvic anatomy and pathology both in adult and in pediatric populations. The noninvasive nature of sonography, its high-resolution imaging capabilities, and its ability to separate fluid from soft tissue structures in multiple imaging planes have proven to be clinically useful.
In the pediatric population, transabdominal (TA) ultrasound is used in a variety of clinical circumstances, including the evaluation of ambiguous genitalia, pelvic masses, and disorders of puberty. It is also used to further evaluate pelvic or lower abdominal pain that may result from appendicitis.
The size, location, contour, vascularity, and physiologic state of pelvic organs are easily obtained using both TA and transvaginal (TV) ultrasound. The information obtained complements the clinical evaluation and aids the process of forming differential considerations.
Color and spectral Doppler have evolved to play a role in assessing normal and pathologic blood flow. Sonohysterography can provide more detailed evaluation of the endometrium. Sonography also plays an important role in guiding interventional procedures.
The role of the sonographer is to gather the clinical history, identify the referring physician’s indications for the study (working diagnosis), review the previous imaging results, and tailor the ultrasound examination to each patient. Critical thinking by the sonographer produces valid, reliable, and reproducible results that are the basis of an effective diagnostic medical sonographic practice.
A complete history is critical in order to tailor the ultrasound examination and correlate ultrasound findings with the proper differential consideration. It is useful for the sonographer to use a routine patient questionnaire requesting the following information: date of last menstrual period, gravidity, parity, physiologic menstrual status, hormone regimen, symptoms, history of cancer, family history of cancer, past pelvic surgeries, laboratory tests, previous Papanicolaou (Pap) smear or biopsy results, and pelvic examination findings. A review of previous examinations (ultrasound, computed tomography, magnetic resonance imaging, positron emission tomography) should be done before the start of the ultrasound examination to determine whether a mass was previously present and to assess if there has been any change in size or internal characteristics.
The patient’s menstrual status is described by using the terms premenarche, menarche , and menopause . Premenarche is the physiologic status of prepuberty, the time before the onset of menses. Menarche is the state after reaching puberty in which menses occur normally every 21 to 28 days. Perimenopause, or premenopause , is a transitional stage of 2 to 10 years before complete cessation of the menstrual cycle. This is the stage of gradually declining estrogen during which menstrual cycles may become shorter, longer, or irregular. Menopause is when menses have ceased permanently, generally agreed to be defined as 1 year without menses.
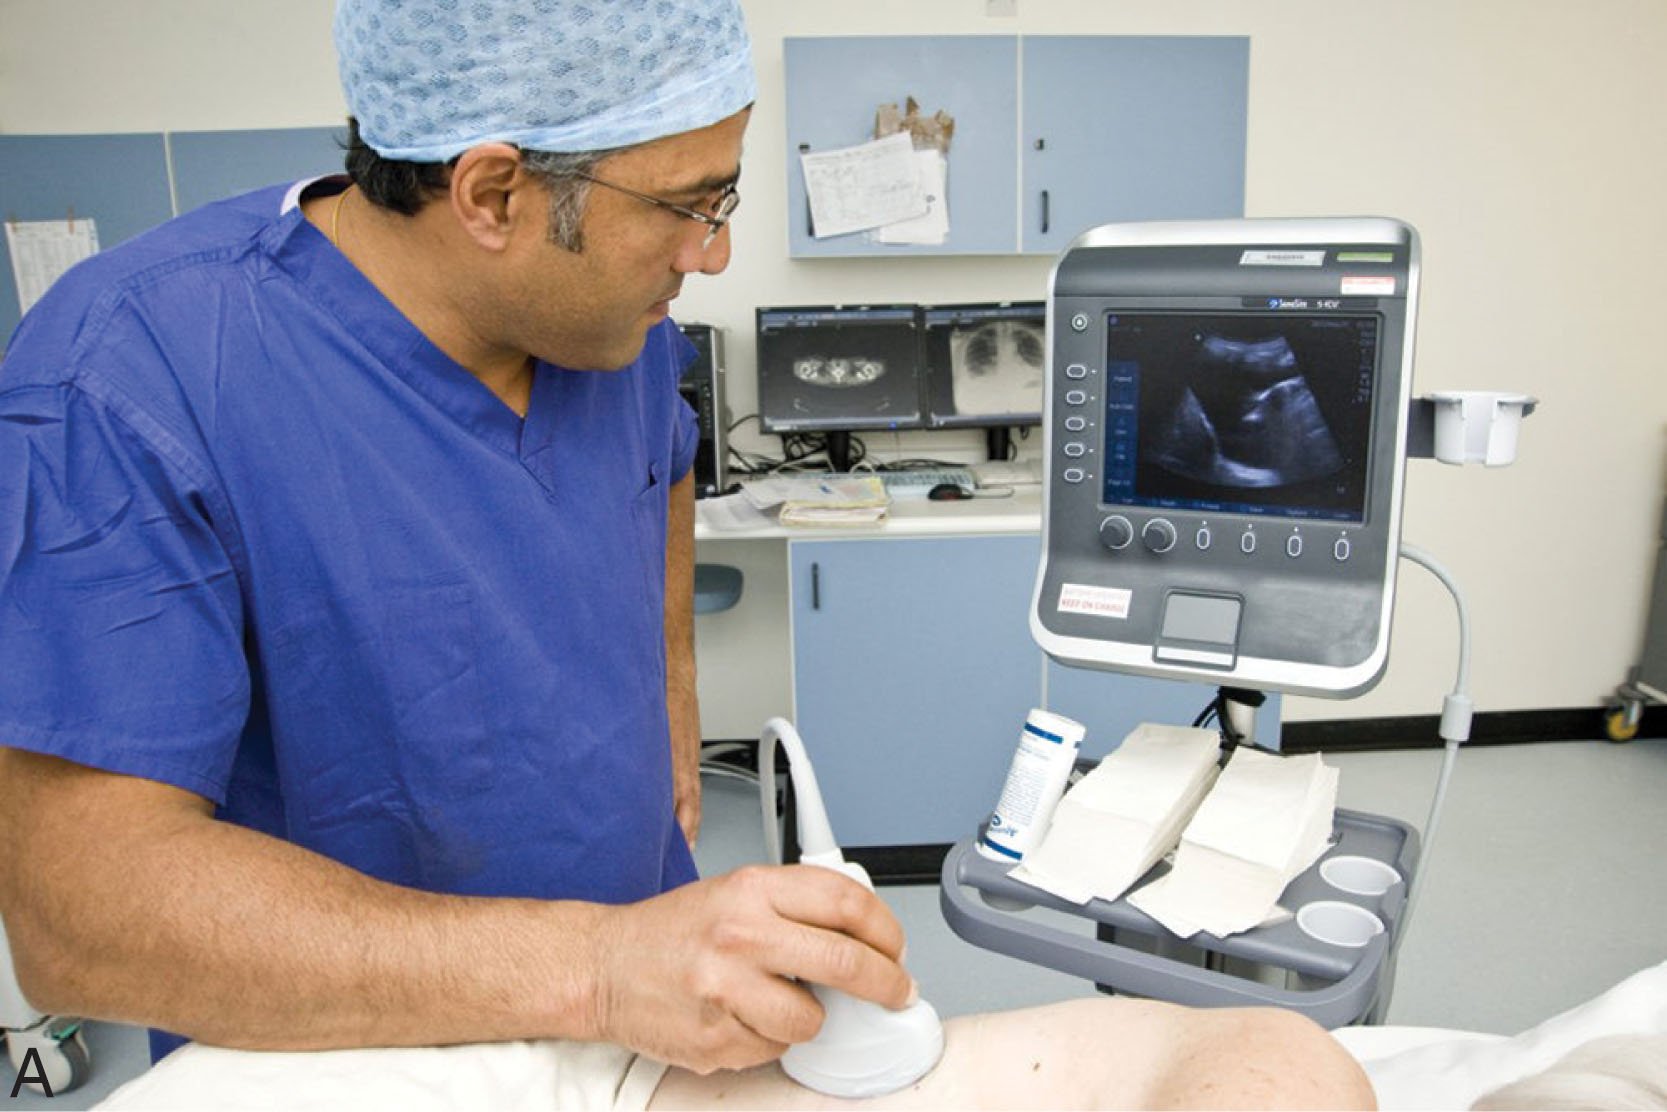
After the clinical history has been taken, the sonographer should carefully explain the examination to the patient. If both the TA and TV examinations are going to be performed, the patient should be instructed that the pelvic ultrasound examination will be performed in two parts. The first is the TA approach, in which the transducer is carefully scanned across her lower abdomen after warm gel has been applied, and the second is the TV approach, which is an internal ultrasound and similar to a pelvic examination. The sonographer should tell the patient that she will be allowed to empty her bladder completely after the first part of the examination is completed. After receiving a brief explanation of the entire ultrasound examination, the patient is placed in the supine position. Ideally the scanning should be performed on a gynecologic ultrasound examination table, which can be modified for the TV examination.
By understanding all of the patient’s clinical history and by talking and listening to the patient, the sonographer can gain a perspective as to what questions the ultrasound examination needs to answer and can tailor a plan of how to accomplish this. Once the scanning begins, the sonographer adds the information gained to develop a clinical and diagnostic image for each patient.
Four major organizations have determined standards for the pelvic ultrasound examination: the Society of Diagnostic Medical Sonography, the American Institute of Ultrasound in Medicine (AIUM), the American Congress of Obstetricians and Gynecologists, and the American College of Radiology (ACR). These organizations can be investigated by visiting their websites. This chapter uses the standards set by the ACR as its primary example. The ACR Standard for the Performance of Ultrasound Examination of the Female Pelvis outlines the following guidelines when performing a pelvic ultrasound examination:
Ultrasound examination of the pelvis should be performed only when there is a valid medical reason.
The lowest possible ultrasonic exposure settings should be used to gather the necessary information. The AIUM Bioeffects Committee identified ultrasound intensity (free-field spatial peak, temporal average [SPTA]) of 100 mW/cm 2 as the intensity below which no significant biologic effects in mammalian tissues exposed in vivo have been confirmed.
All relevant structures (anatomy and pathology) should be identified by the TA and TV approaches; in most cases both techniques are used unless contraindicated.
Alternatively, a transperineal, also known as translabial, approach can be useful in patients who are not candidates for TV scanning. Such patients might include those with suspected rupture of membranes in pregnancy or uterine prolapse.
The ACR also sets standards for personnel, protocols, documentation, equipment, quality control, and quality improvement.
The female pelvis is routinely evaluated with at least one of two ultrasound techniques: TA and TV ( Box 42.1 ). The TA examination is performed from the anterior abdominal wall using a curvilinear, or sector, transducer with frequencies of up to 5 MHz. TA scans typically use the distended urinary bladder as a “sonic” window to identify the uterus and adnexa as an overview of the other pelvic structures. However, if the protocol is to do a TA study in conjunction with a TV study, not all institutions begin with the urinary bladder fully distended. Even when the urinary bladder is only partially distended or is empty, a TA scan may still help as an overview to the pelvic structures.
Vagina and uterus serve as anatomic landmarks
Document the following:
Uterine size, shape, and orientation
Endometrium
Myometrium
Cervix
Vagina serves as a landmark for the cervix and lower uterine segment
Uterine length measured in the long axis from the fundus to the cervix
Anteroposterior depth of the uterus measured in the long axis from its anterior to posterior walls, perpendicular to the length
Width measured from the transaxial or coronal view
Cervical diameters (length and width) can be obtained (usually performed in pregnancy)
Endometrium analyzed for thickness and echogenicity
Myometrium and cervix evaluated for contour changes, echogenicity, and masses
Ovaries should be identified anterior to the internal iliac (hypogastric) vessels
Document the following:
Size, shape, contour, and echogenicity
Position relative to the uterus
Ovarian size determined by measuring the length of the long axis with the anteroposterior dimension measured perpendicular to the length
Ovarian width measured in the transaxial or coronal view
Ovarian volume may be calculated
Evaluate cul-de-sac for the presence of free fluid or a mass
If a mass is detected, document its size, position, shape, echographic pattern (cystic, solid, or complex), and its relationship to the ovaries and uterus
Differentiate normal loops of bowel from a mass
The TV examination is performed with the patient’s bladder empty, using higher transducer frequencies of 7.5 MHz or more. These higher frequencies have better near-field focusing and resolution, which permit greater detail and characterization of the uterus and adnexa.
TA and TV sonography are complementary techniques, and both are used extensively in evaluation of the female pelvis. Anatomy and pathology should be identified in at least two orthogonal planes, usually sagittal and axial or coronal and transverse , using both techniques ( Fig. 42.1 ).
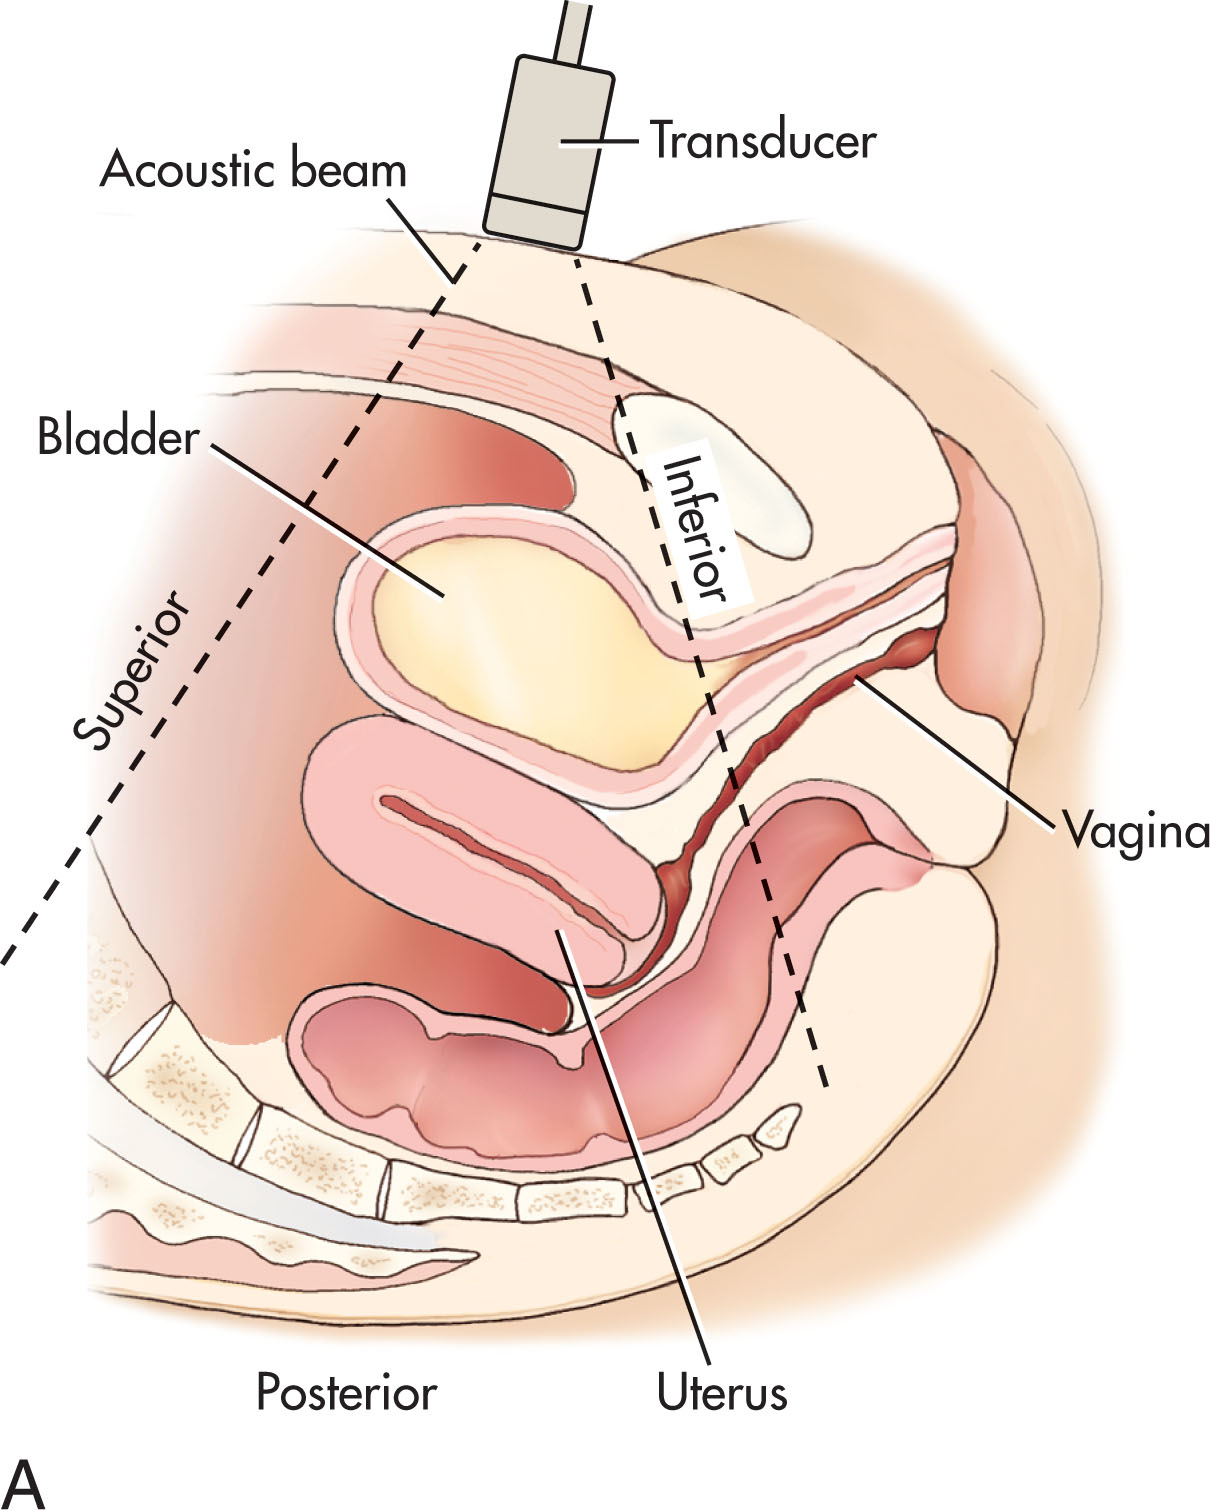
When a mass is found on sonography, the following features should be characterized:
Location (uterine or extrauterine)
Size
External contour (well-defined, ill-defined, or irregular borders)
Internal consistency (cystic, complex, predominantly cystic, complex, predominantly solid, or solid)
Ultrasound scanning equipment usually has built-in presets to optimize visualization techniques. These can be fine-tuned, and each ultrasound laboratory can develop its own unique techniques. Included are the use of harmonic imaging (cleanup on the anterior noise in fluid-filled structures), compound scanning (improved echo texture), and a variety of penetration and resolution capabilities. Sonographers need to be aware of these techniques and their capabilities to improve diagnostic imaging and avoid artifacts that can lead to an inaccurate diagnosis.
The TA approach visualizes the entire pelvis to provide a global overview. The TA technique may be limited in patients who are obese and unable to fill their urinary bladders, older patients who are unable to fill due to incontinence issues, or in patients with a retroverted uterus. This technique gives a less optimal characterization of adnexal masses because of distance from the transducer and interference from the bowel.
For an initial study of the female pelvis, it is recommended that a TA study be made, especially if the patient has not had a previous ultrasound. The TA examination is performed with a distended urinary bladder. Instruction should be given to the patient to drink at least 32 oz of fluid 1 hour before examination time and not to empty her bladder before the scheduled appointment. The full bladder displaces the bowel and any gas it contains from the field of view and flattens the anteflexed uterus slightly so it is more perpendicular to the transducer angle. The distended bladder also becomes an acoustic window to view pelvic anatomy and pathology and serves as a “cystic” reference. The bladder is considered optimally full when it covers the fundus of the normal-sized uterus ( Fig. 42.2 ). Over-distention of the bladder may compromise the sonographic evaluation and compress, distort, and displace anatomy (see Fig. 42.2D ). When this occurs, imaging may be repeated after the patient partially empties the bladder.
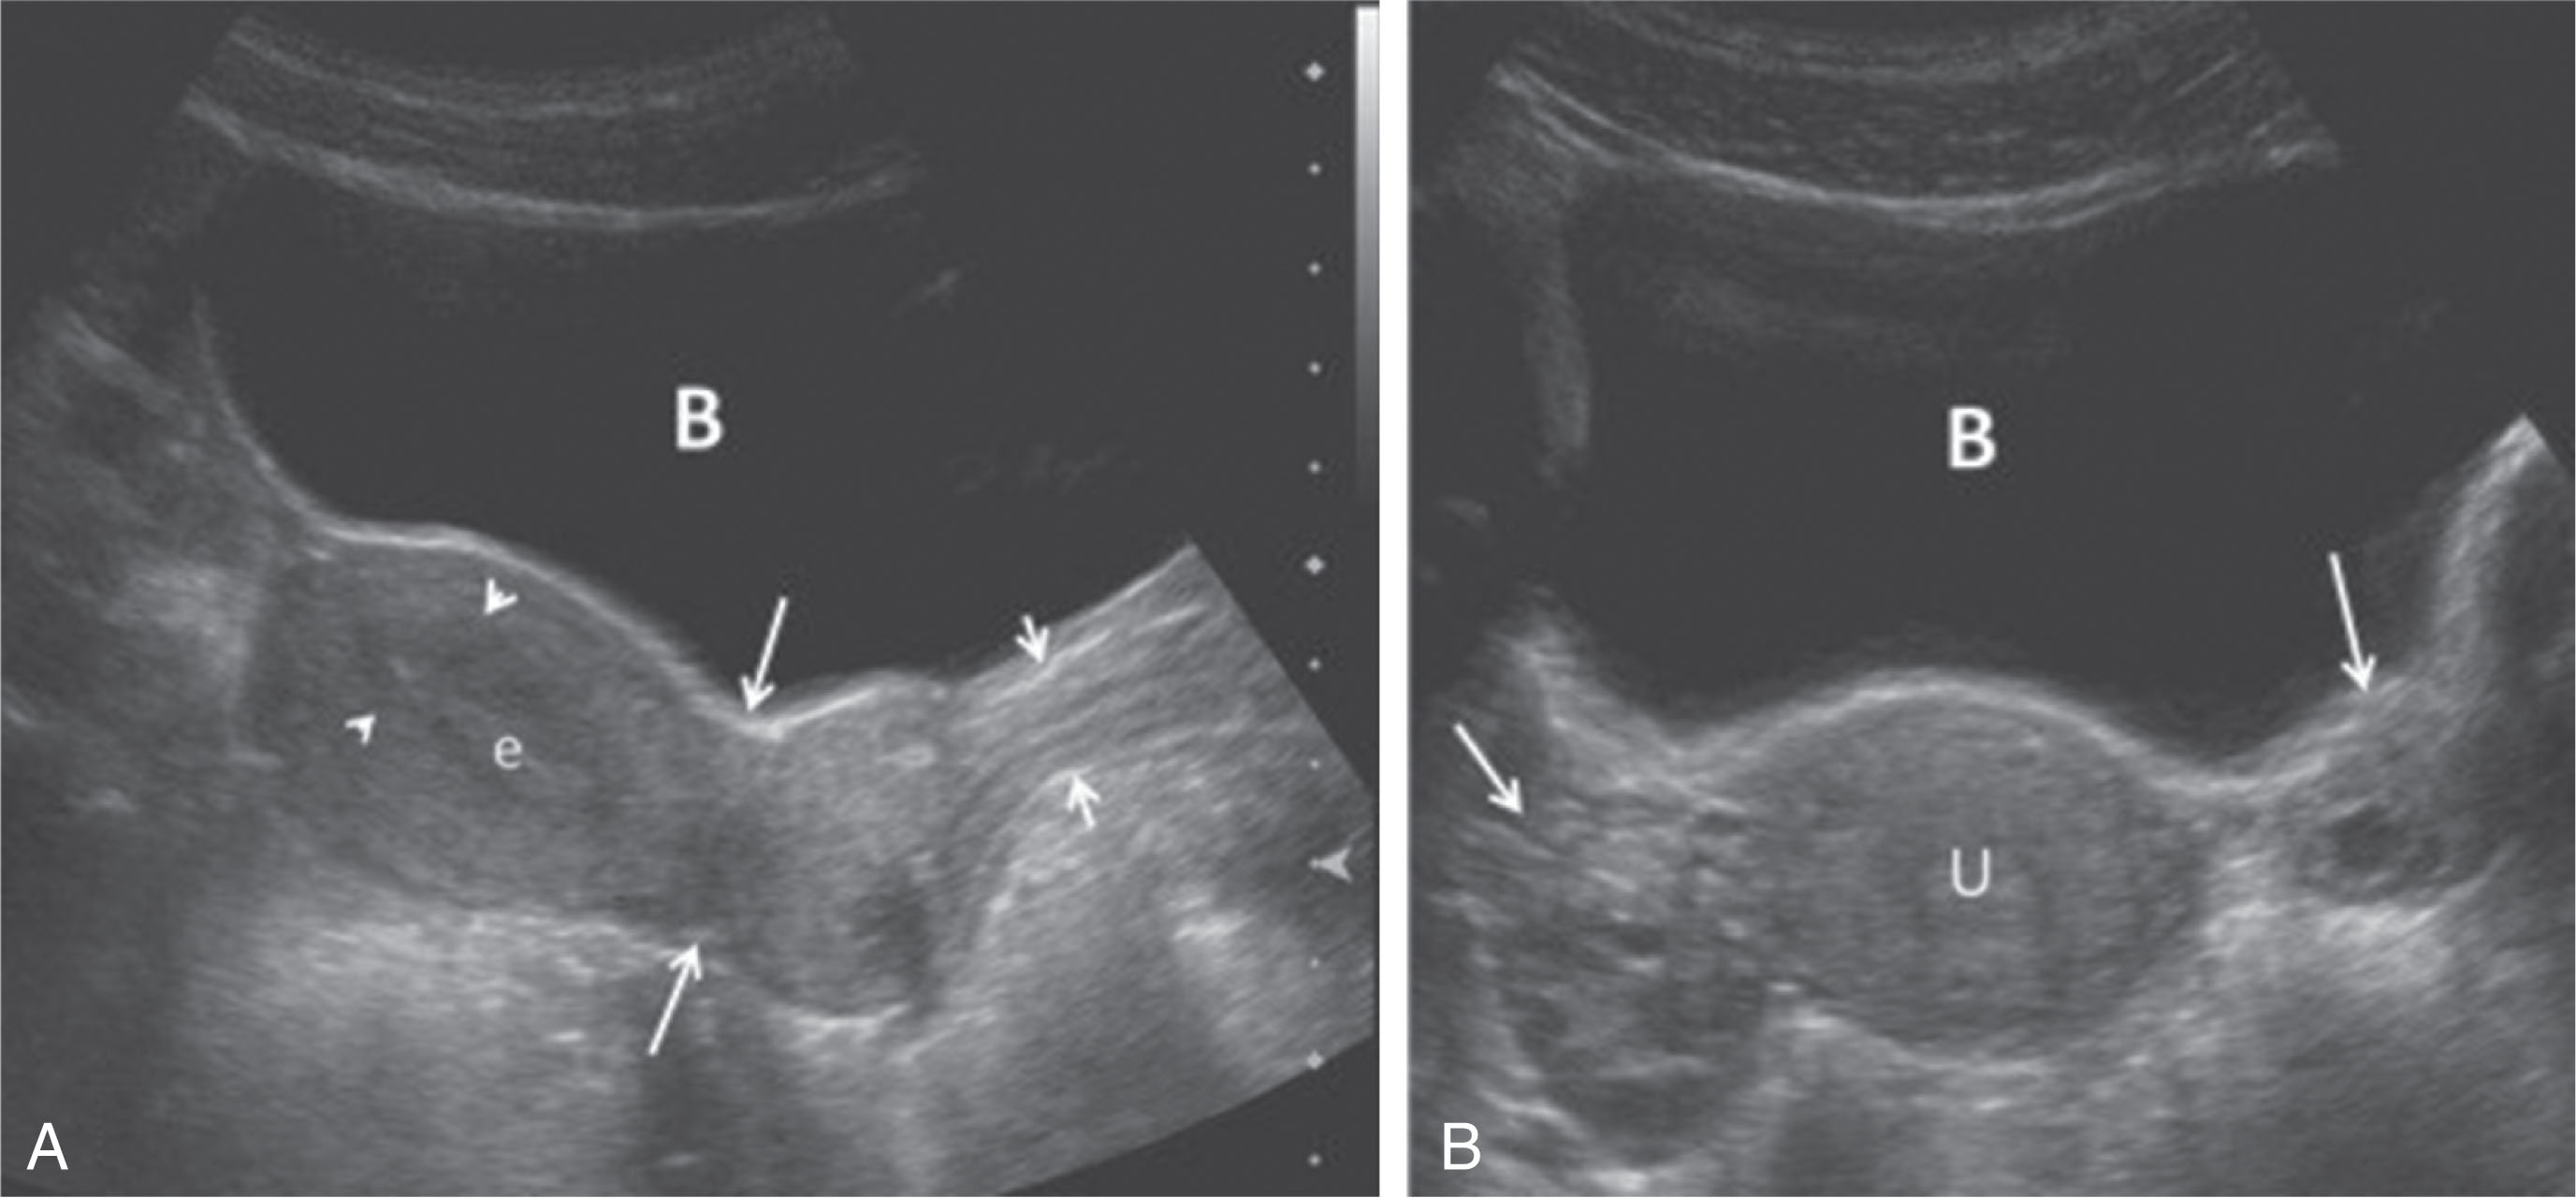
In most average-size patients, the anatomic survey is usually performed with a transducer frequency range of 3.5 to 5 MHz. If the ovaries lie anteriorly, the use of a higher-frequency transducer may be preferable. If the patient is obese, the lower-frequency transducer may be used. The TA examination is best initiated by identifying the urinary bladder and evaluating its walls and lumen. It is important to definitely identify the urinary bladder to rule out the possibility of a midline cystic, complex mass, or free fluid, which can inadvertently be mistaken for the bladder. The patient may even feel that she has a full bladder if a large mass is pushing against the urinary bladder. The bladder shape may be helpful because a well-distended bladder typically has a triangular or elongated shape on midline scans. If there is any question as to whether a cystic structure in the pelvis represents the bladder, it can be confirmed by having the patient void or by checking for ureteral jets entering the bladder.
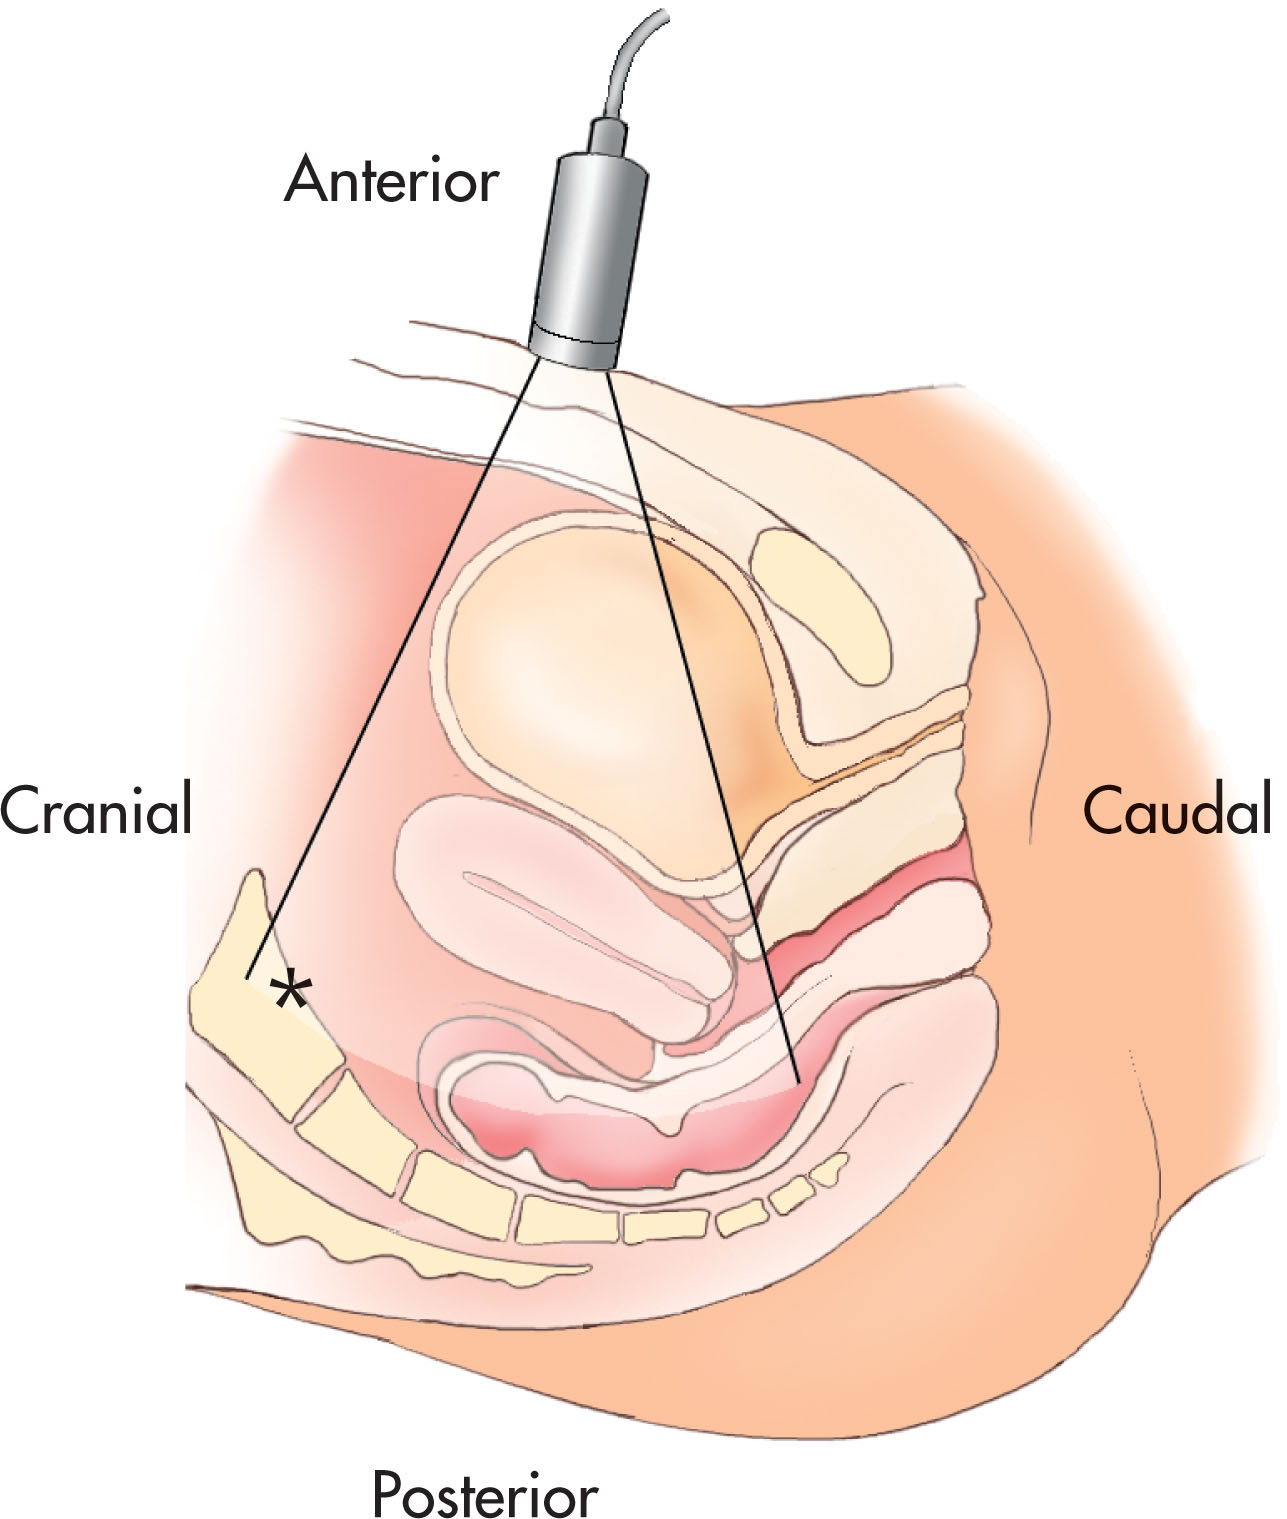
The uterus should then be identified in its long axis. This may not be in a true anatomic sagittal plane because the uterus can normally deviate toward either the right or the left. A somewhat oblique angulation through the distended bladder may be necessary to visualize the entire uterus and cervix. Anatomic orientation is correct for longitudinal scans ( Fig. 42.3 ) when the left side of the screen represents cephalic anatomy (toward the patient’s head) and the right side of the screen represents caudal anatomy (toward the patient’s feet). Once the long axis has been established, parallel sagittal scans are then obtained to the right and left to evaluate the uterine margins and the adnexa. The adnexal area may be imaged by scanning obliquely from the contralateral side and scanning through the fluid-filled bladder. In many instances, the adnexal area can be visualized by scanning directly over the adnexal area. Gentle pressure with the transducer on the pelvic area may be necessary to bring the area of interest within the focal zone. The iliac vessels can be used as a landmark to identify the lateral adnexal borders.
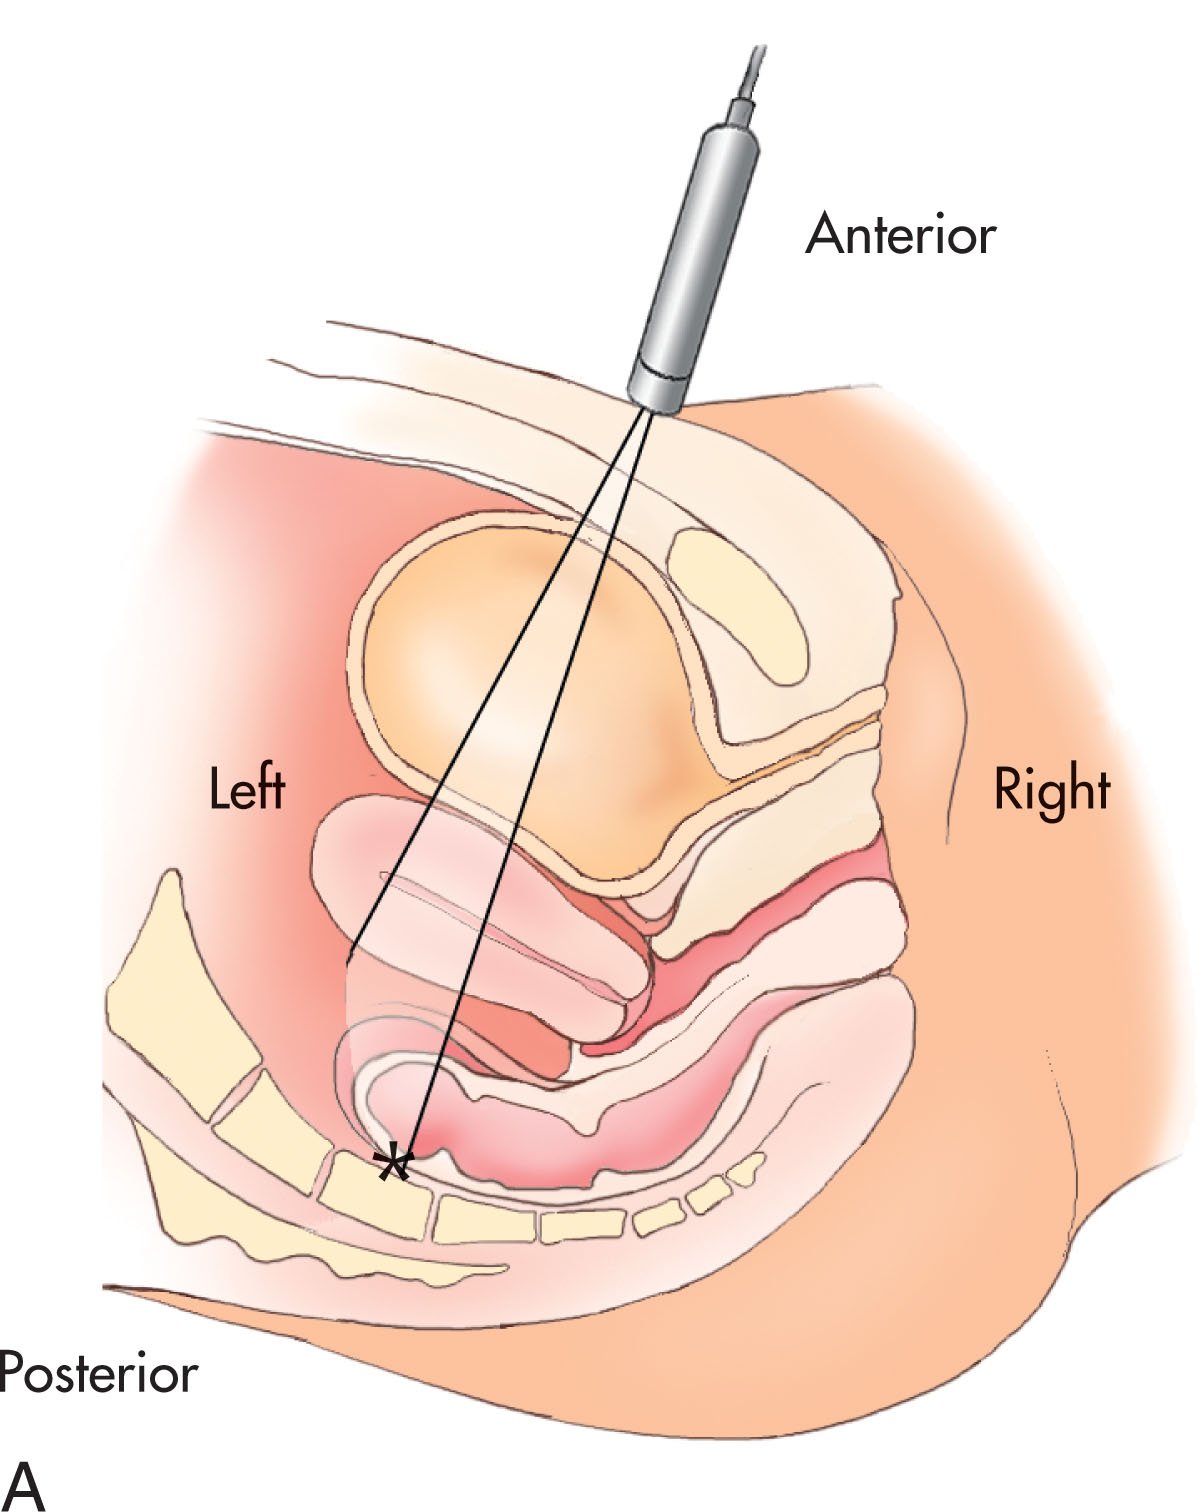
By identifying the true sagittal plane of the uterus and cervix and then rotating the transducer 90 degrees, the axial or axial-coronal (transverse) images can be obtained. Again, angulation from the contralateral side or direct visualization may help to image the adnexa. Anatomic correlation is correct for axial scans when the left side of the screen correlates with the right side of the patient ( Fig. 42.4 ). Applying gentle pressure on the transducer or placing the free hand on the abdomen helps move overlying bowel gas to bring the area of interest within the focal zone. The ovaries tend to travel cephalad with increasing bladder distention and may come to lie superior to the uterine fundus. When this occurs, it may be necessary to have the patient empty her bladder before the examination can be completed.
Documentation and scanning techniques should be methodical and become routine for viewing by both the sonographer and the physician. A routine protocol consists of longitudinal and transverse scans of the uterus (including the myometrium and endometrium ), cervix, rectouterine recess (cul-de-sac), right adnexa, and left adnexa ( Box 42.2 ; Figs. 42.5–42.8 ). Measurements of normal structures and pathology are made in the length, width, and depth dimensions. Additional information may be obtained by the Doppler evaluation of all pelvic anatomy and pathology.
Survey the pelvic area before images are recorded.
Midline: distended urinary bladder, uterus, endometrium, cervix, vagina
Measure length of uterus from the fundus to the cervix
Angle right of midline: bladder, uterus, area of right ovary
Angle left of midline: bladder, uterus, area of left ovary
Look at both right and left adnexal areas in true pelvis (iliacus muscle is lateral border)
Low: distended urinary bladder, vagina, cervix
Mid: bladder, body of uterus, endometrium; look for ovaries
High: fundus of uterus, endometrium; look for ovaries lateral to cornu of uterus
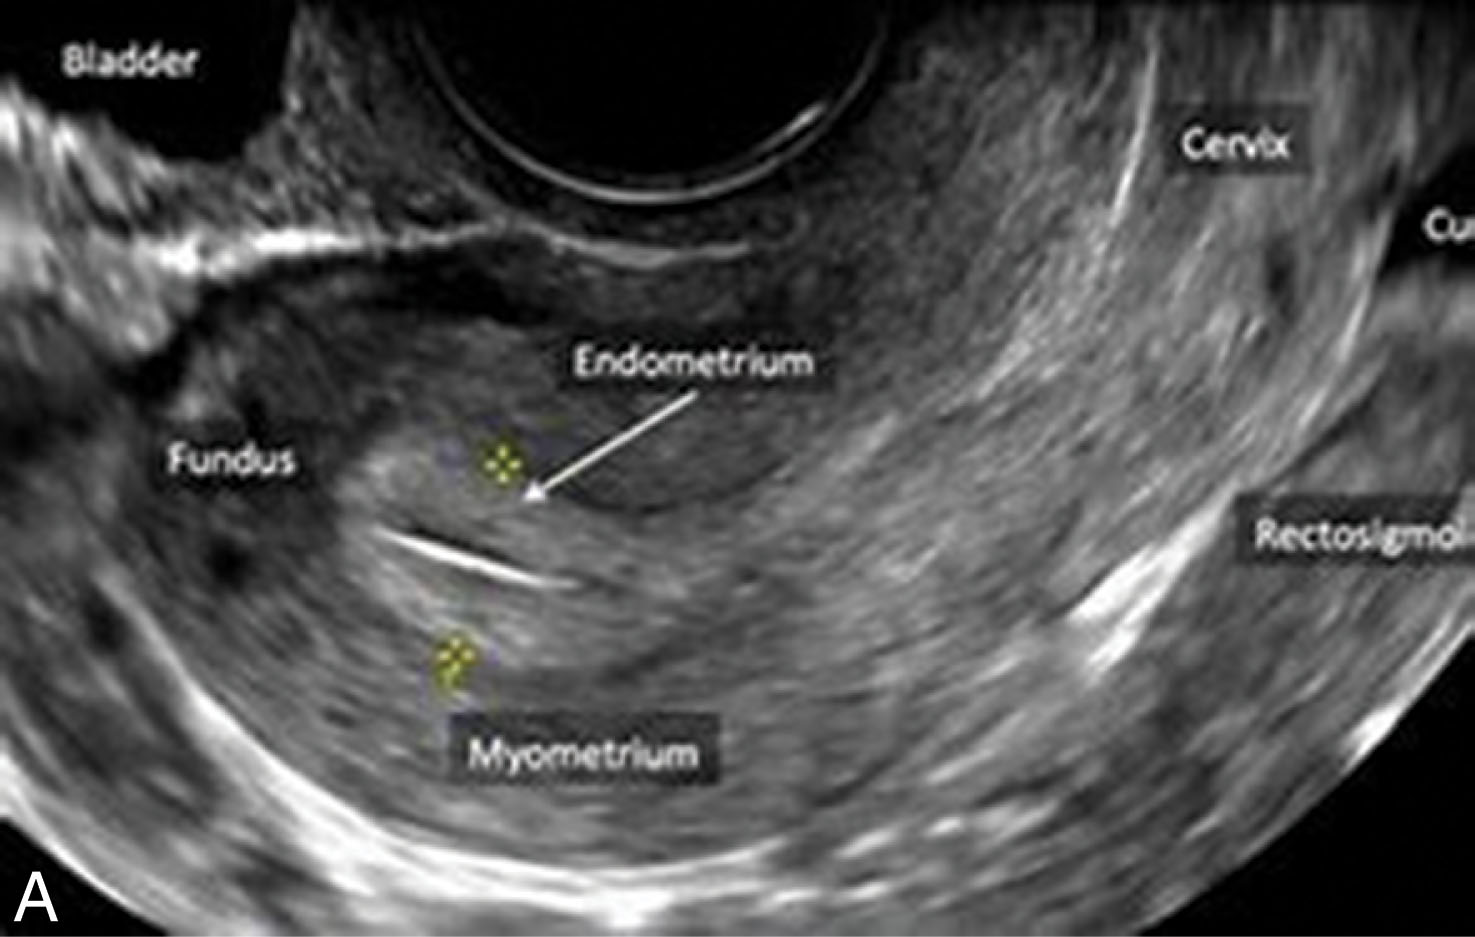
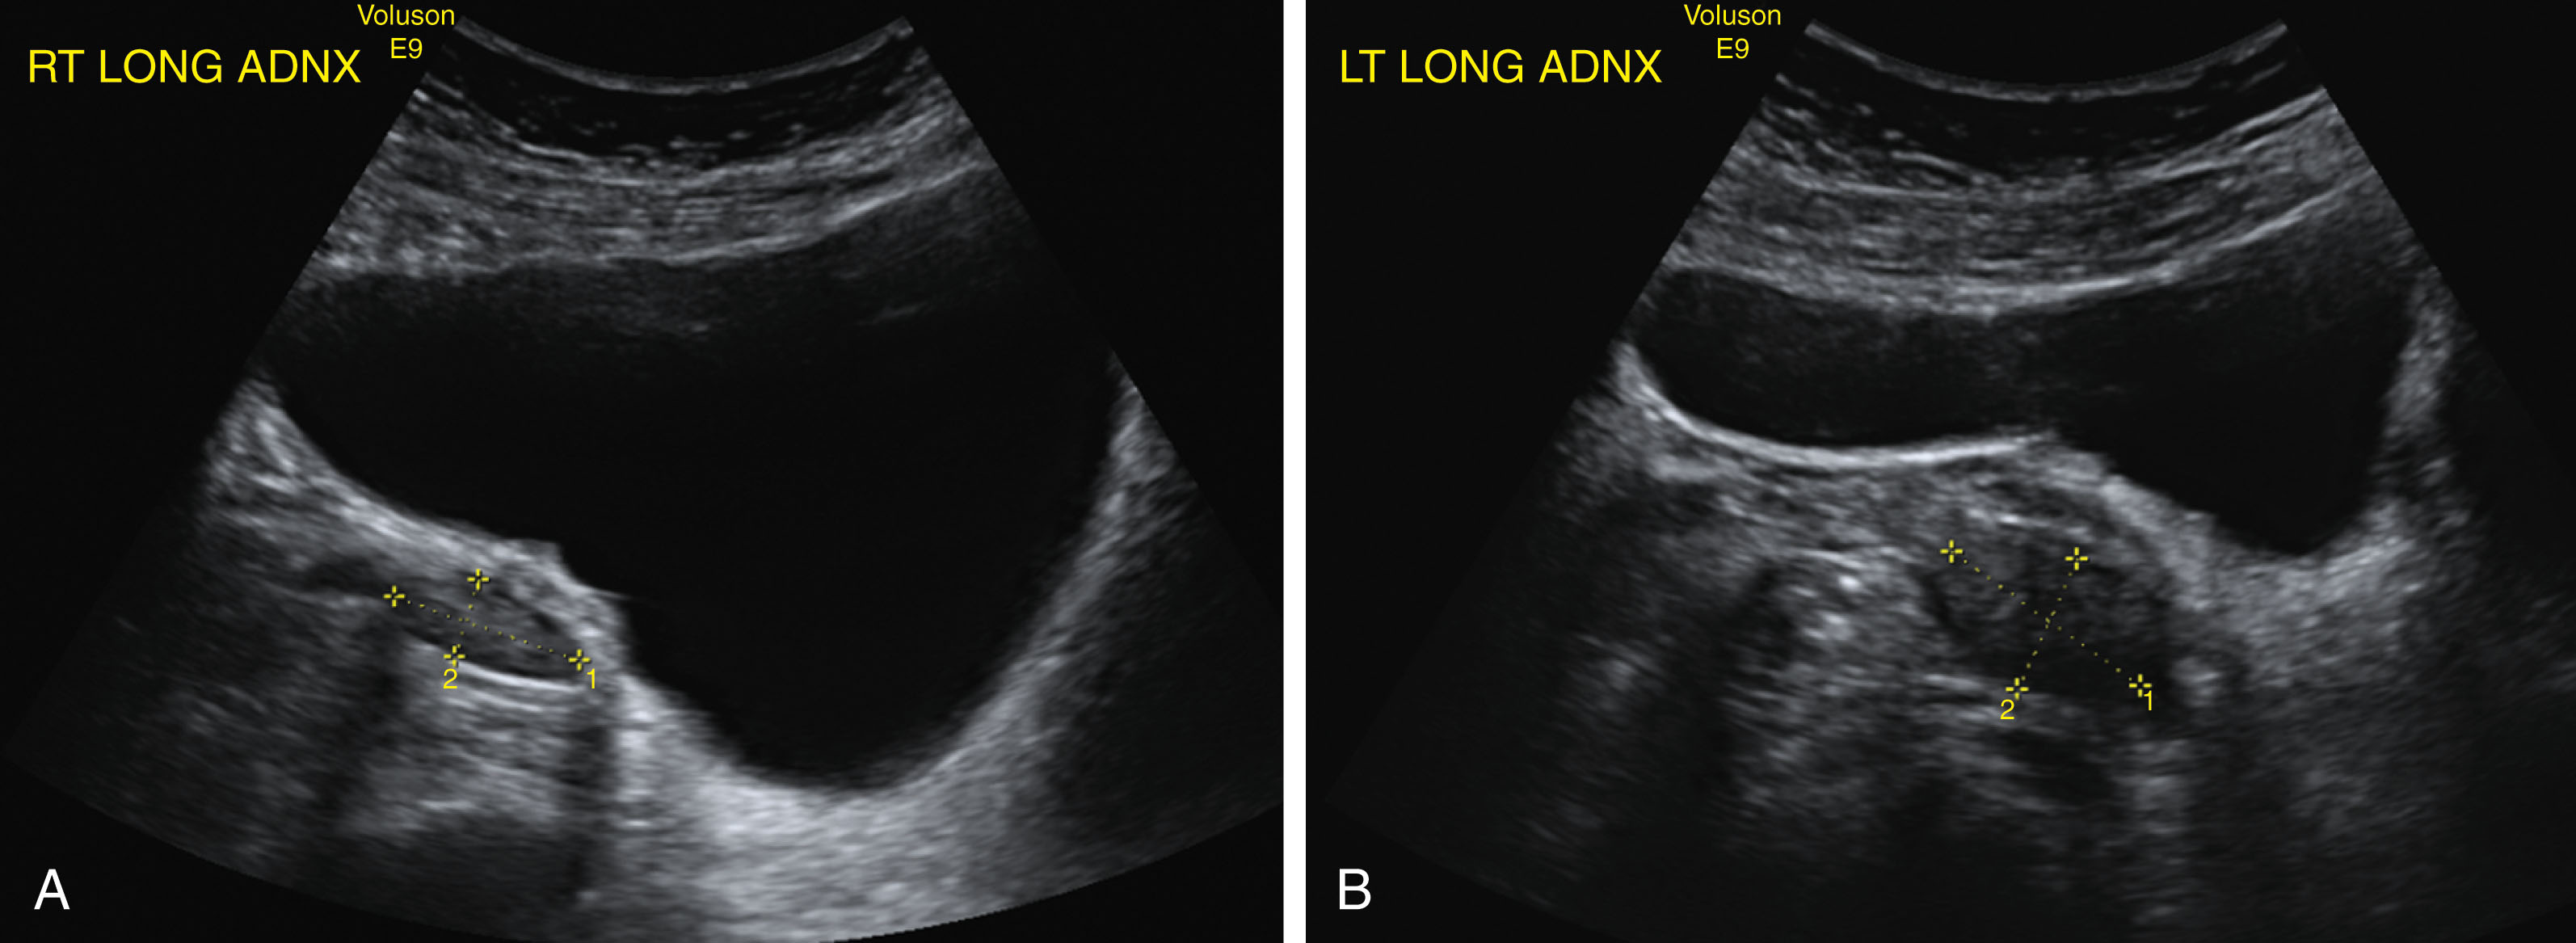
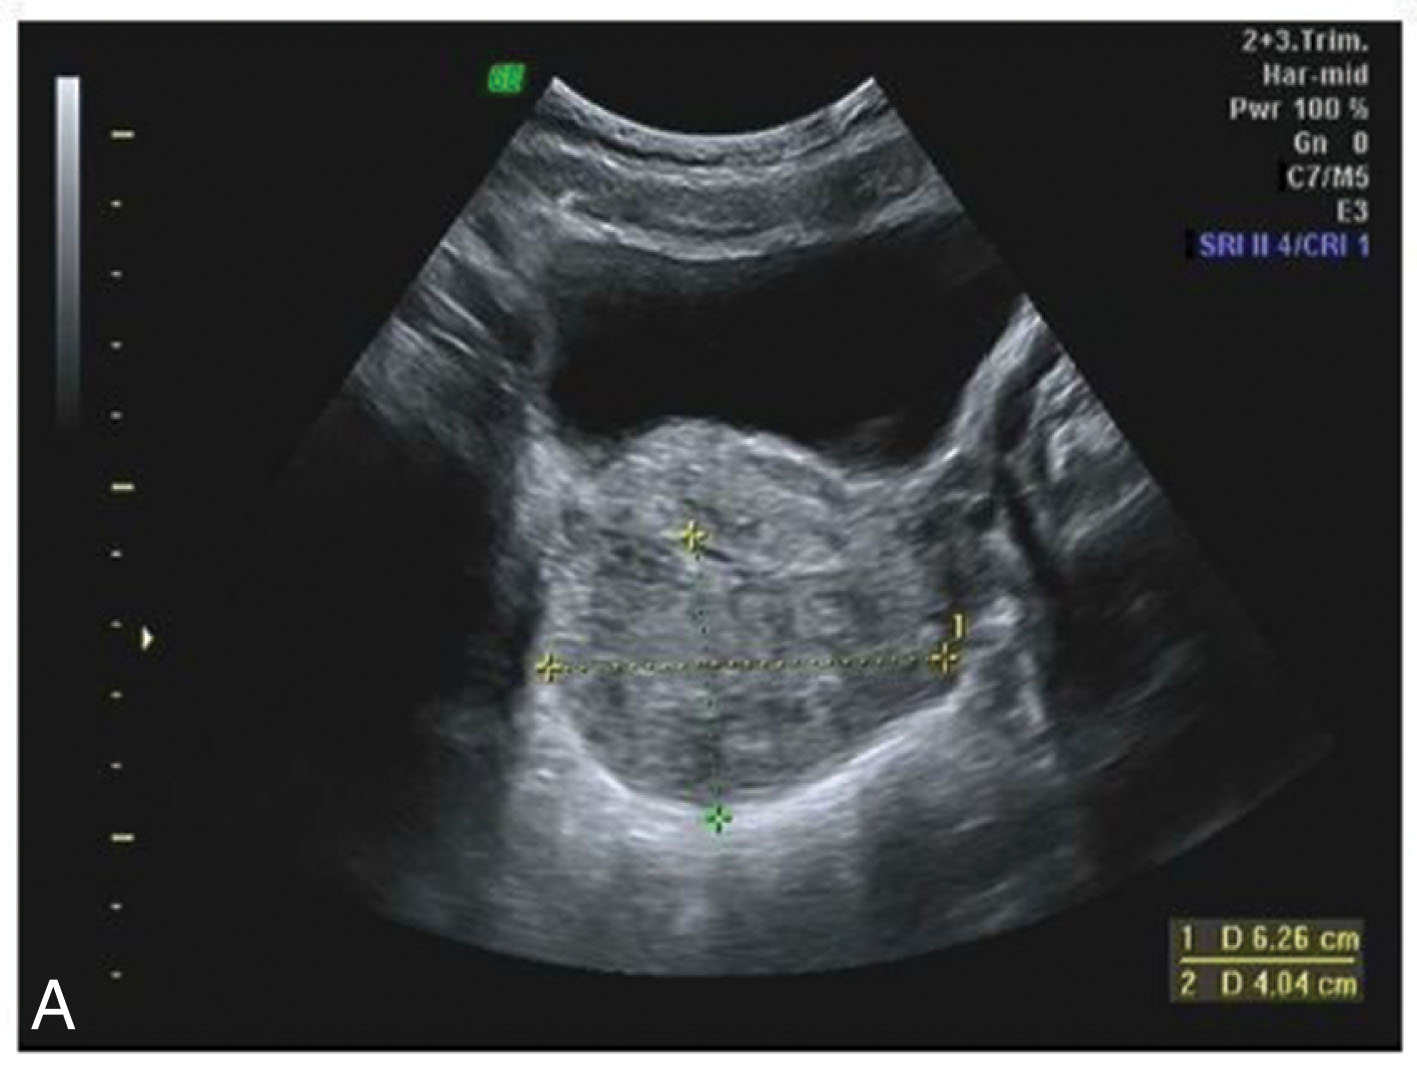
If pathology is present, documentation of the right upper quadrant (Morison’s pouch and subphrenic area) and bilateral renal areas must be obtained. The evaluation of these areas demonstrates the presence or absence of free fluid, hydronephrosis (either renal in origin or as a secondary result of a pelvic mass), or anatomic variants related to pelvic findings.
It is important to have adequate bladder filling for all TA examinations. The examination routinely begins with a TA examination to look for large masses, fluid collections, or any obvious abnormalities. The survey of the pelvis is made to identify the uterus and ovaries. Then scan both the right and left flanks, and document the sagittal and transverse views of the liver–right kidney interface and the spleen–left kidney interface.
The inclusion of the TV transducer in standard gynecologic sonography protocols has vastly improved the effectiveness of the pelvic examination. This examination allows the sonographer and physician a better visual survey by shortening the distance from the transducer to the ovaries, uterus, and adnexal regions. The resolution of pelvic structures has improved, and the ability to zoom in on smaller objects has been enhanced. This advance in technology brings with it more frequent detection of small tissue differences.
Become a Clinical Tree membership for Full access and enjoy Unlimited articles
If you are a member. Log in here