Physical Address
304 North Cardinal St.
Dorchester Center, MA 02124
On completion of this chapter, you should be able to:
Describe the scanning techniques used in abdominal scanning
State how to properly label a sonogram
List the criteria for identifying abnormalities
Explain terminology used to describe the results of ultrasound examinations
Define the criteria for an adequate scan
Identify abdominal sectional anatomy in the transverse and longitudinal planes
Describe the use of Doppler in the abdomen, including Doppler scanning techniques for abdominal vessels
The production of a high-quality sonographic image is an art that demands many talents of the sonographer: a high degree of manual dexterity and hand-eye coordination; the ability to conceptualize two-dimensional (2D) information into a three-dimensional (3D) format; and a thorough understanding of anatomy, physiology, pathology, instrumentation, artifact recognition, and transducer characteristics. The sophistication of ultrasound systems requires a greater understanding of the physical principles of ultrasound and computers than ever before. Moreover, sonographers should incorporate Doppler techniques, color flow mapping, tissue harmonics, strain analysis, and 3D imaging to understand better anatomy and physiology related to hemodynamic blood flow and reconstruction.
Although one-on-one, hands-on training in a clinical setting is an essential part of the sonographer’s experience of producing high-quality scans, this chapter will take you on a journey toward mastering the foundations of abdominal scanning. Correlation of ultrasound images with sectional anatomy is critical for producing consistent, quality images. This chapter will present the approach to general abdominal ultrasound. Specific organ protocols will be presented in their respective chapters. You may find the protocol for an abdominal scan to differ slightly between ultrasound departments; the key is to develop a protocol that is within the national practice guidelines, such as the American Institute of Ultrasound in Medicine (AIUM) or American College of Radiology and to maintain such protocol for all patients consistently. The protocol presented here is generic and may be adapted to the particular laboratory situation. Also included in this chapter are special scanning techniques and specific applications of abdominal scanning.
Remember that your goals as a sonographer are to produce diagnostic images that the physician can interpret to answer a clinical question, to create diagnostically useful images, and to be familiar with ultrasound instrumentation and the clinical considerations of the patient examination. Clinical considerations include knowing which patient position should be used for specific examinations, transducer selection and scanning techniques, patient breathing techniques, and how to perform a sonographic survey of the abdomen.
Be sure you are very familiar with various types of ultrasound equipment. Know where the operator’s manual is and how to find what you need in the manual. (Every manufacturer places the power supply in a different position, so make sure you know how to turn the machine on and off.) Become familiar with the transducers available for each machine, how to activate the transducers, and how to change transducers; some of the plug-in formats take some practice to master. Know where the critical knobs are that operate the ultrasound instrumentation (e.g., time gain compensation [TGC], power, gain, depth, angle, focus, Doppler, color flow). Know where the annotate text keys are for labeling the image. If the ultrasound equipment is new to you, it may be a good idea to use a team approach as one sonographer manipulates the controls while the other sonographer acquires the images until you become comfortable with the equipment.
It is highly recommended that the student sonographer practice in a supervised laboratory setting (away from patients) or with one of the anatomic mannequin/ultrasound models before working with patients. This way, the student sonographer can become familiar with the ultrasound equipment by scanning phantoms or even “building” their own phantoms to be scanned.
The next step should be for one student to scan the other students in the sonography laboratory. This step allows the experience of feeling how cold that gel is when applied to the abdomen and knowing what the probe feels like with different individual scan techniques. (Most laboratories are equipped with gel warmers to avoid that patient discomfort.) The student can see firsthand how a light touch does not make as pretty an image as a moderate touch with the transducer adjacent to the skin; also, the student may experience the agony of the heavy hand as the transducer scrapes across the rib cage. The student will also learn how much scanning gel is the right amount: It is too much gel if it drips down your wrist and onto your clothes.
Controlled supervised scanning should also emphasize how important it is for the patient to take a breath or suspend breathing to obtain the highest quality images. A recommended patient breathing technique tip is to have the patient inhale through the nose to reduce the amount of air going into the stomach. Breathing is probably the weakest learning link for the student . Careful control of respiration is critical for making a beautiful scan versus an image that is not easy to interpret.
The student sonographer should also begin to learn the specific protocols required for each examination. Nationally recognized protocols for all areas of ultrasound have been developed by the American College of Radiology ( www.acr.org ) and the AIUM ( www.aium.org ) for ultrasound examinations. Likewise, the American College of Obstetricians and Gynecologists ( www.acog.org ) has developed ultrasound protocols for the female patient. The American Society of Echocardiography ( www.asecho.org ) has developed extensive guidelines for all areas in echocardiography. The Society for Vascular Ultrasound ( www.svt.org ) has established protocols and guidelines for specific vascular examinations. Each of these protocols can be found on the websites of the respective organizations.
Students may be overwhelmed at first with the detail these protocols require and may not completely remember all the steps in the protocols when they first begin their clinical scanning experience. Some equipment manufacturers have built a Smart Examination Protocol into the equipment; once activated, the system will direct the sonographer to the next required view. Suggested steps to help the student master the protocols are included in the workbook that accompanies this textbook.
A new student in the clinical ultrasound laboratory may be overwhelmed at first with the control panel on the ultrasound system, the hand-eye coordination required to produce an image, understanding the probe orientation and translation of right from left on the monitor, and the protocol necessary for the particular examination. The following suggestions may make your entrance into the clinical world a little smoother:
Know all the ultrasound equipment in your laboratory. This means that every free minute should be spent with the equipment, finding the correct knobs necessary to perform the examination. Know where the depth, gain, 2D, color, M-mode, harmonics, and TGC controls are located.
Know where the operator’s manuals are for each piece of equipment so you may have a reference for troubleshooting.
Find out what protocols are used for each examination. Most departments have a Standard Manual of Protocols for all their examinations.
Understand how to read the patient order, determine what question the ordering physician needs to have answered, and know which items in the patient records are relevant for patient identification.
When you call for patients, be sure to check their ID with at least two identifiers (i.e., name and birth date, doctor who ordered the examination, type of examination ordered).
Introduce yourself and briefly explain the procedure you are going to do. Also, explain the department's procedure to notify the patient’s physician of the examination results.
Know the pertinent questions to ask a patient prior to the ultrasound examination, e.g., “Is this the first imaging study?” “Do you know why your physician sent you for an ultrasound?” “Do you have any specific pain or symptoms?” “Have you had previous surgery?”
Always keep your conversation professional. Remember that you need to focus on the examination.
Discuss the case only with your mentor or with the physician responsible for interpreting the study.
An electronic or written order by the health care provider will indicate the reason for the ultrasound examination. This order should contain the appropriate clinical information relevant to the patient to provide the necessary information from the ultrasound procedure to the clinician.
Accurate documentation must be made for the ultrasound procedure. There should be a permanent record of the examination and its interpretation available on the electronic medical record or written format. The images obtained from the examination should be recorded in a retrievable format (i.e., picture archiving communication system [PACS] system or disc). Communication of the results must be maintained between the providing physician and the ordering physician.
Ultrasound can distinguish multiple interfaces between soft tissue structures of different acoustic densities. The strength of the echoes reflected depends on the acoustic interface and the angle at which the sound beam strikes the interface. The sonographer must determine which patient “ scan window ” is best to record optimal ultrasound images and which transducer size best fits into that window. The curved array transducer provides a large field of view, but in some patients, this transducer may be too large to fit in between the ribs to provide adequate contact for accurate reflection of the sound wave. The smaller diameter or footprint transducer allows the sonographer to scan between intercostal spaces with the patient in a supine, coronal, decubitus, or upright position but limits the near field of view. It is not unusual to use multiple transducers on one patient to complete the examination, as transducers are available in multiple sizes and frequencies.
It is recommended that the patient fast for 8 hours before the ultrasound examination of the abdomen. Fasting helps to reduce the interference that may be caused by gas overlying the midline abdominal structures. It will also ensure that the gallbladder will be fully distended. If the patient has eaten, it is still possible to perform the general ultrasound examination; however, visualization of all structures may not be as clear.
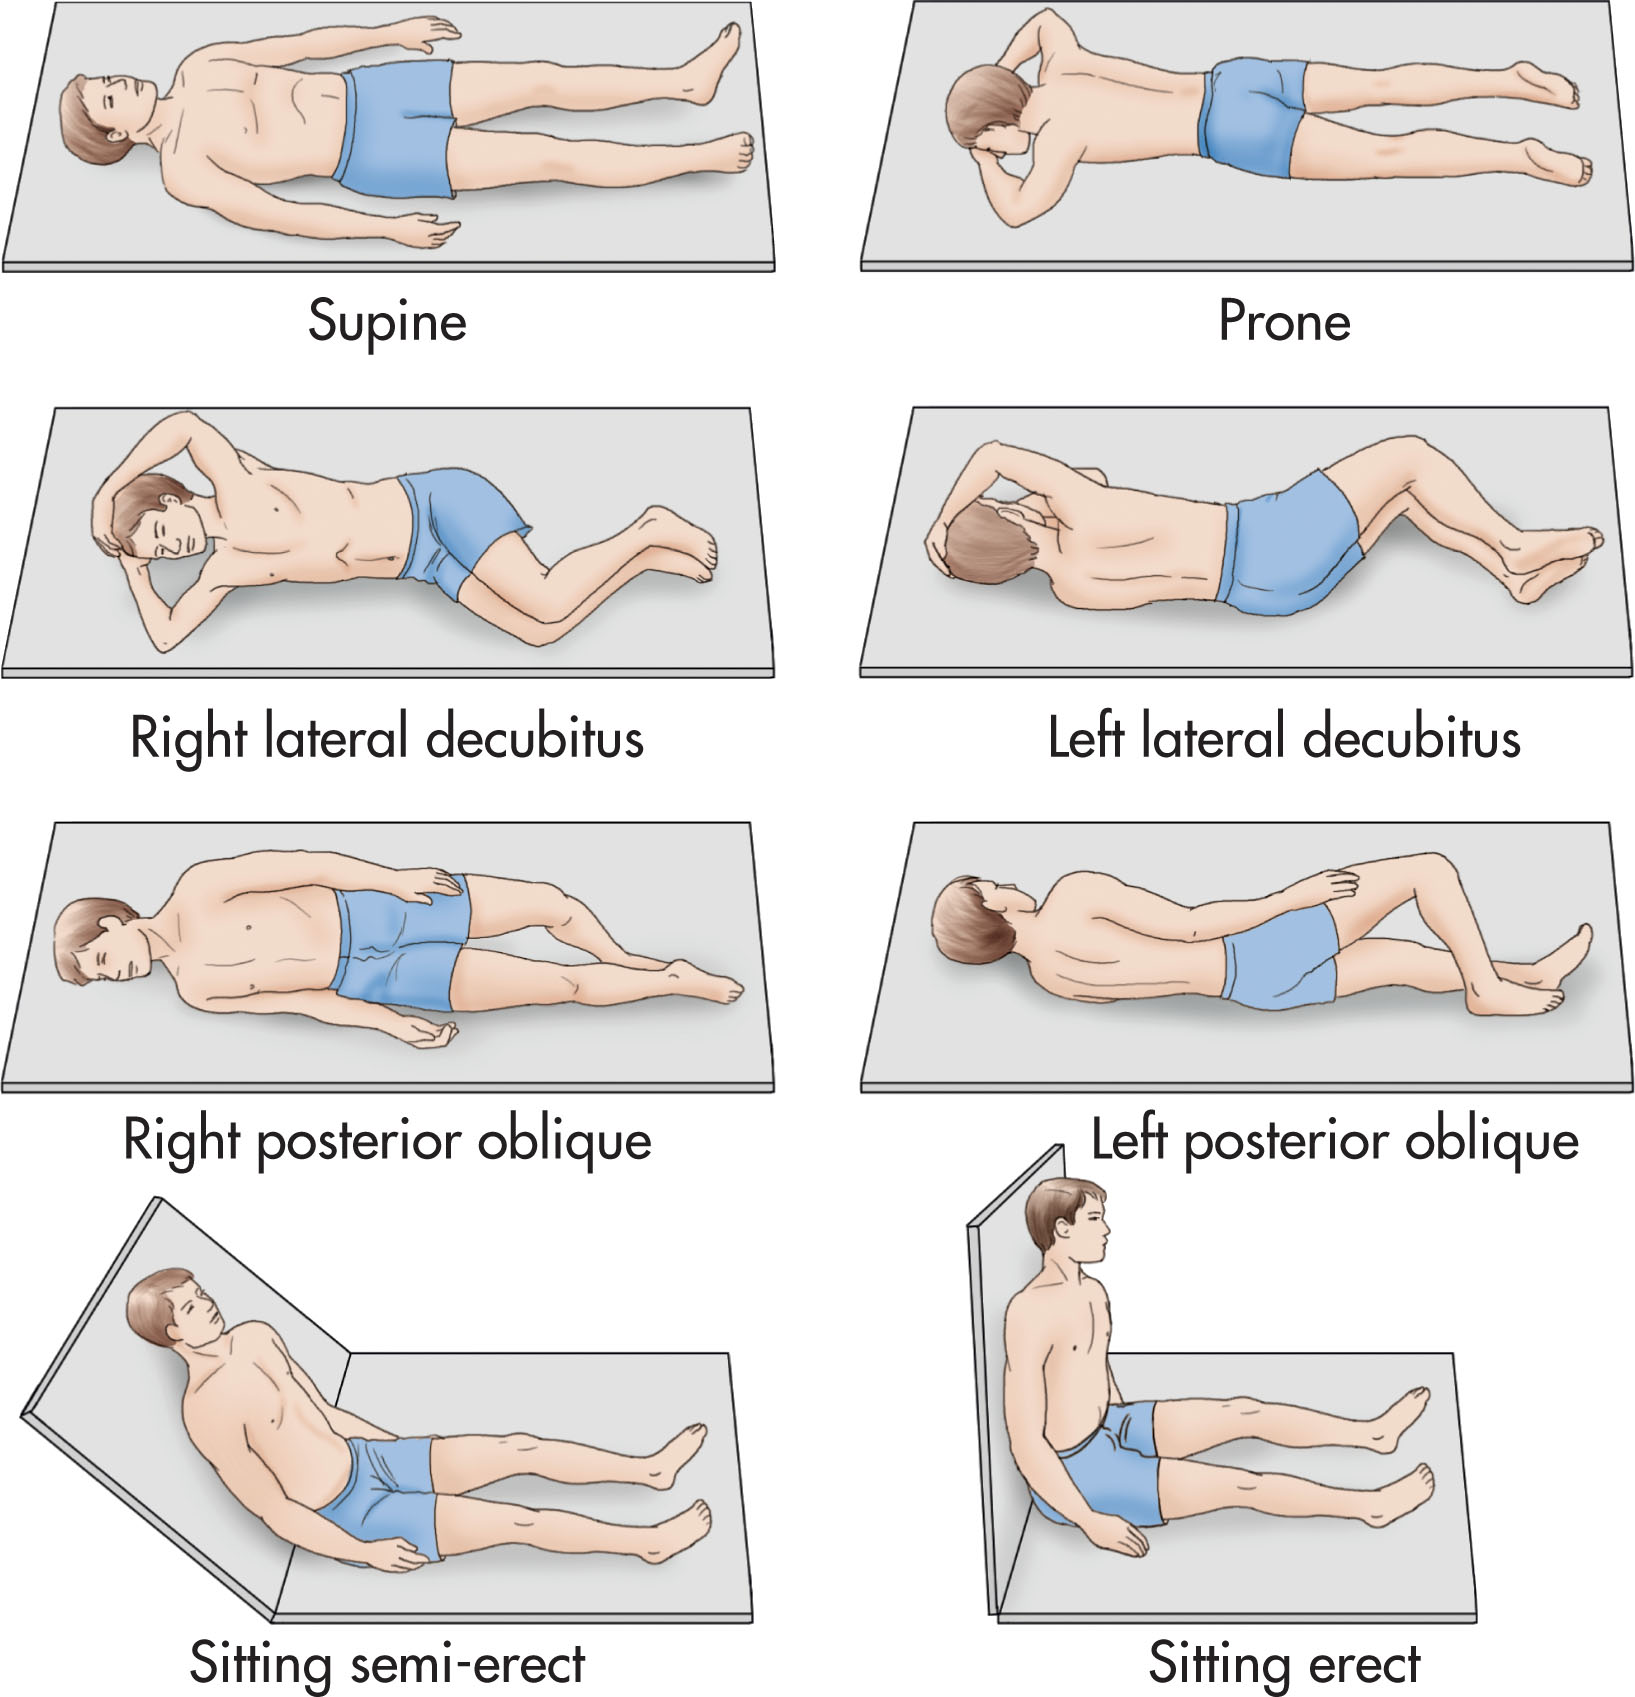
The general abdominal examination is performed initially with the patient in the supine position. Additional views may require the oblique, lateral decubitus, prone, and occasionally upright positions to examine specific areas of interest ( Fig. 6.1 ). For example, the gallbladder may be examined with the patient in the supine, oblique, or lateral decubitus positions. These organ-specific positions will be discussed in more detail in their respective chapters.
Be aware of the various transducers available for each ultrasound system, and know which transducers are used for specific examinations. Transducers are available in multiple frequencies, shapes, and sizes. Fig. 6.2 illustrates the curved array, linear array, phased array, and sector array transducers. An array transducer is a transducer assembly with more than one element. Most transducers contain multiple active elements. The real-time array transducers provide rapid and dynamic imaging.
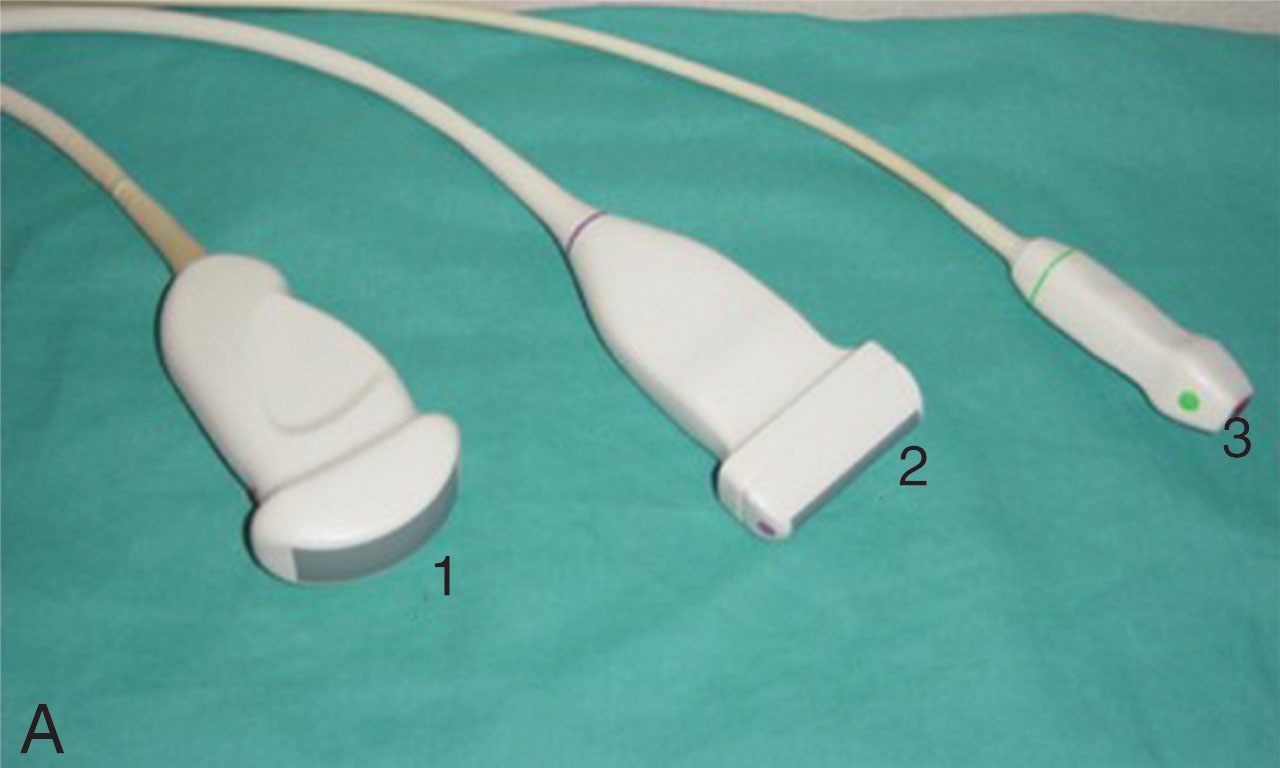
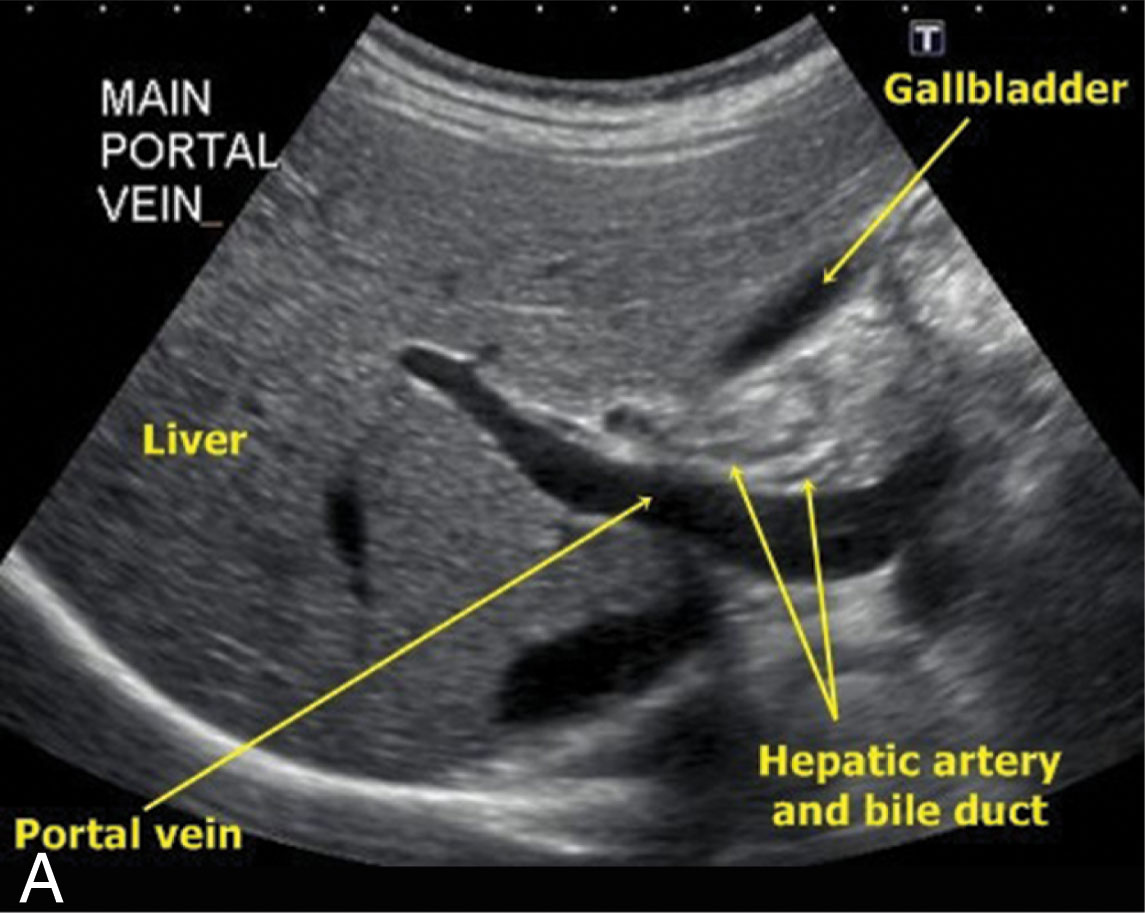
The curved array transducer ( Fig. 6.3 ) provides a large pie sector and is used to survey the abdomen, pelvis, and obstetrical evaluation. This transducer is curved because the piezoelectric crystal arrangement is curvilinear. The curved array transducers combine advantages of the sector and linear formats and are optimally used when the sonographic window is large.
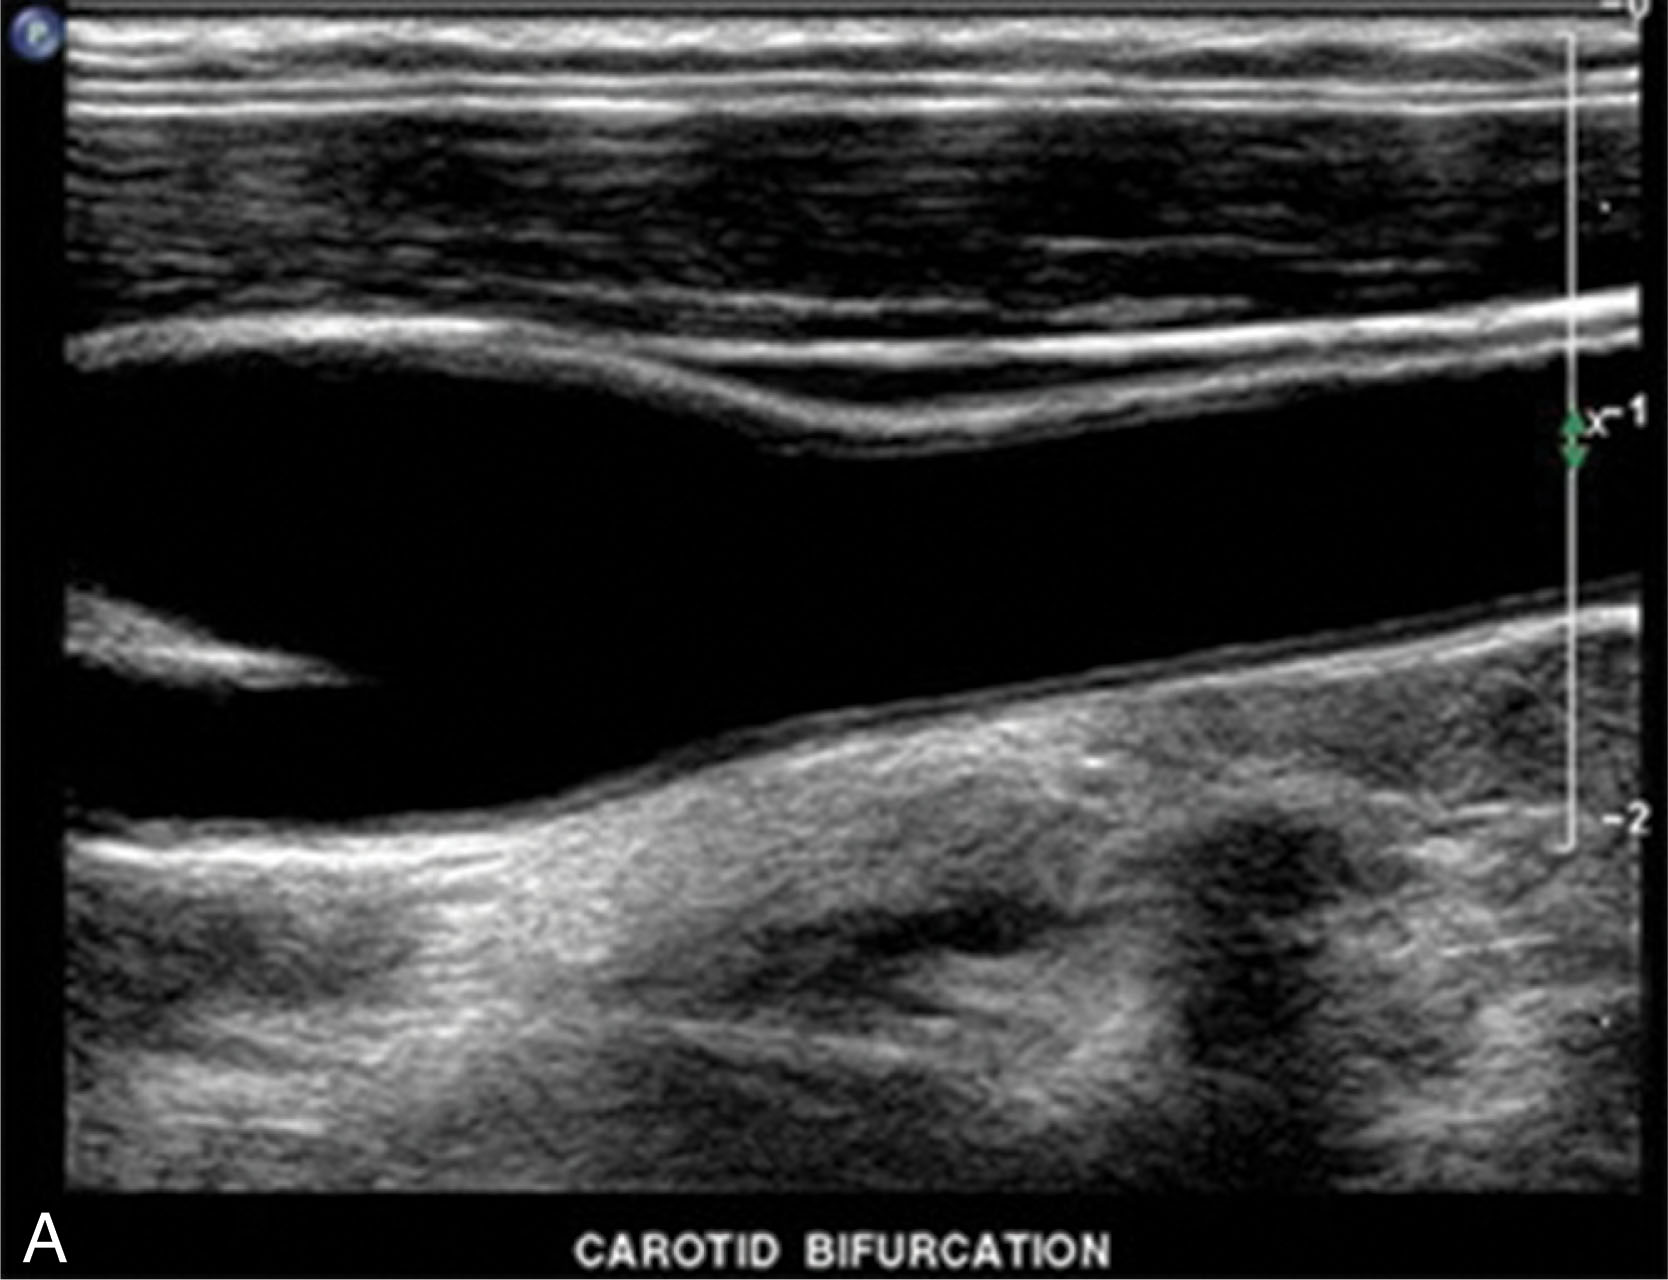
The linear array transducer ( Fig. 6.4 ) provides a rectangular image of the structure and offers the best overall image quality. The footprint is wide, and the frequency is high (7.5 to 11 MHz); thus, excellent imaging is available for the more superficial structures such as the vascular and musculoskeletal system. A linear, curved array transducer is also available (the piezoelectric crystal arrangement is curvilinear).
The sector phased array ( Fig. 6.5 ) provides a small pie sector of the area. The sector array is useful for finding a “window” between the intercostal spaces to image the liver and biliary system. It is also used extensively to image the cardiac structures.
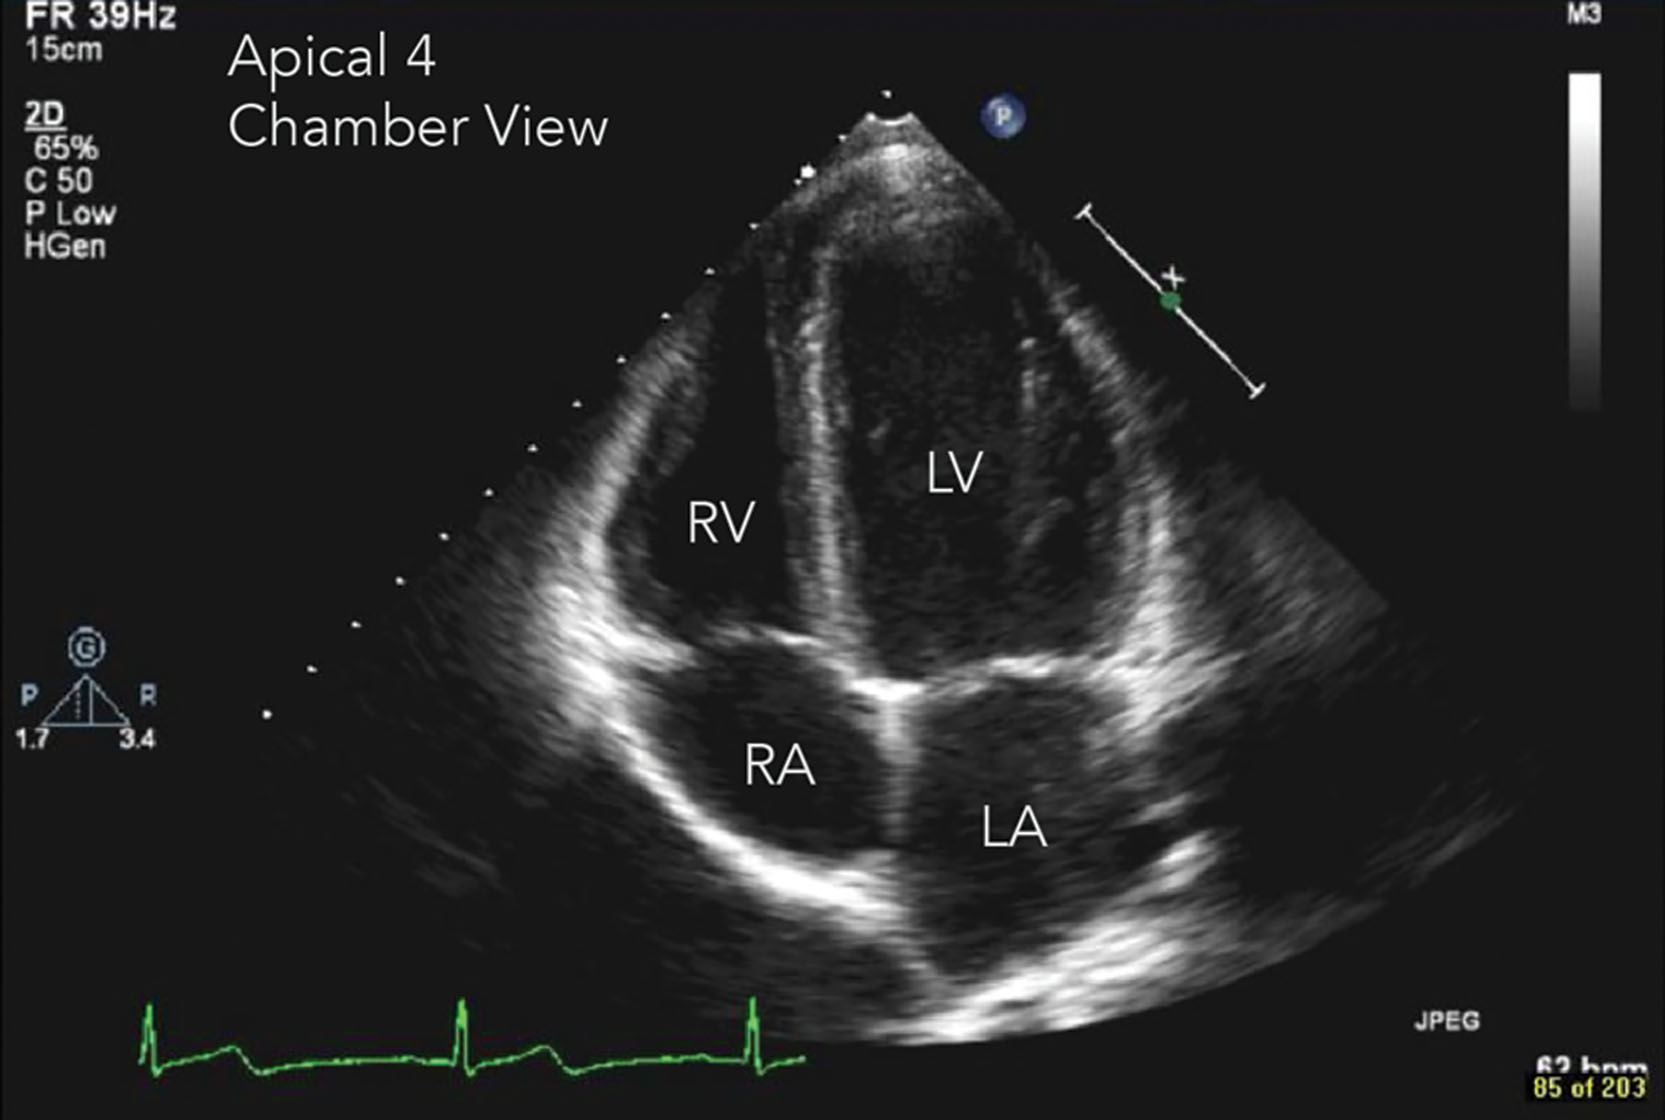
The endocavity or transvaginal transducer ( Fig. 6.6 ) is a high-frequency crystal mounted on a longer handle. The transducer is used in female pelvic and male pelvic examinations. If the endocavity transducer is used, the sonographer needs to be familiar with the decontamination process for the transducer. This process is discussed further in Chapter 42 .
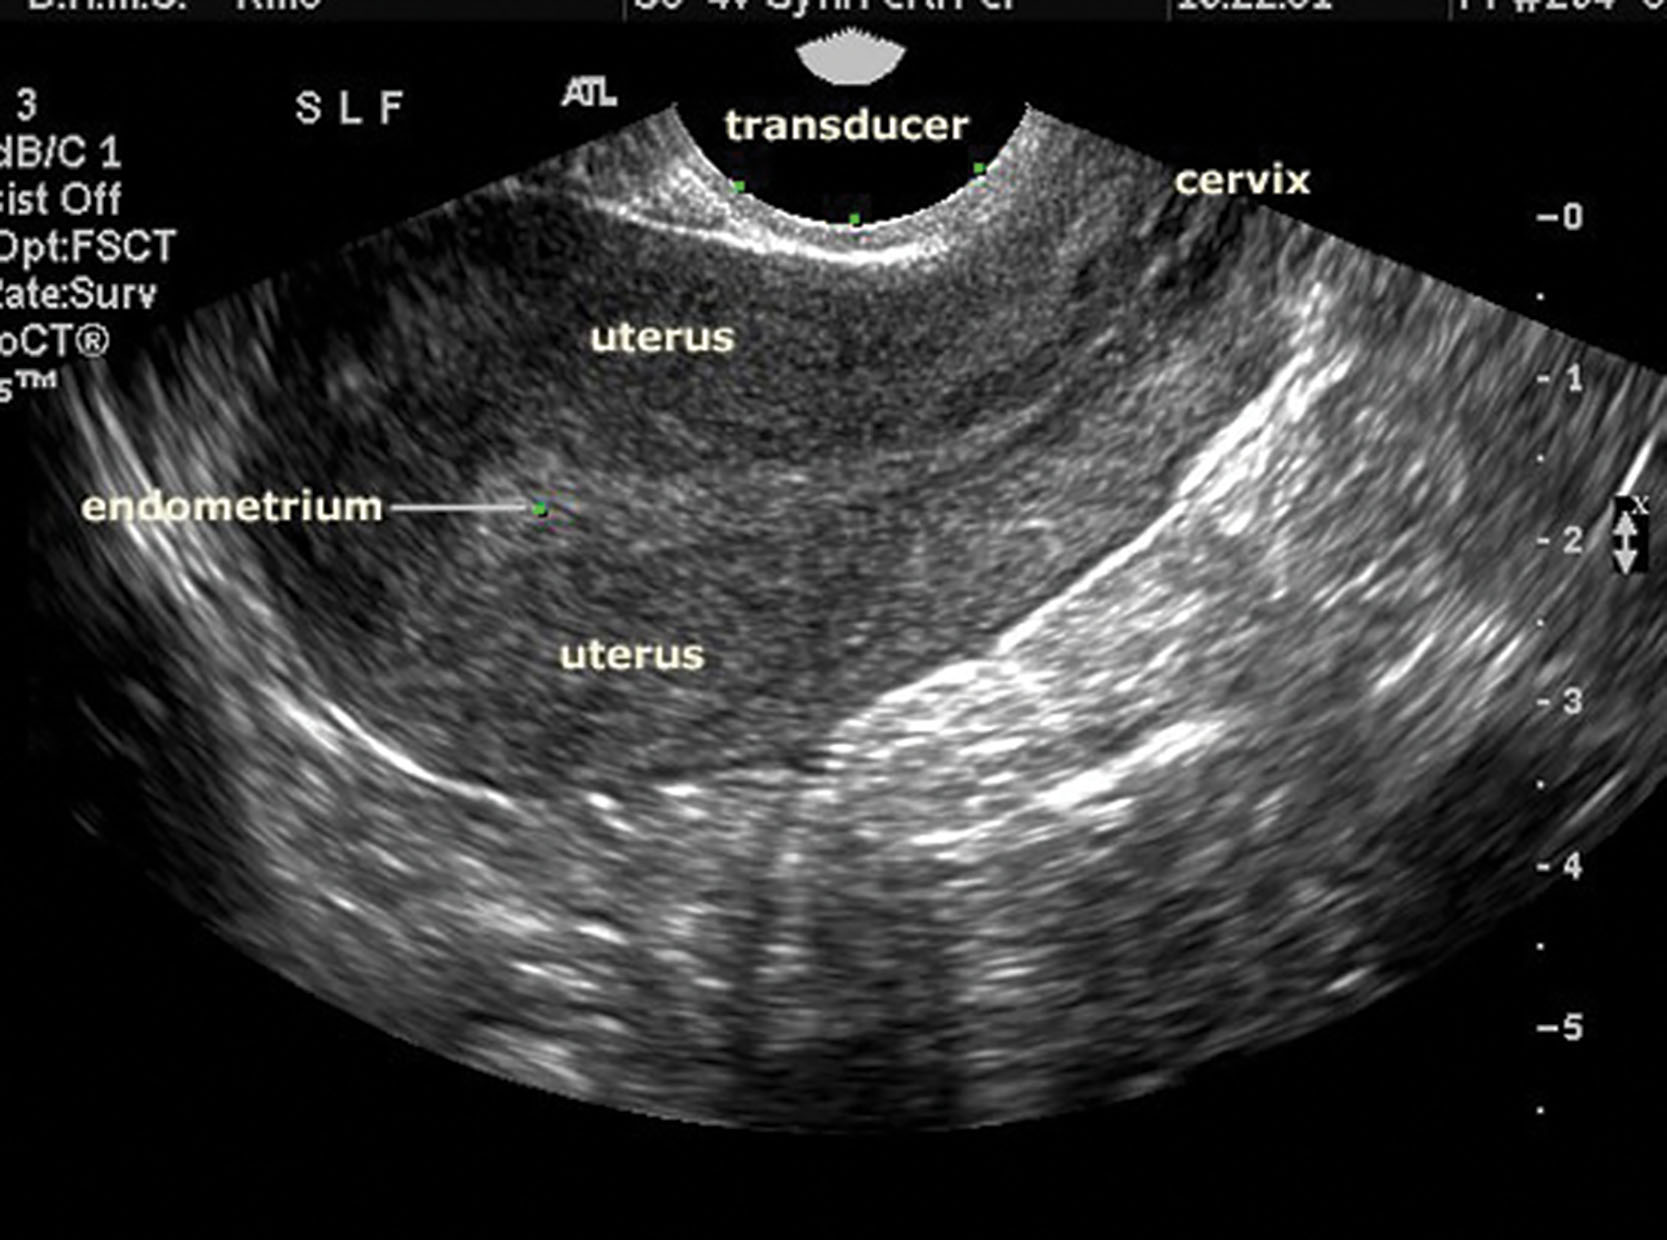
The size of the patient will influence which megahertz transducer will be used. Generally speaking, the lower-frequency transducer has better penetration and is used for the adult abdomen, obstetrics, and cardiac applications. In contrast, the high-frequency probe has a higher resolution with improved axial resolution and is used for more superficial structures such as the thyroid, scrotum, breast, early pregnancy, and some pelvic applications.
Become a Clinical Tree membership for Full access and enjoy Unlimited articles
If you are a member. Log in here