Physical Address
304 North Cardinal St.
Dorchester Center, MA 02124
Julie A. Woodward
Author’s Note: The science of filler injection is complex and ever-changing. It seems pretty simple to uncap a needle and inject a gel filler into a wrinkle or fold to make it better or into the cheeks or lips to make them bigger. Although the process itself may be simple, severe and sometimes horrific complications can occur in untrained hands or even in the best-trained hands. Like all cosmetic procedures, no one should ever simply read a book and begin performing a procedure. To competently inject fillers, the injector must understand the composition of the filler, the concept of what to inject and where to inject it, and how much to inject. In addition, an absolute firm understanding of the associated anatomy is requisite. Permanent blindness and massive facial tissue loss are well reported in the literature. Although these are very rare, they exist as a possibility for every treatment, and the injector must also be able to manage the initial care of these complications. —Joe Niamtu, III
Soft tissue augmentation with injectable fillers can be traced as far back as the late 1800s, when Austrian surgeon Robert Gersuny first experimented with injections of mineral oil and paraffin. The first injectable filler to obtain approval from the US Food and Drug Administration (FDA) was bovine collagen in 1981, and this was the mainstay of treatment in the United States until 2003, when hyaluronic acid (HA) was FDA approved in the US. HA gained rapid popularity because, unlike bovine collagen, it did not require a test spot injection on the forearm 1 month before treatment. Over the past several decades, the number of commercially available filler materials and the number of patients seeking soft tissue augmentation has seen a dramatic increase. According to the American Society of Plastic Surgery, 2.6 million filler injections were performed in the United States in 2018. The two leading filler companies state that 140 million syringes of HA filler have been used over the past two decades.
Any soft tissue filler should be sterile, inert, and stable over an extended period. Most fillers are absorbable, and HA fillers are also reversible. Filler selection must be tailored to each individual patient and the desired location for injection. Each filler has its unique characteristics that the industry promotes as potentials for its use Tables 10.1-10.3 show current information on HA fillers.
| Filler | Type | Year | FDA Indication |
|---|---|---|---|
| Restylane | HA | 2003 | Mid/deep dermis |
| 2011 | Lip over 21 | ||
| Sculptra | Poly- l -lactic acid | 2004 | HIV-associated lipoatrophy |
| 2009 | Nasolabial folds | ||
| Juvéderm Ultra/U Plus | HA | 2006 | Mid/deep dermis |
| Artefill Bellafill |
PMMA + bovine collagen |
2006 | Nasolabial folds |
| 2014 | Distensible acne scars | ||
| Radiesse | Calcium hydroxylapatite | 2006 | Subdermal |
| 2015 | Hands | ||
| Perlane | HA | 2007 | Deep and sub-dermis |
| Prevelle Silk | HA | 2008 | Mid/deep dermis |
| Juvéderm Ultra XC/UP XC | HA | 2010 | Mid/deep dermis |
| Belotero Balance | HA | 2011 | Mid/deep dermis |
| Restylane-L/ Perlane-L | HA | 2012 | Mid/deep dermis; lidocaine approval added |
| Juvéderm Voluma XC | HA | 2013 | Cheek augmentation |
| Restylane Silk | HA | 2014 | Submucosal perioral/mid-dermis |
| Restylane-Lyft (name change from Perlane) | HA | 2015 | Pre-periosteal midface added |
| Juvéderm Volbella | HA | 2016 | Submucosal |
| Restylane Defyne | HA | 2016 | Mid/deep dermis |
| Restylane Refyne | HA | 2016 | Mid/deep dermis |
| Revanesse Versa | HA | 2017 | Mid/deep dermis |
| Teosyal RHA two-thirds/4 | HA | 2017 | Mid/deep dermis |
| Restylane Kysse | HA | 2020 | Lips |
| Distributor | Trade Name | Proprietary Manufacturing Process | Marketed Uniqueness | Density (mg/mL) | G Prime | Needle Gauge |
|---|---|---|---|---|---|---|
| Galderma | Restylane Silk | Non–animal-stabilized hyaluronic acid (NASHA) |
|
20 | 344 | 30 |
| Restylane L | 20 | 514 | 29 | |||
| Restylane Lyft | 20 | 565 | 27 | |||
| Restylane Refyne | XpresHAn | Flexibility | 20 | 47 | 30 | |
| Restylane Defyne | 20 | 260 | 27 | |||
| Restylane Kysse | 20 | 156 | 30 | |||
| Allergan | Juvéderm Ultra XC | Hylacross | Hydration | 24 | 94 | 30 |
| Juvéderm Ultra Plus XC | 30 | 135 | 27 | |||
| Juvéderm Volbella | Vycross |
|
15 | 159 | 32, 30 | |
| Juvéderm Vollure | 17.5 | 273 | 30 | |||
| Juvéderm Voluma | 20 | 307 | 27 | |||
| Merz Aesthetics | Belotero Balance | Cohesive Polydensified Matrix | High integration | 22.5 | 39 | 30, 27 |
| Prollenium | Revanesse Versa | Thiofix |
|
25 | 130 | 27 |
| Revance | Teosyal RHA 2 | Resilient | FDA approved; not yet distributed in the US | 23 | 144 | 30 |
| Teosyal RHA 3 | 23 | 184 | 27 | |||
| Teosyal RHA 4 | 23 | 296 | 27 |
| Trade Name | Marketed Uniqueness | Clinical Pearls/Off Label Indications | Rationale |
|---|---|---|---|
| Restylane Silk | Precision and Structure | Perioral rhytids | Small particle allows good integration and low water absorption will not swell upper lip |
| Restylane L | Infra-orbital rims | Low integration so will not migrate and lowest water absorption; flows nicely through 30G needle. Fig. 2 | |
| Restylane Lyft | Midface; infraorbital rims, hand | Excellent lift capacity on periosteum; excellent longevity | |
| Restylane Refyne | Flexibility | Etched dermal lines; lips, hand | High flexibility, excellent integration and high water absorption |
| Restylane Kysse | Lips | Good hydration, and flexibility good structure | |
| Restylane Defyne | Nasolabial and melolabial folds | High flexibility with good structure | |
| Juvéderm Ultra XC | Hydration | Lips; etched lines | High water absorption; flows through 30G needle |
| Juvéderm Ultra Plus XC | Lips; temples; hand | High water absorption; with dilution works well in temples | |
| Juvéderm Volbella |
|
Infraorbital rims and periocular rhytids | Low water absorption and targets fine wrinkles well with 32G needle |
| Juvéderm Vollure | Etched dermal lines | Smooth yet structured; 30G needle | |
| Juvéderm Voluma | Midface | Excellent lift capacity, yet smooth, Excellent longevity | |
| Belotero Balance | High Integration | Etched dermal lines, lips | Soft, good integration, low Tyndall effect |
| Revanesse Versa | Low antigenicity-safe | Infraorbital rims, nasolabial and melolabial folds | Low water absorption smooth injection with moderate integration |
| Teosyal RHA 2 |
|
Limited experience | |
| Teosyal RHA 3 | Limited experience | ||
| Teosyal RHA 4 | Limited experience | ||
| Sculptra | Biostimulator | Temples; facial framing; décolletage, chest, buttocks; thighs | Dilutions widely vary; Widespread improvement of skin quality with one’s own natural collagen |
| Radiesse | Biostimulator | Midface, neck décolletage, hands | Dilutions widely vary; Widespread improvement of skin quality with one’s own natural collagen; white color |
Most fillers exert their therapeutic effect through the simple volumizing effect of their physical mass. Their results will depend on the rheologic characteristics, which are discussed later. Some, termed biostimulators , are also known to stimulate collagen formation. These biostimulators are often injected very dilute and are usually used for facial framing or to stimulate collagen formation in the neck and décolletage. FDA approval for individual fillers is expressly limited to specific sites or indications in the United States, but virtually all have found widespread off-label use in other anatomic regions of the face and beyond. Various fillers have also been reported to be useful for the treatment of functional ophthalmic conditions, such as lower lid ectropion, lagophthalmos, and enophthalmos.
As one may expect, complications of soft tissue fillers have increased along with an increased number of injections worldwide. The most common include bleeding, bruising, injection site pain, pruritis, superficial inflammation, undesirable cosmetic result, allergic reaction, infection, and foreign body granuloma formation. Serious adverse events are rare but can include soft tissue necrosis caused by intravascular injection; blindness caused by intravascular embolization to the ophthalmic, central retinal, or choroidal artery; and stroke caused by cerebrovascular embolization.
Table 10.1 presents the injectable fillers currently approved for use in the United States. There are numerous products on the horizon or in use outside the United States that are not mentioned in this publication. There are also many nonsurgical or surgical procedures that can be considered as alternatives or adjuncts to soft tissue fillers, such as autologous fat transfer, neurolytics, chemolytics, chemical peels, laser skin resurfacing, surgical implants, blepharoplasty, and facelift surgery.
HA is a naturally occurring polysaccharide with repeating disaccharide units found in skin. It is also present in synovial fluid between joints and in the vitreous of the eye. It was FDA approved as a viscoelastic to aid with cataract surgery in 1983. For the HA molecules to have longevity in soft tissue, crosslinking with 1, 4-butanediol diglyceryl ether (BDDE) was introduced. This is the technique of connecting the strands of HA together to increase their size and prevent rapid degradation by naturally occurring hyaluronidase. HA products currently account for the majority of soft tissue filler injections in the United States, and include the following:
Restylane
Restylane L
Restylane Silk
Restylane Lyft
Restylane Refyne
Restylane Defyne
Restylane Kysse
Juvéderm Ultra
Juvéderm Ultra Plus
Juvéderm Volbella
Juvéderm Vollure
Juvéderm Voluma
Perlane
Prevelle Silk
Belotero Balance
Revanesse Versa
Teosyal RHA 2, 3, and 4
All currently marketed HA fillers are cross-linked with BDDE, except for Prevelle Silk, which is cross-linked with divinyl sulfone (DVS).
These fillers can be distinguished from each other by a number of different rheologic properties and biomechanical characteristics that vary across the spectrum of products. Their differences are determined by their degrees of cross-linking and proprietary manufacturing processes of either sieving or homogenization to determine particle size.
Hyaluronic acid filler rheology is important to understanding the behavior of these gels. Most rheologic studies are done in vitro, so their results do not perfectly correlate with filler performance in vivo, but they do provide a general sense as to how they behave in tissue. Although a detailed discussion of gel rheology is beyond the scope of this chapter, a brief summary of the essential concepts is presented here.
Density is a measurement of the amount of HA in mg/mL that exists per milliliter of carrier substance.
Elastic modulus (G prime ) is a measurement of the storage energy that determines the stiffness/elasticity of a filler. Stiffness is a general guideline as to the filler’s lift capacity. It is measured in a device called a rheometer that places the filler between two metal plates and then measures the pounds of atmospheric pressure (Pa) needed to extrude the filler through a small port. The numbers vary quite a bit from study to study because they depend on the rheometer used, the operator of the rheometer, the ambient temperature, and barometric pressure. Calcium hydroxylapatite, a biostimulator, has the highest G prime, and Belotero Balance has the lowest.
Viscosity is the measurement of energy of friction manifested as the ability of a filler to flow. High G prime fillers tend to have a higher viscosity, while lower G prime fillers tend to have a lower viscosity.
Cohesivity is the ability of a filler to stick to itself. Fillers that are the most cohesive demonstrate the greatest tissue integration on injection, which seems counterintuitive to most people. Those with lower cohesivity seem to have less tissue integration but provide very good structure. Restylane is the least cohesive, while Belotero is the most cohesive.
Water absorption or swell factor is a measure of osmotic activity resulting from the high fixed charge density of the HA molecule, attracting water molecules and producing soft tissue swelling. It is demonstrated to varying degrees by all HA fillers and is reported to last for 3 to 5 or more years, depending on the site of injection. A variety of techniques have been used to measure water absorption. Juvéderm Ultra and Ultra Plus as well as Restylane Refyne have been demonstrated to have more ability to absorb water than some other fillers. Non–animal-stabilized hyaluronic acid (NASHA) fillers, Volbella, and Revanesse Versa have the lowest affinities for water Table 10.3 ( Fig. 10.1 )
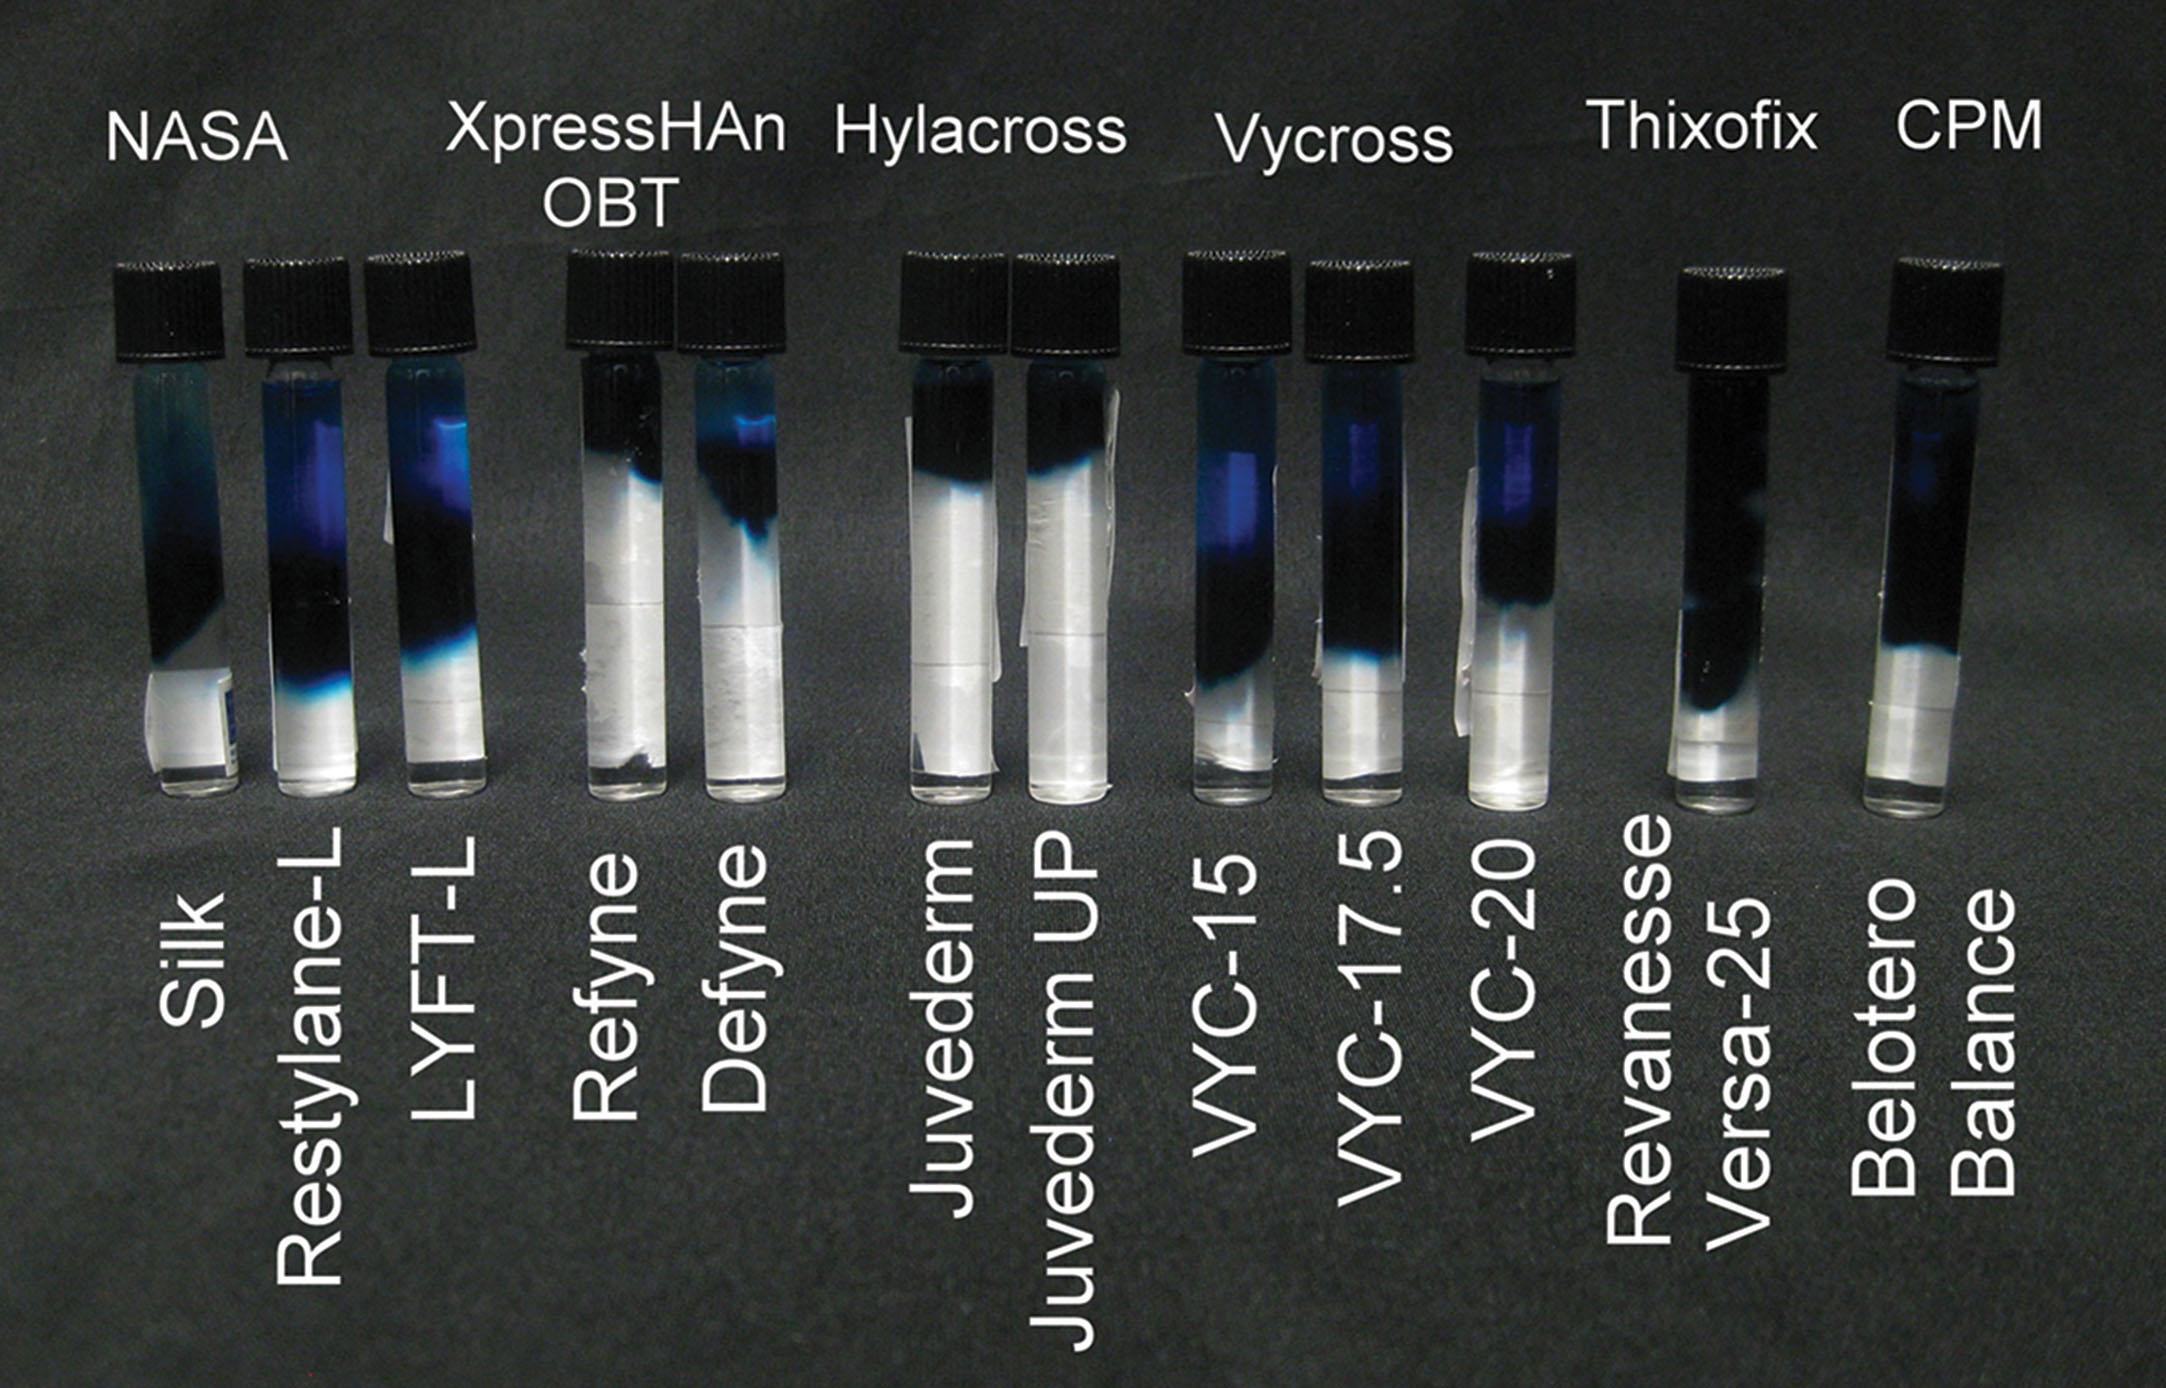
Flexibility is measured by X-strain. The expresHAn or optimal balance technology produces highly flexible fillers in vitro. Restylane Refyne has the highest flexibility.
Some brands of HA fillers are premixed with lidocaine to improve patient comfort during injection. All HA fillers are absorbable, and the augmentation effects typically last 3–5 months, although the material itself has been reported to persist in tissue for years after injection. Some studies also suggest that HA fillers may induce the deposition of type I and III collagen through undetermined mechanisms.
One golden rule for fillers is “never inject without hyaluronidase in the office.” A major advantage of HA products is their rapid reversibility by the off-label injection of the enzyme hyaluronidase. Approximately 30 units of hyaluronidase are needed to hydrolyze 0.1 cc of filler. The use of hyaluronidase to dissolve HA filler is not an FDA-approved indication for the product, but the FDA will allow industry to mention that the filler is dissolvable.
Calcium hydroxylapatite is a naturally occurring calcium-based crystal that is a major component of bone and teeth. Radiesse is currently the only FDA-approved calcium hydroxylapatite filler and is composed of 25–45 µm microspheres suspended in a carboxymethycellulose carrier. It begins its action as a filler but is described to work more as a biostimulator over time. It is not known to be a dissolvable filler. It possesses significantly higher stiffness (G prime) and viscosity than HA fillers. It is also available with or without lidocaine. Shortly after injection, the gel carrier resorbs, leaving the calcium hydroxylapatite spheres to slowly degrade and become replaced with collagen over several months. Therefore the clinical effects may last significantly longer than the filler material itself and have been reported to persist for 1 year or longer. Radiesse is approved for correction of facial rhytids, augmentation of the dorsum of the hands, and for the treatment of lipoatrophy in HIV patients.
Poly- l -lactic acid (PLLA) is a synthetic bioabsorbable thermoplastic polyester biostimulator that is also widely used for medical implants. Sculptra is the only FDA-approved PLLA soft tissue filler. It is composed of 40- to 63-µm PLLA spheres suspended in a carboxymethycellulose and mannitol carrier, which is reconstituted with sterile water before injection. Unlike most other fillers, Sculptra injection does not result in immediate soft tissue augmentation, but rather achieves its therapeutic effect by inducing a local foreign body reaction that over time leads to a progressive increase in collagen deposition. It is typically administered in multiple sessions over several weeks or months. Clinical results begin to manifest after several weeks and are reported to last up to 2 years. Sculptra is approved for the correction of nasolabial folds (NLFs) and HIV-associated lipoatrophy but is most popular for off-label facial framing, particularly in the temple area.
Zyderm, a bovine collagen, was the first soft tissue filler to obtain FDA approval as a medical device in 1981. Several other collagen fillers have since gained approval, including Zyplast, Cosmoderm (human collagen), and Evolence (porcine collagen). However, these products have been discontinued primarily because of the difficulty arising from the need for patch testing on the arm 1 month before facial injection to avoid allergic reactions. They are derived from bovine, porcine, and human sources, and some undergo various methods of cross-linking to prolong their effect in vivo. Historically, collagen fillers have a short duration of 3–4 months, but more recently released products are reported to persist for 6 months or longer.
Polymethylmethacrylate (PMMA) is a synthetic, biocompatible, nonbiodegradable, thermoplastic polymer that has seen widespread commercial application, including its use as a medical implant material for cataract lenses. Bellafill (formerly Artefill) consists of 30- to 50-µm PMMA microspheres (20% by weight) suspended in bovine collagen gel and lidocaine. It is thought that the PMMA microspheres serve as a scaffold for connective tissue growth after spontaneous absorption of the collagen carrier. Bellafill is approved for the treatment of NLFs and acne scars. Because it is suspended in bovine collagen, it does require patch testing 1 month beforehand. The safety record for this product is actually better than HA products as far as numbers go and as a percentage of total injections. However, when events do occur, they are difficult to manage because of the permanence of the filler and the inability to dissolve it. Fifty two percent of complications occur in the periocular area, so injection in this area is contraindicated.
Liquid injectable silicone is a synthetic, nonbiodegradable polymer of dimethylsiloxane. It is not FDA approved in the United States but is mentioned because some practitioners use this off label. It is approved only for intraocular use. It has a series complications that are difficult to manage, including granulomas, local and systemic inflammation, inflammatory pulmonary disease, blindness, and death from vascular embolism. Nonmedical industrial-grade silicone, injected by oftentimes unlicensed practitioners or nonmedical personnel, has caused some of the worst filler complications.
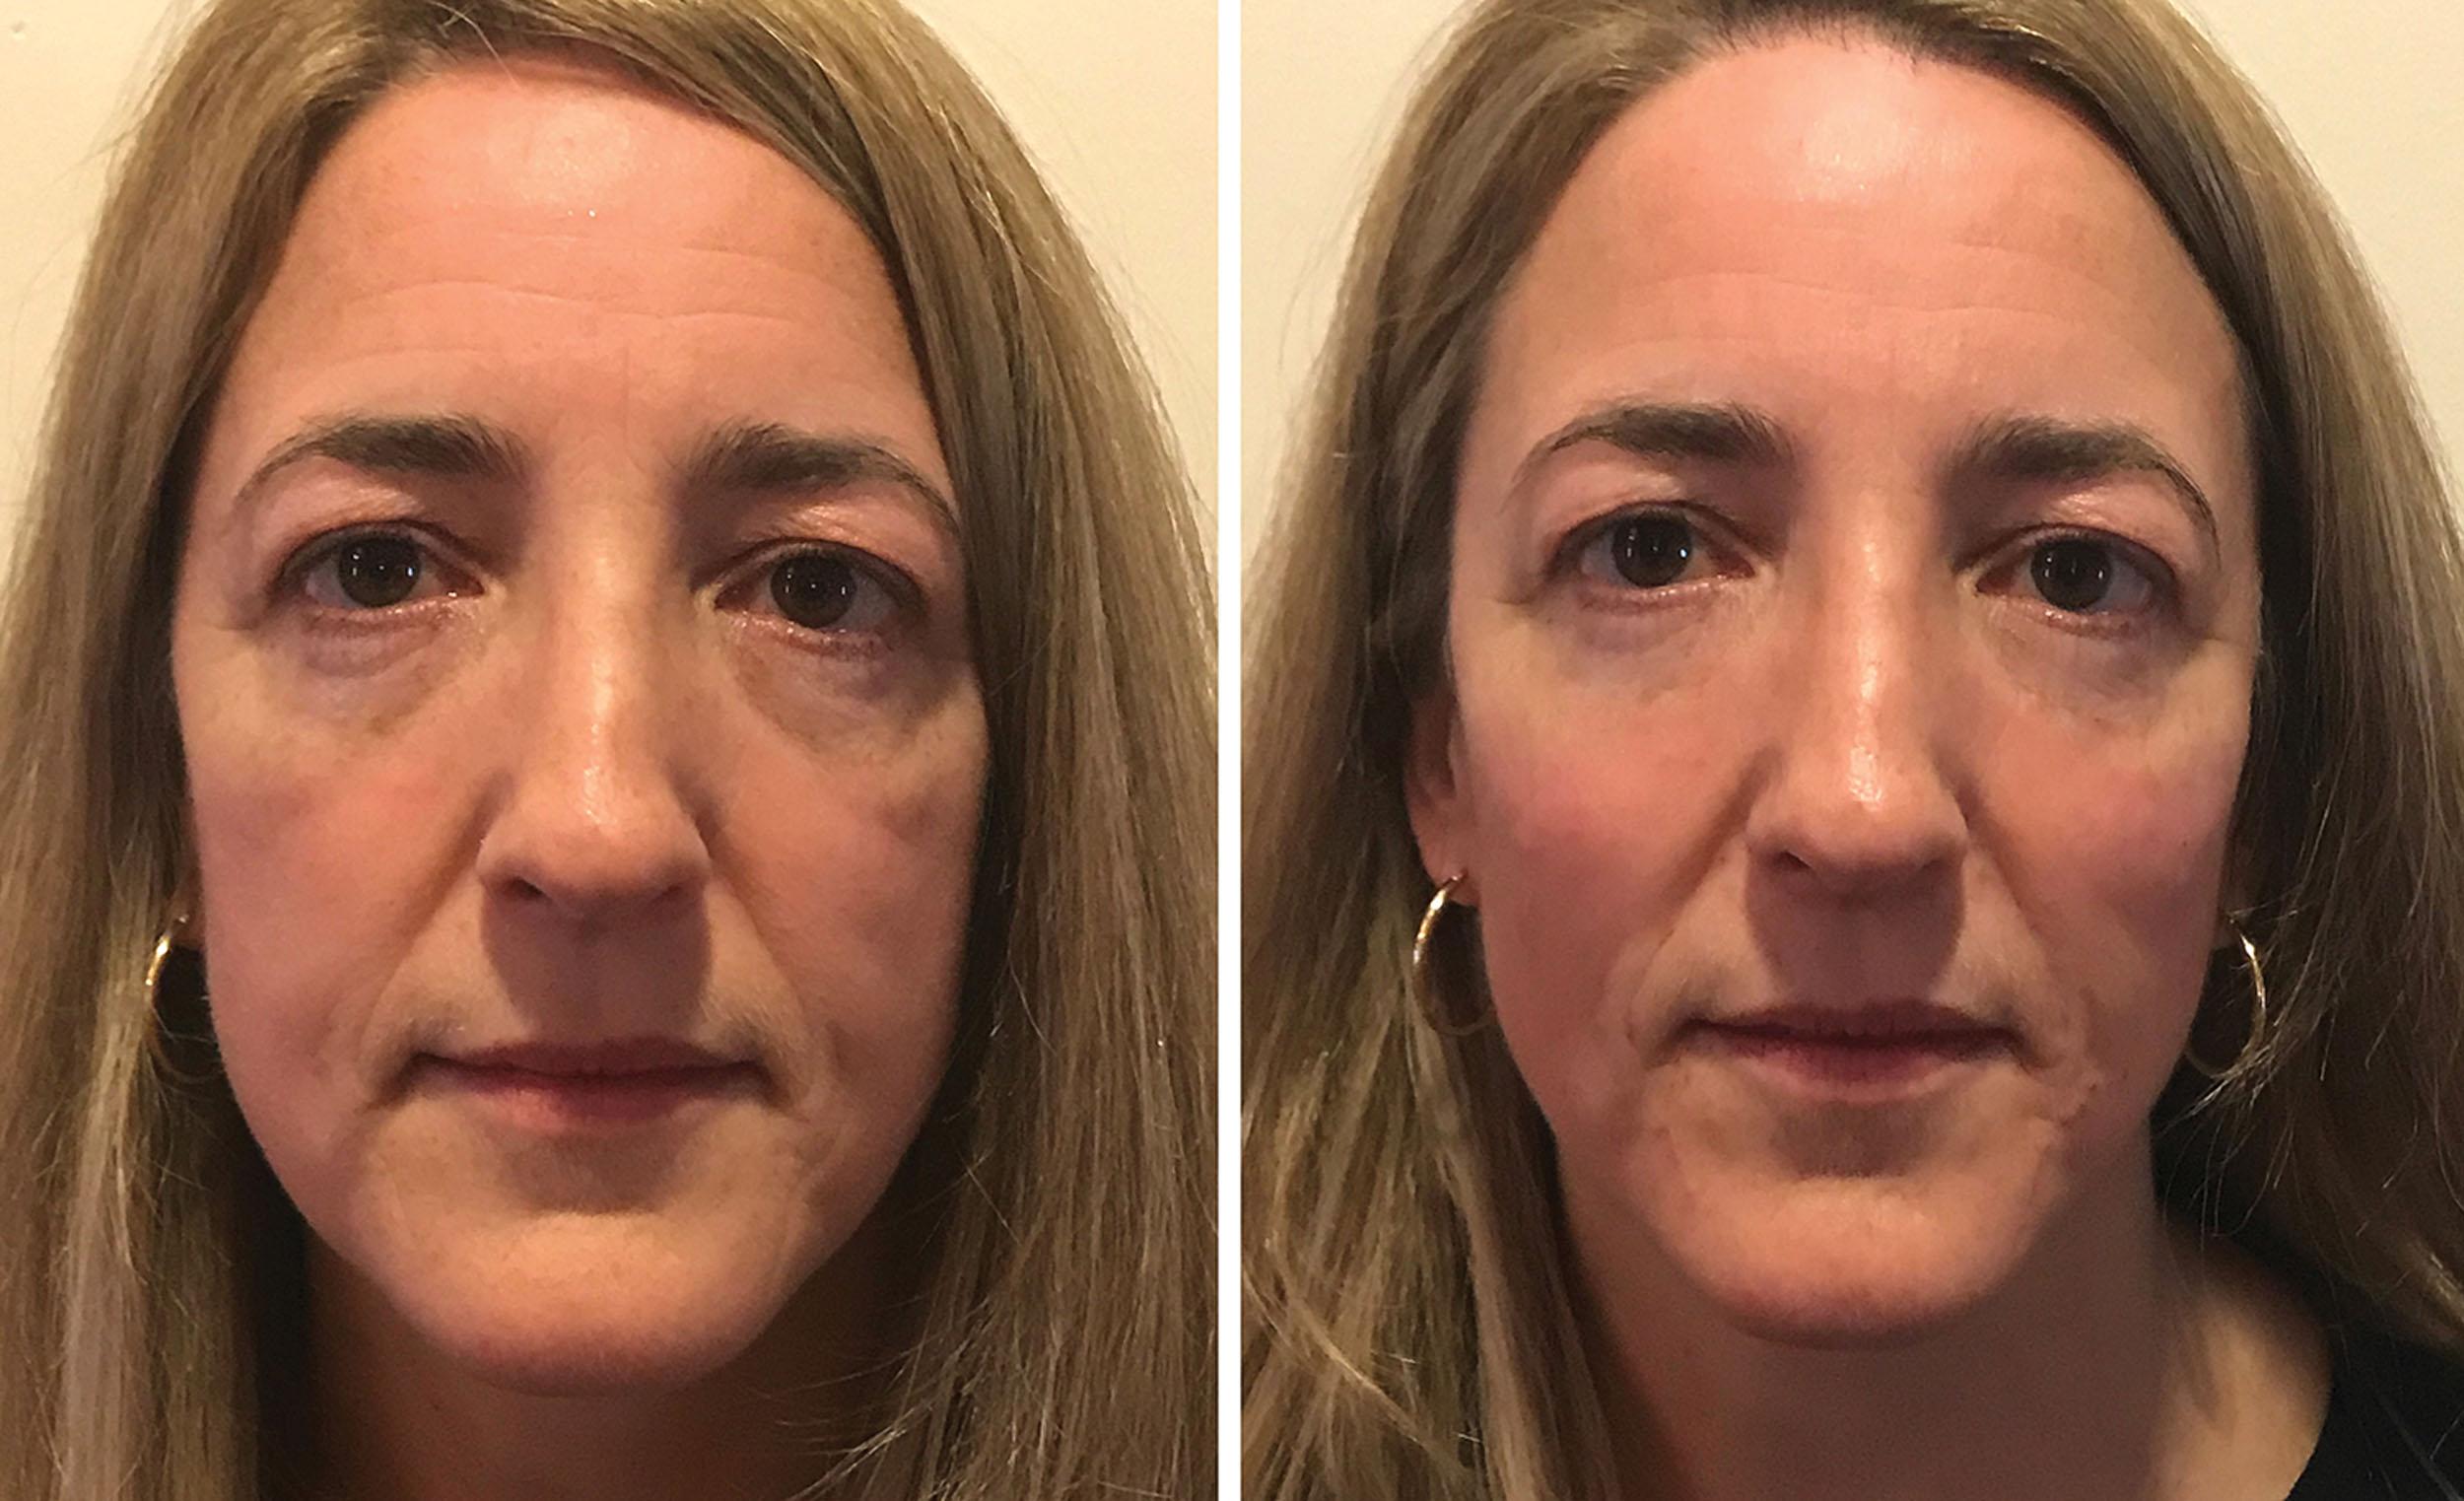
Fig. 10.2 shows a patient before and 5 minutes after injection with Restylane and a cannula technique. This illustrates the conservative nature of the procedure with the right filler in the hands of the right injector.
Joe Niamtu, III, and Shelia Barbarino
The prime statement, “The key to success is placing the ‘right’ filler in the ‘right’ place in the ‘right’ patient” is often referred to in this chapter as it is so important. This means picking the correct product for the task at hand and then placing it in the proper anatomic plane(s).
Although these fillers as a group are referred to as dermal fillers, a common mistake of the novice injector is to place HA gel fillers too deeply or too superficially. This can produce inadequate augmentation, and it dissolves faster and can cause a vascular occlusion. If some of the HA fillers are placed too superficially, it will result in undesirable small superficial white or clear bubbles in the body of the lip that will remain for the duration of the lip filler. There is a “sweet spot” on the skin where the placement of filler produces controlled augmentation, and this spot differs from patient to patient. Experienced injectors know where to put the filler for the maximum result, and this is a learned skill guided more by feel and visual result than by science. Placing fillers such as silicone, Radiesse, fat, Sculptra, Juvéderm Ultra Plus, or Voluma in the superficial dermis can produce contour irregularities. Placing fillers such as Restylane, Restylane Kysse, Versa, Volbella, or Belotero in the subcutaneous tissues is a less judicious choice than their more robust larger-particle or thicker-gel counterparts.
Although confusing, the tenet of intradermal placement is a good starting place for the novice injector. Injecting in the dermis is an appreciated tactile situation with contributions from the pressure of the needle entry and advancement and the syringe pressure. Again, experienced injectors can sense the correct plane. A pearl for novice injectors as to when the needle is in the dermis is observing the needle bevel on skin entry; this means that the injector can actually see a slight silver hint of the needle color through the skin. When the bevel of the average injection needle enters the skin and cannot be seen, this is an approximate indication that the tip is in the dermal plane. All injectors must be aware of the intended tissue plane target for various fillers ( Fig. 10.3 ).
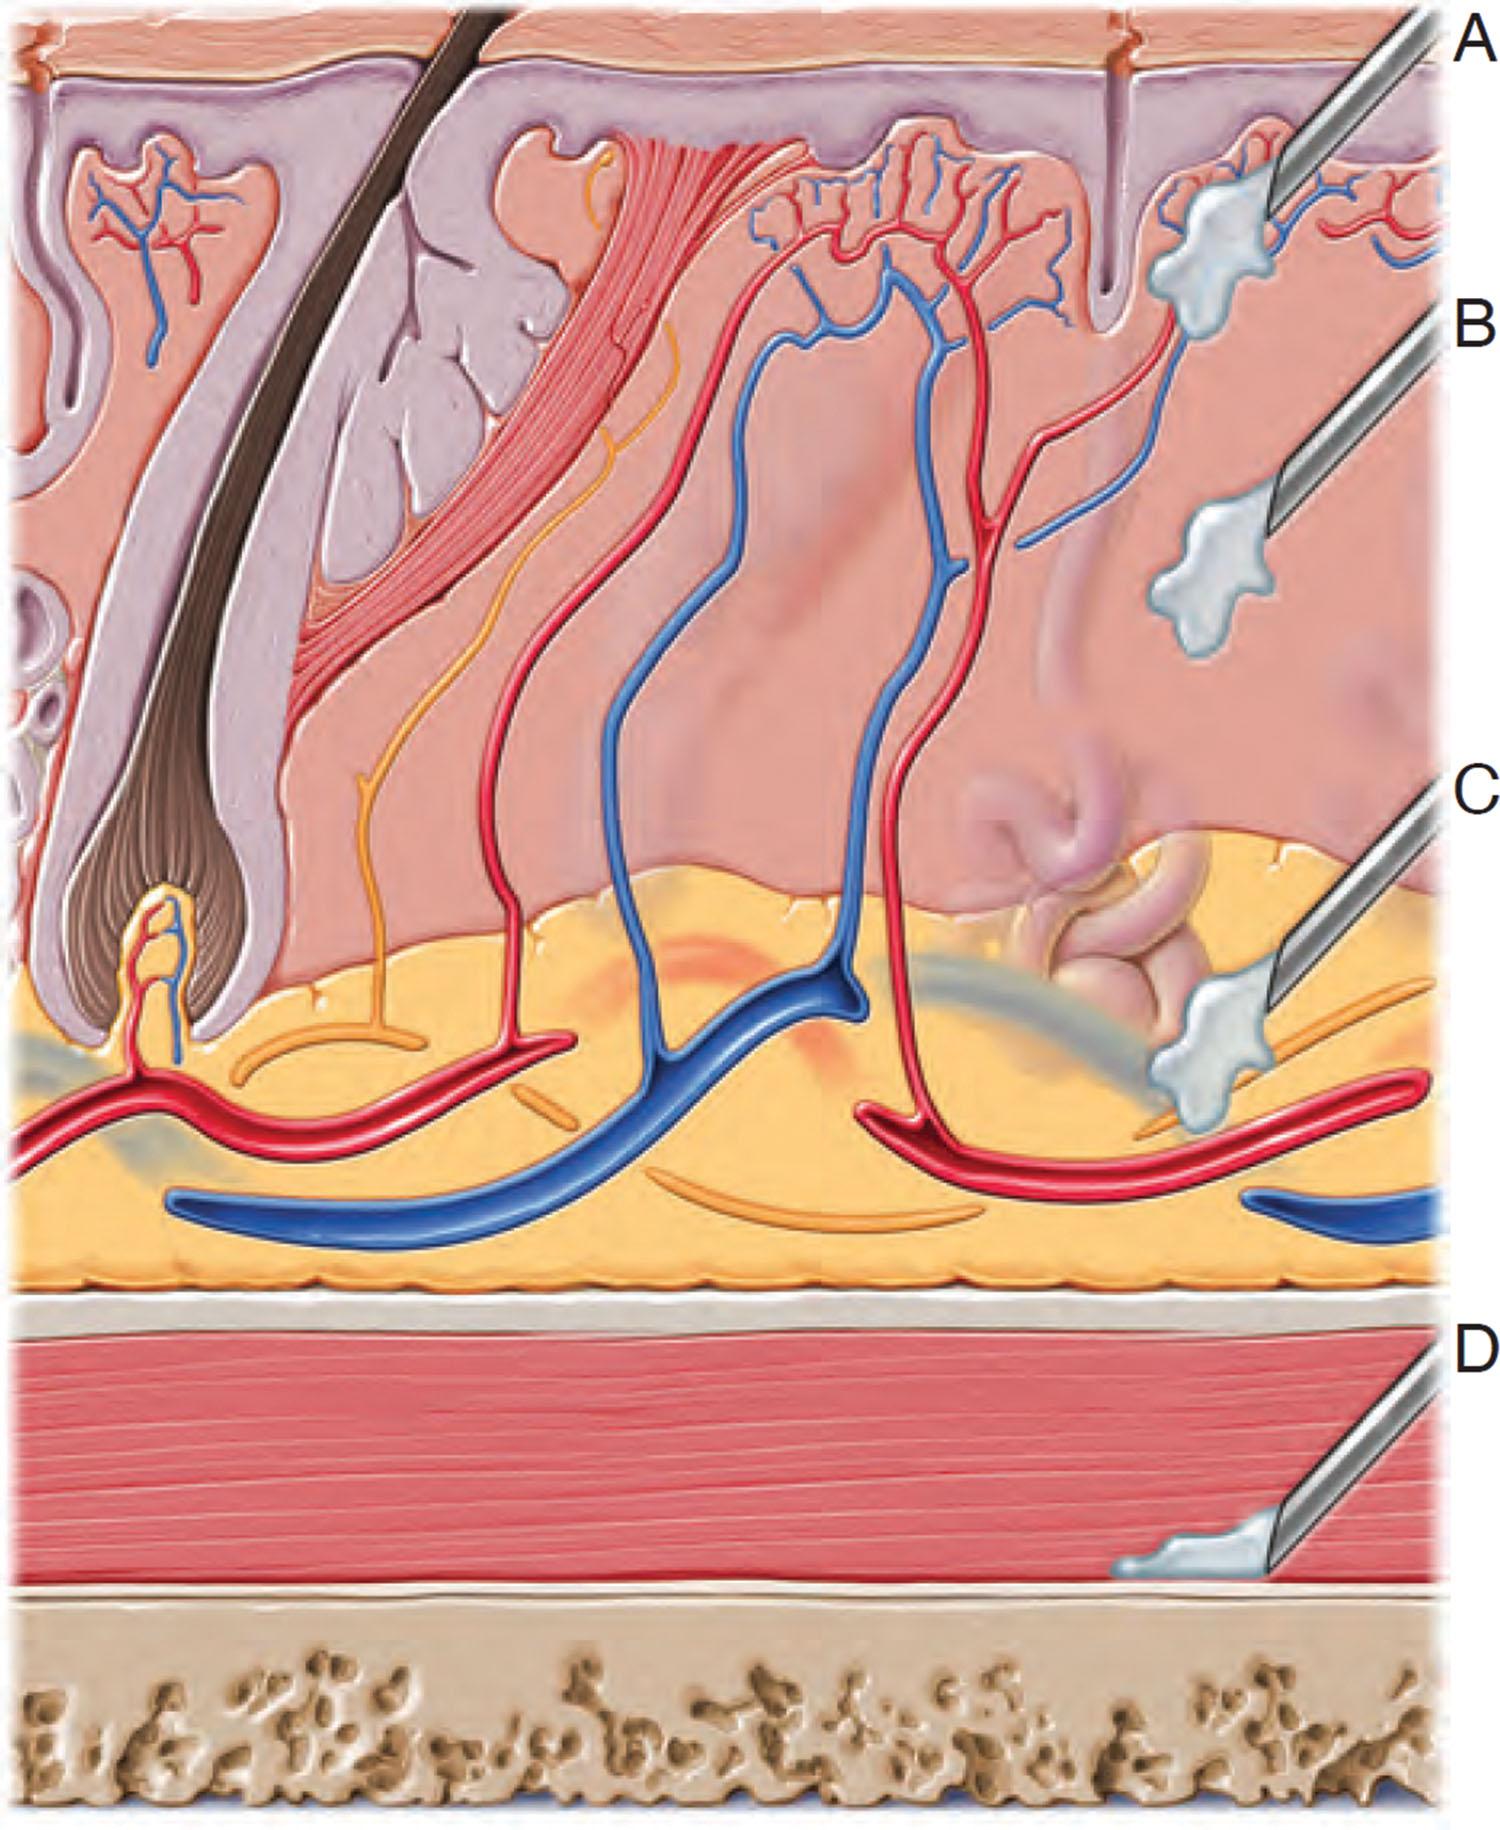
Experienced injectors will frequently layer fillers in different tissue planes to achieve results and sometimes use different fillers for the same injection. These anatomic tissue targets are discussed in detail throughout this chapter.
“Doctor, how long will my filler last?” This is a question asked by many patients and is not an easy one to answer. Although companies quote optimistic lengths of filler longevity, much variability exists. It depends on the type of filler, the patient’s metabolism, the area of the face where the filler is placed, and other variables. As a general rule, fillers placed in areas of extreme motion such as the lips will not last as long as fillers placed in a more immobile area such as the zygoma.
I never guarantee longevity as there are too many variables. I tell patients that most HA fillers will hopefully maintain a result lasting from 6 to 12 months. Silicone may last forever; Radiesse may last 1.5 years; and Voluma may last up to 2 years. I have had patients claim that their filler only lasted 2 weeks and others say it lasted 4 years. Although the industry is pushing permanent fillers, it must be remembered that permanent fillers can cause permanent complications! If a patient wishes to have longer-lasting results, other options such as Silikon 1000 for fat transfer can be considered. When the filler is not to the patient’s or surgeon’s liking, reversal is a welcome option and is discussed later in this chapter.
Because of the growing plethora of fillers, a contemporary practice must stock all of the common fillers and in essence be a “filler bartender.” All injectors have their favorites, but various patients choose various products based on their experience, the desire to try something new, and in response to topical literature, direct-to-consumer ads, websites, and magazine ads. Patient choice is also driven by discounts offered at times by various companies and their “loyalty programs” in which patients receive points or credits similar to frequent flyer miles. Finally, high-volume injectors receive discounts on how much filler they order.
The rate of advancement of filler technology has proved to be confusing for patients (and some doctors), so it is imperative to “choose the right patient and the right filler for the area(s) to be treated” for a given application. Many patients do not understand the difference between fillers and neuromodulators (neurotoxins), so education and comprehension are the two prime factors. Although fillers have broad aesthetic applications, they are not miracle treatments. Many patients present with abundant and severe wrinkling that would better be treated with skin resurfacing or a facelift. Although these patients may be temporarily improved with $4000–$5000 worth of filler, it is not in their best interest in the long run. Some patients may not desire surgery or not care about the filler expense, but acting in the patient’s best interest is always the first rule of medicine.
In theory, fillers can be injected anywhere on the body; however, complications such as blindness, stroke, and severe tissue loss and disfigurement are becoming more common with the increased use of fillers. The main consideration is to accurately explain what can be realistically expected as a treatment result. Showing patients a series of before and after images for specific anatomic areas is one way to provide a reasonable expectation. I often ask patients, particularly millennials, to name a famous person or show me a photo of someone they desire their lips to look most like after their lip filler settles without bruising or swelling. This can give the injector an idea of the patient’s expectations and whether or not they are logical. Many young patients have scores of selfies on their phone, so finding a photo of a desired result is not problematic. Although some injectors encourage patients to present a targeted result, this can be problematic because the expectations can be unattainable. However, it does help open a conversation about perception and reality. In addition, the injection of fillers should not be presented as a one-time procedure but as a sculpting treatment sequence to approach a result. One huge advantage of HA fillers is that there is no need to overcorrect as with older fillers that resorbed quickly. It is also very helpful to have the patient return 2 weeks after injection to review the result. Any areas of underfill or asymmetry can be corrected, and postinjection images can be taken for marketing and education. The novice injector should begin with “appetizer-sized” portions of filler and remember that there is nothing wrong with a treatment requiring multiple visits to achieve optimum results. Having patients return can be very helpful as I see patients who are happy, but I may also see deficiencies. Also, from time to time the inverse occurs in which the patient is not happy, but the result is adequate. Discussing all possibilities before injection is imperative as is having the proper informed consent. This is especially true with older female patients who may expect unrealistic results from treatment to lips or wrinkles. The best candidates for novice injectors are younger patients with small deficiencies.
The communication that occurs before filler injection can be paramount to a success or failure in the eyes of the patient and or the law. This is the time to detail many other critical issues, including expected longevity, what the filler will or will not do, who will be responsible for the cost of the revision filler, and how much filler must be used. Many problems can be easily resolved by showing the patient their signed consent if postinjection problems arise. My consent is a dynamic instrument. I add to it regularly to preempt potential problems that may arise or new problems not on the current consent. Consents should be accurate and include extremely rare but possible problems such as blindness and tissue loss. “Better to have and not need than to need and not have.” Pre-injection photography is also invaluable for situations in which the surgeon is blamed for an existing pre-injection problem. These photographs not only serve to assist in adverse situations, they serve as a teaching and learning tool for the surgeon and are invaluable for marketing. I am truthful with the patient and explain that their photographs are part of the chart in my office and the intention is for no one else to see (unless they are part of a study or are kind enough to release photos for me to use as directed by their wishes). Any patient refusing to take pre-injection photos may be a risk.
Because of the high cost of a syringe of filler, many new filler patients desire to test the waters by purchasing a single syringe. It is important to warn the patient they may need one or even two more syringes to attain their desired result. For the nasolabial folds (NLFs) in adult patients, I almost never use only a single syringe. The problem is that a single syringe is usually insufficient to augment bilateral NLFs in most patients, especially older patients. The average adult can tolerate at least two to four syringes and would have better results if finance was not an issue. Attempting this to save money will usually produce an unhappy patient, because the result is minor, and the patient can spend $700 and see no results. This can reflect on the expertise and reputation of the surgeon. When adults in the late fourth decade and beyond present for NLF or oral commissure treatment and request a single syringe, I explain the drawback to them and ask them to save their funds until they can afford the proper amount, which is usually at least two syringes.
It is important to advise patients to not expect their NLFs or wrinkles to be eradicated; they will be improved, but not gone. I explain that the NLF is a valley, and the filler will make it shallower, not eliminate it. I also explain that although the NLF (or other wrinkles) may look much better in repose, they will still show upon smiling and animation. This is important because some patients will return after injection and complain that they still see their wrinkles or folds when they smile. When treating the lips, a single syringe may be split between the lips of younger patients, but older patients, especially those with lipstick lines and perioral wrinkles, can take several syringes.
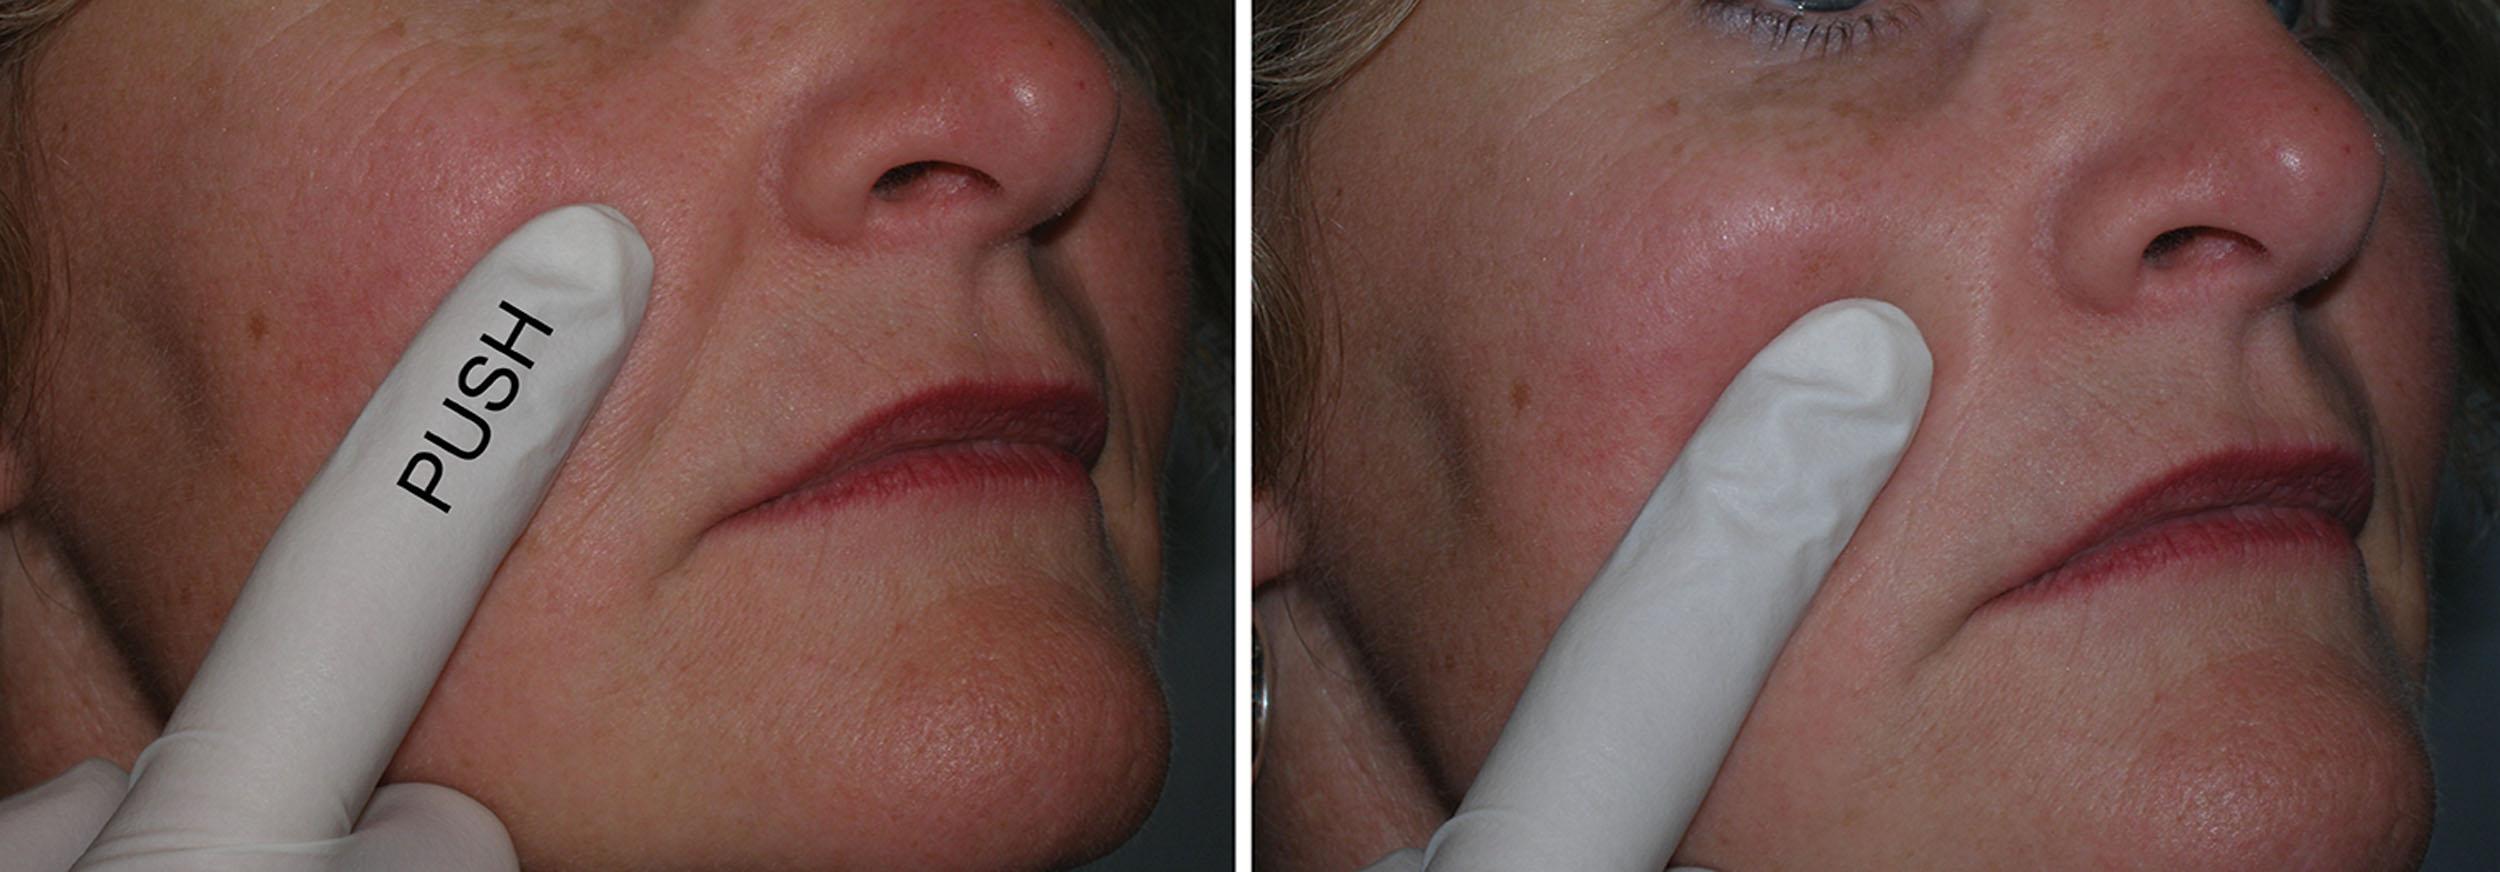
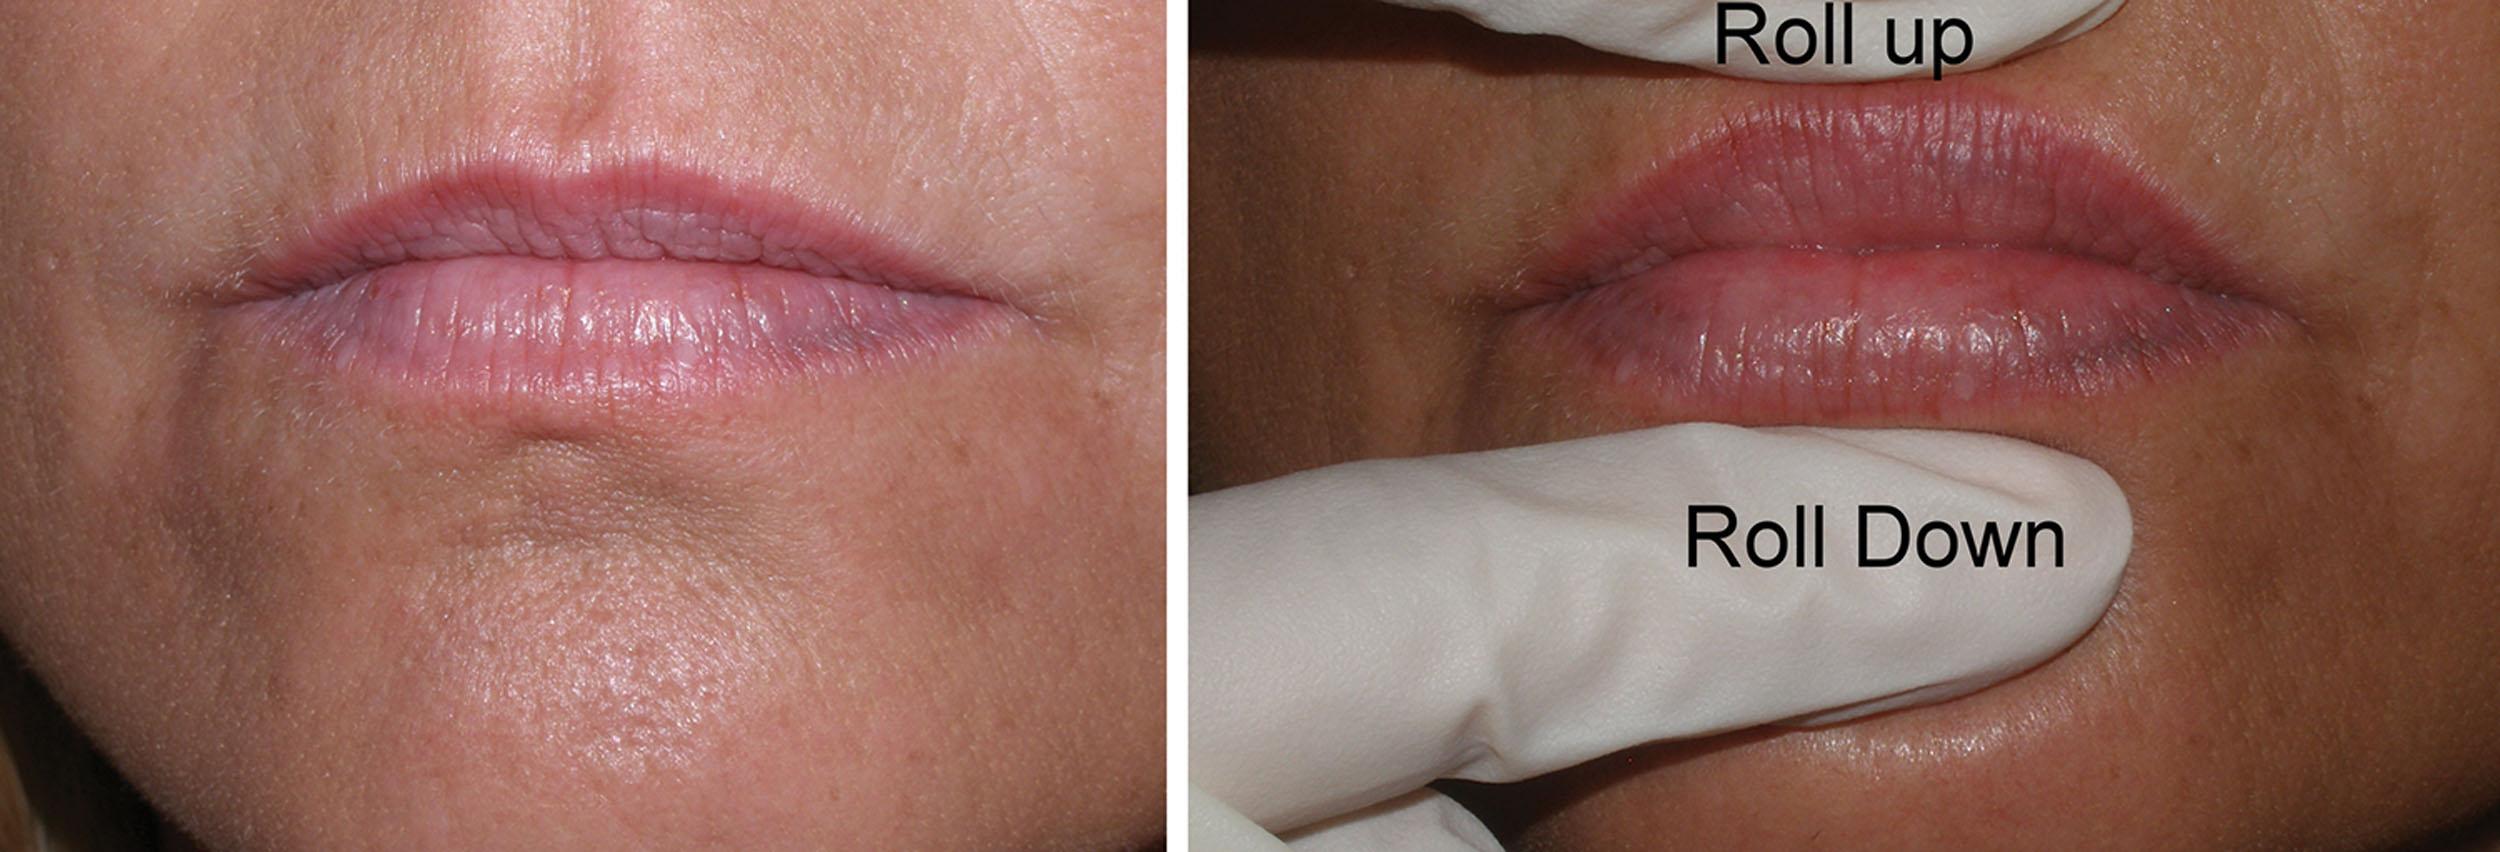
To give the patient an idea of the anticipated result, I use the following method to demonstrate an approximate goal of nasolabial and lip injections. For the NLF, I place my index finger lateral to the patient’s NLF and gently push in on the skin. This elevates the NLF, simulating an augmentation ( Fig. 10.4 ). I let them know that the fold will improve but not disappear. For the lips, I take both gloved index fingers and roll the upper lip up and the lower lip down. This allows increased vermilion show, similar to injecting filler, to increase pout and volume ( Fig. 10.5 ).
Having taught hundreds of injectors over the years, I open my lectures in jest by saying that if you can decorate a cake or caulk a bathtub, you can become proficient in filler techniques. There is actually some truth in this because there is a distinct similarity of injection pressure and continual movement with the cake and caulk examples. Push the plunger too hard or fail to maintain a continuous motion, and you will get blobs instead of controlled lines. It is this combination of tactile pressure sensation and motion the novice injector must develop.
Although it sounds painfully simple, the surgeon must do the following:
Ask the patient what changes they desire. Is the filler to hide smoker lines, to smooth out and enhance their outline, or for volume? This will guide your treatment and assist in your selection of product and technique. It will also let the injector know that the average patient is not really sure what they want and many times will leave it up to the expertise of the injector.
Make an accurate diagnosis of the problems that exist.
Decide how to treat the situation.
Decide how much filler may be required to properly treat the situation.
Confirm the patient’s treatment budget.
Confirm that the patient understands the possible complications from the filler injection.
Provide a postoperative filler instruction and checklist sheet for the patient that explains swelling, bruising, and the fact that the lips may not look normal for up to 2 weeks.
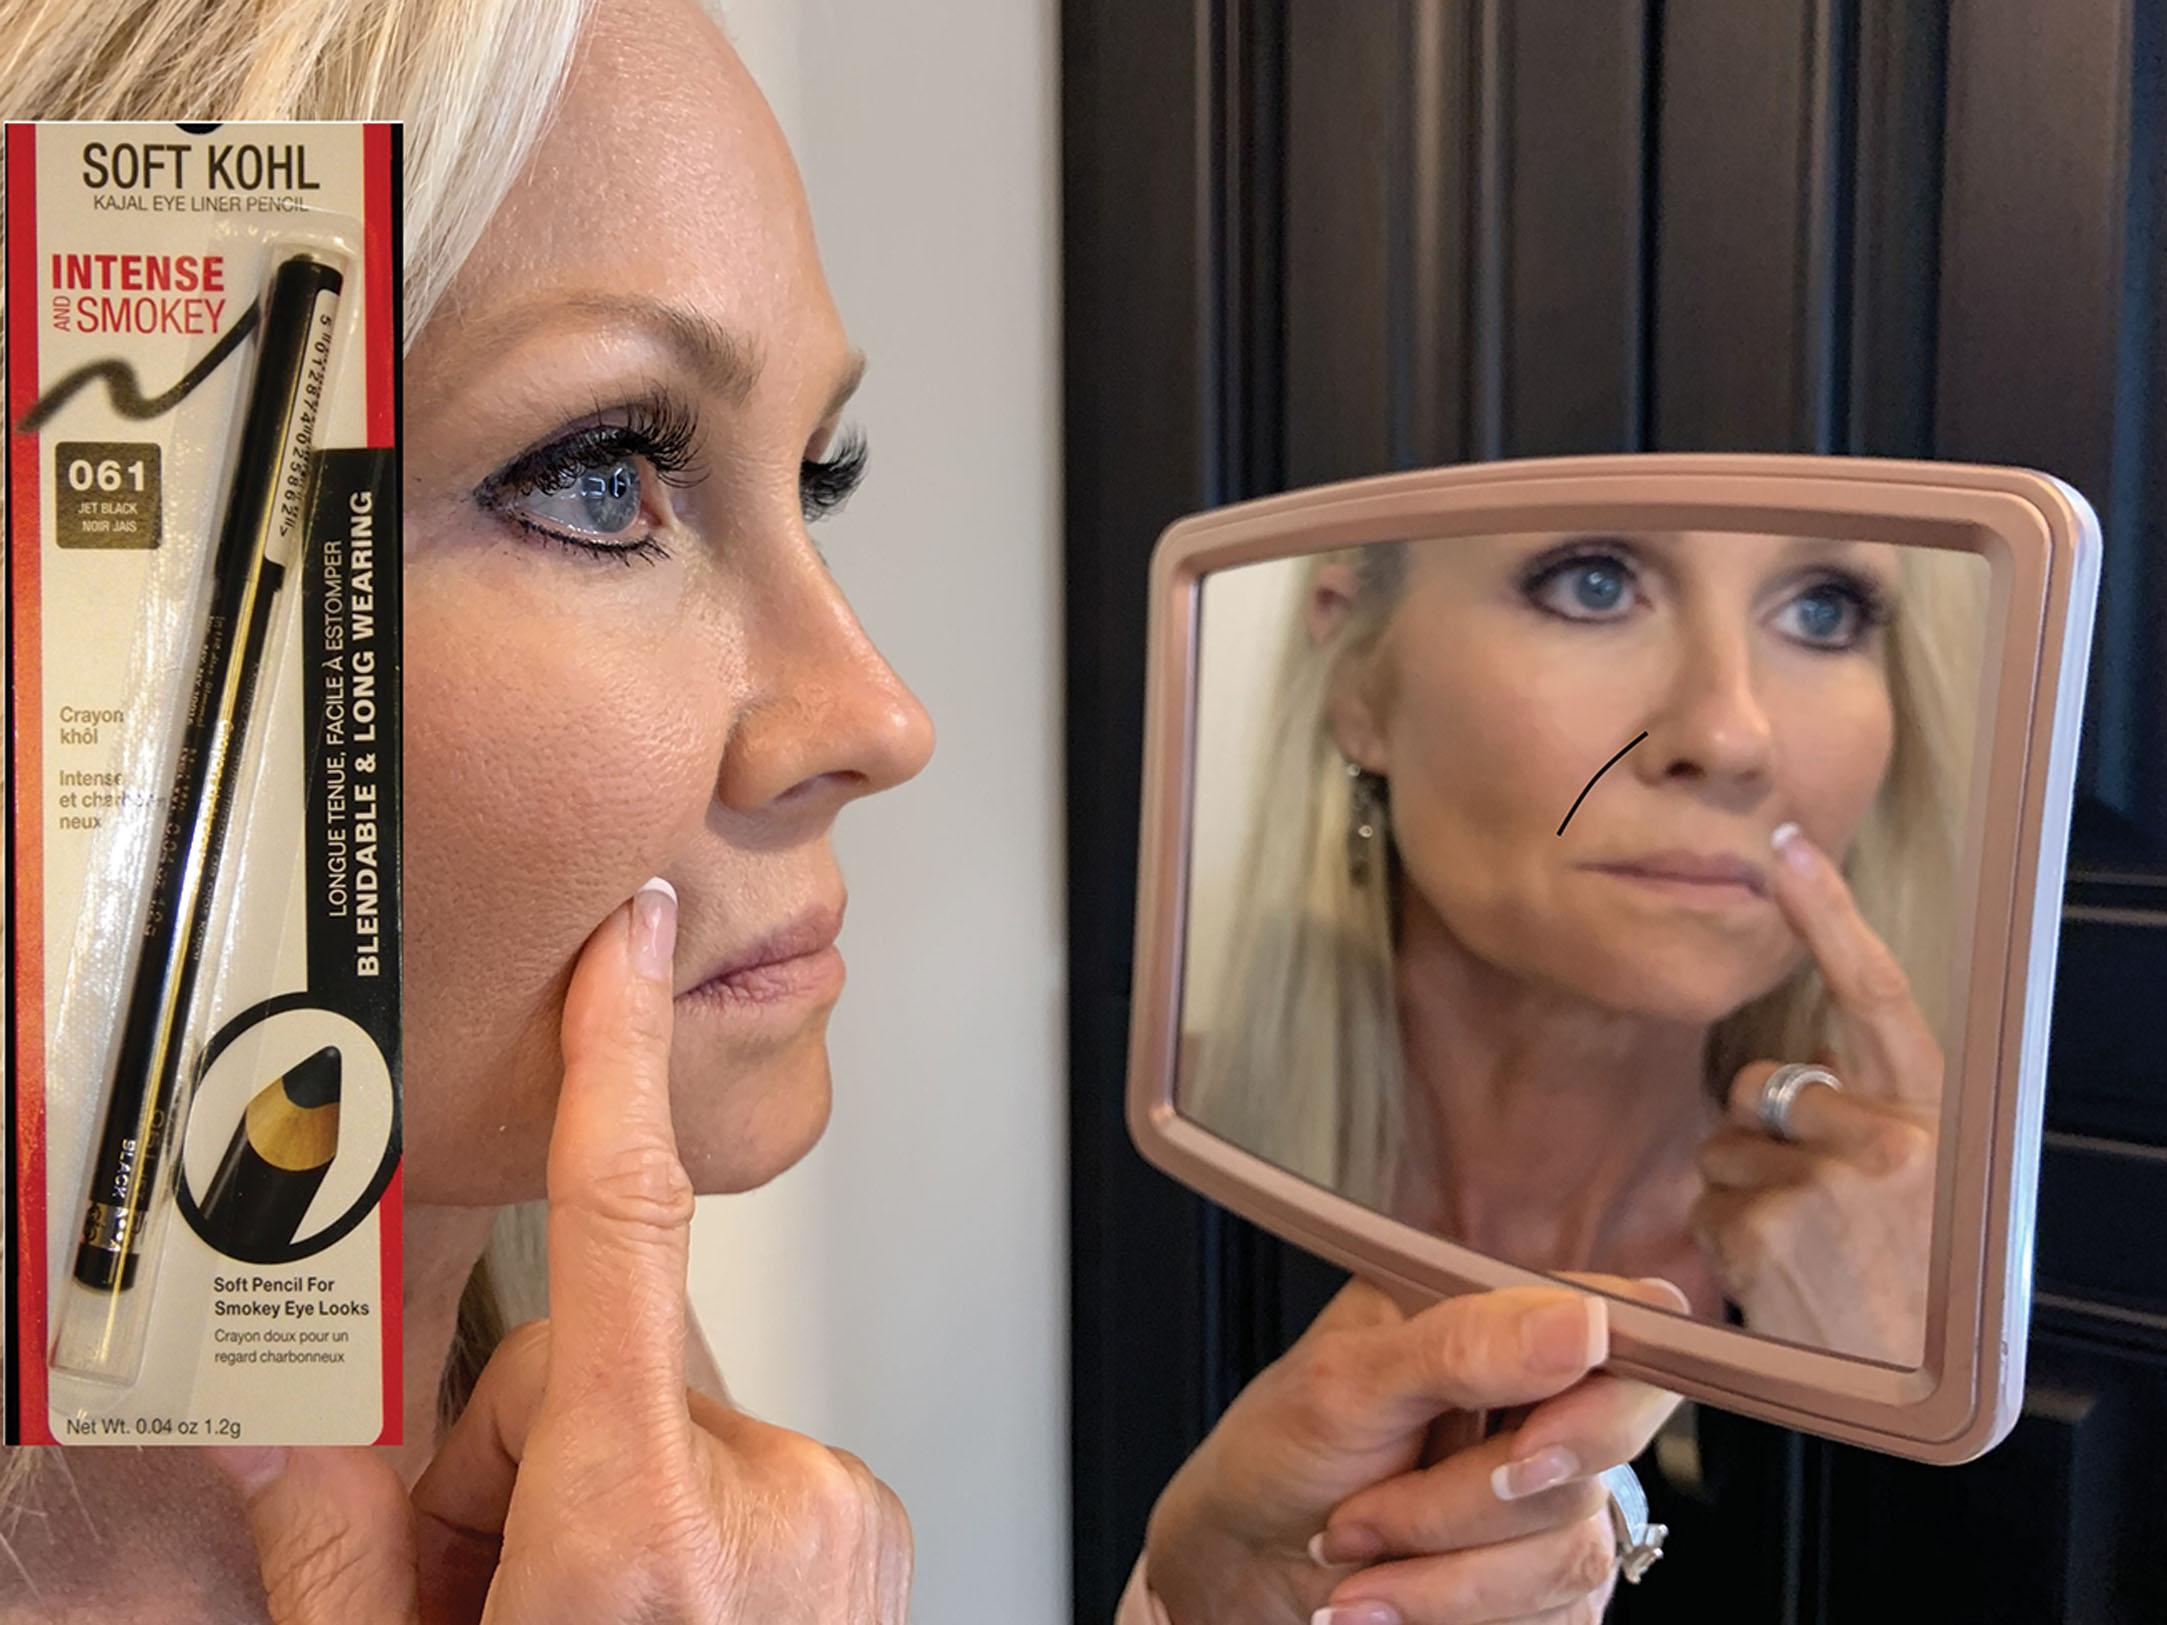
Patient input is extremely valuable. There have been times when I was about to augment the upper NLF, and the patient was not bothered by this region but expected lower fold augmentation. Similarly, a patient may ask me to fill their “smile lines,” which I would interpret as the nasal labial folds, but they may interpret this as the marionette lines. The price of the treatment and the expected outcome warrant careful pre-injection conversation. The first step in this communication is to hand the patient a mirror, ask them what bothers them, and then mark the areas with a soft kohl eyeliner pencil ( Fig. 10.6 ). This is an invaluable marker because it is like a grease pencil and marks very easily. It also is extremely easy to remove and can simply be rubbed off with the fingers or gauze. I have never had a tattooing problem when injecting around these marks. By the patient confirming the drawings and hence the perspective areas of filler injection, a logical two-way communication is now set. If the patient disagrees with the markings, then further communication is necessary.
The next thing the surgeon and patient must address is the specifics of treatment. When a patient presents for “lip filler,” the description is ambiguous. A younger patient may need a small touch-up (air in the tires), whereas an older patient may need volume, outline, lipstick lines, and oral commissures treated. The treatment, expense, and recovery will be very different in each of these cases. For this type of patient, I will use a highly cohesive product that will “airbrush” the area being treated, not necessarily add significant volume. The more the product of choice integrates with the tissue, the less you have to worry about your results looking fake or the appearance of filler migration beyond the border of the lip line. Many patients rely on the surgeon to decide what the problem and treatment will be. Astute surgeons will always make the patient take some responsibility for their diagnosis and treatment.
I begin conservatively with patients who have never had fillers and tell them before injecting them that when we are done, their lips or folds are going to look overdone because of the local anesthesia, the filler, and edema, and they will settle in usually by the following day. I further explain that very infrequently, a patient may have unusual swelling that could last for days. Finally, I explain that bruising is very hard to predict; lip filler patients commonly have some component of bruising, but some will bruise significantly. I ensure that they do not have important social or work plans in the following several days. It is not unusual for patients to desire filler before some event such as a wedding or reunion, and this is a slippery slope in terms of them possibly looking worse (edema and ecchymosis) instead of better. Last-minute filler injections before an important function should be discouraged and rescheduled. It is also important to ensure that the patient is not currently taking any medications that affect platelet activity as these patients will bruise and swell, sometimes much worse, and this can come back as a negative reflection on the injector, when it is in fact the fault of the patient. Again, there is no such thing as overcommunication when it comes to filler injections. Cosmetic doctors must keep in mind that patients are presenting because they are not happy with their physical situation and may have deep insecurities associated with them. It is up to the injector to take this seriously because the right treatment, in the right area, in the right patient can be a hugely satisfying experience; however, the antithesis of this can be a nightmare for all involved.
Before injection, the intended areas of injection are prepped with an alcohol pad or suitable surgical prep, and all makeup is removed. Makeup particles that become embedded with injection can produce inflammation, irritation, or infection, so it is important to really scrub these areas as opposed to simply wiping or blotting them.
Pain control is of utmost importance. Patient comfort and easing apprehension should be kept in mind throughout the entire procedure, similar to the painless dentistry model. I see numerous patients who were treated elsewhere, had a painful injection experience, and switched offices because of their friends’ comments about how our procedures did not hurt. Never underestimate the power of marketing from painless treatment. Although most contemporary fillers contain lidocaine, I still use topical (and occasionally, local anesthetic) injections on all patients. Undoubtedly, anesthesia care takes time and lengthens filler procedures, but this extra time spent will come back to the surgeon many times over in happy, pain-free patients and referrals. I have taken many patients from other offices that did not practice adequate pain control. In addition, a compassionate staff member who holds the patient’s hand or touches the patient in a comforting manner and voice also relaxes anxiety.
For lip augmentation, topical anesthesia is applied to the external and internal lip and sulcus and on the skin if wrinkles or folds are to be treated. In the previous editions of this textbook, I described injecting all treated areas with lidocaine and epinephrine before injection. I did this for decades because most topical preparations were ineffective. I then came across a mixture of 23% lidocaine and 7% tetracaine in a plasticize Pentravan base. This particular preparation and formulation can be compounded by local pharmacies and has become a game changer in my office. I am not sure if it is the plasticized base that makes the difference, but I rarely use any injectable anesthetics in filler patients as this preparation is extremely effective on skin and mucosa. The topical is left in place for at least 10 minutes ( Fig. 10.7 ). The patient is then allowed to rinse their mouth, as the anesthetic stimulates saliva and will cause numbness in the pharynx, which is disconcerting for some patients. If the NLFs or other areas are to be treated at the same visit, the topical anesthetic is an advantage as the lips can be treated first with a topical application while injecting the other areas, and dental blocks or local anesthesia infiltrations, if required, can be done through anaesthetized mucosa, making the entire situation easier.
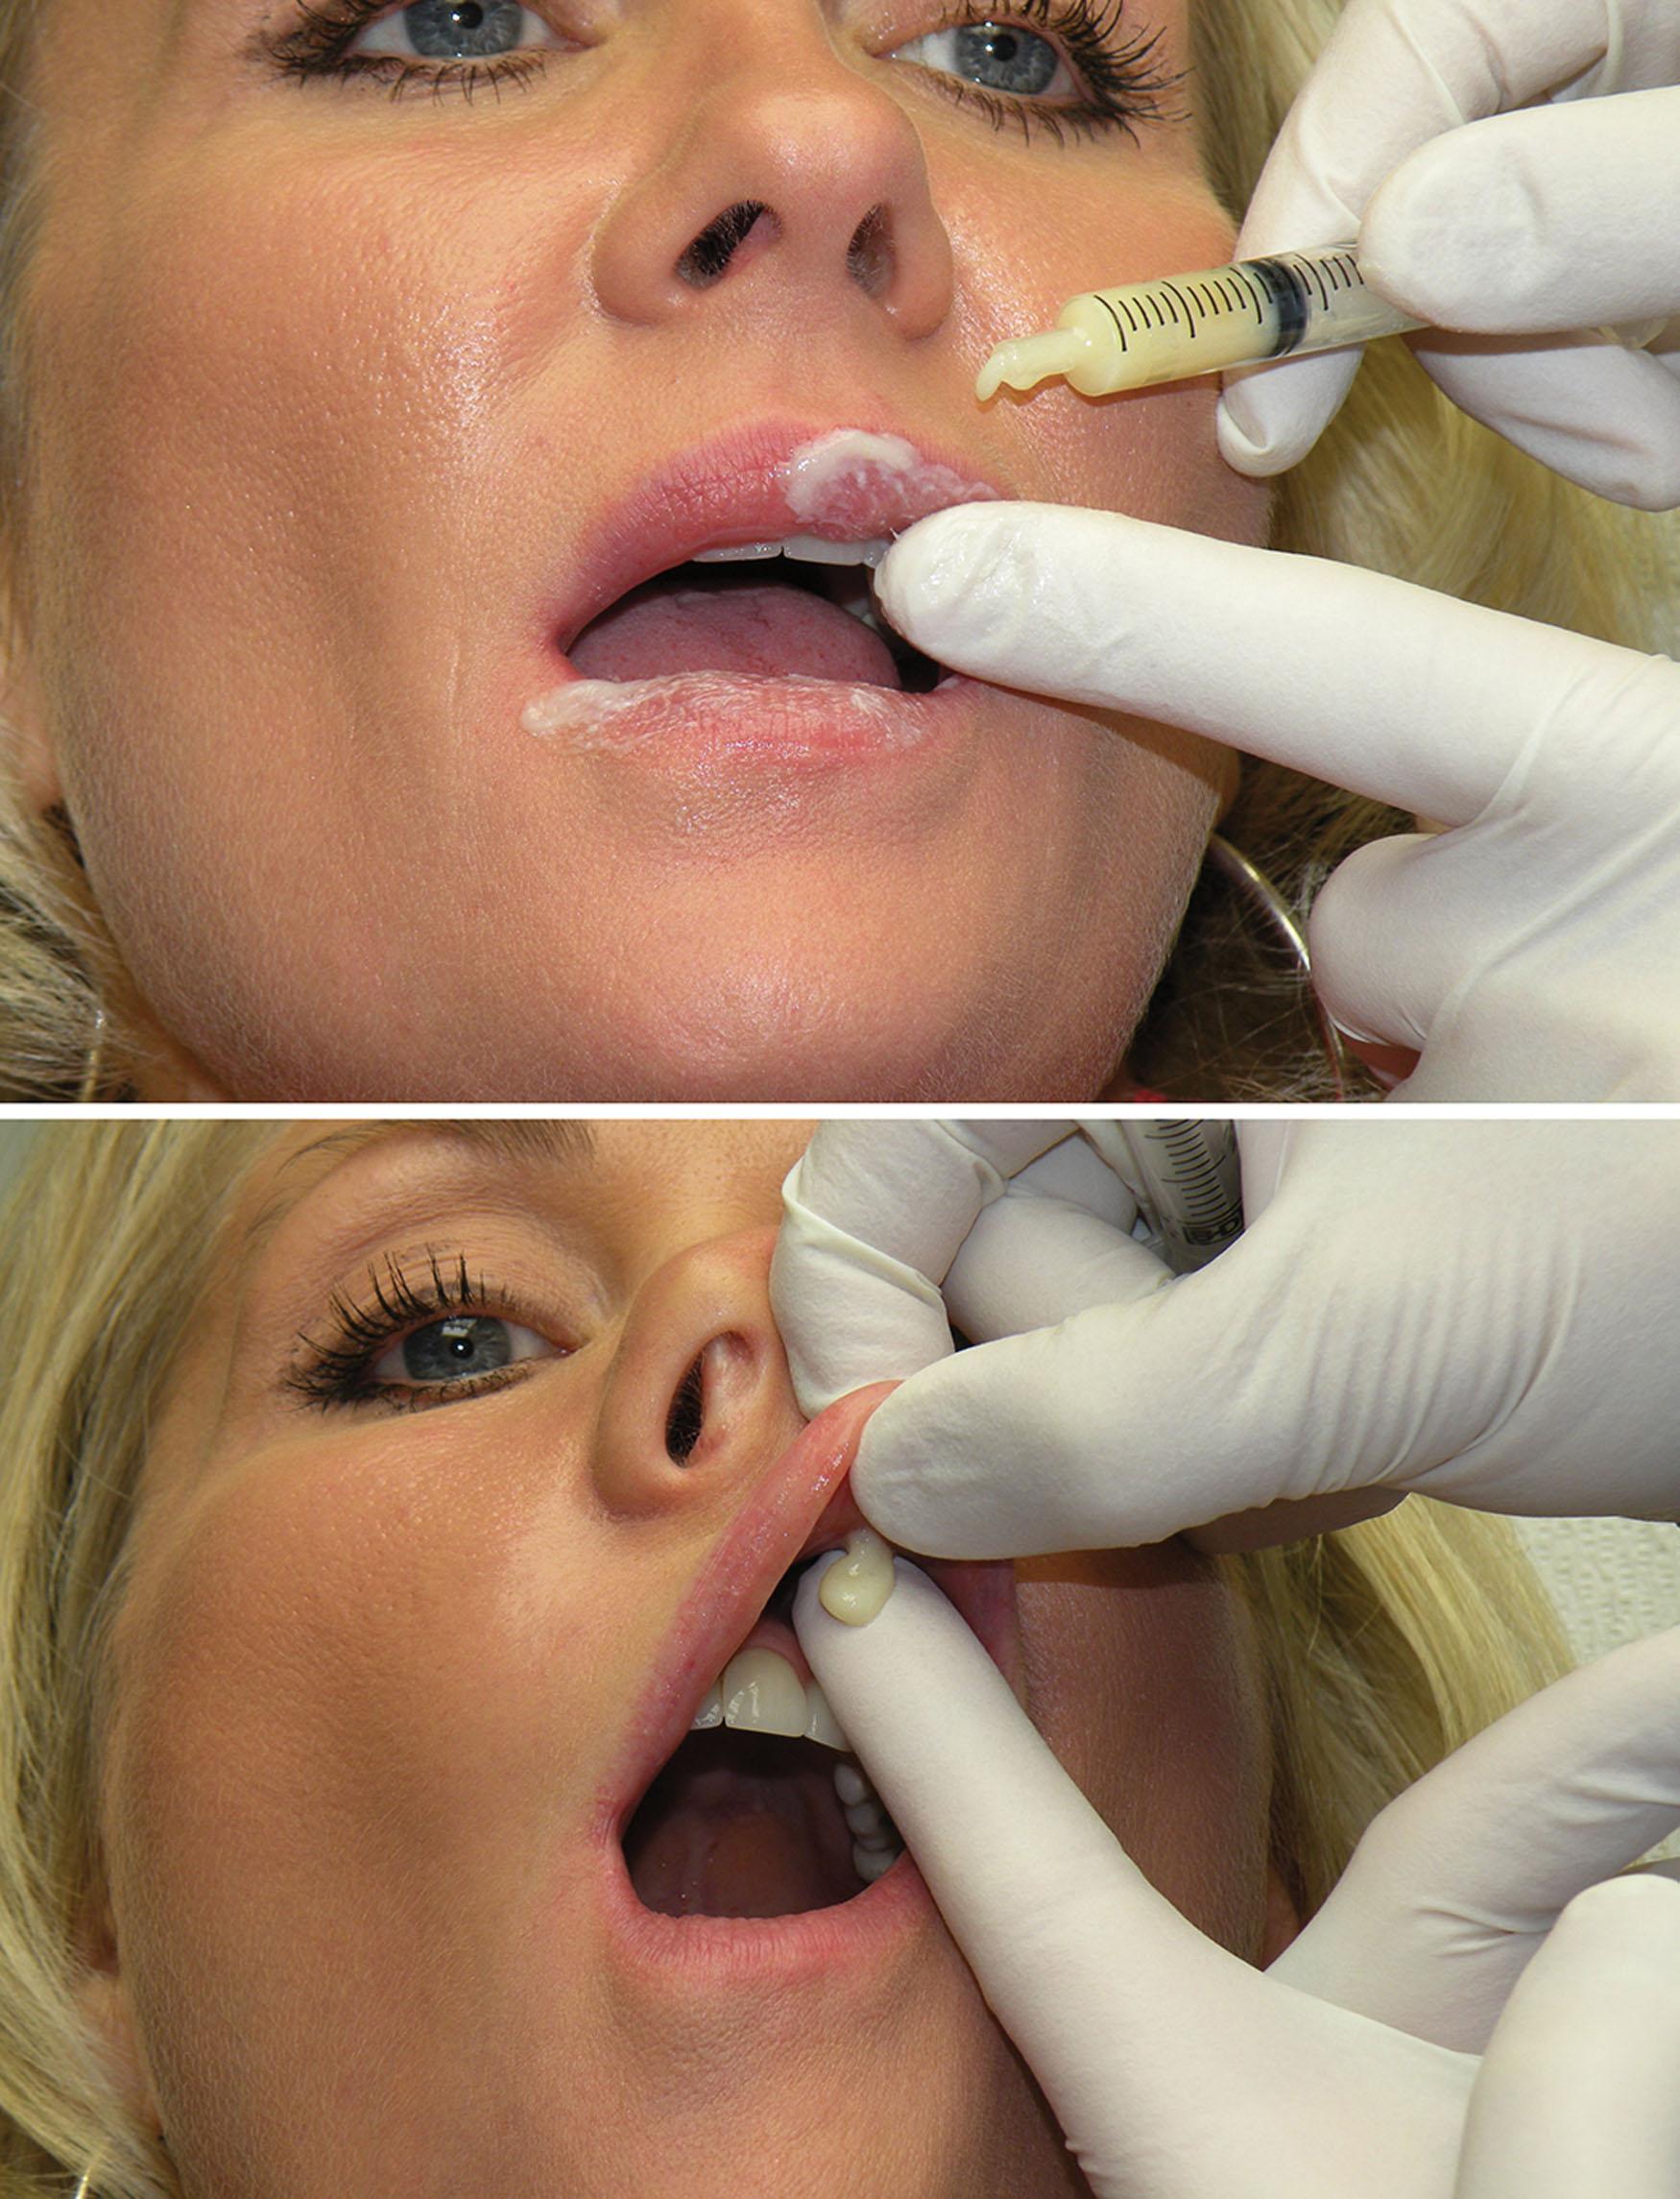
I have heard numerous high-profile doctors say that “their patients do not need supplemental anesthesia.” If this is true, it is because the patient does not know better. Although some surgeons employ local anesthetic blocks, I do not use them because they are more difficult and less dependable than infiltration techniques and numb large areas of the face for hours. Using an infiltration, I refer to as the “mini block” technique, which is a series of injections performed across the upper and/or lower sulcus. A 1-mL syringe with a 33-gauge needle is used with 2% lidocaine and 1 : 100,000 epinephrine. The epinephrine can be omitted to reduce the longevity of the anesthesia. Lidocaine in 0.2-mL aliquots is injected just above the upper sulcus ( Fig. 10.8 ) and just below the lower sulcus ( Fig. 10.9 ). This is generally performed in four to five areas from the canine tooth on one side to the canine tooth on the other side. The patient is then allowed 5 minutes for the anesthetic to take action. The local anesthetic will affect lip animation, and this is another important reason for marking the patient before local anesthesia so landmarks are not lost or distorted. In addition, some of the wrinkles that existed with animation may not be visible if the lip is not moving normally.


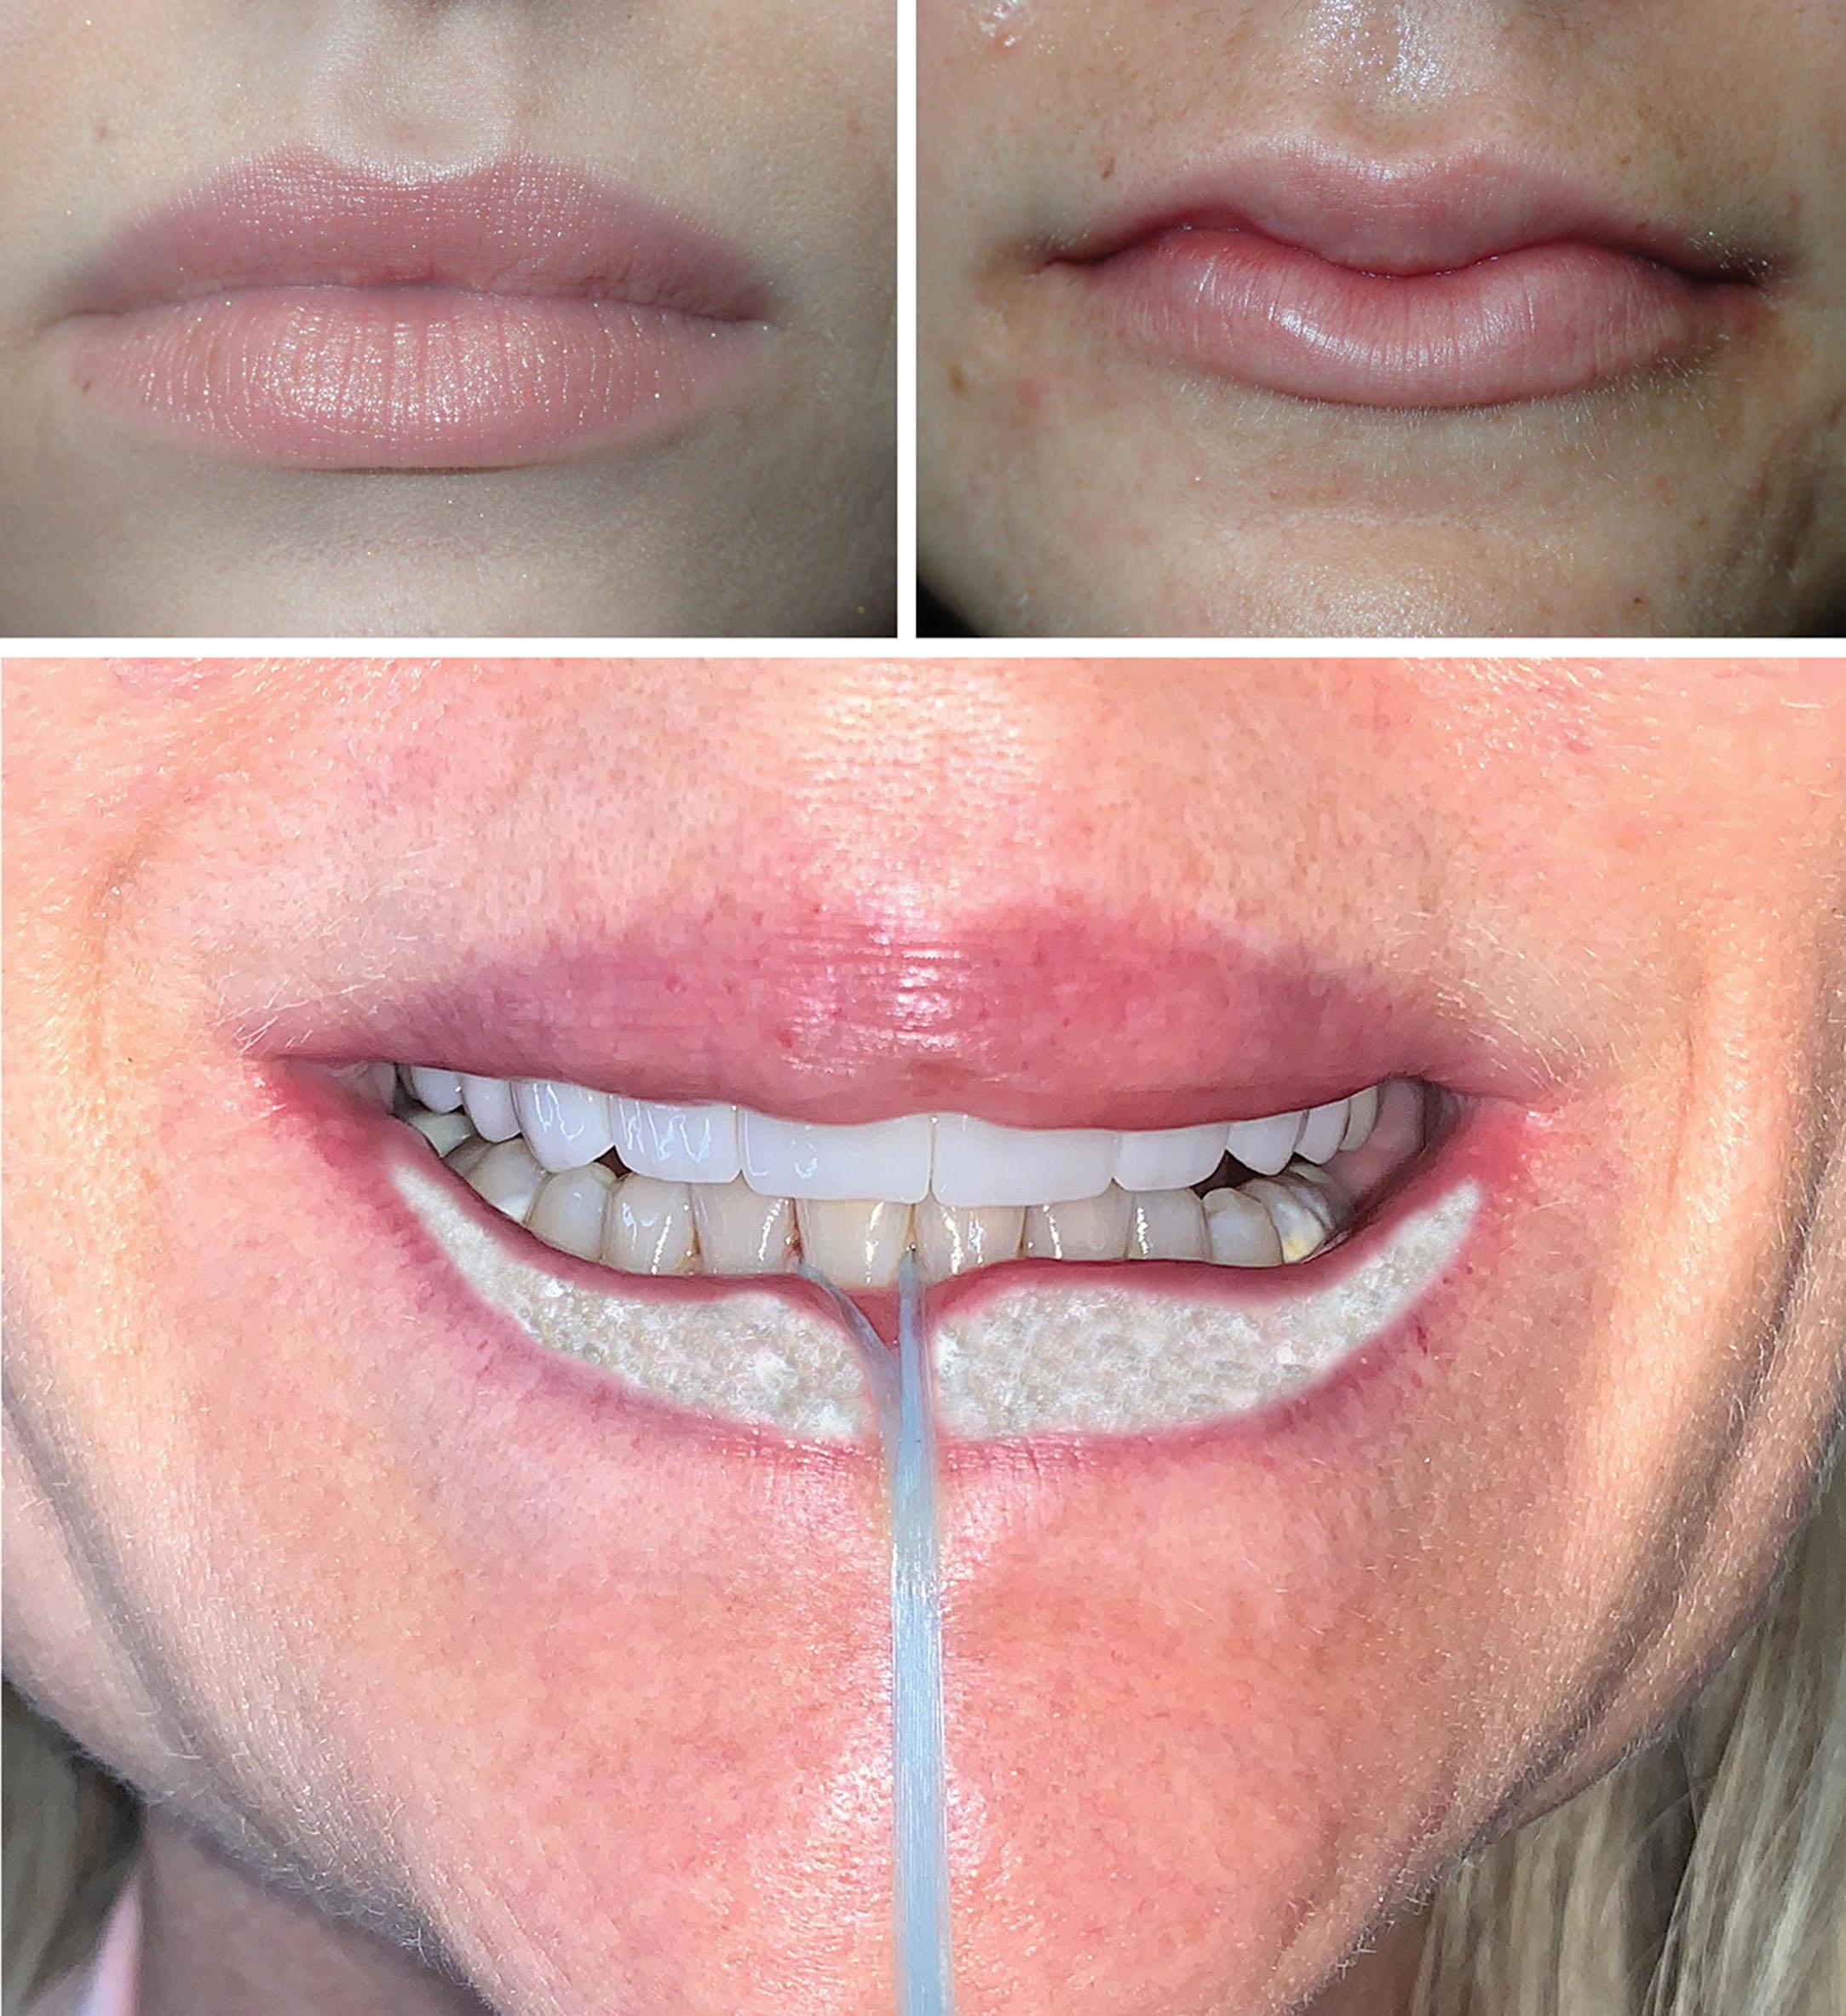
Treating young patients without significant photodamage is usually straightforward. They may simply need a small amount of volume to plump up the lips or some basic vermilion outline for definition. Care is taken not to place the filler material too close to the vermilion border so that it can migrate and look unnatural, which is undesirable to most. A new technique that highlights youthfulness is having lip cleavage. Creating a lip cleavage involves creating the two pillows of the lower lip, leaving a small area of “cleavage” in the center of the lower lip. You can easily attain this result by using dental floss fastened around the patient’s lower front tooth and having them or your assistant pull forward while you are injecting the two side pillows of the bottom lip.
Treating the senescent lip, on the other hand, can be more challenging. The youthful lip is shorter, curvaceous, defined, and volumized ( Fig. 10.10 ). The aging lip lengthens for numerous reasons, including volume loss from skin, muscle, and minor salivary gland and fat changes (see Fig. 10.10 ). Loss of tooth structure (attrition) also contributes to postural differences of the lips.
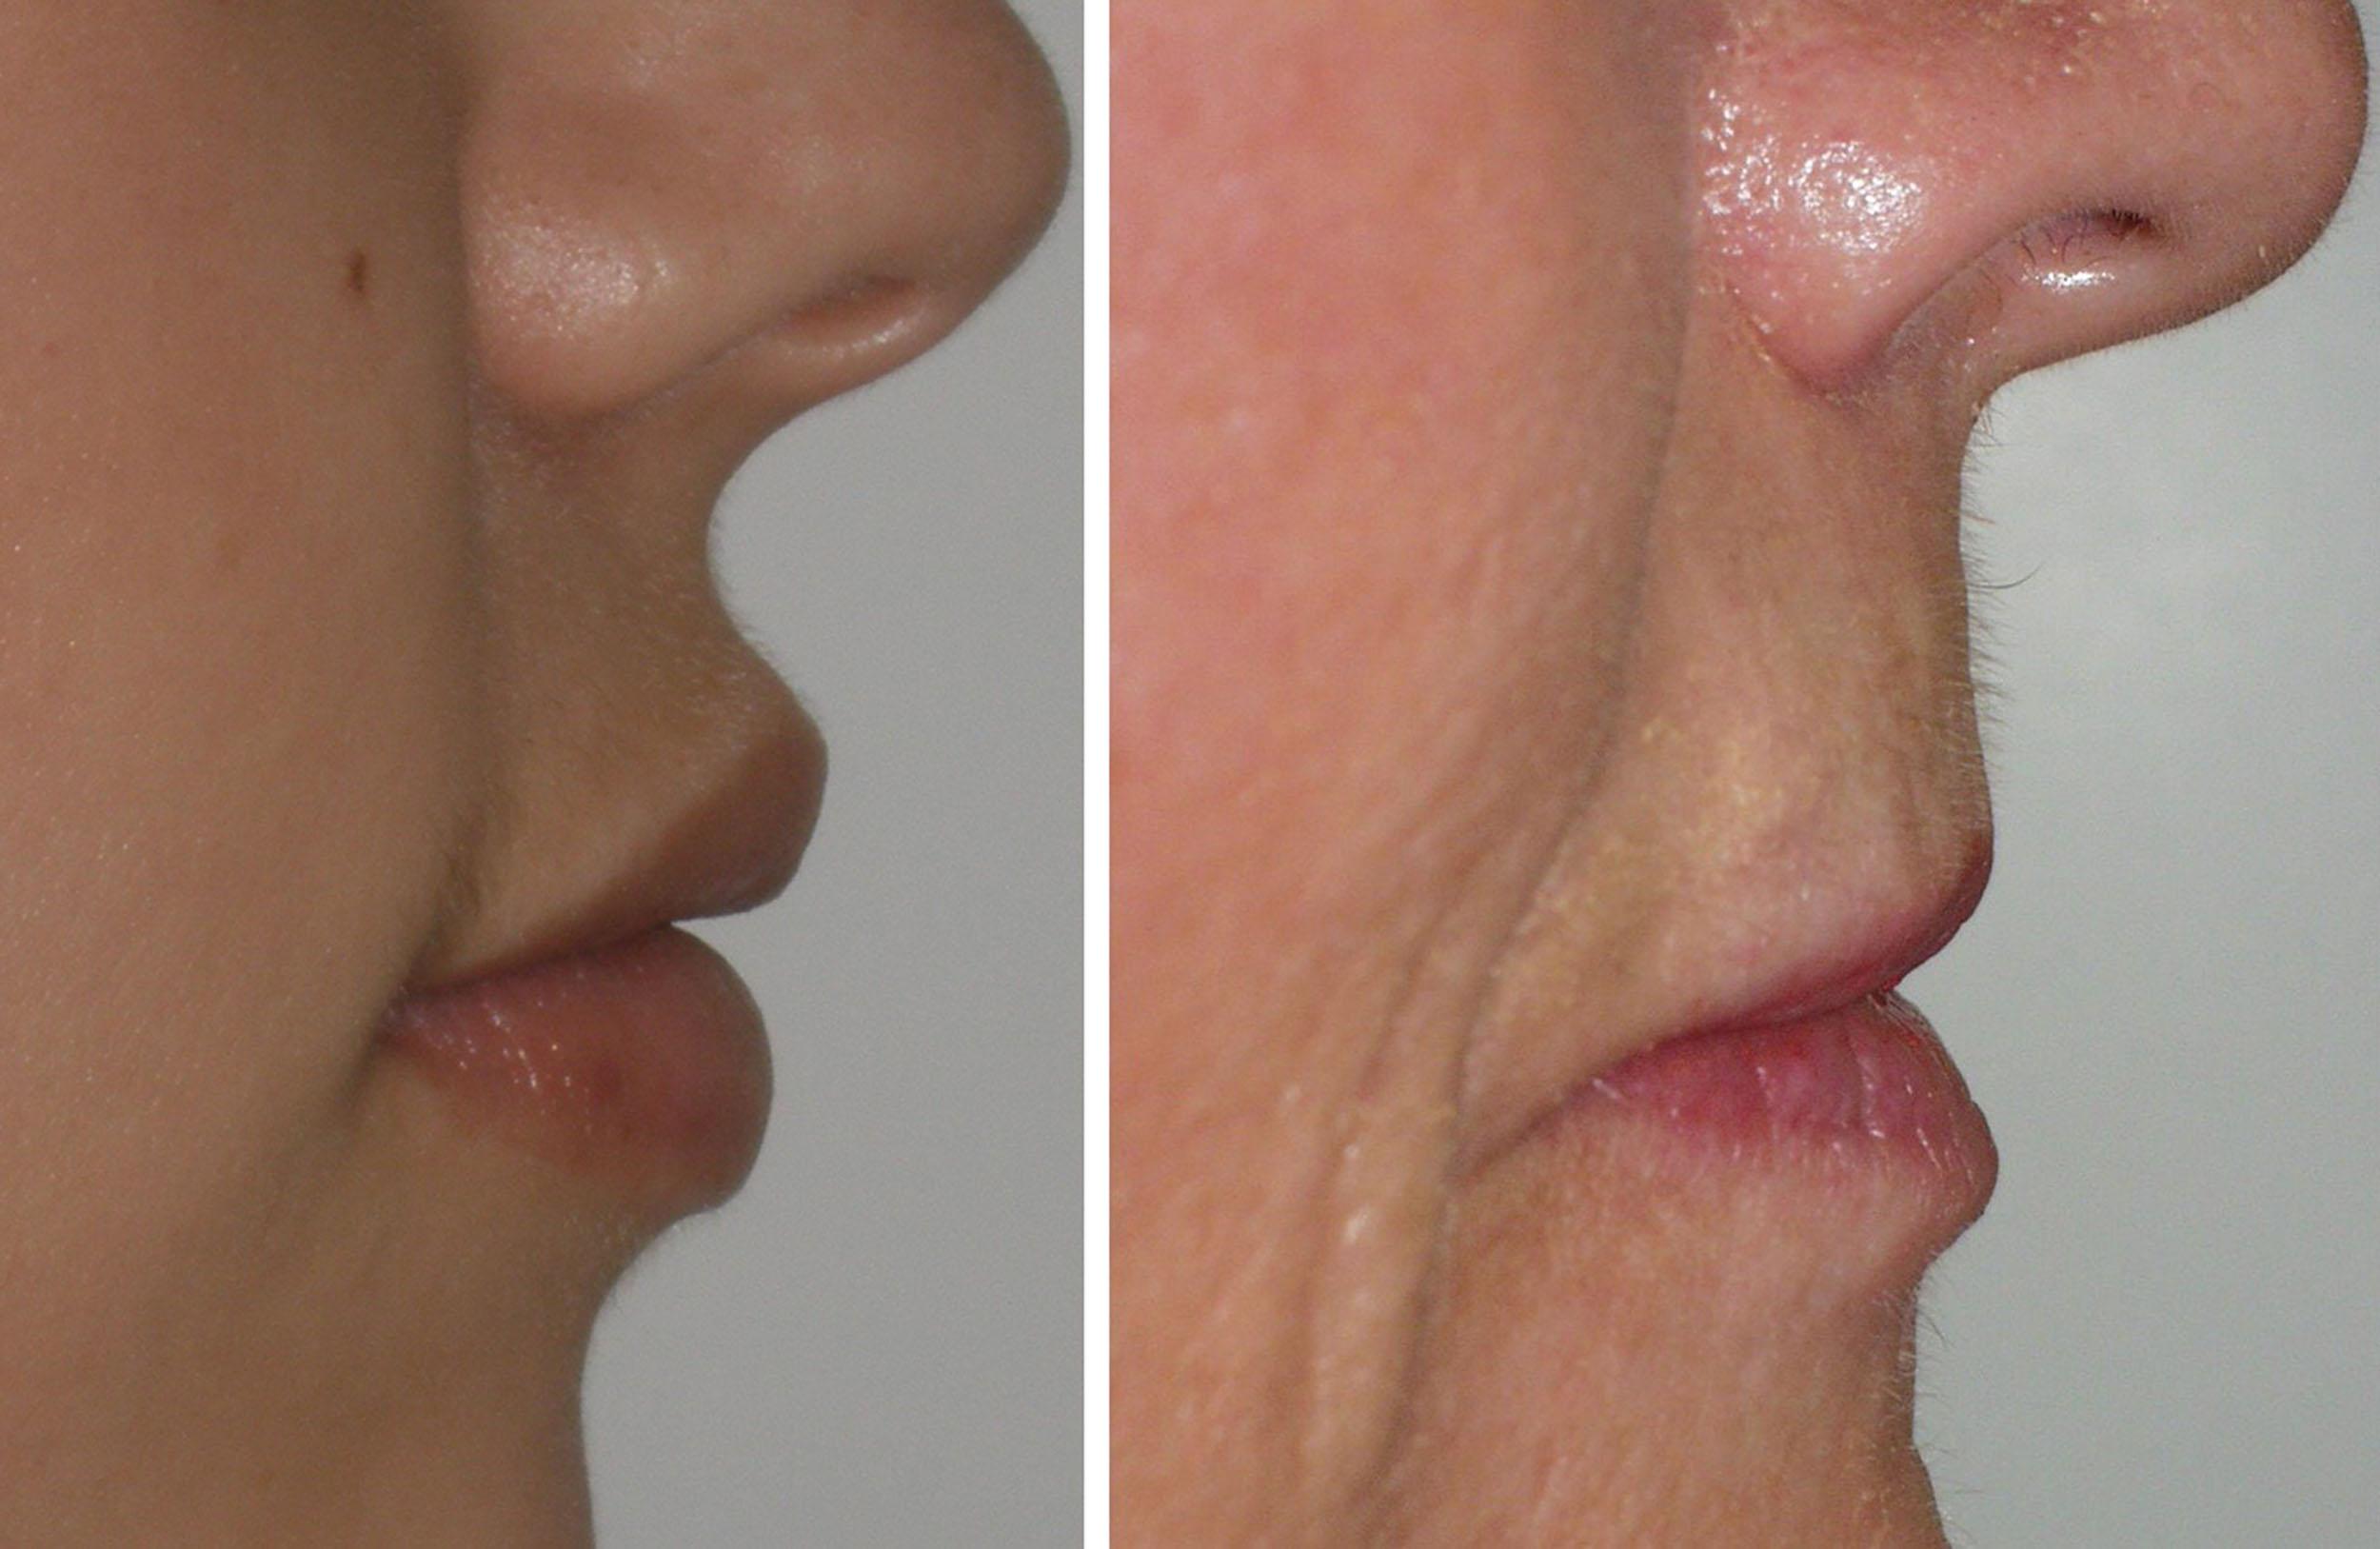
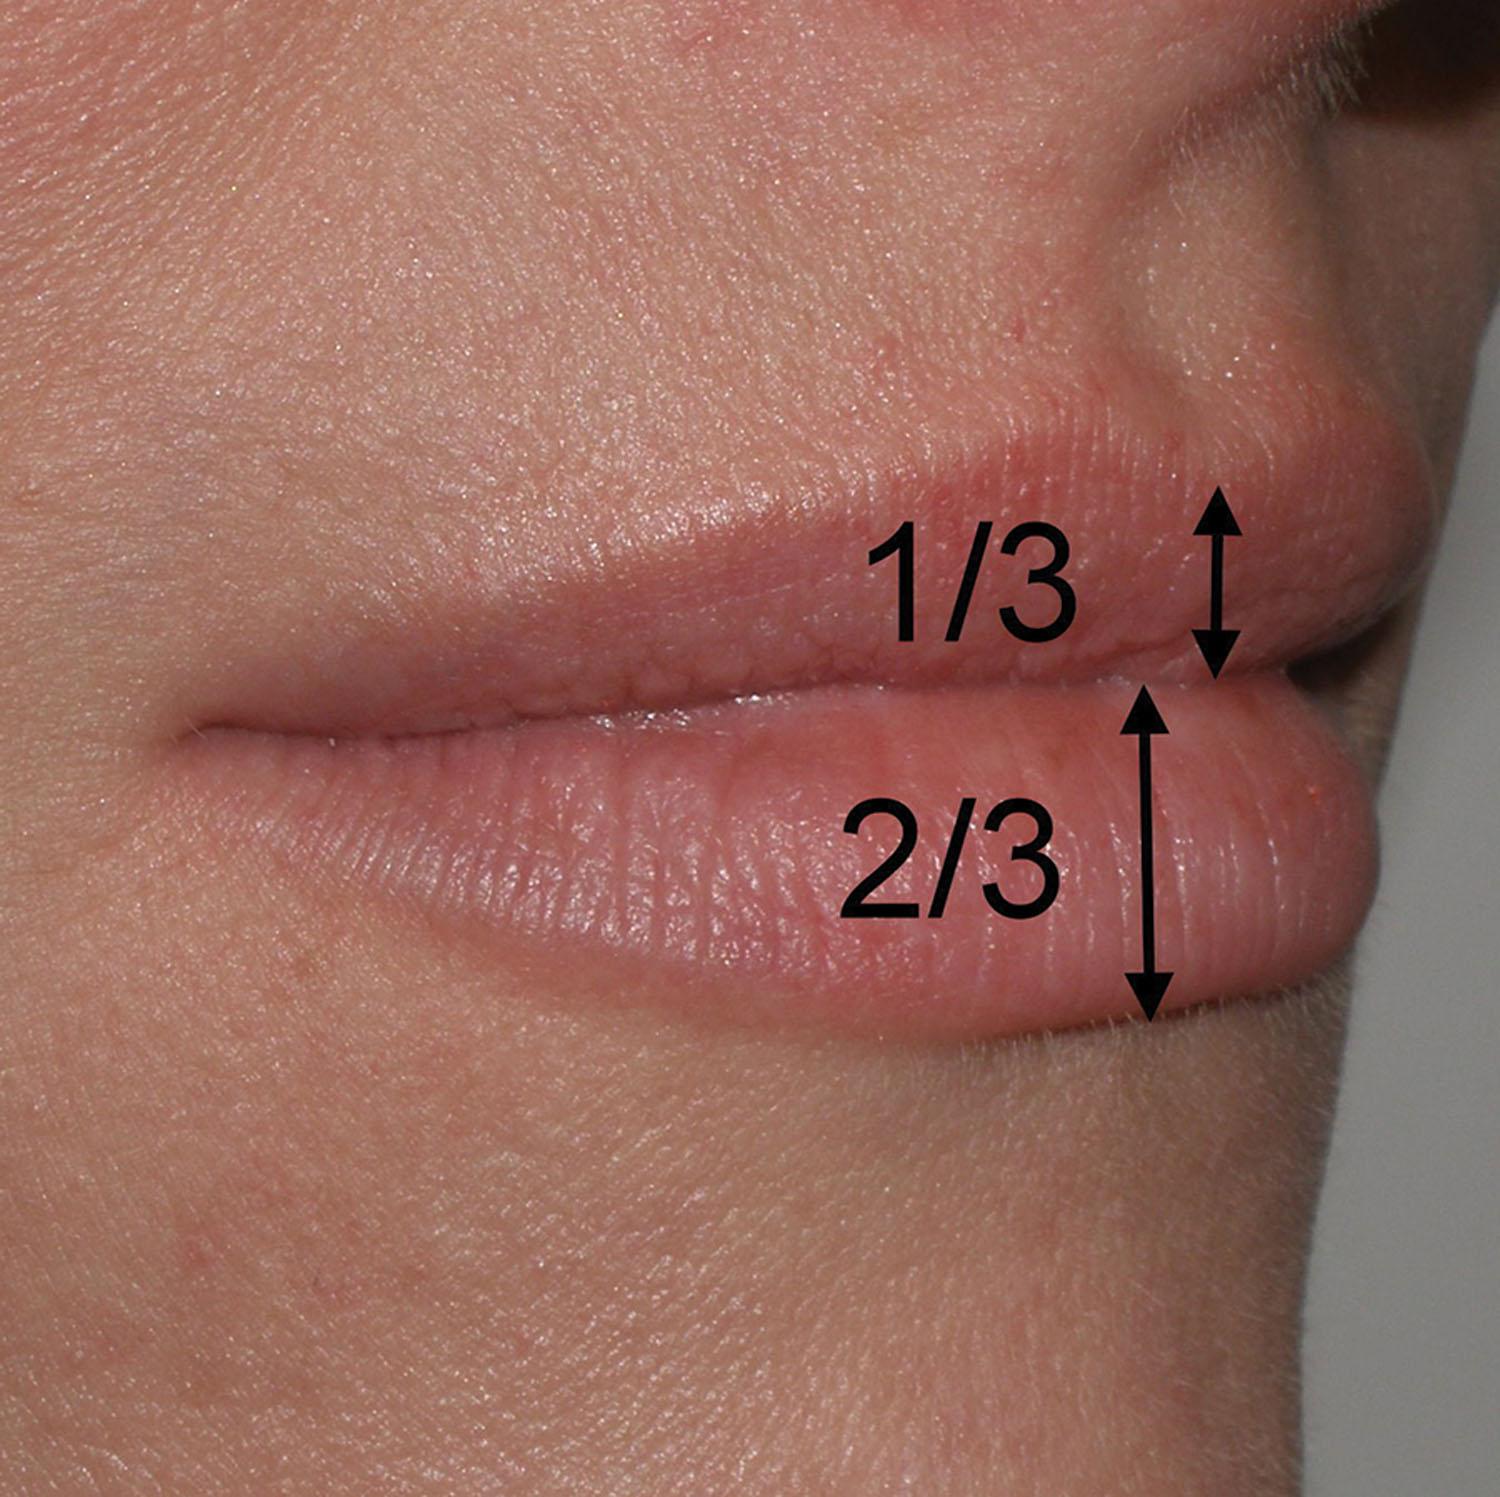
A successful injector is a student of lip form and function and must be cognizant of the differences between youthful and senescent lips. In youth, the upper lip constitutes about one-third of the total lip volume, and the lower lip constitutes about two-thirds of the mass. This applies to the “golden ratio” of 1 : 1.61 for the upper and lower lip, respectively. This varies among patients and ethnicity ( Fig. 10.11 ). As fashion changes, many injectors feel that beauty standards are now changing as well. Most younger patients desire to have an equal volume of lower lip to their upper lip. This goes back to ensure that you see a photo from every patient of what their “dream” lips will look like postfiller. The youthful perioral region is defined by numerous anatomic components that undergo changes with aging. The astute injector is aware of normal lip volume, outline, philtrum, philtral columns, and the natural pillows of the architecture of the lips ( Fig. 10.12 ).
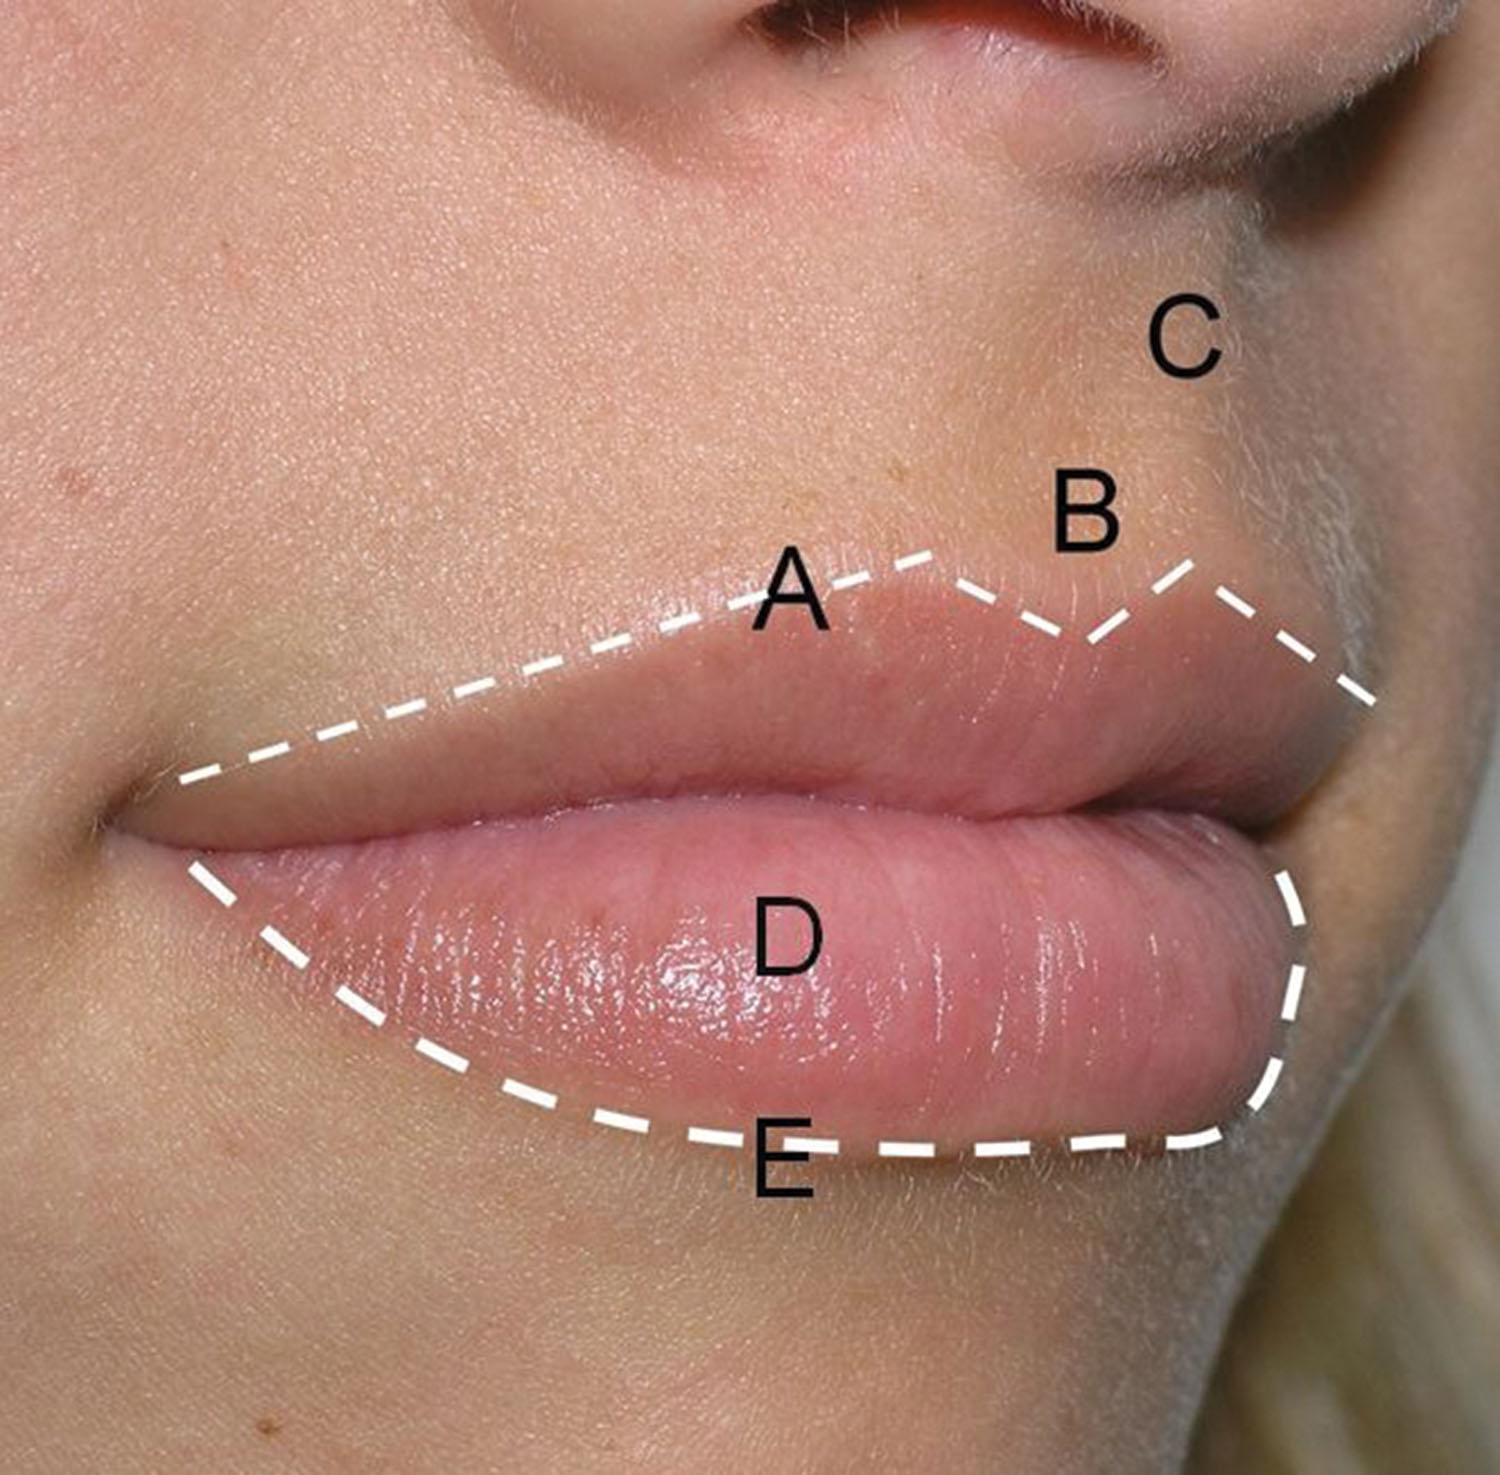
As with many other body parts, some patients exhibit outstandingly aesthetic lips. These patients may exhibit three distinct prominences or tubercles in the upper lip and two in the lower lip. On the upper lip, one “pillow” lies centrally, and one is present on each lateral region. On the lower lip, the two prominent tubercles lie on each side of the midline. Some injectors strive to duplicate these prominent regions. My experience is that this looks good on some patients, but most older patients feel that the discontinuous tubercles look less aesthetic than simply having full, contiguous lips. I personally have a better experience augmenting the patient’s existing anatomy then trying to recreate new anatomy. Sometimes the lip tubercles are accompanied by connective tissue, and trying to convert a tubercular lip into a straighter lip is almost impossible as the filler does not want to follow through the lip and is frequently contained by the connective tissue, which can imbalance the augmentation that is confirmed to the tubercular areas.
I felt it important to include different methods of treating the same areas as outlined by internationally recognized key opinion leaders and talented injectors. Therefore this chapter will contain numerous descriptions of similar techniques as performed in the hands of specific injectors.
Every practitioner has his or her specific filler injection techniques. The two most popular are linear threading and serial puncture ( Fig. 10.13 ). Linear threading involves inserting the needle and injecting the filler in a straight line while continuously moving in a backward direction. This process would be analogous to placing a line of toothpaste on one’s toothbrush, laying down a seam of calking, or decorating a cake. Although I personally inject while withdrawing, other injectors advocate injecting antegrade to push structures out of the way. I feel that the latter can be more prone to vascular injection. The other injection method is known as the serial puncture technique. This involves placing small boluses of filler with multiple punctures along the lip or wrinkle. In reality, many instances call for a combination of both techniques. Another popular evolving technique is to turn your needle perpendicular to the lips and add “pillars” in a retrograde fashion to the lips, adding length and height to the lip versus just volume up and out. Your preference of technique will determine if you are a “cannula” or a “needle” person.

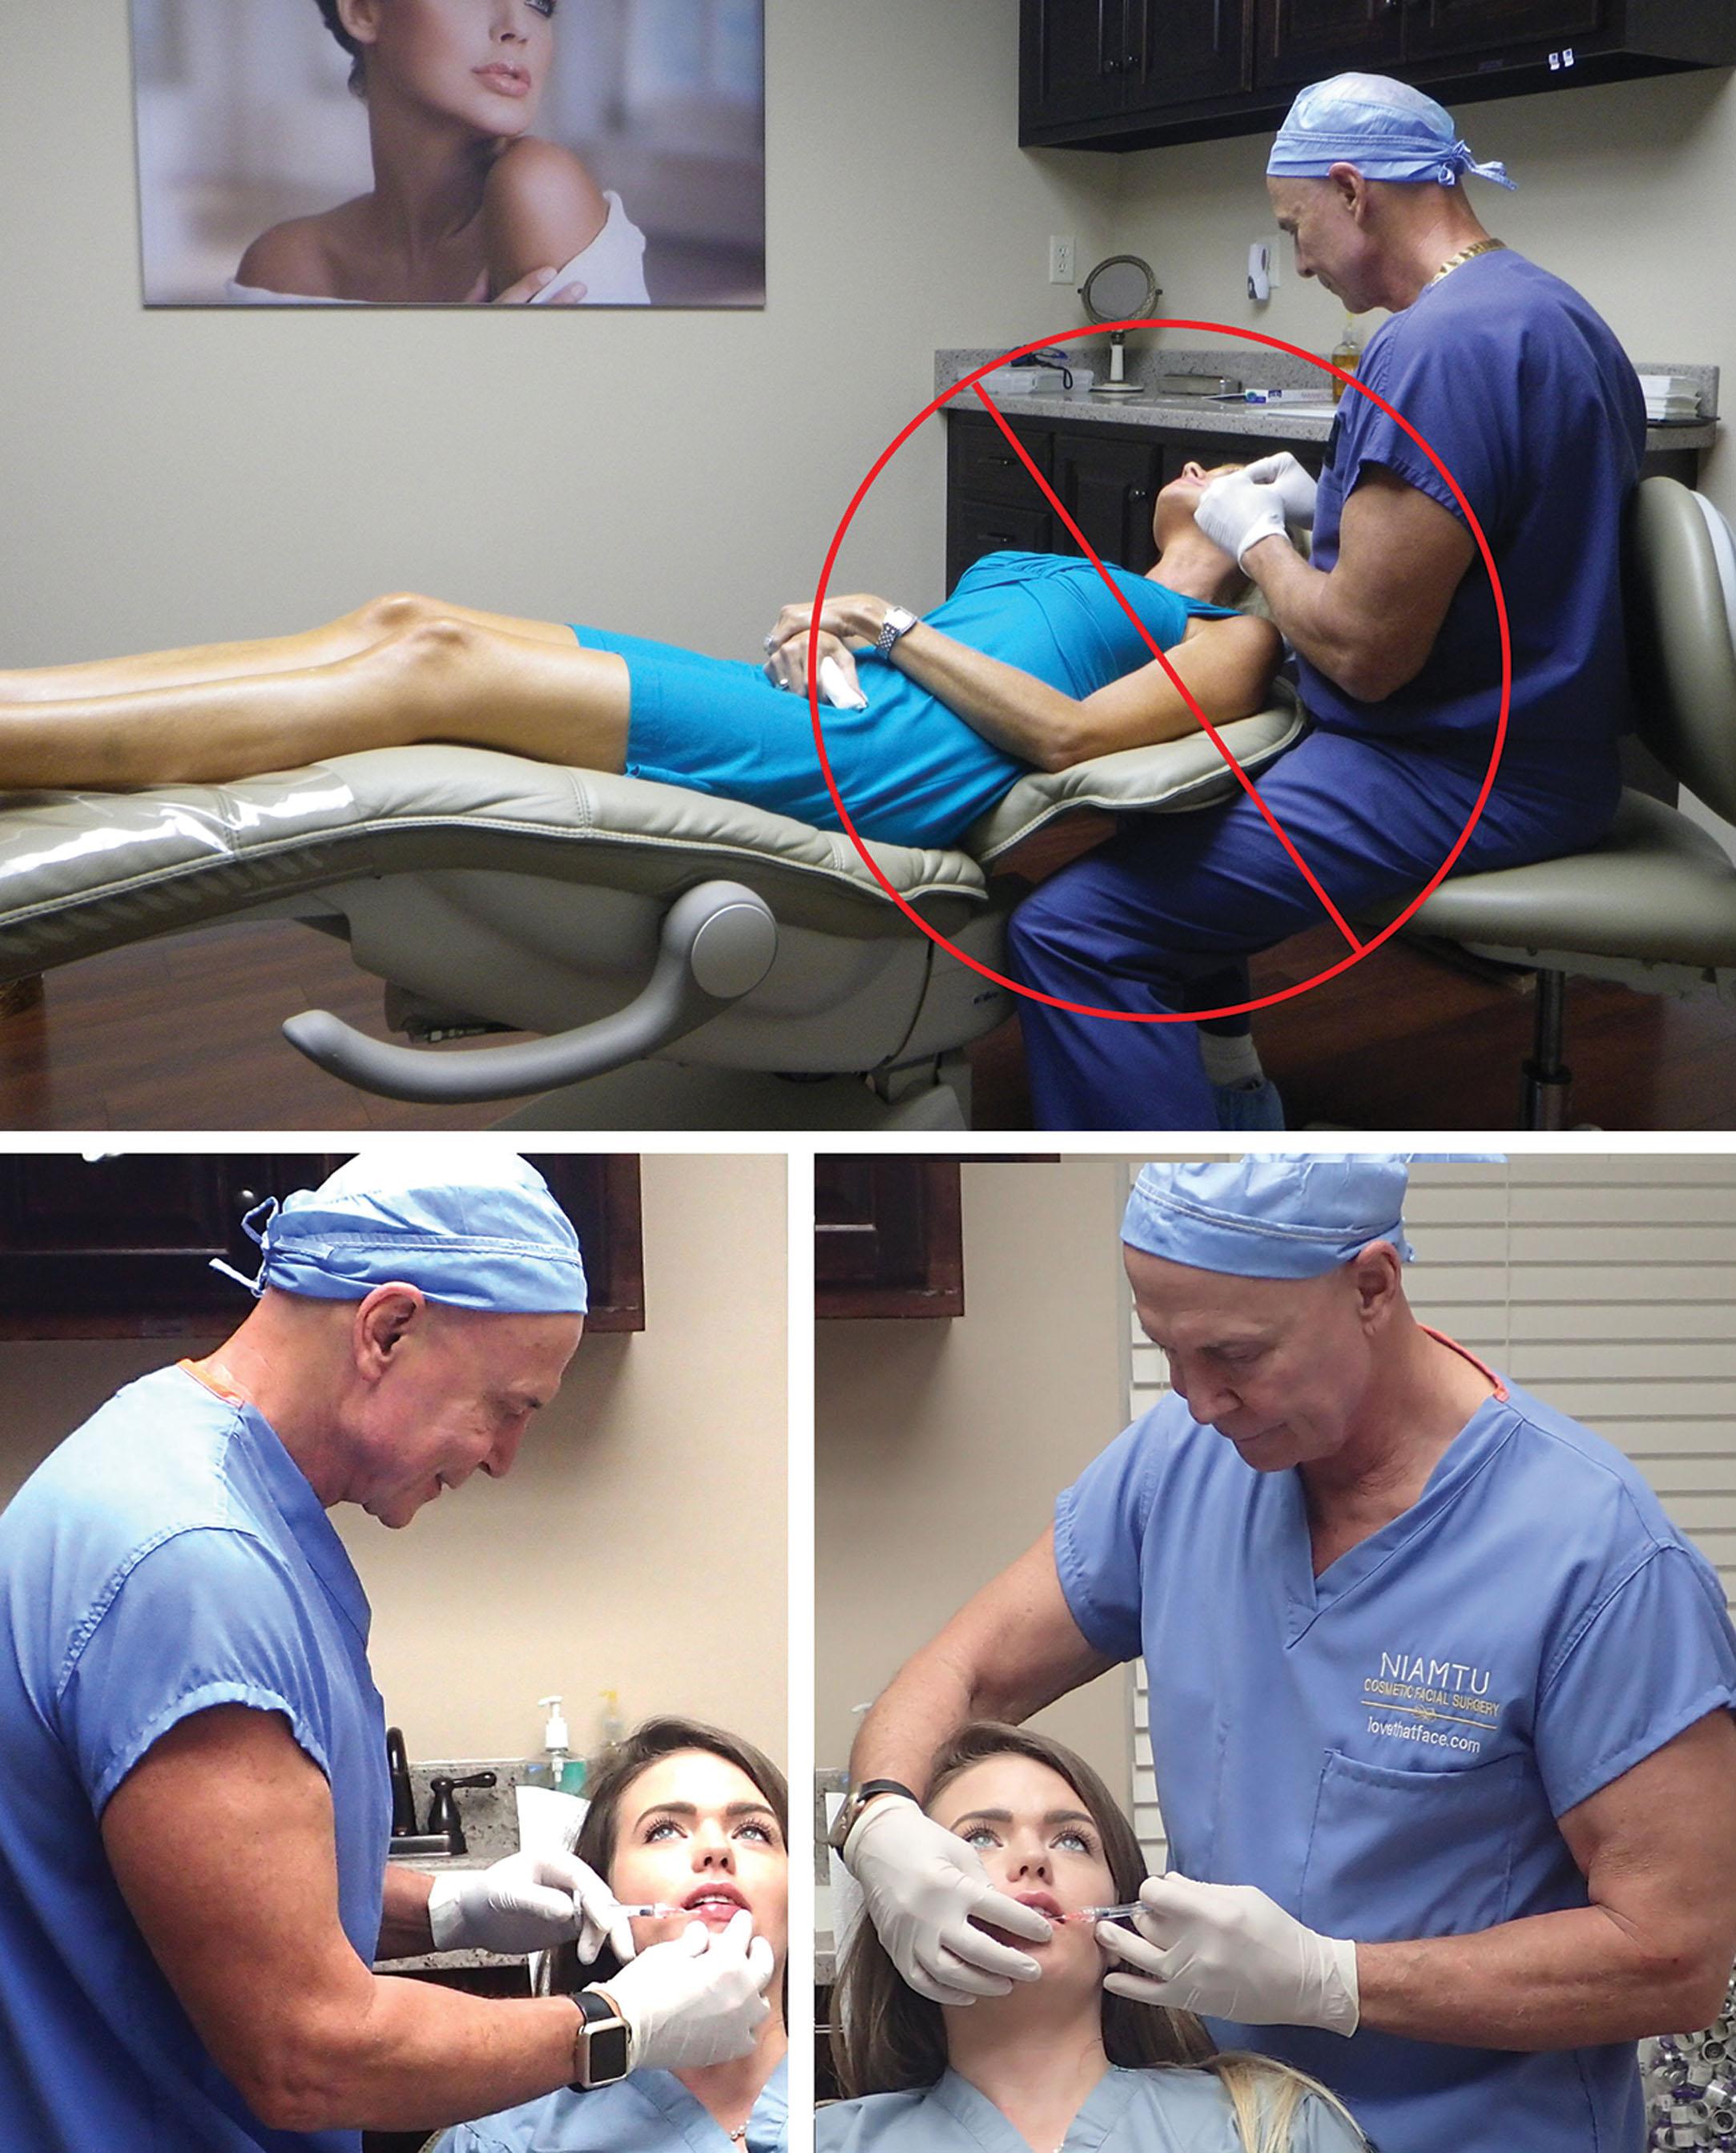
Before discussing specific injection techniques, I personally feel that it is important not to inject patients in the supine position as gravitational repositioning of the facial soft tissue structures impedes accuracy ( Fig. 10.14 ). In addition, I feel that a more accurate injection technique can be utilized by injecting on both sides of the patient. Many practitioners perform the entire injection sequence from their preferred side, depending on whether they are right or left handed. When looking across the patient at their anatomy, I believe that the ability to judge accuracy and symmetry is impeded; therefore walking around to the other side of the chair and injecting the contralateral side is a more accurate method (see Fig. 10.14 ).
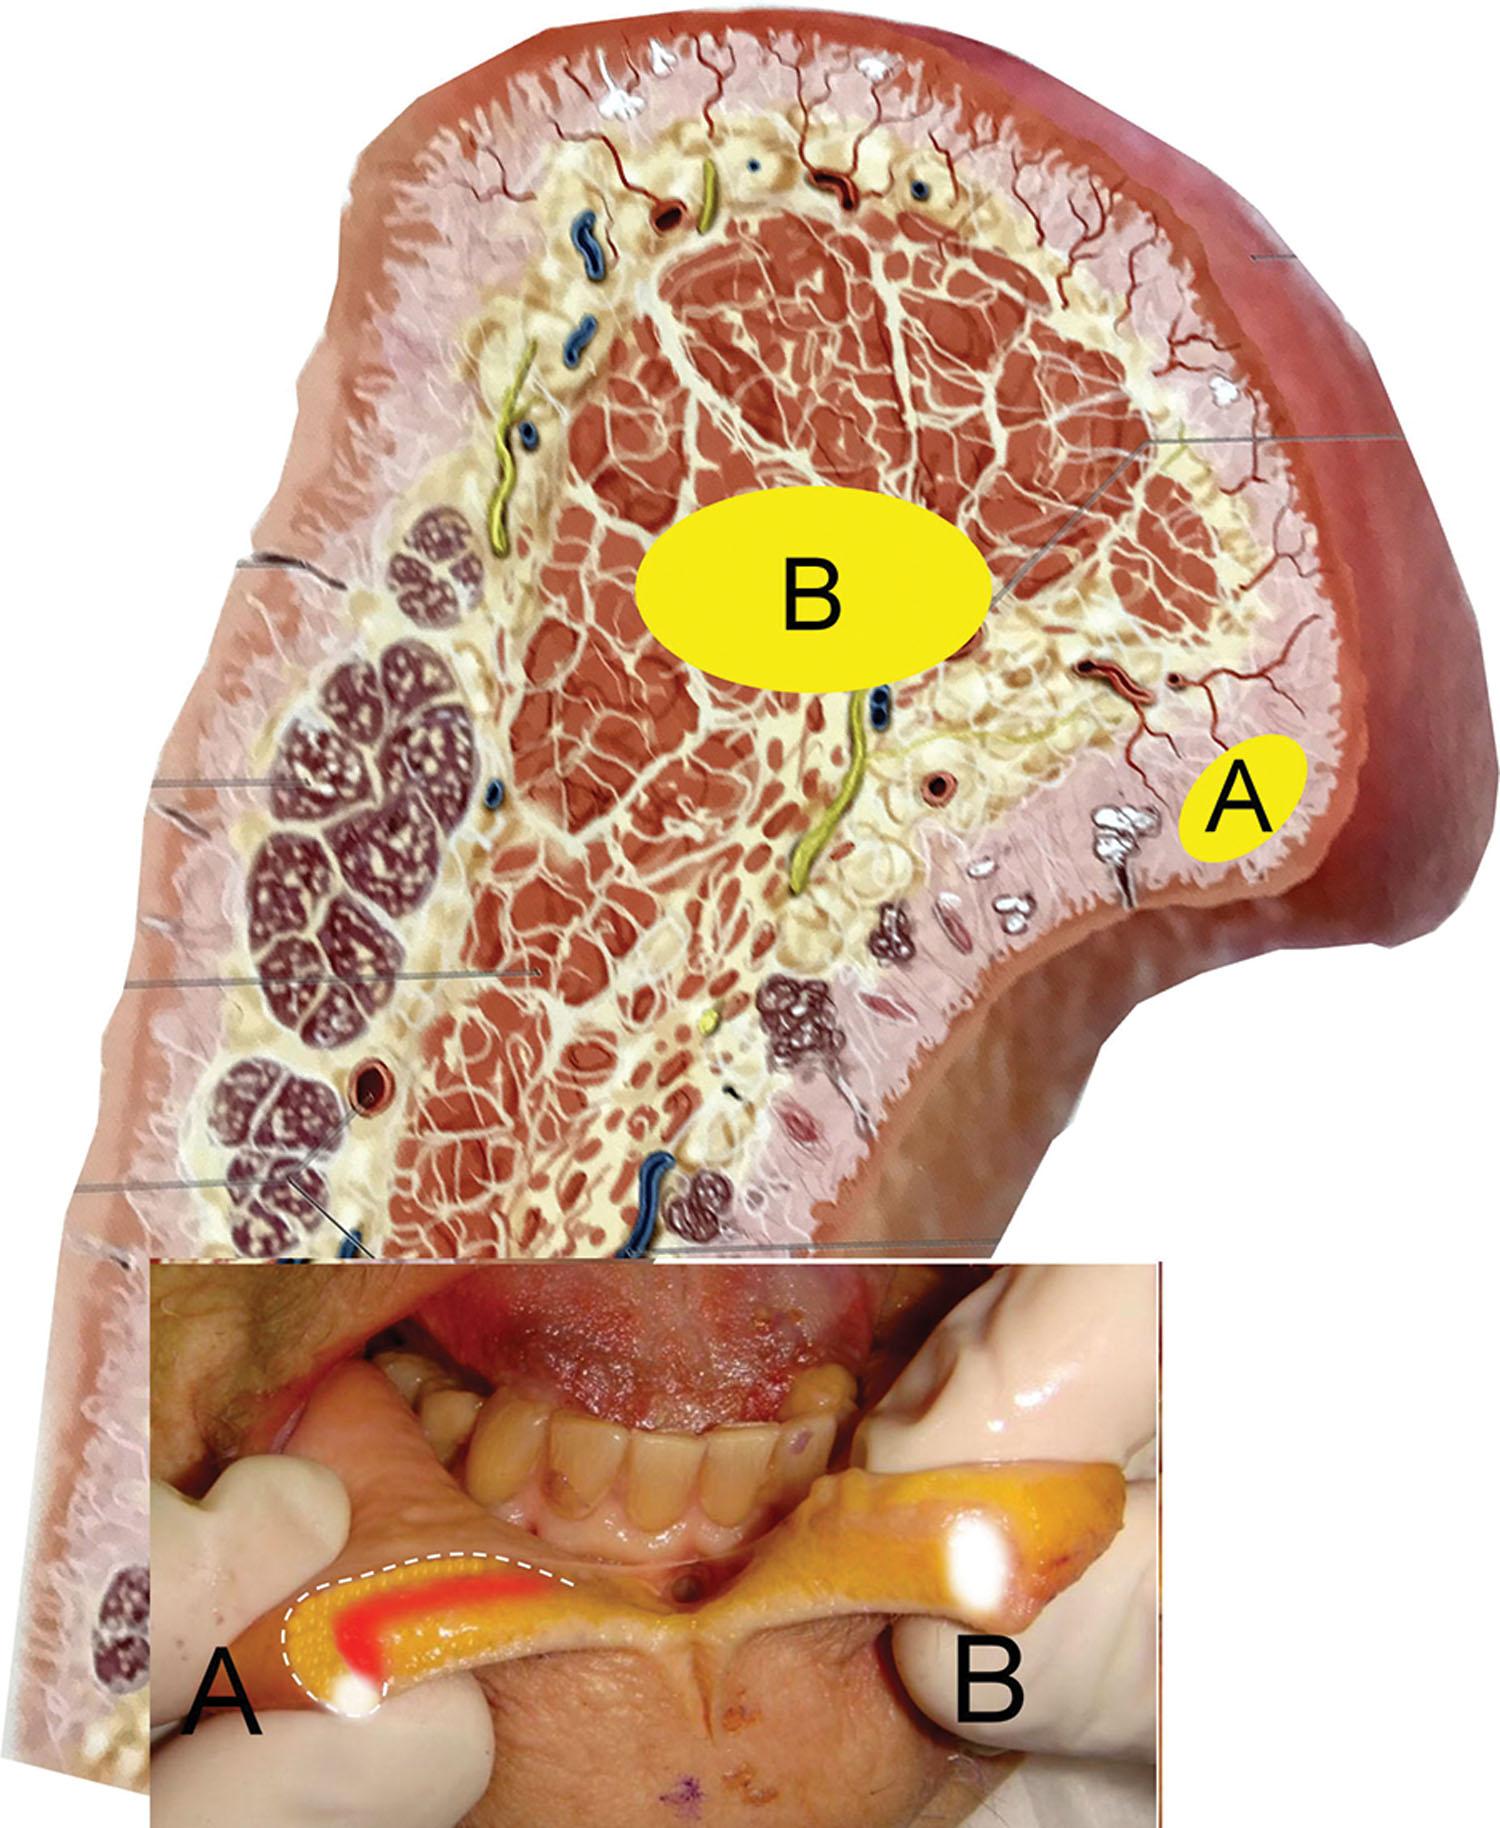
Although vermilion border augmentation is a powerful means of enhancing the lip, many patients have adequate outline and a defined white roll or Cupid’s bow and do not require an outline. The most common presentation in my practice is the patient who presents with the desire for more lip volume. These patients request plumper, fuller, pouty, and more voluptuous lips. Many are younger and already have adequate vermilion border. These patients will benefit from deeper fill that will increase the general lip volume and pout. By augmenting the deeper portion of the lip, the actual lip will roll out and produce increased pout. The target for volumizing the lip is basically the center of the area of the lip. This is deep to the muscle and contains connective tissue, minor salivary glands, and fat ( Fig. 10.15 ).
For younger patients who have minor volume loss or desire a more contemporarily fashionable lip, I describe this as “putting a little air in the tires.” A single syringe split between both lips can reestablish youthful volume. One of the newer and popular techniques is adding lip cleavage to the lower lip. In other words, having a small dip in the central part of the lower lip with two soft pillows of lip directly adjacent. We can thank the Kardashians for this aesthetic request among millennials. To achieve this look, the injector places dental floss fashioned around the lower front tooth and has the patient or assistant pull down while injecting the adjacent pillows next to the divide. This will achieve a more contemporary and youthful look that young patients are often trying to achieve ( Fig. 10.16 ). Older patients will require more filler, and it is not uncommon to use two syringes for plumping.
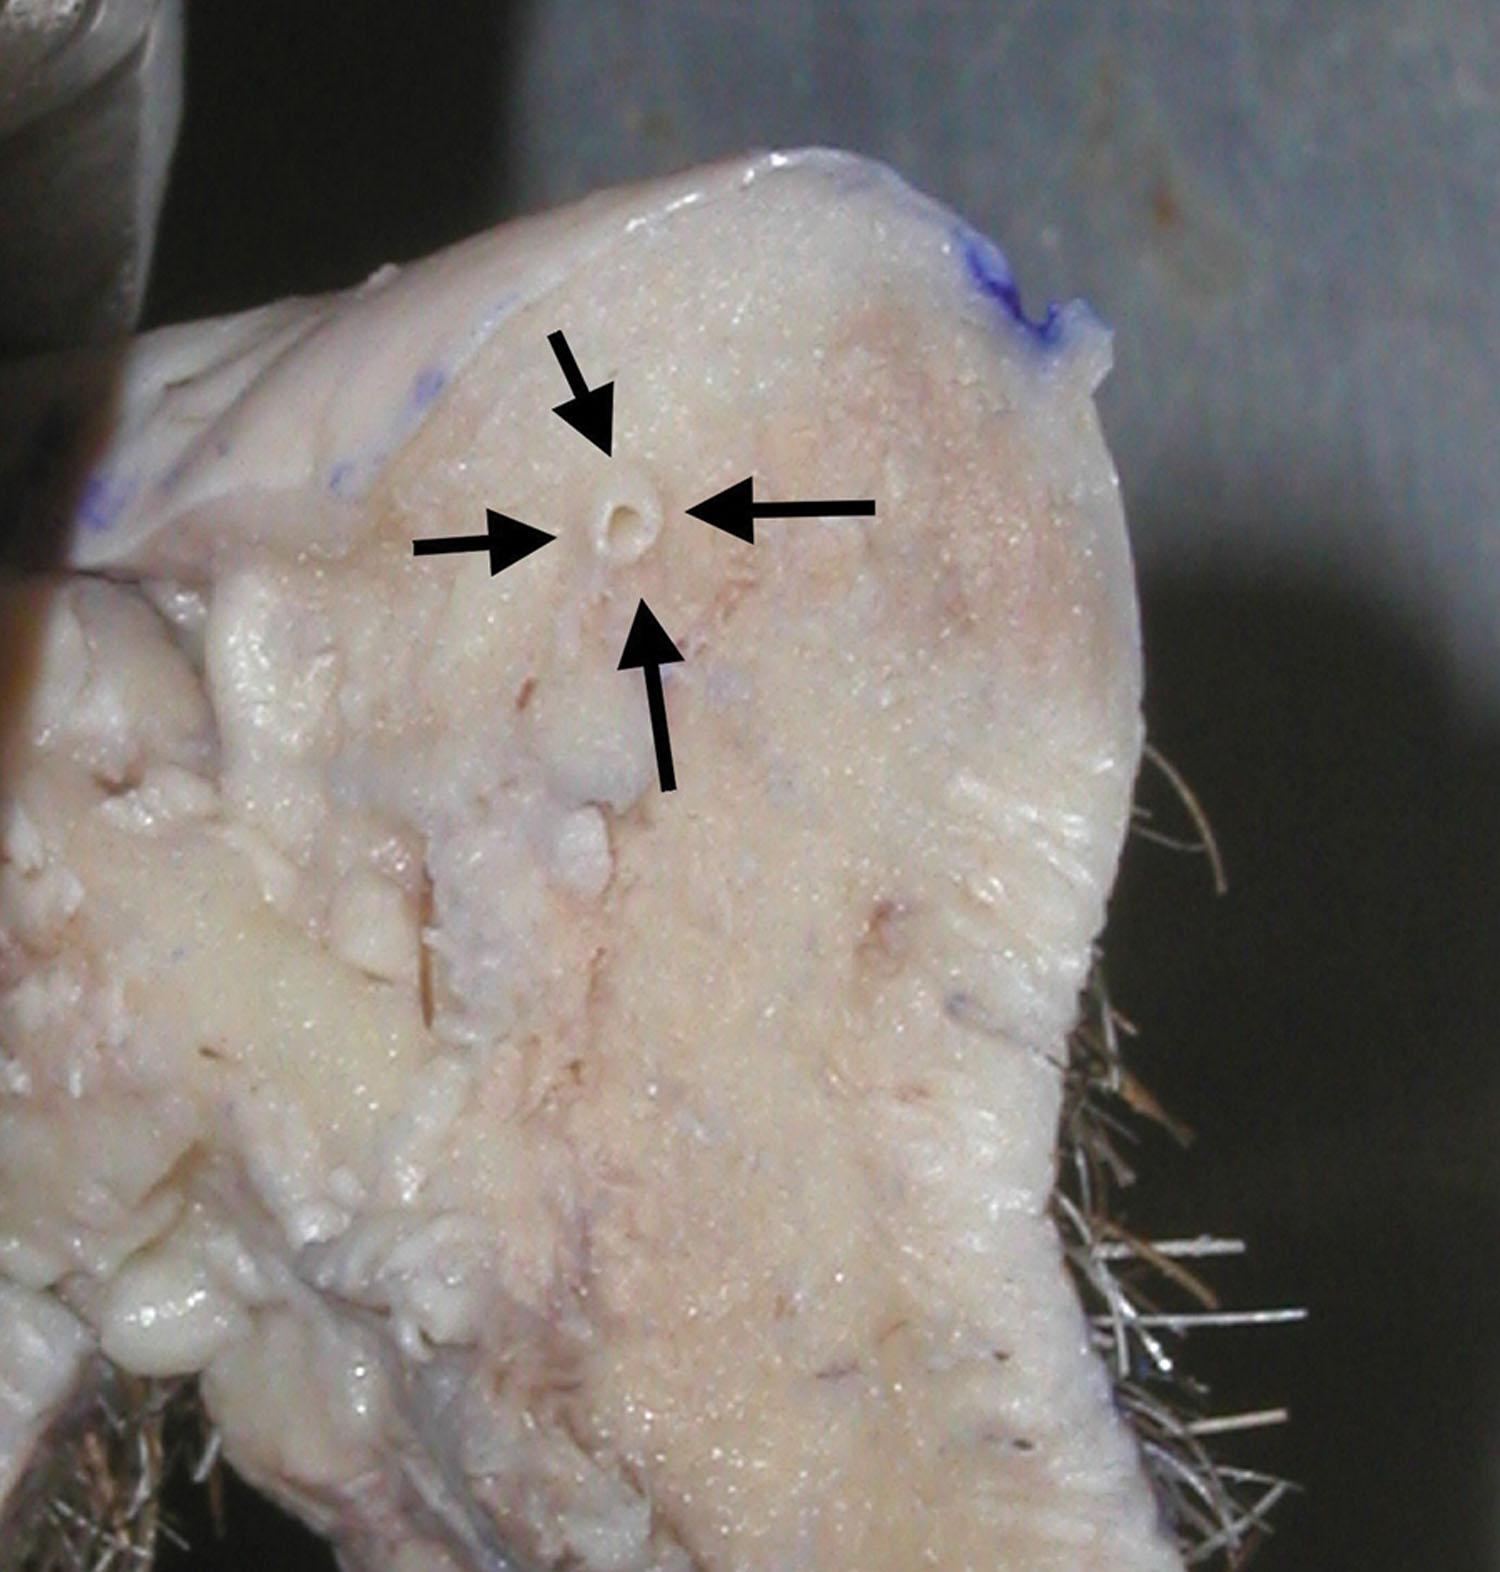
When volumizing, the needle is inserted at the wet-dry line (the demarcation between the wet and dry vermilion), deep into the central lip. The center of the lip is generally a safe plane because the labial artery lies at the posterior one-third of the lip. The target for injection when performing deep volumization is the central lip. The central lip refers to the deep tissues midway between the outer mucosa and skin and the intraoral mucosa, literally the center of the lip when considering the lip in cross-section, as shown in Fig. 10.15B . The needle and filler are anterior to the labial artery, and this is generally a safe zone ( Fig. 10.17 ).
The most common form of injection are the needles that accompany the filler syringes out of the package, which are generally ½-inch in length. One of the keys to atraumatic injection to produce less edema and bruising is to reduce the number of needle punctures. Given the fact that the injector is using a ½-inch needle, this means that needle insertion points can be placed as far away as ½-inch from each other and still have contiguous fill ( Fig. 10.18 ). The needle is inserted to the hub and slowly withdrawn while continuous, steady injection is performed (linear threading). In this area, the goal is to produce a “tube” of filler to enhance the volume ( Fig. 10.19 ).


As noted earlier, some injectors reproduce the prominent lip tubercles seen in some aesthetic lips, and instead of a continuous tube of filler, the tubercles are reconstructed by placing three boluses in the upper lip and two in the lower lip. Some patients have atrophic lips that require projection of the region from the nose to the vermilion. This region can be injected with filler to increase the pout in conjunction with conventional lip fill, as described earlier.
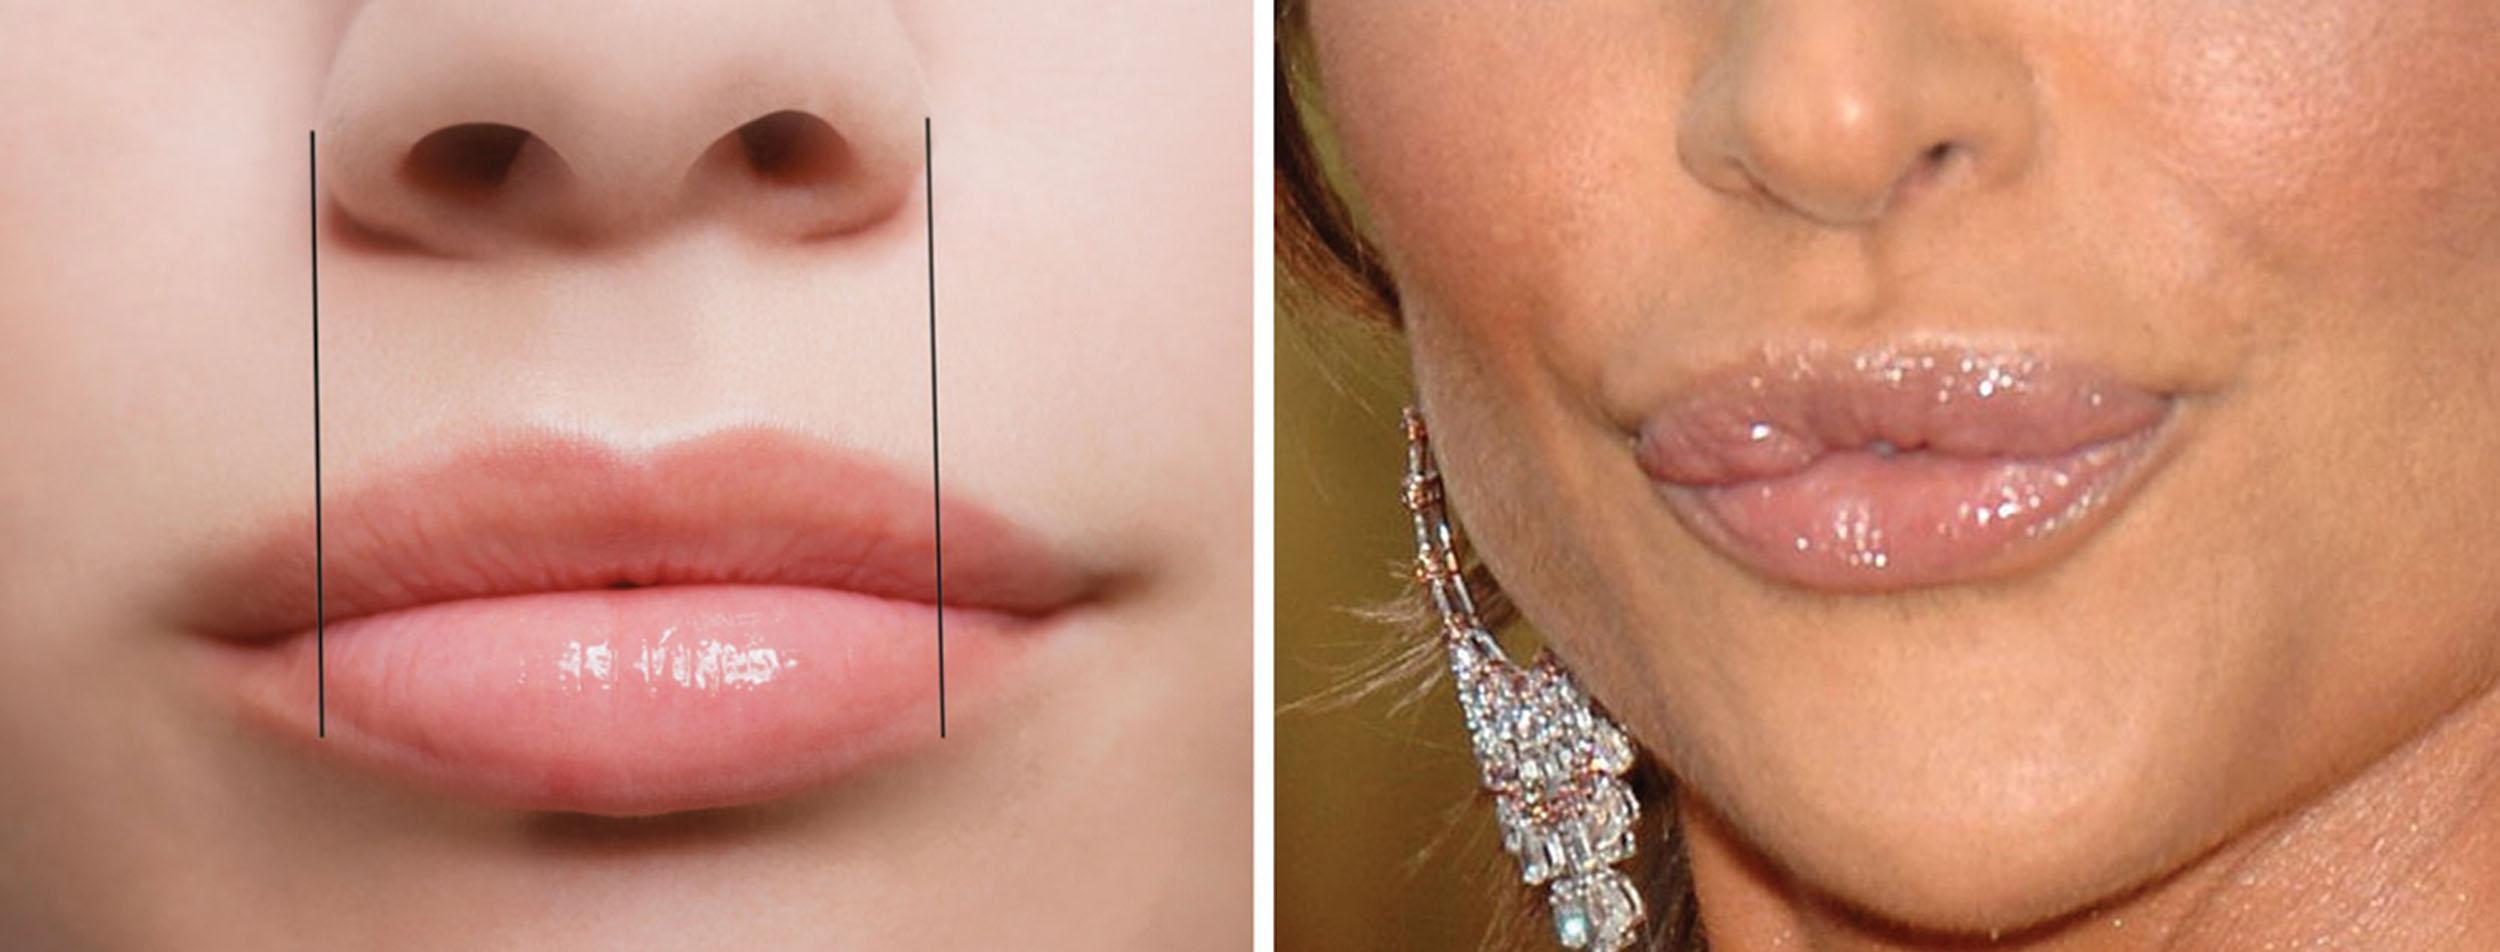
As stated earlier, the injectable filler is not carried to the end of the lateral commissures in many patients. This is intentionally not filled to prevent the duck-look overfill ( Fig. 10.20 ). Imaginary lines dropped from the lateral alae can serve as a guide to stop or reduce lateral injection (see Fig. 10.20 ). However, some patients do request or desire augmentation at the corner of the mouth; for these patients, the technique is the same as shown in Fig. 10.21 .
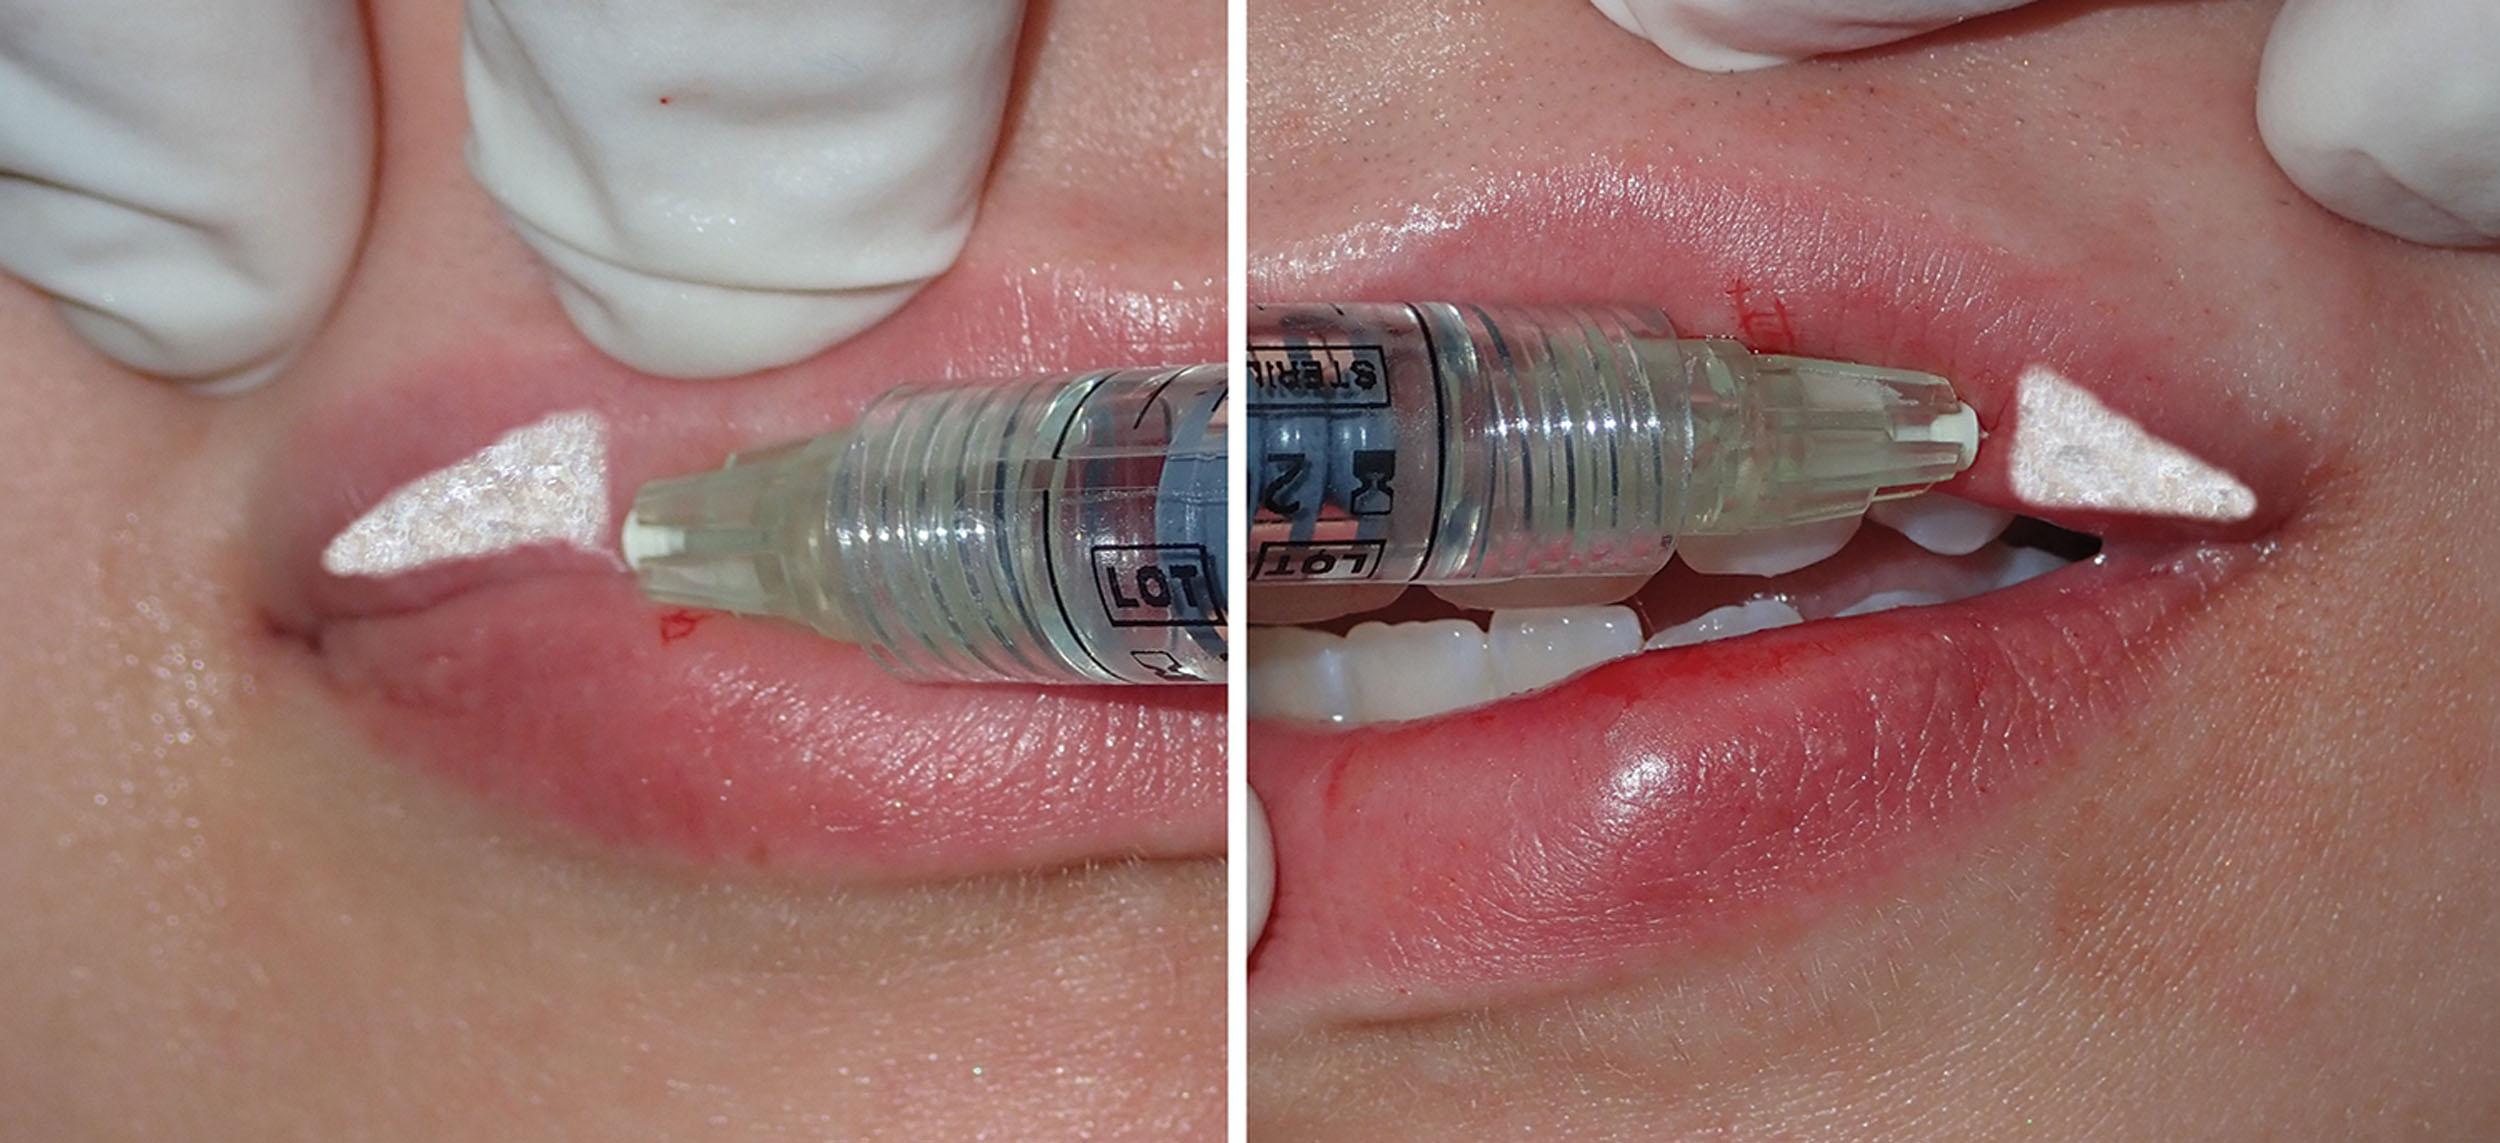
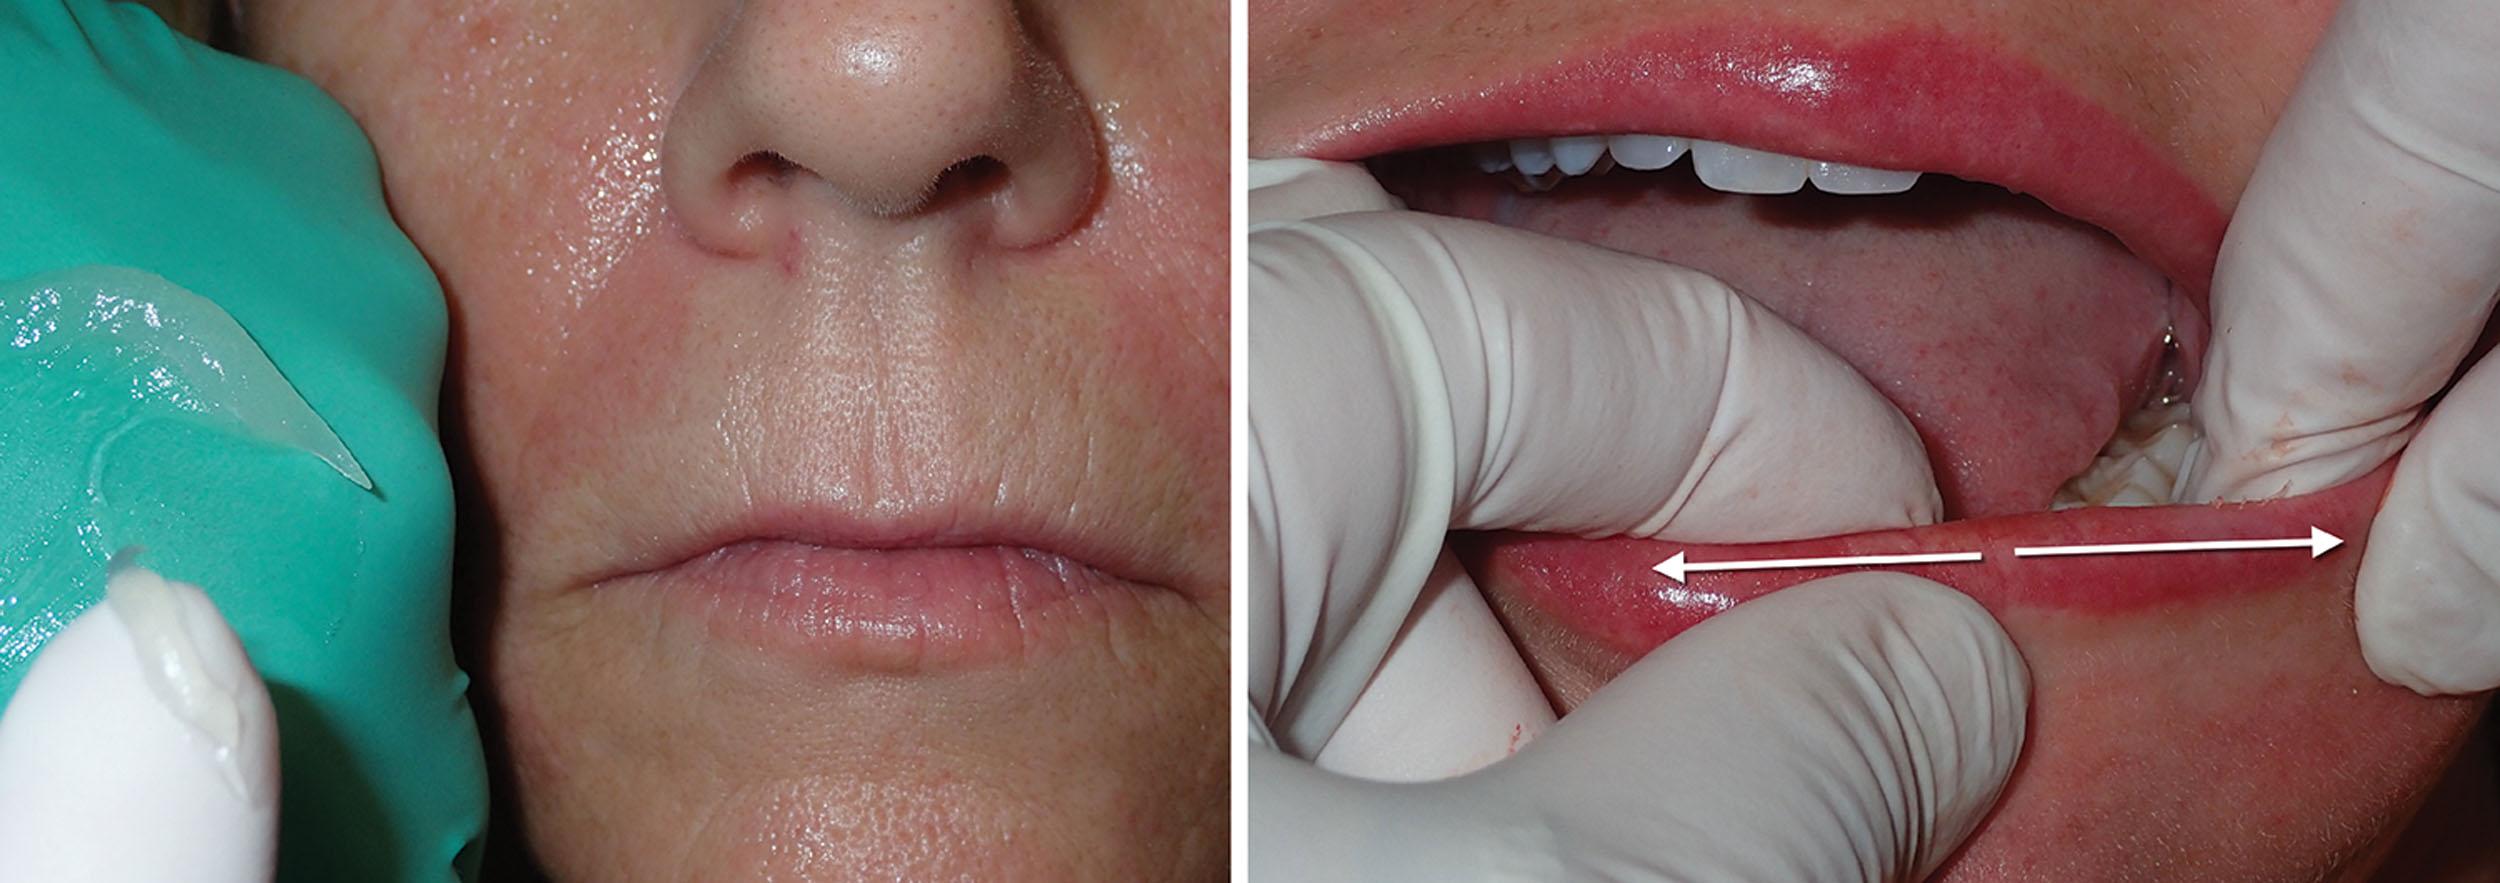
After filler is injected, the region is inspected for symmetry and fill. I strongly believe massaging the injected filler is a critical (and often overlooked) step in obtaining natural and aesthetic results. Most fillers have the consistency of soft gels or paste and will not always be homogenous when injected. Massaging the filler more evenly distributes and forms it and produces a smoother, more homogenous result ( Fig. 10.22 ). In addition, the injector can actually level out an area of excess by moving the filler through the tissues. The injector or assistant keeps a small bolus of petroleum jelly on the back of their glove during all filler injections, and a small amount is used to coat the lip and skin to enable a smooth, lubricated massage. One caveat is that when a patient sees the injector performing massage, the patient may think that this is something that they should do as well. I always tell the patient not to perform any massage as they may displace my treatment. I further explain that they should wait at least 1 week and if they notice asymmetry or bumps to return to the office and allow me to perform the massage.
Joe Niamtu, III
Blunt, rounded, flexible cannulas have been a welcome innovation in the science of facial filler augmentation ( Figs. 10.23–10.28 ). Numerous companies produce disposable, flexible 4-cm, blunt cannulas with the orifice set proximal to the tip. These cannulas have a standard Luer-Lock connection and are packaged with a “pilot” needle of the same gauge (see Fig. 10.23 ). They are blunt and therefore less traumatic, flexible for better negotiation, and can be used in virtually any filler application as conventional needles. Many injectors have switched to using cannulas only, which come in the same gauges as standard sharp needles. I prefer a 27-gauge cannula for most lip injections.
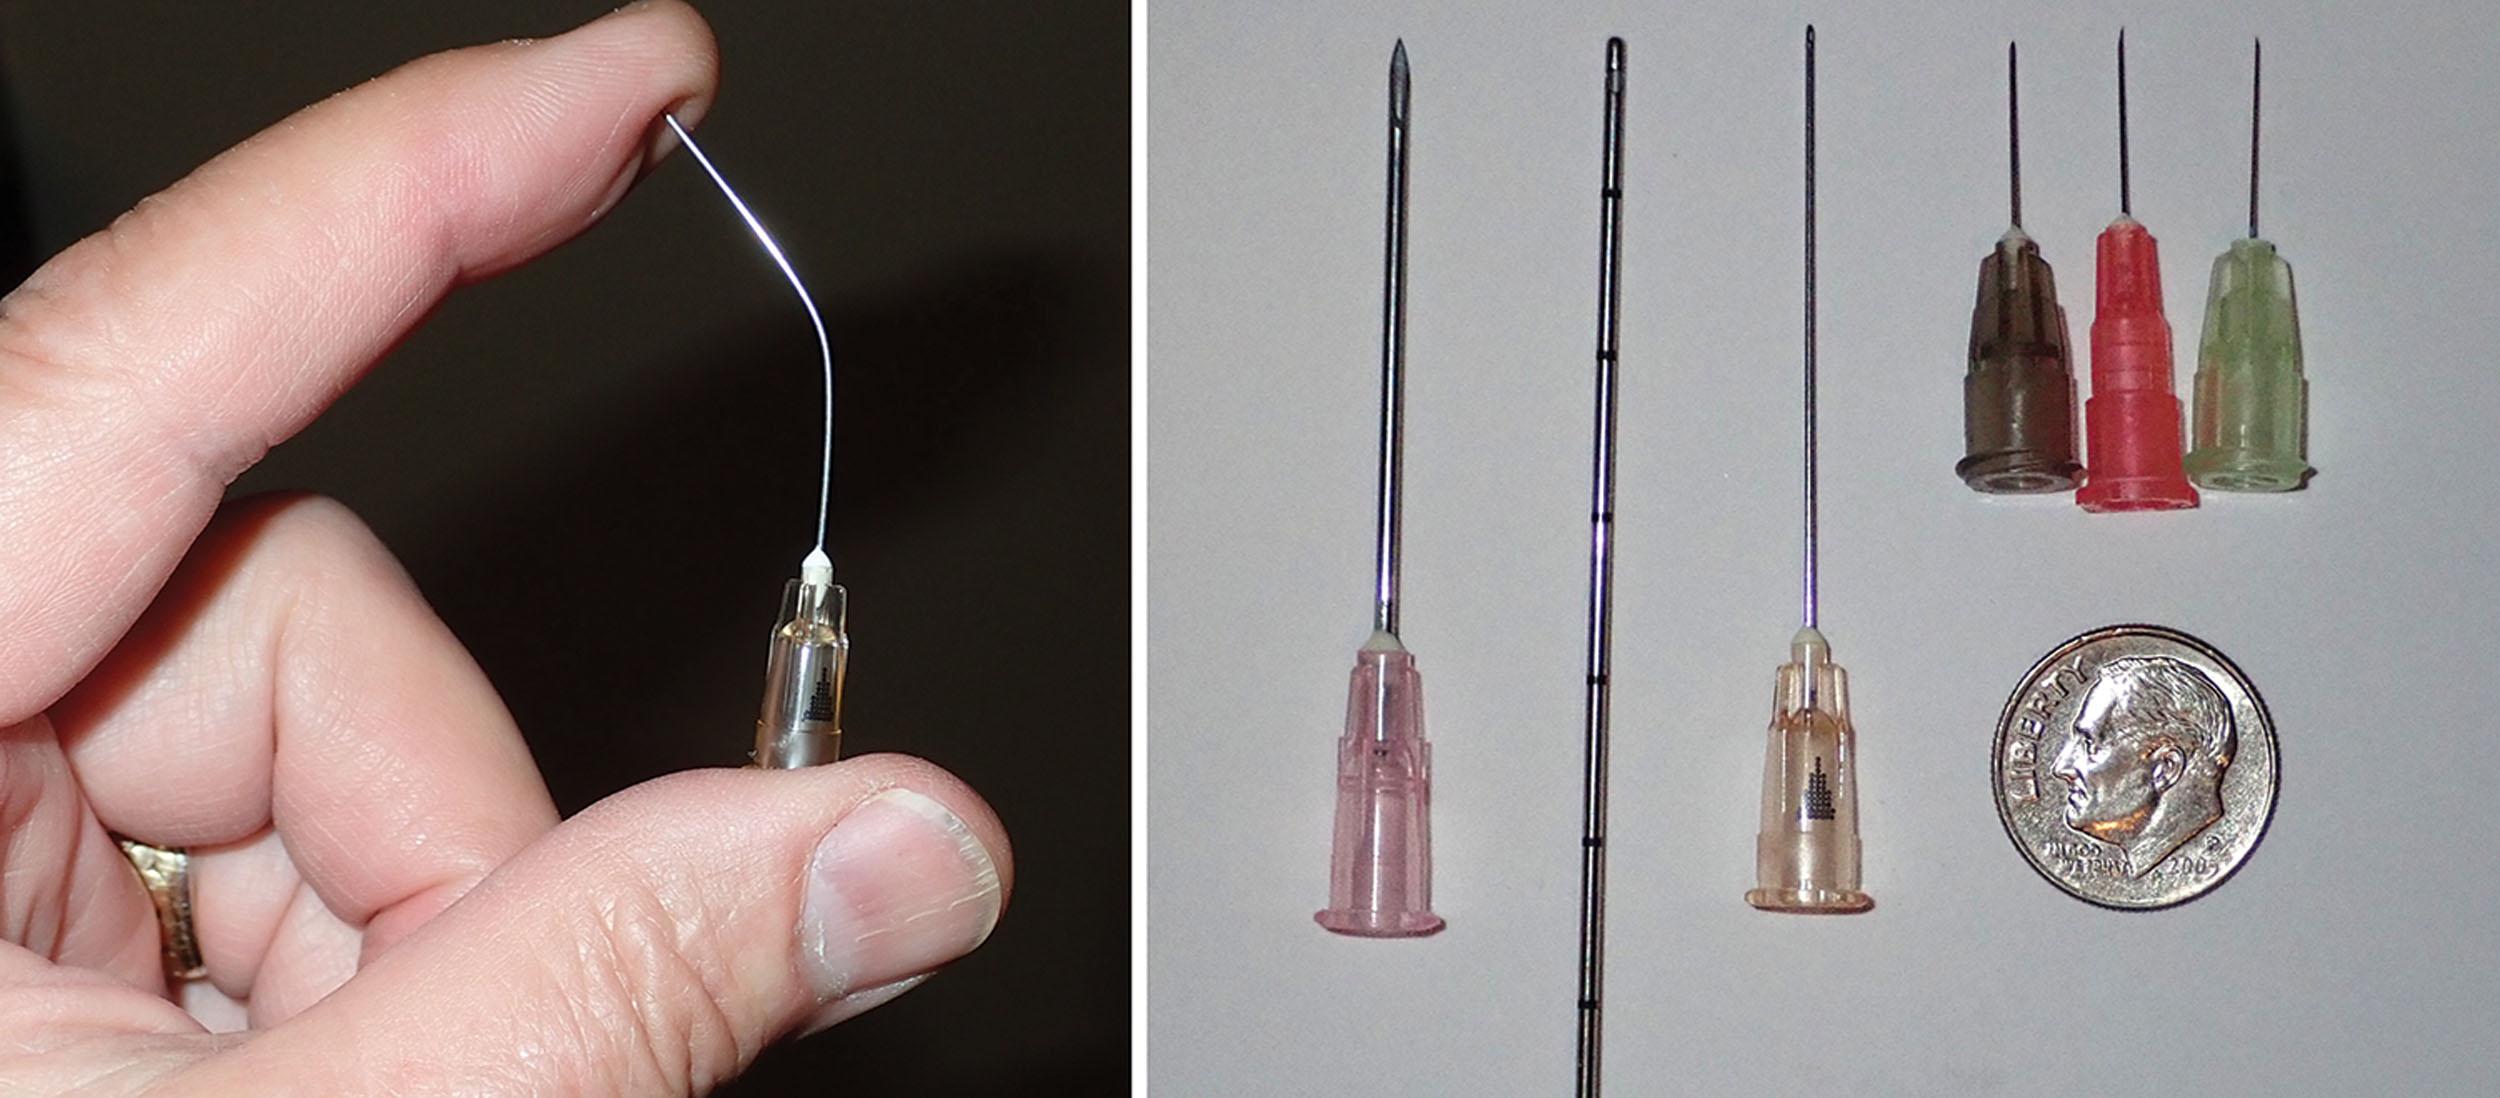
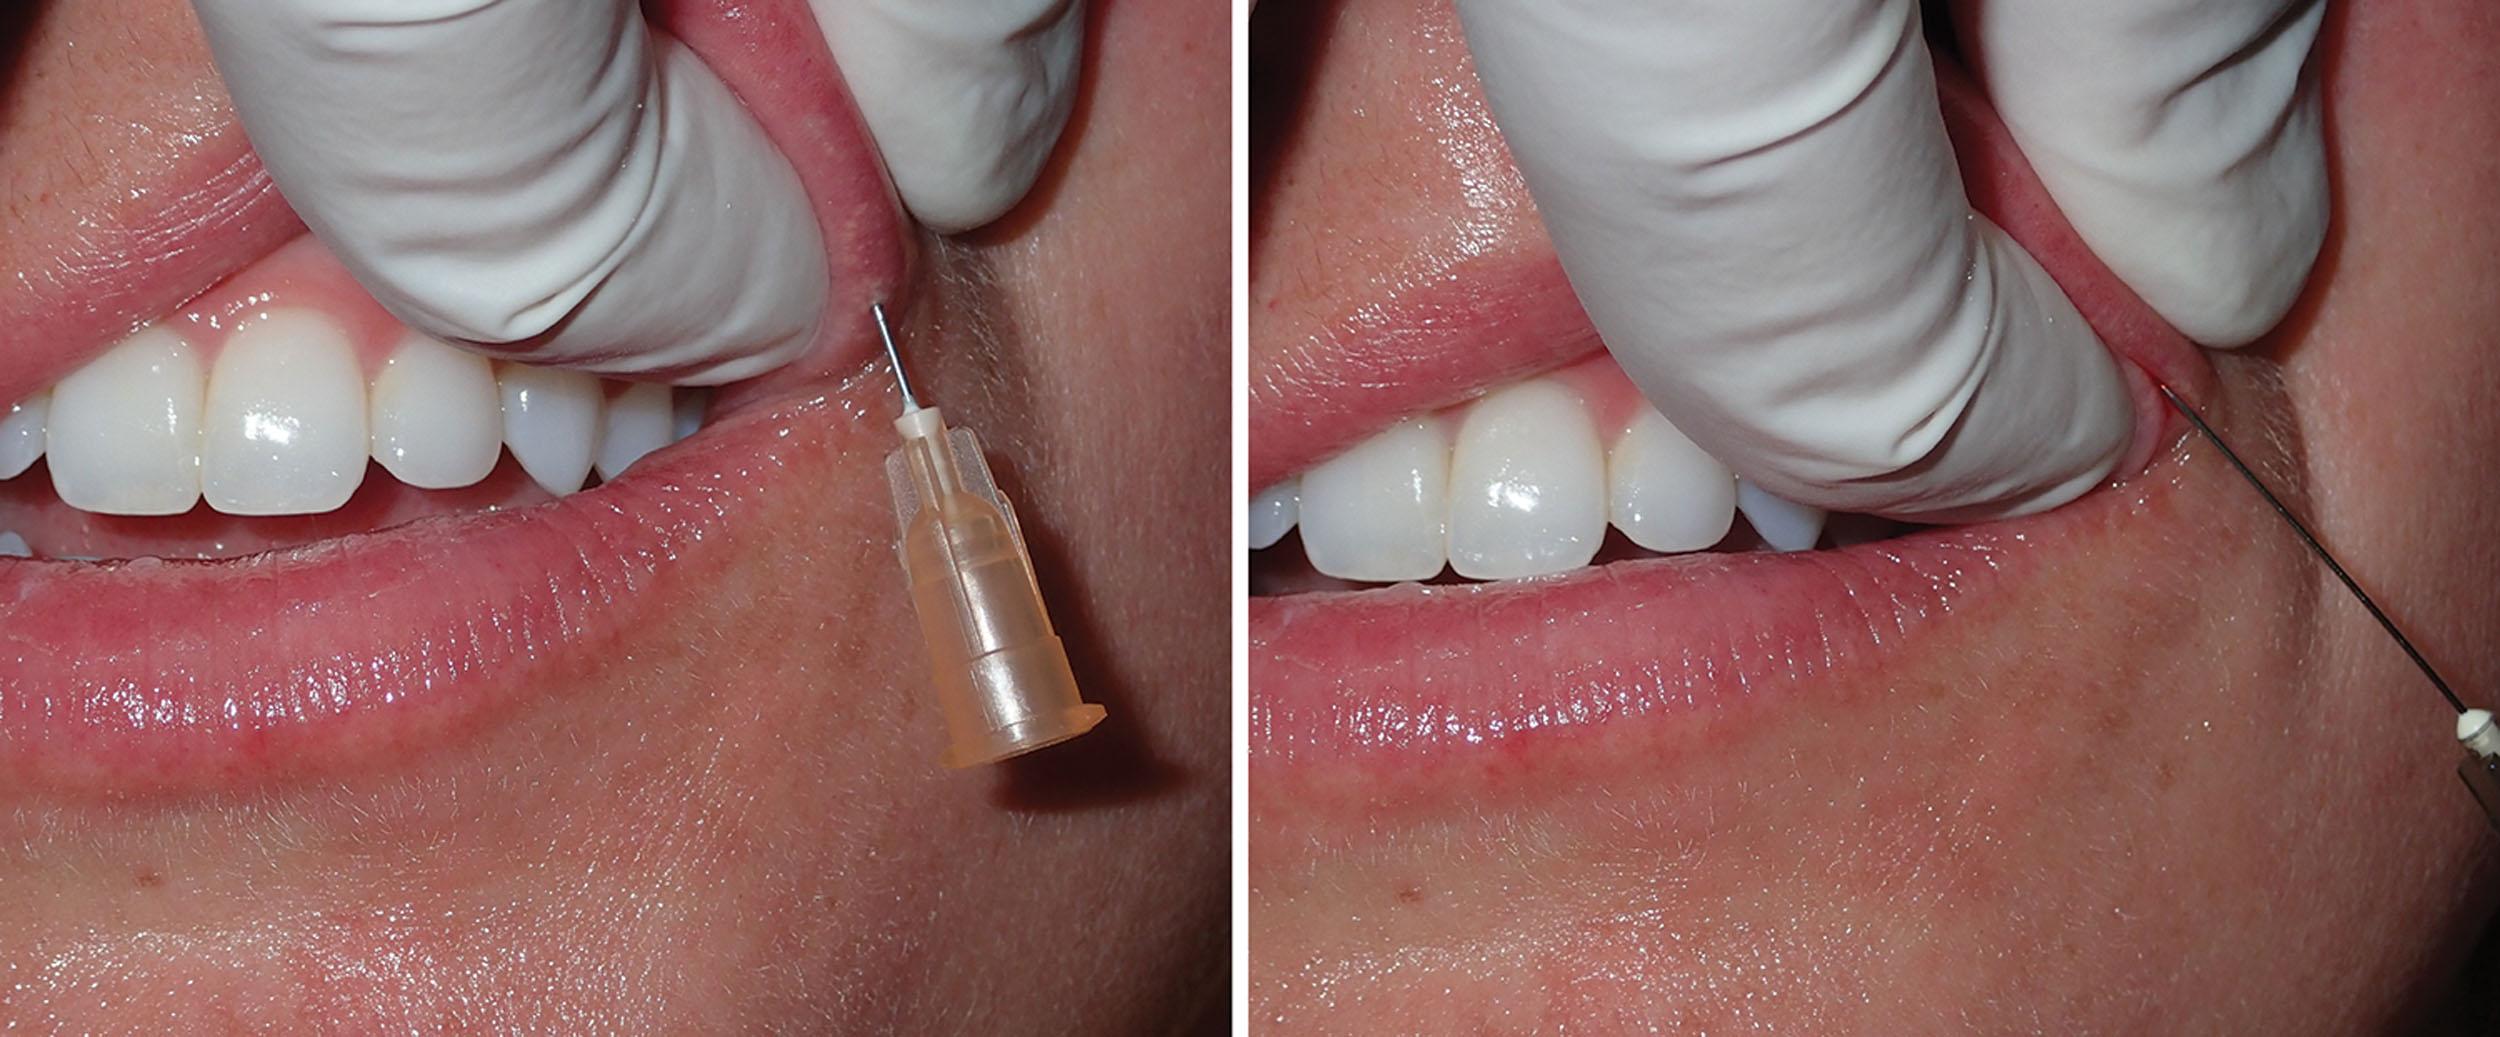


Many clinicians feel that cannulas have numerous advantages over needle injection. The tip is blunt and easily moves through the lip without lacerating tissues and vascular structures and therefore produces less bruising and swelling. This type of blunt cannula may reduce the chance of intravascular injection, but this has still been reported with cannulas. No injector should ever feel totally safe from inadvertent intravascular injection because they are using a cannula. I personally feel that the greatest advantage of using a cannula is that the entire lip can be filled with a single puncture. This is a very atraumatic way to inject the lips and is especially useful in patients who are prone to extreme swelling or bruising. The cannula is passed through the entirety of the lip, negating the need for multiple needlesticks. The size of the cannula and orifice allow a larger deposition of filler with minimal syringe pressure, making the injection process much faster. Because the cannula is blunt, an entry point is first made with a supplied half-inch “pilot needle” at the lateral lip (see Fig. 10.24 ). The cannula is inserted into the puncture and threaded through the center of the entire lip (see Fig. 10.25 ).
The filler is then injected in a single smooth action while simultaneously withdrawing the cannula. Because more filler is deposited in the center than at the lateral borders, the syringe pressure is increased (and the withdrawal slowed) as the midline is approached to deposit more filler, and then backed off as the cannula approaches the puncture insertion point. This forms a natural taper from one side across the center to the other side. The same procedure is performed on the other lip in most cases. Some patients require increased pout; this can be accomplished by injecting filler (with a cannula or needle) in the cutaneous portion of the lip (the area under the nose and above the vermilion). This cutaneous augmentation can produce an extremely aesthetic lip, especially in the lateral view, but it can create an “apelike,” overprotruded lip if overdone.
The final step in cannula injection is to massage the filler. Because a puncture hole was made on commissure, it is important to pinch this hole when massaging so the filler is not expressed out from the open puncture when massaging toward that side. It is helpful for the assistant to place their little finger in one commissure to stretch the lip, which facilitates the massage (see Fig. 10.26 ). As noted, having a dollop of petroleum jelly on the back of the assistant’s hand is convenient for lubricating the mucosa and skin for massage without interrupting the process. Some injectors also use the cannula for vermilion outline as well as deep volume injection.
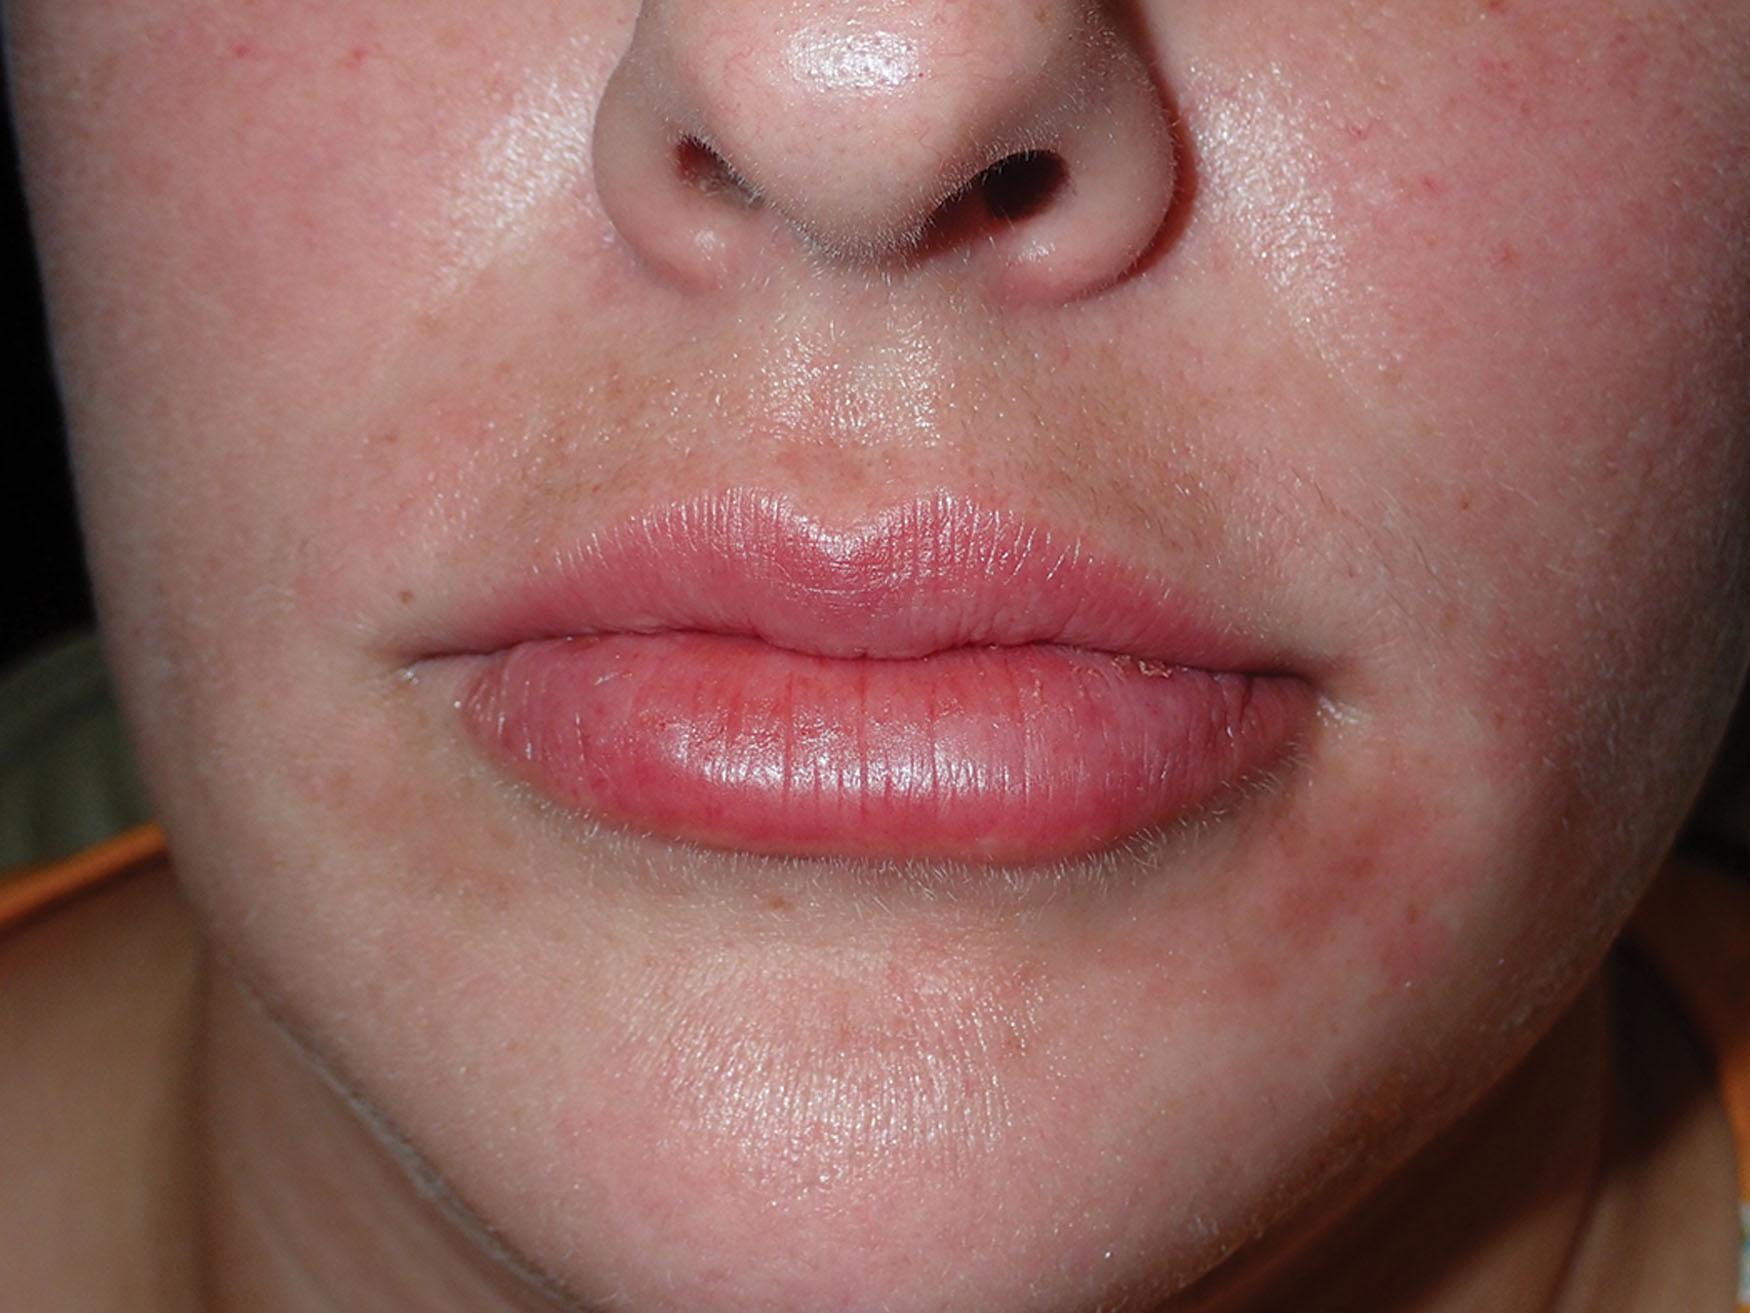
The cannula technique is atraumatic when properly performed, and it is not uncommon for me to use this technique to treat a lip filler patient on their lunch break from work ( Fig. 10.29 ).
The talented injector pursues proper diagnosis and possesses the ability to figure out the desires of the patient and temper them in the realm of natural appearance. Each patient is evaluated for specific areas of filler enhancement. Some patients (young and old) lack the specific outline of a “Cupid’s bow” or “white roll.” The Cupid’s bow of the upper lip is a lazy- M shape, and the corresponding vermilion/cutaneous border of the lower lip is curvilinear. In patients with well-defined lip borders, a pleasing light reflex is visible and contributes to maximum lip aesthetics. If a patient has adequate lip volume, they may only need border outline, but some patients need both volume and outline. And of course, older patients may need volume, outline, vertical rhytid injection, and oral commissure elevation. Generally, the older the patient, the more challenging it is to rejuvenate the lips in the perioral region.
When injecting the lip borders for outline, needle placement is critical. A potential space exists between the mucosa and orbicularis oris muscle, and this space is the target of the border outline shown in Fig. 10.15A .
Injecting in this target space is both visual and tactile. When the needle is in the correct plane, the filler will visually flow both antegrade and retrograde. This can be seen and also palpated by the non-injecting hand. By pinching the border between the non-injecting thumb and index finger, the injector can feel the free-flowing filler and confine the filler to stay within the border. If the needle is in the correct plane (the described potential space), the filler will flow freely with minor syringe pressure. This is confirmed by observing the border being properly created. If the needle is too deep, no distinct outline is seen. If the needle is too superficial, the filler will not flow but instead “ball up,” and the syringe pressure will increase. In this case, the needle must be redirected into the proper potential space.
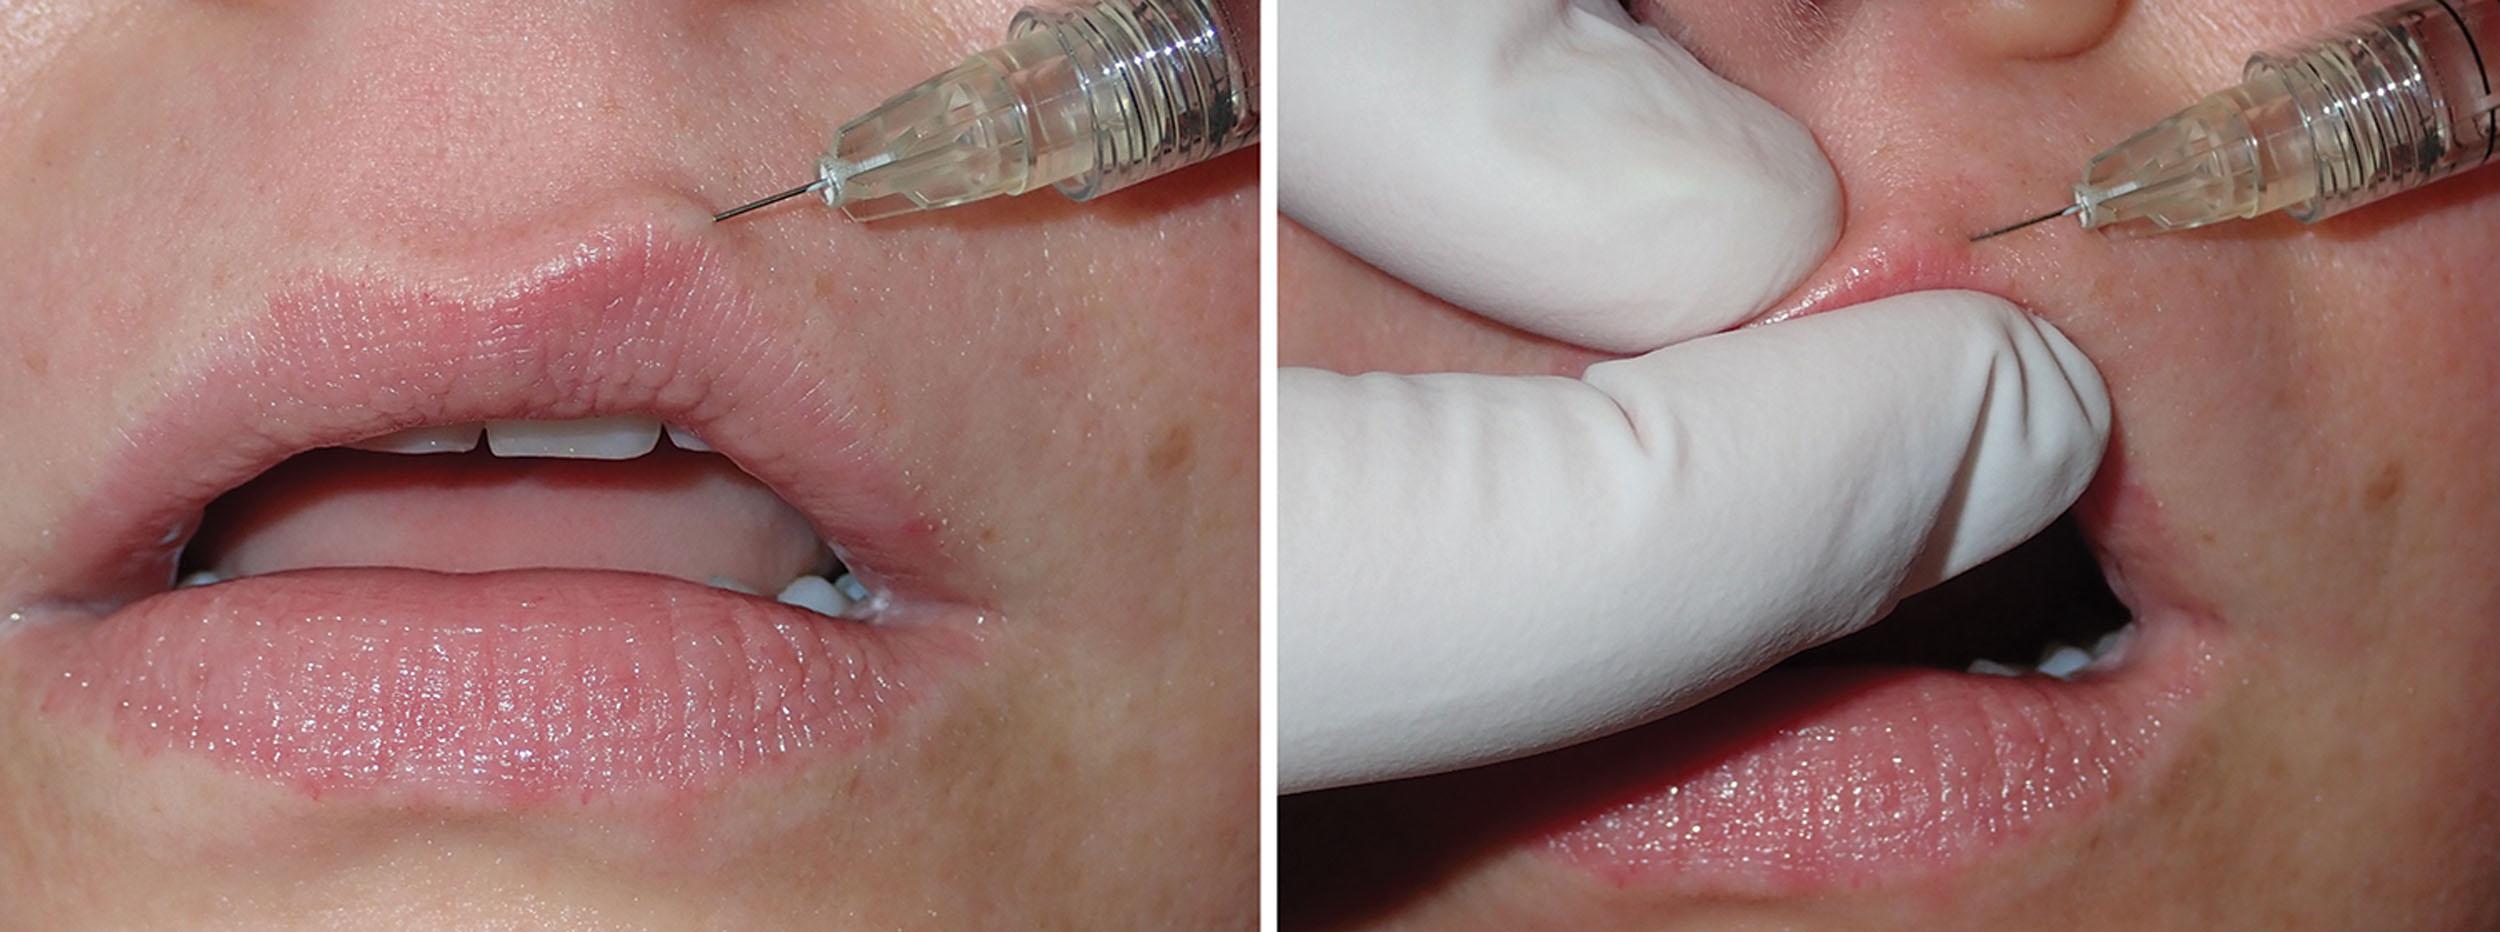
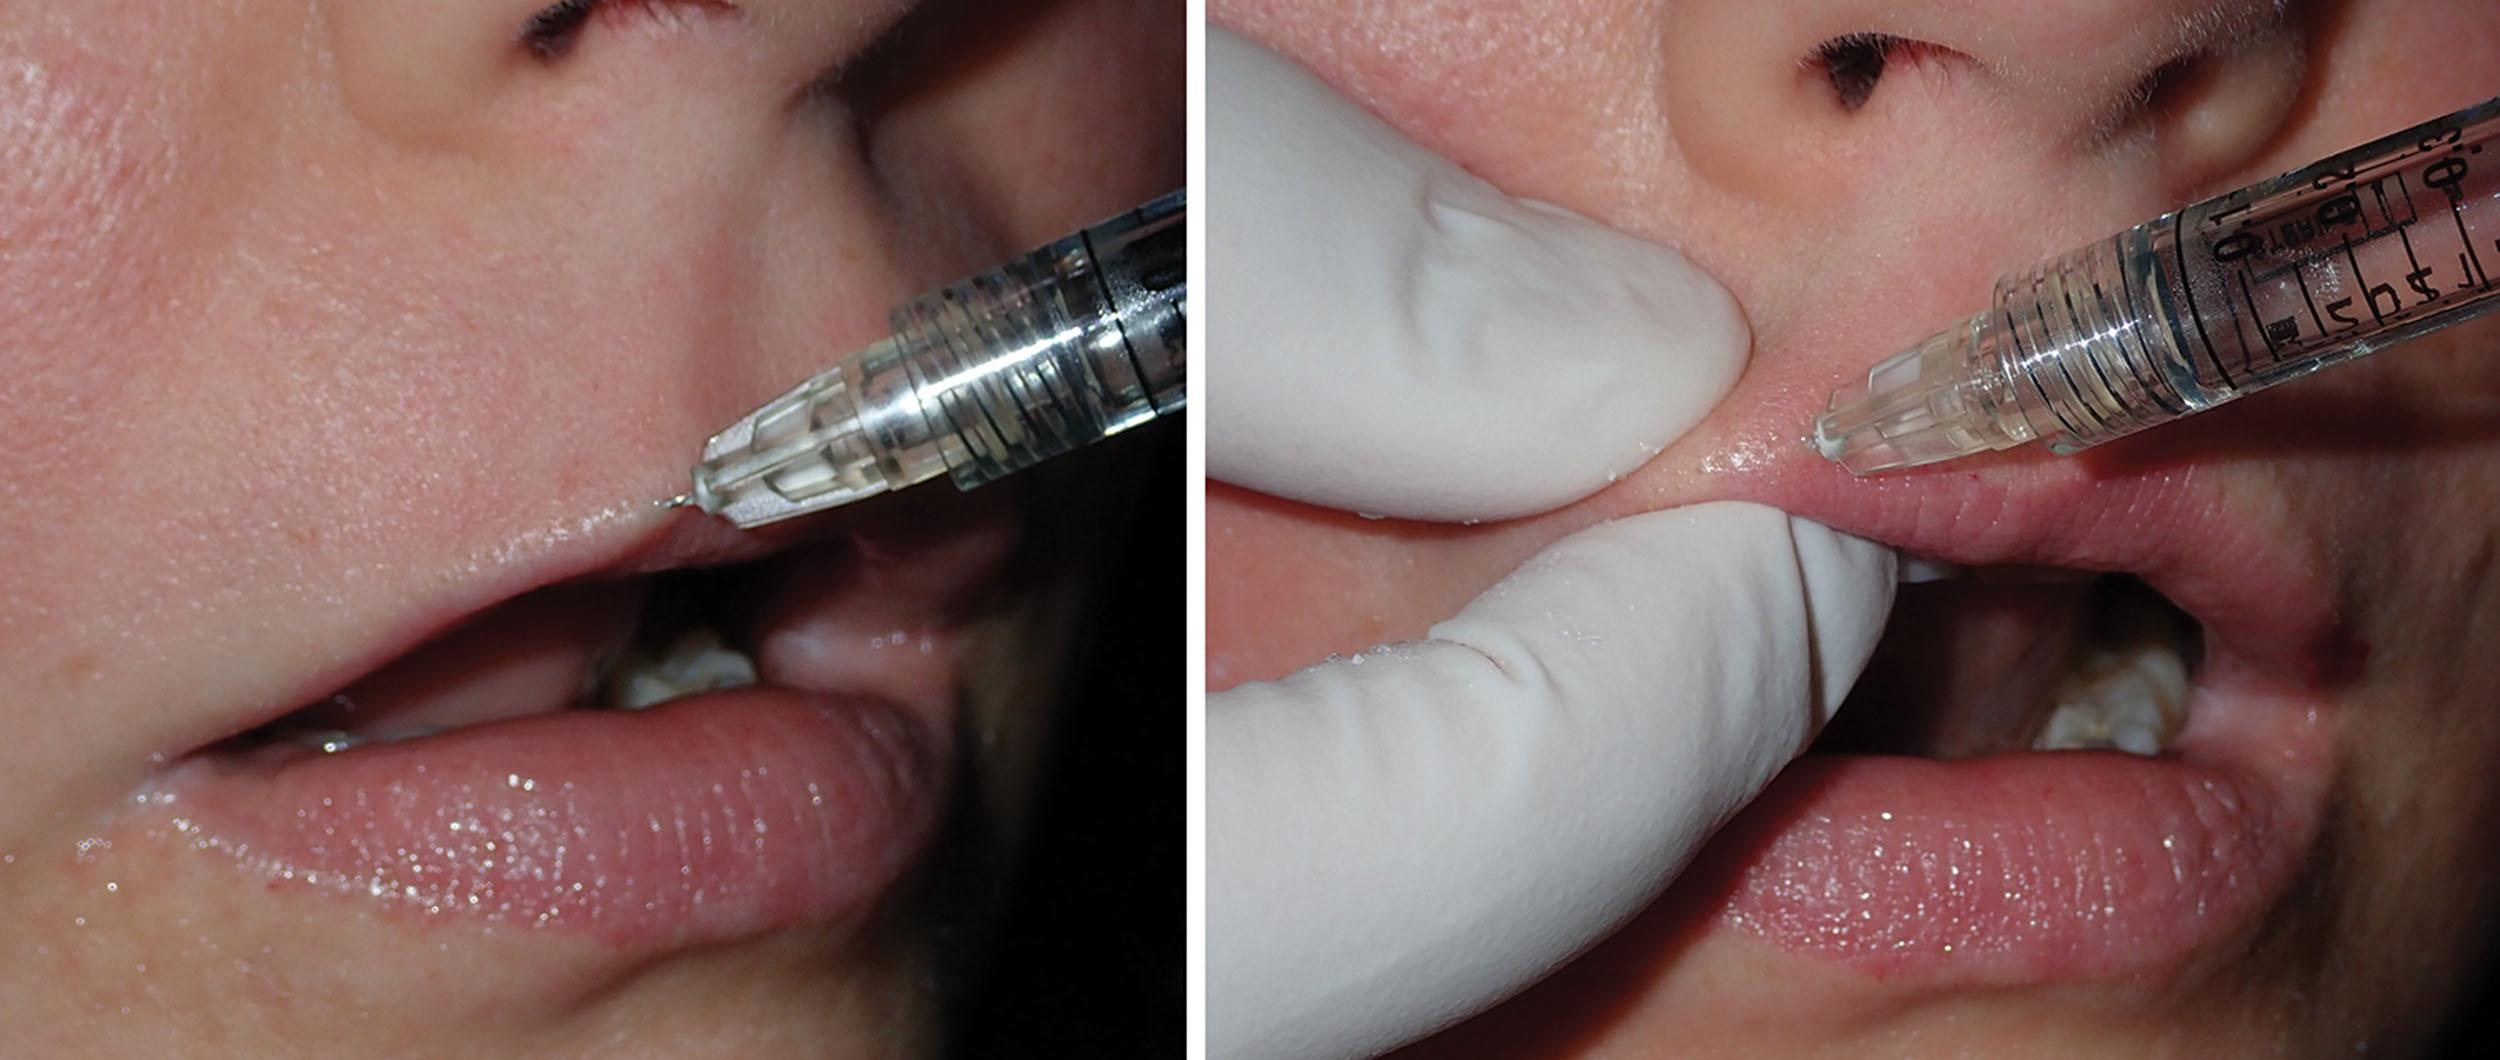
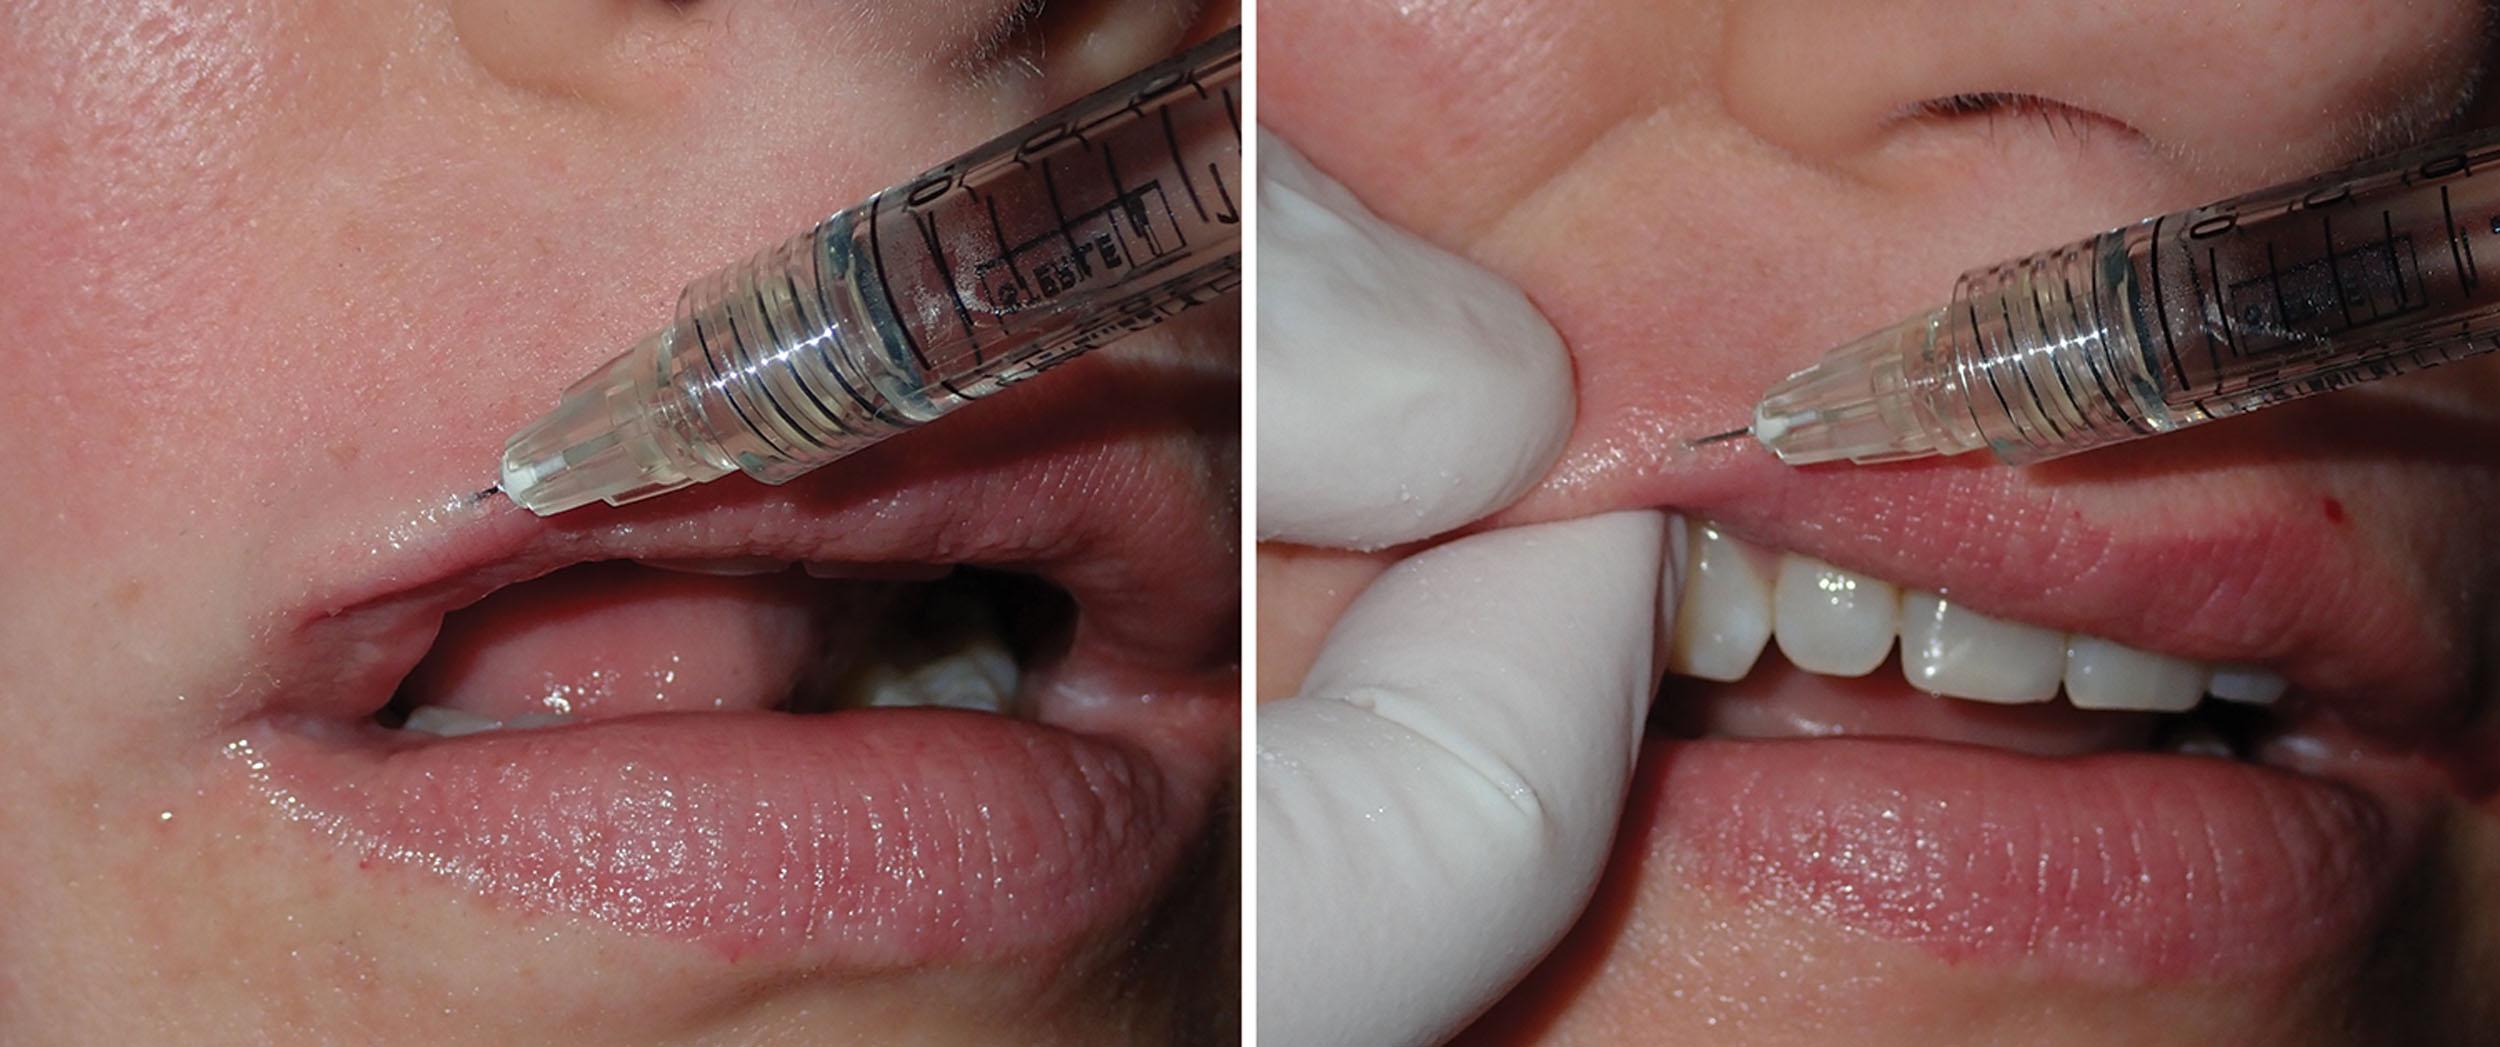
When augmenting the vermilion border for outline or white roll enhancement, I begin with the central “V” of the Cupid’s bow ( Fig. 10.30 ). The finger and thumb contain the filler and assist in palpation of the augmentation. Some patients require the white roll to extend all the way to the commissures, while others only need this augmentation more centrally and gently tapering several millimeters short of each commissure. The needle is inserted all the way to the hub, and the filler is injected with even syringe pressure on withdrawal. Most filler needles are ½ inch long, and the border is augmented at ½-inch intervals, taking care to not leave a gap between needle insertion points. The needle is then injected toward the commissure to complete the upper lip white roll ( Figs. 10.31 and 10.32 ).
The white roll is similarly created in the lower lip, which is more curvilinear than in the upper lip ( Fig. 10.33 ). Reestablishing the light reflex accentuates the lip form and outline, especially in women who wear shiny lip gloss.
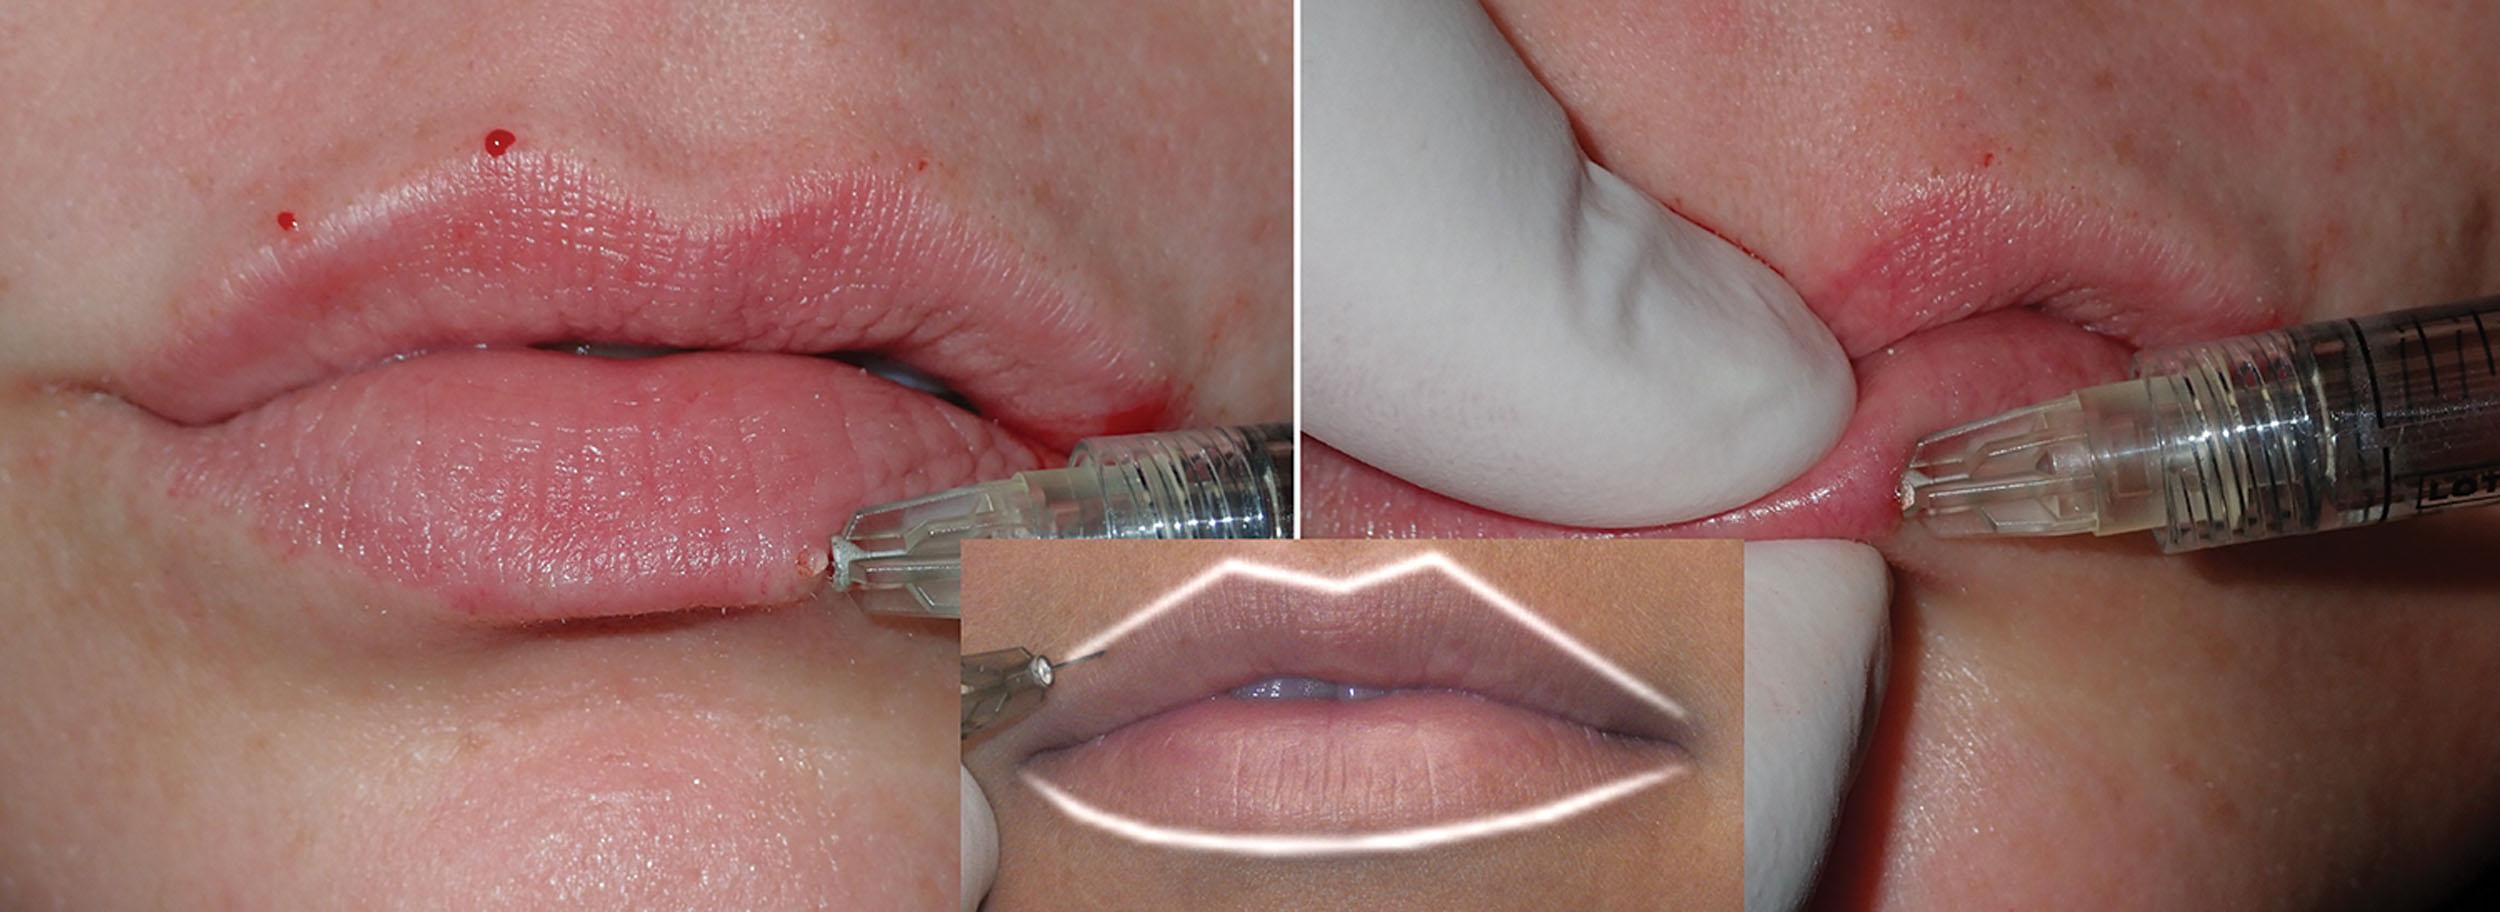
A single syringe is usually more than adequate to outline the vermilion on both lips. The lower-lip central vermilion outline is a small but powerful augmentation. Outlining the vermilion border in both lips as described is sometimes all a patient needs for lip enhancement, especially those who do not desire larger lips. Many patients also require simultaneous “plumping” by adding volume to the central lip.
Although the lips are frequently the requested region of improvement, there are numerous perioral indications that can make patients look younger as well as enhance the result of the lip augmentation. Philtral column enhancement is one of the least appreciated and most overlooked aspects of lip rejuvenation. It may never occur to many injectors to address this region, and others may be intimidated by the unique anatomy. The philtrum is a subcolumellar depression with well-defined “pillars” on either side. In younger patients, this complex is angularly defined and contributes to youthful aesthetics. As we age, the architecture of these structures changes, and the central upper lip becomes devoid of this pleasing topography. When treating this area, the injector can enhance existing philtral columns or create new ones.
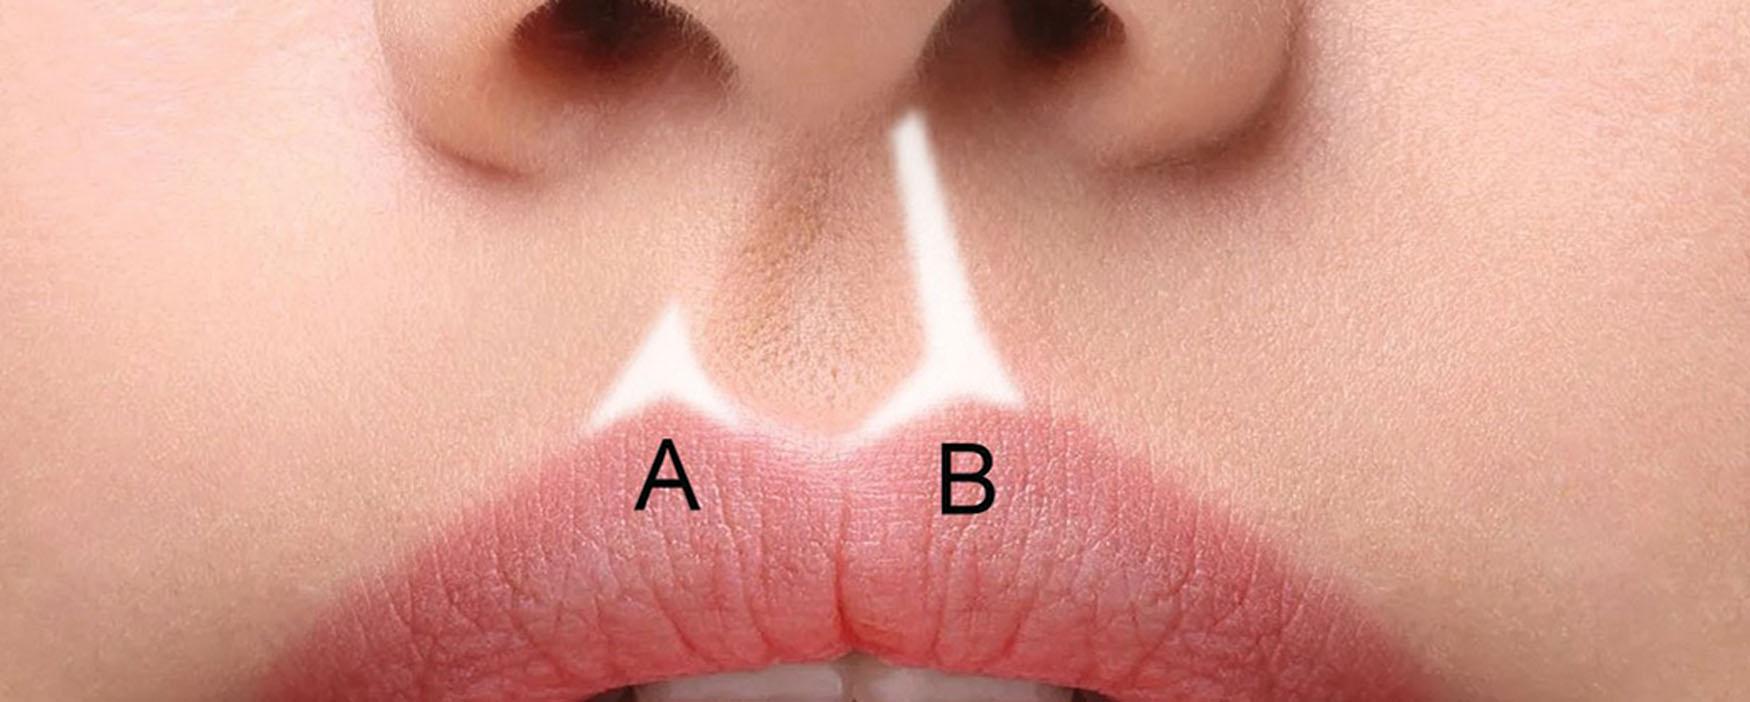
Filterable columns are examples of extremely subtle and finite anatomy that have a huge impact on a youthful appearance. For simple structures, they posses a lot of detail. The philtral columns are not vertically straight but rather converge at the superior portion at a 10- to 20-degree angle from vertical; the base of the column is lateral to the tip ( Fig. 10.34 ). The base of the columns plays off of the tip of the chevron points of the Cupid’s bow (see Fig. 10.34 ).
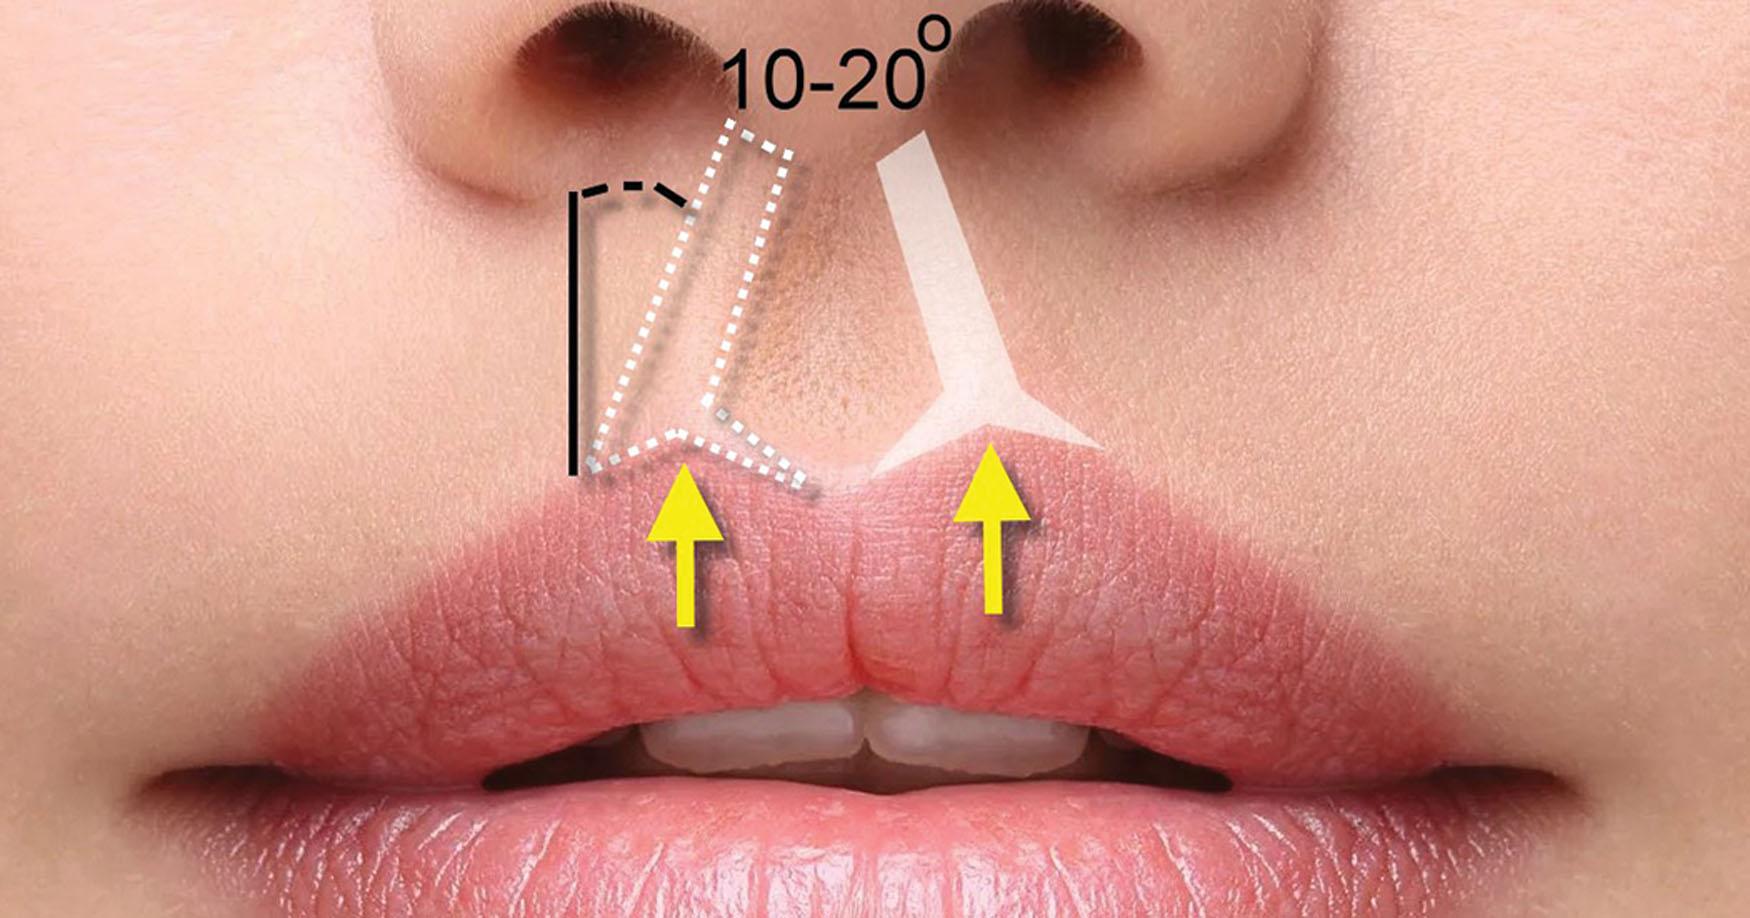
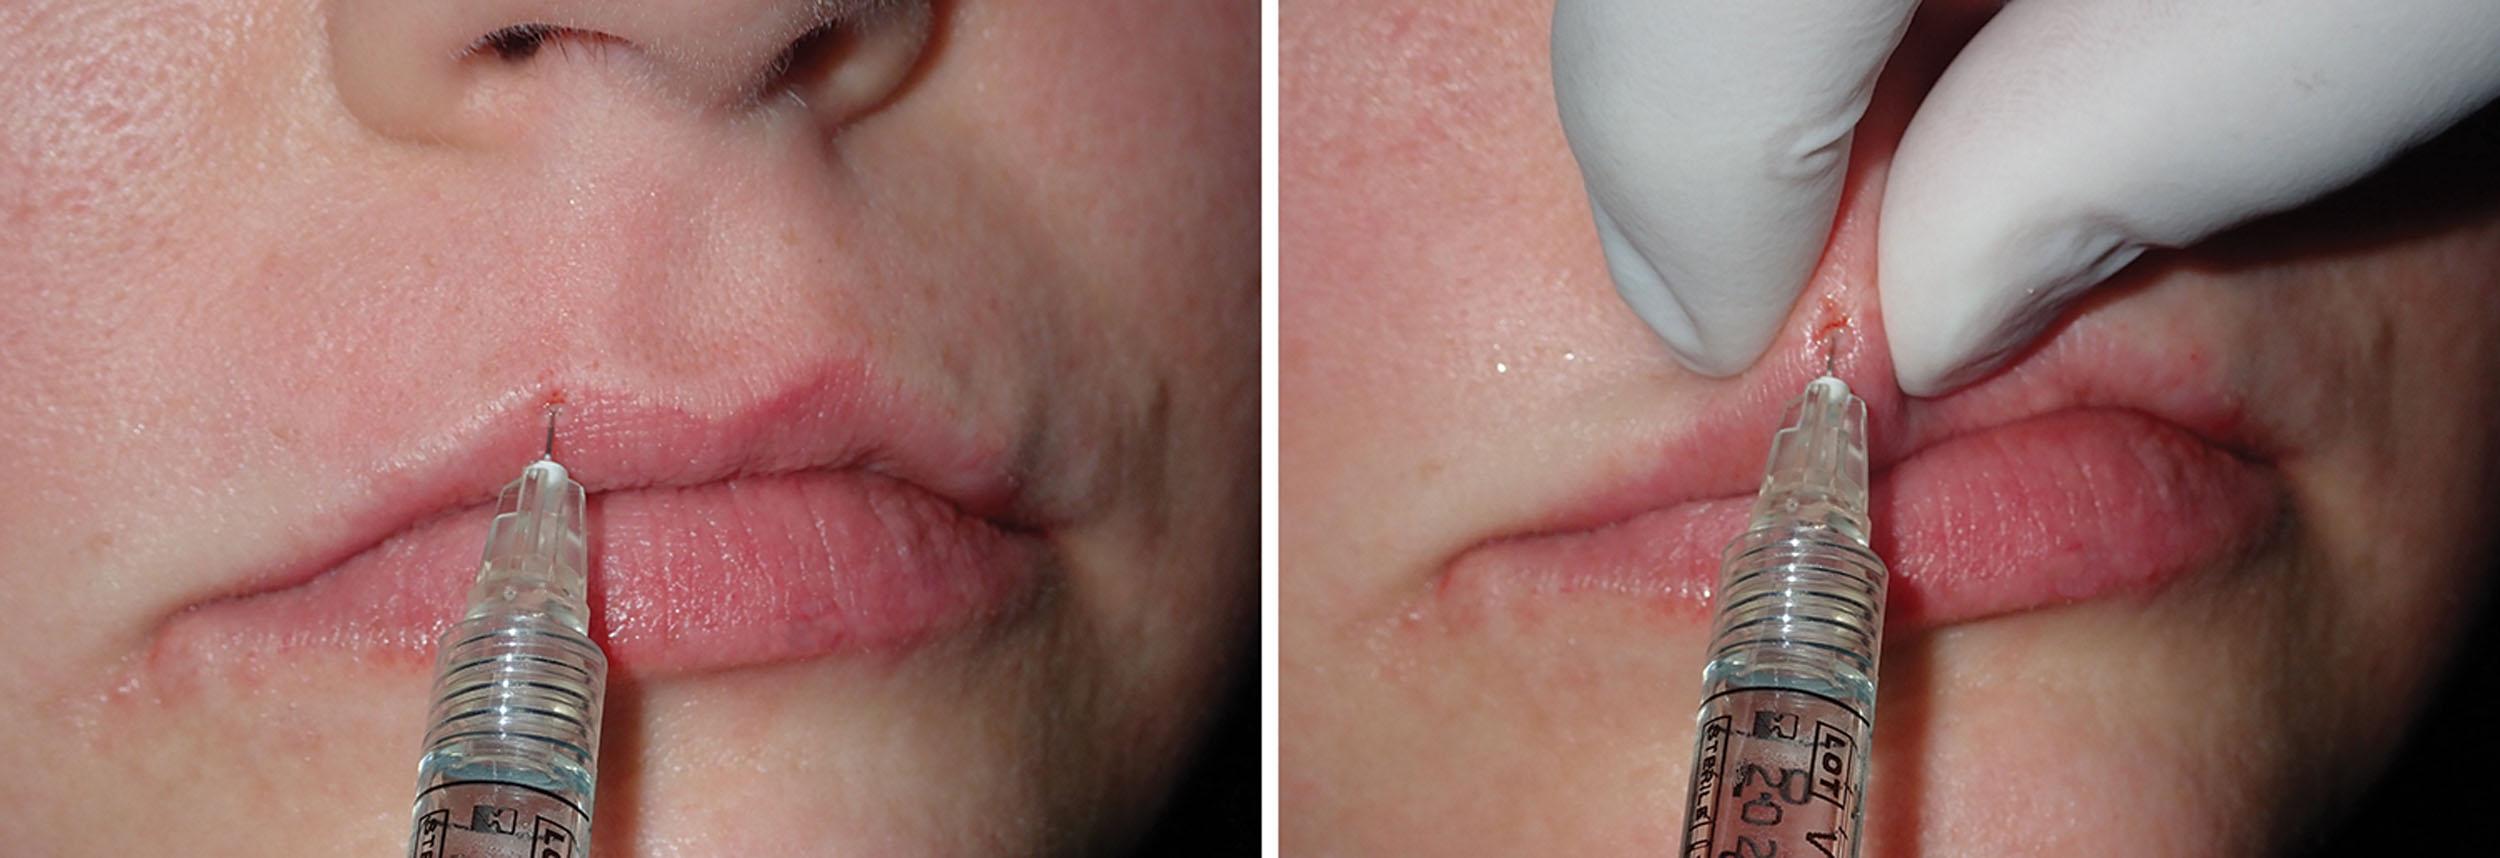
There are numerous ways to augment the philtral columns. A very simple technique when treating the lips is to conserve the last bit of filler in the syringe and simply place a small peak at the vermilion cutaneous junction at the base of the existing column. This filler is injected in the dermis while the other hand pinches the skin to allow a triangular deposition. This technique does not extend superiorly up to the nostril, but rather becomes a small peaked extension of the angular Cupid’s bow. It only takes a small amount of filler to create this peak and in younger patients it gives the semblance of normal anatomy without treating the entire column. For older patients or those with no defined philtral columns, a more complete reconstruction can be performed. The goal is to replicate the normal angled, conical-shaped philtral column. This is merely a bigger version of the previously described technique but more aggressive; it extends to the nostril just lateral to the columella on both sides. It is important to keep the column tapered and angled 10–20 degrees to appear natural. Pinching the upper portion of the skin helps create the taper ( Figs. 10.35 and 10.36 ).
Vertical lip rhytids (lipstick lines) bother women significantly. This is one of the most commonly requested perioral procedures and one of the more difficult conditions to remedy with filler treatment alone. These vertical lines are problematic from the standpoint of aesthetics and because applied lipstick will leech out and follow the lines onto the skin. These lines are perpendicular to the orbicularis oris muscle and are largely a result of this muscle’s function over the years. Lip rhytids can be vertical, angular, and radial ( Fig. 10.37 ). It is suggested that men are less affected because they have more and denser hair follicles in the lips. Smokers and chronic drinking from a straw probably accelerate formation.
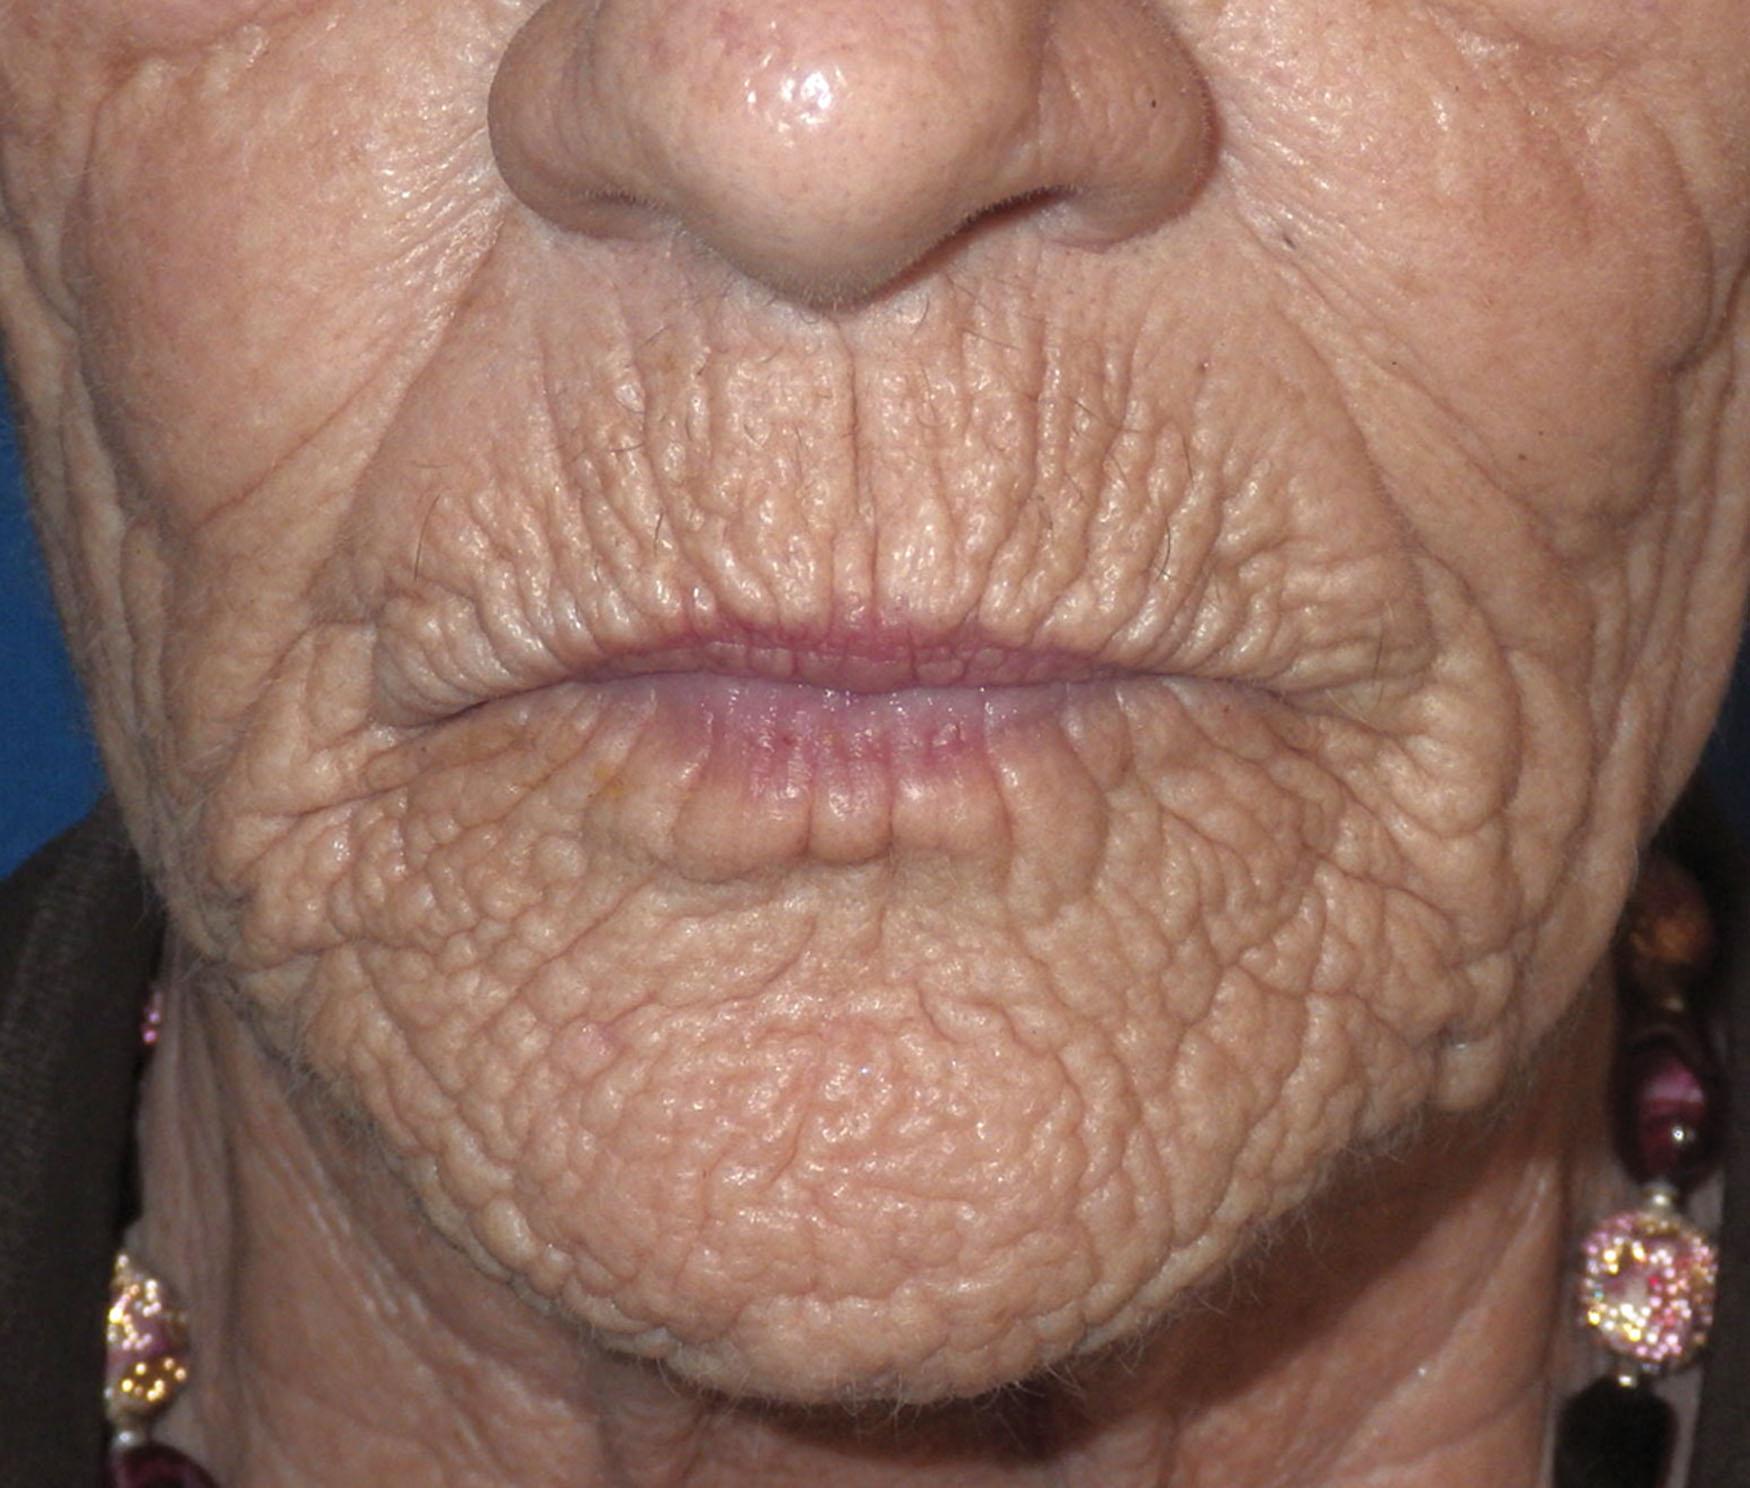
I personally feel that vertical lip rhytids represent one of the greatest challenges of lip rejuvenation. Patients must understand that the wrinkle can be improved at rest and with animation but will never be totally gone. To truly improve vertical lipstick lines, they are injected in conjunction with lip volumization or vermilion outline. One commonly encountered problem is that many older women have lipstick lines but do not want “bigger lips.” They refuse any other filler except treatment of the actual lipstick lines. This ties the hands of the injector, as it is difficult to improve the entire situation with only localized wrinkle injection.
Patients with severe lines are best treated with combination therapy that includes neurotoxin, filler, and laser resurfacing. Patients must understand that these lines will not be eradicated, but rather mitigated. Although lines can be individually injected, this procedure has the liability of creating a series of “speed bumps” or ridges across the lip. The newer and more fluid fillers do not produce as many ridges as the originally available HA fillers. Restylane Silk and Juvéderm Volbella are fillers that work well in my hands and have flow properties that discourage “ridging” or bumps across the lips.
My preferred method for treating vertical lip rhytids is to first volumize the lips with deep fill and outline. Virtually all patients who have enough aging to have lipstick lines also have generalized volume and vermilion border loss. It is explained to the patient that by restoring volume and border to the lip, the skin will stretch and improve the appearance of perioral lines. After the lip is plumped and the white roll reestablished, the lipstick lines are injected. The injection target is the superficial dermis. The needle is inserted barely into the dermis, and a small bolus of filler is injected. This bolus is then massaged superiorly and inferiorly along the length of the vertical wrinkle, which smooths it ( Fig. 10.38 ). As stated, some patients want improvement of their lip lines but do not want bigger lips, and the shortcomings must be explained pre-injection. Not all patients have severe vertical rhytids, and those with mild to moderate lines can be treated with a simple injection of each line. Figs. 10.39–10.45 show before and after images of lip augmentation with injectable fillers.

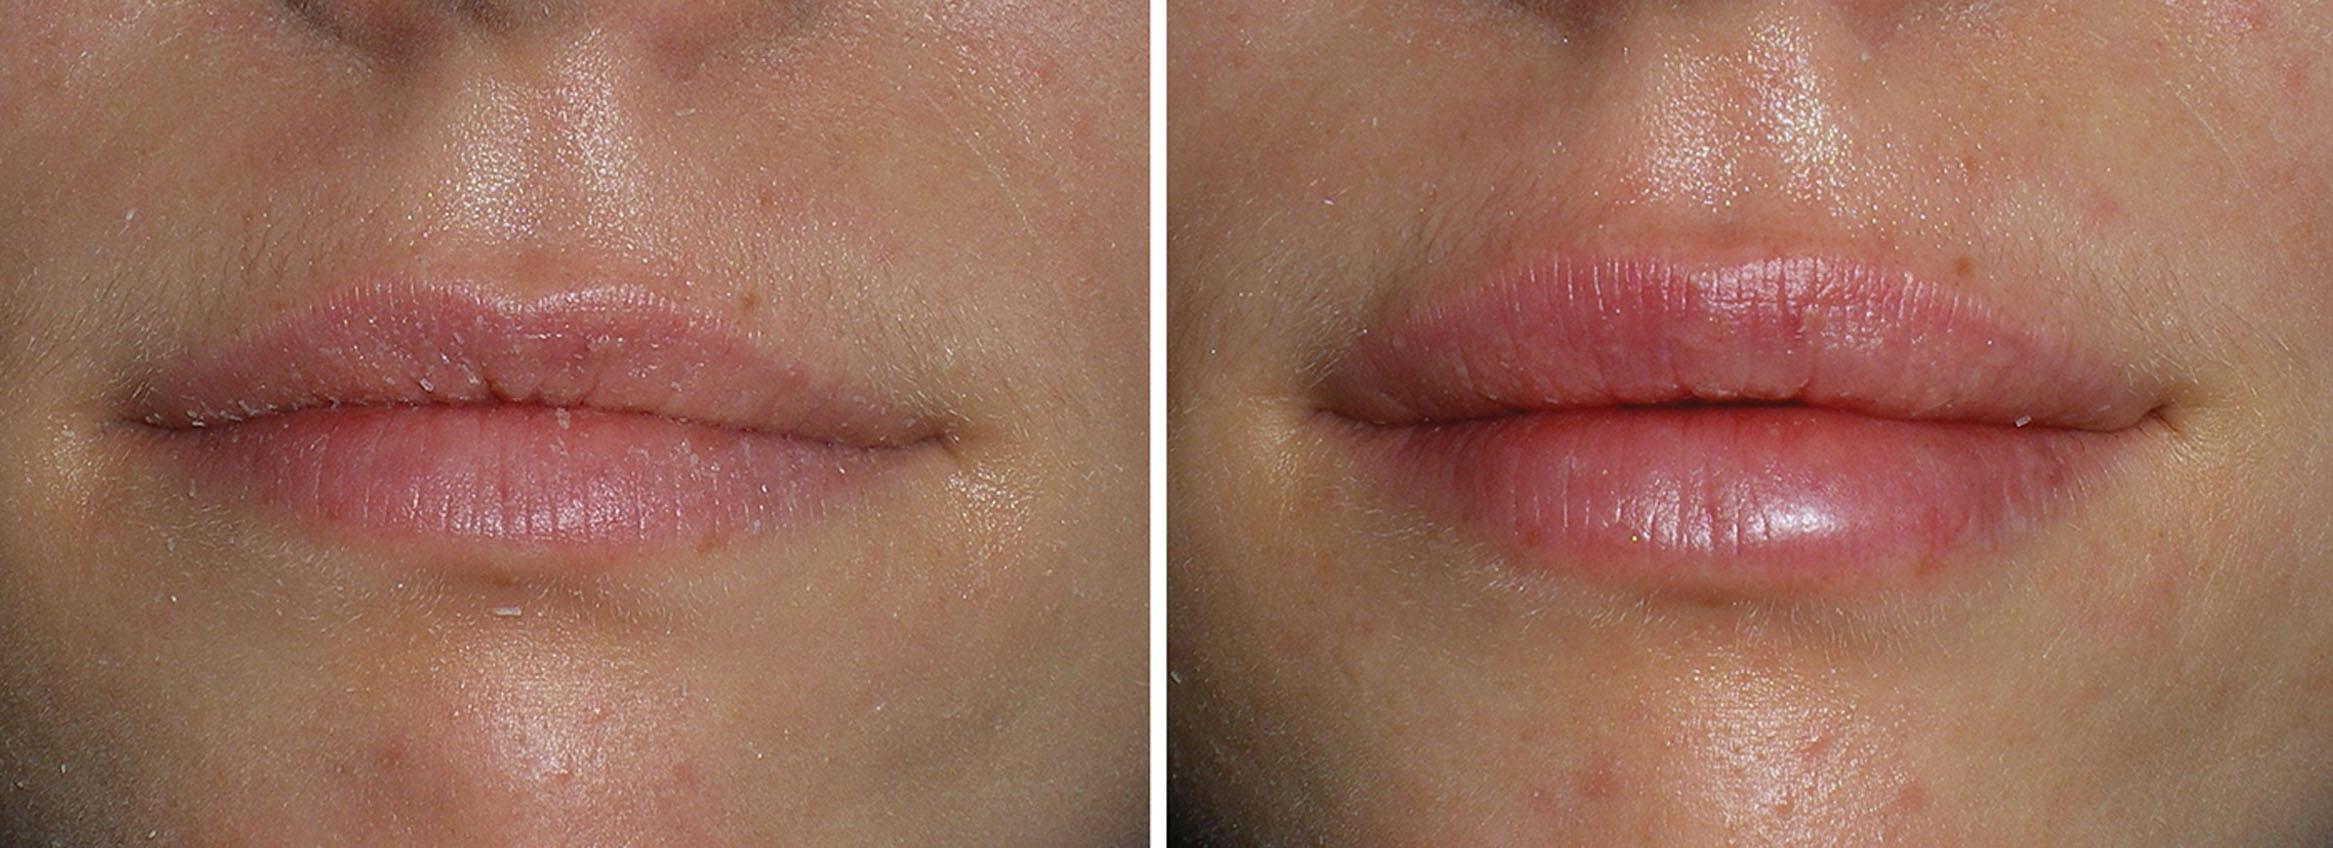
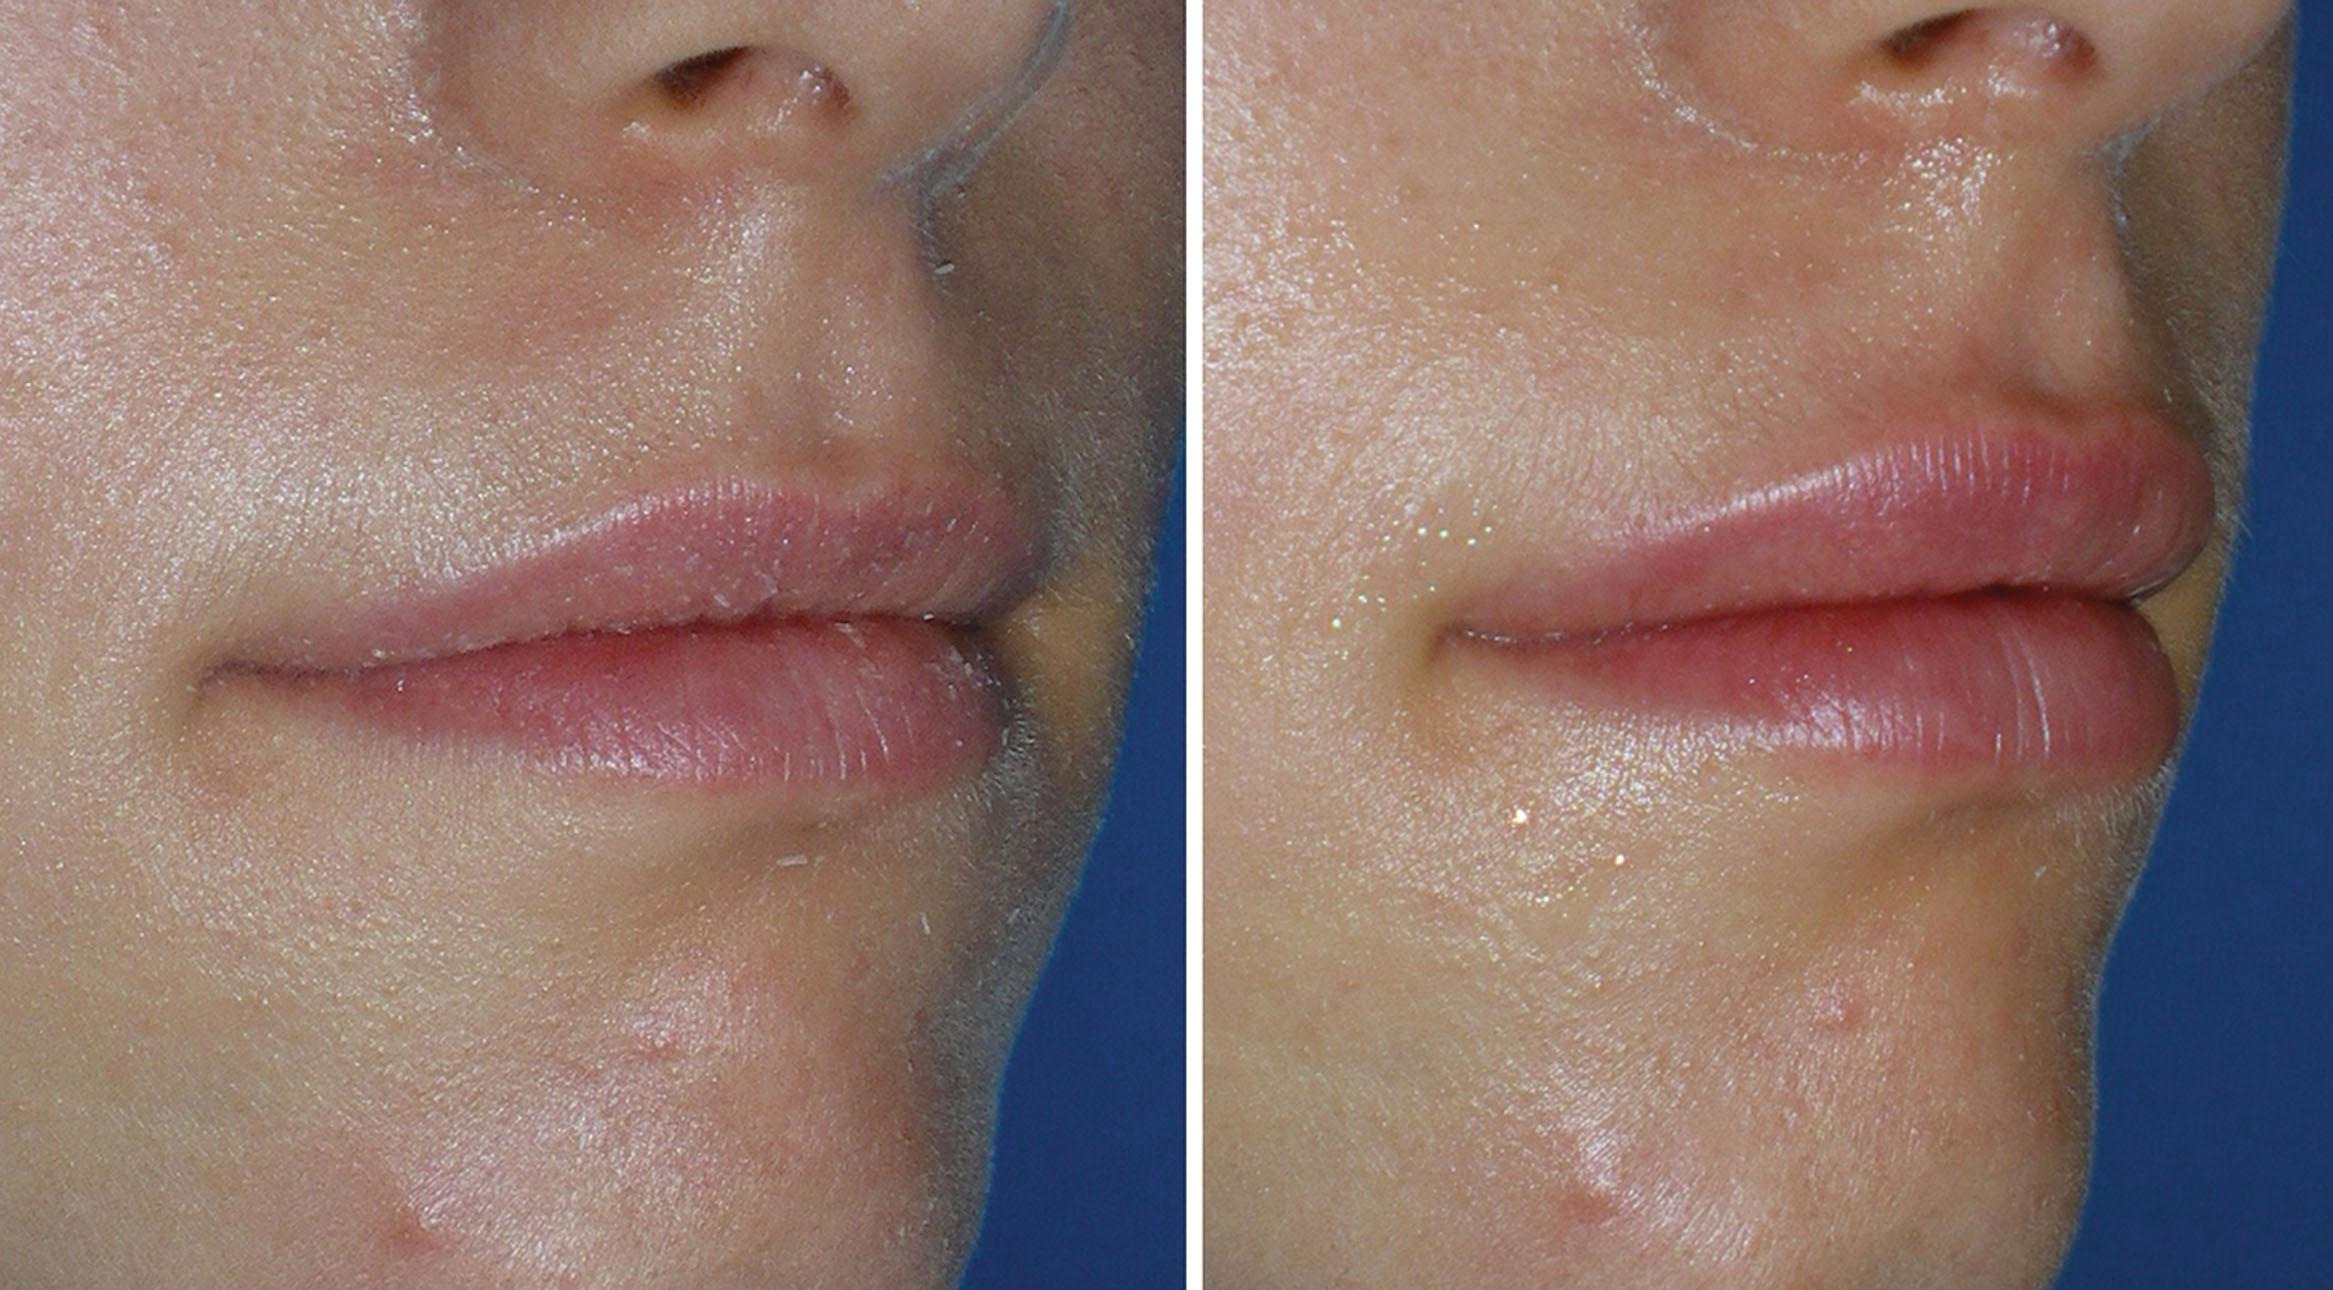
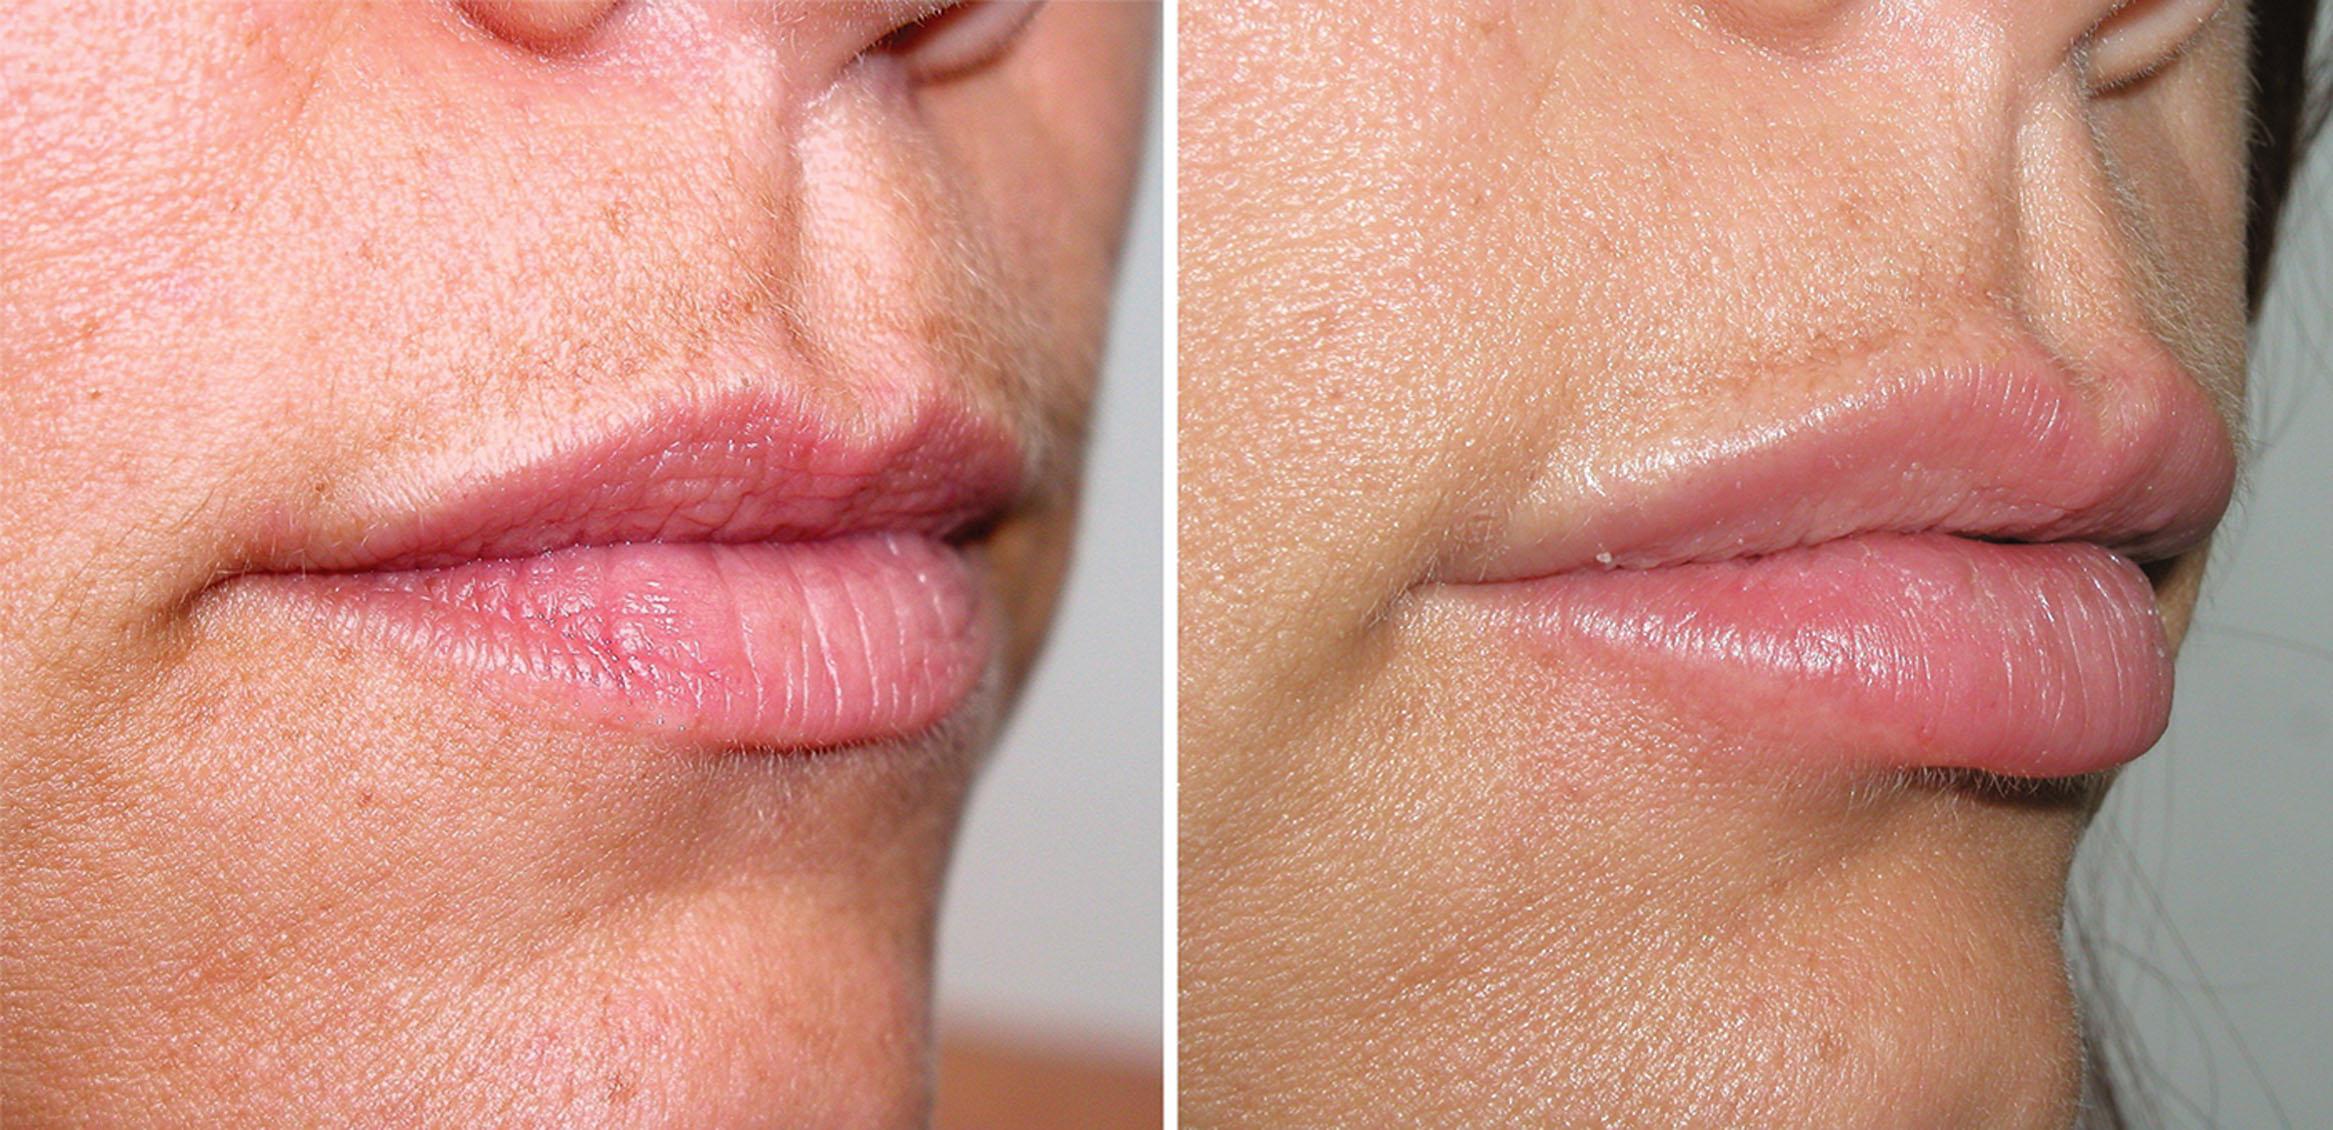
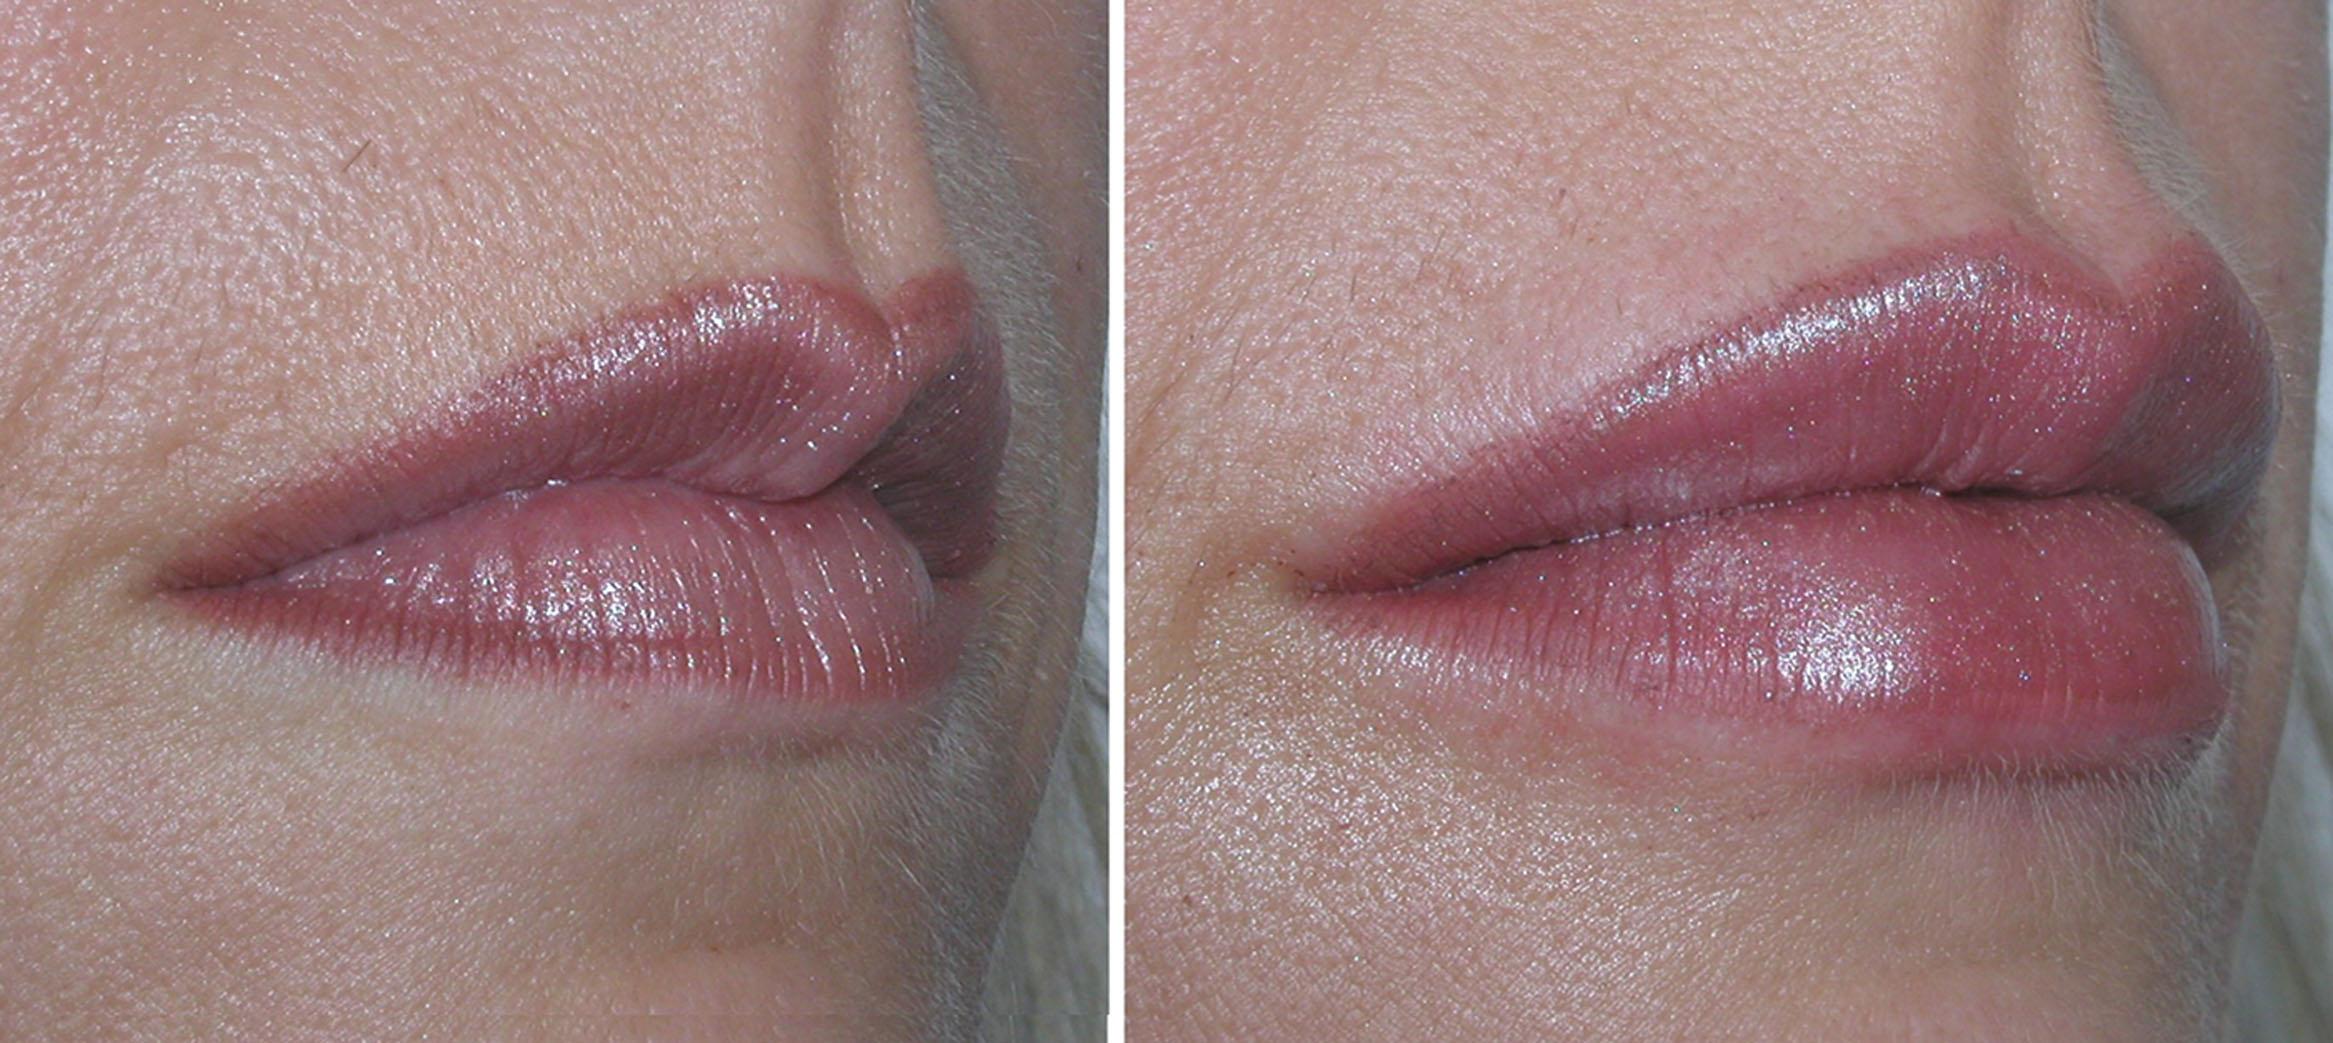
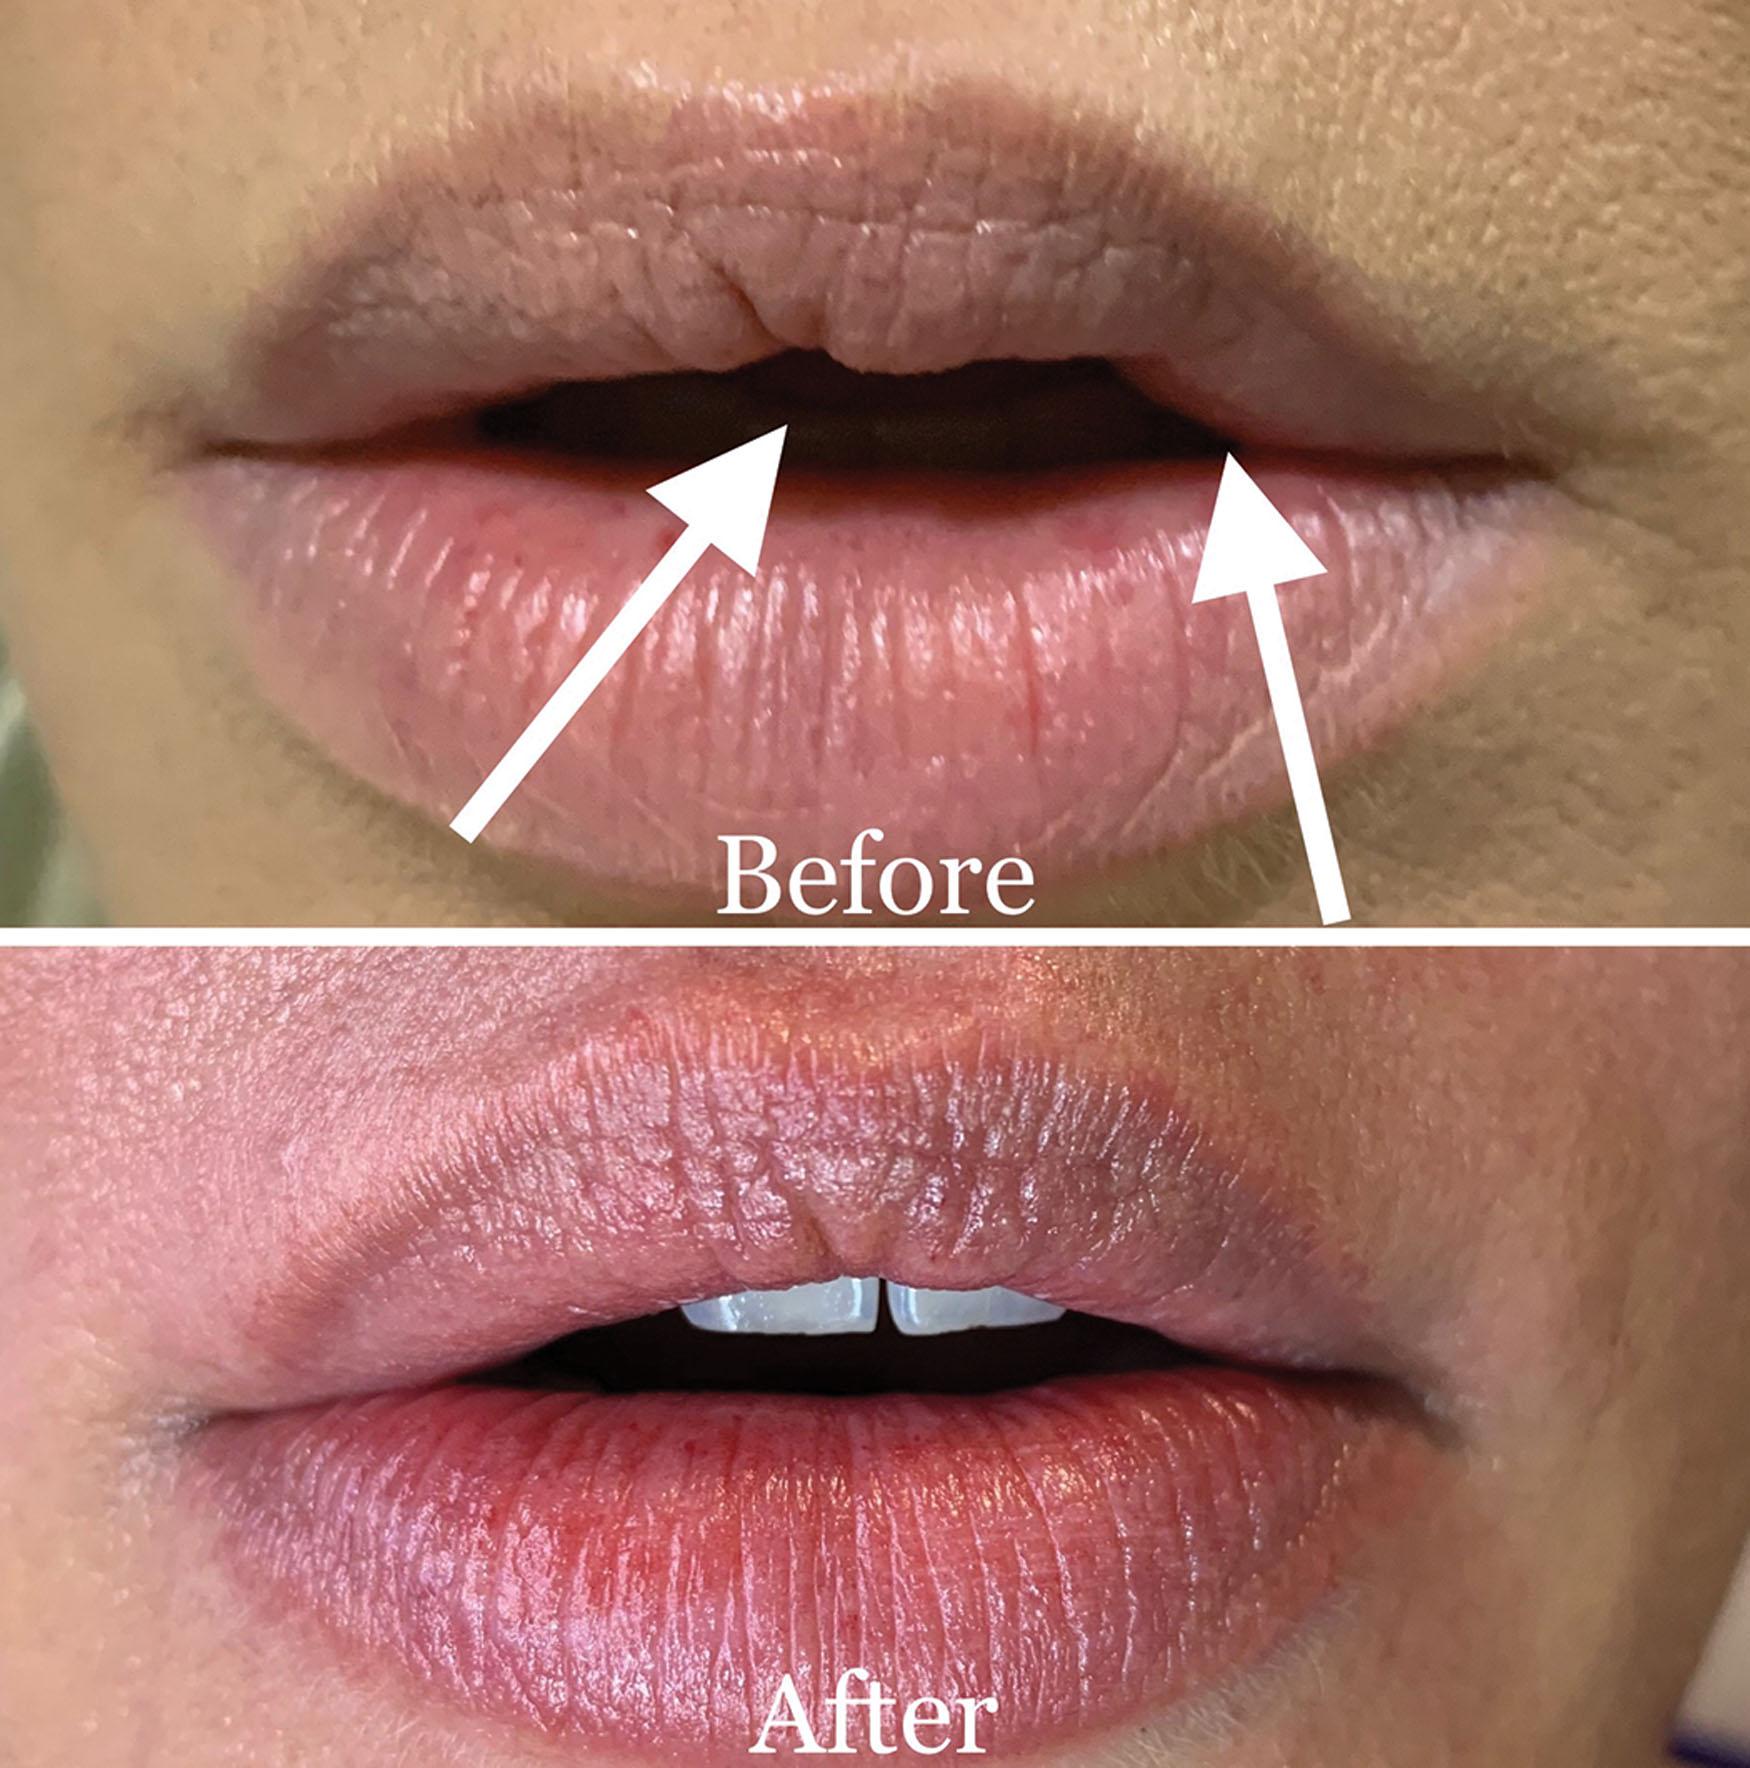
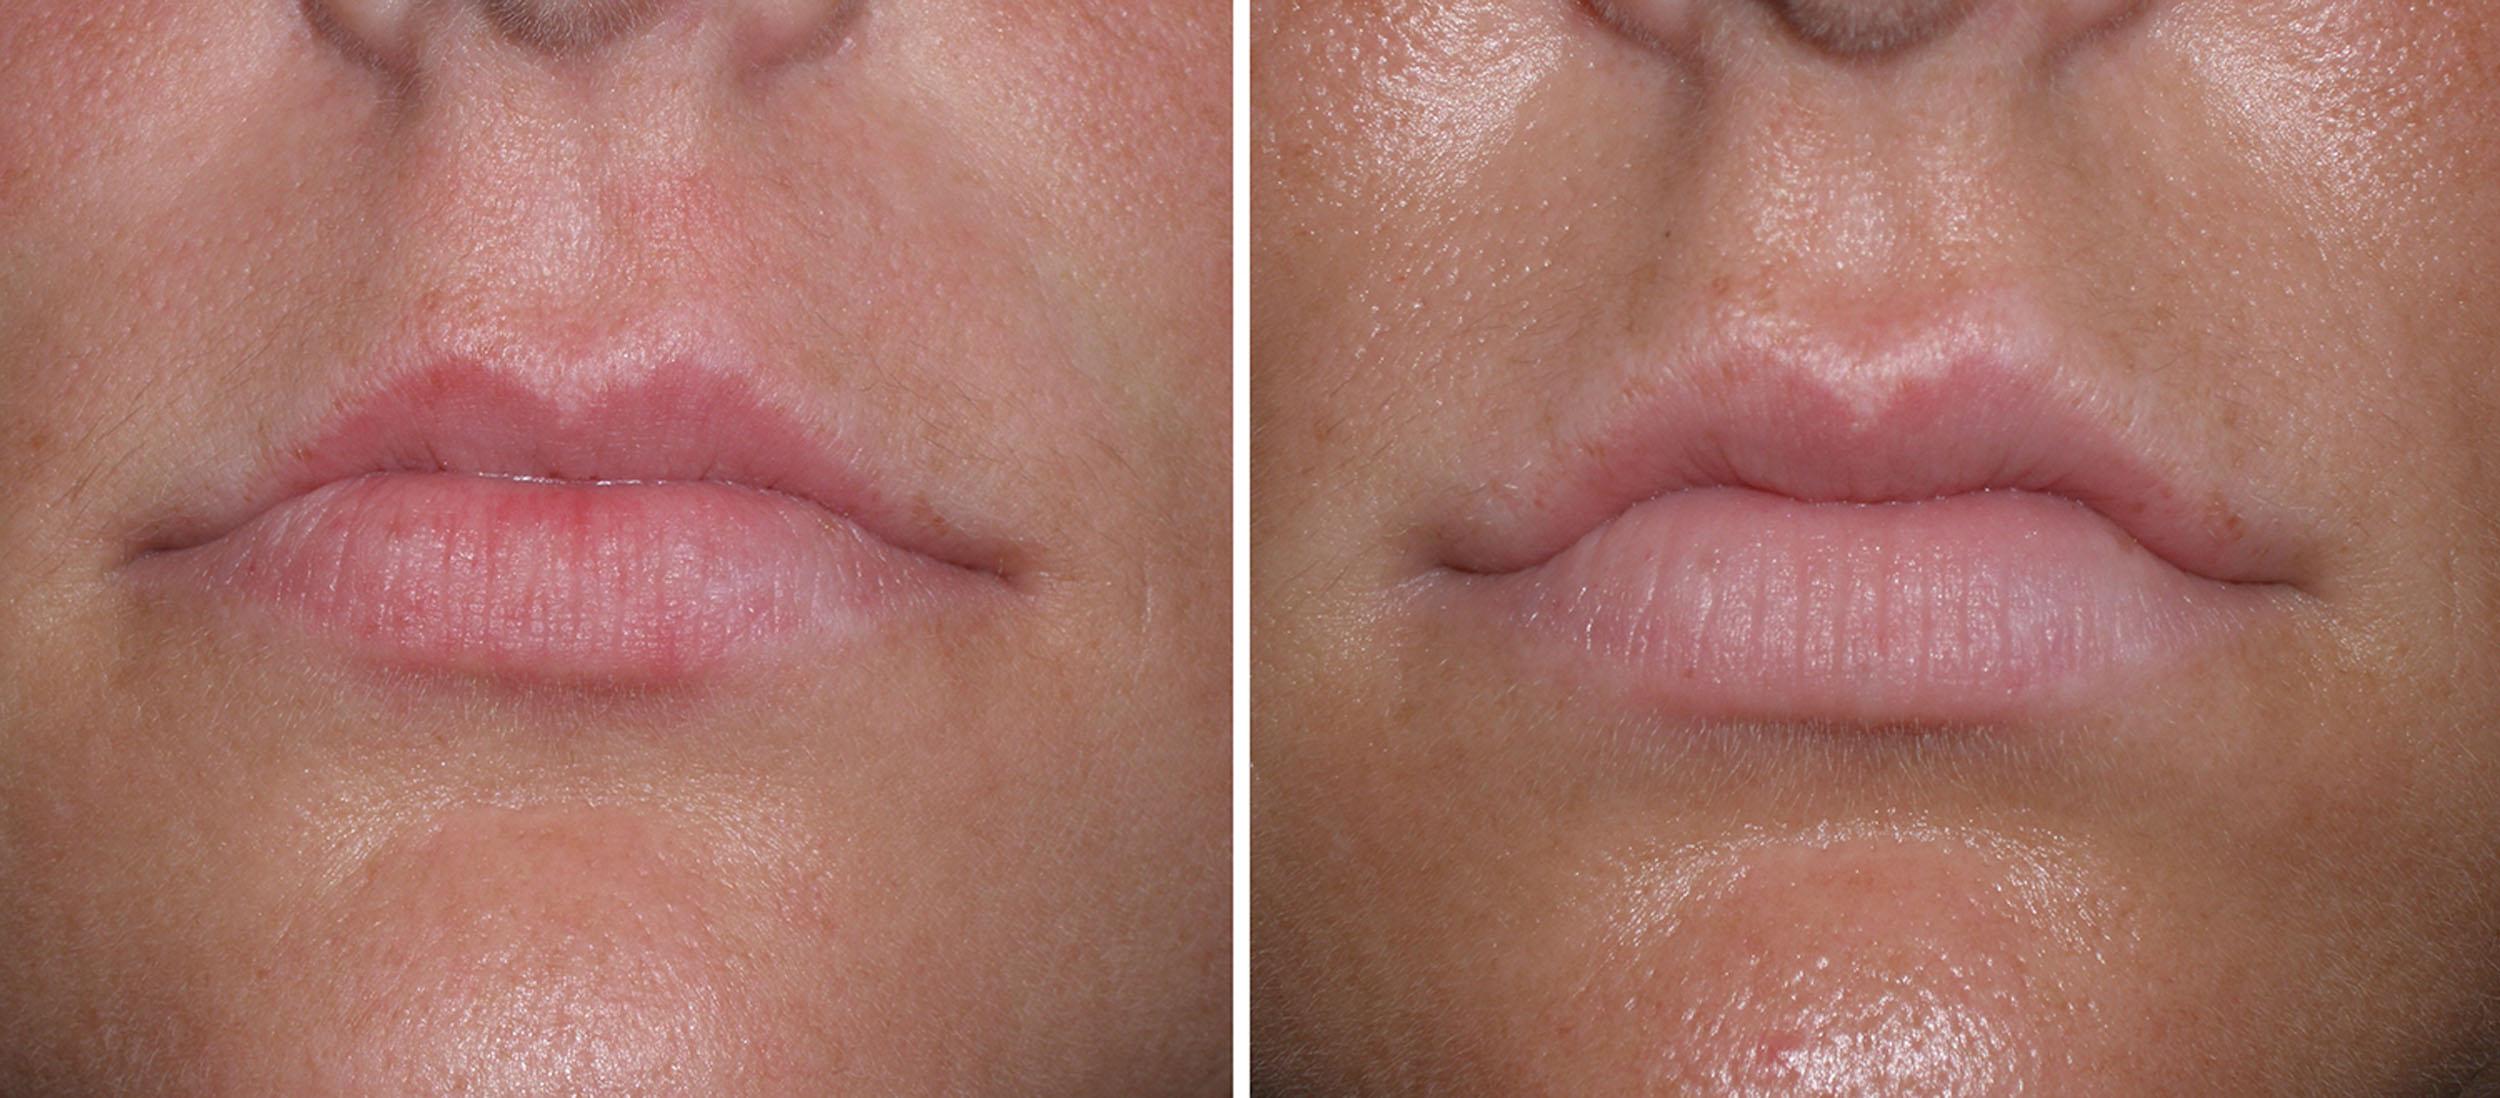
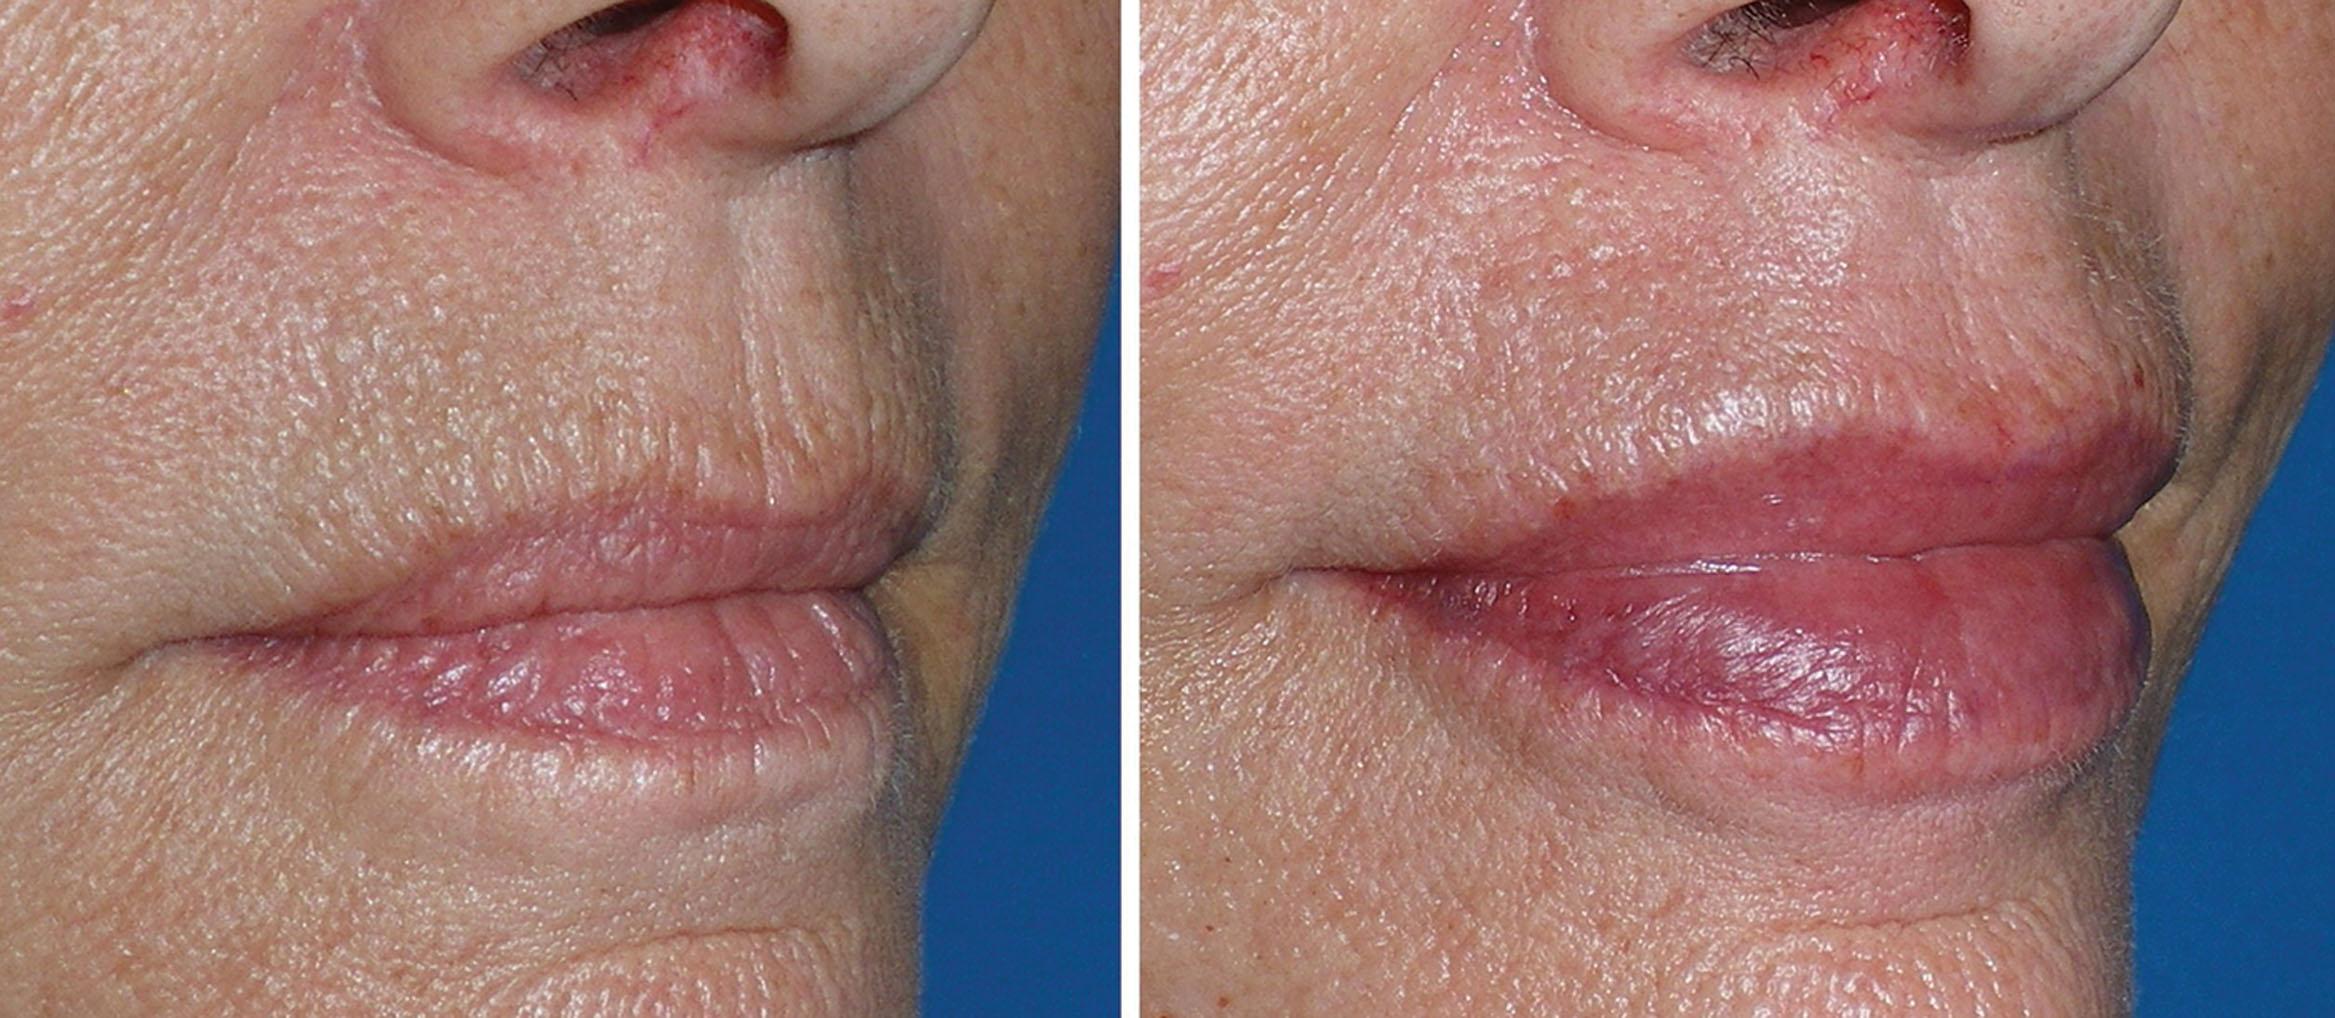
When addressing the perioral region for filler rejuvenation, the corners of the mouth are a commonly requested treatment area. Some injectors address this region before treating the lips with the rationale that less lip filler will be required, and the result will be more natural. This can be a difficult region to enhance and can be a “black hole” for filler, meaning that a lot of filler can be injected with little result. This is an anatomically complex region largely from the numerous muscles merging at the modiolus. Many patients also have a dimple in this region that is accentuated on smiling, adding to the depth of the fold. It is important for these patients to realize that although the commissure may be improved in repose, the dimple and hence the depression may still be visible when smiling or animating. Most young patients have crisp, tight, horizontal, or upward-turning oral commissures. As patients age, tooth structure is lost, which decreases the vertical dimension of the jaw and causes overclosure, which increases the perioral soft tissue drape and in part results in downturned oral commissures ( Fig. 10.46 ). Also contributing to this aging is muscle atrophy, loss of fat, photoaging of the skin, and jowling.

Older patients with heavy jowls can have very deep melomental folds (or marionette lines) and be under the impression that the filler will lift and improve the jowl. It is imperative to explain to the patient the best- and worst-case scenario for treatment result so they have a reasonable idea of what to expect. One of the most hated aging changes is “permafrown” ( resting bitch face in millennial vernacular) or downward-turning corners of the mouth. This is one aging change that can be dramatically improved with neurotoxins and fillers.
Patients with severe tooth wear or dentures may need to have their vertical dimension increased by a restorative dentist or have new dentures to lengthen the intermaxillary space, which stretches the skin drape and can improve the perioral aging. Keeping one’s lips closed while opening the mouth can mimic the effect of increasing intermaxillary space.
Combining neuromodulator (neurotoxin) treatment of the depressor anguli oris (DAO) muscle with injectable fillers in the area can be symbiotic. When injecting the commissure, it is important to control the flow of the filler, as it has a tendency to spread laterally in this region. If the injector is not cognizant of this, lateral pouches can form, which worsens the deformity ( Fig. 10.47 ).
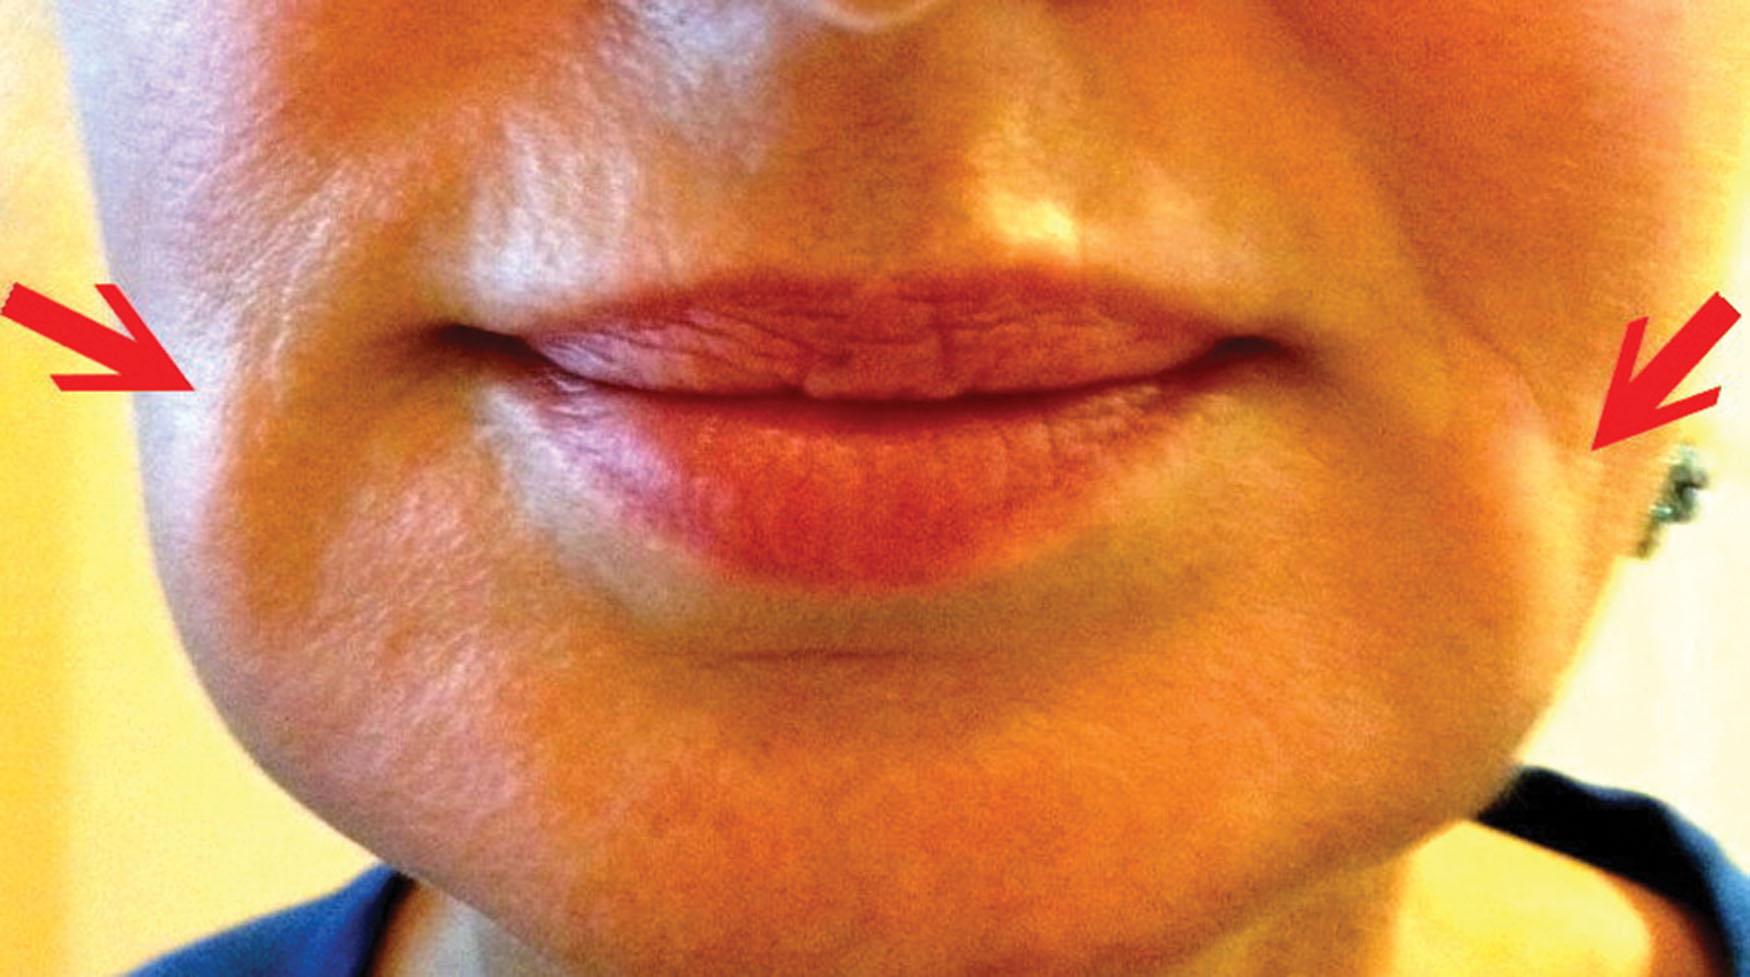
Numerous injection techniques are used to treat the oral commissures or the melomental folds and in my opinion, both regions need simultaneous treatment for maximum improvement. As stated earlier, this type of perioral treatment should accompany lip filler treatment in older individuals for a more comprehensive rejuvenation. Some patients (even younger ones) may present with a downturned commissure but without deep melomental folds, and just the corner of each lip can be treated. In older patients, a “hockey stick” configuration is formed by the horizontal commissure and the vertical melomental fold; treating both of these regions simultaneously is the key to improving them separately ( Fig. 10.48 ).
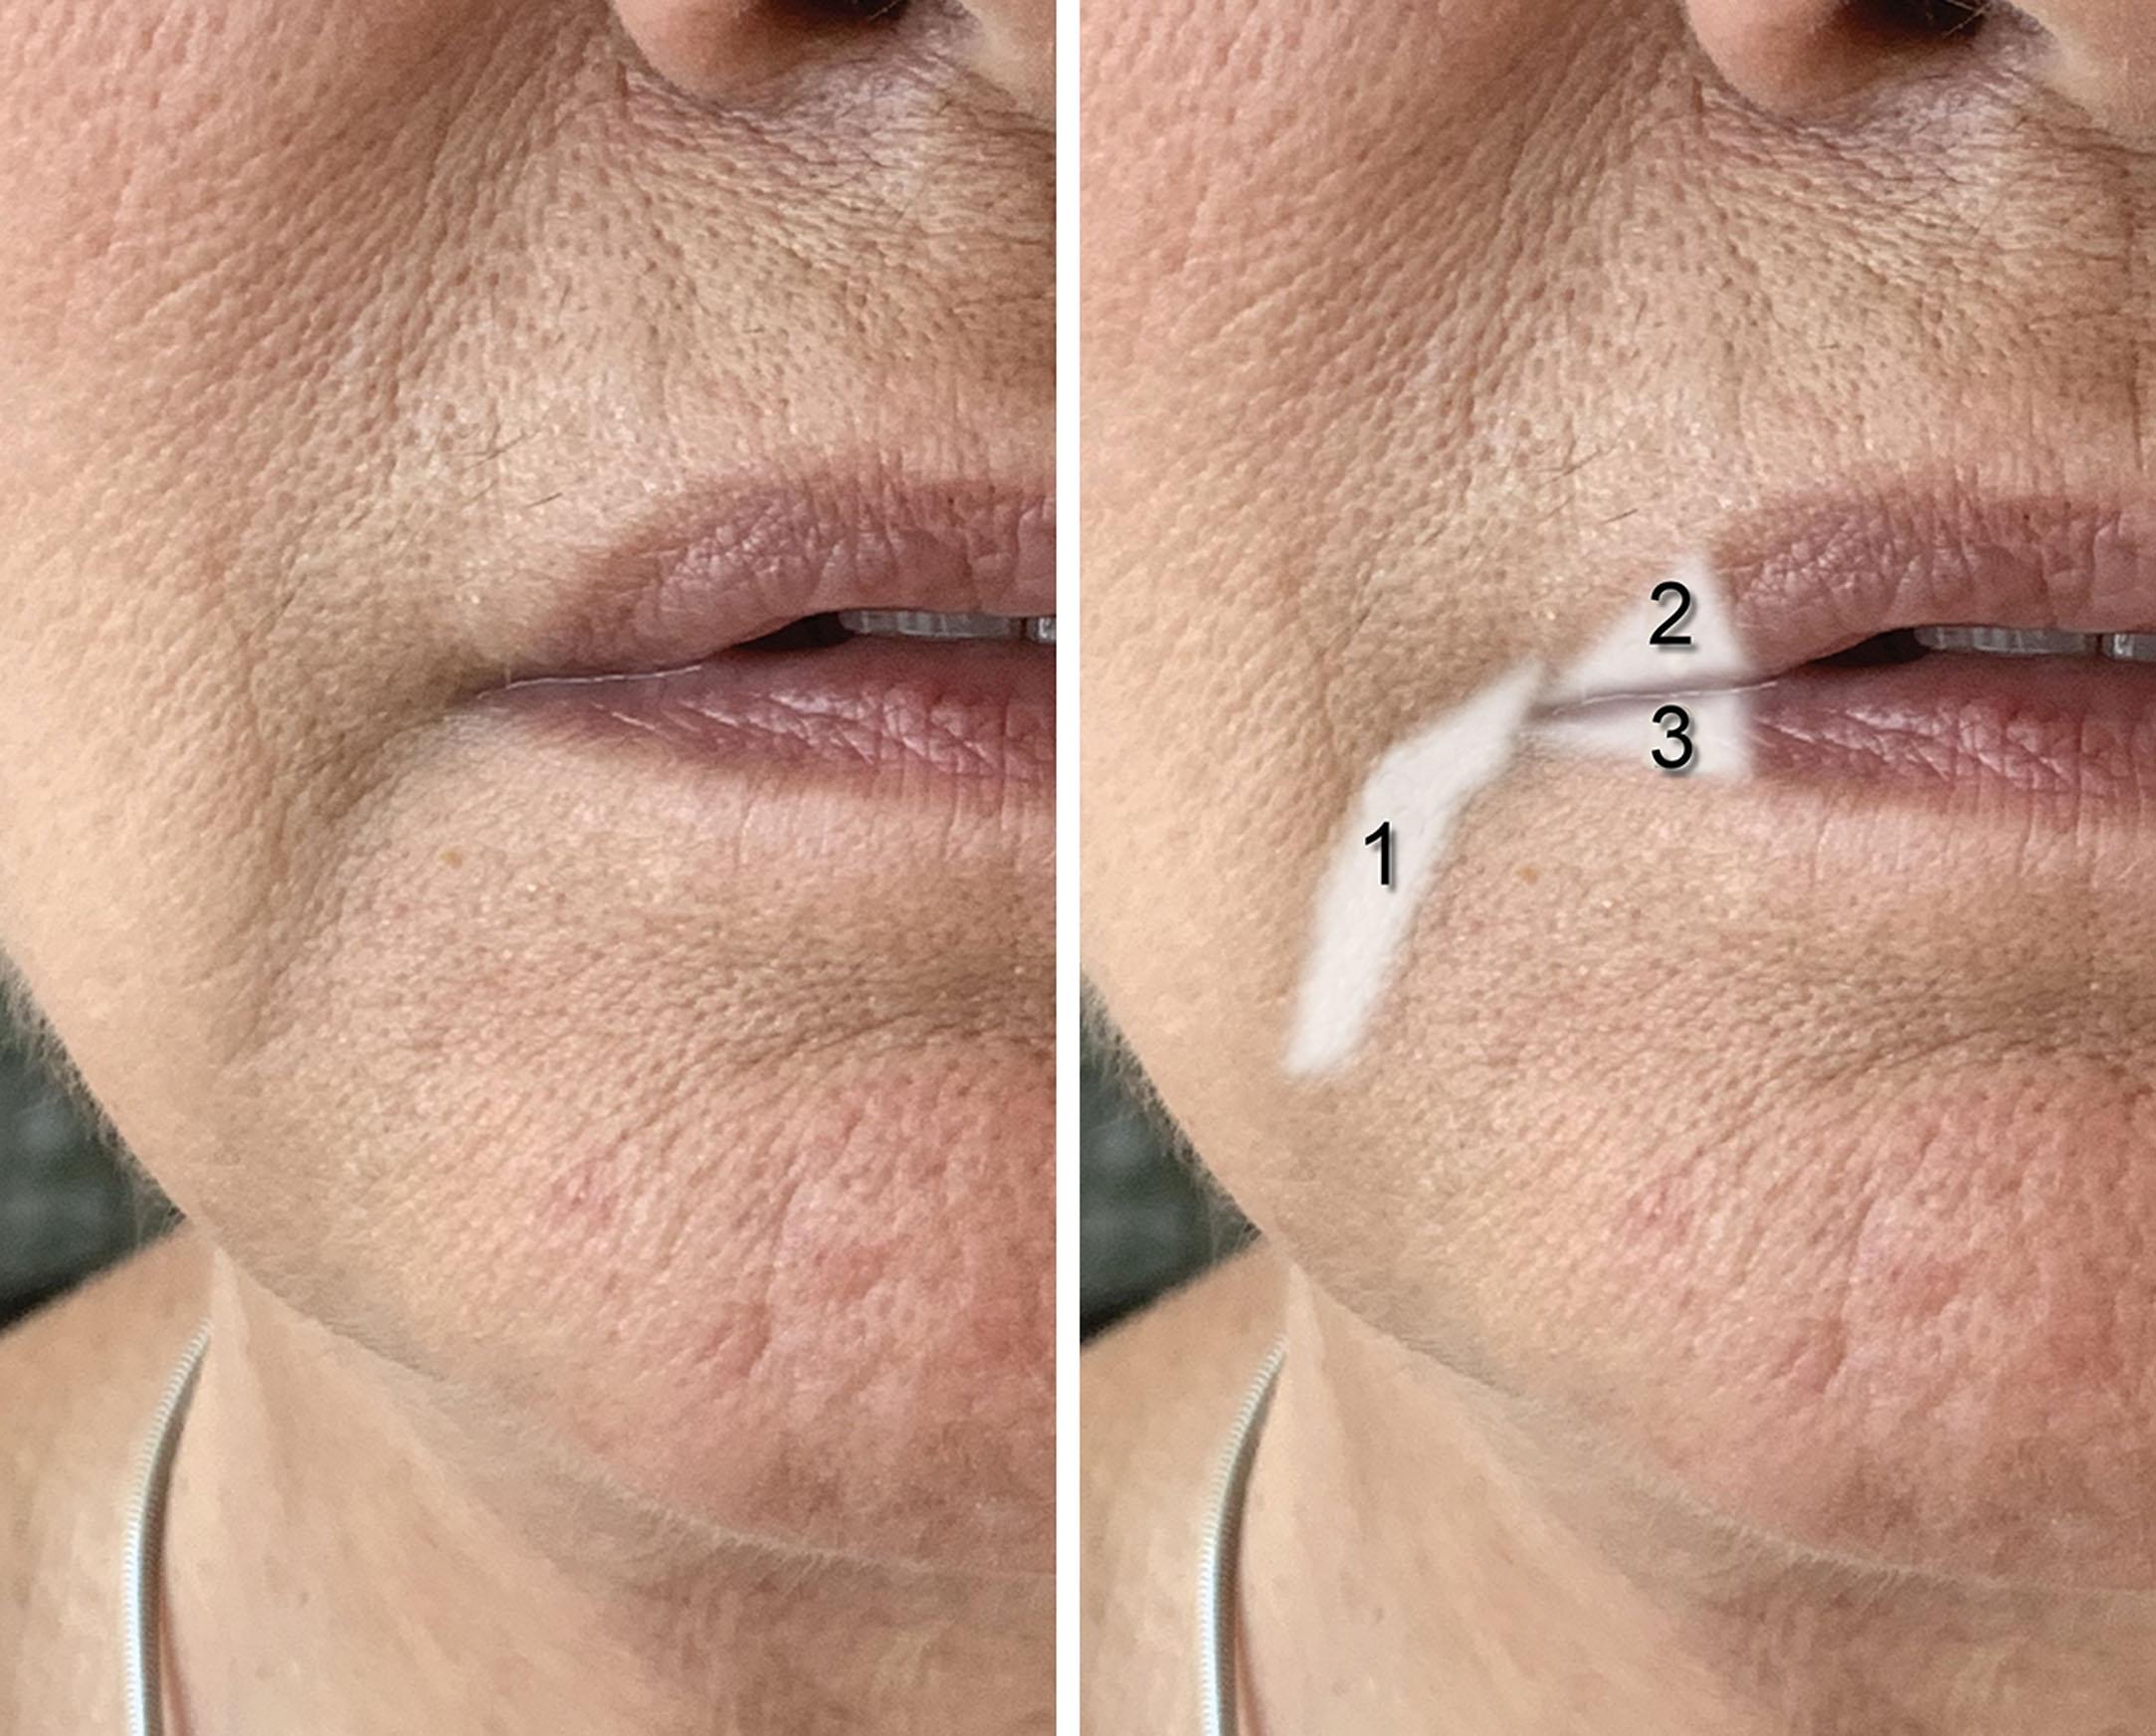
In my experience, attempting to correct the melomental fold as an isolated unit does not produce the desired results. I prefer to inject into each lateral commissure to plump and fill this area, which becomes more indented with aging. After the corners are filled, the actual melomental fold is addressed. I find it best to treat this area with several depths of filler. First a deeper base is injected, and then a second more superficial layer is injected above that. Massage is also important in this area to keep the filler within the desired boundaries.
The NLF and melolabial fold can also be treated with a flexible blunt cannula. Some patients can be treated solely with the cannula ( Fig. 10.49 ). Extremely deep folds may also require intradermal injection with a needle. The cannula can be used to create the base, and the needle can be used to finish the augmentation intradermally.
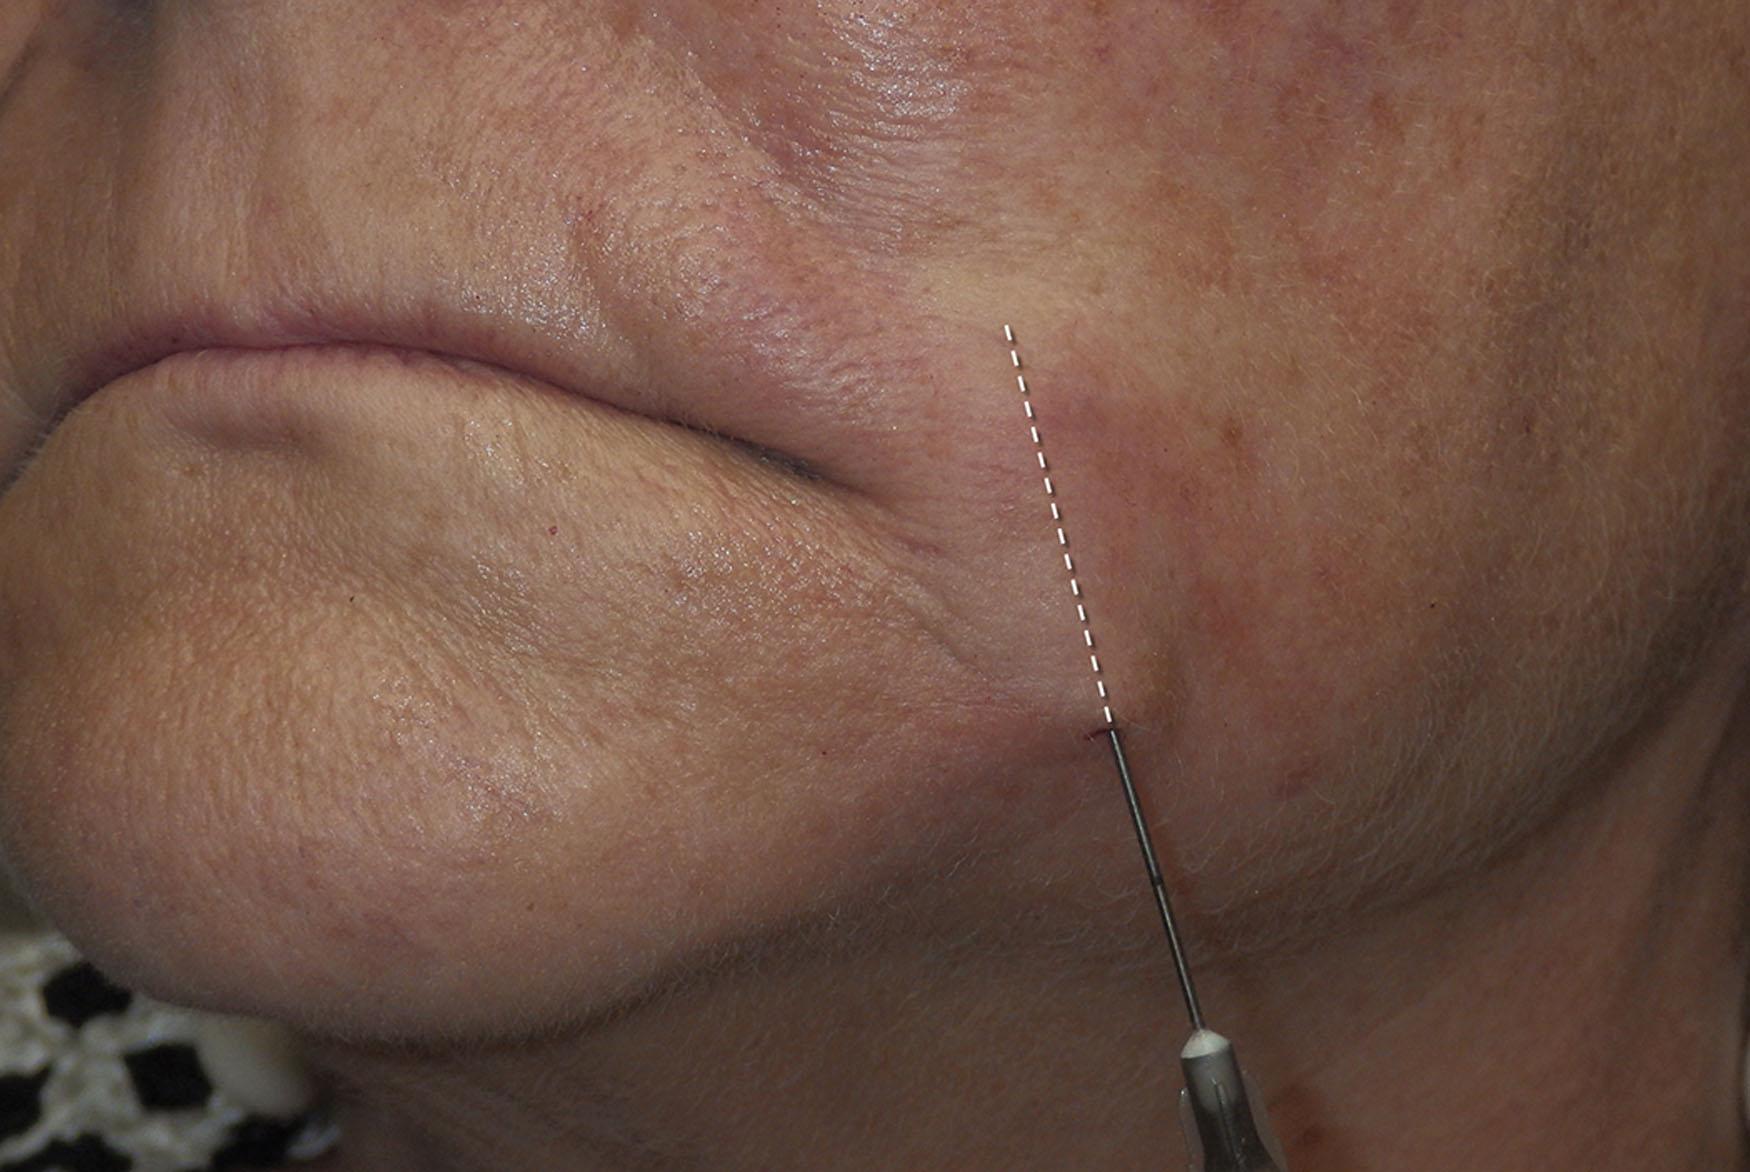
It is important to stop after filling the first side and show the patient the result in a mirror so they can appreciate the difference. If both sides are treated before the patient looks in a mirror, they may not be able to note the significant difference. Fig. 10.50 shows actual cases in which I stopped on the first side to show the patient the difference.

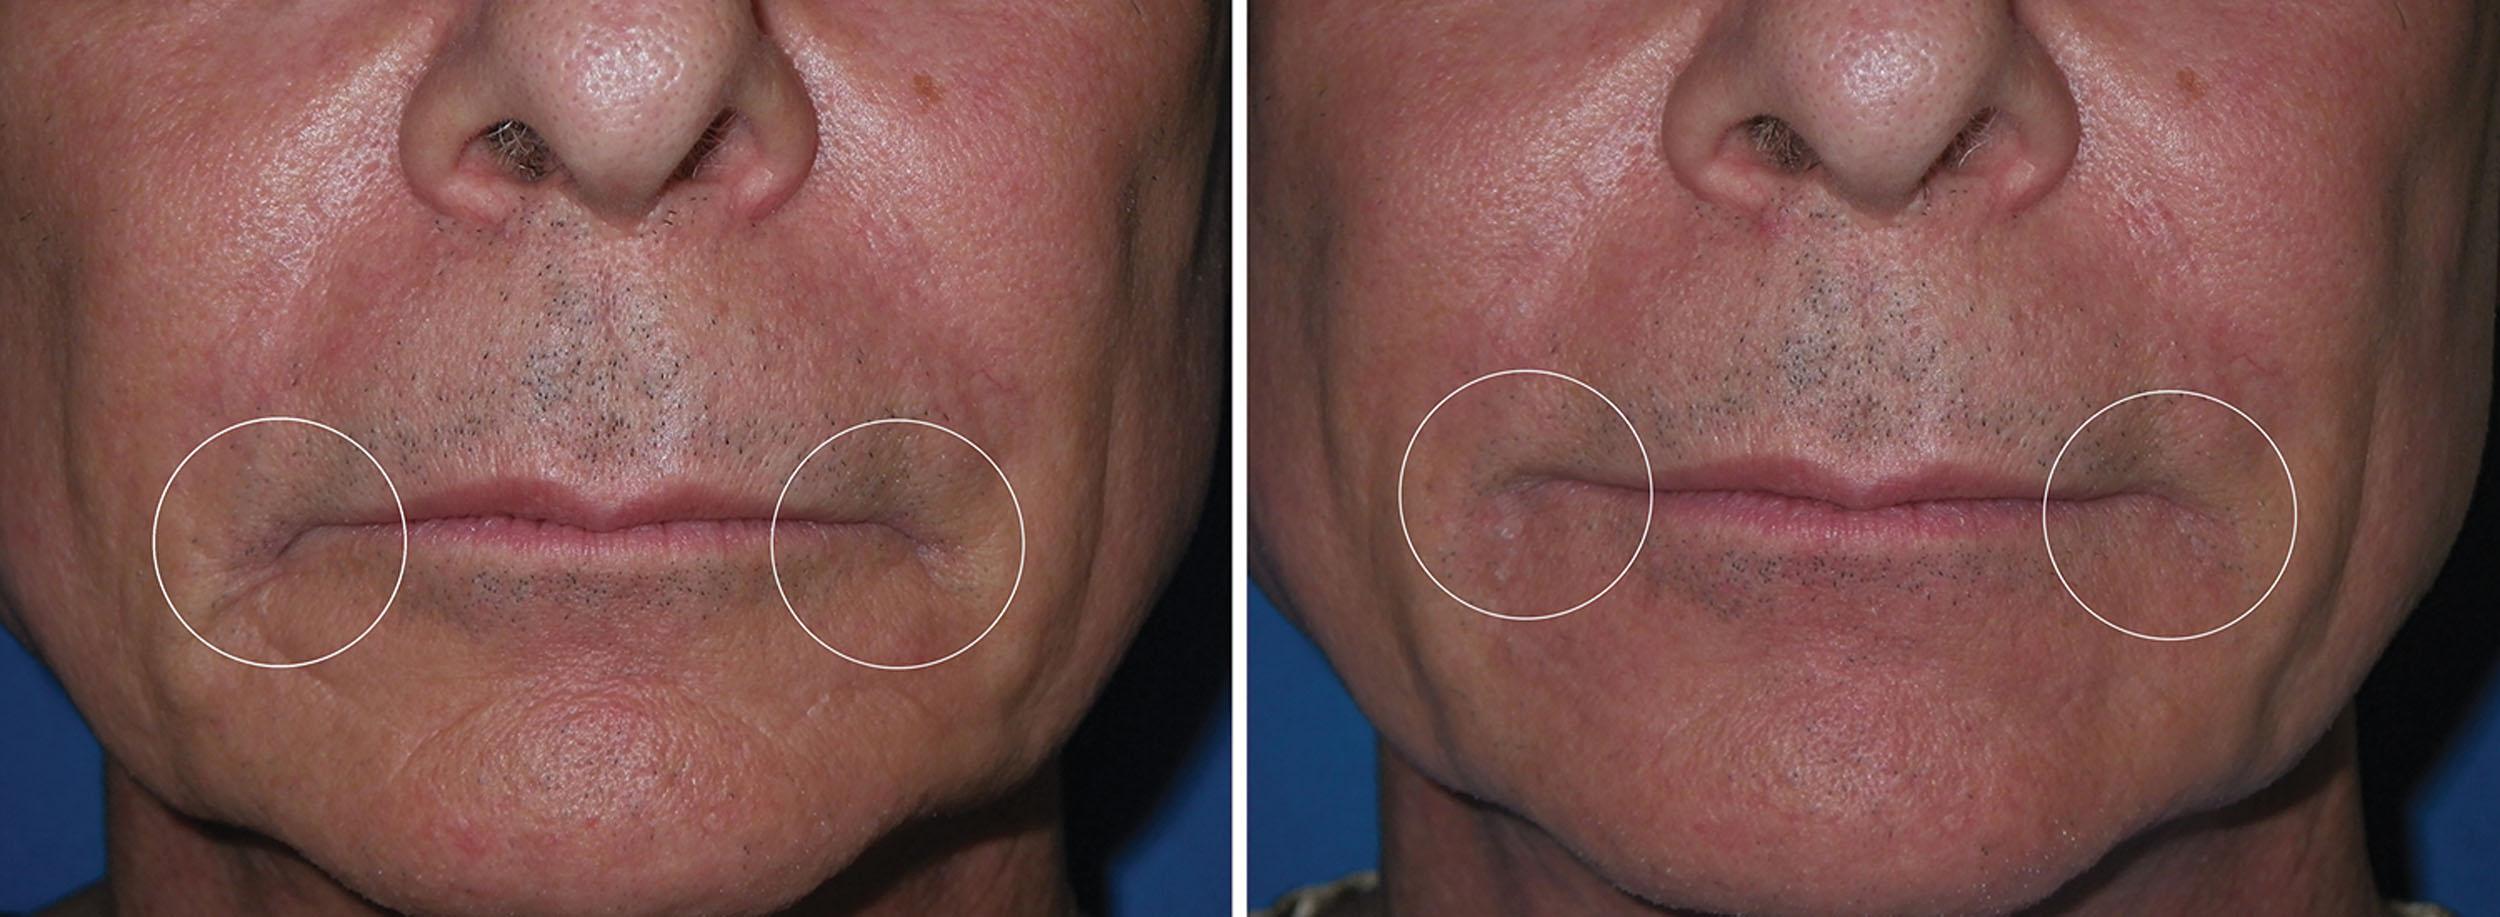
Although most filler injection is performed solely for aesthetic reasons, there is a functional application for commissure and melomental fold treatment. Filler in this region can improve or sometimes prevent Candida albicans infection. Angular cheilitis (also called “perlèche”) is a common irritation/infection in the oral commissure area and can extend into the melomental folds. This occurs when “drool lines” form and entrap saliva, which causes irritation and creates a “yeast-friendly” environment. This is especially common in older patients who have skeletal and dental tissue loss that collapses the soft tissues. This is treated with antifungal medications, but in the presence of deep or redundant soft tissue, it can be very resistant.
The crevice can be significantly reduced with underlying filler injection which reduces saliva collection and yeast habitat. Fig. 10.51 shows a before and after filler injection for perioral rhytids that were associated with angular cheilitis. The condition cleared within 1 week after filling without other treatment.
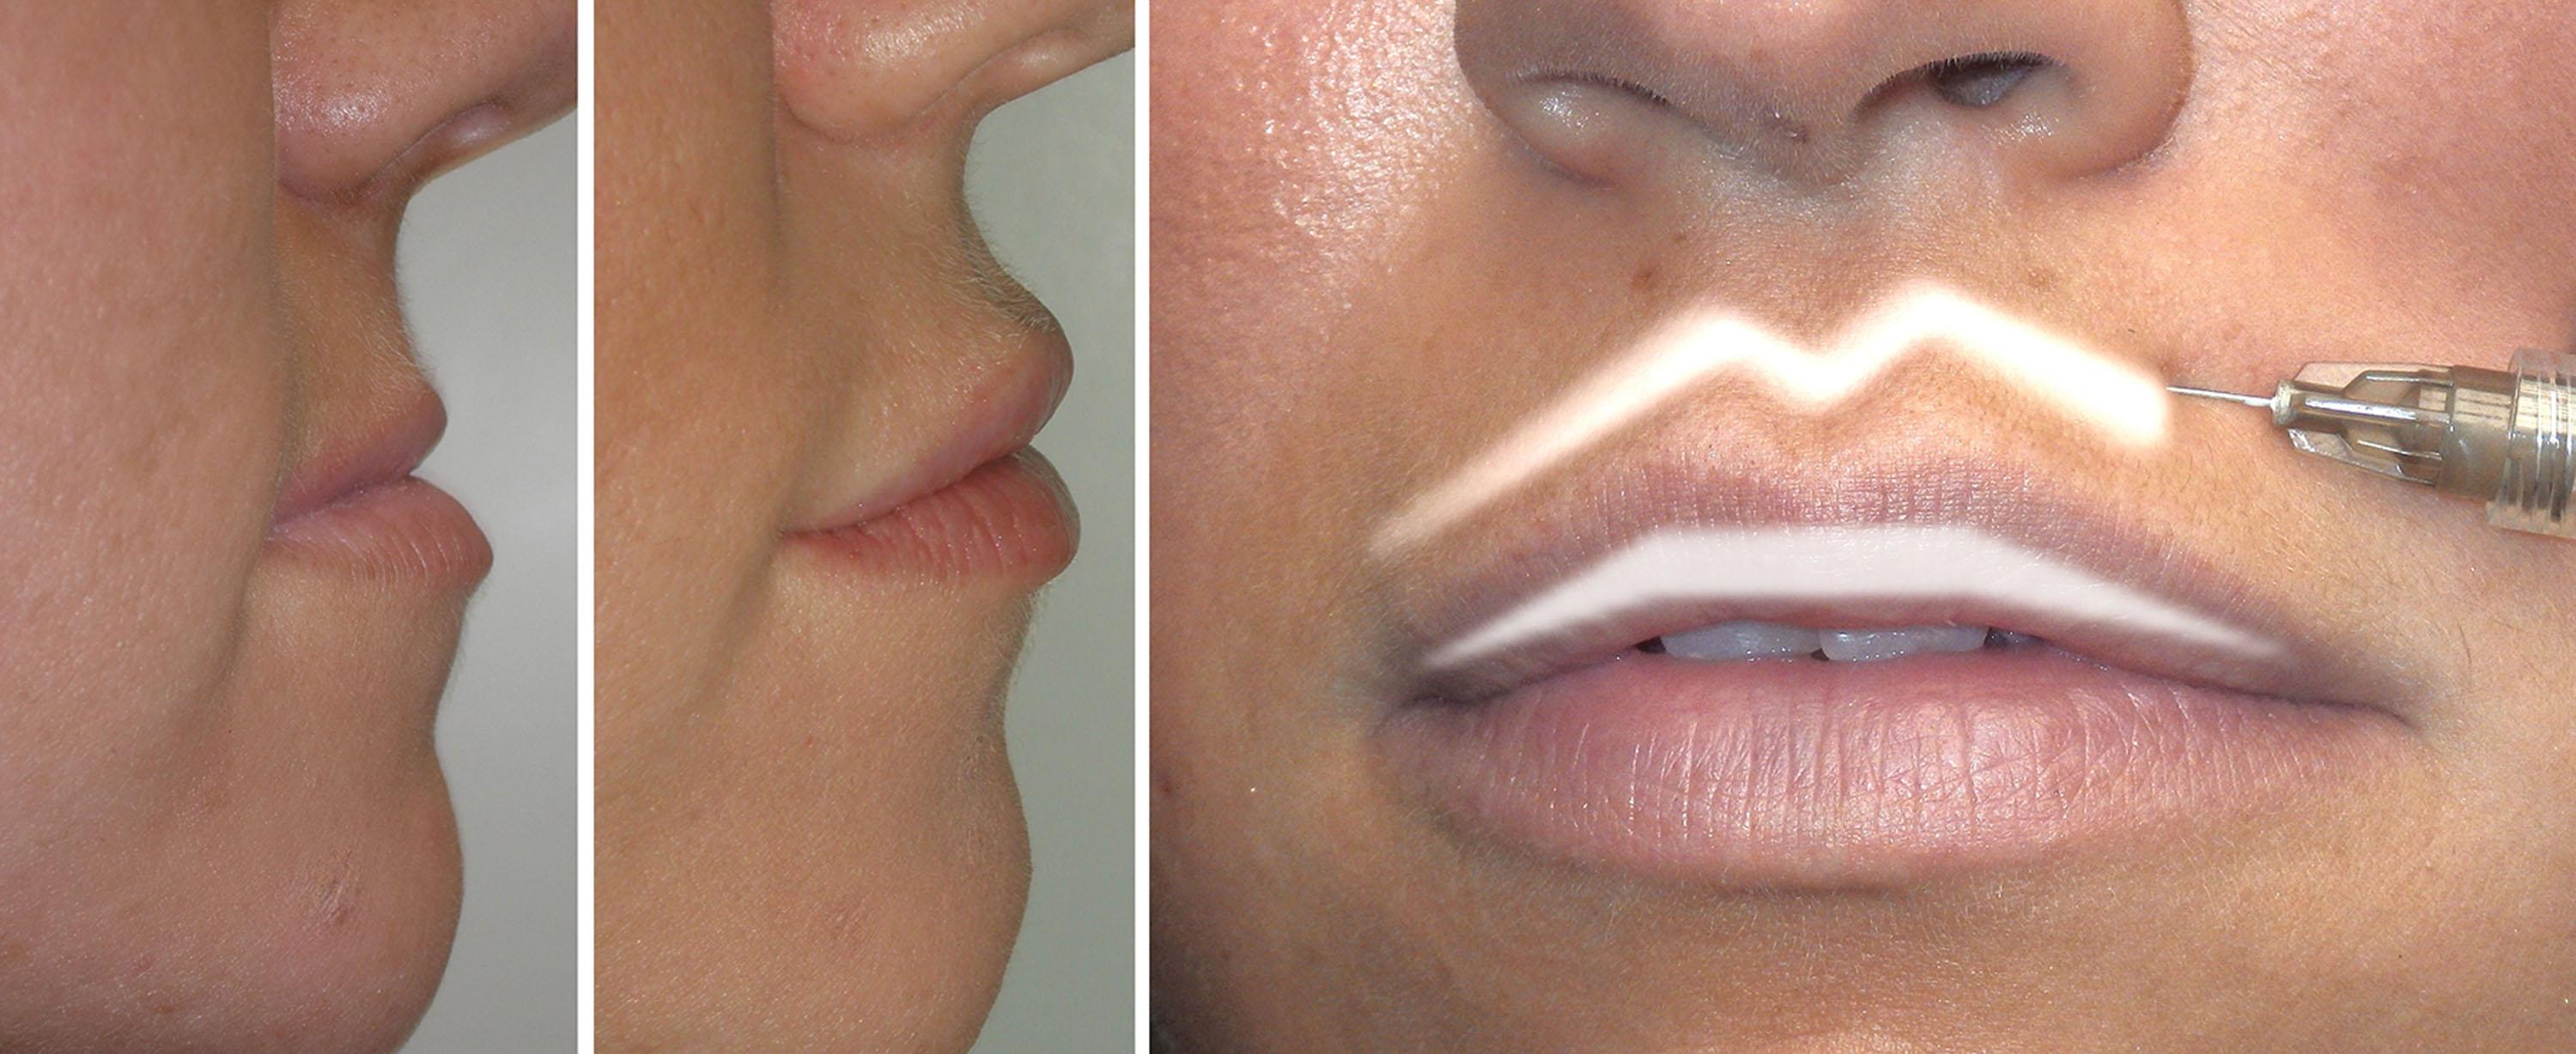
Facial fillers can be used to balance minor facial disharmonies such as mandibular prognathism or maxillary hypoplasia. These skeletal developmental deformities are mostly treated with jaw surgery but can be camouflaged with proper filler treatment in some instances. This is accomplished by enlarging the deficient region as shown in Fig. 10.52 .
Postinjection icing is especially important and can limit swelling and bruising. This applies to all treated filler areas, but is especially important for the lips because of their generous vascularity ( Fig. 10.53 ).
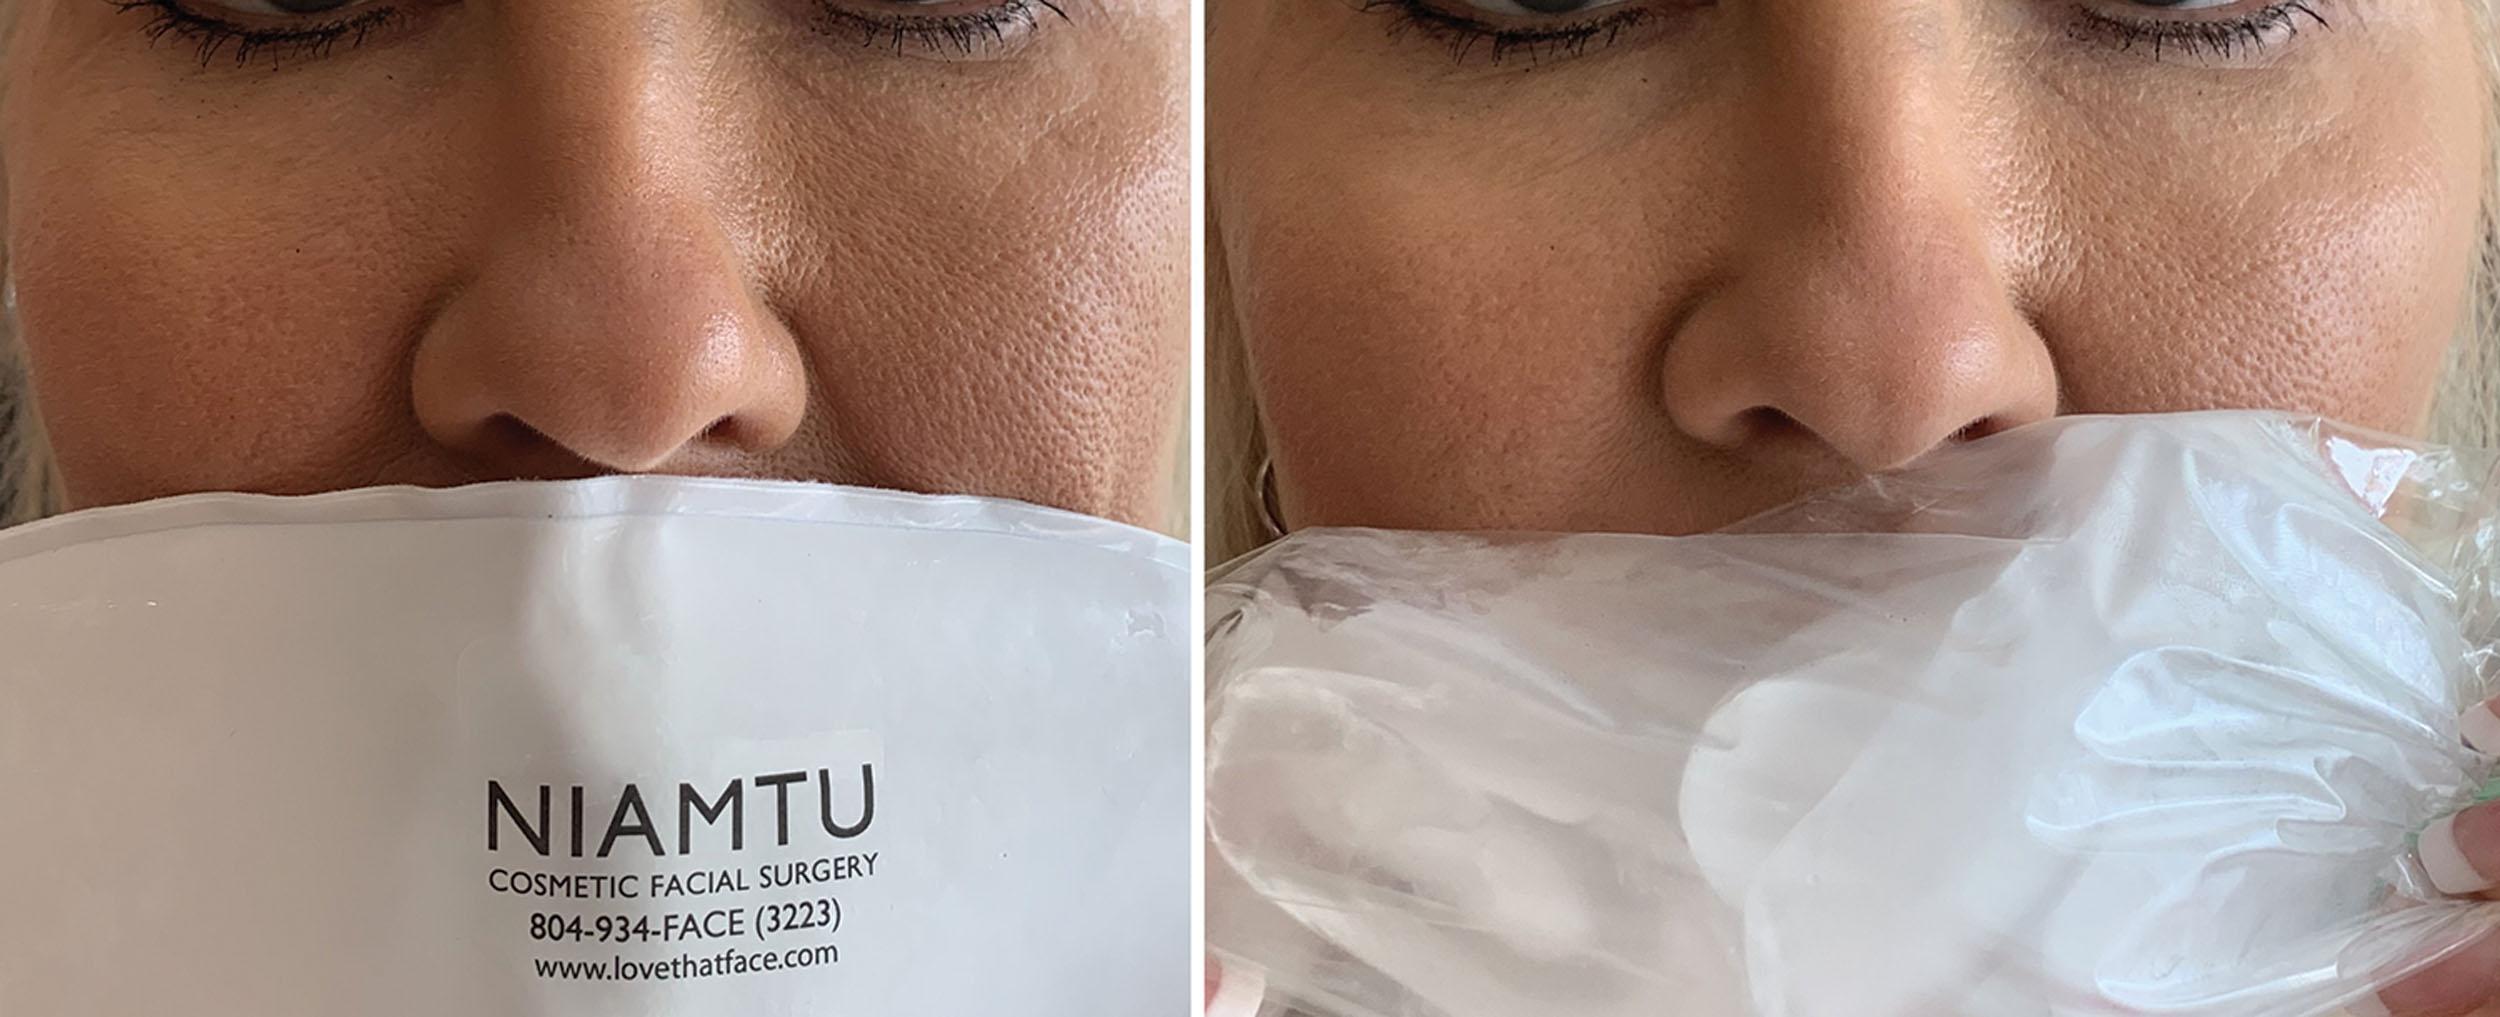
Dr. Shelia Barbarino suggests her injection patients use postinjection Arnica and Bromalene and stay well hydrated after treatment. She also uses Enhance ( www.alastin.com ) and feels that it reduces swelling, bruising, and recovery. In addition, she has her patients rub their lips together as if they were spreading new lip gloss, which helps the filler work its way into the fine lines and wrinkles that were not specifically targeted.
Lisa Espinoza
The ideal of the perfect lip has changed immensely over the past decade, not only among various ethnicities and cultures, but also among age groups. A beautiful set of lips can improve a person and provide a rejuvenated, attractive, and more youthful look. The lips frame one-third of our face and can have a dramatic effect in defining the overall attractiveness of our facial appearance. This concept has led to an increase in lip augmentation procedures in recent years. The worldwide sharing of lip aesthetic improvements by social media platforms has also popularized, shaped, and altered the perception of what the new aesthetic lip should look like. There seems to be a paradigm shift of patients seeking lip enhancement procedures from the older to the younger. The centennials and the millennials have not seen age-related lip changes but are looking to augment what they were genetically born with. Some are seeking to manipulate asymmetries, and others want to balance ratios or enlarge. The Generation X and Baby Boomer generations continue to augment their lips for the traditional reason of volume loss and anti-aging.
Describing the four main changes that occur with lip aging along with your approach during your aesthetic consultation can help ease the patient’s anxiety. Many patients presenting for vermilion lip augmentation do not comprehend the importance of enhancing the philtral columns. It is important to communicate the importance of total and natural lip rejuvenation to ease their anxiety and appreciate your artistry. The first main change discussed is the flattening of the Cupid’s bow with respective thinning of the vermilion border. The second is the flattening of the philtral columns which accentuates and elongates the upper perioral region. Volume loss of the body of the upper and lower lip along with the lower lips is multifactorial but has a definite link to decreasing estrogen. Lastly, one of the hallmarks of facial aging is the downturn of the oral commissures, leading to a downward frown. The most aesthetically pleasing lip has been described as one-third fullness to the upper lip and two-thirds fullness to the lower lip. The popularized mathematical Golden Ratio, uses the number Phi , described as 1:1.6, to define the height of the upper lip to that of the lower lip in a Caucasian. Other studied groups include African, Korean, and Chinese subjects, who genetically have larger upper lips, changing the lip ratios. In Korean and Chinese women, the vertical height ratio of the upper lip to lower lip is 1: 1.25 and 1:1.1, respectively, while African lips are most commonly described as 1:2. Overall, giving an individual their ideal lip requires an understanding of the different types of lip ratios and listening to their personal preferences. Fig. 10.54 shows some of the relative anatomy required for natural lip enhancement.
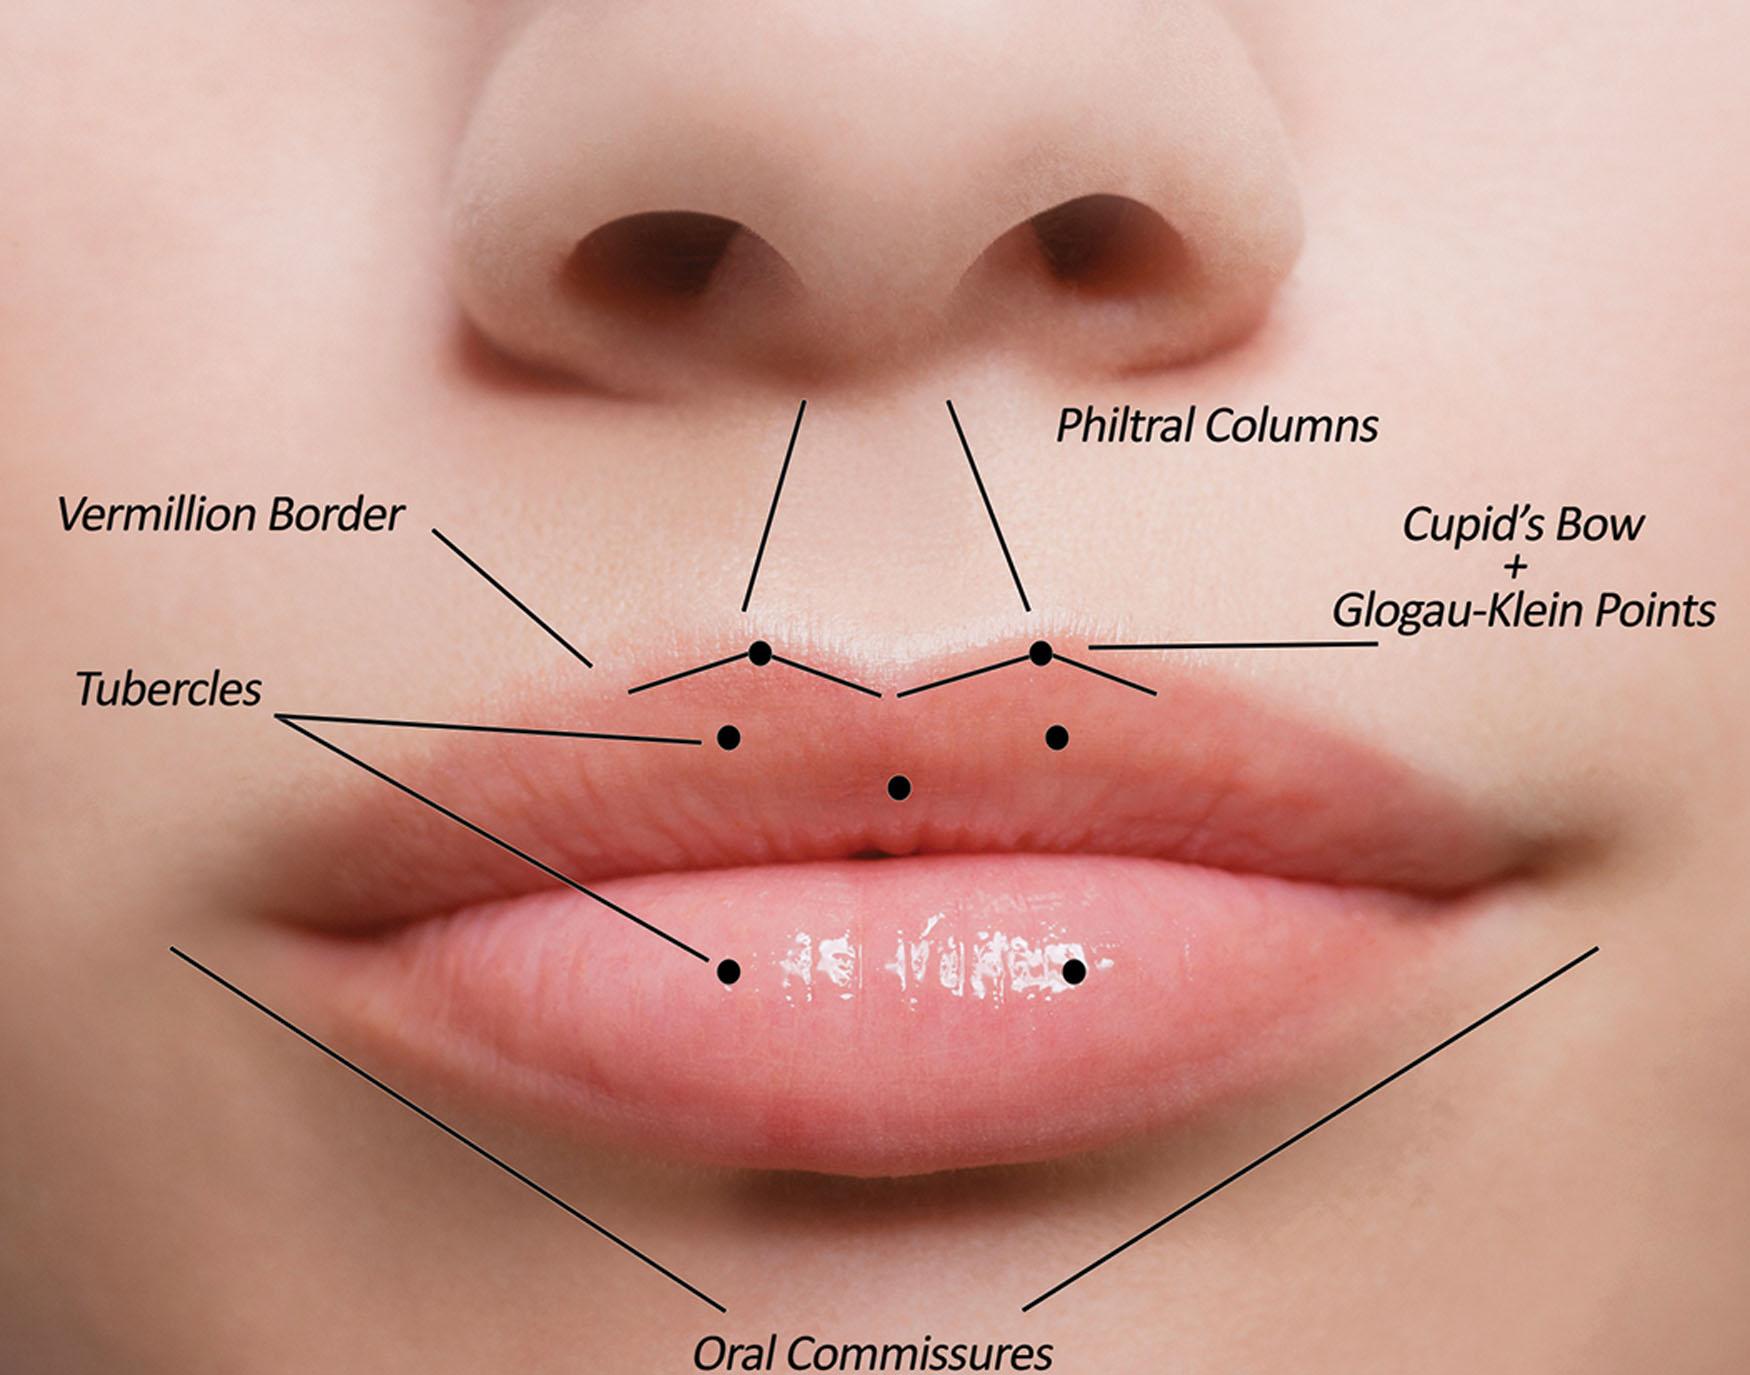
For accurate diagnosis, having the patient look in a mirror and animate by smiling, pursing and downward frowning can assist the doctor’s diagnosis but also allows the patient to appreciate their specific aging changes. It is very helpful for the injector to ask them what they see and what they desire for an outcome with their lip enhancement procedure. An ideal situation occurs when the patient and injector are aligned to the same diagnoses and treatment goals. If a disparity exists between the injector and patient, it is important to educate them so they understand and accept your treatment plan. Some patients will insist on overtreatment, undertreatment (usually for financial reasons), or a look that is incongruent to your brand. It is important to remember that it is their face but your reputation. It is perfectly acceptable to turn down treatment for a patient with unrealistic expectations or demands. The informed consent process is essential and should cover the basic fundamentals of swelling, occlusions, bruising, and asymmetry. The consent must also detail even the rarest complications such as skin necrosis from vascular occlusion and blindness. It is also important to emphasize that humans are not symmetrical from right to left or from top to bottom, and you will work your hardest to make their lips as symmetrical as possible in an asymmetric world. Injectable fillers are expensive, and it is important to discuss that the majority of clinical studies in the scientific literature with impressive before and after photos have 2 mL or more of product in the lips. If you recommend two syringes of filler, and a patient insists on one but their spouse says that they spent $700 and cannot see a difference, you have lost this battle. Again, if a patient requires several syringes and insists on a single syringe, you are better turning them away or postponing their treatment until their finances can equate to the proper number of syringes.
During the patient’s anatomic assessment, it is very helpful for medical records and possible future marketing to have well-controlled clinical photographs in the frontal, three-quarter, and lateral views. Instances may present in which a patient insists that you changed a feature that actually existed before your treatment. Having photographs to document preexisting situations can be invaluable. It only takes seconds to snap several photos, and they could be your best friend in the end. It is also important to describe and document any and all asymmetries seen within the lips and perioral region during repose and animation. The astute clinician will look for projection, as the upper lip should project about 2 mm further than the lower lip. It is important to understand the significance of differences in ratio from the upper lip to the lower lip and decide which ratio is appropriate. The injector should also assess muscle hyperactivity that may manifest as a “gummy smile.” Hyperactivity of the lip elevators (the levator labii superioris, levator labii superioris alaeque nasi, and the zygomaticus minor muscles) can contribute to excessive gingival show. In addition to muscle hyperactivity, developmental maxillofacial situations such as vertical maxillary excess can also contribute to excessive gingival display. Botulinum toxin injections are an excellent nonsurgical treatment to reduce muscle activity, thereby preventing excessive lip retraction and producing less gingival show ( Fig. 10.55 ).
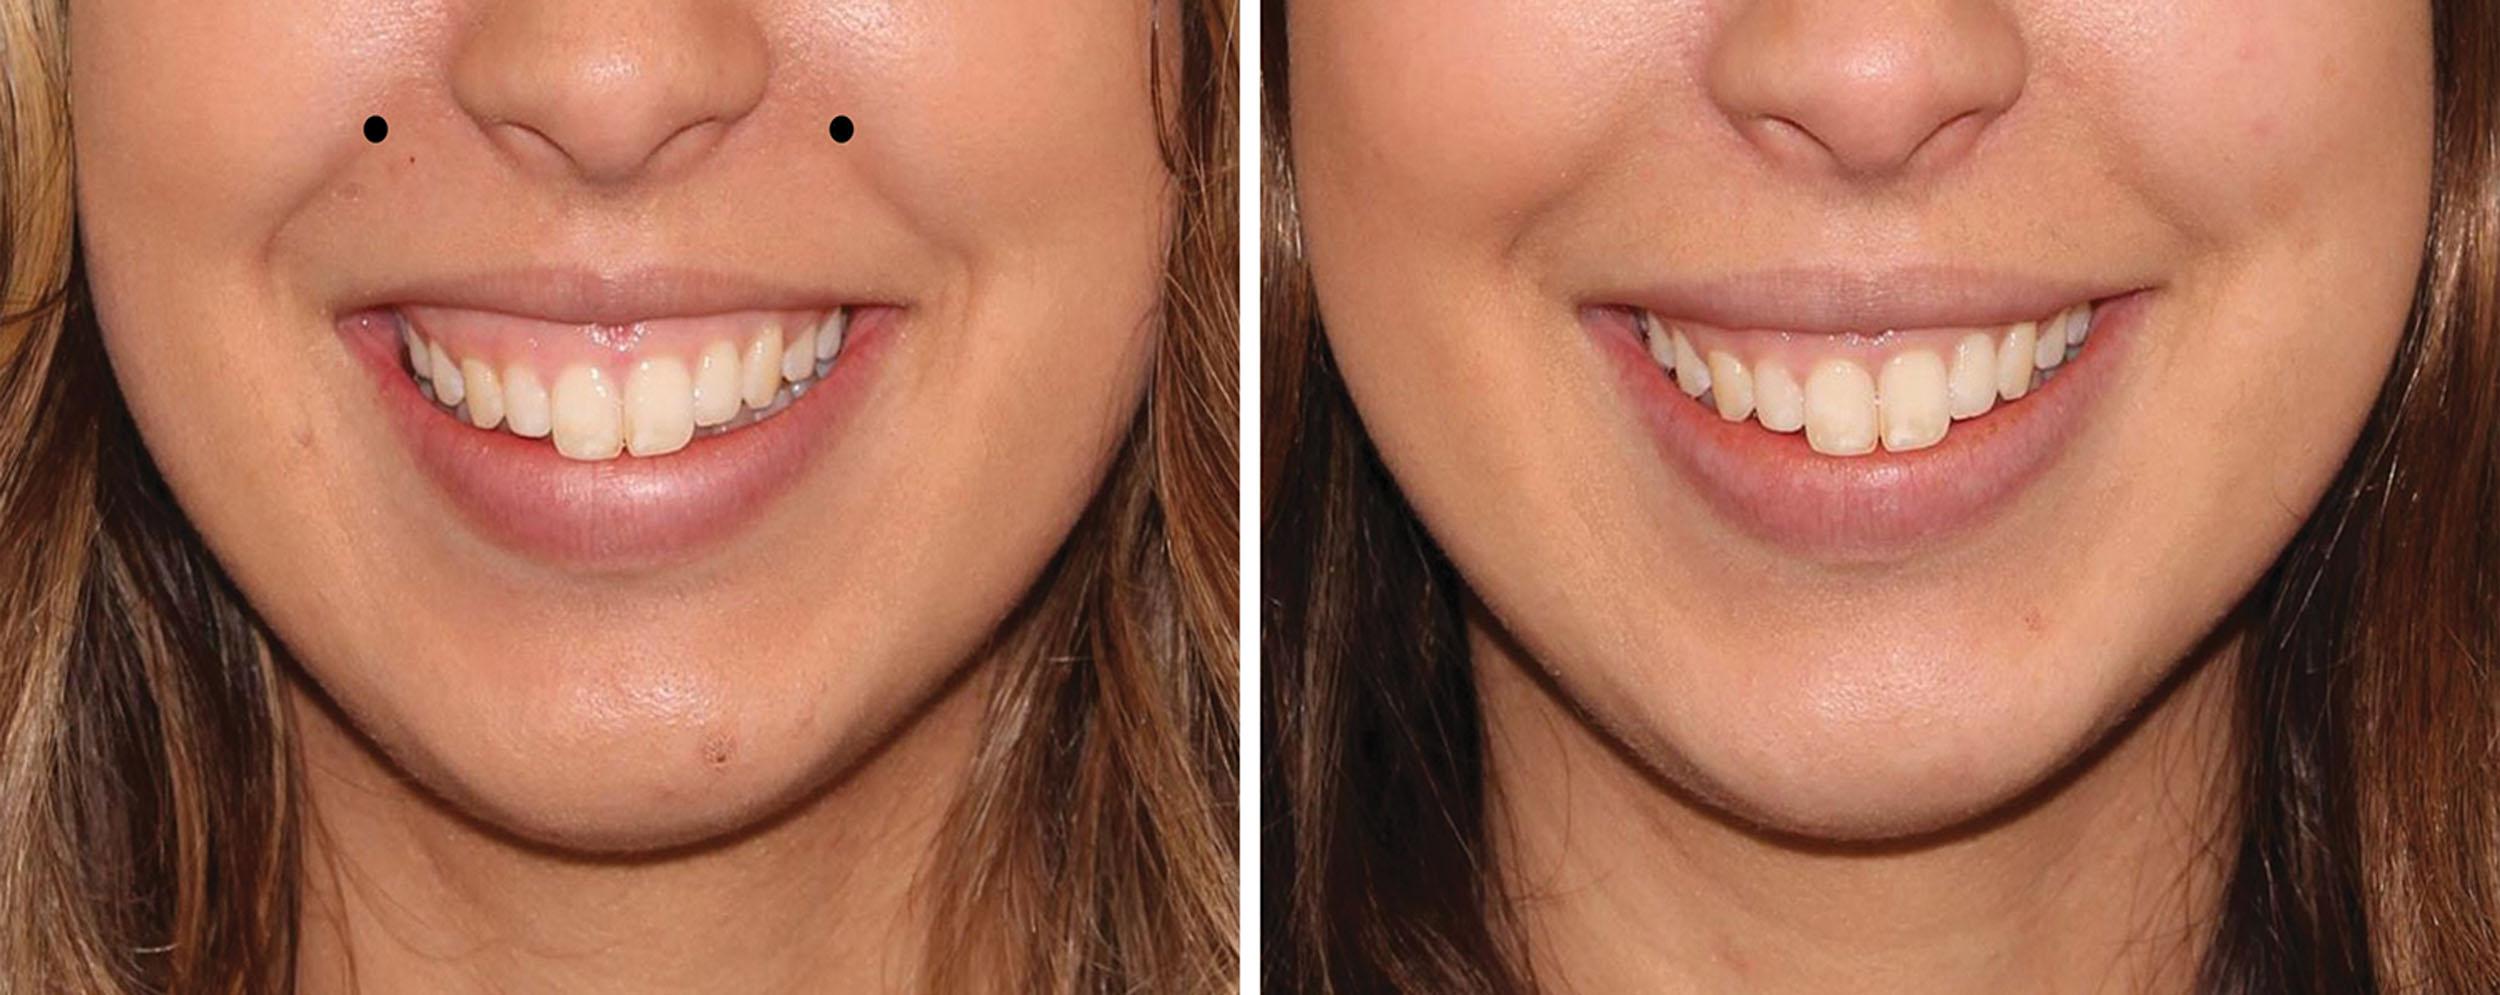
Examination must also include observation for downturned oral commissures that may be caused in part by an overactive DAO muscle. This is also an effective area for treatment with botulinum toxin, which can assist in relaxing the overactive lip depressors. Examination should also assess the level of deficits in the philtral column, oral commissures, and vertical “smoker” lines. Patients will likely need more than one syringe if all three areas need to be additionally injected at the time of the treatment.
Choosing the correct filler(s) is the next most difficult and important decision in leading to superior outcomes. When choosing the most suitable filler for lip augmentation, many factors must be considered. The rheology of firmness (G prime), cohesivity, water coefficient, flexibility, cross-linking, hydrophilicity, viscosity, reversibility, cost, longevity, and patient prior experience are all of importance. Prescreening for the use of high-dose nonsteroidal antiinflammatory drugs (NSAIDs), fish oil, aspirin, and other blood thinners should be done ahead of time as even small amounts can contribute to intrainjection bleeding and postinjection bruising. Any dose of aspirin must be discontinued at least 10 days before injection as it can result in the highest rate of bruising. Finances relating to the number of syringes and respective fees and type of filler should be decided. Once the patient approves these details, consent, aseptic cleansing, and instrumentation setup can be initiated.
Why inject the lower lip first? I feel that there are more pain fibers and sensitivity in the midline of the face and that upper lip injection has more discomfort than the lower lip. It is suggested that injecting the lower lip first will be less alarming and painful for the patient, allowing the patient to ease into the discomfort of the more painful region, the Cupid’s bow. In the lower lip, there are two tubercles that lie lateral to the midline (see Fig. 10.54 ). The lower lip should be injected with a 27- or 30-gauge needle by three or more insertion points. A retrograde tunneling technique is most common in the sub-vermilion line. Injecting in the correct plane is important for successful aesthetics. Injecting too superficially may cause irregularities and visualization of the filler, whereas injecting too deeply may involve the labial artery. Having a soft hand and injecting slowly with the least amount of plunger pressure will reduce the risk for vascular occlusions, bruising, swelling, and overcorrection. The lateral entry points can be identified by marking the right and left external nares in drawing a line downward to the lips. Injecting medial to these lines will accentuate the pout and enhance the two lower lip tubercles that lie lateral to the midline (see Fig. 10.54 ). A fanning technique can be used within these tubercles. Care must be taken not to inject lateral to the external nares line to prevent the sausage look of the lower lip where it is all one size. A third injection point is often needed centrally across the lower lip for greater effacement. This is very personalized as some injectors like to leave a depression centrally. On average, 0.1 mL is enough for each injection with a total of 0.3–0.5 mL for the lower lip. Injecting at the sub-vermilion border in the lower lip is important as not to enhance the white lip roll or give an edematous look to the lip.
If additional height is needed in the lower lip, it can be achieved by running two linear threads of filler to both sides of the midline. It is important to ensure that the injection enters directly at the vermilion border and not below as not to efface the white roll. This vertical column technique can also be another tool to even out asymmetries ( Fig. 10.56 ).
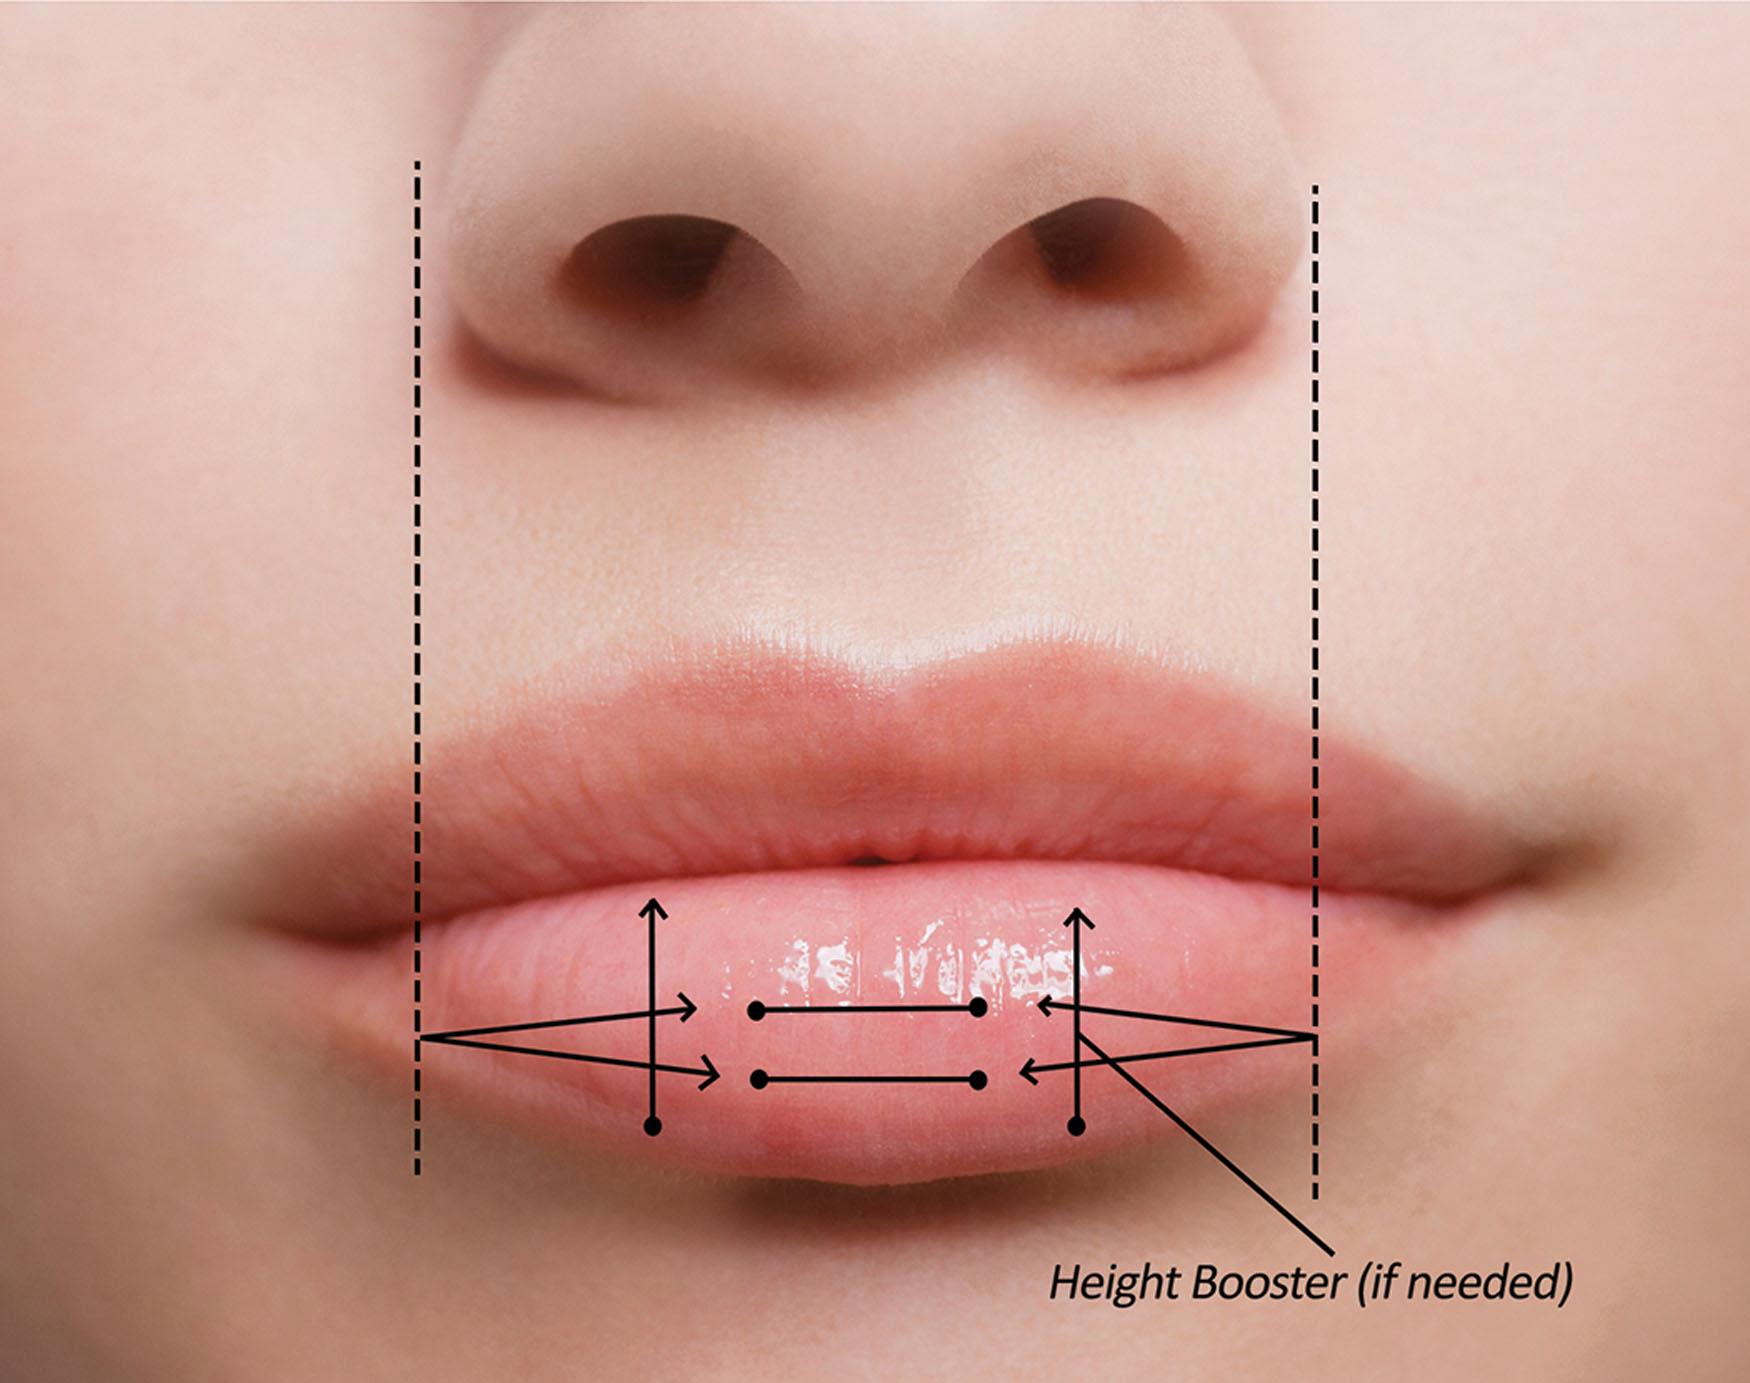
The injector must develop a plan that includes premeasuring and strategizing the approach to the upper lip as it is the most sensitive area of the face to inject. Minimizing the number of injection sites can result in a less painful procedure with minimal bruising along with the decreased risk for overcorrection. Painless injection can lead to improved patient satisfaction seen by patients returning every 6 months versus several years. Defining the vermilion border is one of the most important ways to accentuate beauty in the lower face. Long before lip aesthetic injection procedures existed, lipstick and lip liners were used to reshape and beautify a lip. Creating a sharply defined and well-demarcated vermilion border will maximize light reflection and flaunt lip architecture. Treatment of the vermilion border is begun laterally and proceeds medially. Existing lip anatomy defines how far lateral the injections will be placed. Injecting slightly lateral to an imaginary line dropped from the alar base ( Fig. 10.57 ) may be appropriate for younger patients, but in older lips it may be necessary to start your vermilion definition at the commissure. Depending on the diameter of each side of the lip, the upper lip can typically be injected with two to three injections per side and approximately 0.1 mL within each injection thread. The injector must ensure that the needle is placed superficially as the superior labial artery runs along the vermilion border of the upper lip traversing between the mucosal and upper orbicularis oris muscle (approximately 3 mm in depth).
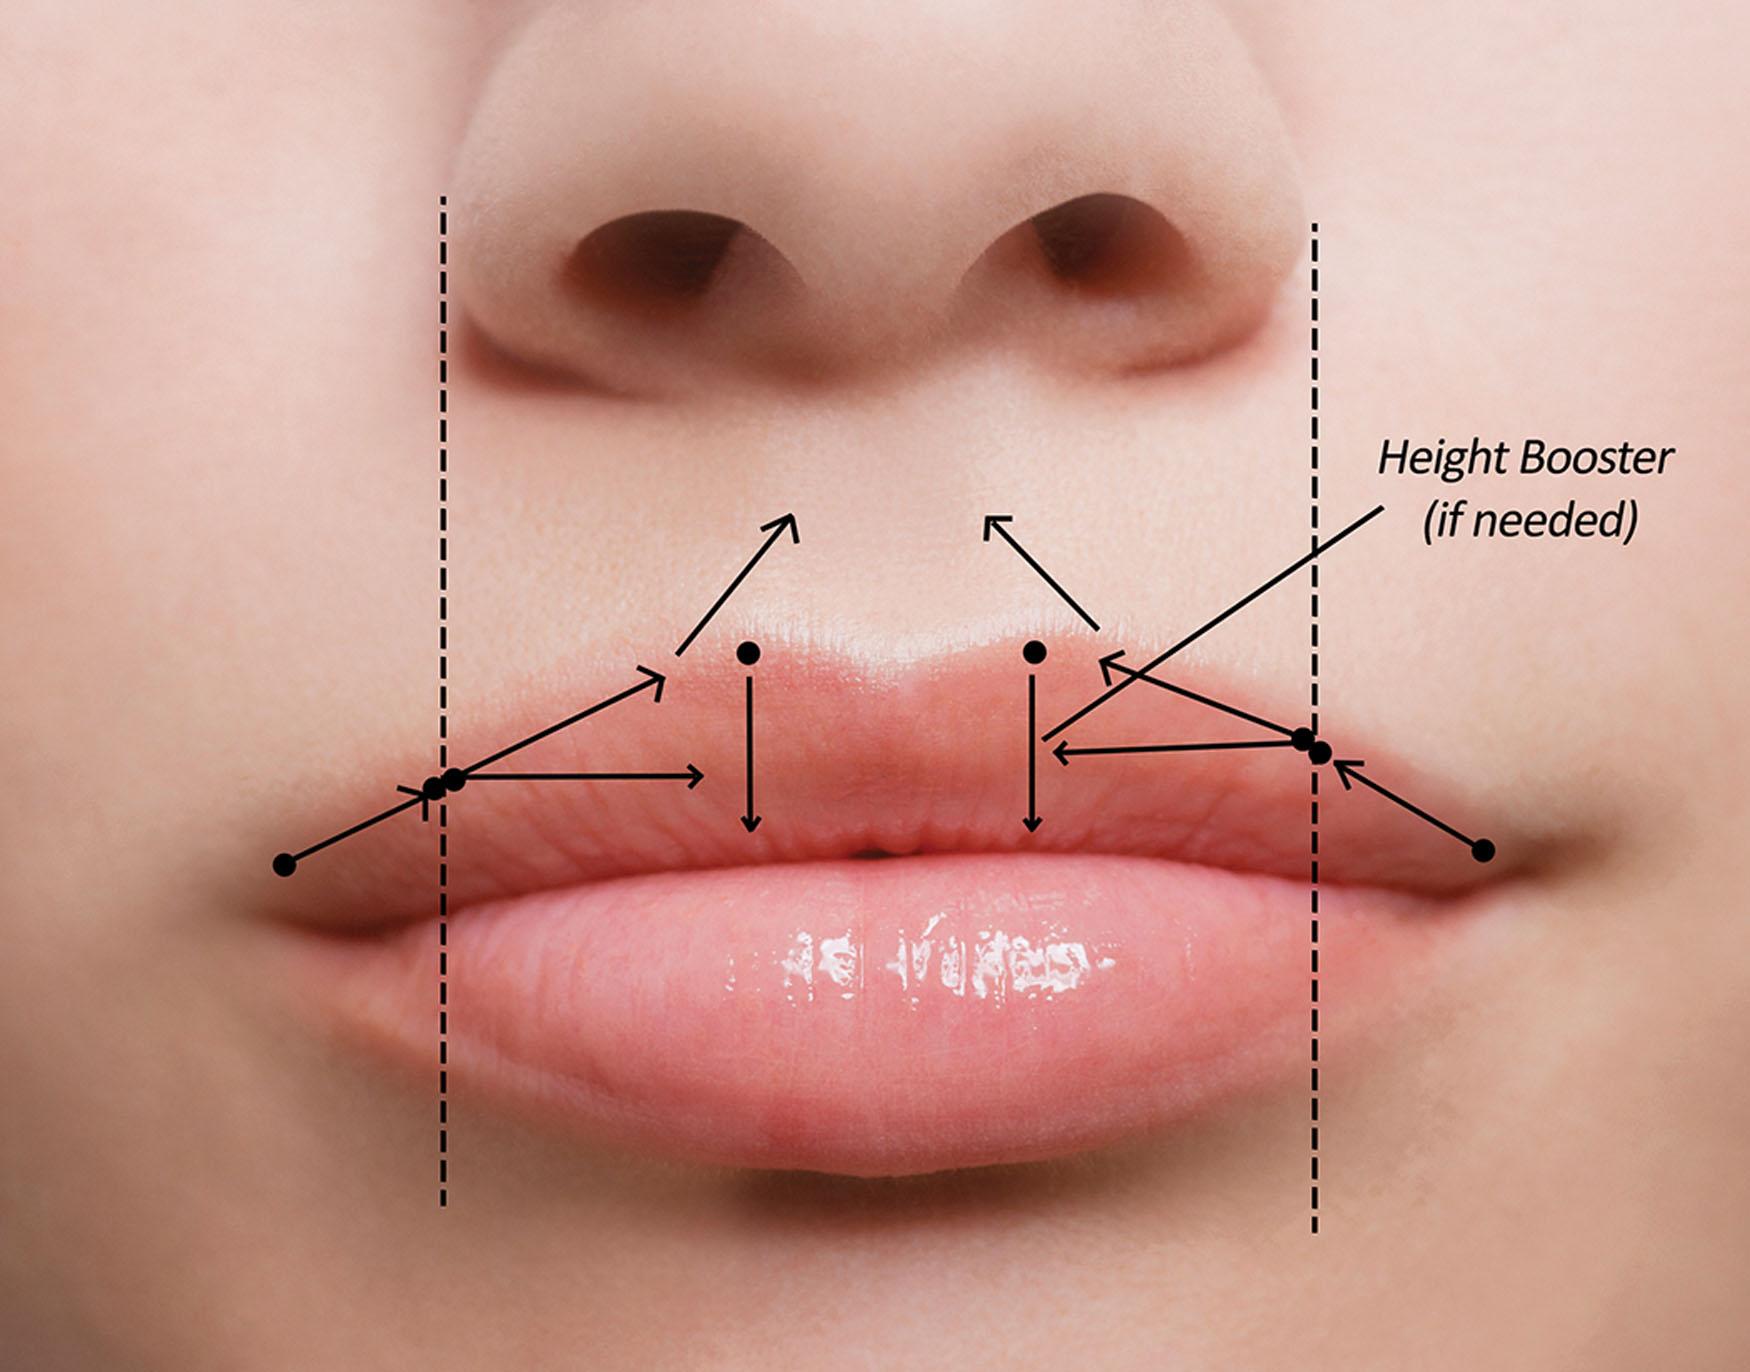
The Cupid’s bow of the upper lip derived its name from the Roman God of Love, who carried a bow that had a double-curved shape that resembled the center part of the upper lip. For centuries, the Cupid’s bow has symbolized an attractive feature that should be well defined and pronounced. The M -shaped bow should match the upturned corners of the upper lip. The two tips of the Cupid’s bow are known as the Glogau-Klein (G-K) points of the vermilion border (see Fig. 10.54 ). Inserting a conservative retrograde linear thread from the G-K points superficially and directly down to the wet-dry border can lift and provide needed structure. These G-K point injections should be done directly at the vermilion border. Additionally, direct injection into the Cupid’s bow must be done with caution or not at all as it may lead to flattening of this delicate and important feature.
The last goal is to volumize the three upper tubercles and enhance the body of the lip. One tubercle is at the midline, which is frequently not emphasized, and the other two lie lateral to the midline tubercle. A fanning technique can be utilized in this area when you are volumizing the body of the lip until the desired projection is achieved.
If additional height is needed in the upper lip or the patient has too much excessive projection, the goal is to solely increase the upper lip height. The same technique is performed at the G-K points of the Cupid’s bow. The injector can create additional retrograde linear columns until the desired result is achieved. It is important to ensure that the injection enters directly at the vermilion border and not below it so there is no enhancement of the white roll. This vertical column technique can also be another tool to even out asymmetries with just a single thread of filler injection (see Fig. 10.57 ).
Success in completing the definition and refinement of the upper lip and Cupid’s bow is related to how effectively shaped the philtral columns are created. Although the columns can sometimes be the last place a novice injector can think to inject or allocate precious filler, they are very critical to setting the stage for defining the Cupid’s bow. As we age, these longitudinal columns decrease in depth and lead to a flattened upper lip. Not only does this displace the upper lip to a lower height, it detracts from the youthfulness of the upper lip. The concavity between the philtral columns, known as the philtrum , is dominant in high estrogen states and demonstrates a youthful look. It is often used by makeup artists as an area to accentuate with highlighter makeup application to draw special attention to that zone. It is critically important that the philtral columns follow an inverted V shape with narrowing of the V as it approaches the nose (see Fig. 10.54 ). They should not be injected in a manner to create a pair of straight parallel lines, which will look extremely unnatural. The injections must also be superficial because of the position of the columellar vessels. It is helpful to pinch the philtral column not only to ensure accuracy in depth of plane but also to reduce pain in this sensitive zone.
Correcting downturned oral commissures is one of the most important steps to achieving the perfect lip. The oral commissure is part of the lower one-third of our facial aesthetics. Underlying bony recession of the mandible, attrition of the teeth, soft tissue volume loss in the superficial and deep fat pads, and excess activity of the DAO muscles all contribute to aging manifestations of the oral commissures. Overlooking the diagnosis and treatment of downturned oral commissures can significantly detract from an otherwise successful treatment. Placing 0.1–0.5 mL per side may be necessary depending on the deficit. A cross mattress linear retrograde injection pattern may provide additional support than just parallel tunnels ( Fig. 10.58 ). This area, because of the vascularity, is a high-bruise zone, so using a smaller-gauge needle and pre-icing are beneficial.
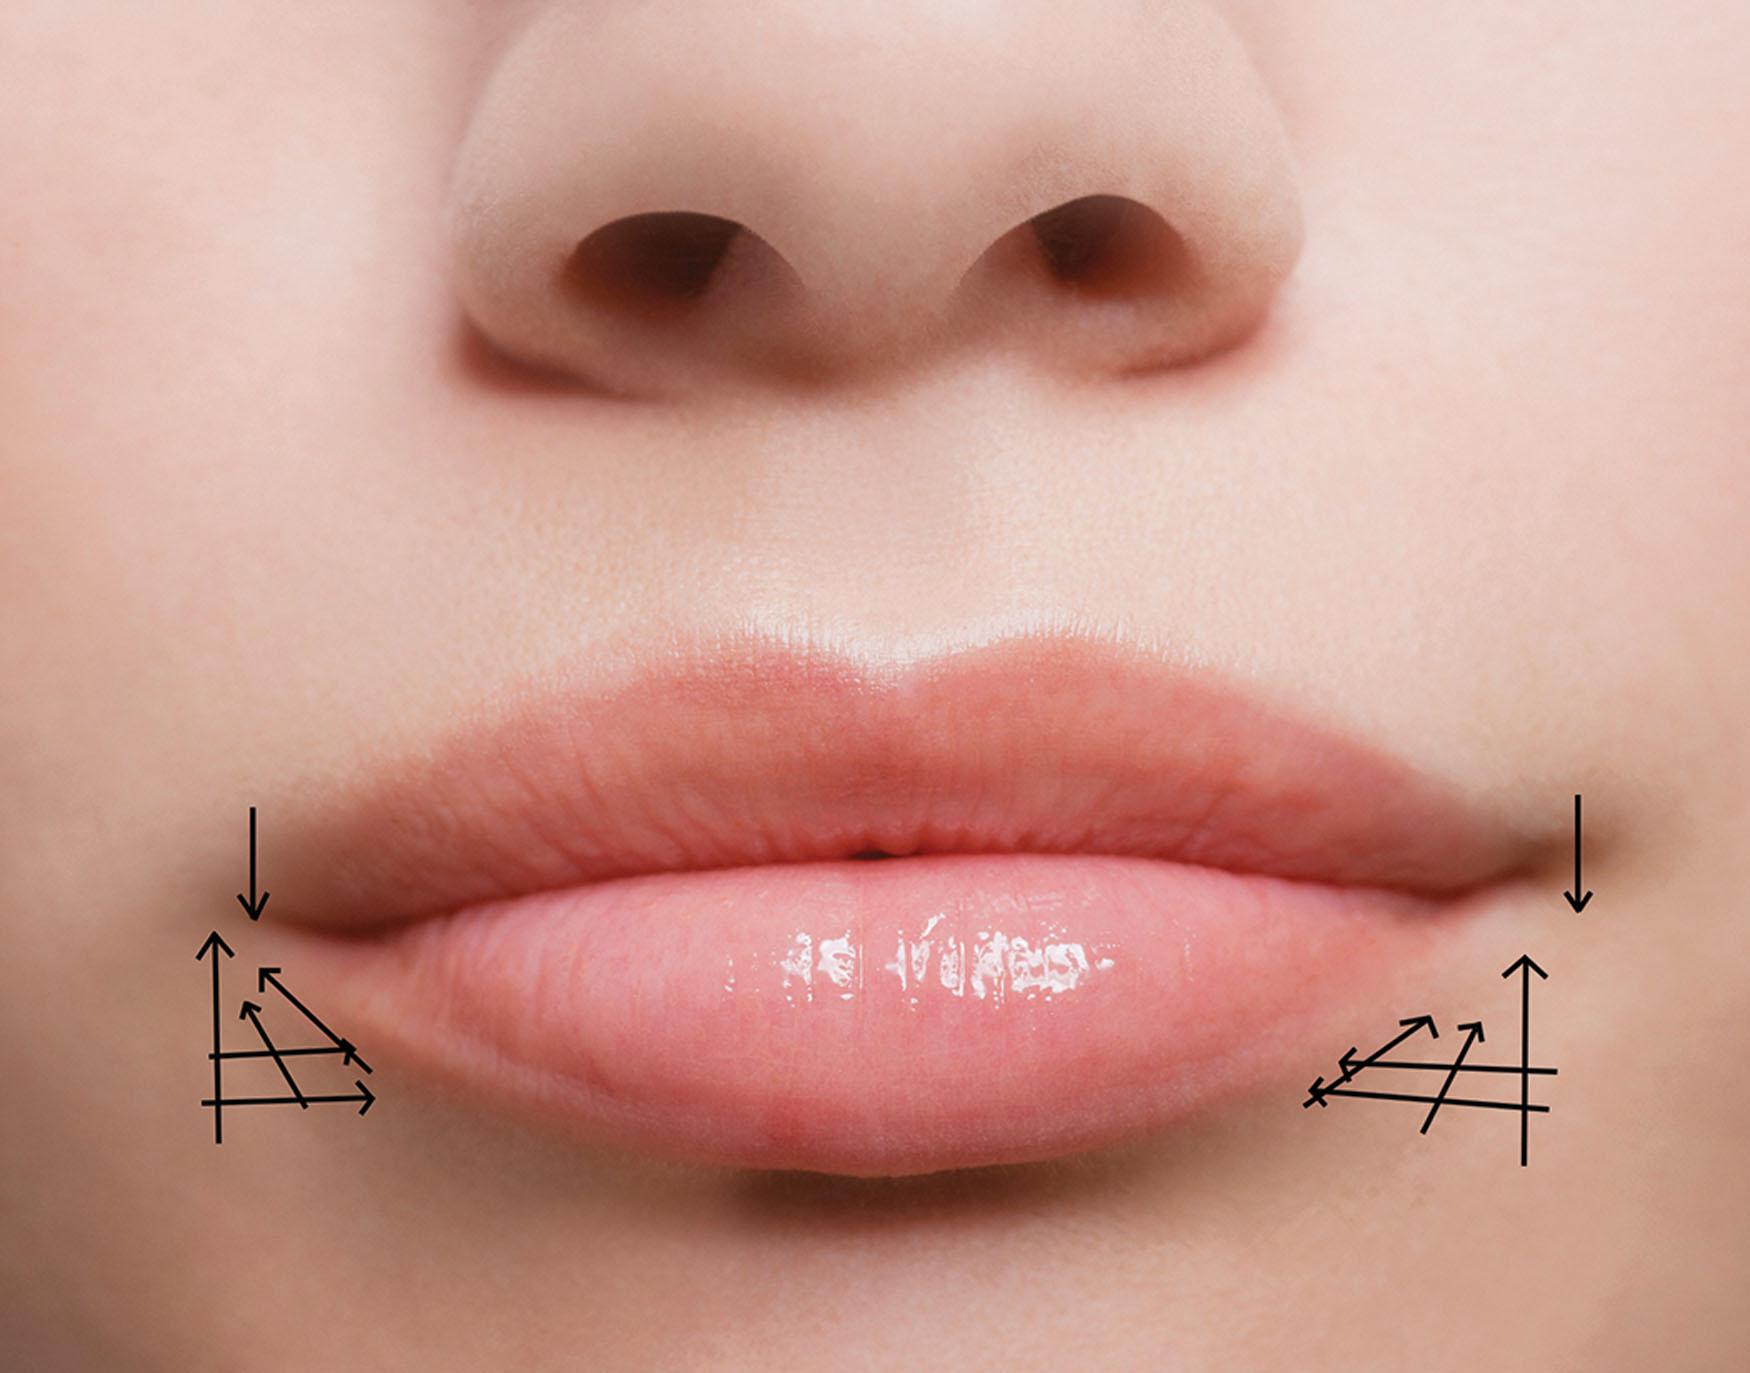
If the patient’s oral commissures have a more severe volume deficit, they can extend downward to become the melomental folds, otherwise known marionette lines . Treating both the oral commissure and the melomental fold simultaneously at the same visit can be advantageous to a more favorable outcome. A 25-gauge cannula technique may also be effective in minimizing bruising and contributing to patient satisfaction and is shown in the video section of this text.
The infamous “smoker lines” are a common area of concern. These lines radiate perpendicularly from the lip and extend upward to the nose and downward toward the labiomental sulcus. Educating patients on the pathophysiology of how they develop can be important to prevent unrealistic expectations. Vertical lip lines above the vermilion border are formed from a myriad of factors. Continual contraction of the orbicularis oris leads to solidifying the etched vertical rhytids. Over time with aging, the regression and thinning of lips can additionally lead to upper lip laxity as skin is not being pulled as taut. Sun damage and decreased skin elasticity also play a significant role in the development of these lines. Correction of the smoker lines is placed as step six because it is hopeful that some of the vertical perioral lines improve after injecting vermilion borders of the lips. Caution must be used to avoid overcorrecting the region as this can produce a “duck” or “monkey-like” appearance and draw attention away from the beautifully augmented lip. In addition, it can lead to elongation and flattening of the cutaneous upper lip, which would be unattractive. Precise and low-volume injection in this highly mobile and animated portion of the muscle decreases lumps or deformities. When injecting in this zone, we use a low G prime product and are conservative ( Fig. 10.59 ). Microboluses with massage or linear threading are two techniques that can be added to deeply etched lines if the vermilion correction is insufficient.
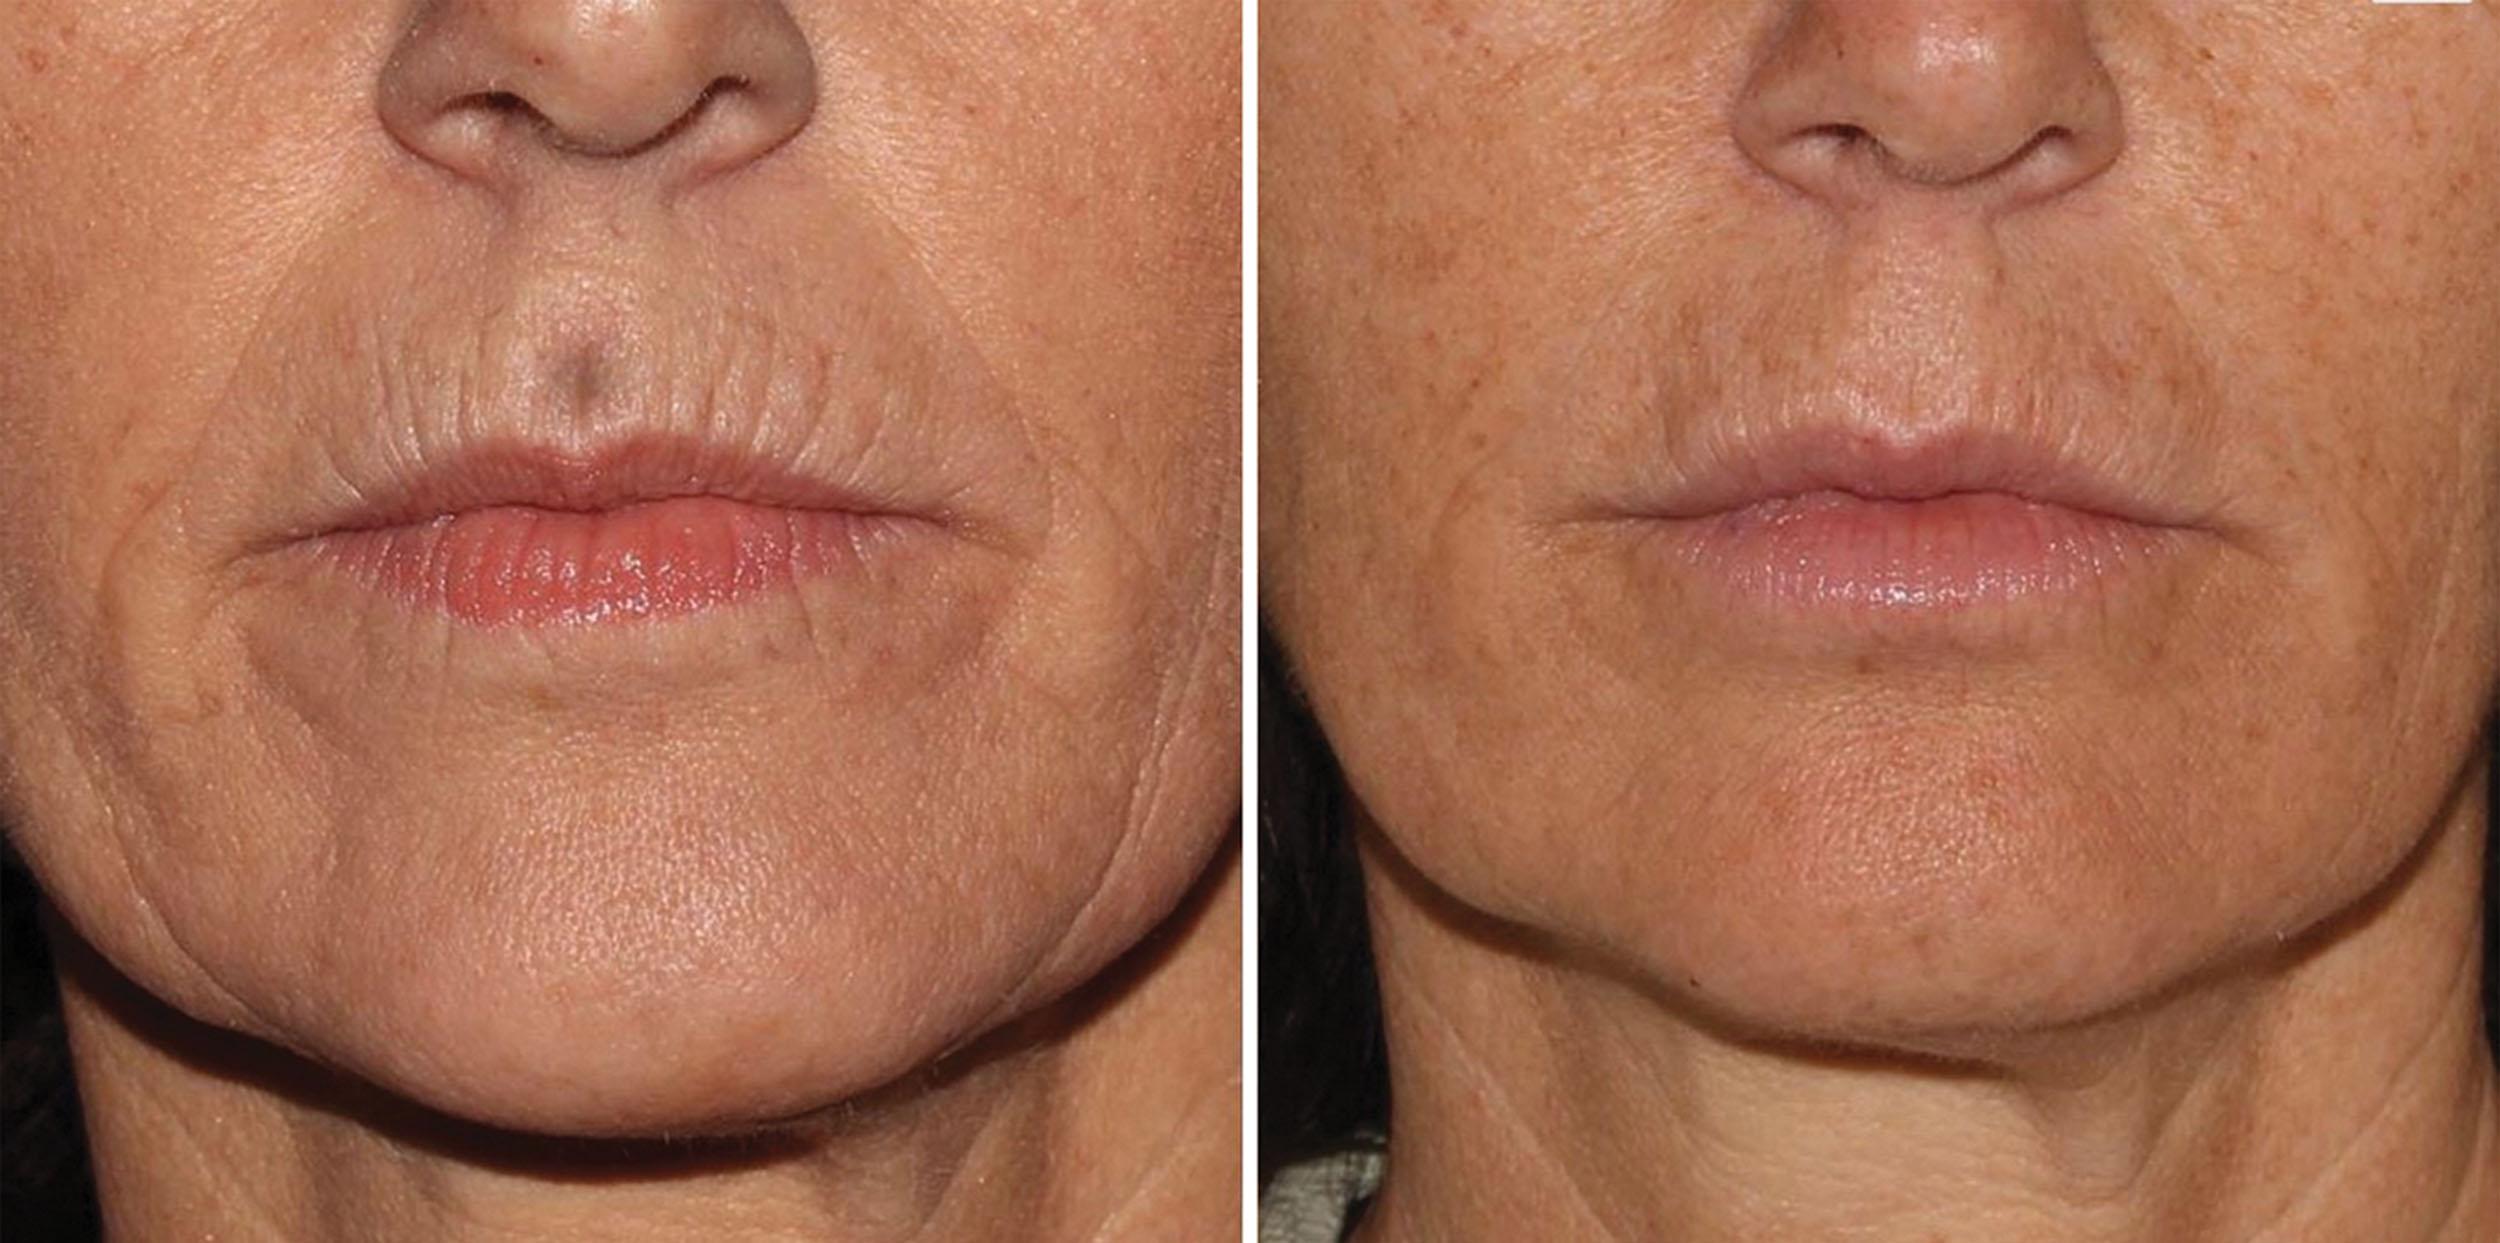
When the injector feels that the treatment is complete, this last step can prove to be the most important. The injector begins by running the fingers over the lips and examining the inner and outer lip. Then the lips are gently massaged to ensure that there was no migration of product into an unintended area and that the lips feel lump-free. It is important to ensure that the patient sees you closely examining the lip, visually or with calipers, for height diameter symmetries. If there are remaining asymmetries possibly resulting from inflammation, ecchymosis, and swelling, acknowledge it with the patient along with a strategy. This can avoid a phone call in the next few days if the patient believes you are unaware or rushed during their procedure. By 2 weeks, the majority of these issues will resolve themselves. Staff should be trained that if a patient calls stating they are in severe “pain” with discoloration or abnormal bruising, they should be evaluated immediately for occlusion. No makeup should be worn over the injected area for 12 hours. COVID-19 has introduced a new problem set, with a continuously worn dirty masks being reapplied postprocedure. It may be advised to routinely apply bacitracin on the lips before mask application or to supply the patient with a clean surgical mask.
Although there are hundreds of lip subtypes, for simplicity the most common ones will be reviewed in the following sections.
Conservative: “I like my lip shape and want natural.” This patient likes the shape of their lips; they just want a minor enhancement. They do not want to change their lip ratios or appearance. They request subtle, natural results and are happy with the lips they were born with. Most are looking dehydrated with some loss of definition. They are typically fearful of the augmentation and do not want to look “done” or “fake” or have anyone notice that they had a procedure.
Technique: This patient most likely only needs the traditional injections without any height boosting. A cannula can often be utilized as an alternative to the needle. If their baseline lip is on the small size spectrum, it is best to first volumize using a 25-gauge cannula and then shape with a needle ( Fig. 10.60 ). Cannulas are best and most commonly used in patients with thin lips who do not want bruising, and product must be placed behind the muscle where the labial arteries reside. They also can reduce bruising.
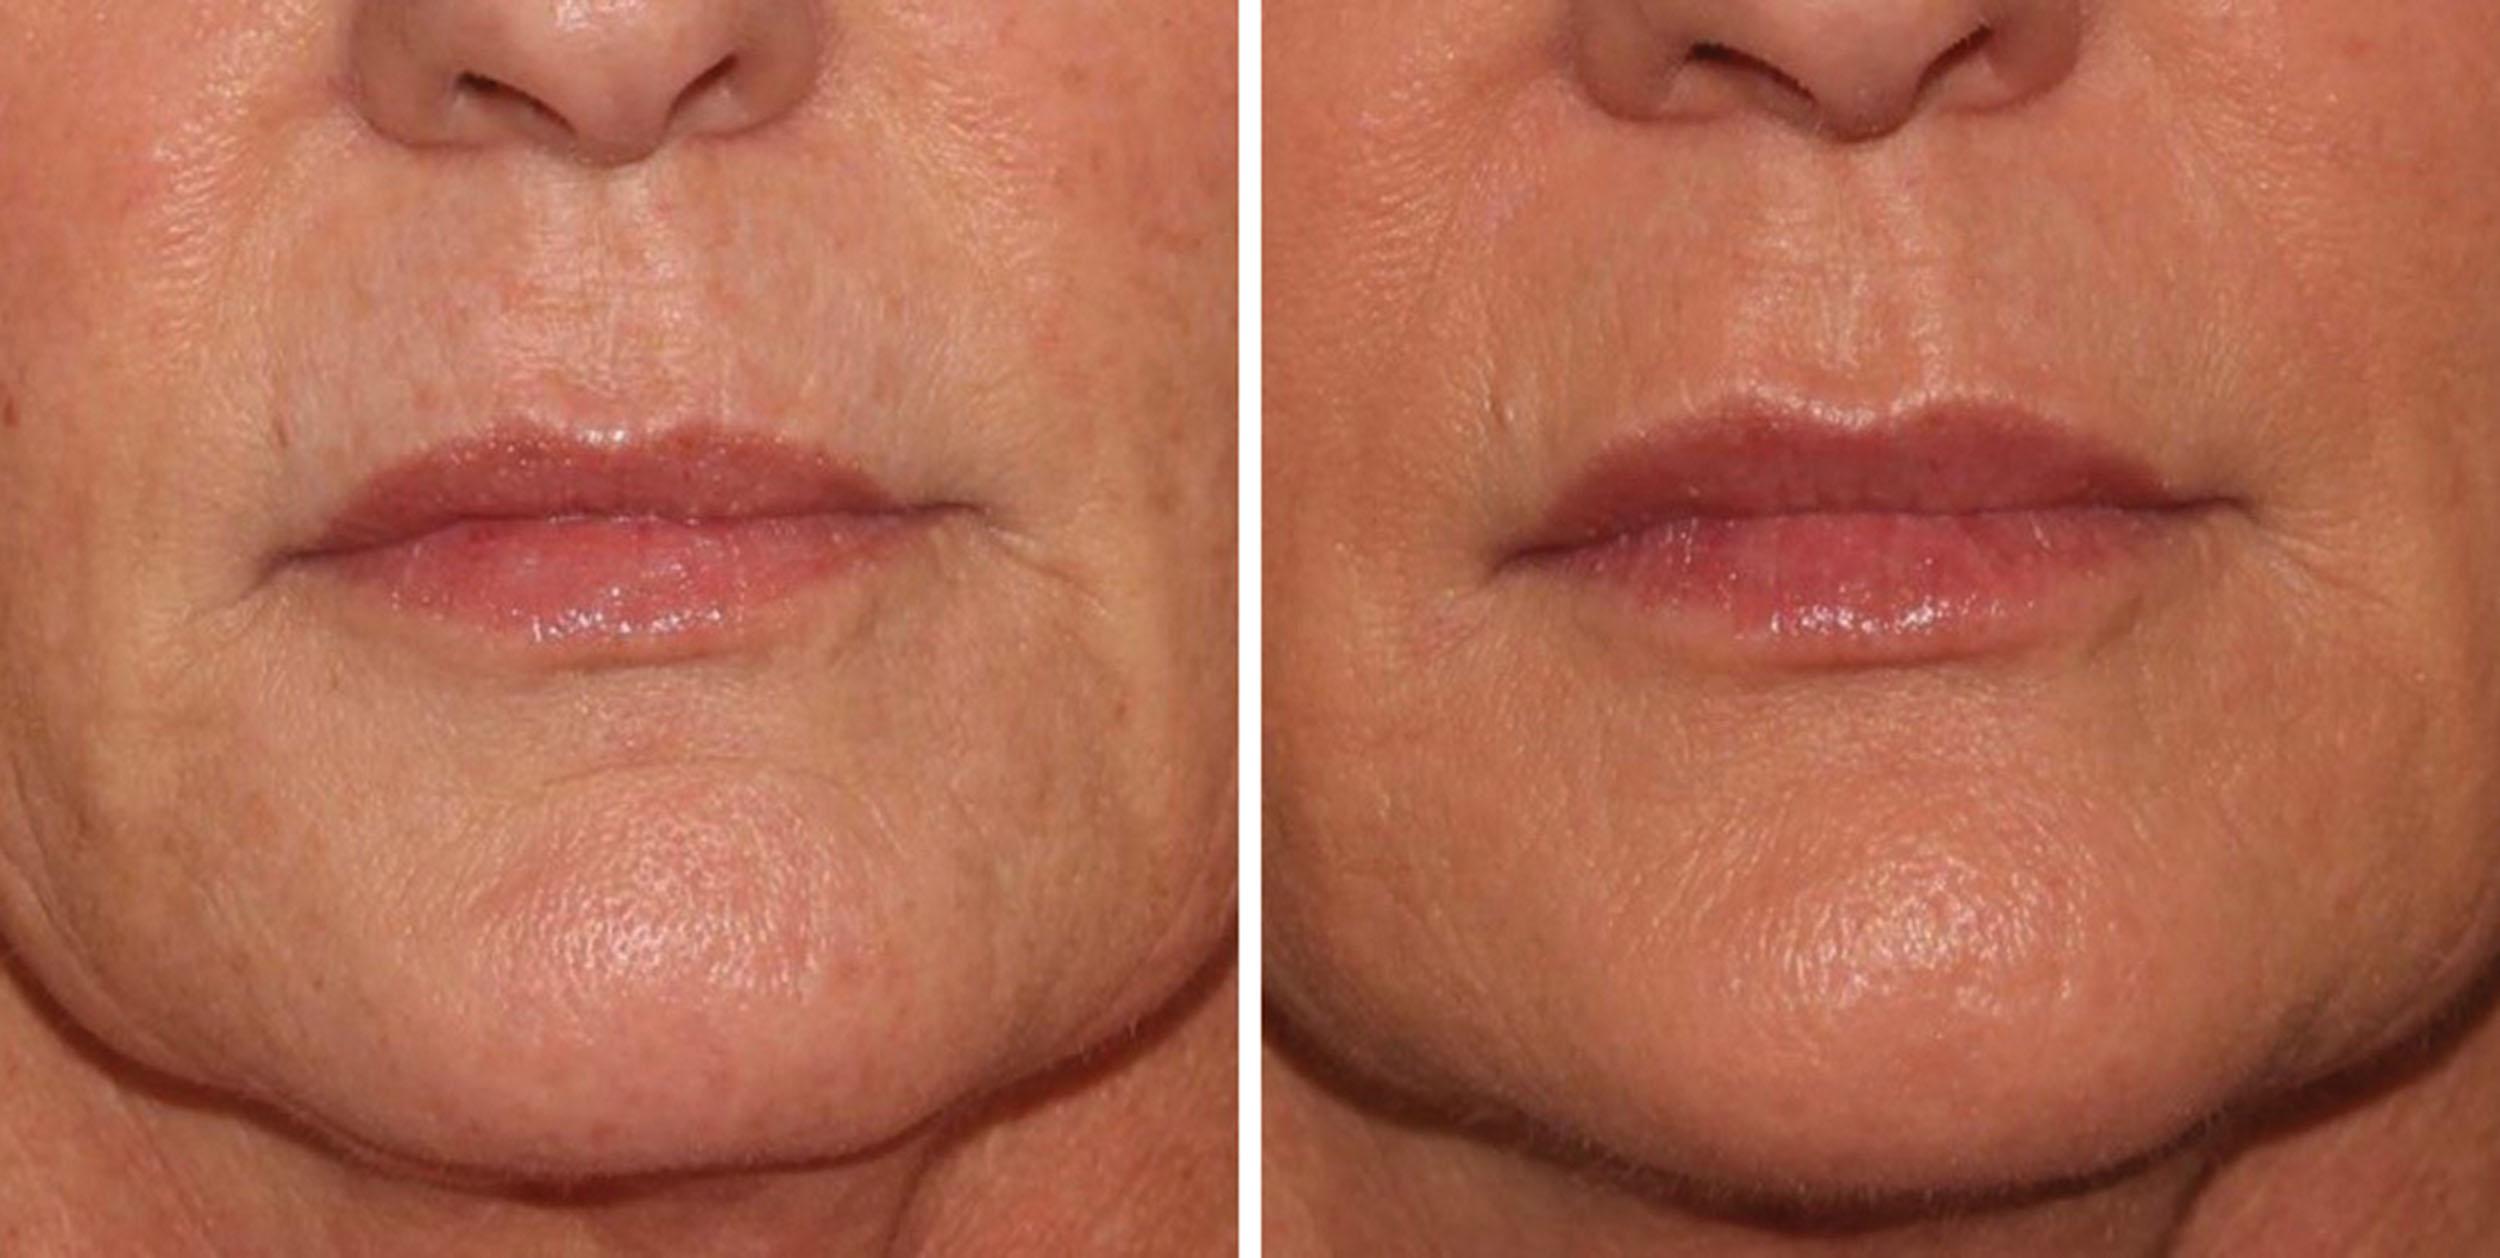
Normal enhancement: “Just make my lips better, but still natural.” The majority of traditional lips may just need a little volumization, hydration, and definition. These cases are fun, easy to inject, and rewarding to the patient and injector.
Technique: A combination of the traditional injection techniques of needle or cannula with or without height boosting linear filler threading is used ( Figs. 10.60 and 10.61 ).
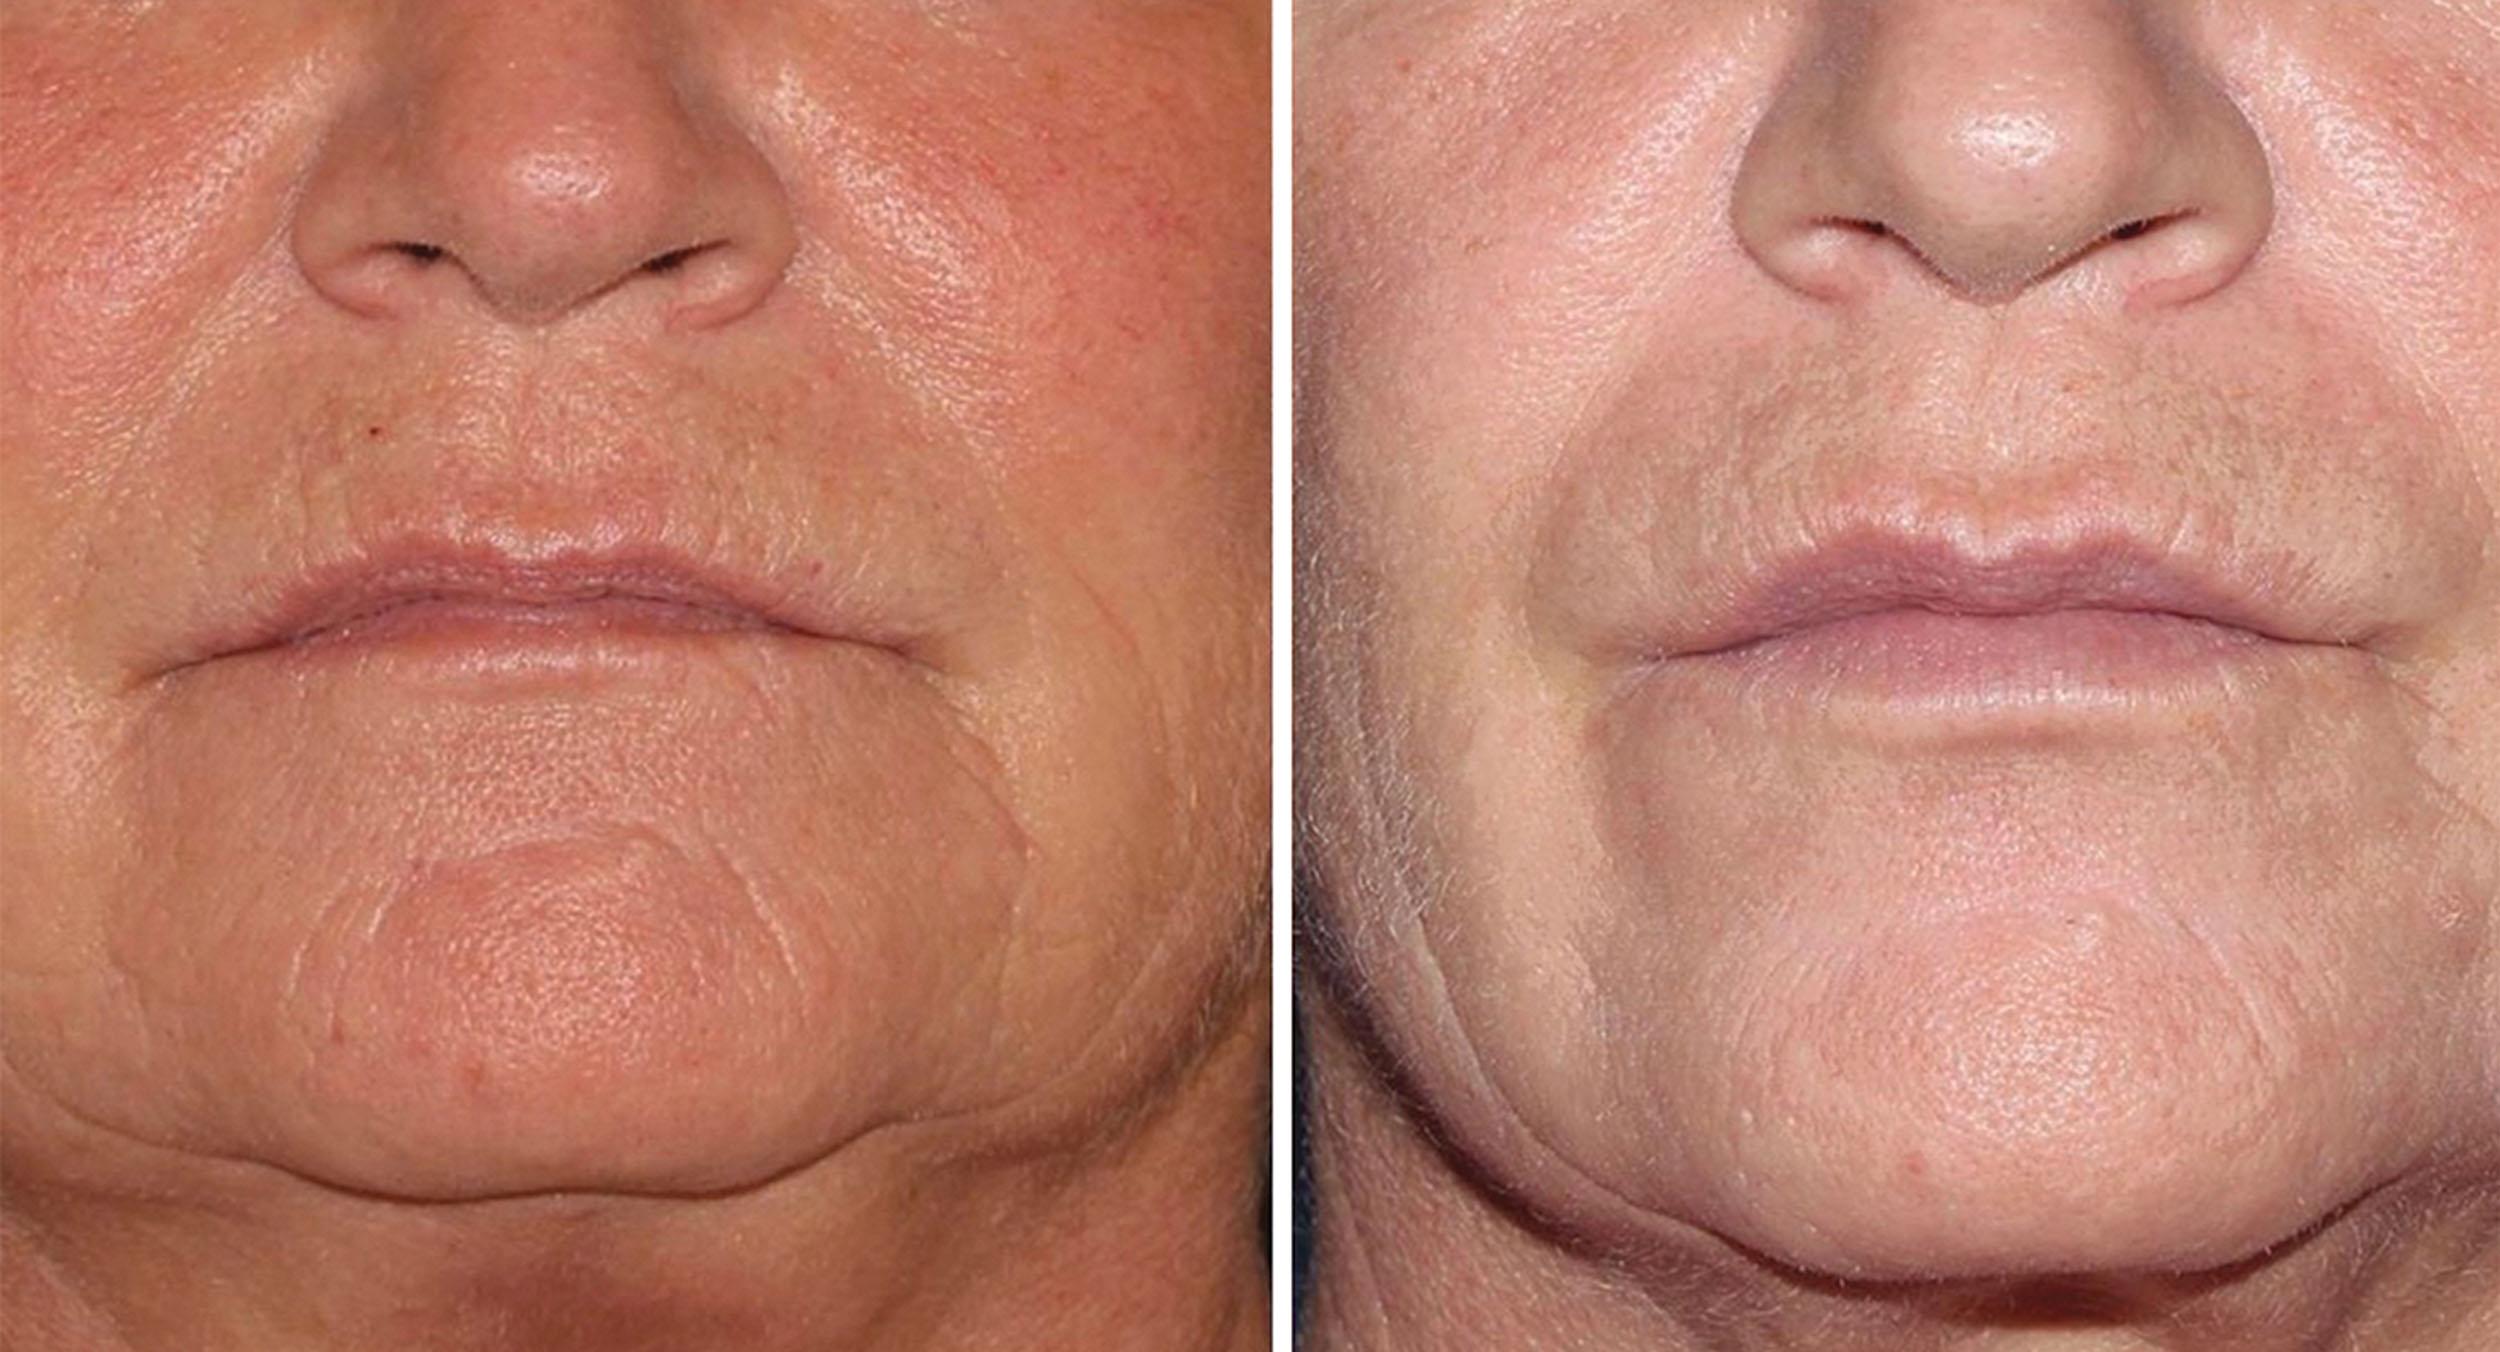
“I have naturally thin lips but want a Kardashian lip.” These are the most difficult patients as they require multiple treatments over a longer period and an increased budget because of the use of multiple needed syringes. These patients also require more hand holding to educate them and give realistic goals. At times it can take 3 mL to achieve the adequate support. The patient must understand the progressive nature of restoring thin, aged lips and that it could take 12–15 months with multiple visits. These patients can be young or old but classically are born with very thin lips and present a photo of voluptuous lips that they aspire to have ( Fig. 10.62 ).
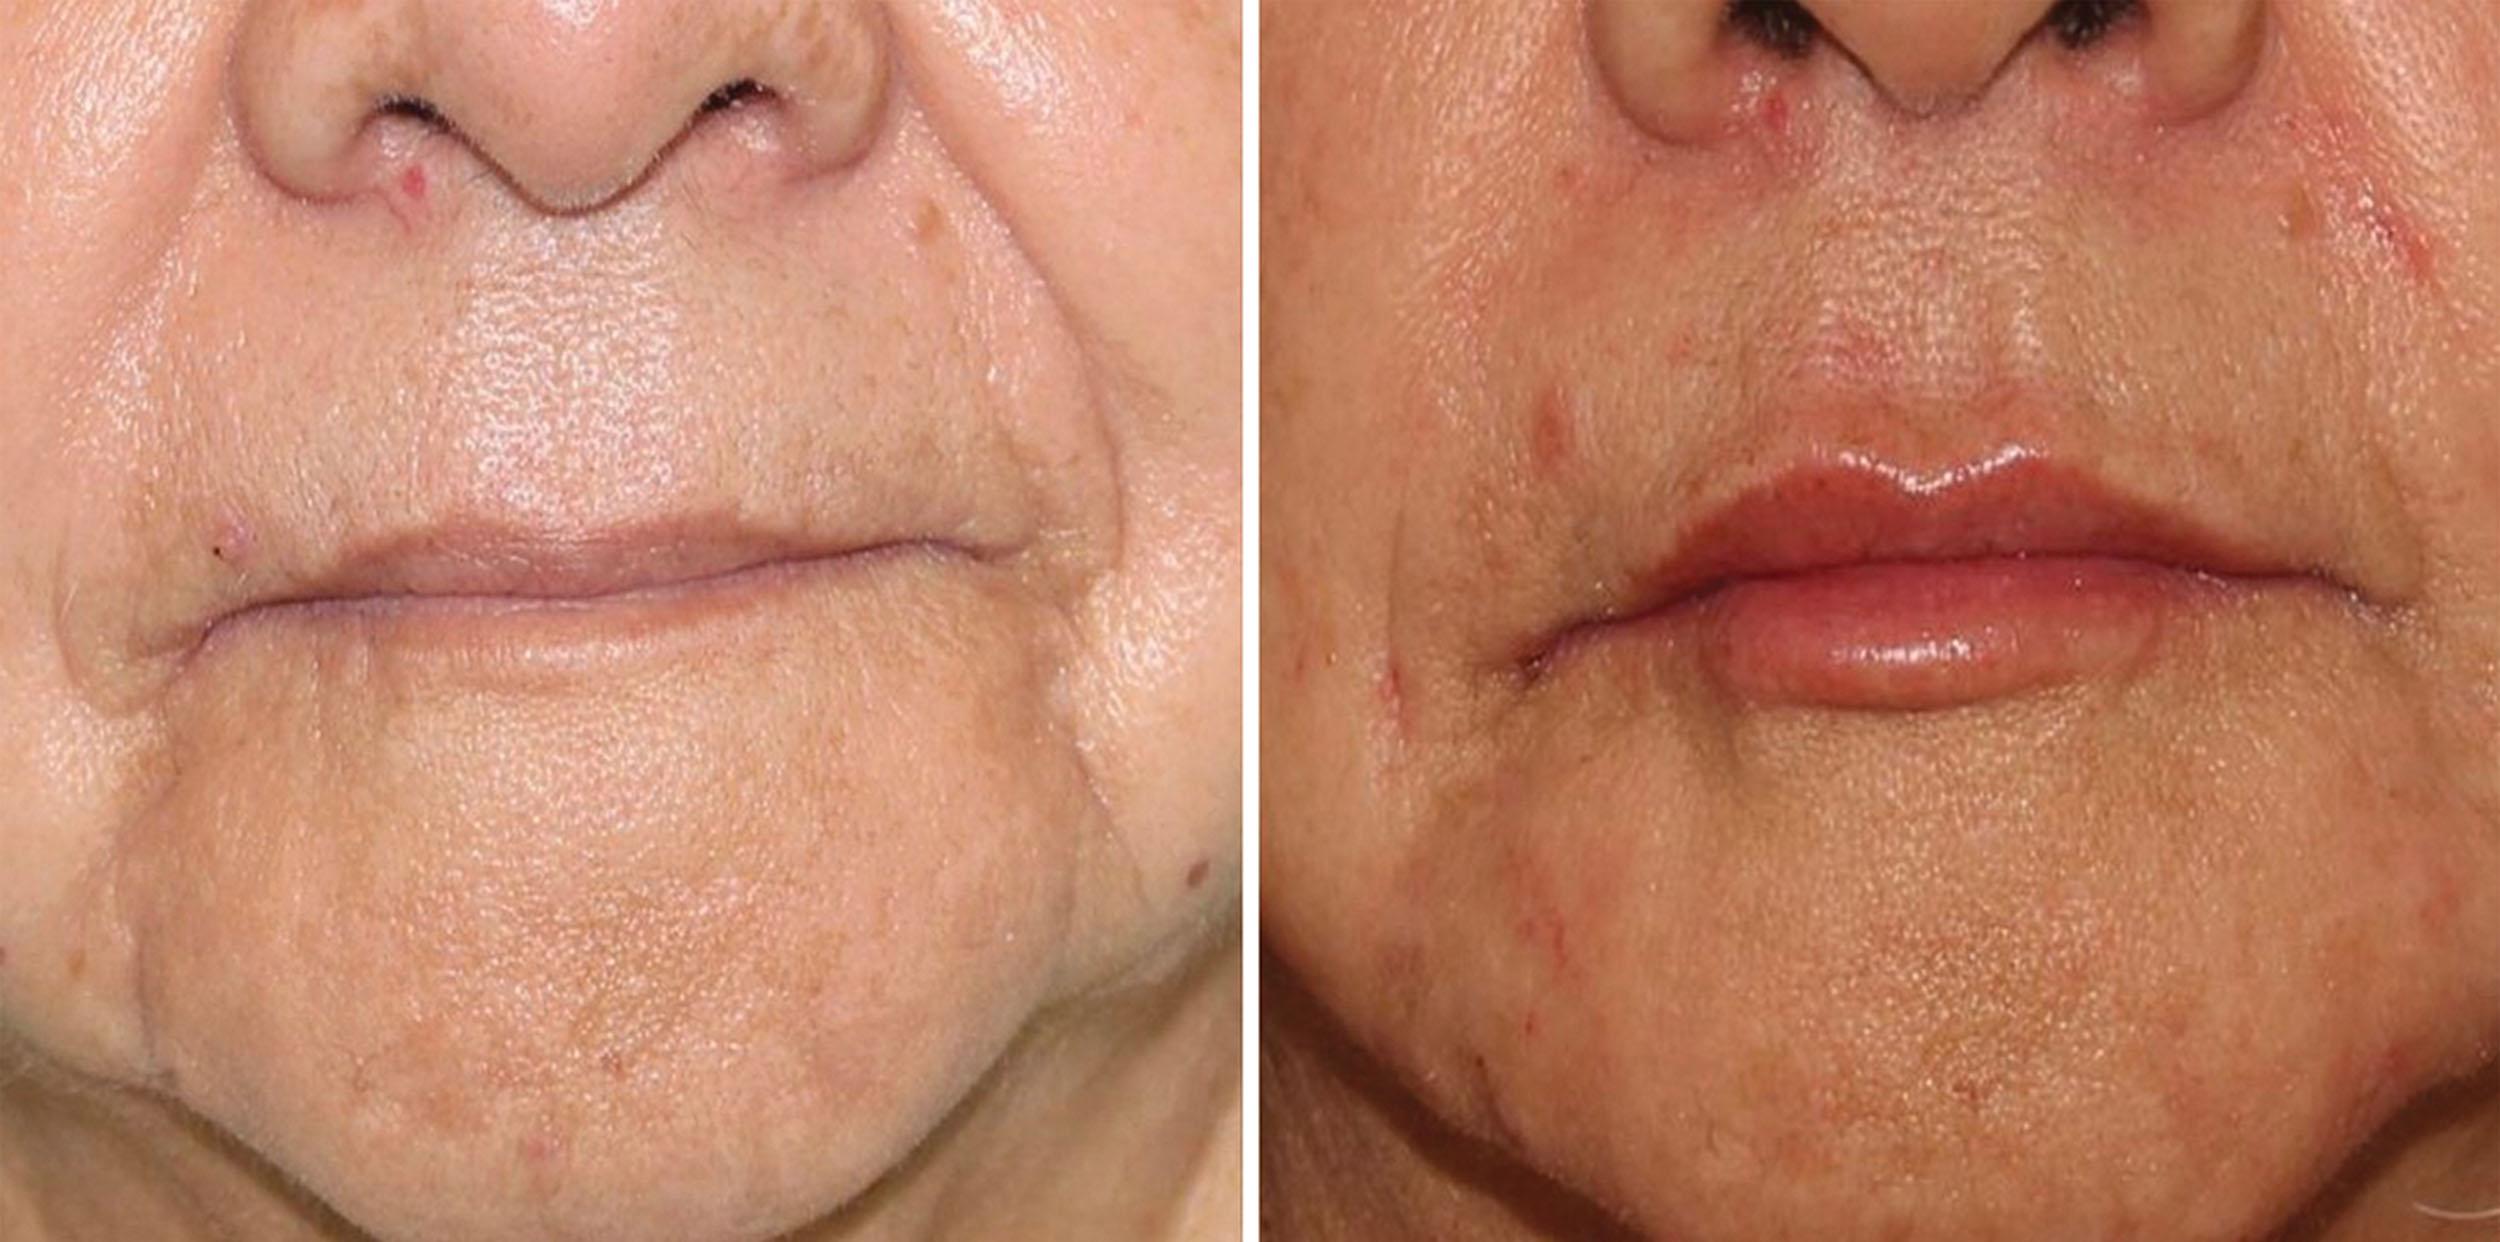
Technique: Use the height boosting technique as a primary technique to more dramatically increase the lip height ratio to the upper lip and lower lip without causing further projection.
“Bigger is better.” Typically these are Generation Y and Z patients. They are young with genetically endowed large lips. They are looking to show them off even further and many times create their own beauty ratio ( Fig. 10.63 ).
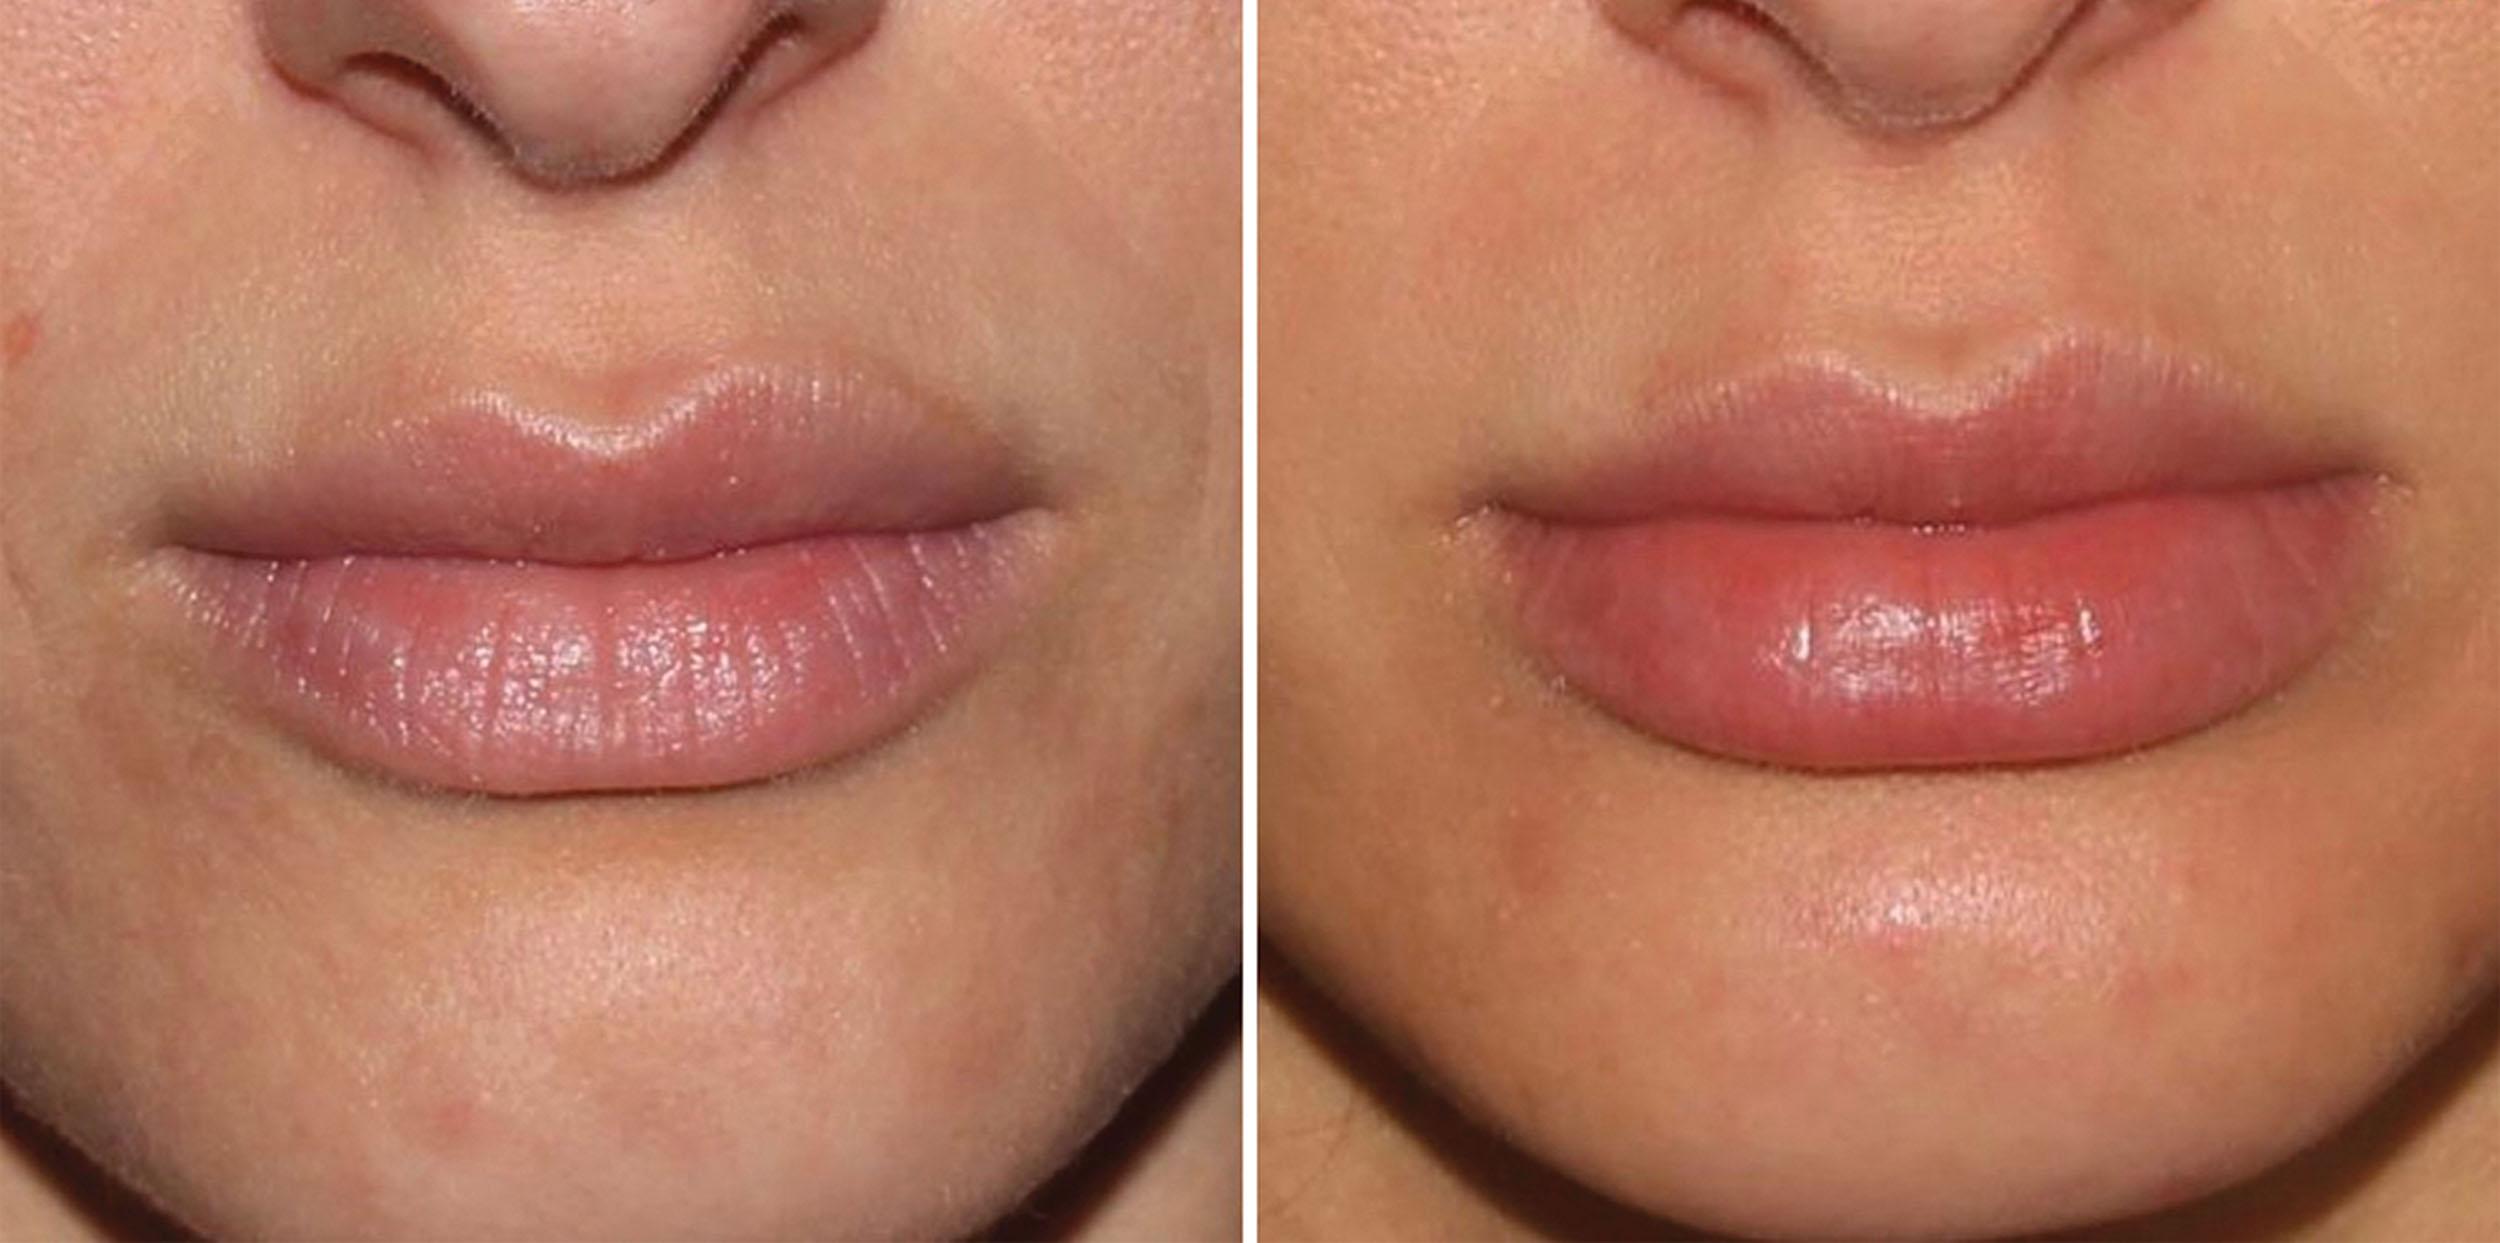
Technique: Focusing on volumizing natural tubercles is step one for a natural look. Some of the popularized lips are adding linear height boosting to create a larger height ratio. With social media images showing only lips in isolation and not in relation to the entire face, it is important to ensure that the large lips match the proportions of the entire face.
Confining the artistic and individualized approach of lip injections to seven systematic steps may be challenging (especially to the novice injector), but like everything that exists in nature, it has the basis of mathematics, science, and the need for simplification. The lips and perioral region play an essential role in emotional expressions and the attractiveness of the face. They are an important part of the central facial triangle that define age and beauty. Understanding the different ratios and shapes between the upper and lower lip heights will lead to more cultural and ethnic awareness for enhanced patient satisfaction. As the field of cosmetic medicine continues to advance on social media, we will see a continued linear increase in lip augmentation. Improved lip injection techniques, listening to patients, and artistically customizing every lip enhancement will lead to the positive emotional response and gratitude that makes us all love injecting lips.
The mentolabial fold represents the region below the lower lip and above the chin. In youth, this fold has a pleasing S-curve that deepens with aging. In addition, this fold is greatly affected by the position of the jaw, chin, and teeth. In patients with microgenia, retrognathia, or lower facial vertical-third height deficiency, this fold can be very deep, with an overhanging lower lip. Some patients present with a simple deepened fold from aging and, as in any other facial fold or wrinkle, the region is augmented with filler ( Fig. 10.64 ). A deep fold can take several syringes to correct or improve. The first injections are placed in the deeper subcutaneous regions to buttress the augmentation, and the remaining injections are layered in the mid-subcutaneous layer and finally in the dermis. This layering support can significantly improve the depression, lift the ptotic lip, and give the appearance of an increased facial lower-third vertical height ( Fig. 10.65 ).
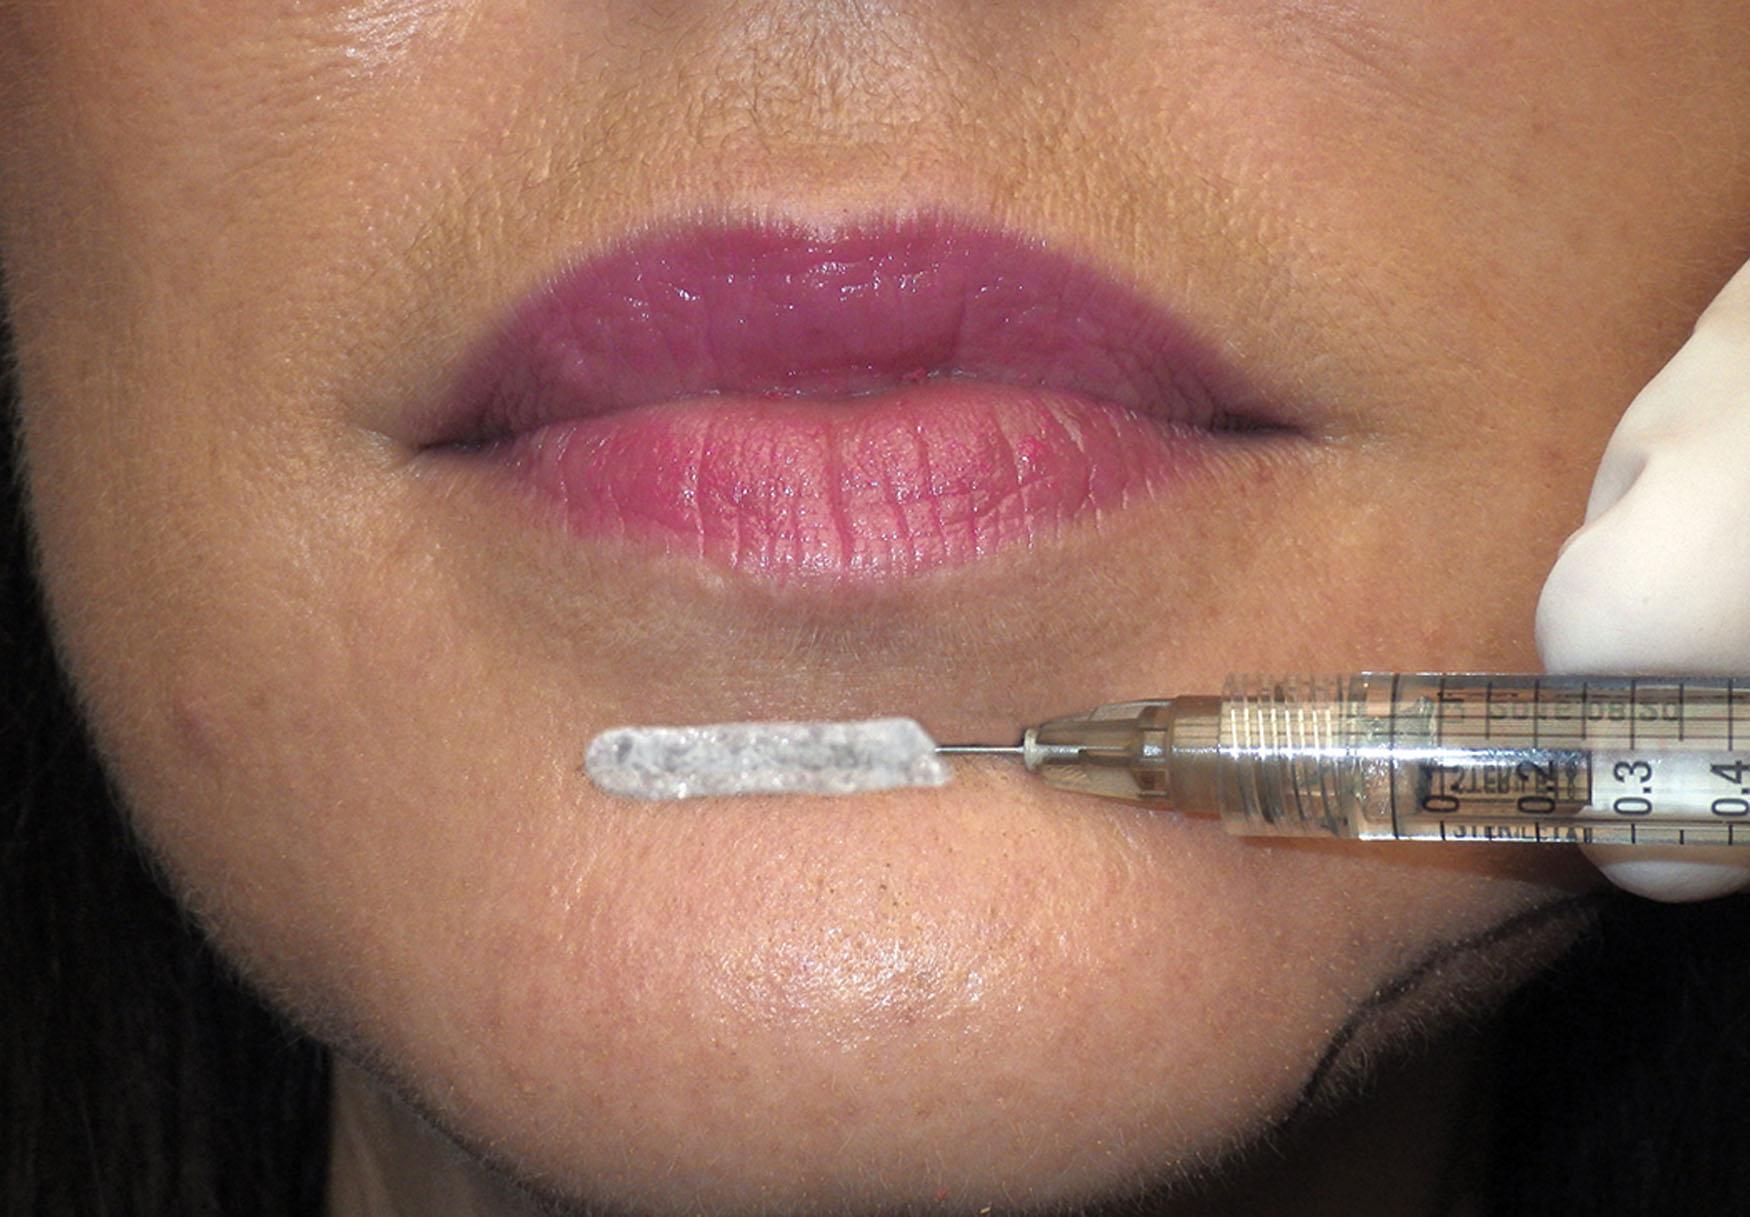
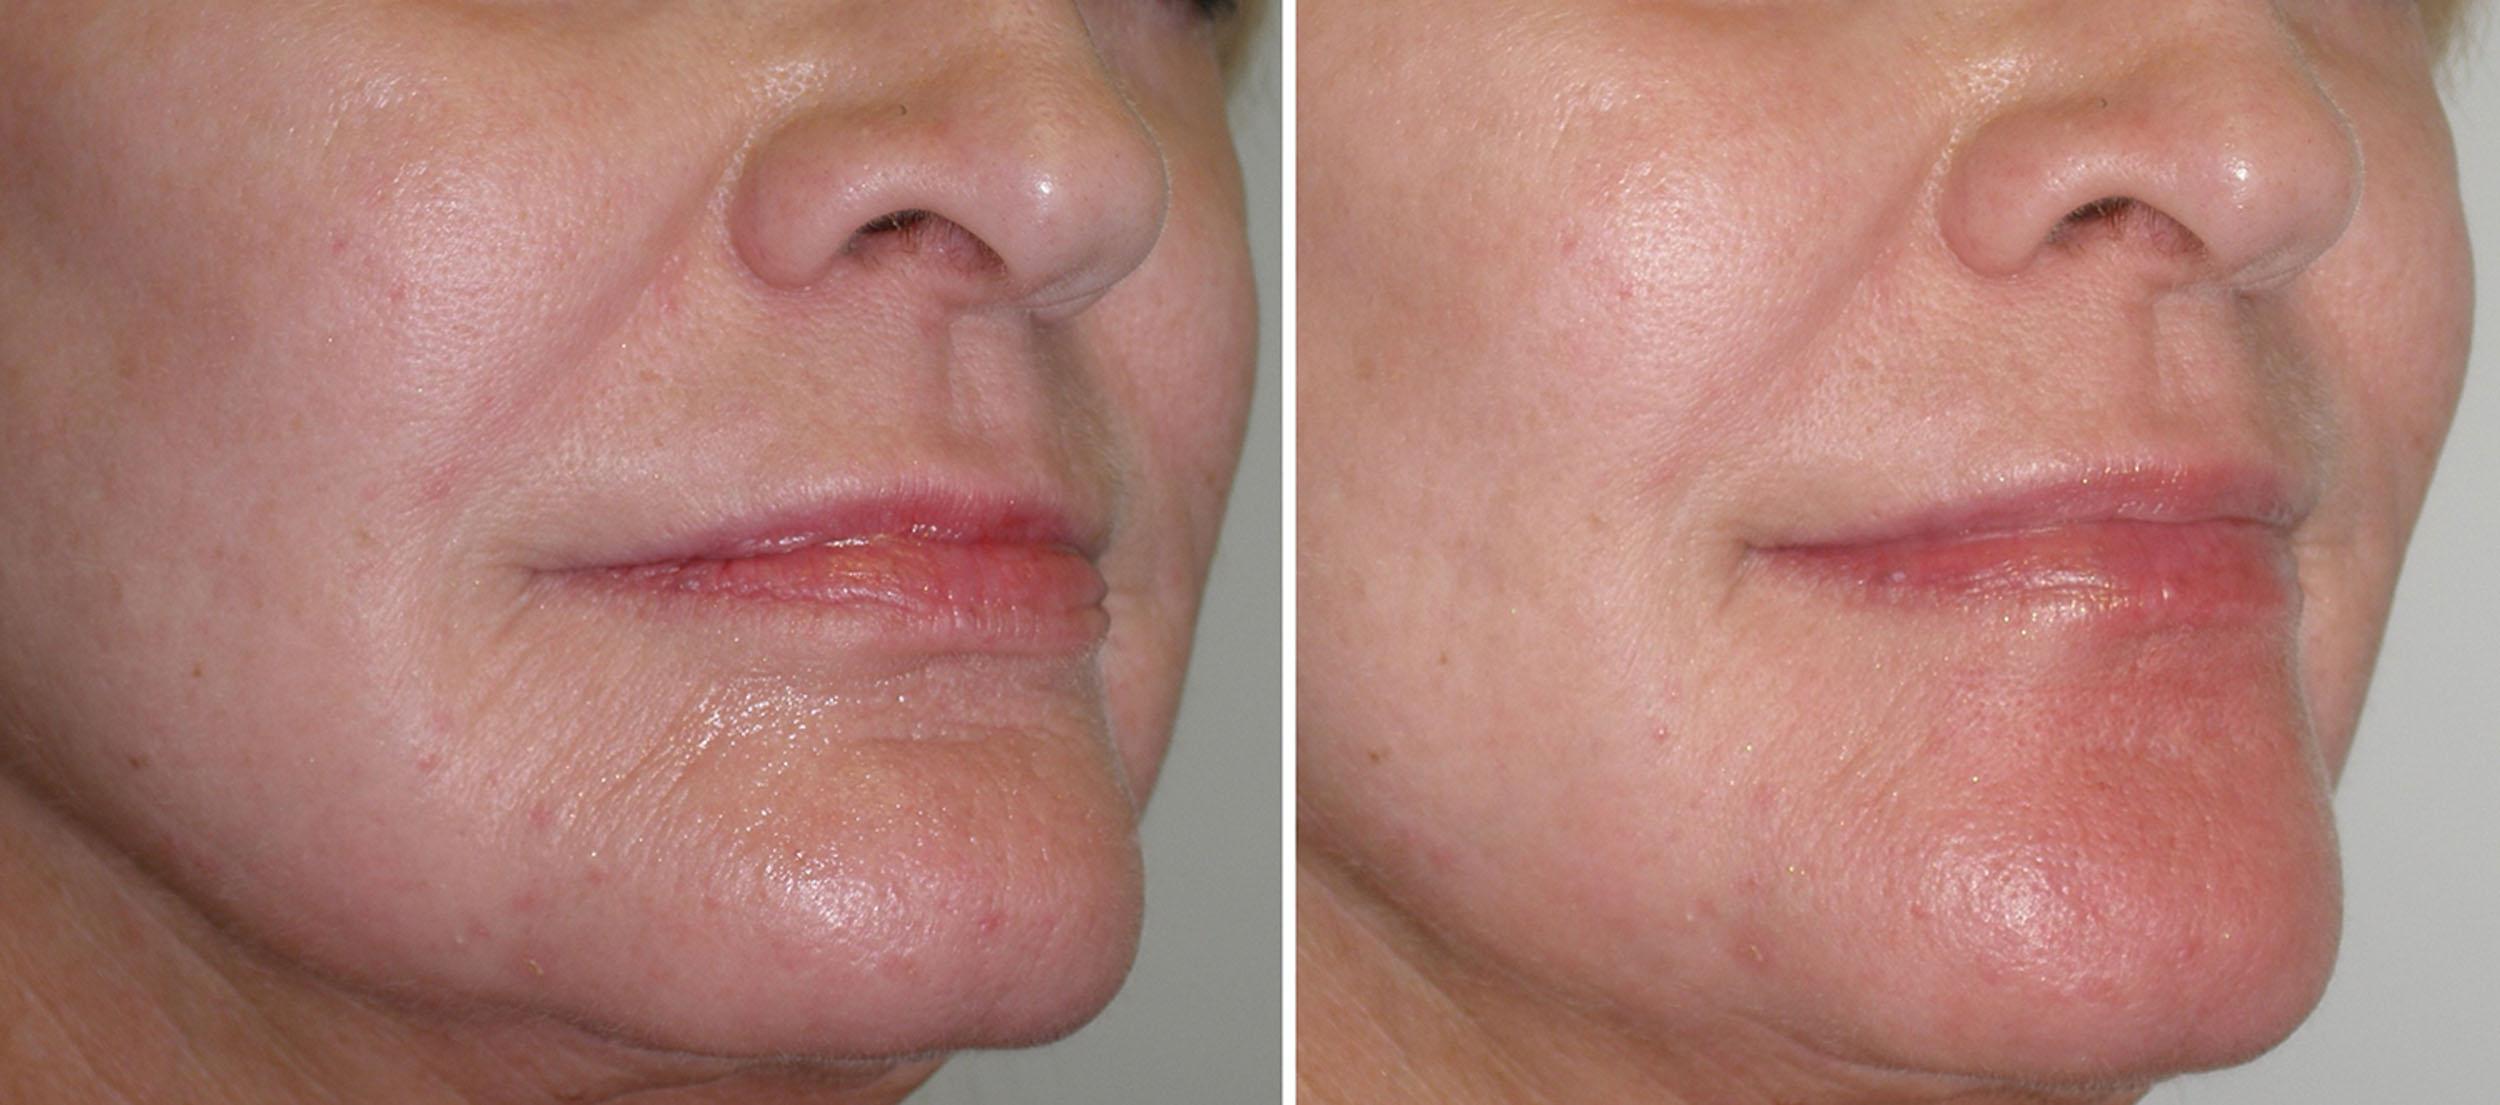
Joe Niamtu, III
The NLFs, which are sometimes called the melolabial folds , are very popular injection options, and treatment is faster and has fewer nuances than the lips. The nasolabial folds are a complex anatomic structure caused in part by the merging of various tissue planes from skin to bone. The descent of the malar fat pad, decades of facial animation, and numerous other factors influence the deepening of the NFL. For decades the NLF was the second most popular filler request, second to the lips. Contemporary injectors realize that with the new high G prime fillers, cheek augmentation can balance the midface and hence improve the appearance of the NLFs. In many contemporary practices, cheek filler treatments greatly outnumber pure NLF injections.
Before treating this area, it is important to give the patient an accurate idea of what to expect and an opportunity to provide their own input as to how they want the fold changed. In most adults, the fold extends from the lateral nasal region and can merge with the melomental folds (marionette lines). Other patients exhibit anatomy in which the NLF merges with the “smile dimples” lateral to the oral commissures. Some patients desire augmentation high on the fold to correct the paranasal depressions, whereas this region does not bother other patients, whose desire may lie in augmentation lower on the fold or even in the perioral region. I explain that the NLF will not “go away”; our goal is to soften it. I further explain that the NLF is a valley, and we want to blunt the fold, not eliminate it. Finally, I never inject an adult with a single syringe of product. In reality, most adults in their fifth decade on up could easily accommodate three or four syringes. Filler is expensive, and it is only natural for patients to want to economize. One of the main problems is they can spend up to $700 on a single syringe, which makes virtually no visible difference when split between two deep folds. When the patient’s spouse sees the bill and the surgical result, you can have an unhappy patient and an unhappy spouse. It is really important to use the right amount of filler for the specific treatment area. Patients who cannot afford a second syringe are asked to save their money and return when it can be filled correctly. The pre-filler consult and communication can be as important as the final result.
When treating the NLF, all makeup is wiped off with alcohol or surgical skin prep. It is important to scrub the area as it can accumulate makeup, and these particles can cause infections or foreign body reactions. The folds are then marked, and topical anesthesia is applied to the skin. Most patients are adequately numb with topical anesthesia, but if we begin and they are uncomfortable, I use local anesthetic infiltrations. The anesthetic technique for the NLF is relatively straightforward.
Patients should not be positioned supine for filler injections because gravity will significantly affect the anatomy of the fold, making accurate treatment difficult. I use a combination of the two methods of linear threading and serial puncture for treating the NLF. Needle position is important, as injecting too deep will not improve the fold and injecting too superficially can produce a bumpy or unnatural appearance. In younger patients, the intradermal injection plane is acceptable to improve a shallow fold ( Fig. 10.66 ).
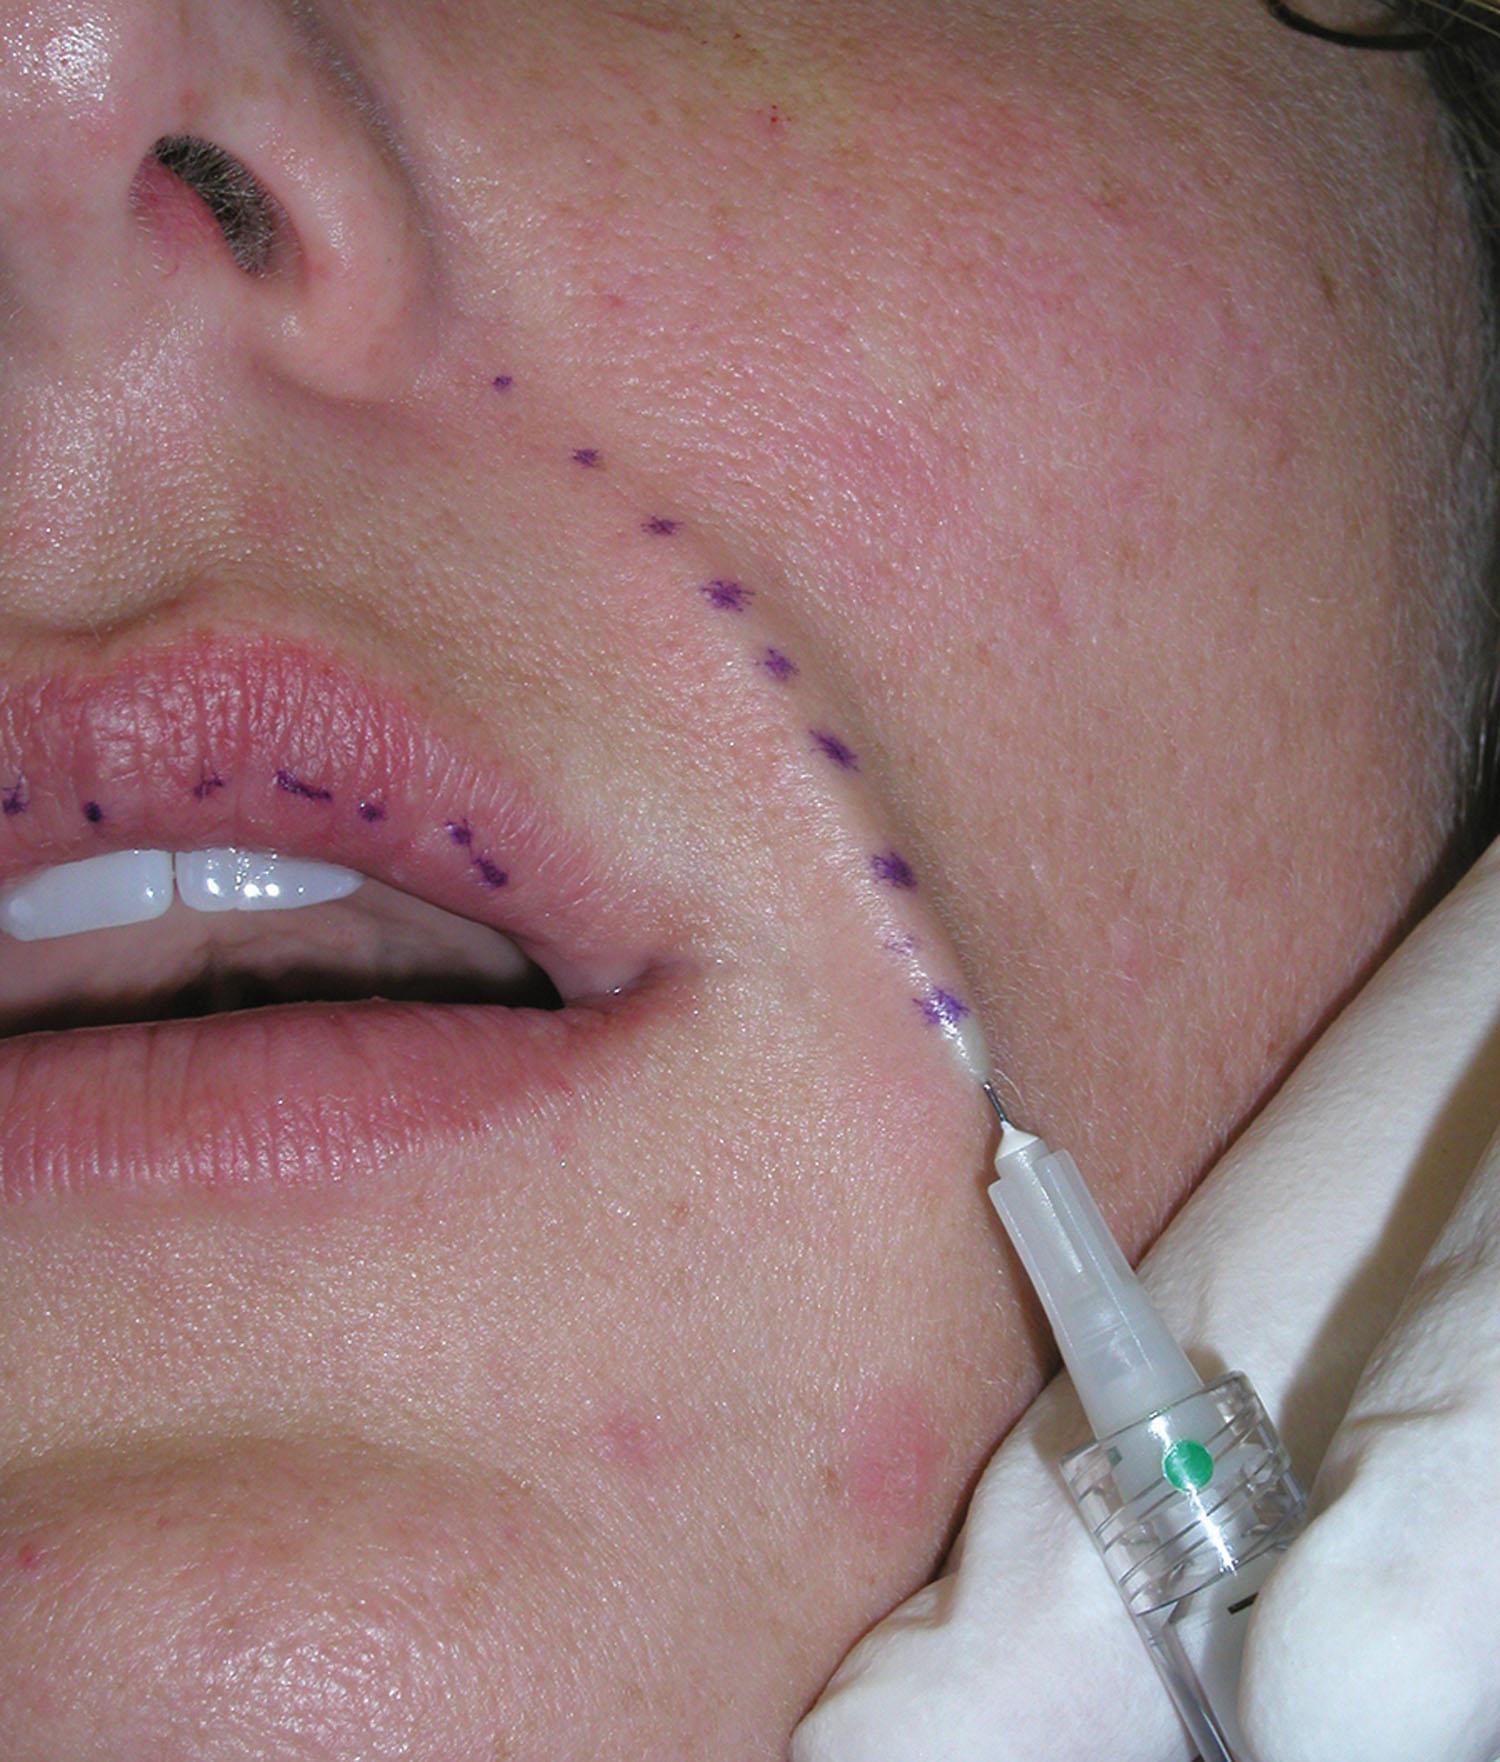
In patients with moderate aging changes, a deep dermal/subcutaneous and superficial dermal layer may be warranted. In older patients with deeper folds, I prefer to layer the filler in three planes. I first perform a deep subcutaneous layer to provide a base, then more superficial subcutaneous injections to create midlevel support, and finally dermal injections to fill the surface layer. The combination of this layering improves longevity and result as it addresses the fold in multiple layers.
Some patients have paranasal depressions on the lateral nose at the superior portion of the fold and request treatment in this area as well. This is a normal anatomic contour, even in young patients, so complete filling is not usually advisable. Older patients, denture patients, or patients with maxillary deficiency may benefit from filling this area. It can be filled as an isolated area but more commonly in conjunction with the entire fold ( Fig. 10.67 ).
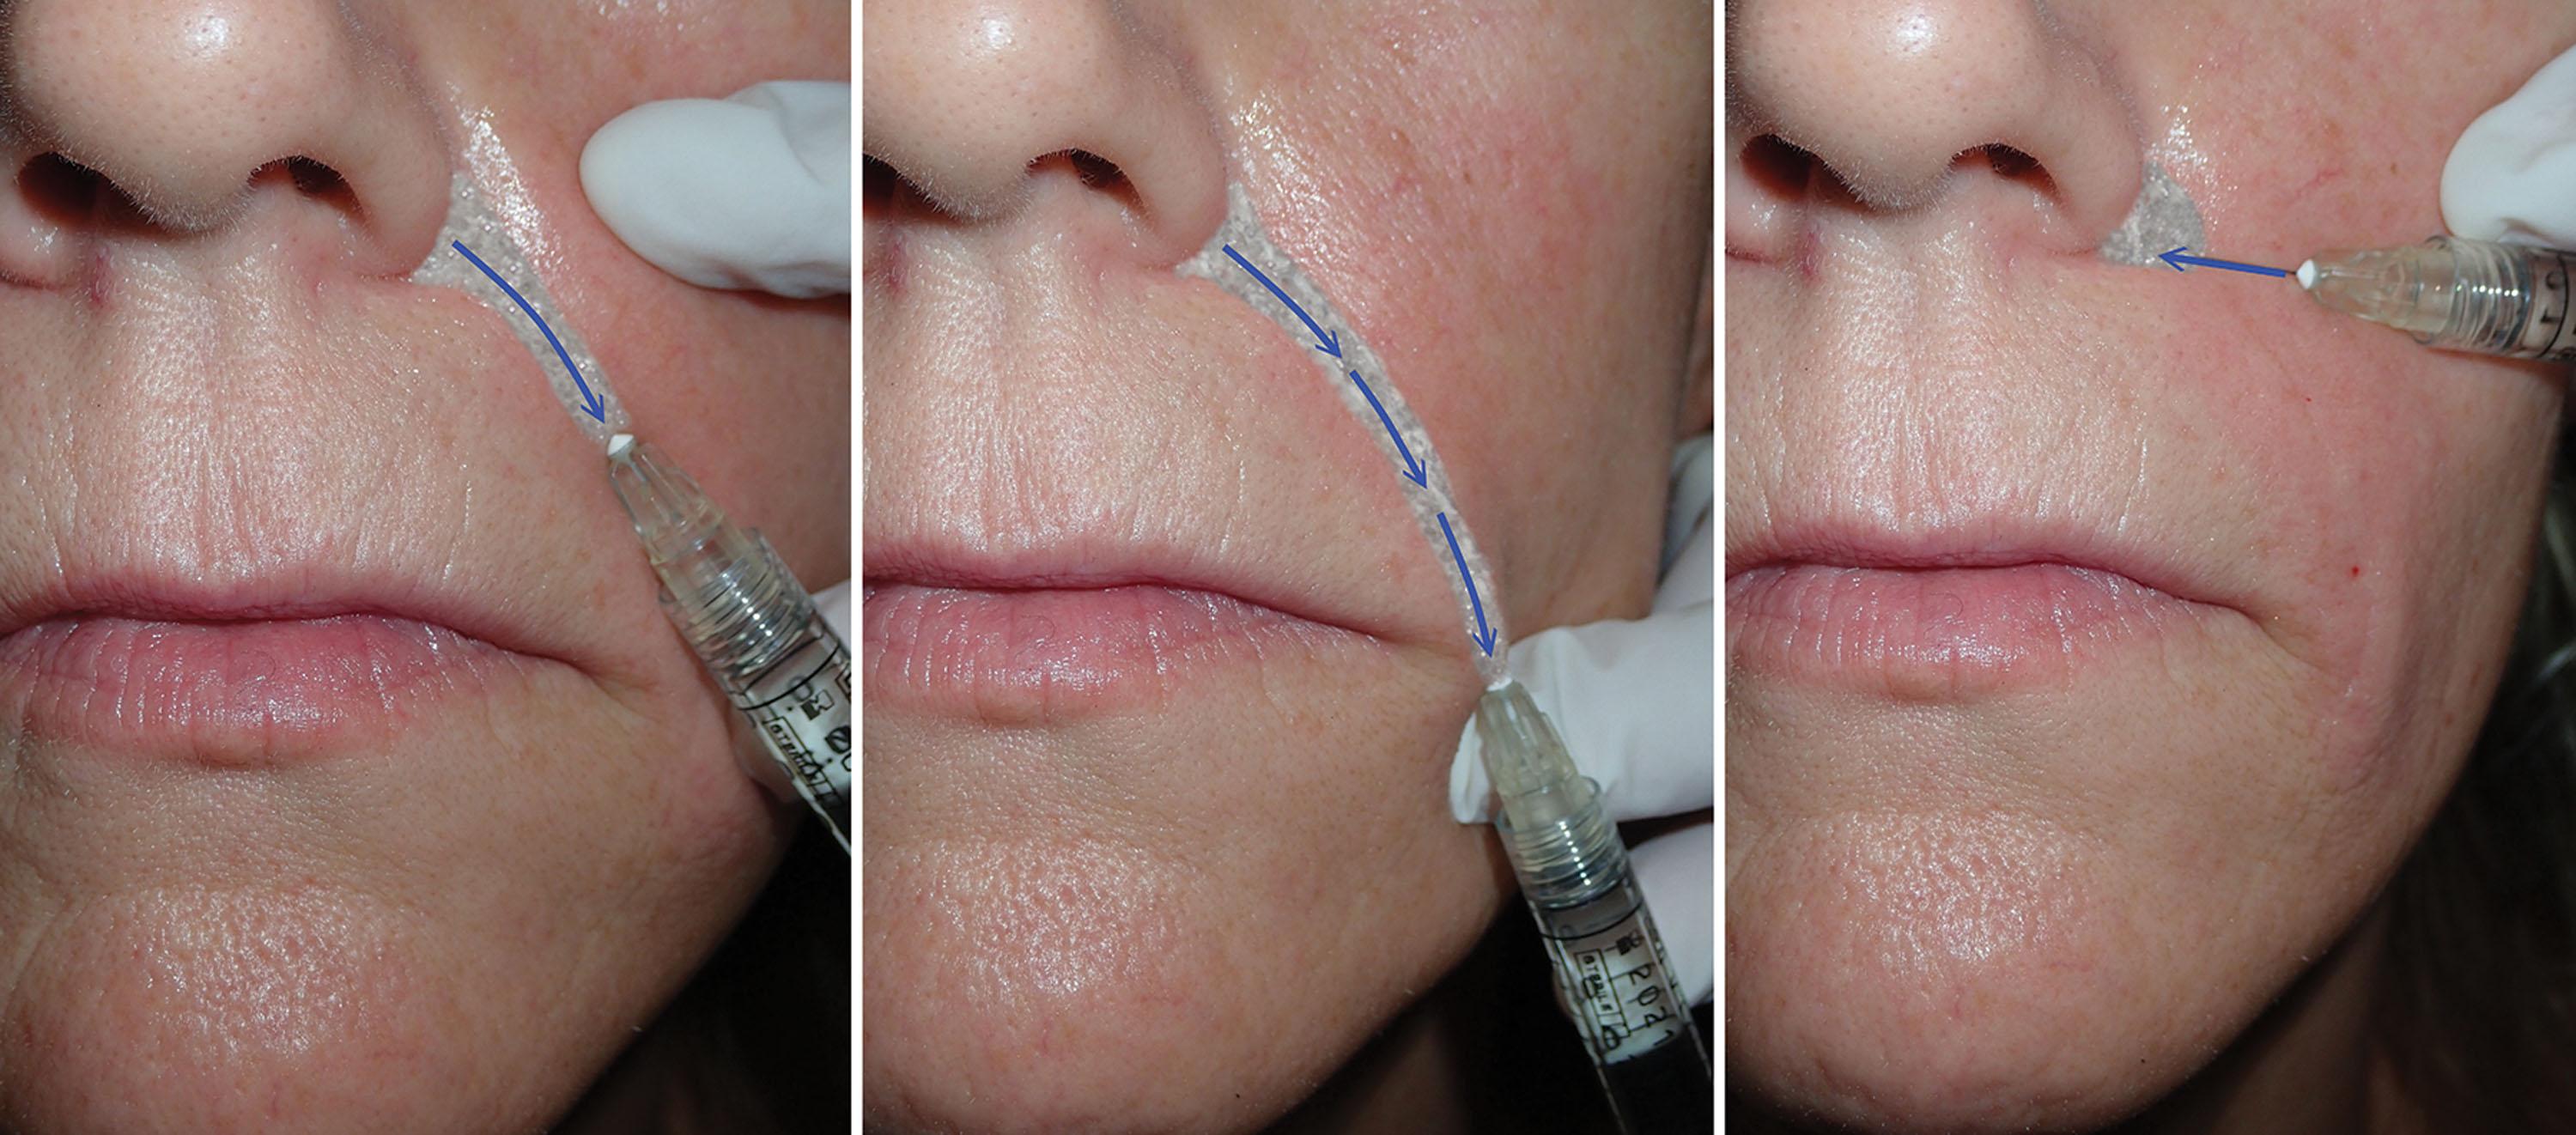
Another means of facilitating NLF filler is to put the cheek on stretch with the non-injection hand. This tension will turn a curvilinear structure into a straight line, making it easier to inject ( Fig. 10.68 ).
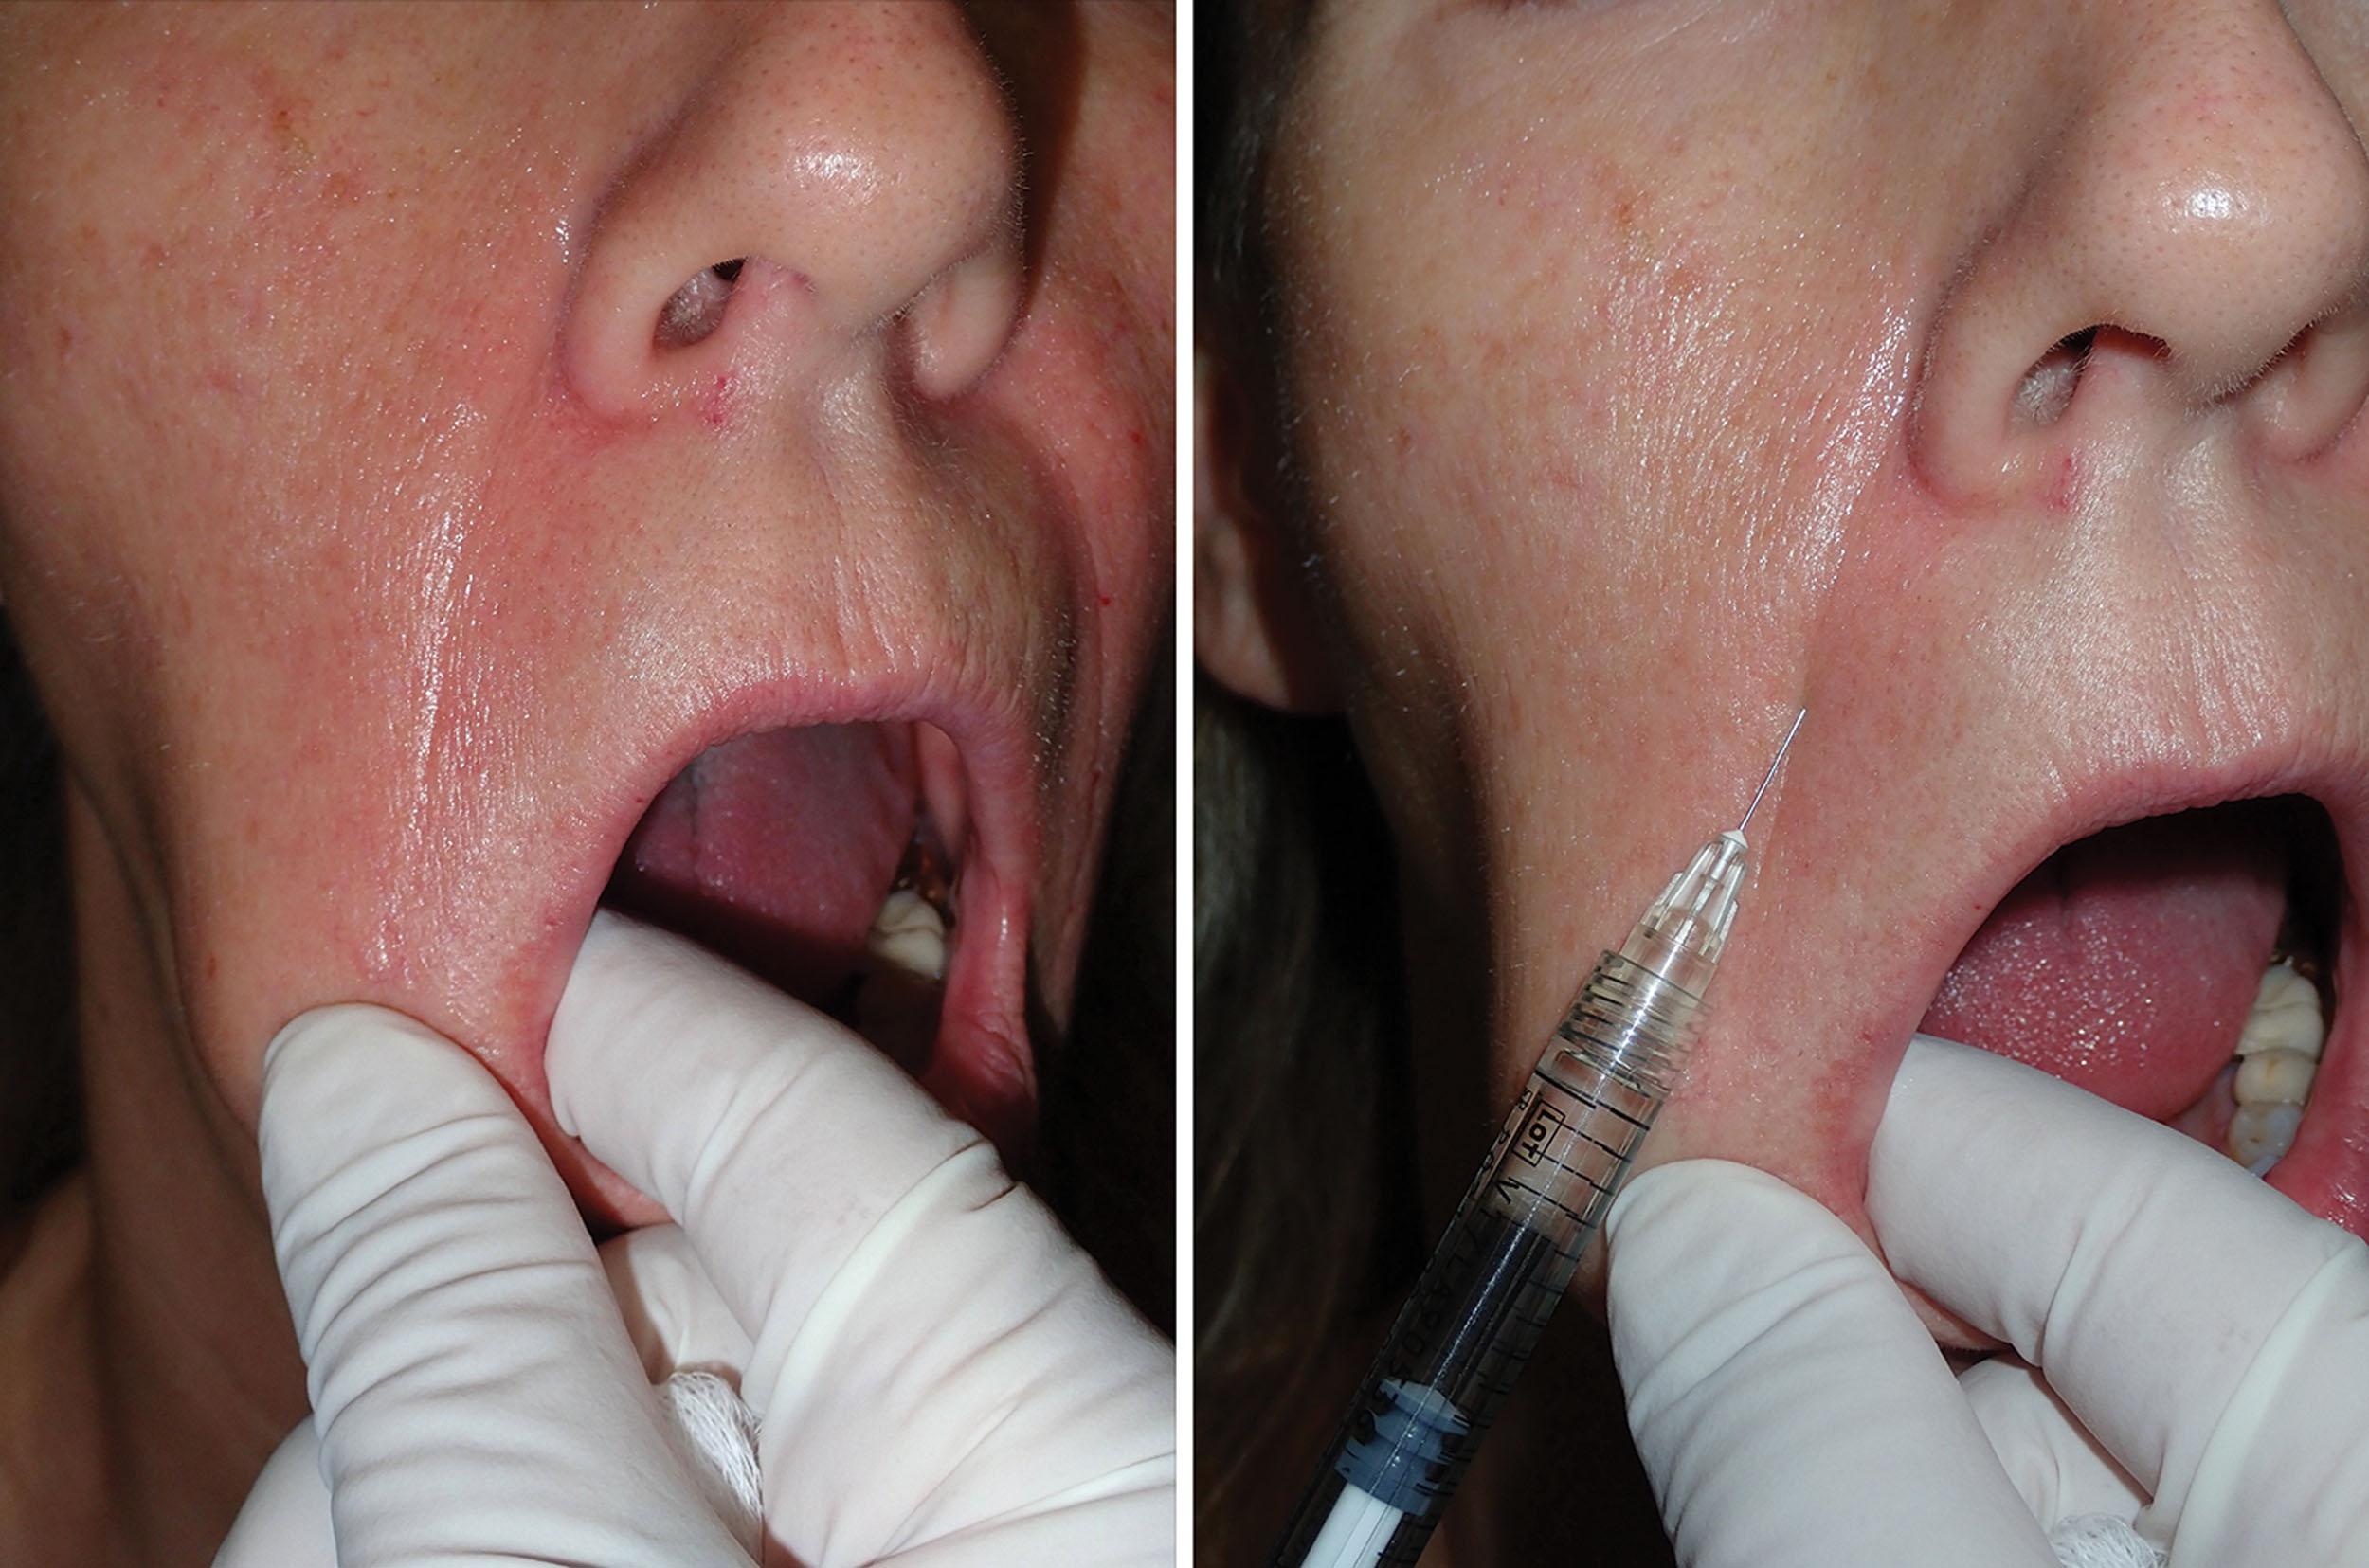
A huge pearl to remember when treating the NLF (or any fold or wrinkle) is that if you cannot see immediate improvement, the needle is probably in an incorrect plane. Many novice injectors place the filler too deep, and it does not plump out the fold. If immediate noticeable improvement is not seen, the needle must be positioned more superficially. Because of the unique anatomic planes of the NLF, even while injecting in the center of the crease, the filler can migrate laterally and create a lateral ridge ( Fig. 10.69 ). This can actually make the NLF bigger. If the filler migrates laterally during the injection, the needle is directed more medially before continuing the injection. Remember that what you see is what you get.
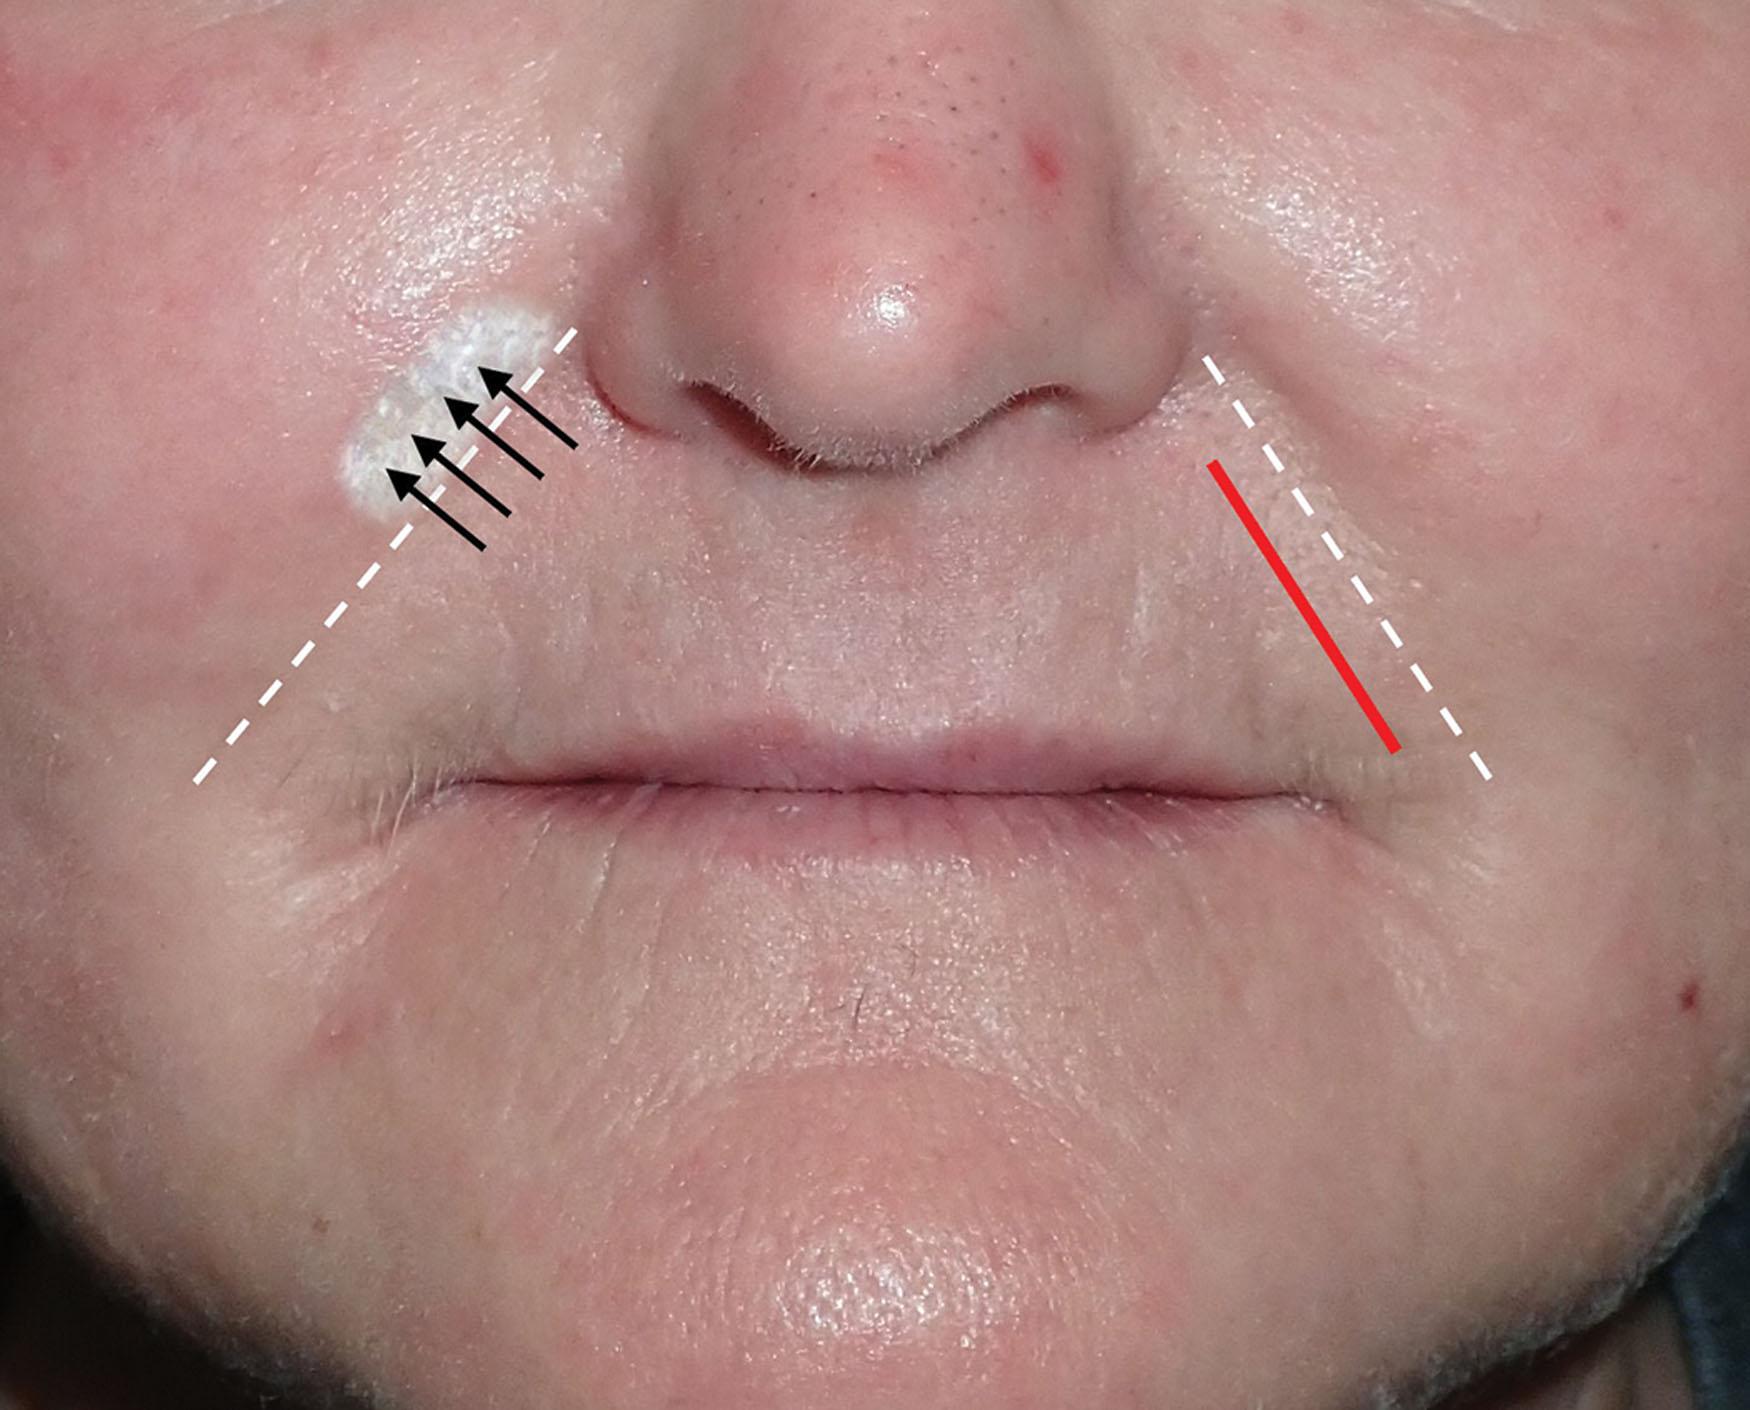
The flexible blunt-tipped cannula is also an effective means of injecting the NLF. Very often, deeper folds need several layers of filler. The cannula can serve to fill the deeper fold with less trauma than a needle. In addition, the cannula is much longer, and the entire fold can be treated from a single puncture ( Figs. 10.70 and 10.71 ). Often, the fold requires more superficial injection to complete the augmentation. This can be done with very small cannulas, but a needle may be required to complete the intradermal fill. As with other regions of filler injection, the NLFs are massaged to homogenize and smooth the filler ( Fig. 10.72 ).
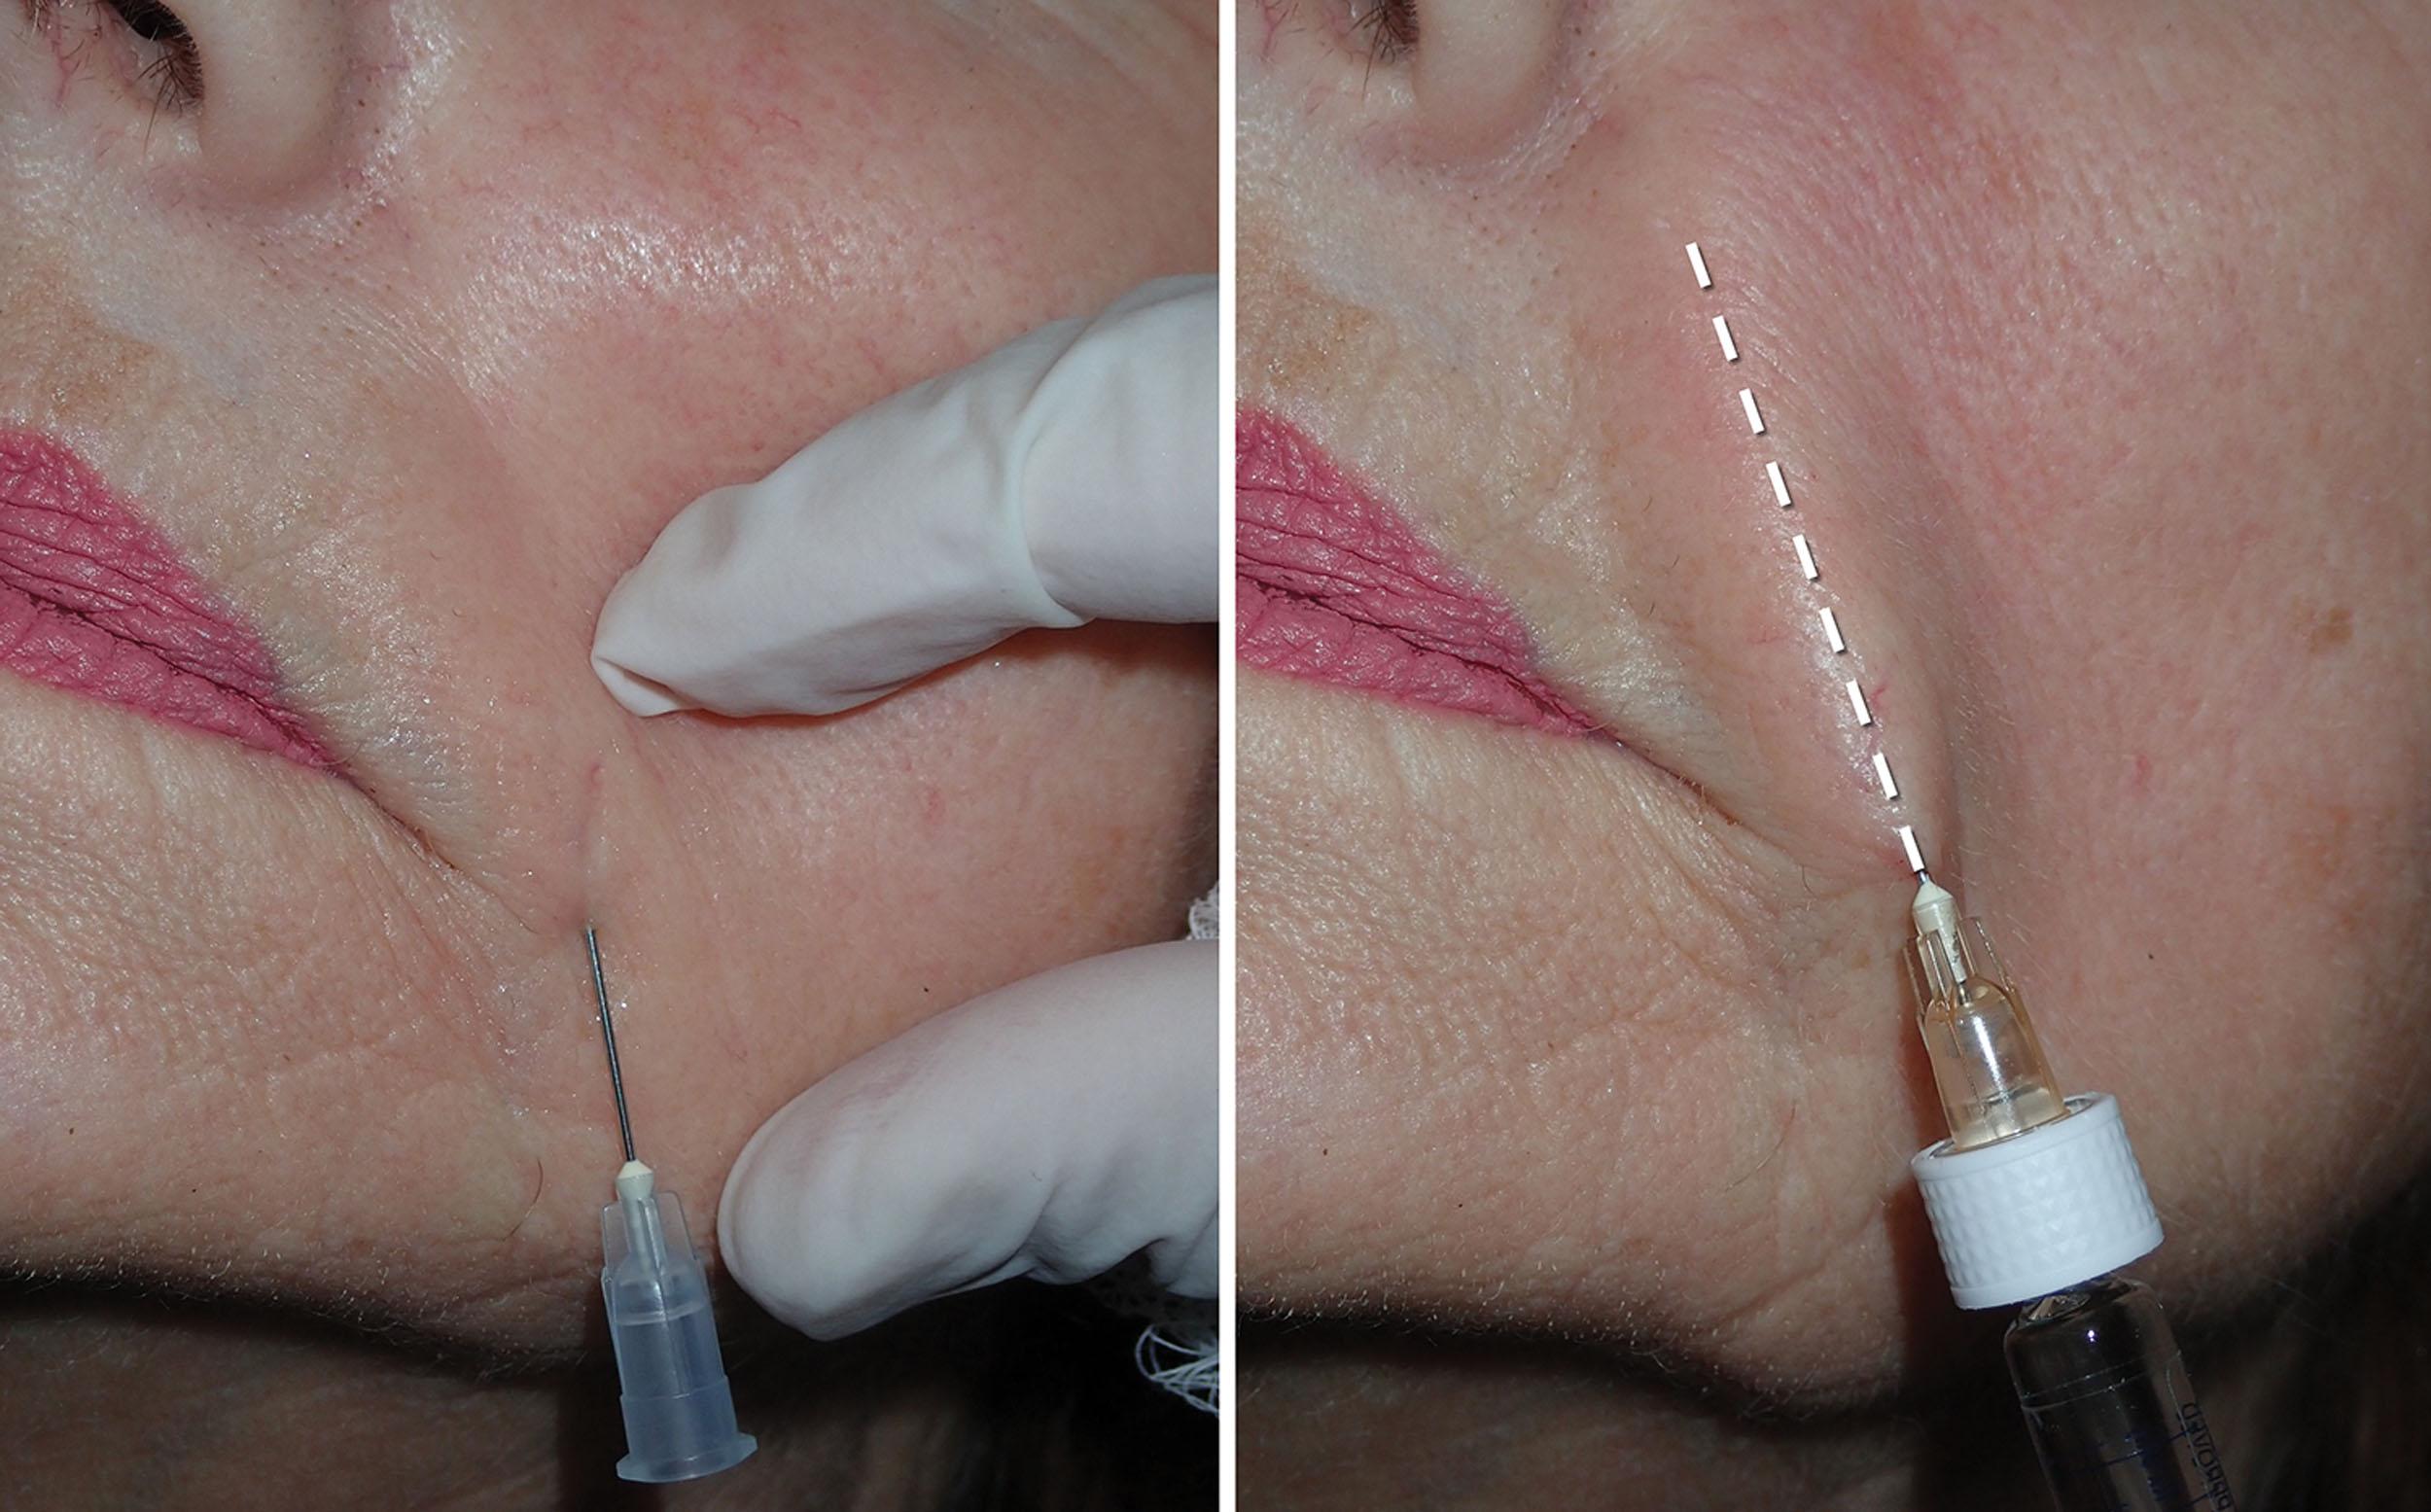
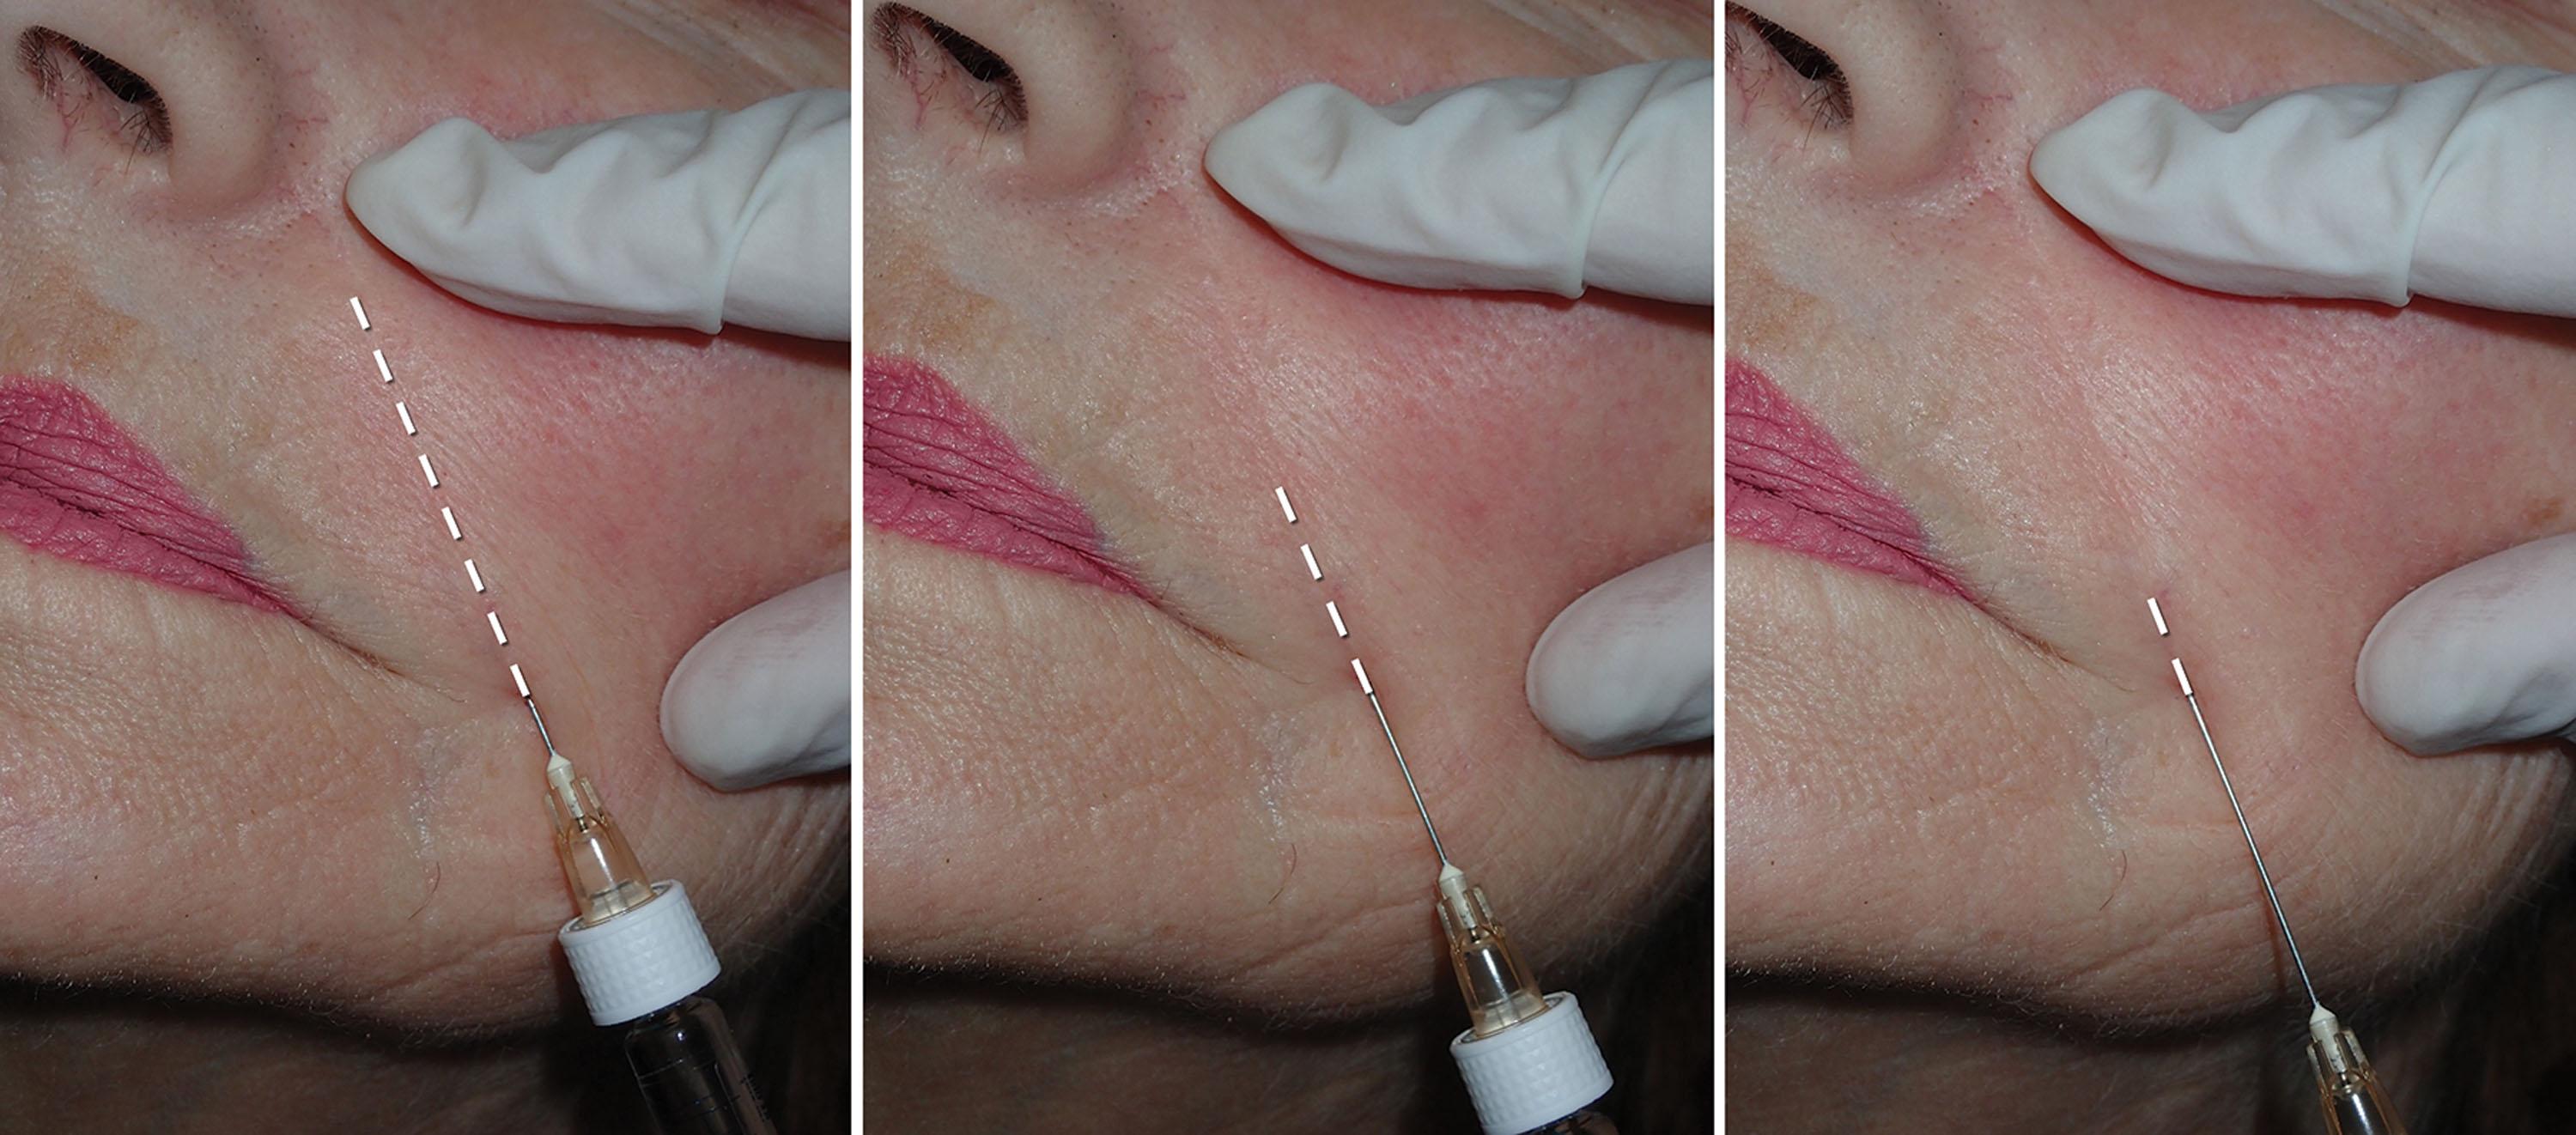
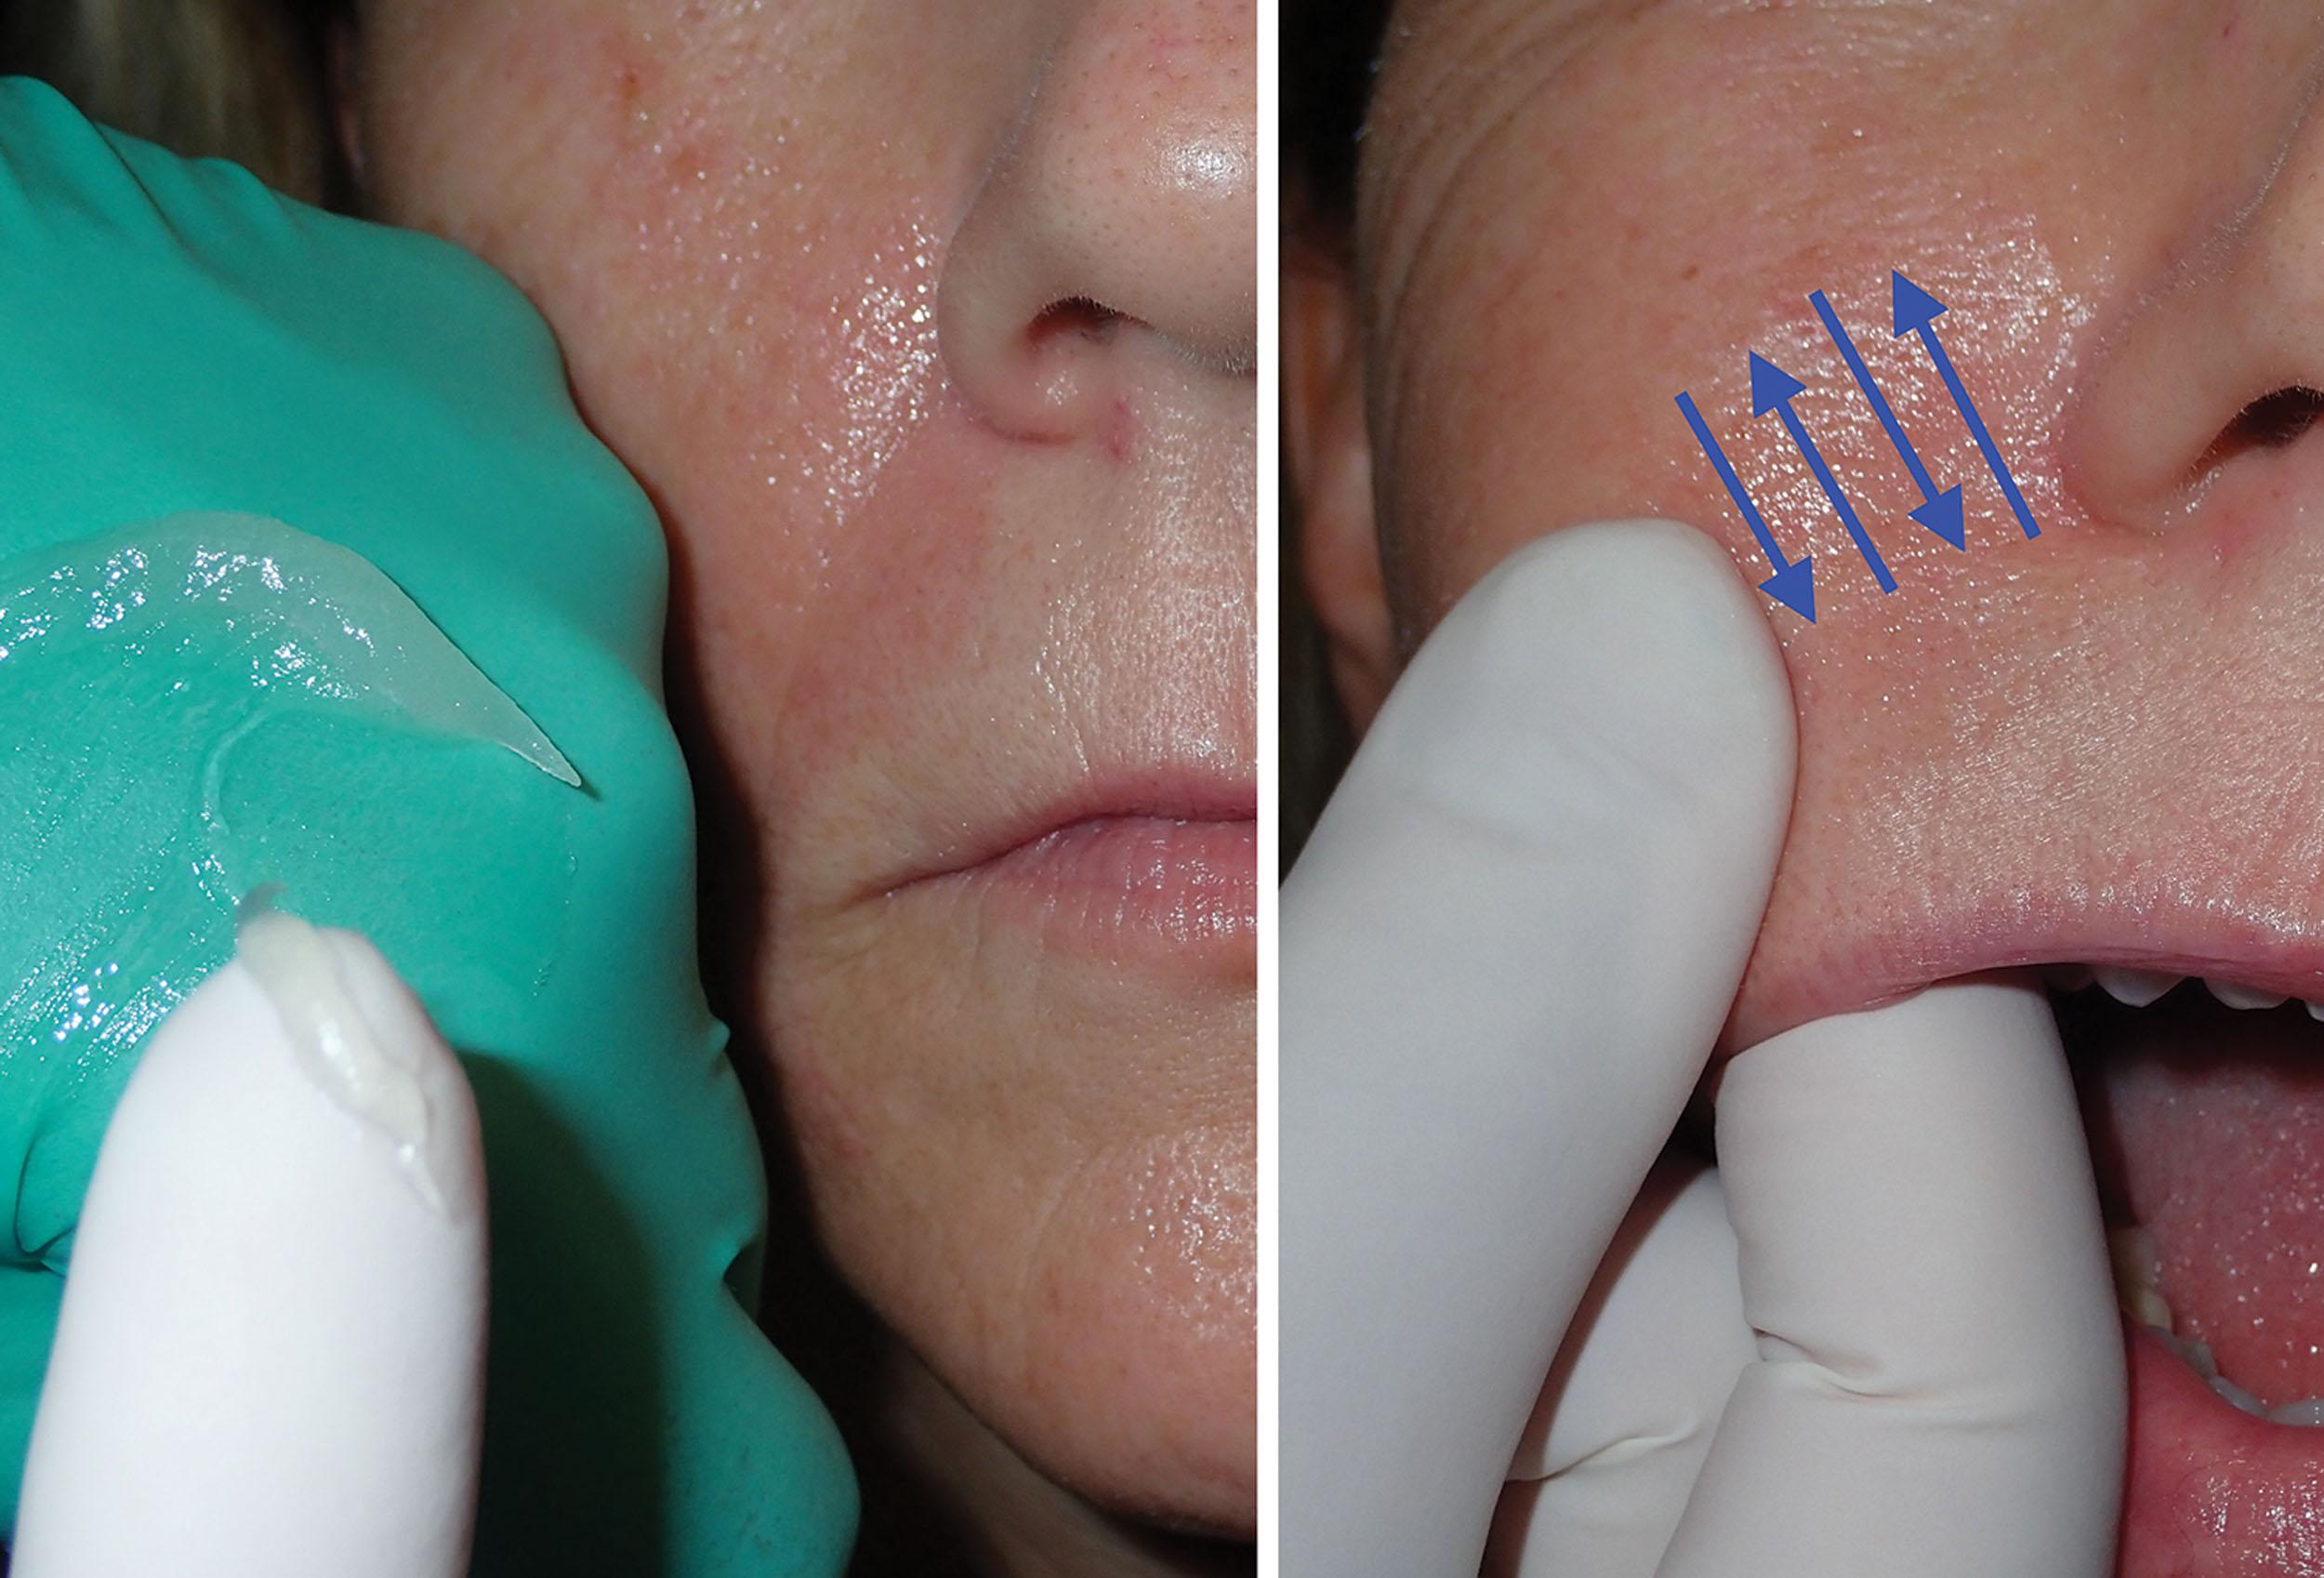
It is important for the patient to appreciate the effect of the augmentation and the same procedure described in is performed with NLF as well. Having the patient look in a mirror after filling the first side allows them to compare the treated side to the untreated side so they can appreciate the difference.
Postinjection instructions are sometimes as important as the actual procedure. The patient is asked to avoid excessive animation because it is possible for the perioral musculature to move the filler. Immediate postinjection icepacks are also important to minimize ecchymosis and edema. When possible (and for all new patients), it is advantageous to have them return to the office in 10–12 days to evaluate their result. If asymmetry or underfill exists, the patient may not realize it, but their friends may and hence affect your brand. Conversely, the patient may be unhappy with the result, and this serves as a time to discuss and/or retreat. Finally, this is an excellent opportunity to obtain “after” photos to use for patient education and marketing. I explain to all filler patients that filler treatment is a sculpting process and not necessarily a one-time treatment. When they understand this, they do not mind complying with follow-up treatment. Figs. 10.73–10.76 show before and after photos of patients injected for improvement of their NLF.
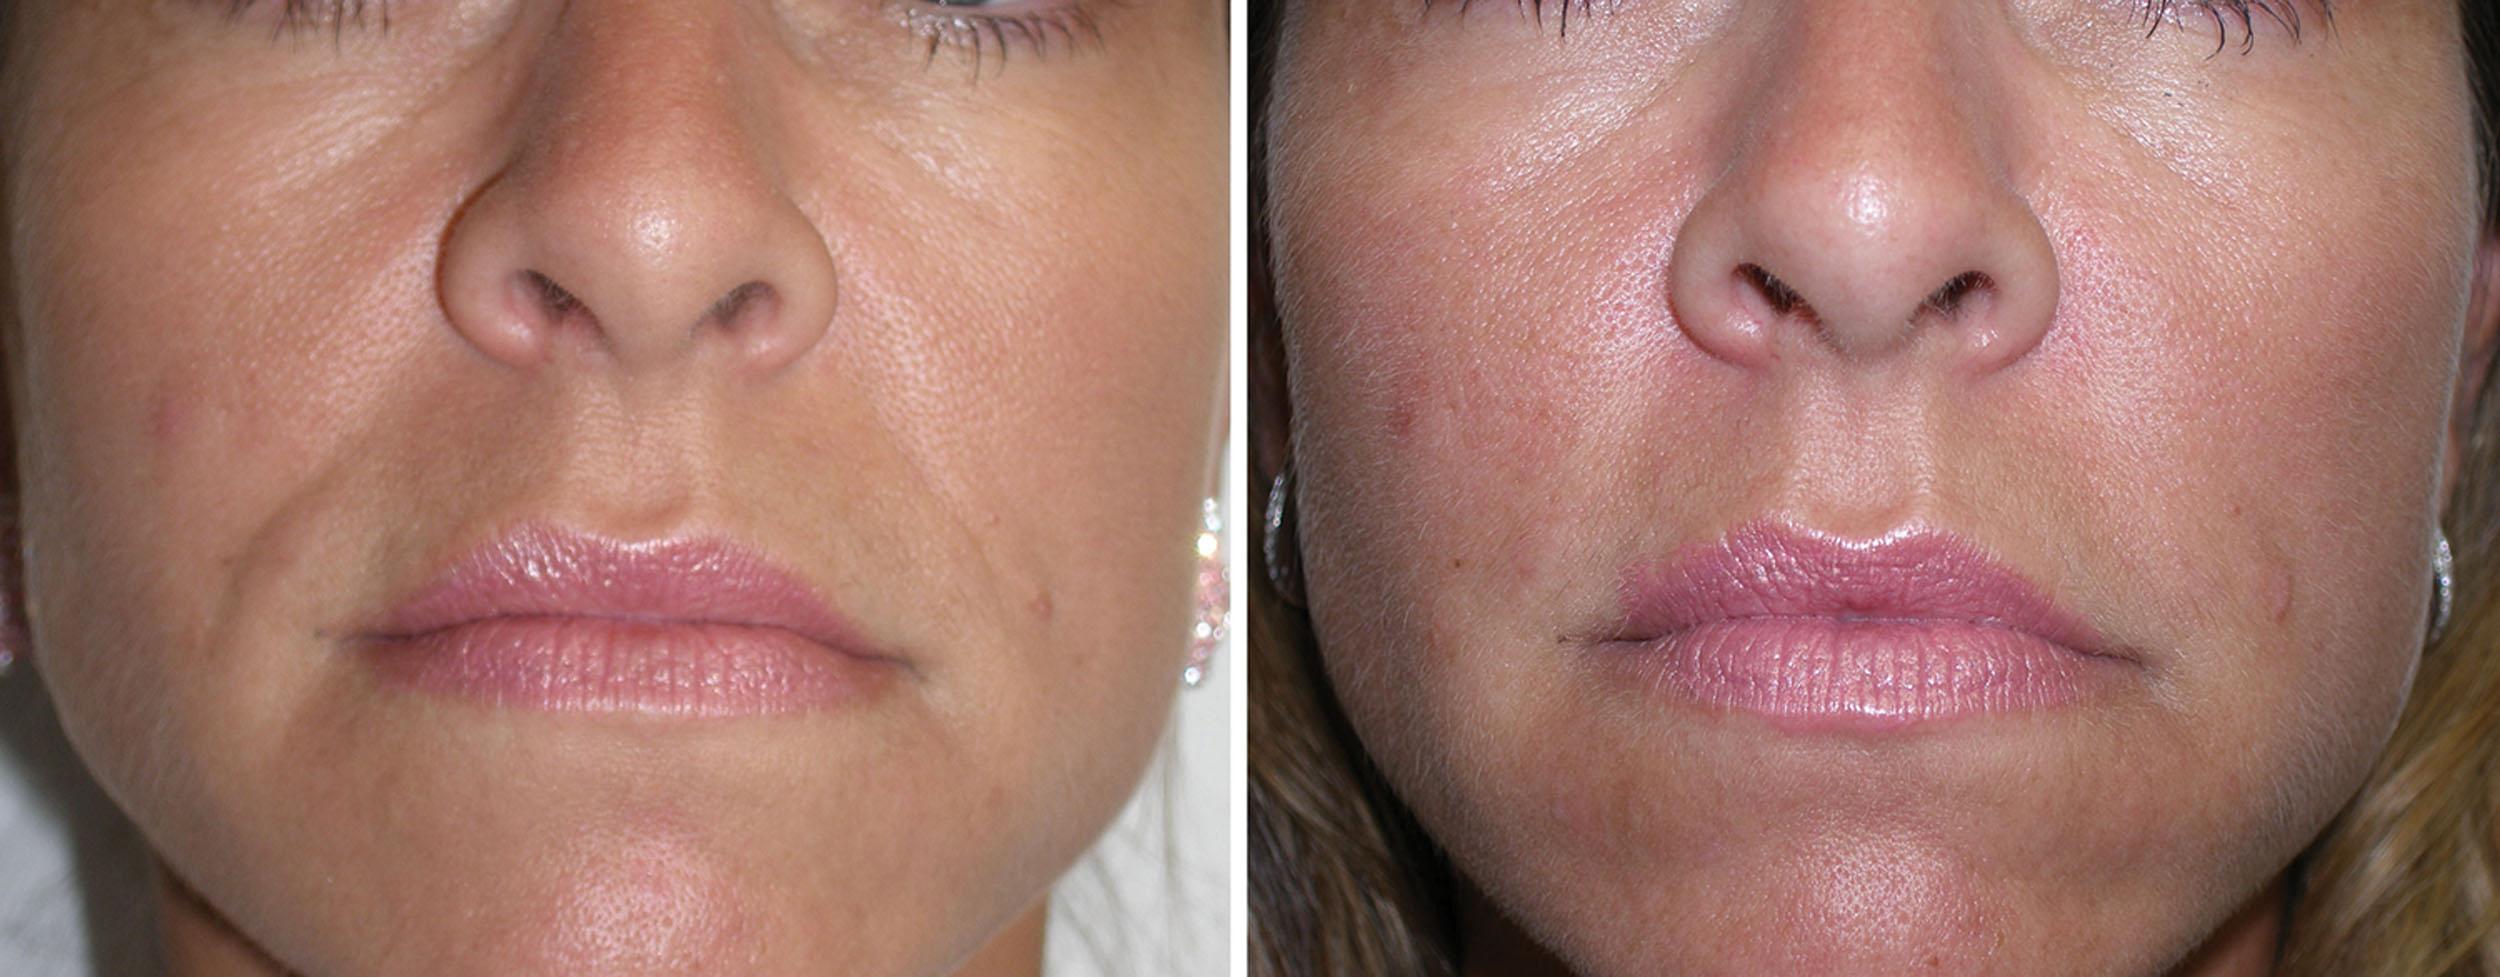
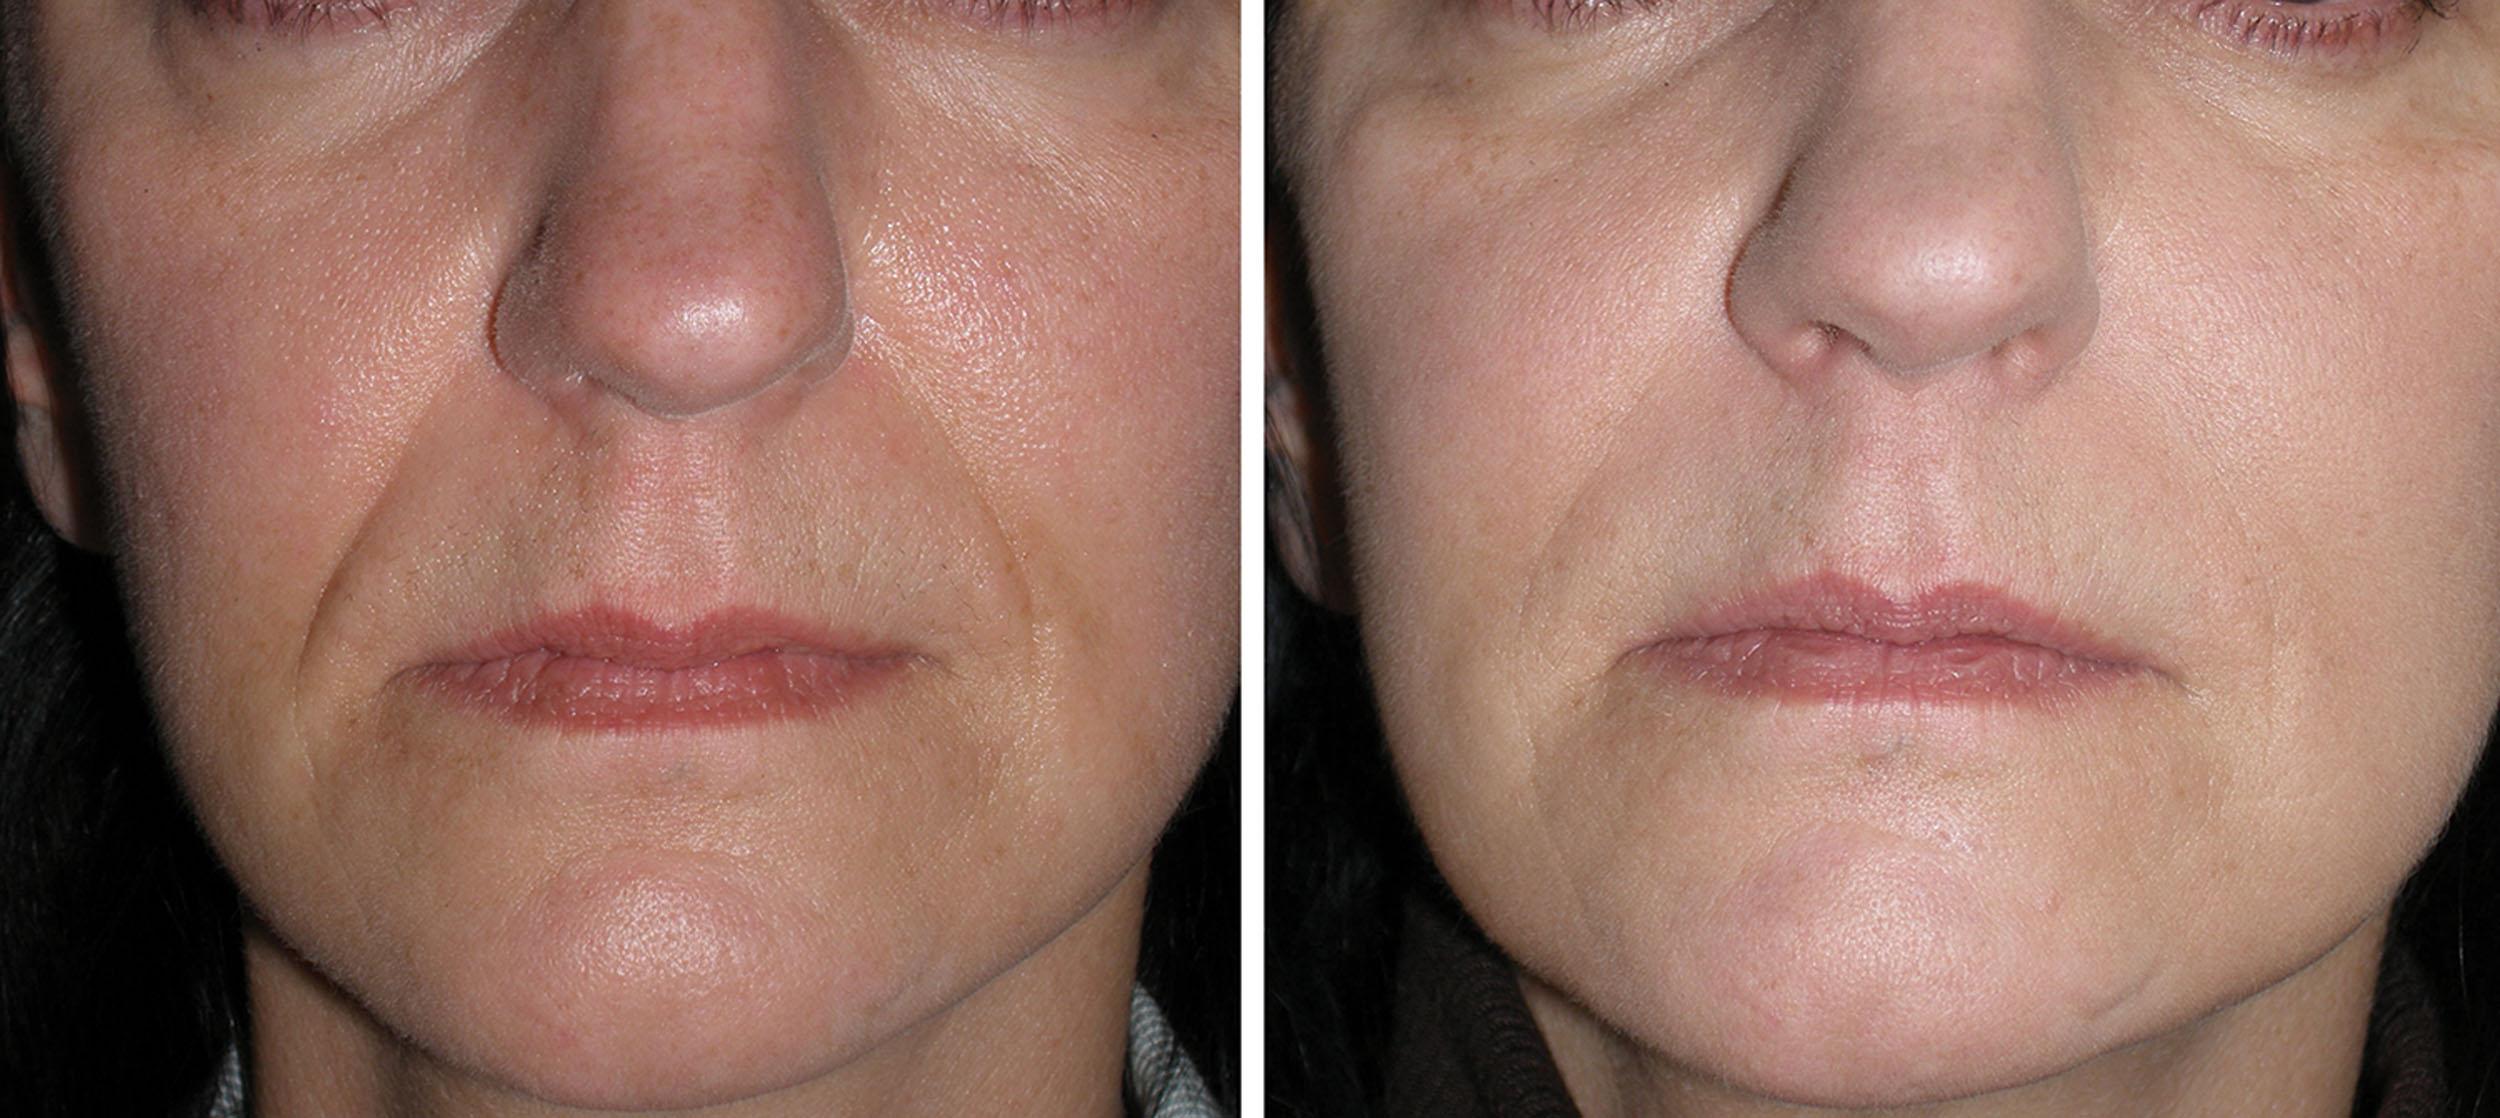
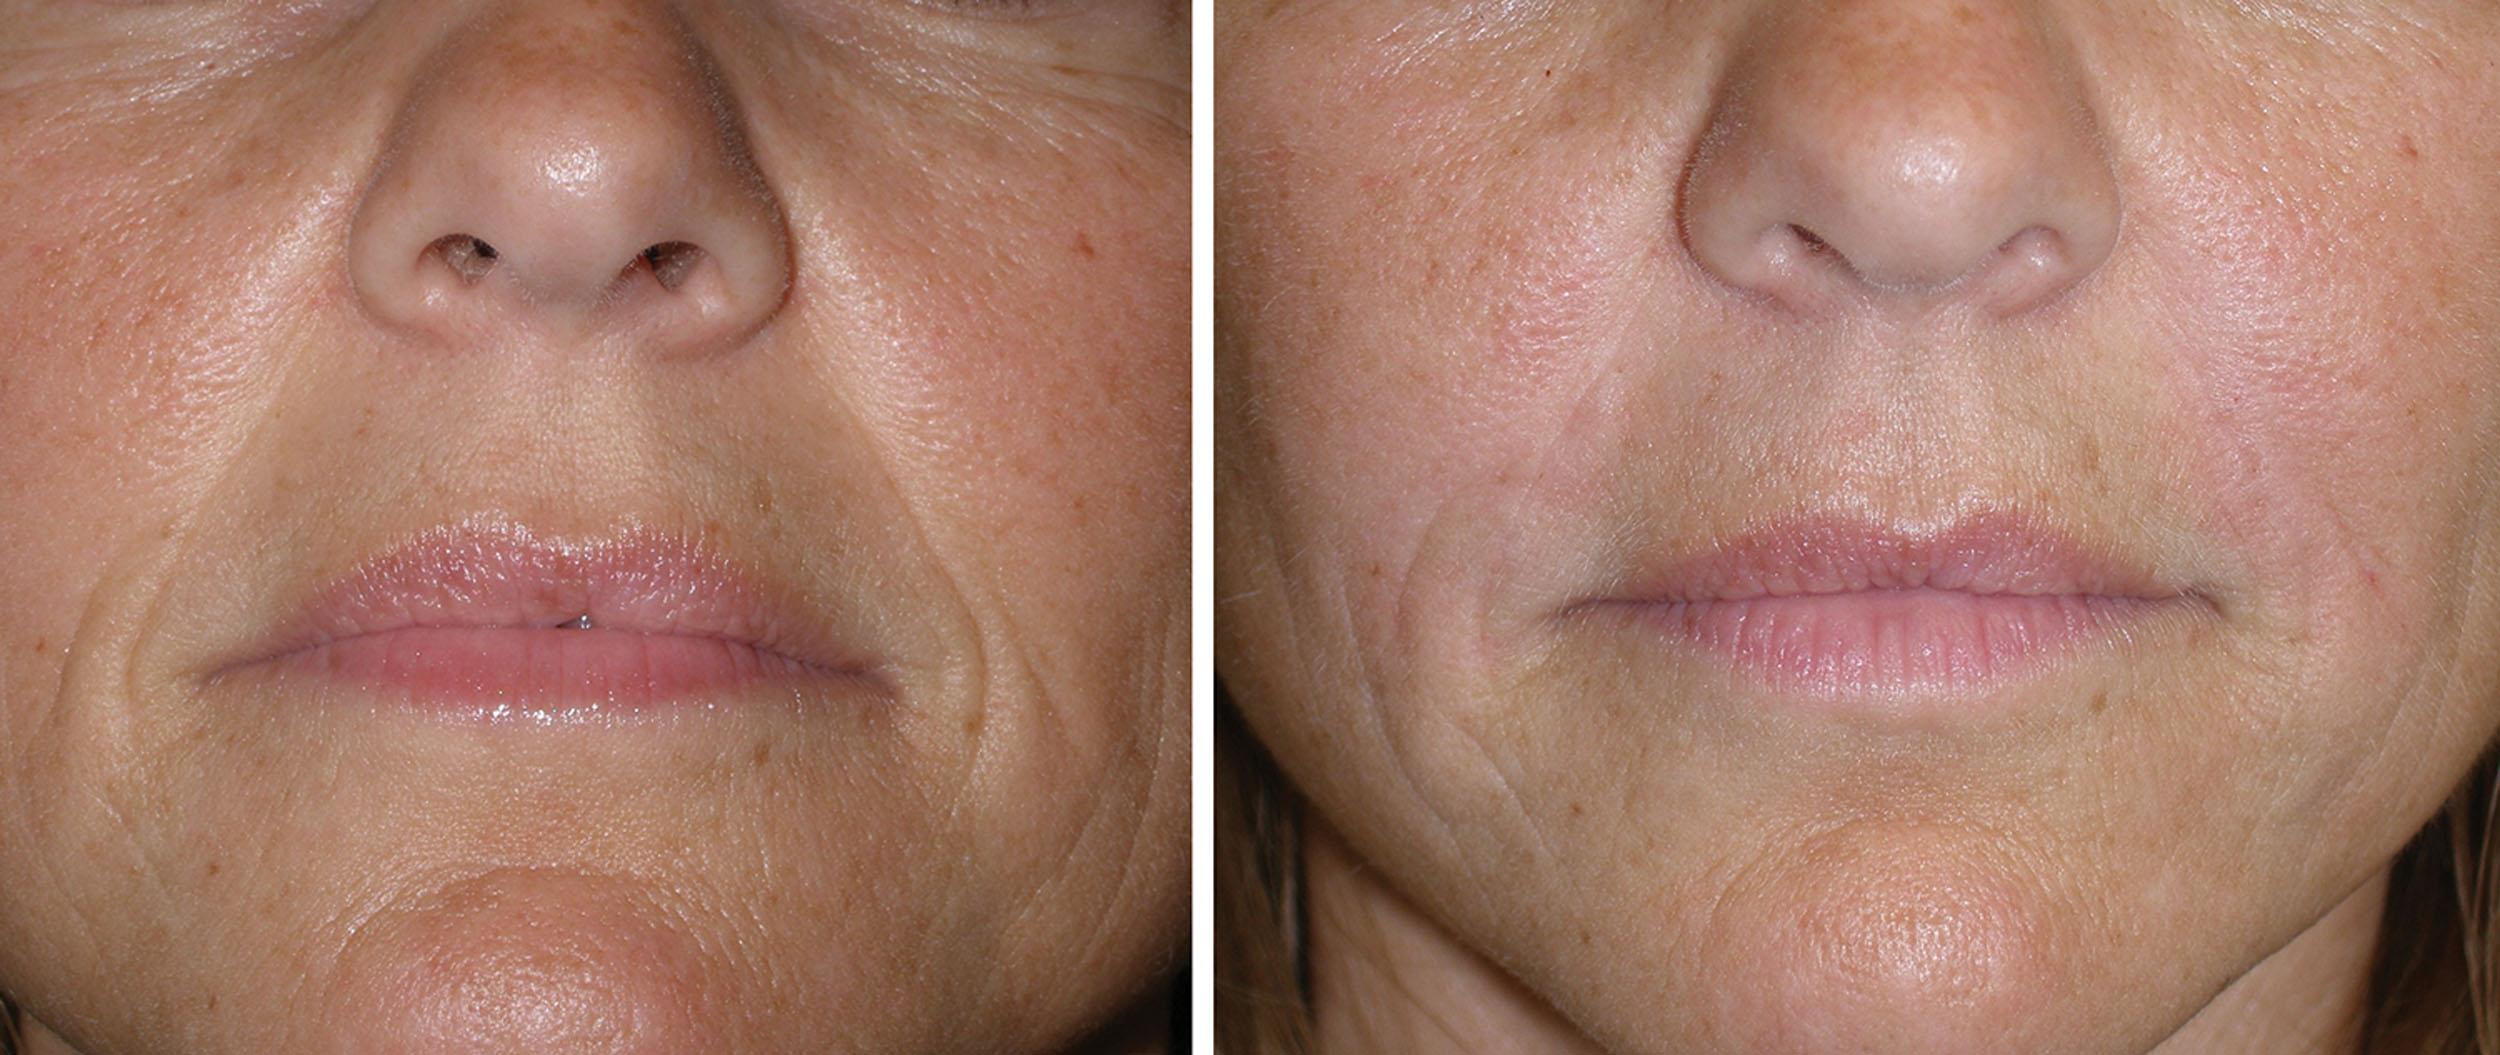
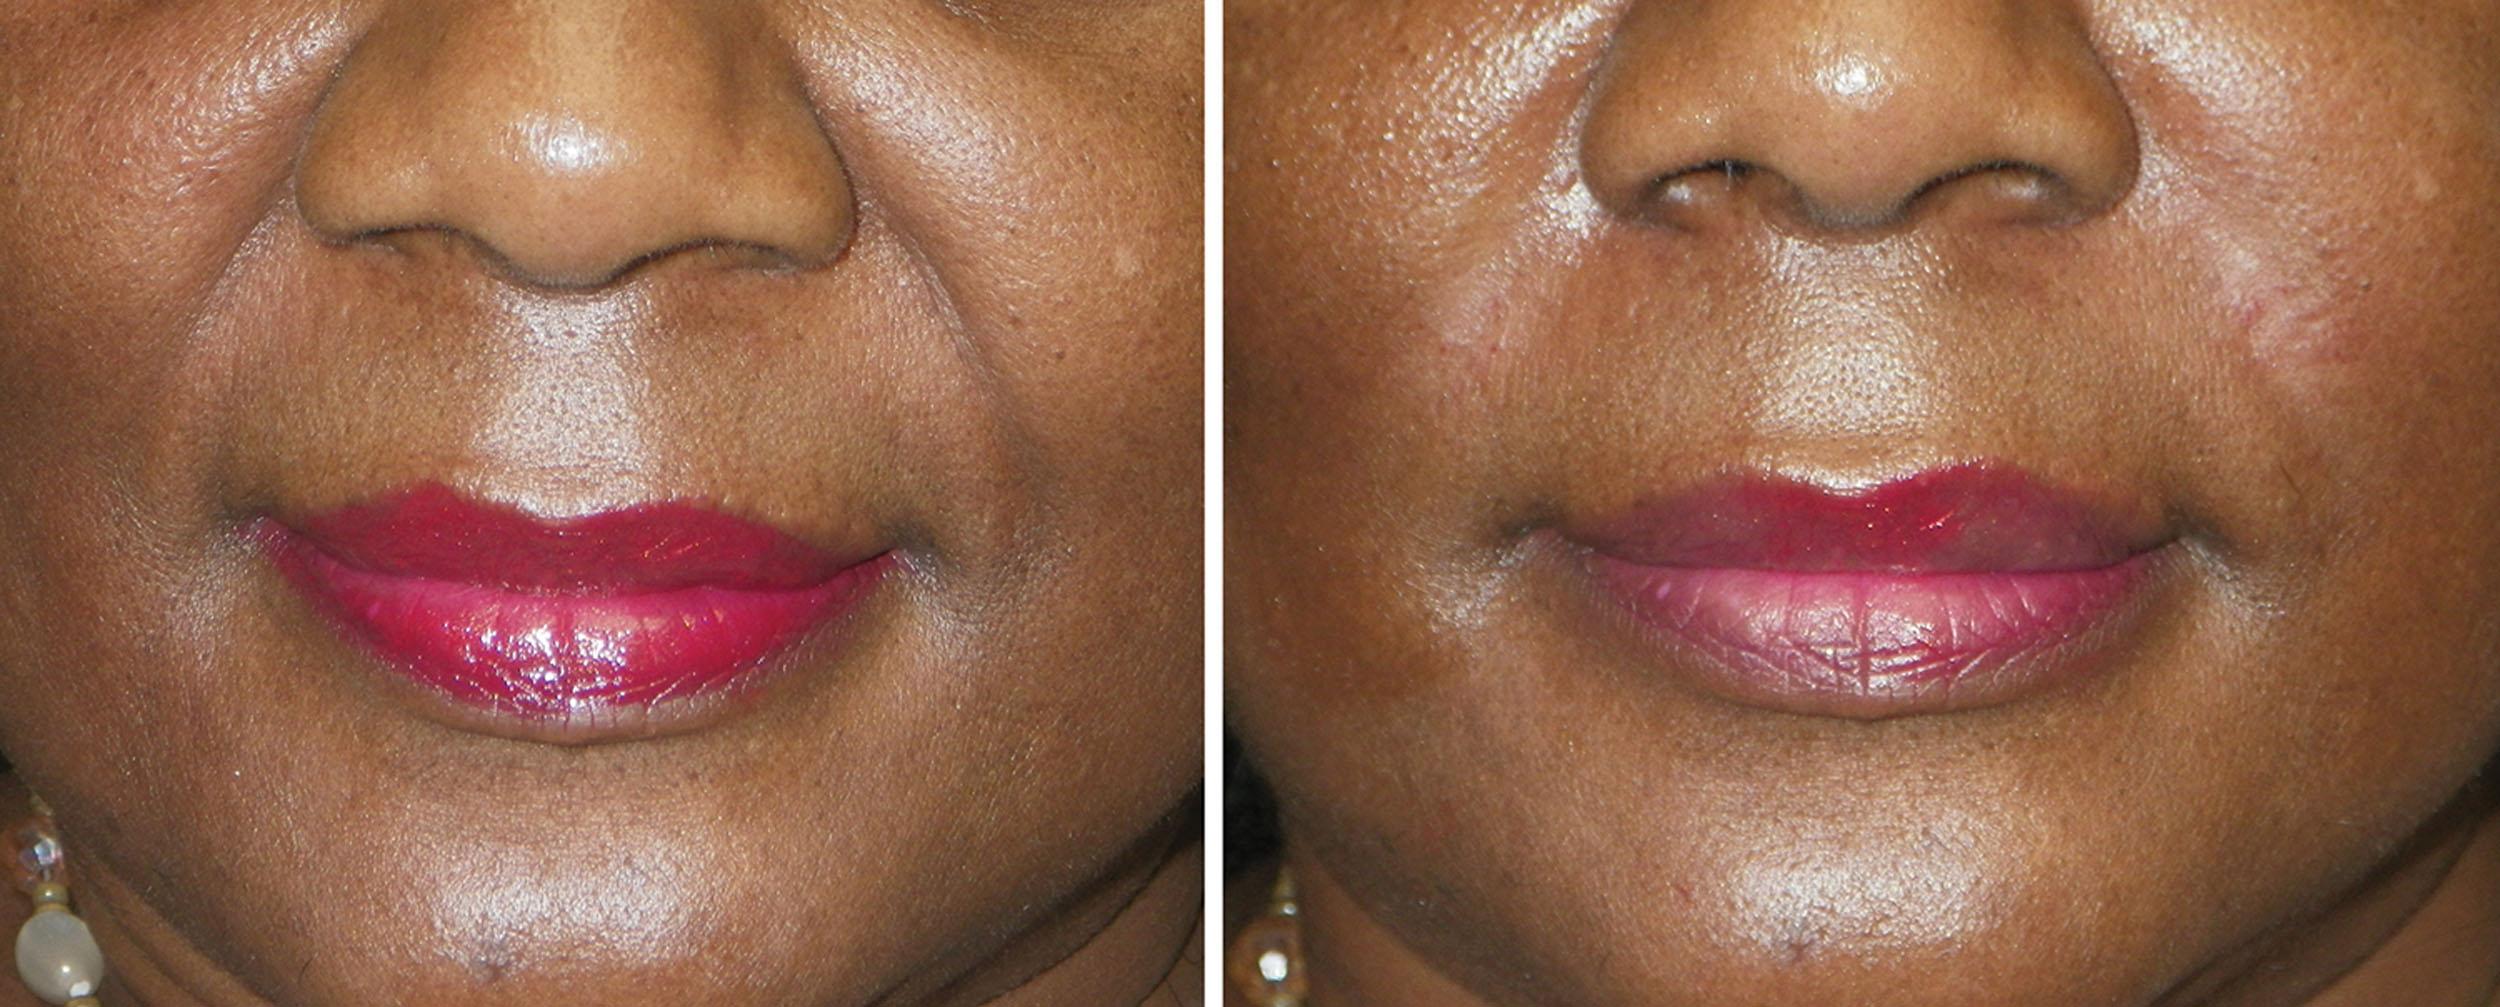
Joe Niamtu, III
One of the additions to this third edition are guest authors who are international experts and key opinion leaders in their respective fields. My goal is to have “How I do it” subchapters. I will still include my own commentary and techniques.
As filler technology has improved, more adaptable fillers are now available, and more anatomic areas are routinely treated. The midface and tear troughs are indicative of very popular contemporary filler treatments.
As discussed in various chapters in this text, a volumized midface is a hallmark of beauty, and volume loss in the midface begins in the third decade. Almost all patients older than 35 years of age can benefit from filler injection of the cheeks. The “cheek apples” and the “ogee curve” are terms frequently used to describe full and rounded cheeks. Although I will initially describe tear trough and cheek filling as separate procedures, they are in fact closely related in most patients, and I treat them simultaneously. When considering rejuvenation, the lower lid is part of the upper cheek, and the upper cheek is part of the lower lid. Thinking and treating the cheek and tear trough as a single cosmetic unit is preferable for comprehensive rejuvenation.
The tear trough (nasojugal groove) is the depression over the orbital rim that is not generally visible in younger patients but may be present as a result of hereditary or maxillary deficiency. In older patients, atrophic aging changes of the skin, muscle, fat, bone, and actinic skin damage allow the inferior orbital rim to become visible and skeletonized ( Fig. 10.77 )
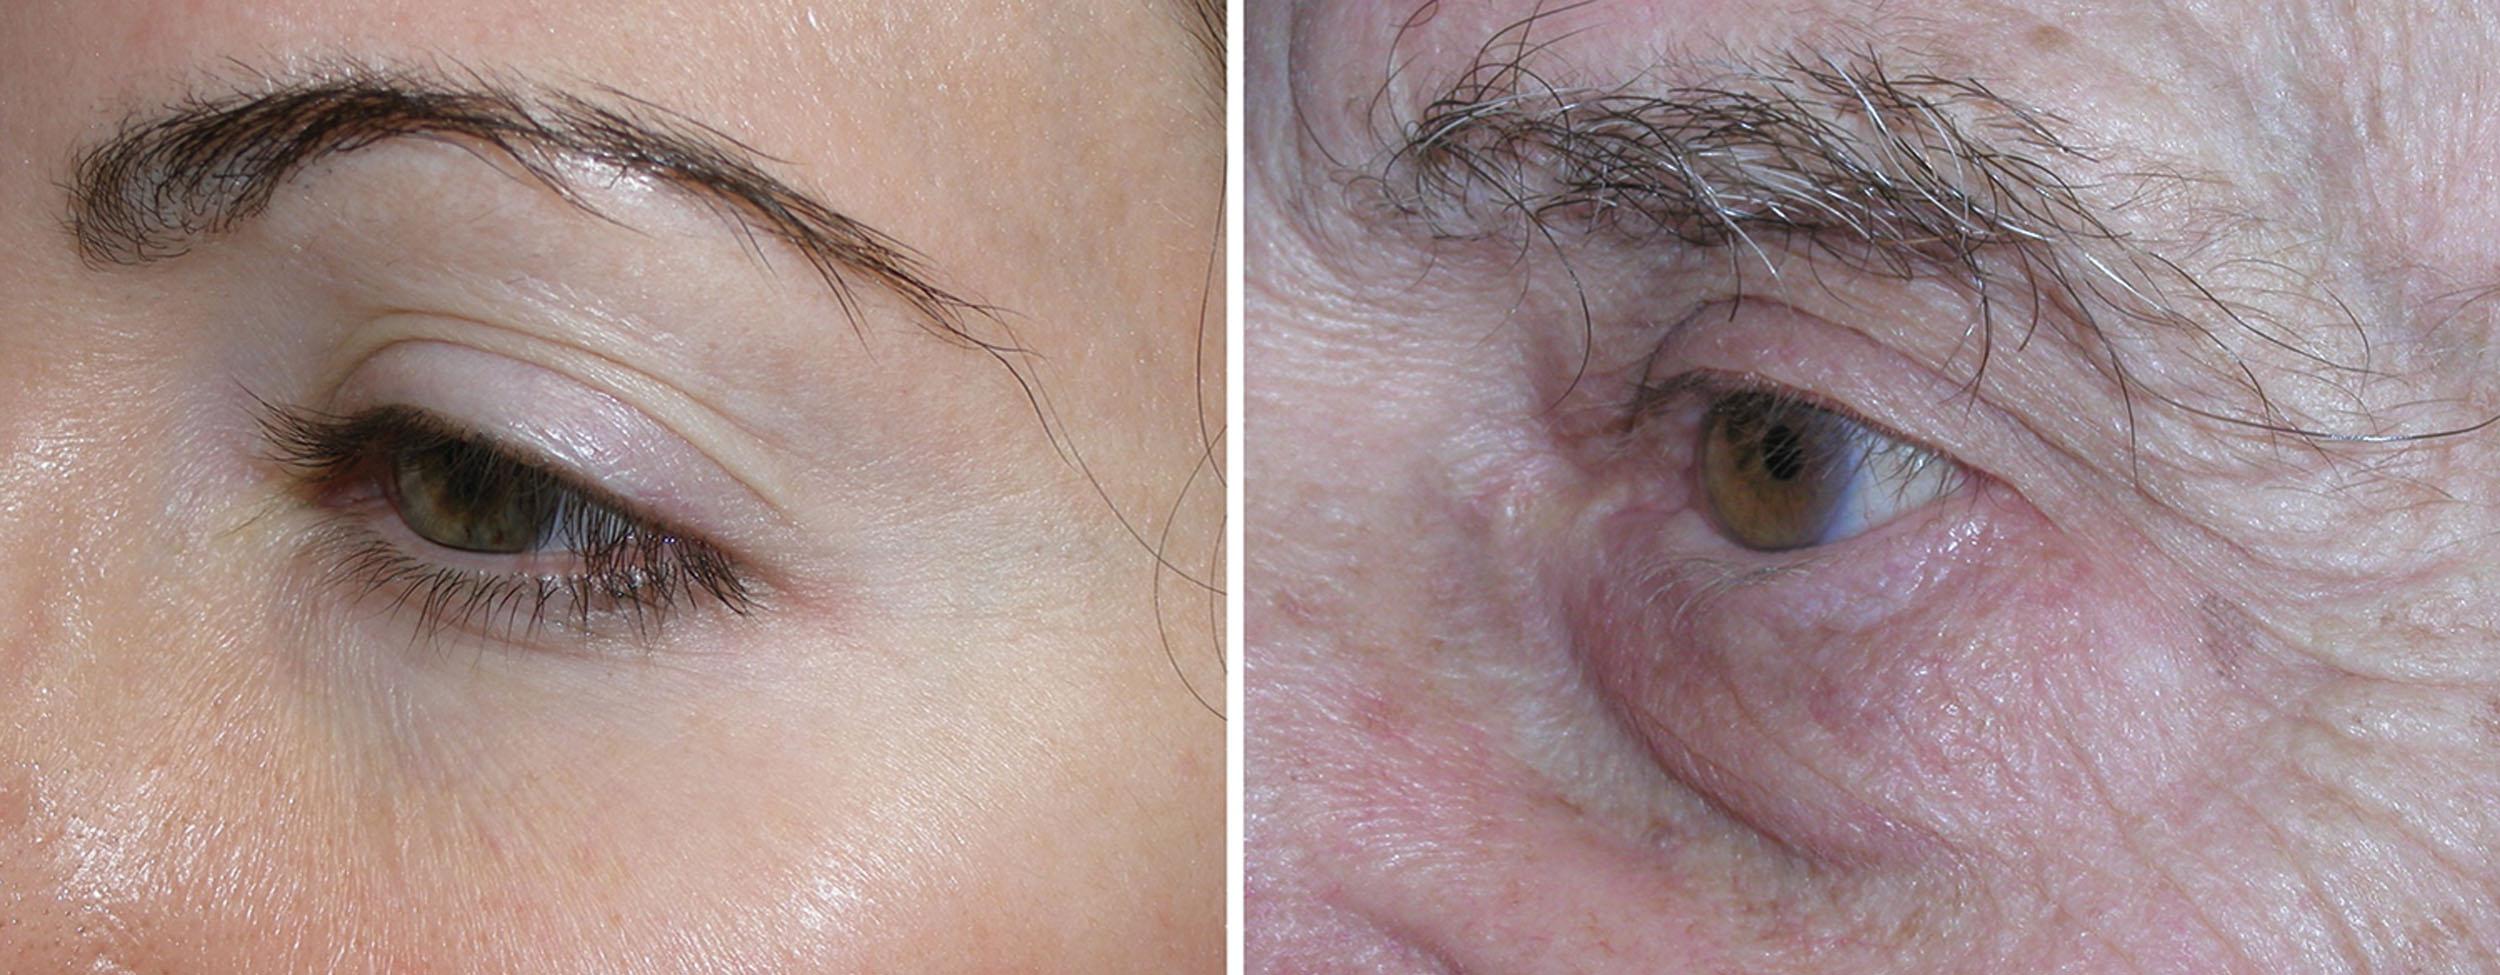
I personally feel that the tear trough area is one of the more difficult regions to inject for several reasons. It is very thin tissue, very vascular, and prone to swelling and bruising. In addition, as with many filler treatments, there is a lot of hype surrounding tear trough filling. For this reason, patients who are in fact candidates may present for blepharoplasty thinking that their aging changes can be remedied solely with tear trough filler. There is no doubt that blepharoplasty can be delayed in selected patients with minor to moderate teardrop changes, but it is in no way a substitute. Pre-injection discussion and education is important to have happy patients. Finally, I again personally feel that not every patient looks better with inflated tear troughs. Although this can be a positive cosmetic change on the correct patient, it can make other patients look puffy and worse in their lower-lid/cheek complex.
An injection preview can be presented to the patient by depressing the skin below the tear trough to produce a filling effect ( Fig. 10.78 ).
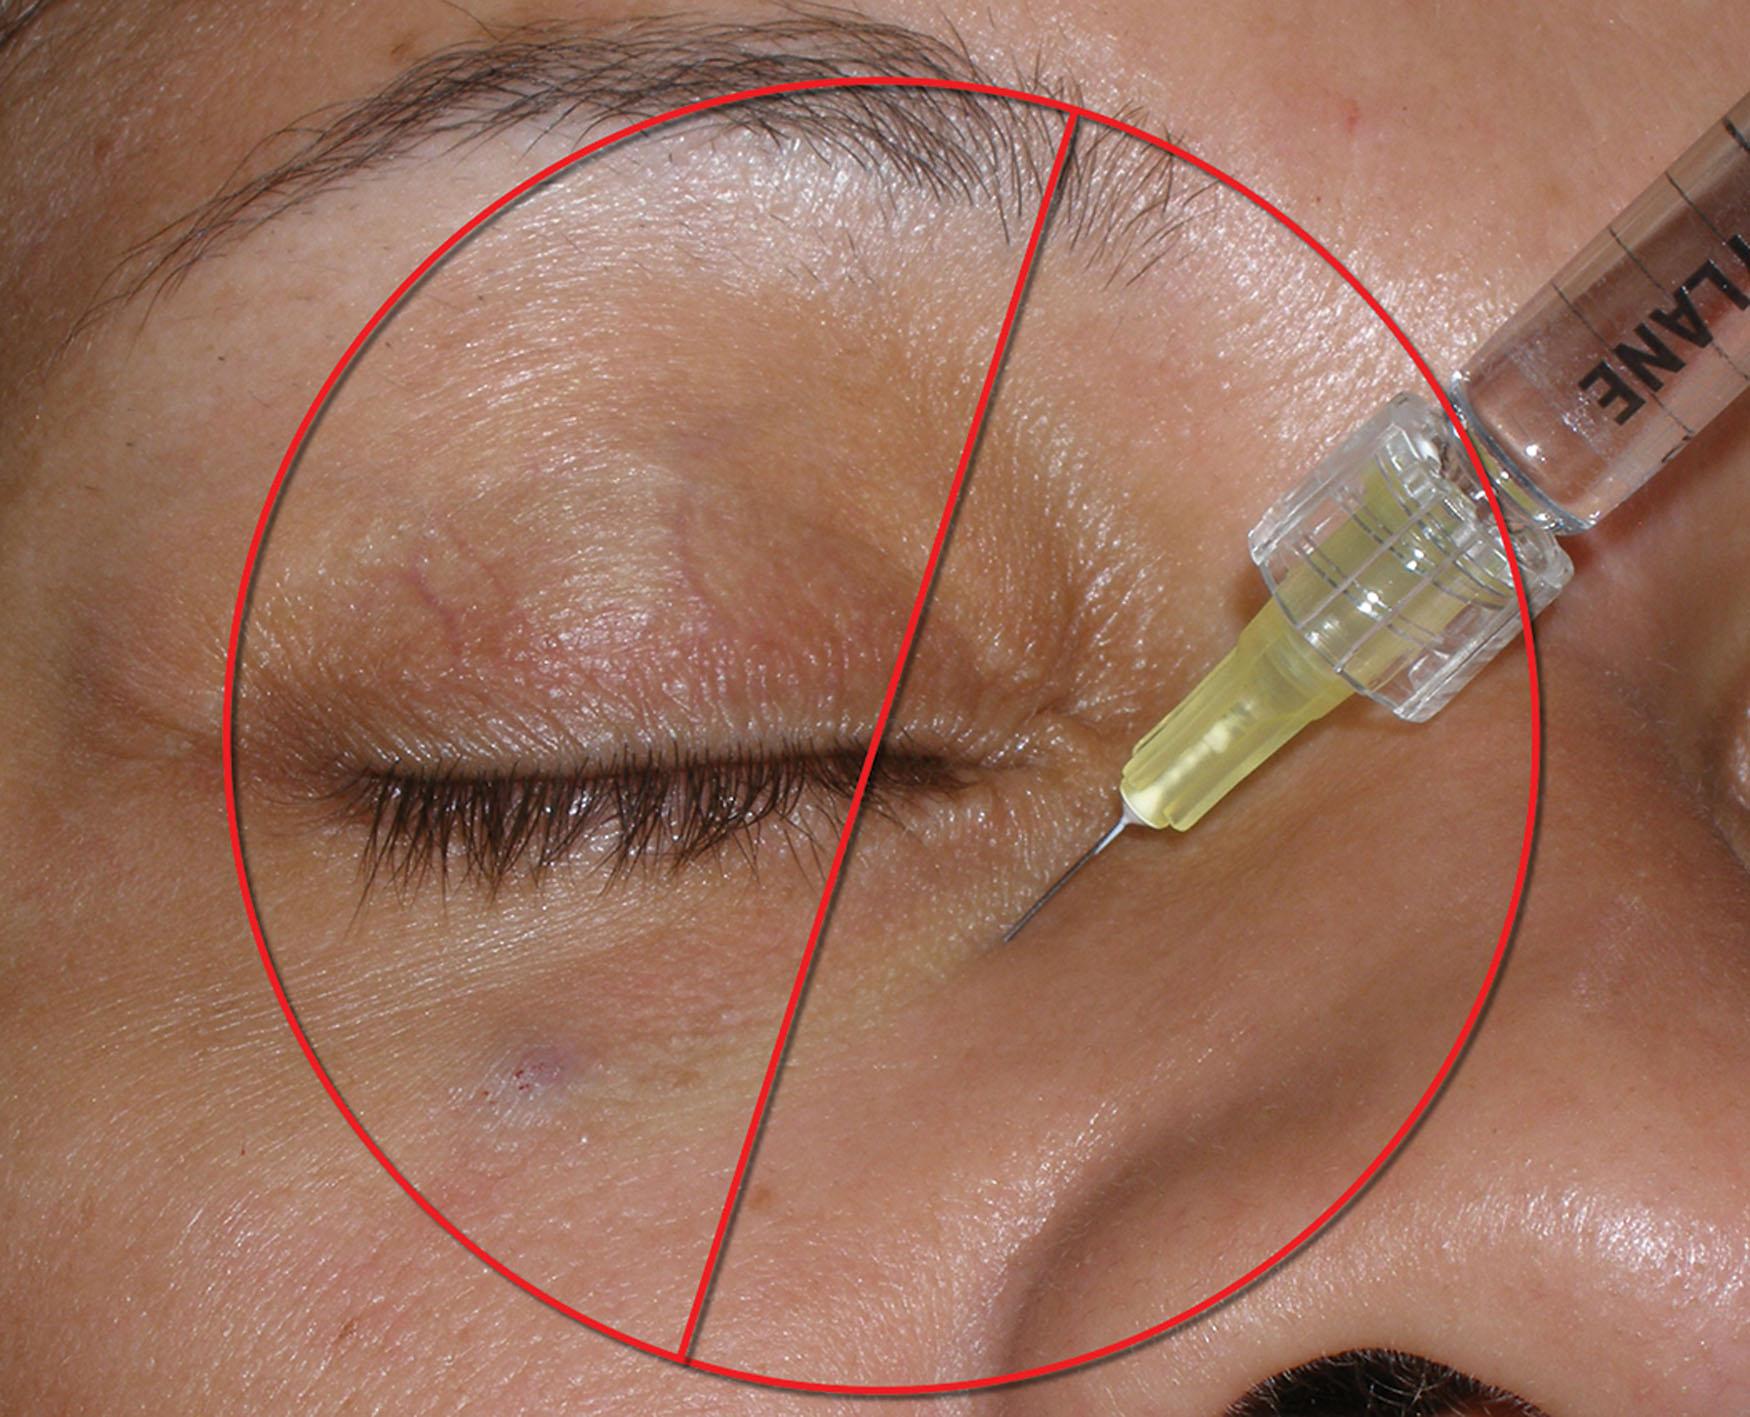
This is one area where I never use non-HA fillers as the ability to dissolve the filler can be insurance against an unhappy patient. As tear trough injection became popular, many articles, lectures, and texts described tear trough injection performed by placing the needle directly through the thin skin over the trough and injecting on the orbital rim periosteum (see Fig. 10.78 ). I have never felt comfortable with this approach as I felt that it caused more potential swelling, bruising, and discomfort.
After rethinking this treatment of placing multiple needlesticks through the thinnest skin on the body in one of the most vascular regions of the face, I began placing my needle more inferiorly and entering through the thicker and less vascular cheek skin. Because most fillers are packaged with half-inch needles, the entry point for tear trough filling is to place the needles through the cheek skin, ½ inch from the intended target. This means that the needle entry point is remote from the needle tip but the needle tip is at the intended injection target ( Fig. 10.79 ).
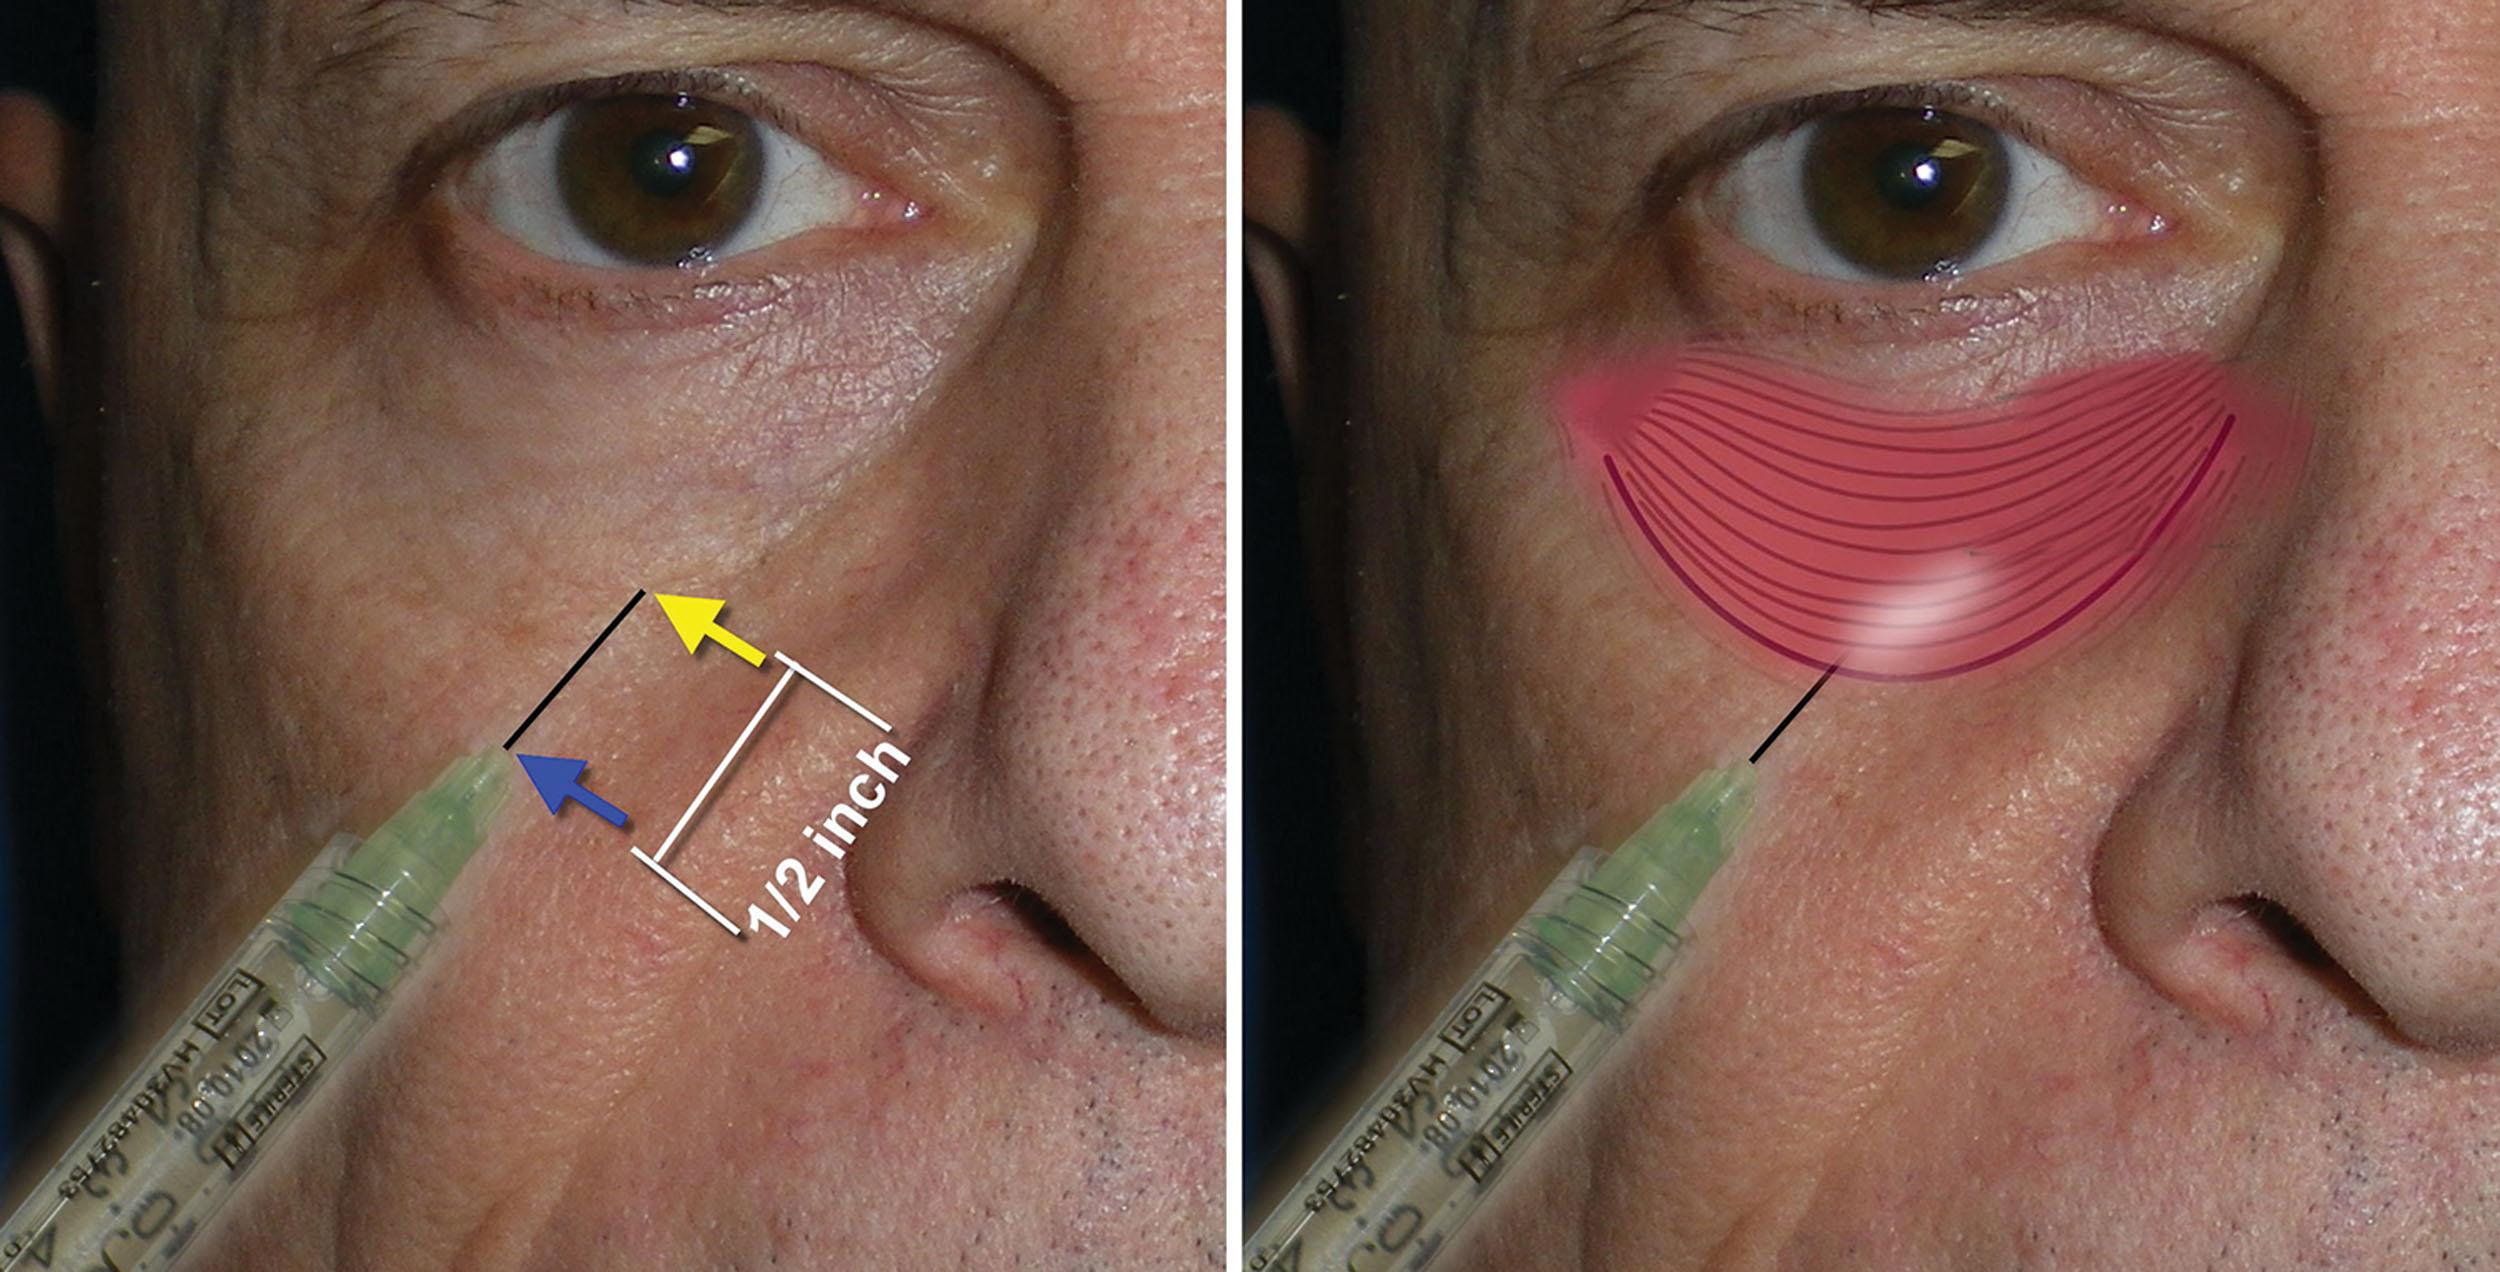
Because of the Tyndall (or Raleigh) effect, I place the filler below the orbicularis oculi muscle. In light-skinned patients, a bluish tinge can be apparent with filler placed too superficially. The tear trough area is very vascular and injectors must be vigilant of inadvertent intravascular injection. The angular artery and vein can be encountered medially as well as smaller caliber vessels throughout the tear trough region. Inadvertent injection in these vessels can result in tissue loss or permanent blindness. This is not an injection region for novice injectors and should only be performed by those who are familiar with the regional anatomy and very experienced with filler injections. Although there are many techniques described for injecting the tear troughs, they all have one thing in common: slow and low-pressure injections. Some injectors prefer needles, and others prefer cannulas. Some injectors prefer injecting at the bone or periosteal level, and others inject the filler in more superficial planes. Like anything else, there are many ways to perform this successfully as long as the injector uses a safe technique with predictable outcomes.
The main reason I prefer injecting submuscularly is that the filler is deposited in this plane and can be “walked” medially toward the nasal bridge. As the periorbital tissue planes are well defined, placing the filler just under the orbicularis oculi allows it to be very easily manipulated with finger pressure ( Fig. 10.80 ). Moving the filler into the medial tear trough with a finger instead of placing a needle in this region greatly improves the chance of avoiding the blood vessels.
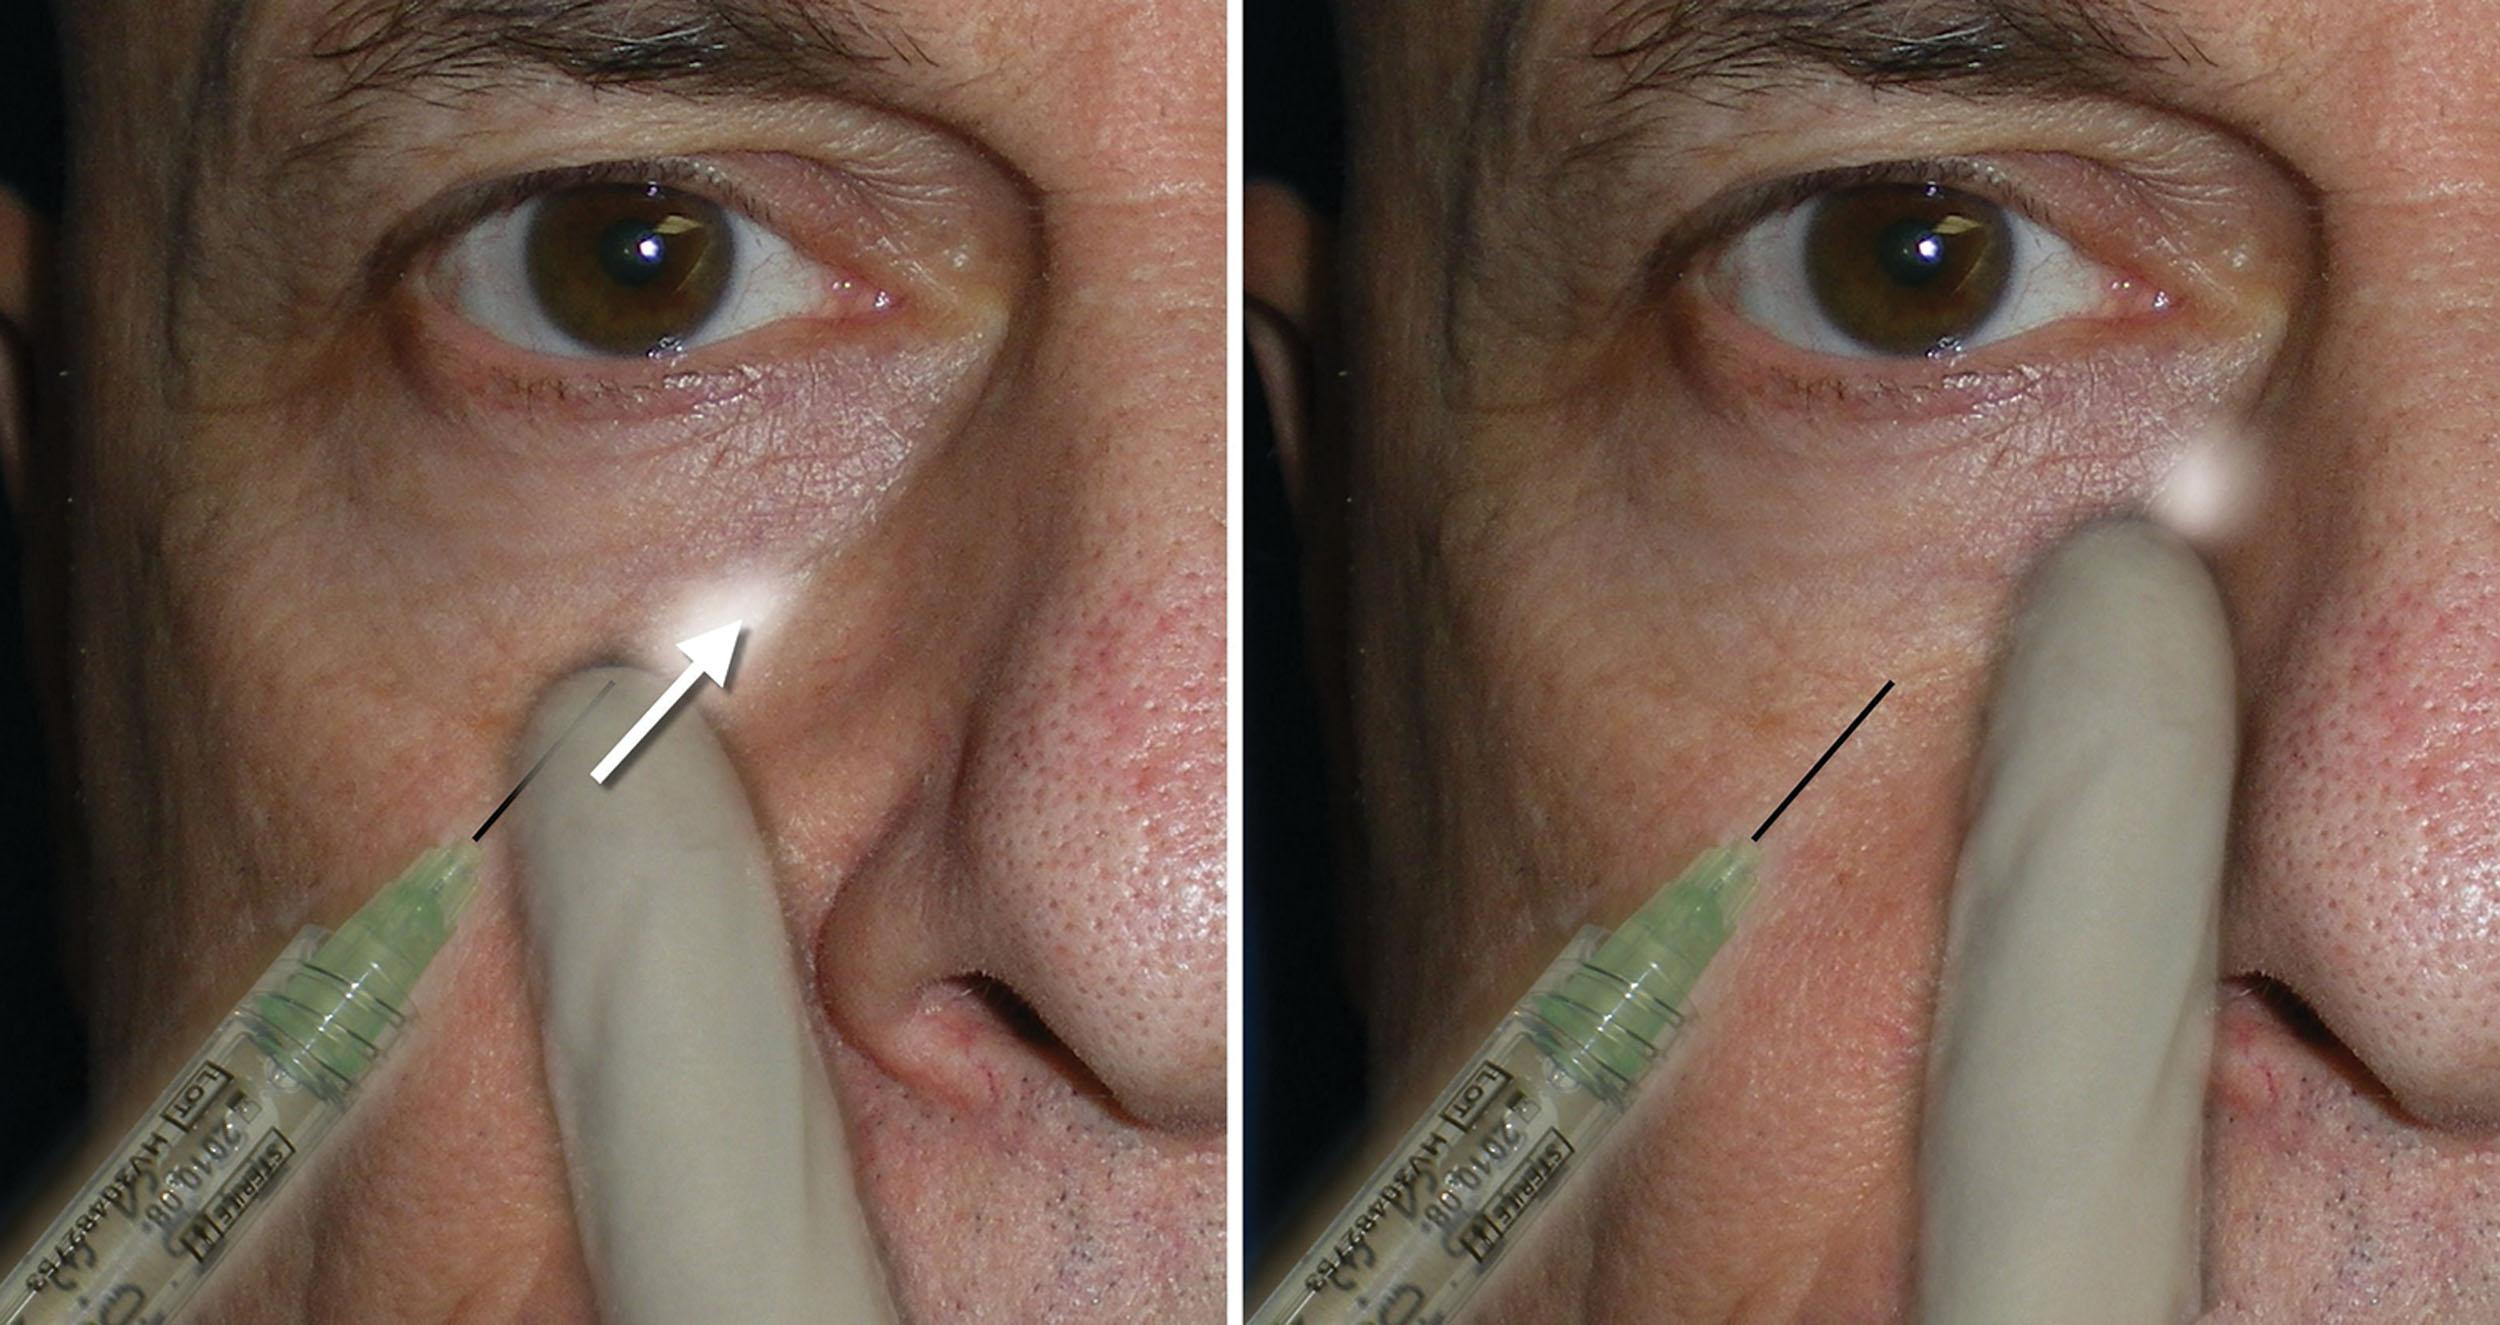
Finally, I try to inject the entire tear trough through one or two needlesticks. There is no doubt that the number of needlesticks can be proportional to the amount of swelling and bruising in this region. The needle can be inserted ½ inch below the center of the tear trough and fanned right and left to treat most of the tear trough through this single entry point ( Fig. 10.81 ). To reach the medial and lateral regions, the needle is slightly withdrawn but not enough to exit the puncture point.
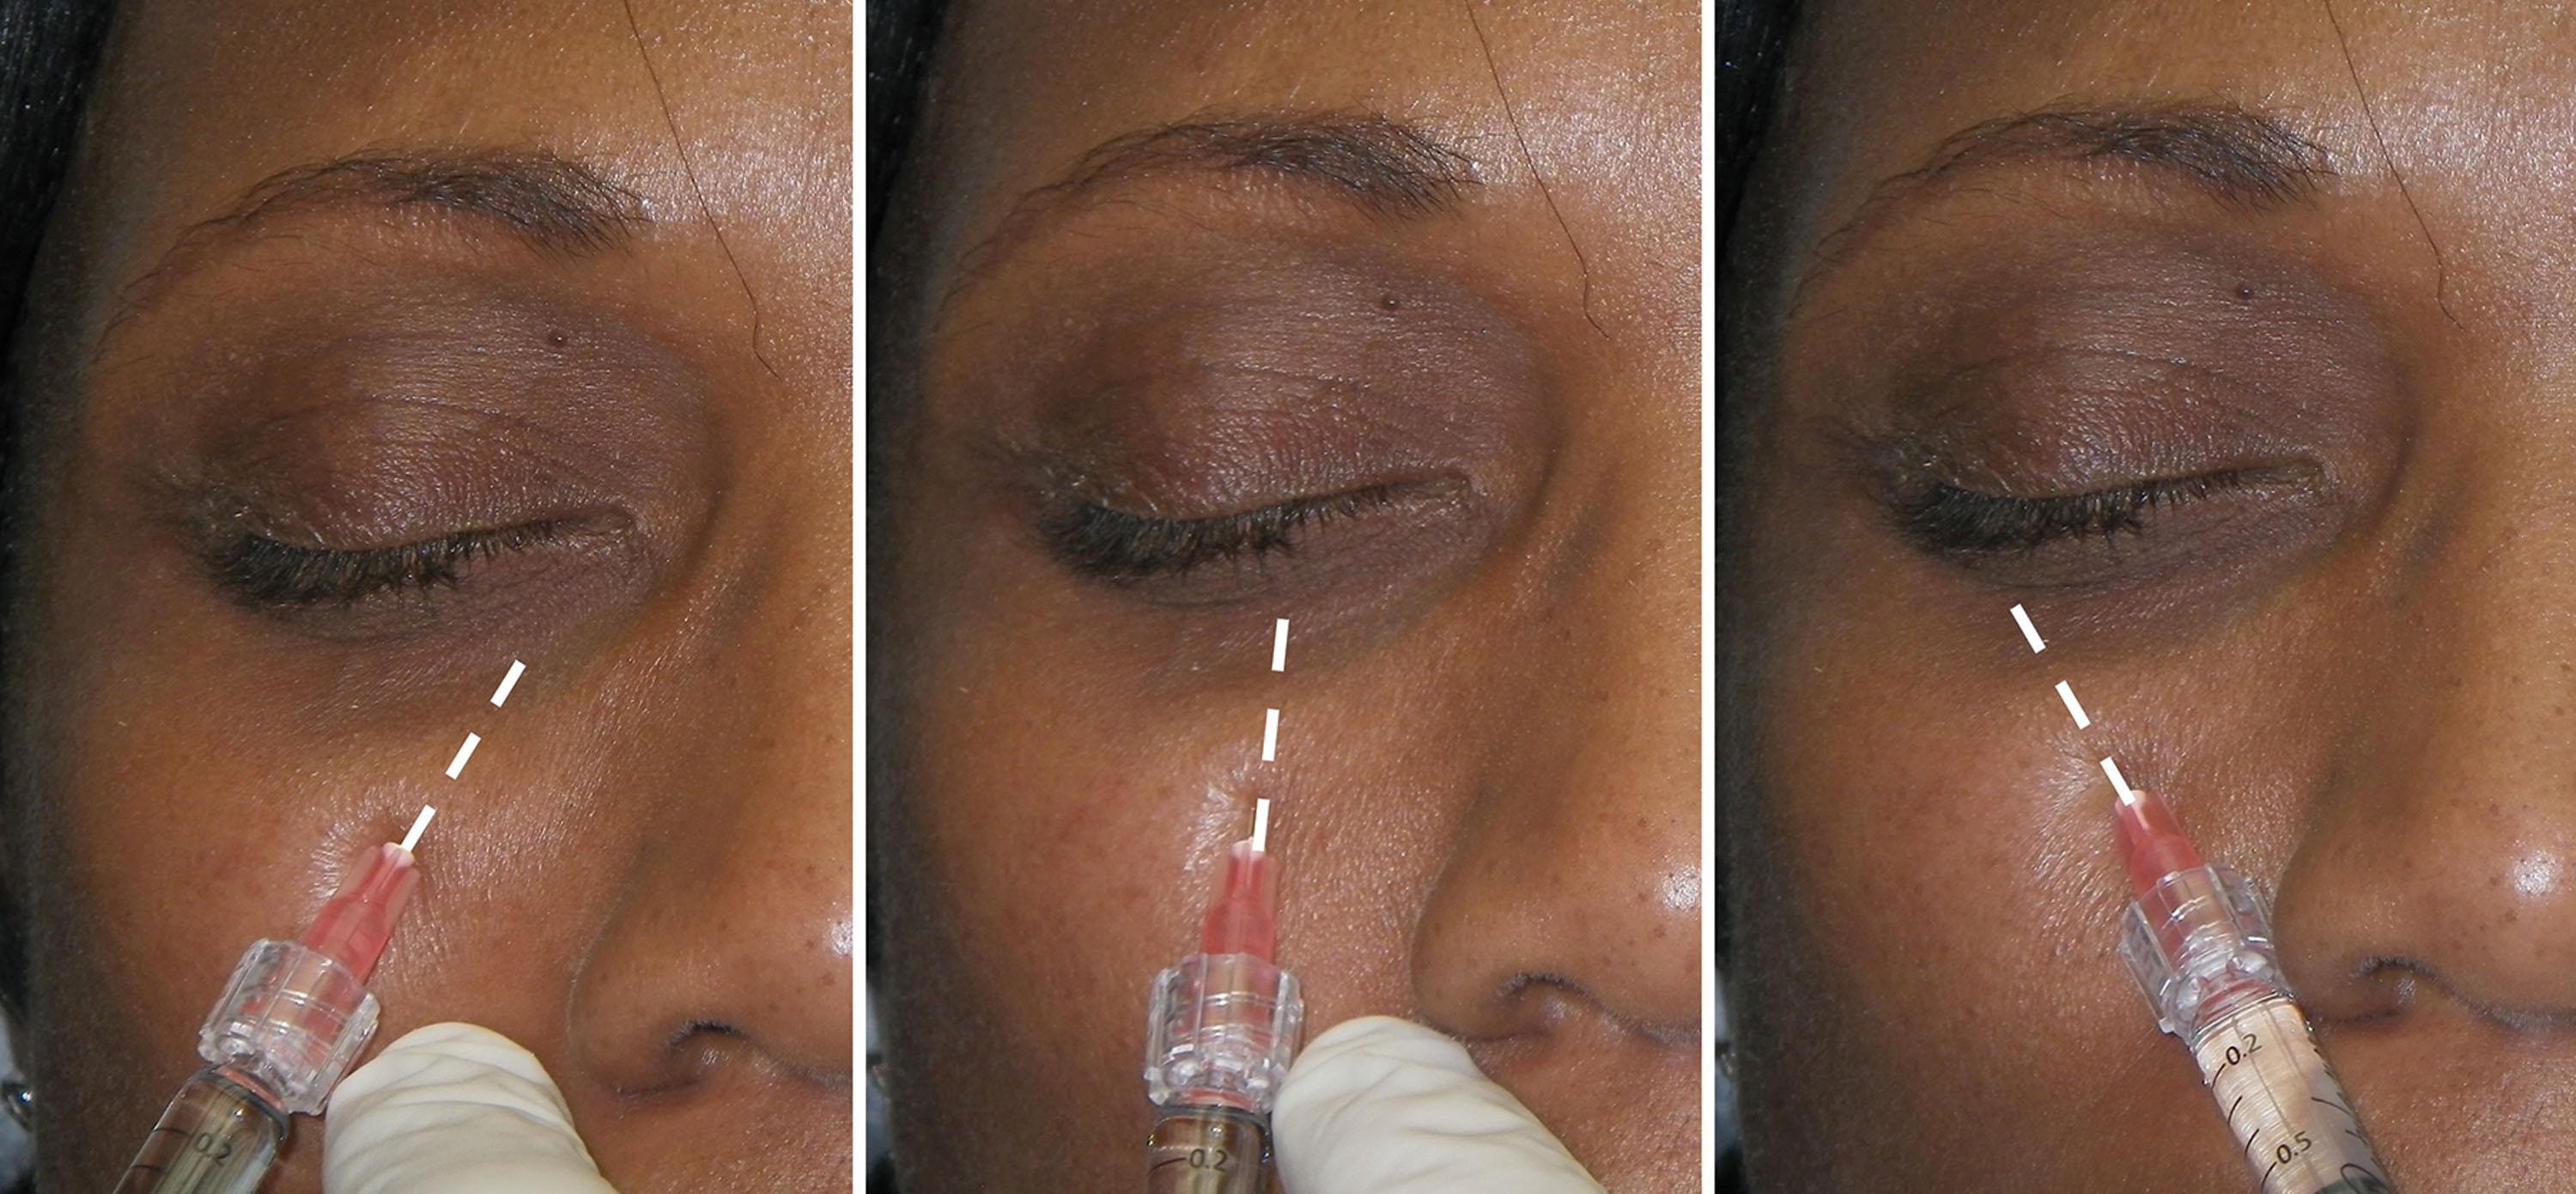
For tear trough filling, thinner, more fluid low G prime fillers are most commonly used. Also, fillers that are less hydrophilic such as Restylane are commonly used. Figs. 10.82 and 10.83 show before and after tear trough filler treatment by the author (JN).
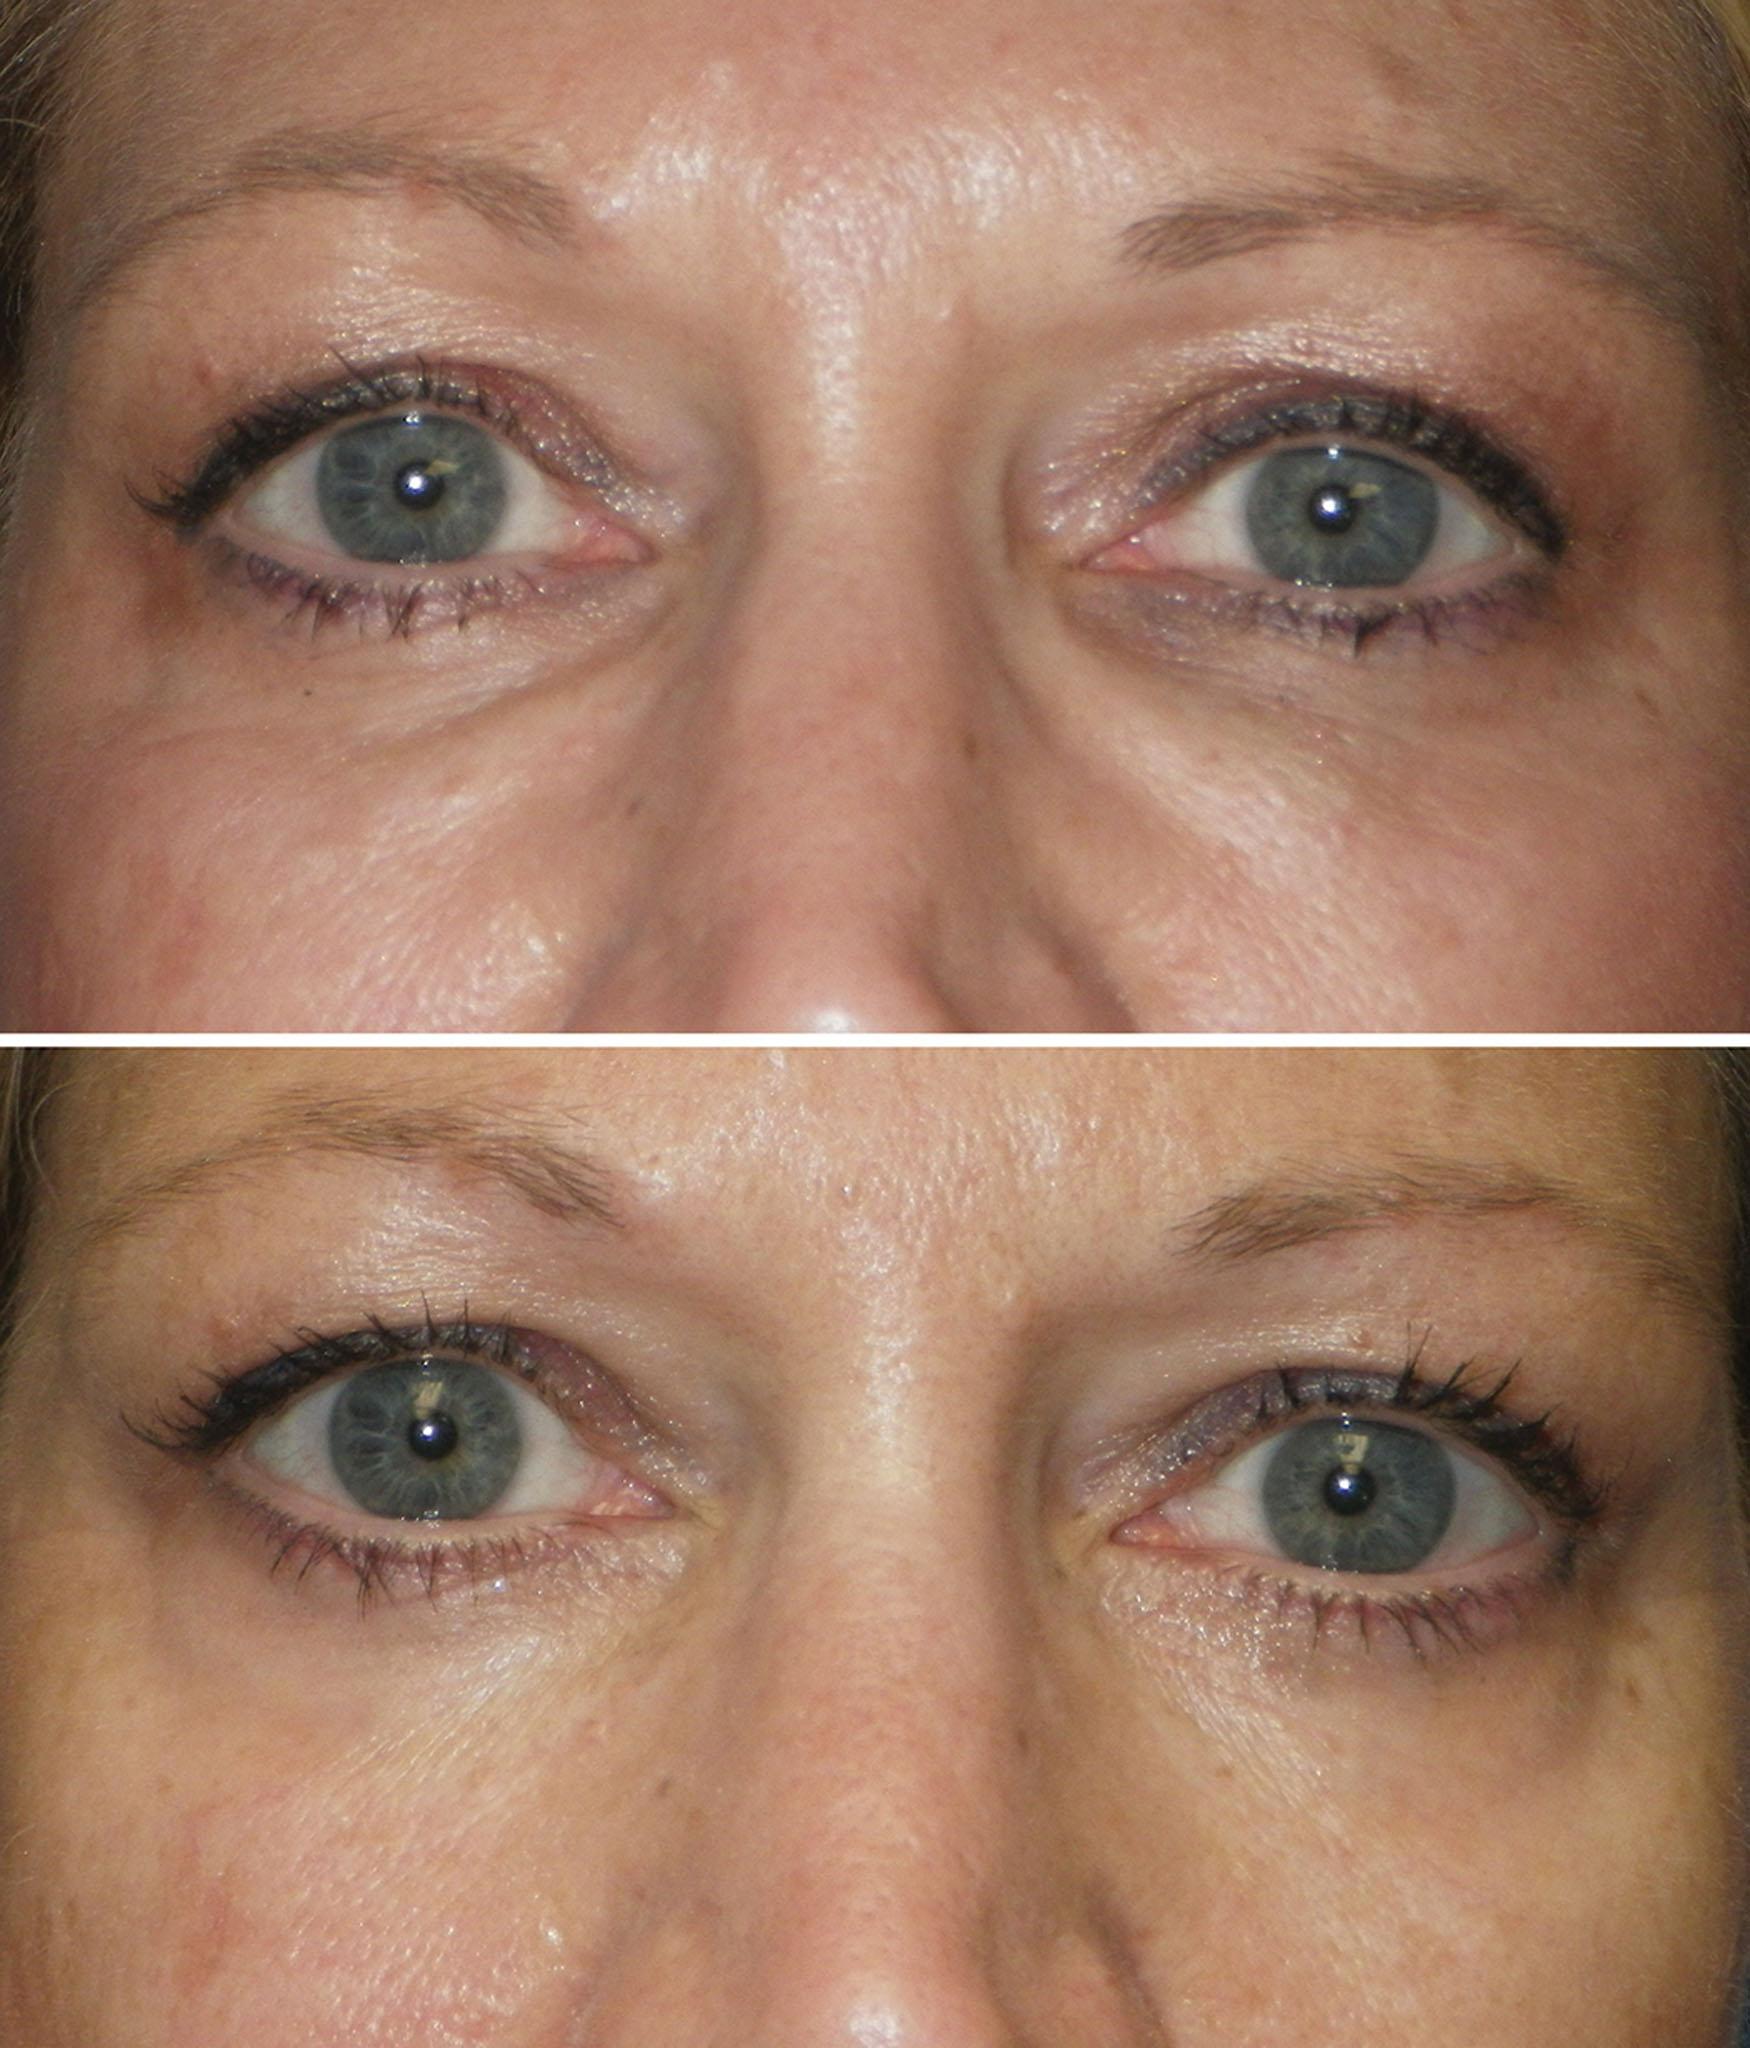
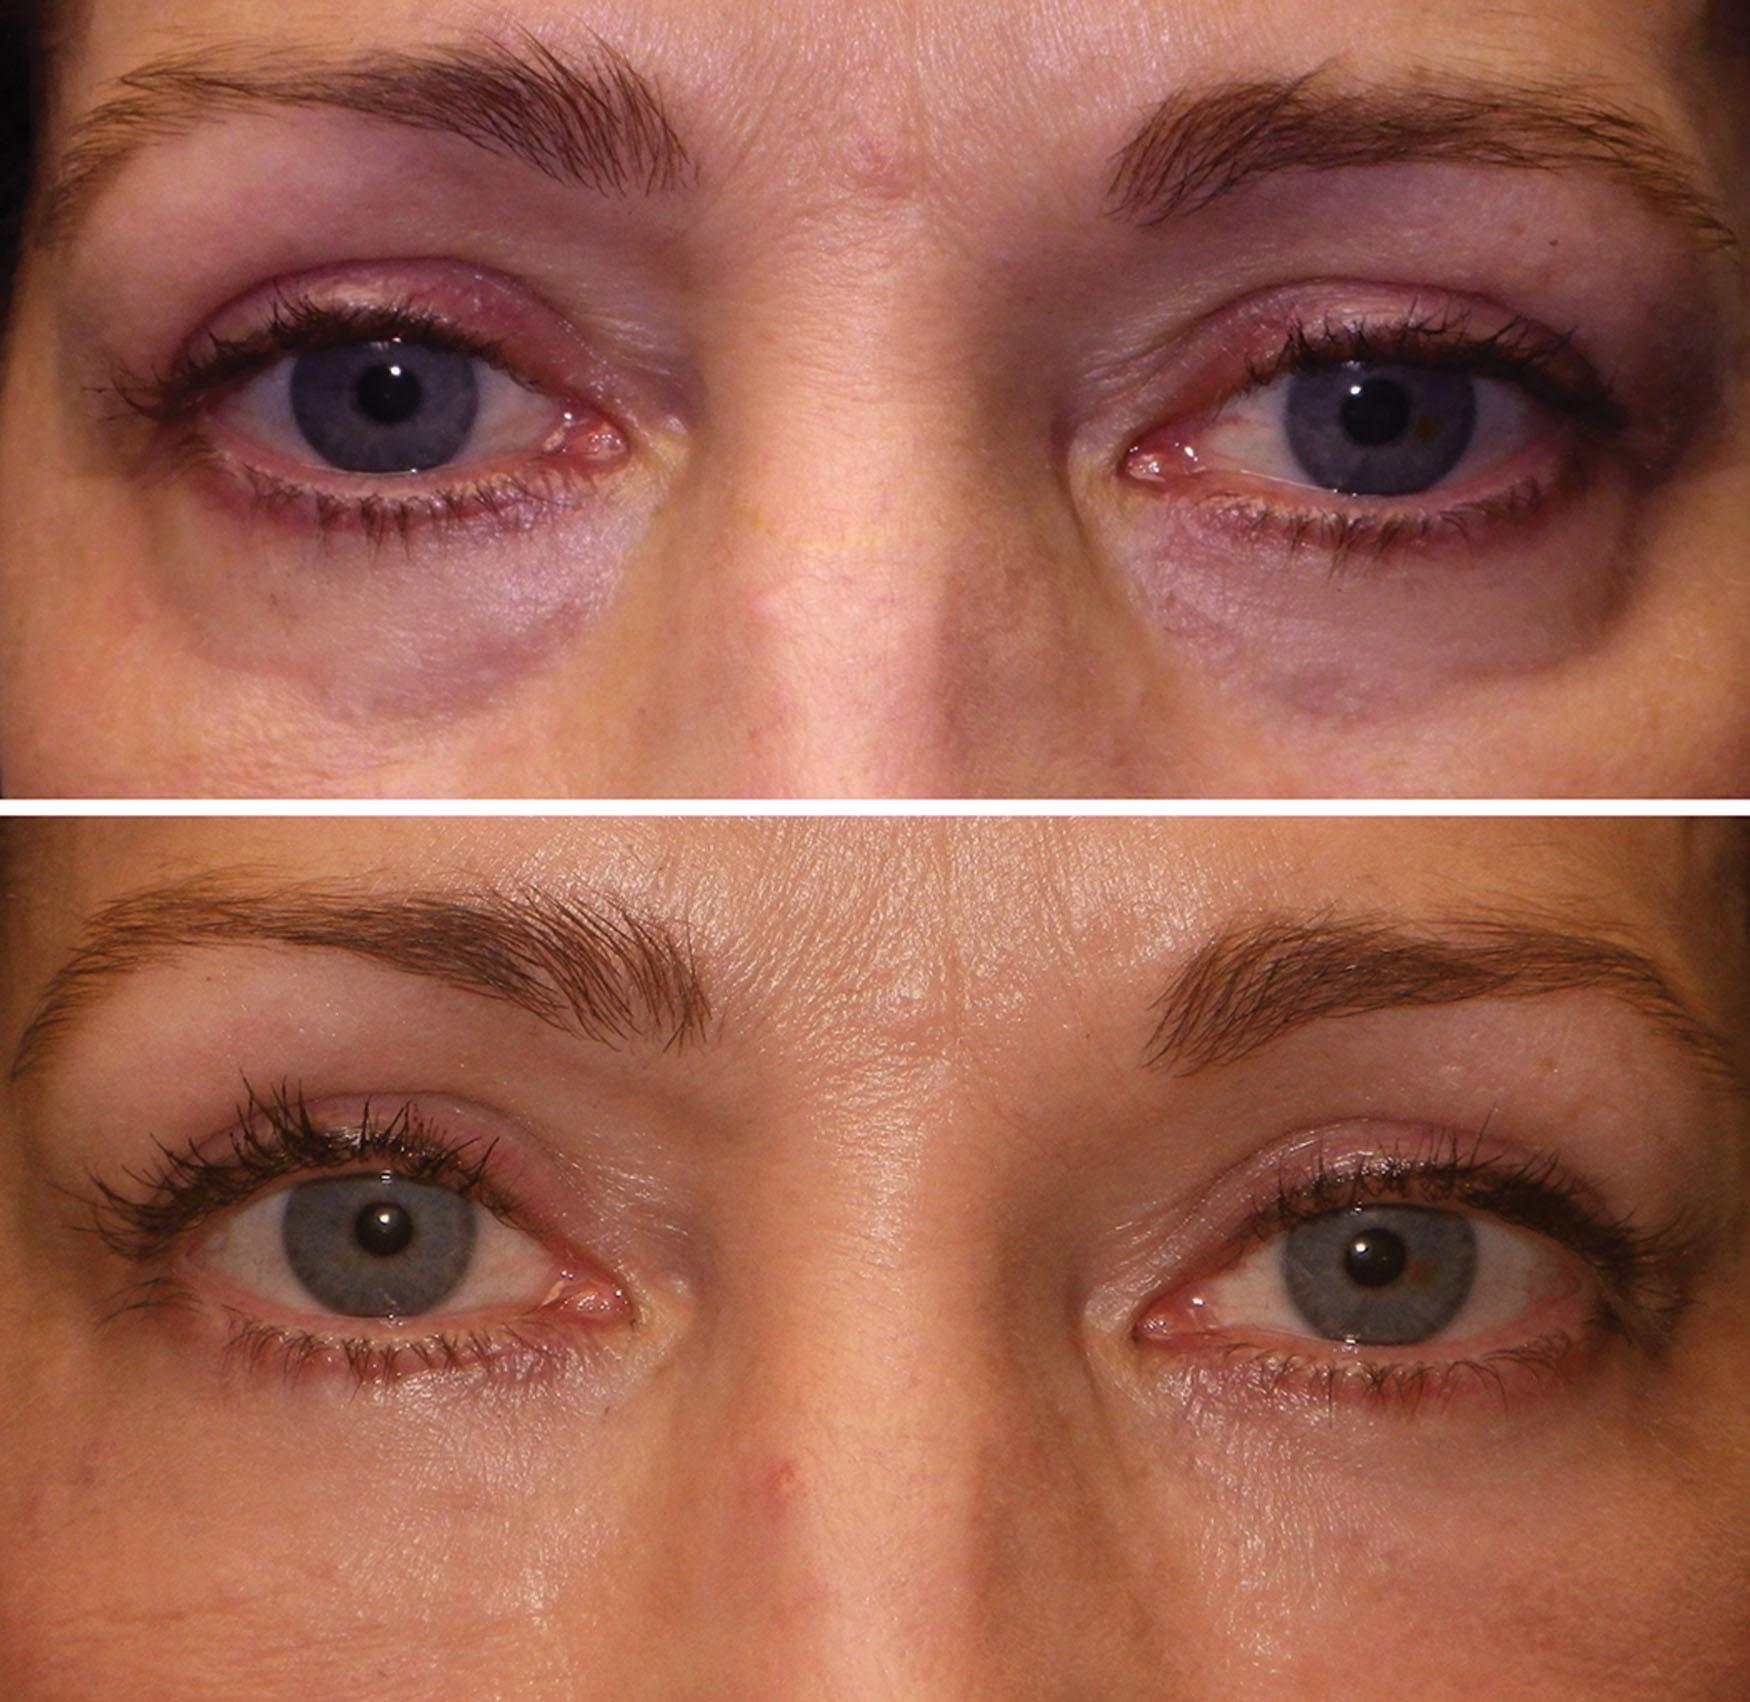
Joe Niamtu, III
Although the described injection method has simplified my tear trough filling, I most often inject the tear trough at the same time as injecting the cheeks. As stated earlier, the midface and lower lid should be thought of as a single anatomic unit. I therefore refer to this treatment as a cheek trough injection, which is a more accurate representation of the treatment and aging changes addressed.
To accurately inject the cheek, the injector must understand the anatomy and subunits of the cheek. The youthful, volumized face has fullness in the infraorbital, malar, and zygomatic regions. From the three-quarter view, one can appreciate the natural “ S -curve” of the youthful midface, which is also referred to as the ogee curve of the cheek in reference to the architectural shape ( Fig. 10.84 ). The projection of the “cheek apple” is such that the normal area of maximum projection creates a light reflex. This area of fullness and light reflection corresponds to Hinderer’s lines, which is the intersection of imaginary lines from the commissure to the canthus and from the ala to the tragus (see Fig. 10.84 ). The intersection of vertical and horizontal lines that lie within a triangle from canthus to commissure to the helical attachment also defines the region of maximum projection in the aesthetic, youthful cheek. All three of the areas shown should be duplicated in midface filling.
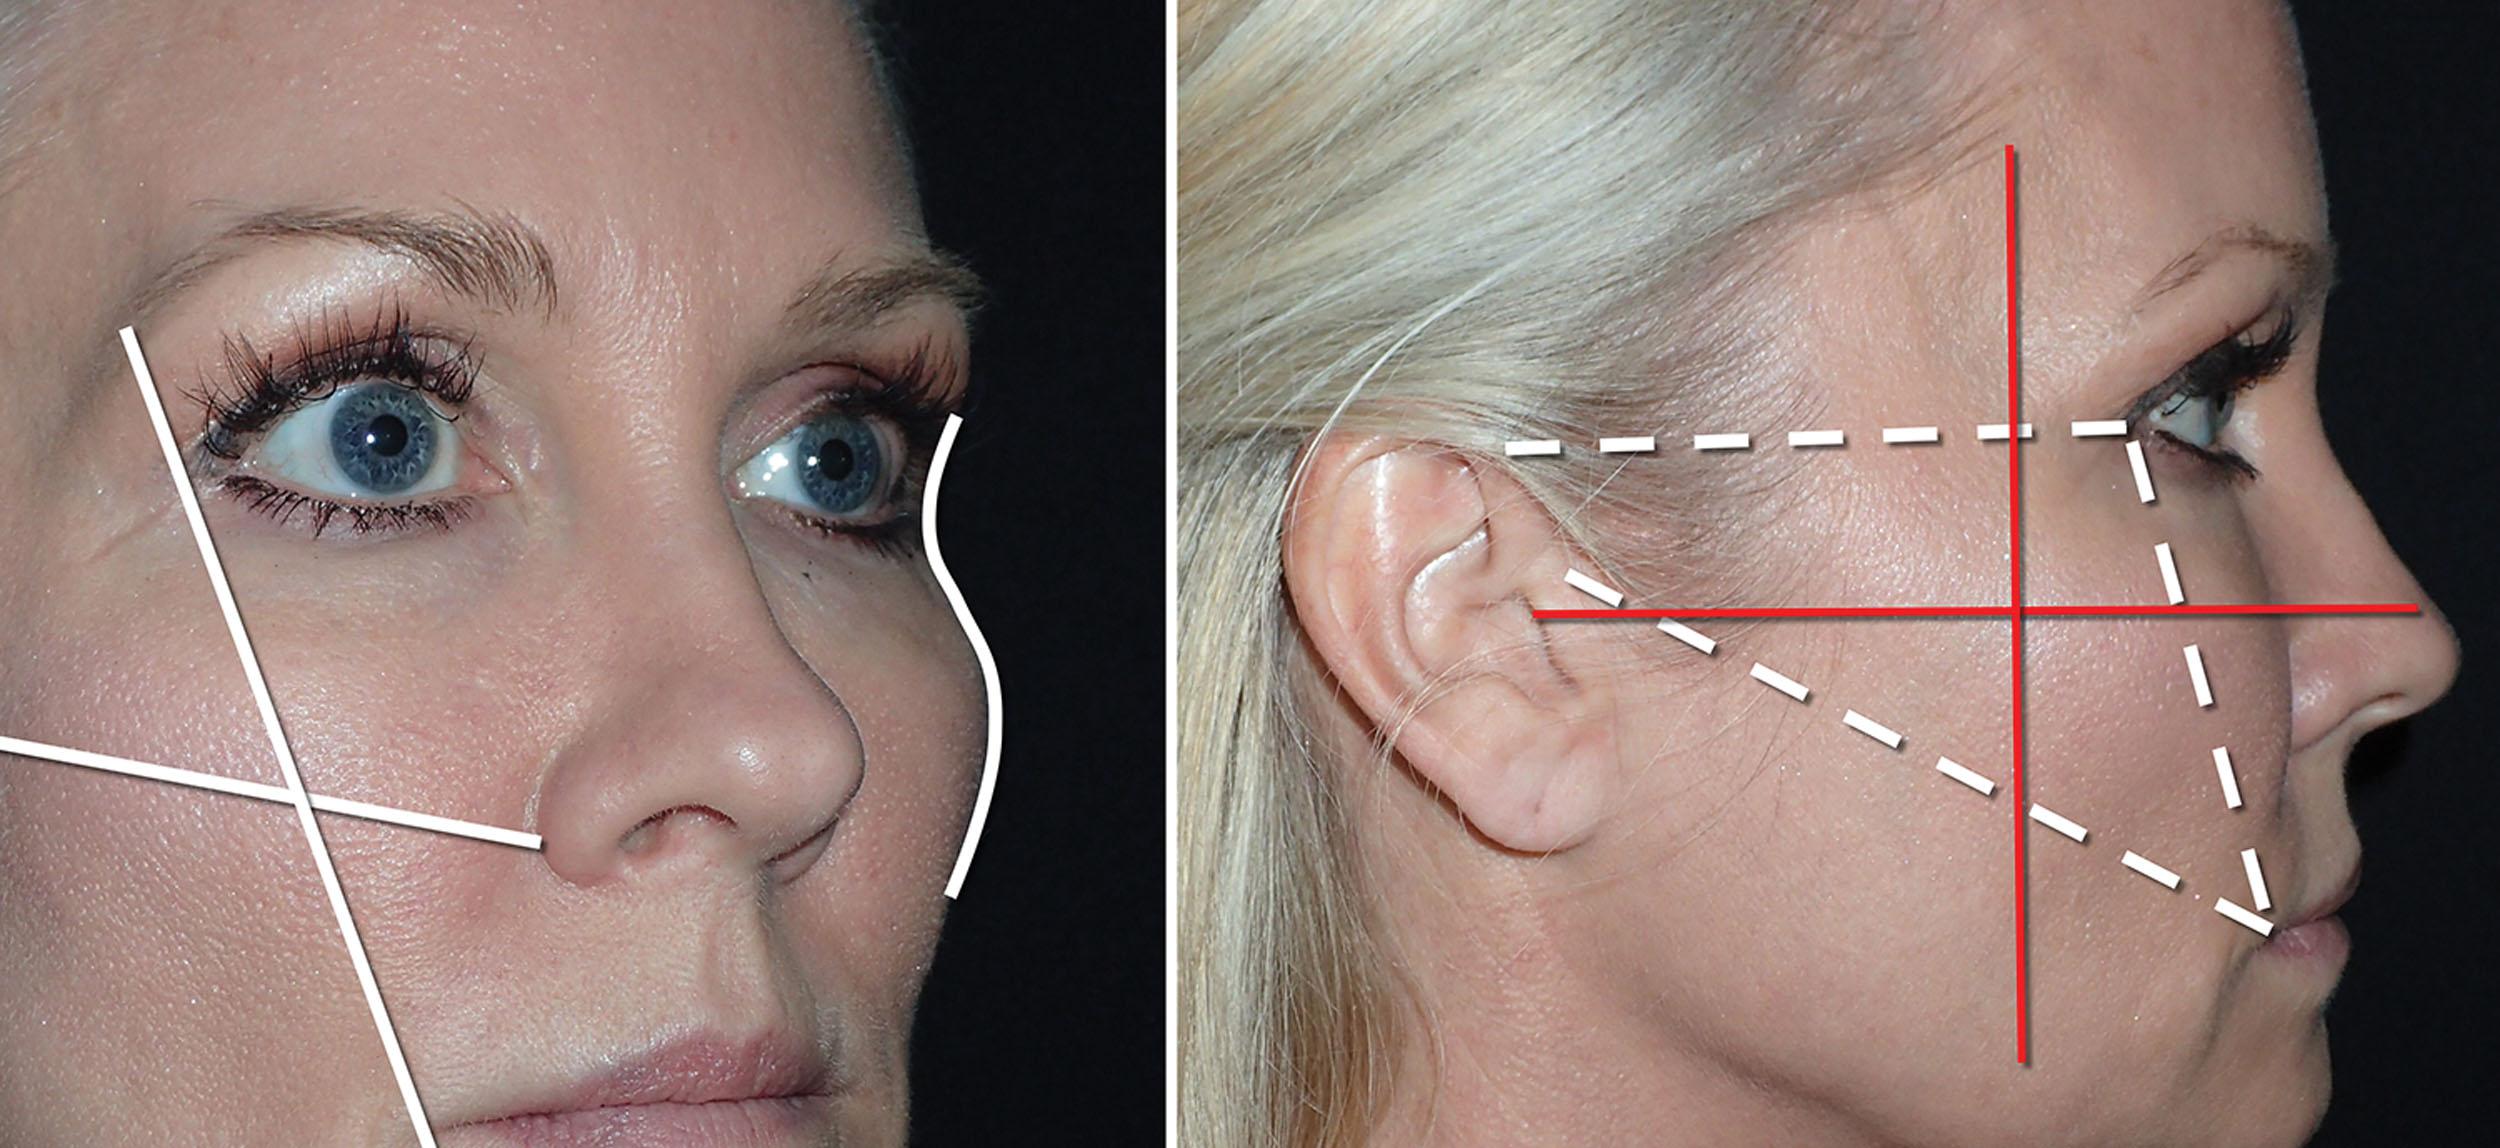
Every patient that presents for midface filler is slightly different. Younger patients may only require a small amount of infraorbital fill, while older patients may require filler across the entire cheek into the zygomatic region.
When teaching midface augmentation, I use two analogies to assist the injector in placing the correct amount of filler in the correct areas. The first analogy is the “olympic rings” method of treating the cheek. Overlapping circles are drawn on the infraorbital, malar, and zygomatic regions of the cheek. This assists the injector in forming a confluent, volumized, and symmetric cheek ( Fig. 10.85 ). Topical anesthesia is usually adequate for treating this area. The filler is injected at the intersection of each circle proportional to the desired augmentation and consistent with normal youthful cheek projection and light reflex. The treatment requires four puncture sites and proceeds from medial to lateral ( Figs. 10.86 and 10.87 ). For mild to moderate volume loss, 1 mL HA filler is generally adequate for each side. Severe volume loss can require up to 4 mL of filler. The infraorbital region is injected first, the malar section next, and the zygomatic region third. The smaller tail of the zygomatic arch is treated last and only requires a small amount of filler. This final section of the zygomatic arch is very important as it gives the “high cheekbone” appearance and is very noticeable to the patient when they look in a mirror. Excluding this final area is a faux pas, and it is overlooked by many injectors. Following this simple mapping can greatly simplify cheek augmentation with filler injection.
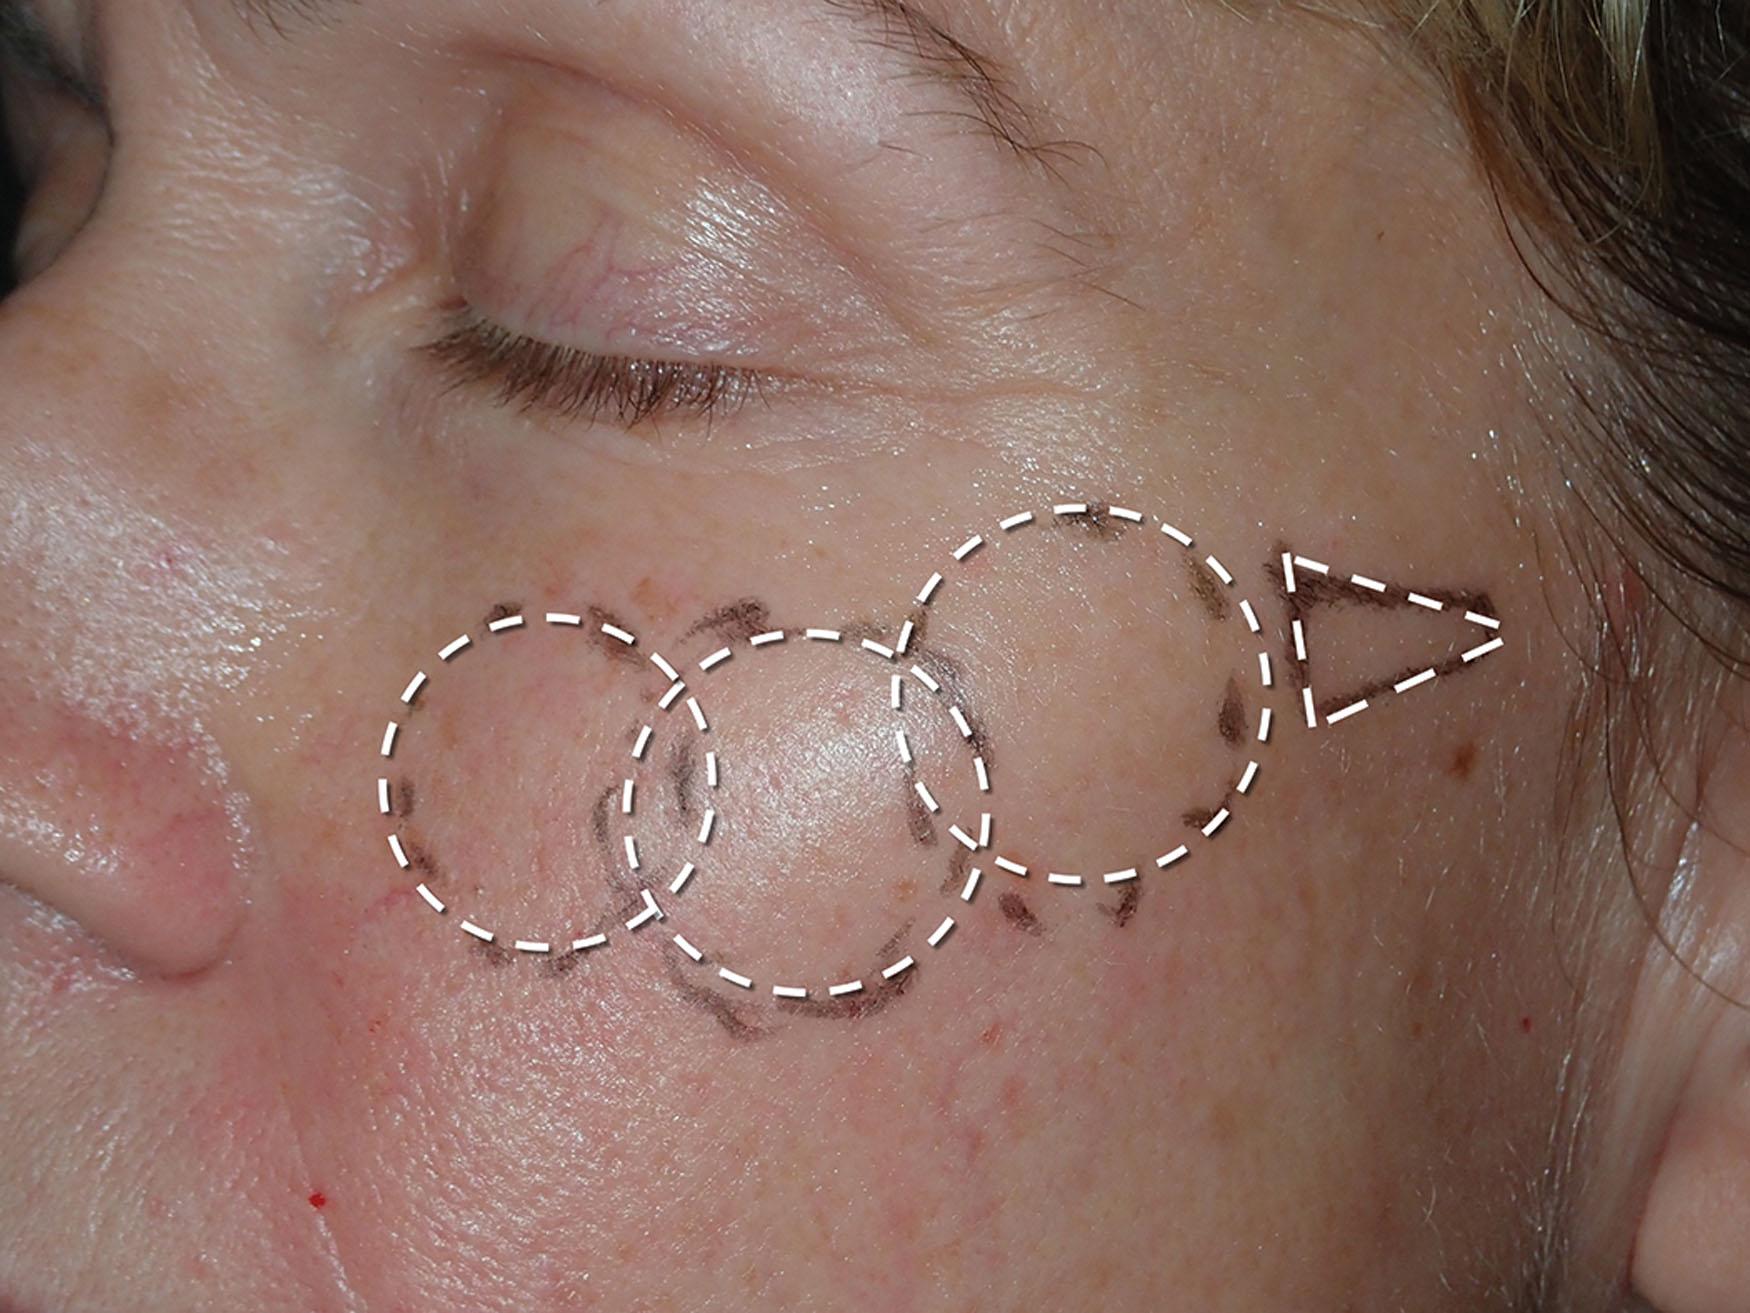
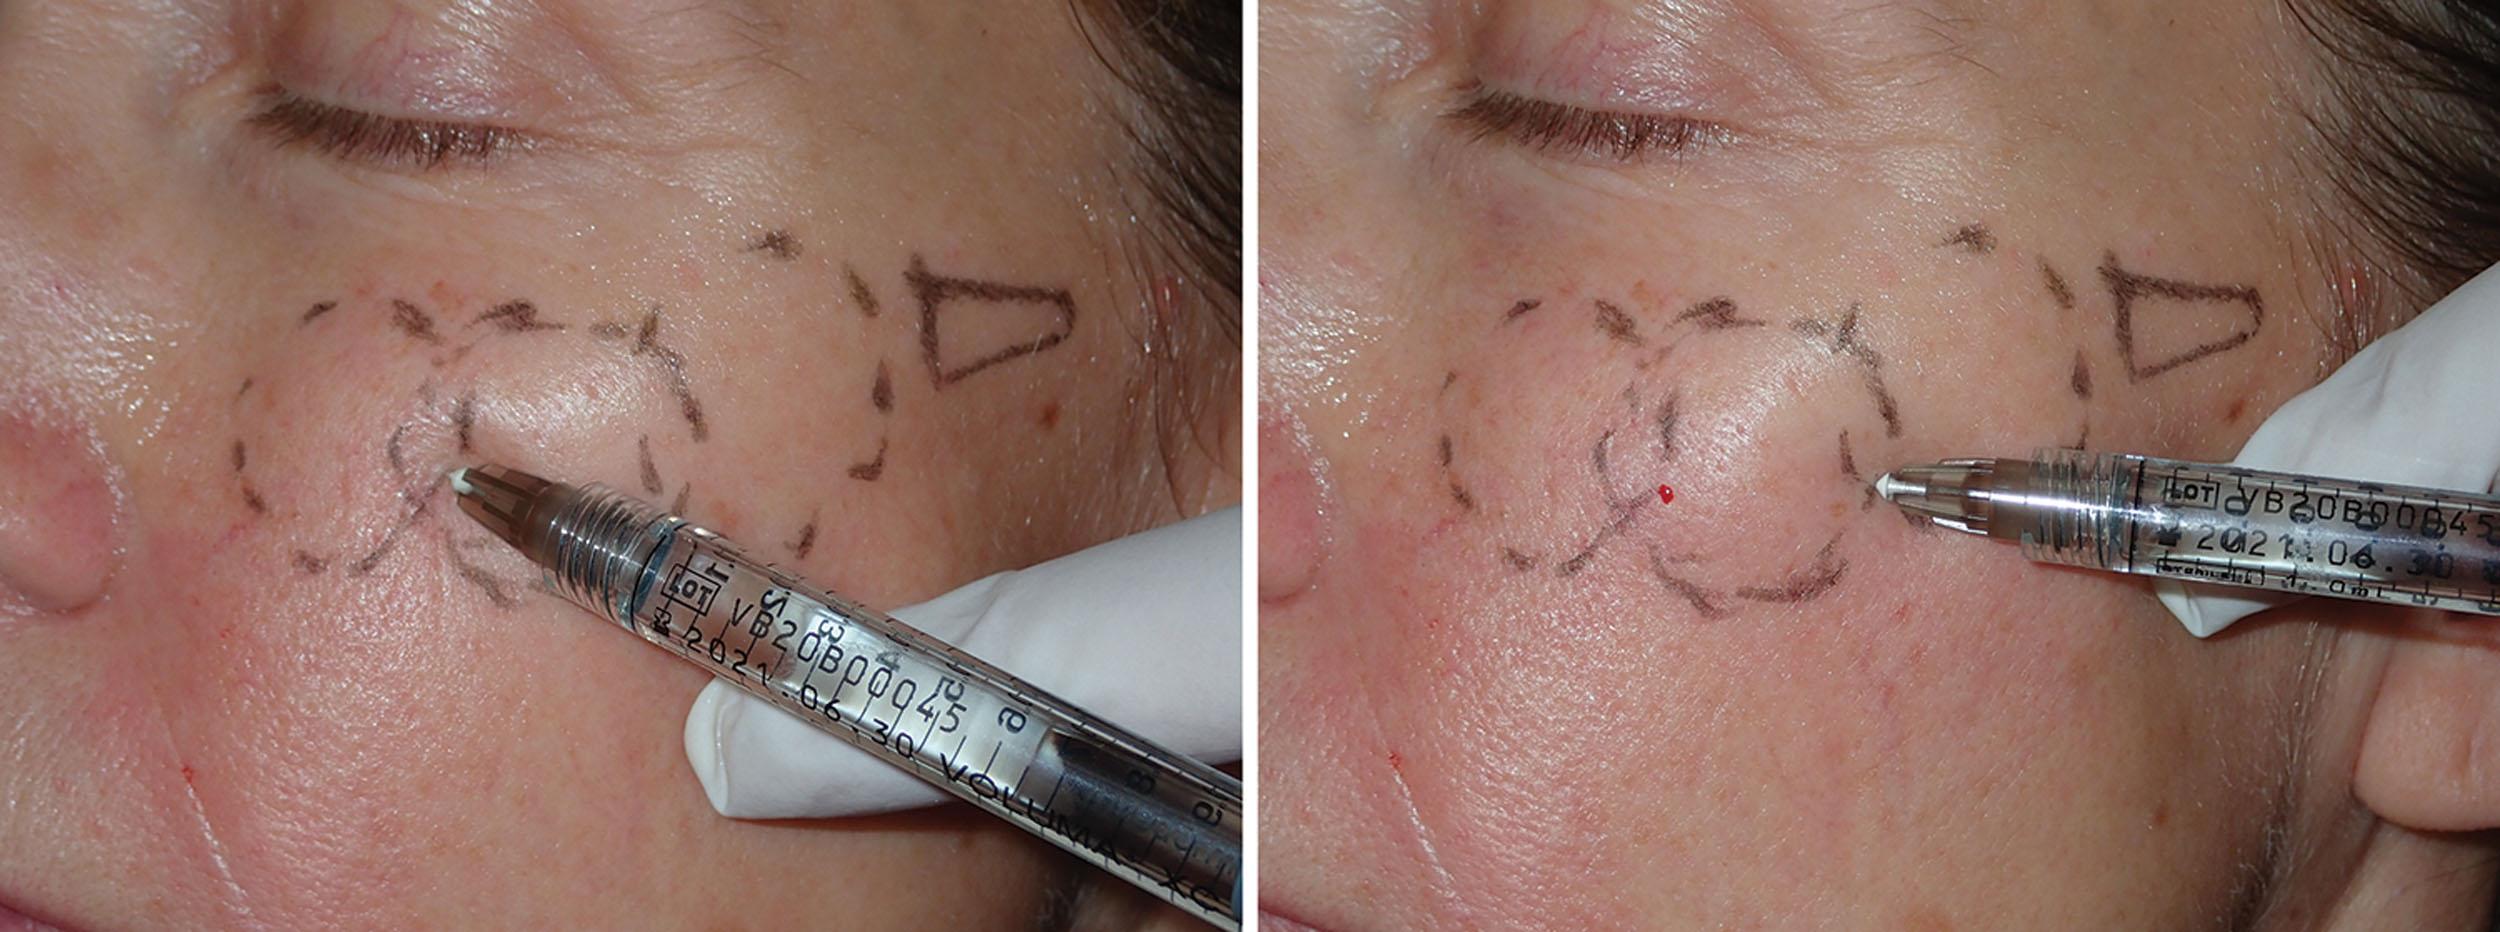
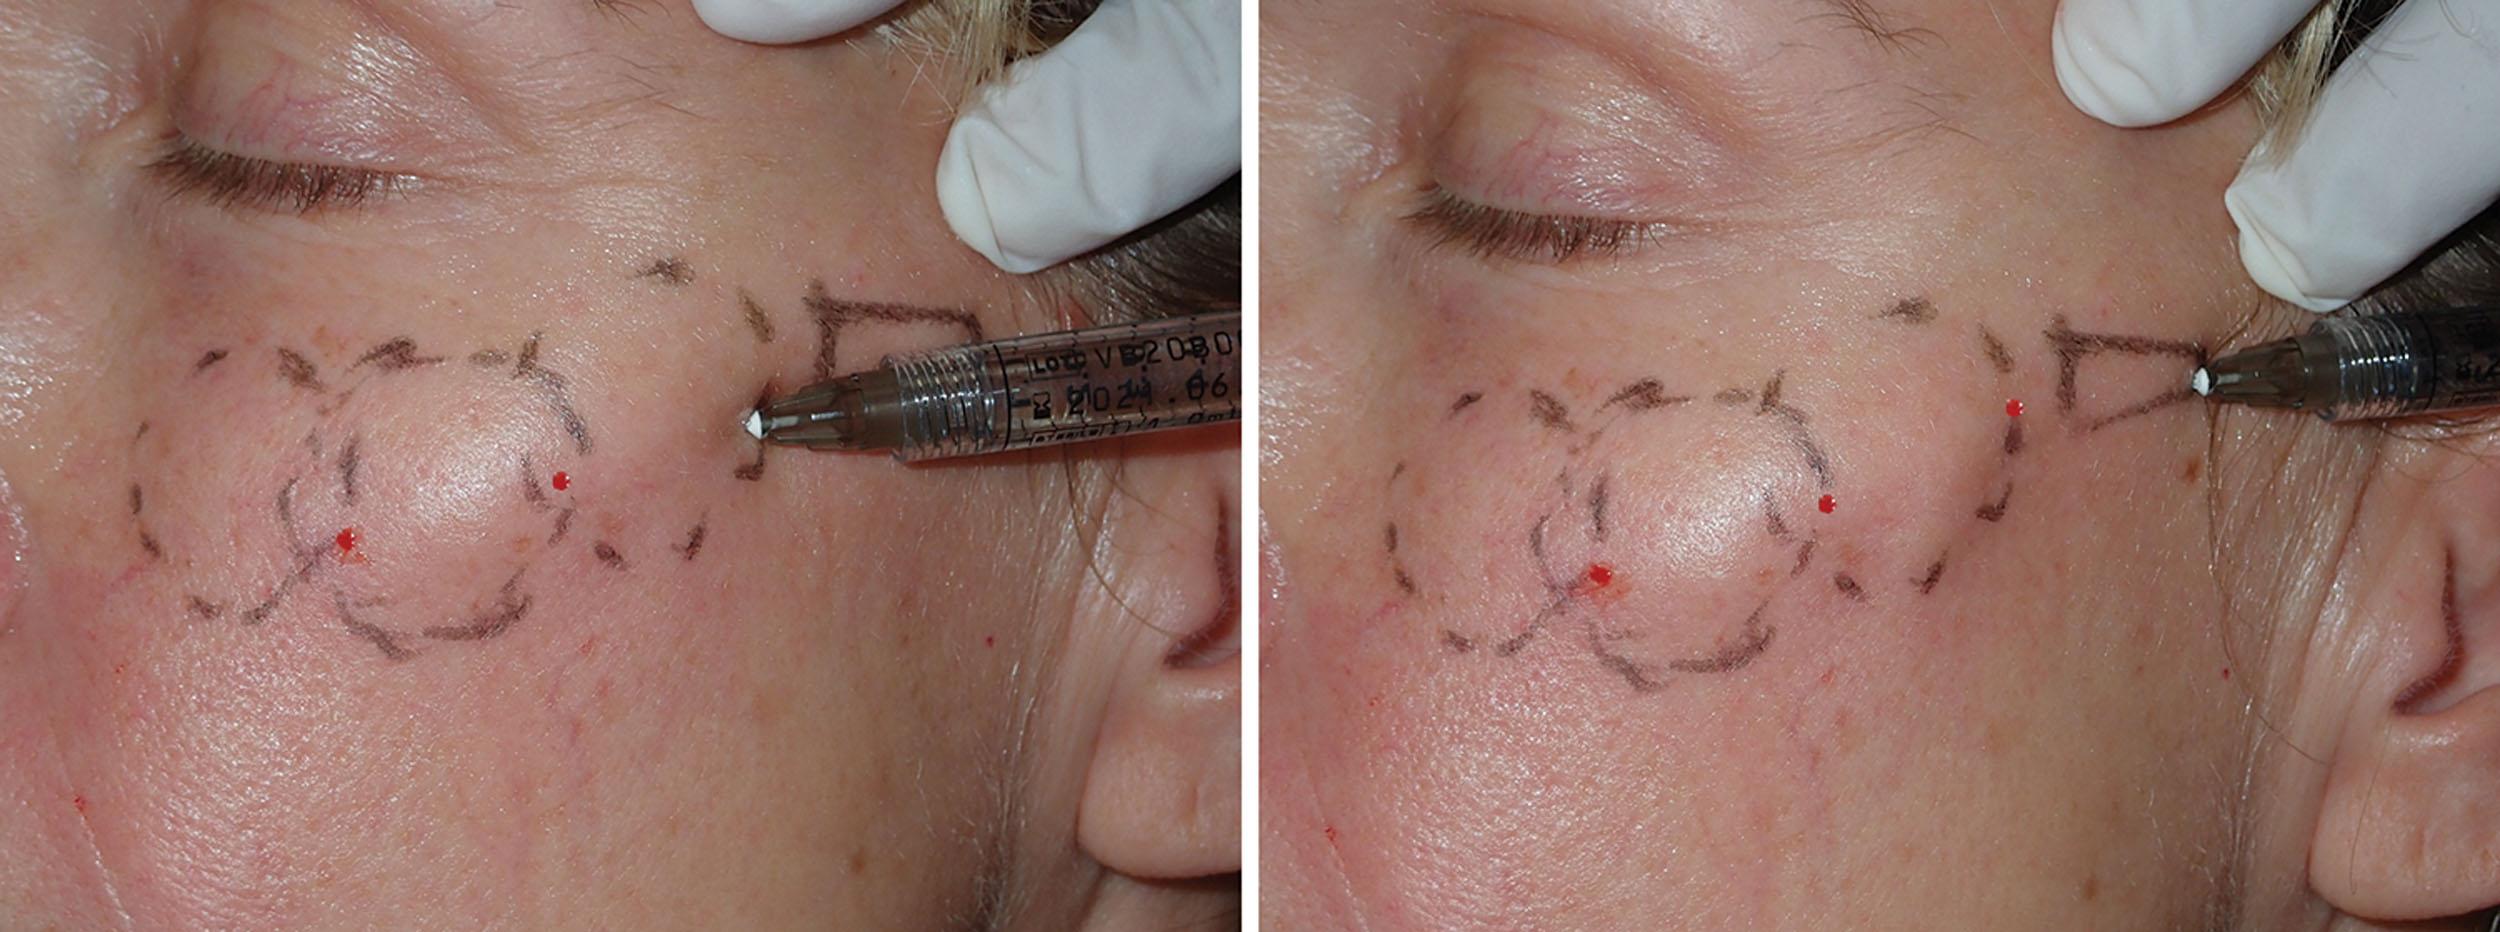
I have described the tear trough and cheek as being a single unit and refer to it as the cheek trough . Many patients who have volume deficiency in the midface would benefit from tear trough injection as well, and this is combined simultaneously with cheek filling. The cheek injections are first performed as outlined with the concentric circles. After injecting the three cheek regions, a bolus of filler is injected from below on the cheek with the needle tip lying in the tear trough ( Fig. 10.88 ). The filler is injected more centrally (in the submuscular plane) and walked to the medial tear trough with the index finger, as shown in Fig. 10.80 .
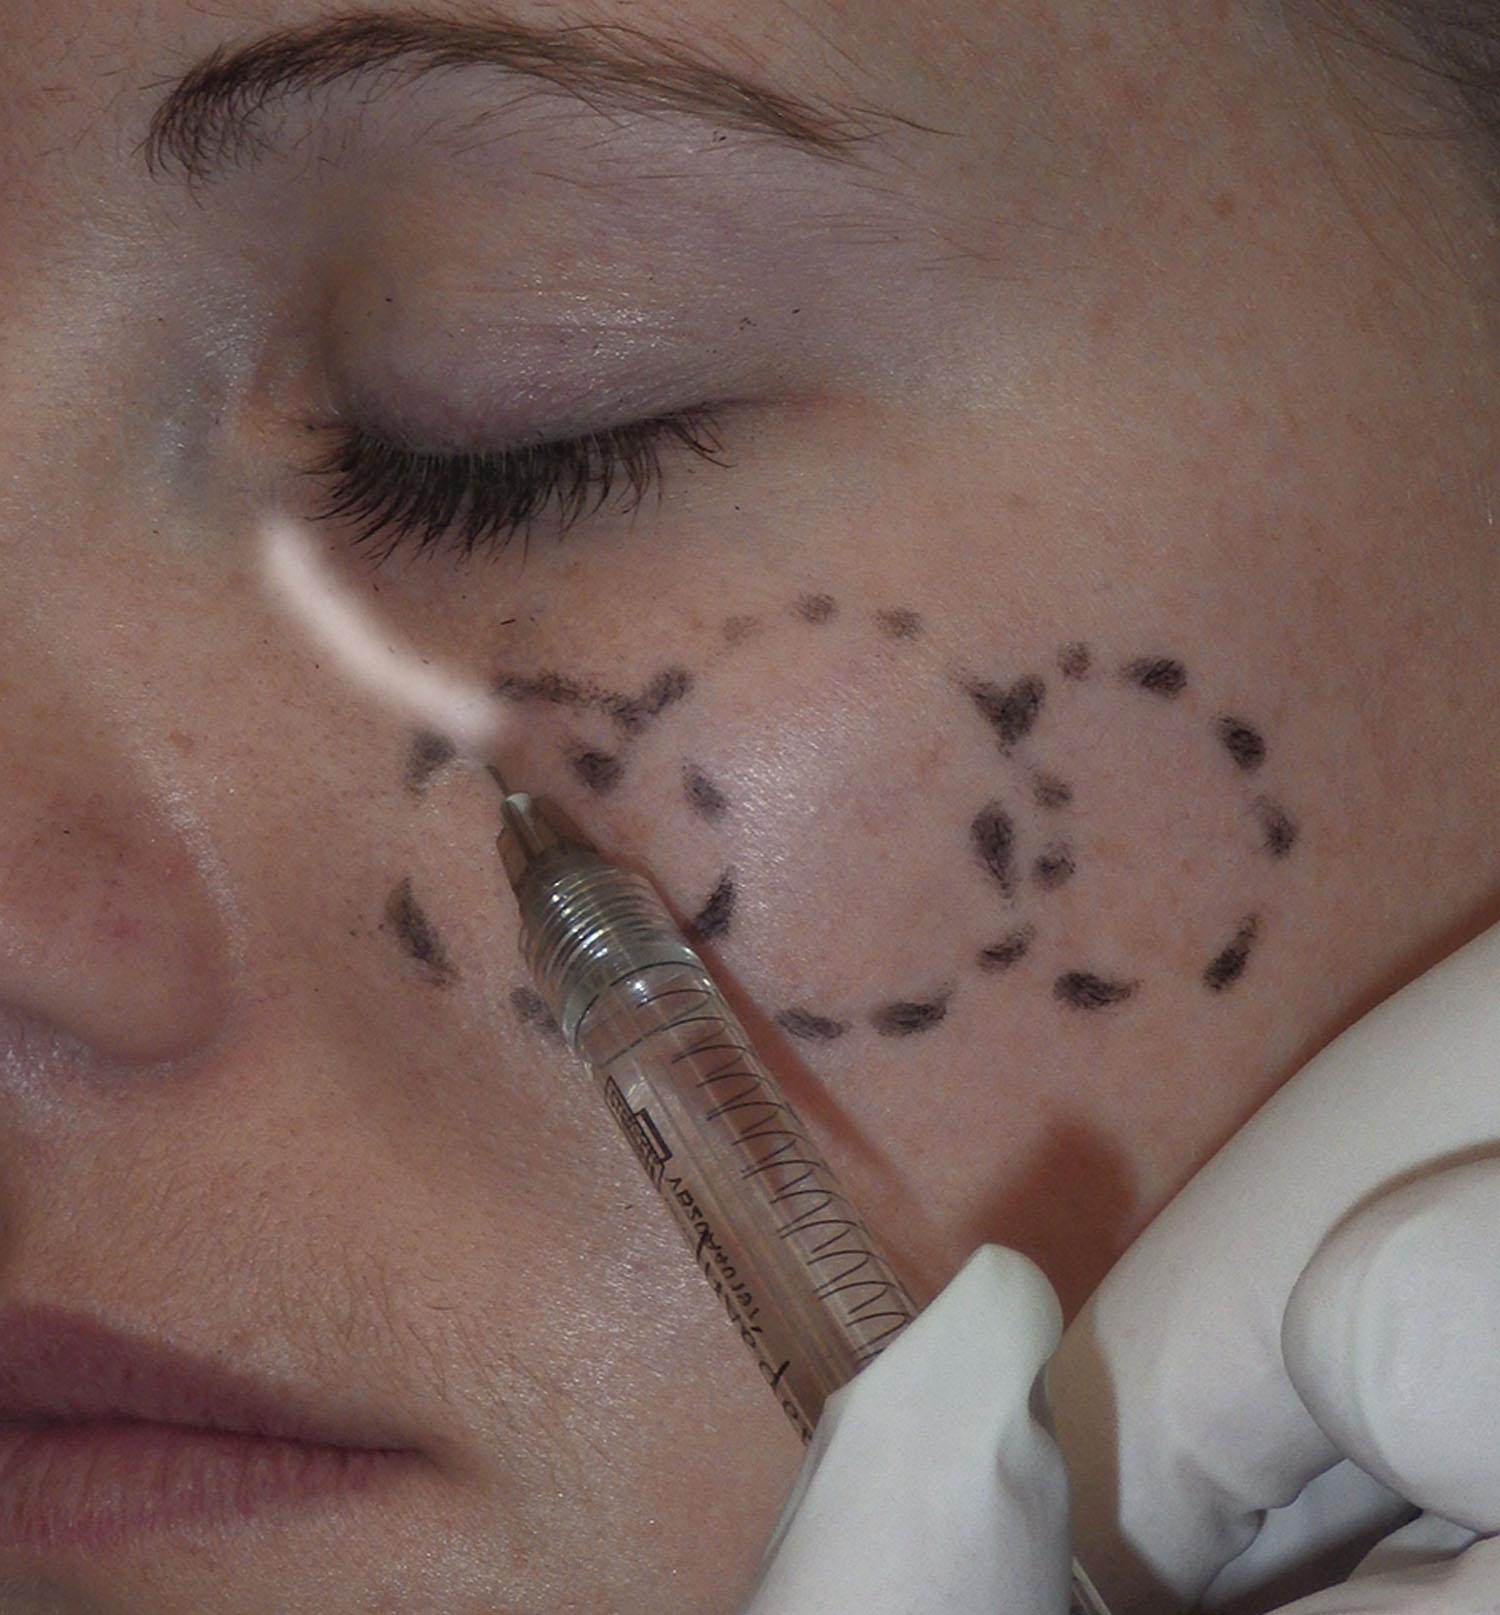
If required, other regions of the tear trough are injected from the cheek as well. It makes no difference if the cheeks are injected first and the tear trough second or vice versa; the importance is injection of both regions simultaneously. Again, this combination cheek trough technique comprehensively addresses both regions of aging and will more predictably and effectively rejuvenate these regions. The same treatment can also be performed with a cannula ( Fig. 10.89 )

Placing many hundreds of cheek implants over three decades has provided me with a “mind’s eye” of mental template to inject ( Fig. 10.90 ). I have illustrated this by tracing an actual submalar cheek implant with a marking pencil to illustrate the pattern I imagine while injecting ( Fig. 10.91 ). I do not actually mark in this manner, but it can be useful to trace a cheek implant for the novice injector.
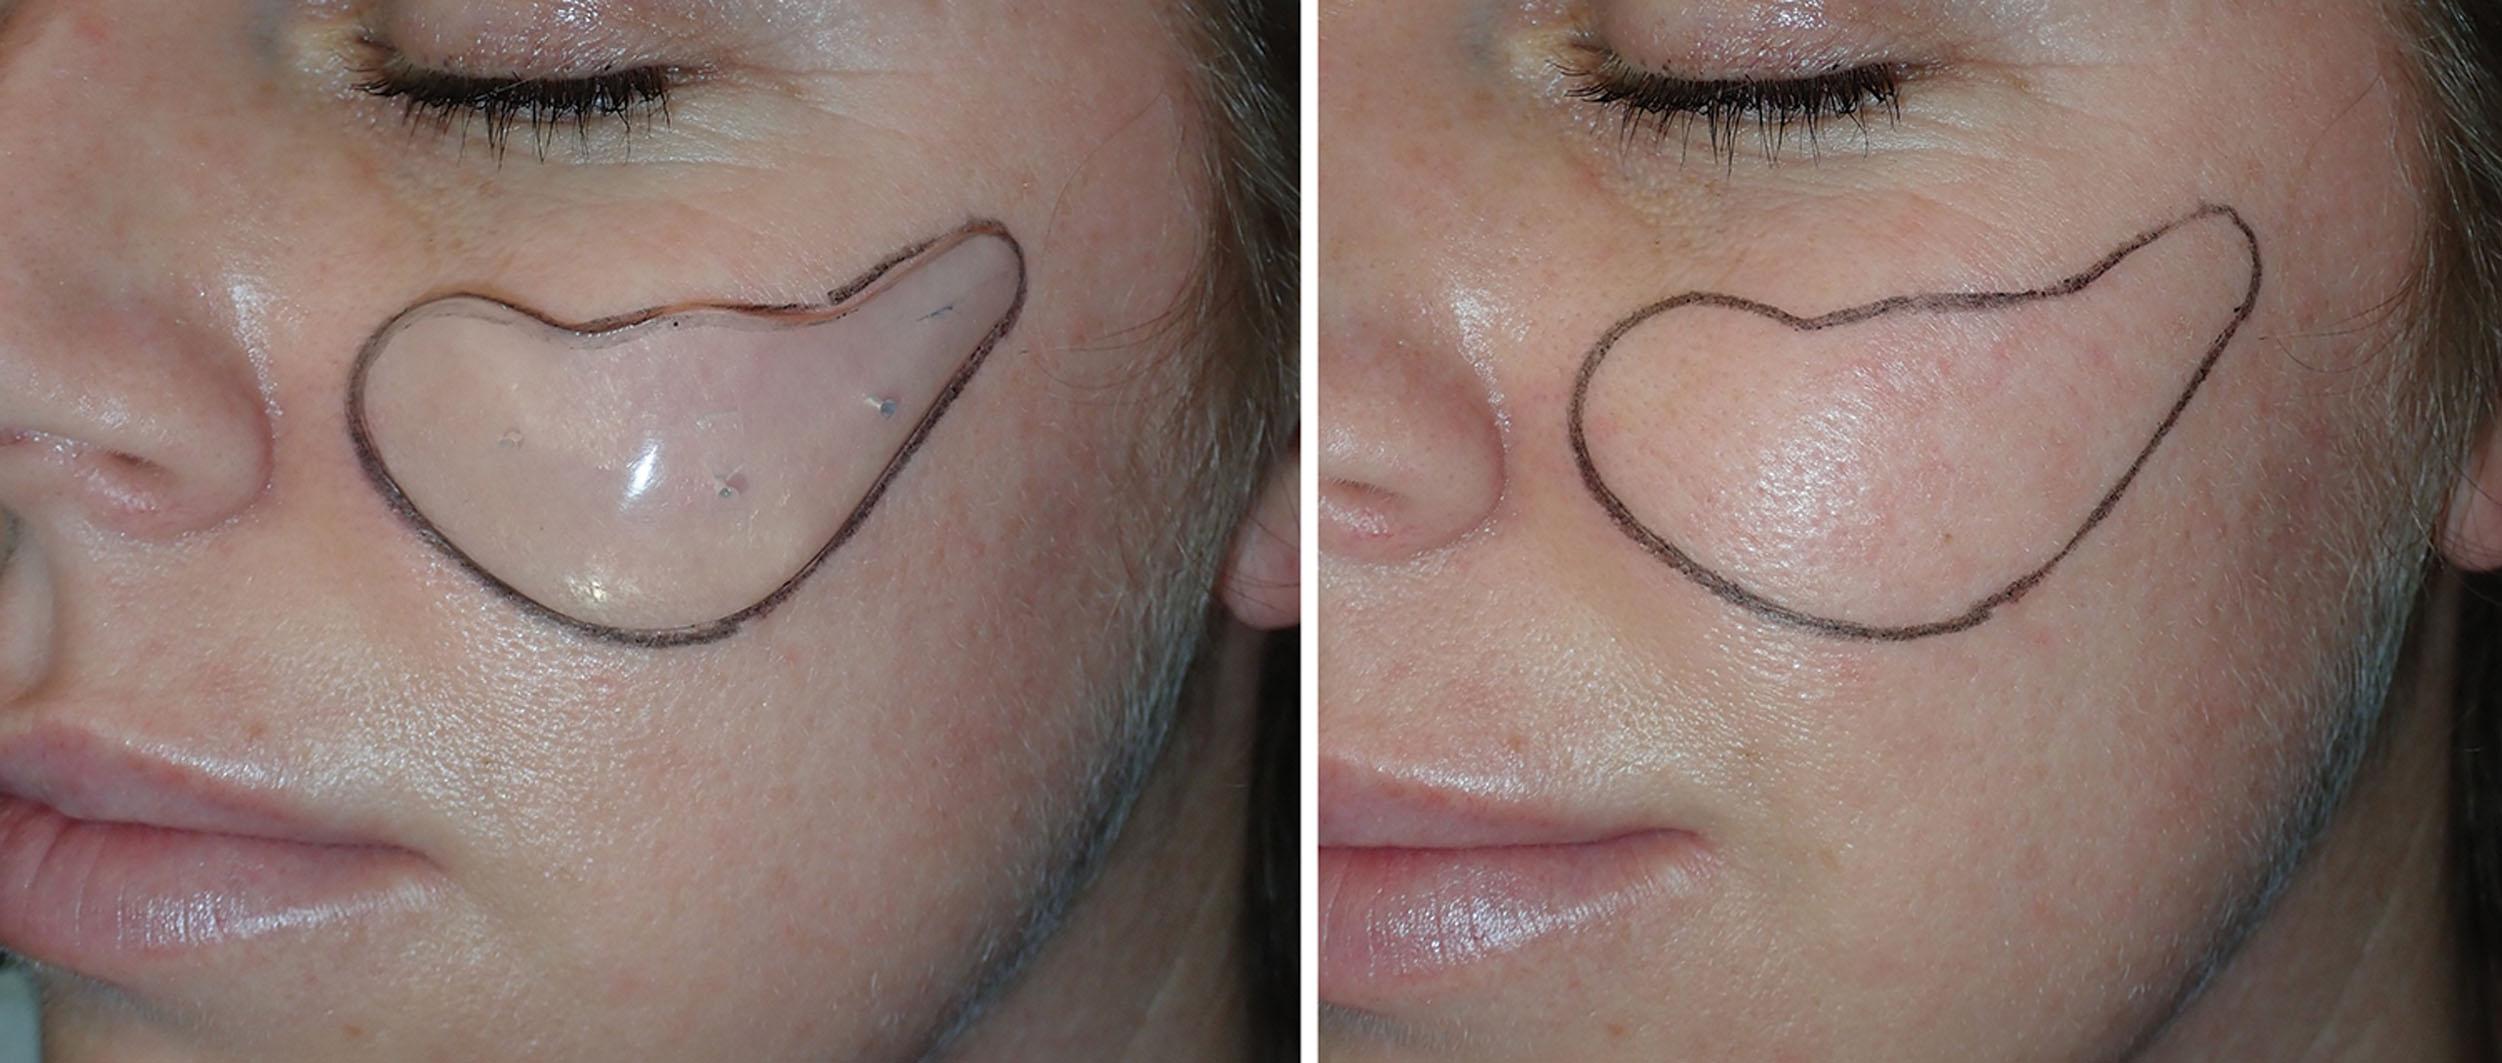

Needle injection can be utilized as shown in Figs. 10.86–10.88 , or a blunt, flexible cannula can also be used, which is very atraumatic ( Figs. 10.89–10.92 ). I published the first article in the literature on cannula usage for facial fillers in Dermatologic Surgery in 2009, and I was using a 20-gauge fat injection cannula for lips, cheeks, and prejowl injections at the time. Although this was effective, the cannulas were big and not flexible. Over the past decade, significant advances have been made in cannula technology.

I have stated that I massage filler immediately after injection in almost all regions to better distribute, smooth, and homogenize the result. This is done extremely gently in the tear trough as it is very easy to unintentionally displace the filler in these thin tissue planes. In the cheek, more robust massage can be performed with the fingers or palm of the hand to shape and round the cheek. Using the round or curved end of the syringe handle can also be a convenient device for massaging with a fixed contour ( Fig. 10.93 ).
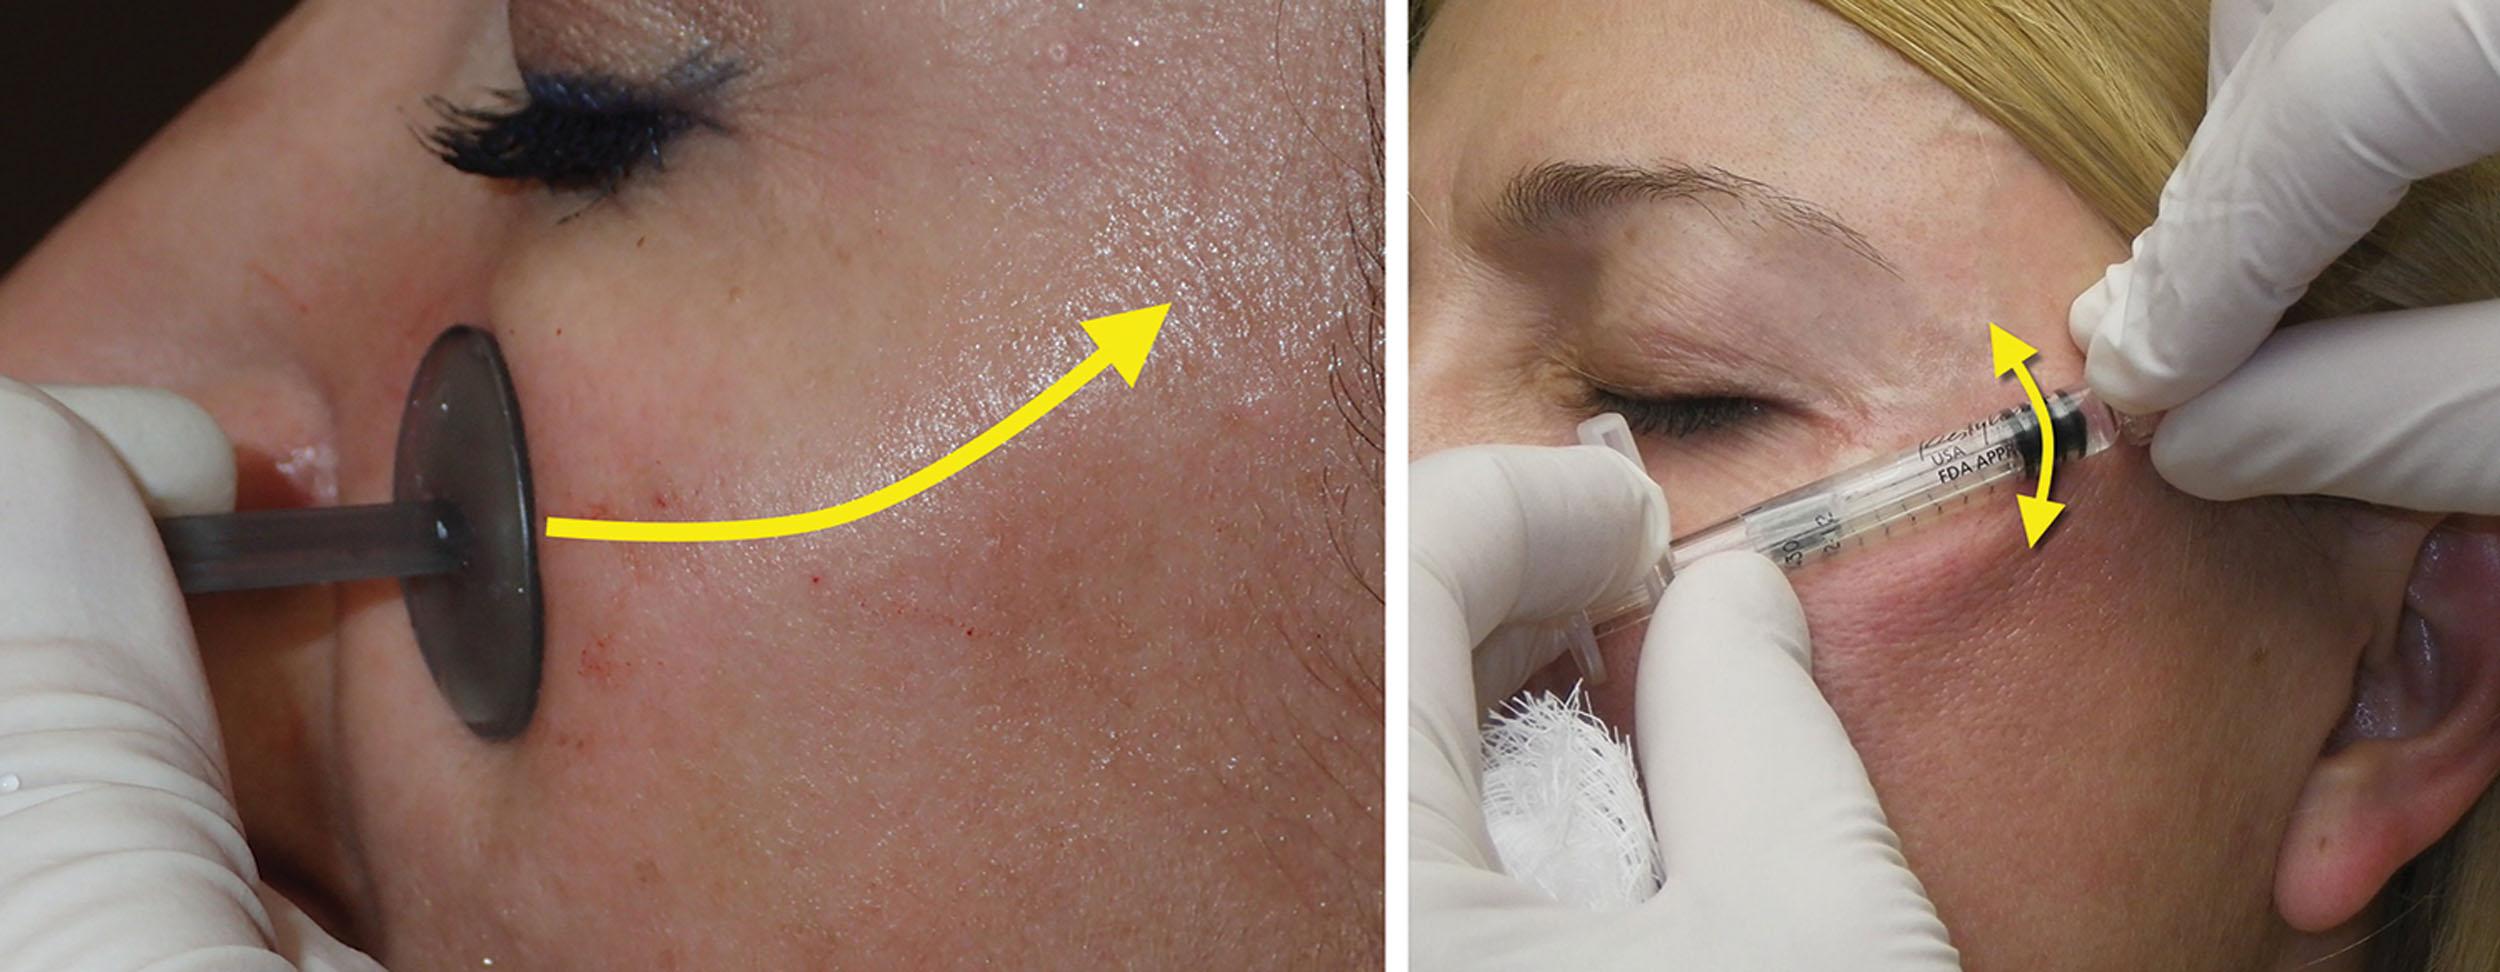
At the end of midface injections, most injectors only look at the result face to face. In addition to the normal frontal view, I stand behind the patient and look down on their cheeks from a bird’s eye view. I feel this is an important view and allows me to massage the filler to homogenize the distribution and assess the symmetry of the treatment ( Fig. 10.94 ).
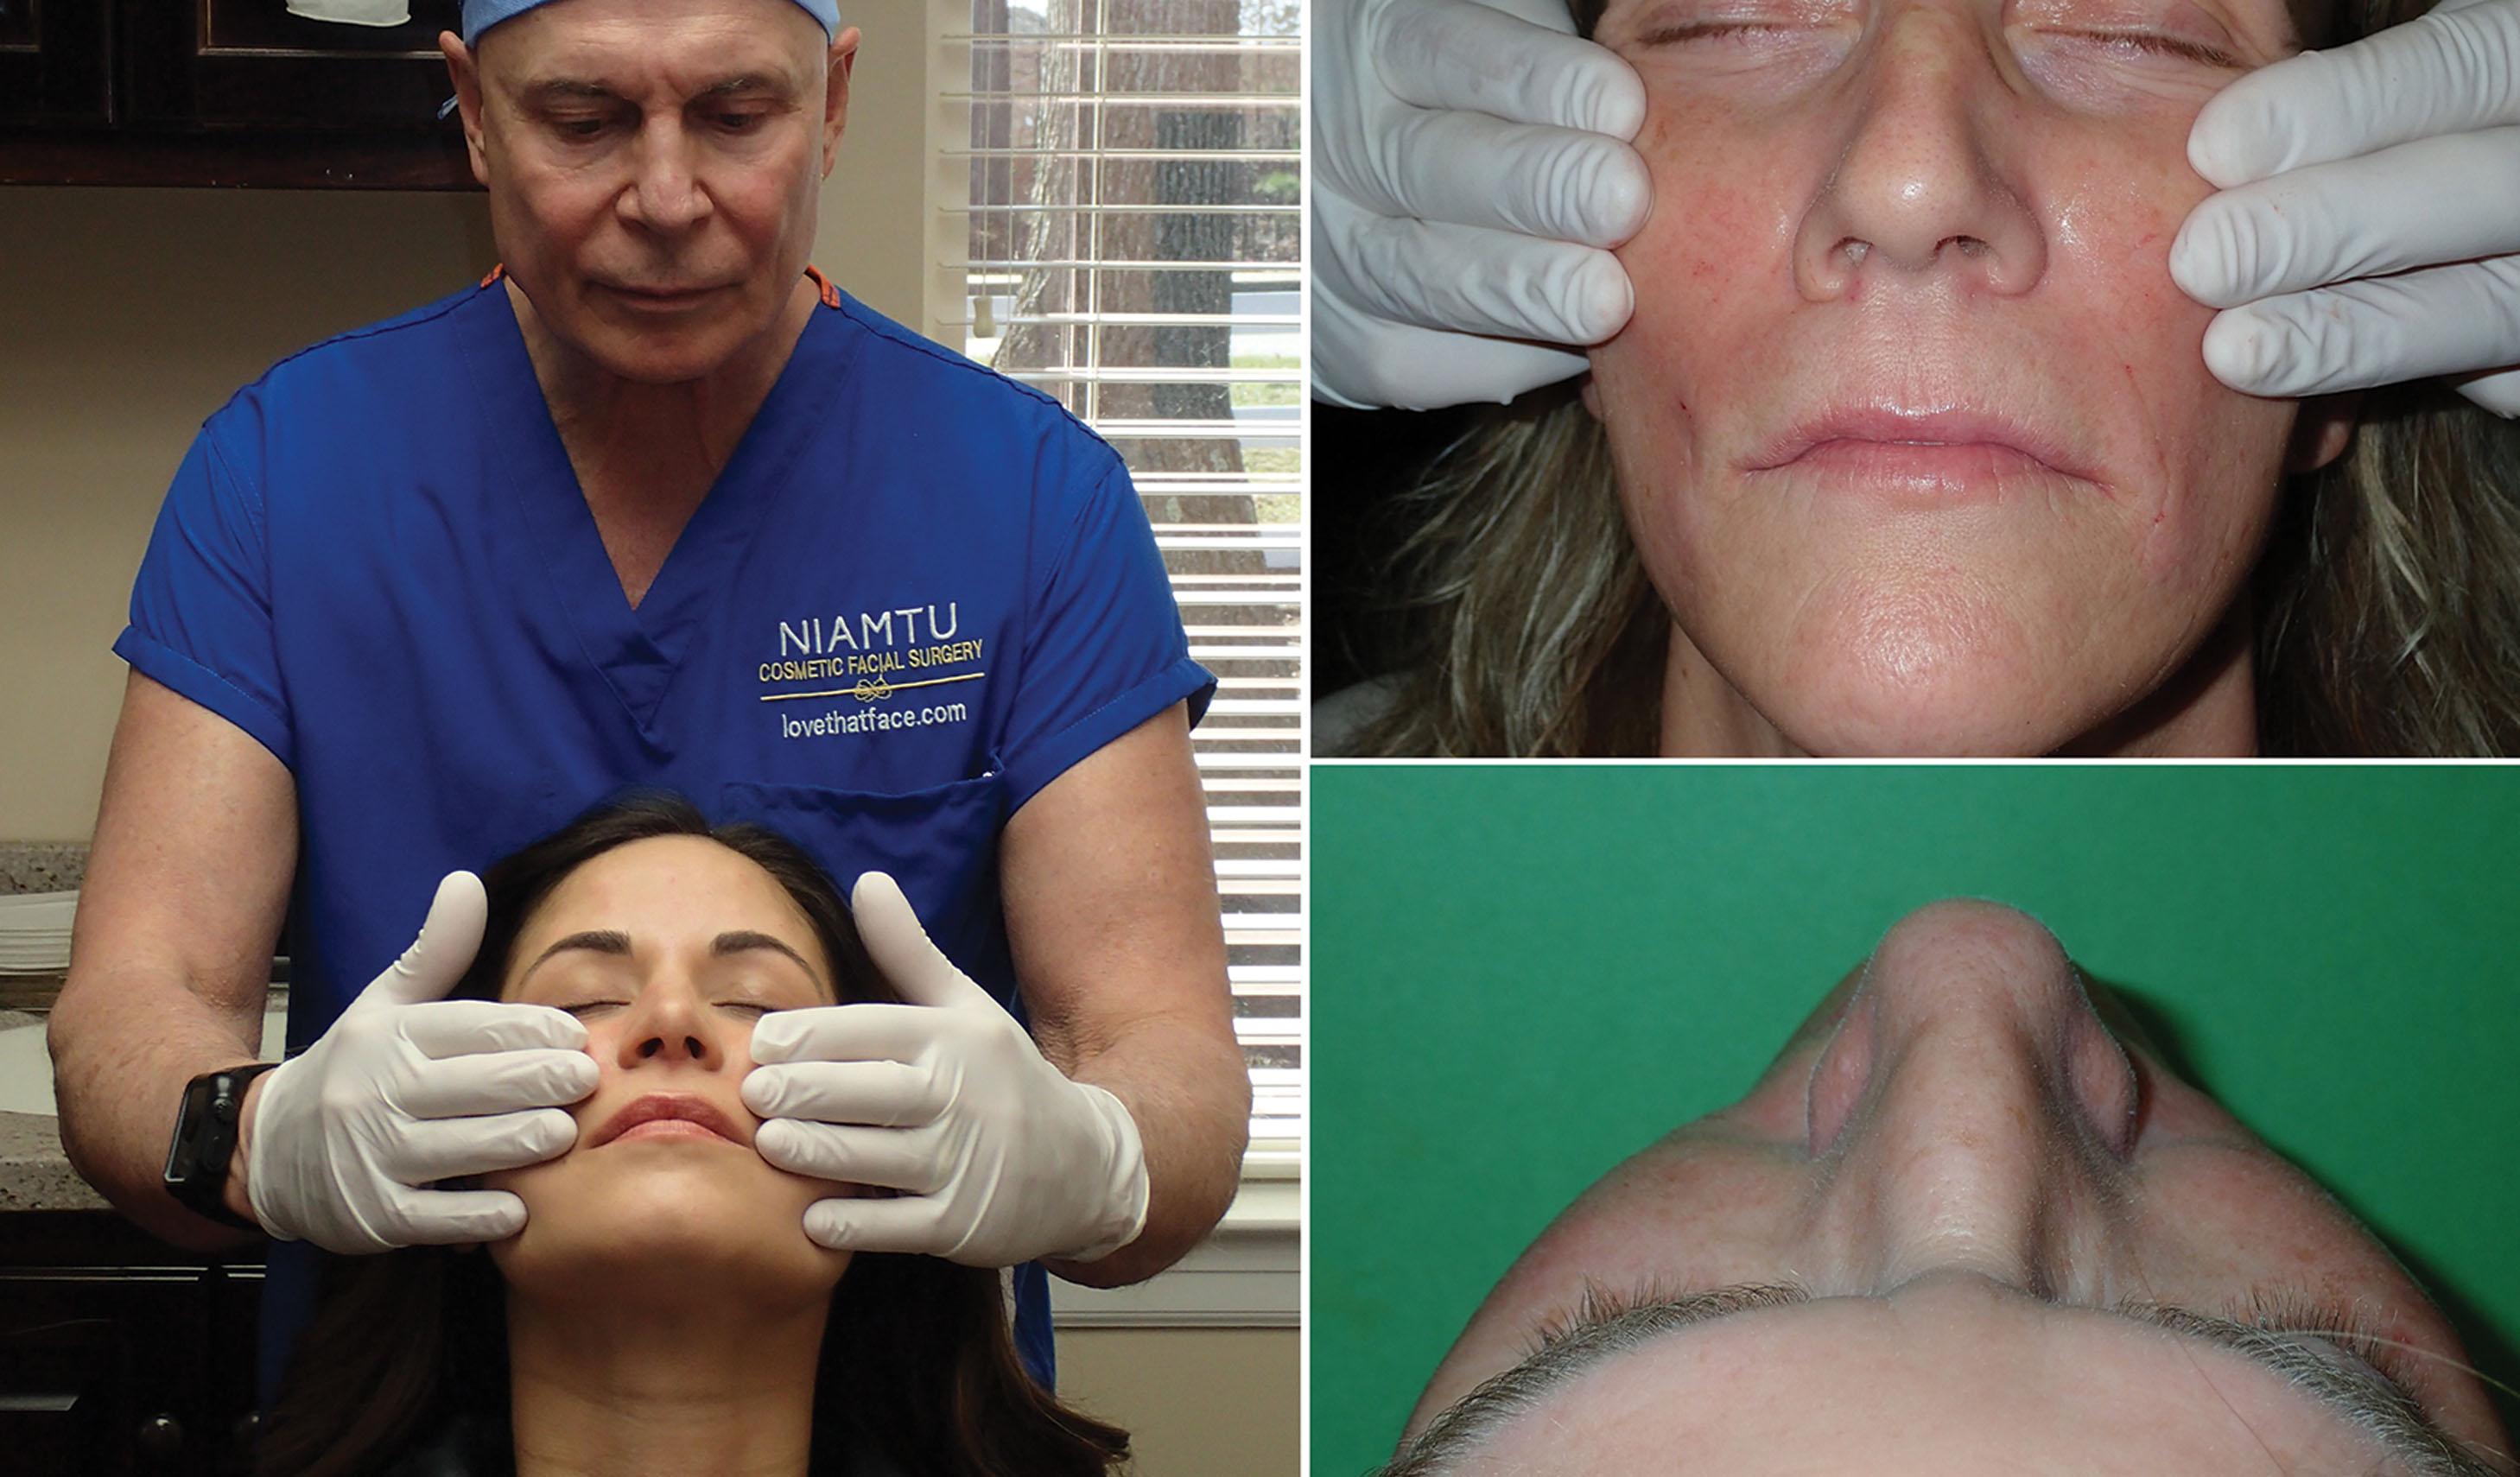
I believe the injection technique is more important than which product is used in the midface and tear trough. For cheek enhancement, I prefer higher G prime fillers such as Juvéderm Voluma, Restylane Lyft, and Radiesse. Some injectors prefer Radiesse, Sculptra, or fat, which are described later in this chapter. The technique of the injector is more important than the type of filler used. Dissolvable HA fillers offer a component of insurance as they can be reversed if the patient or injector is unhappy with results. Figs. 10.95–10.98 show midface augmentation with HA filler.
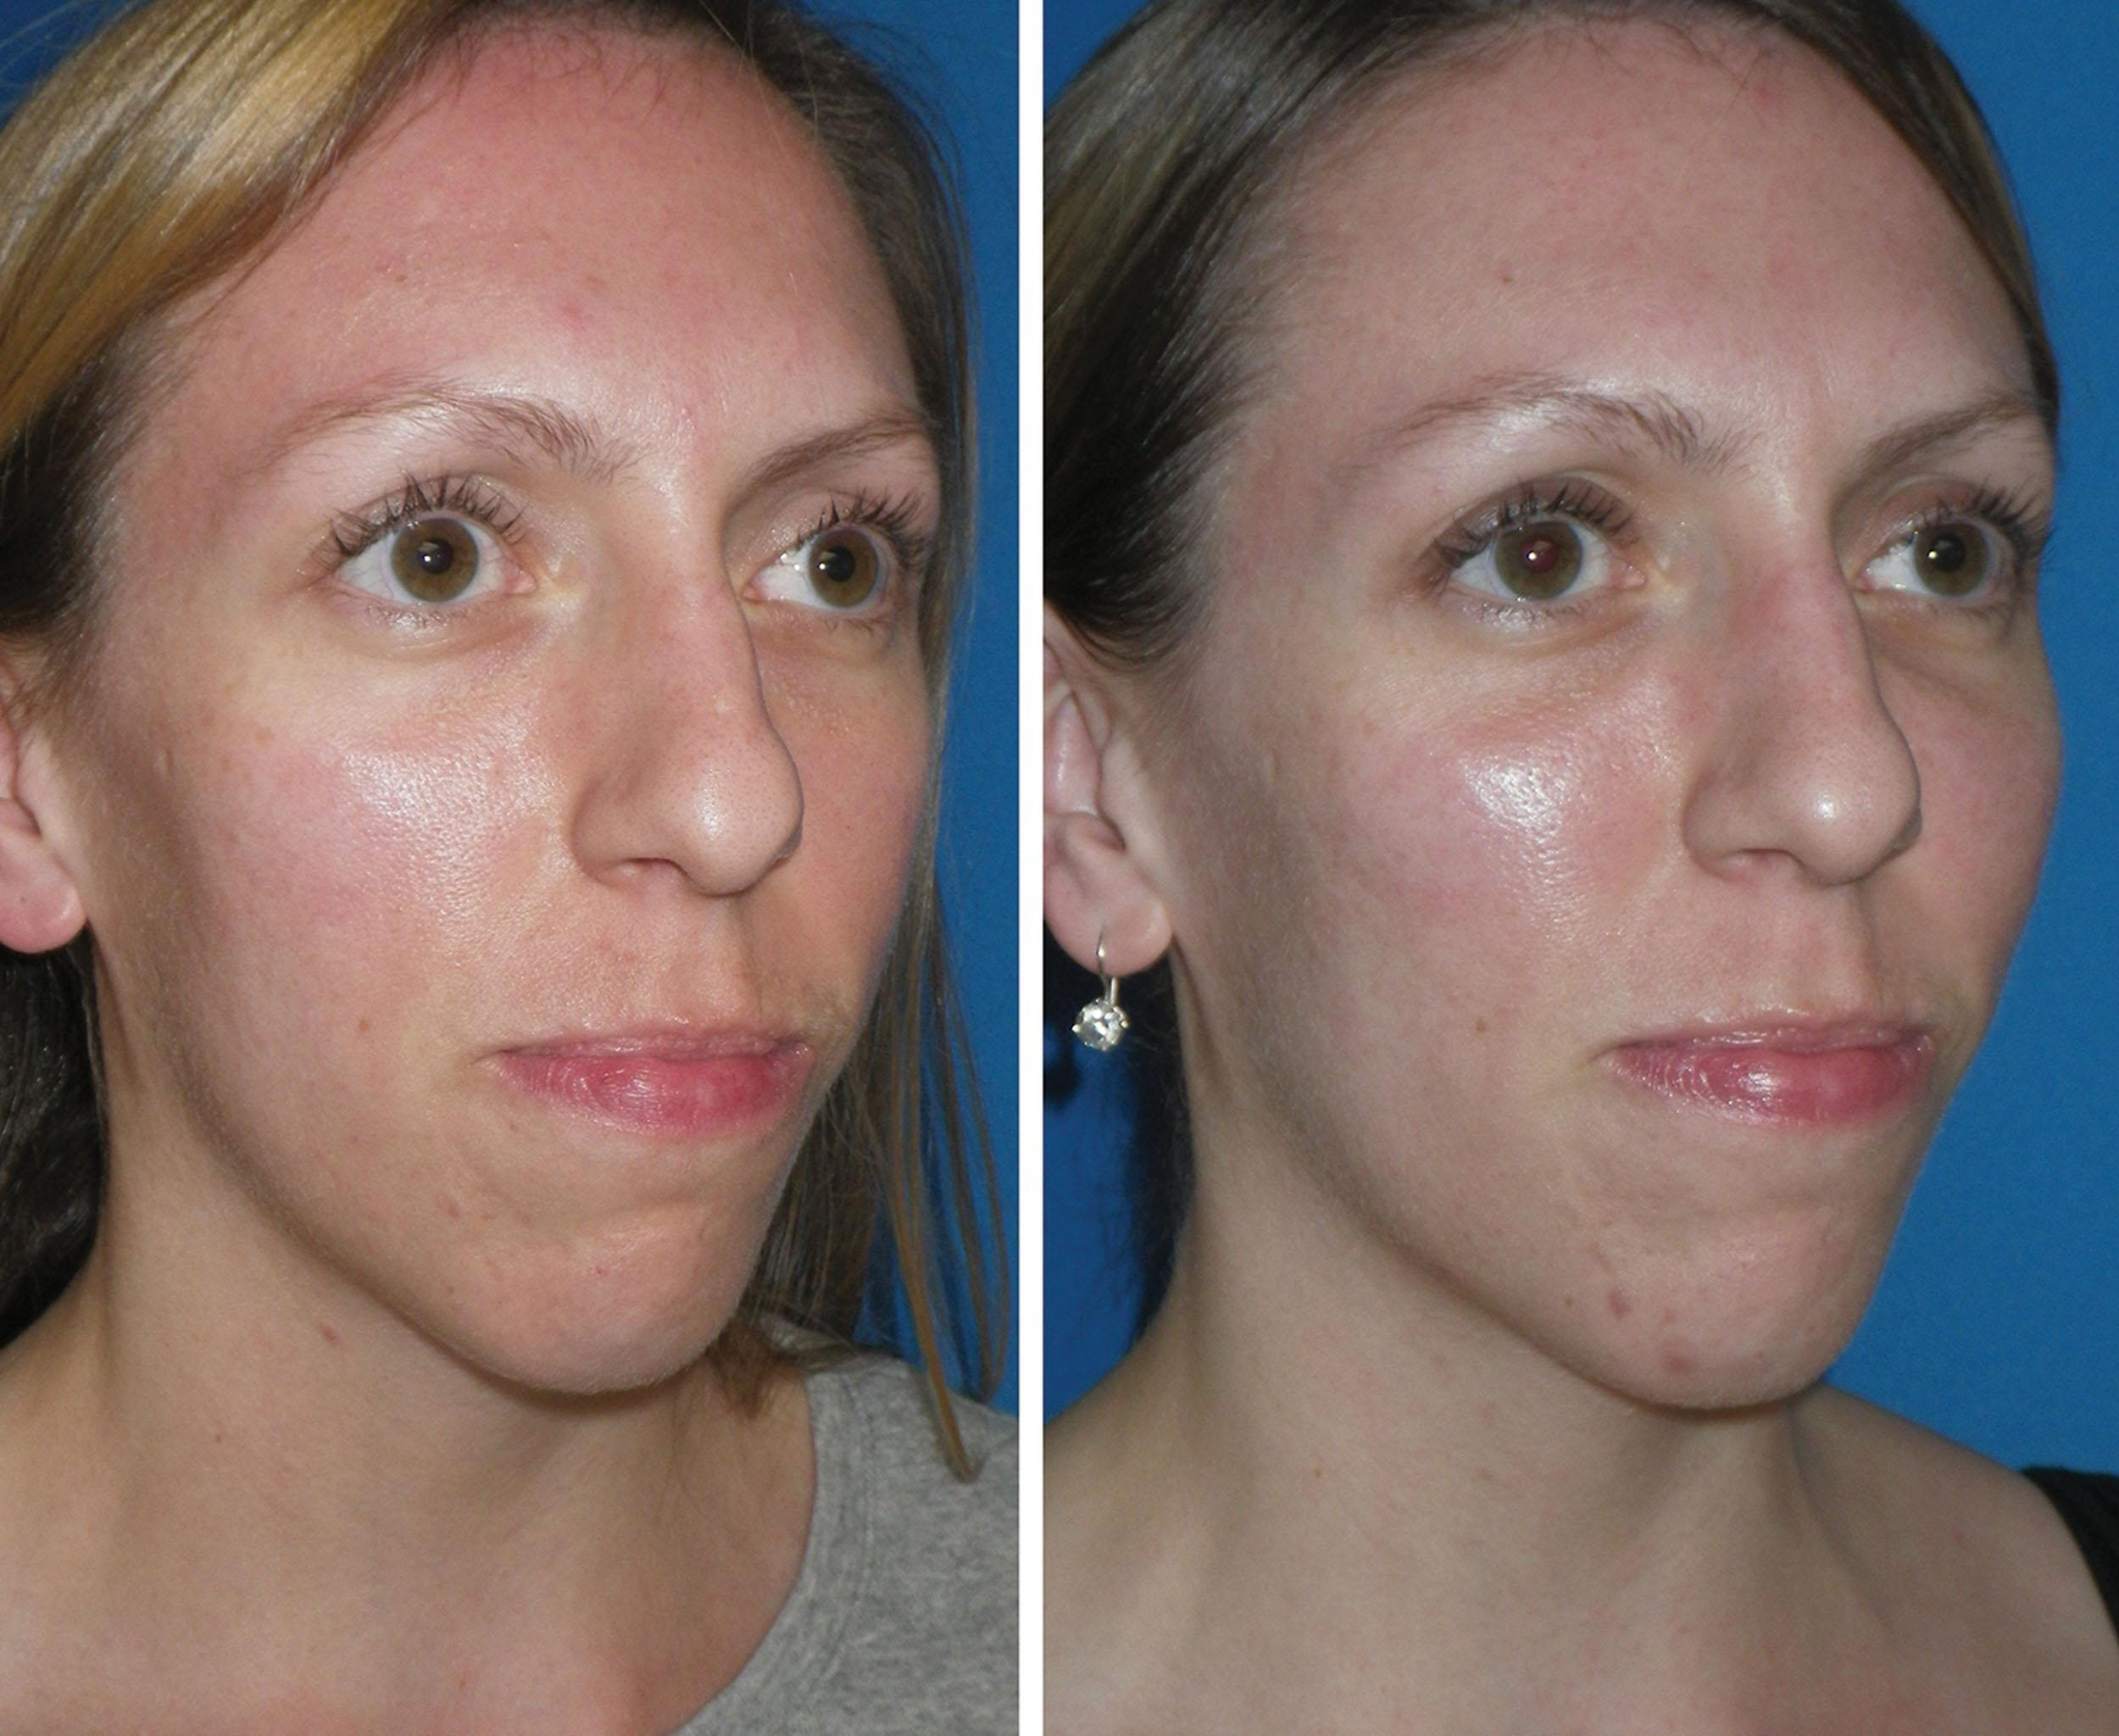
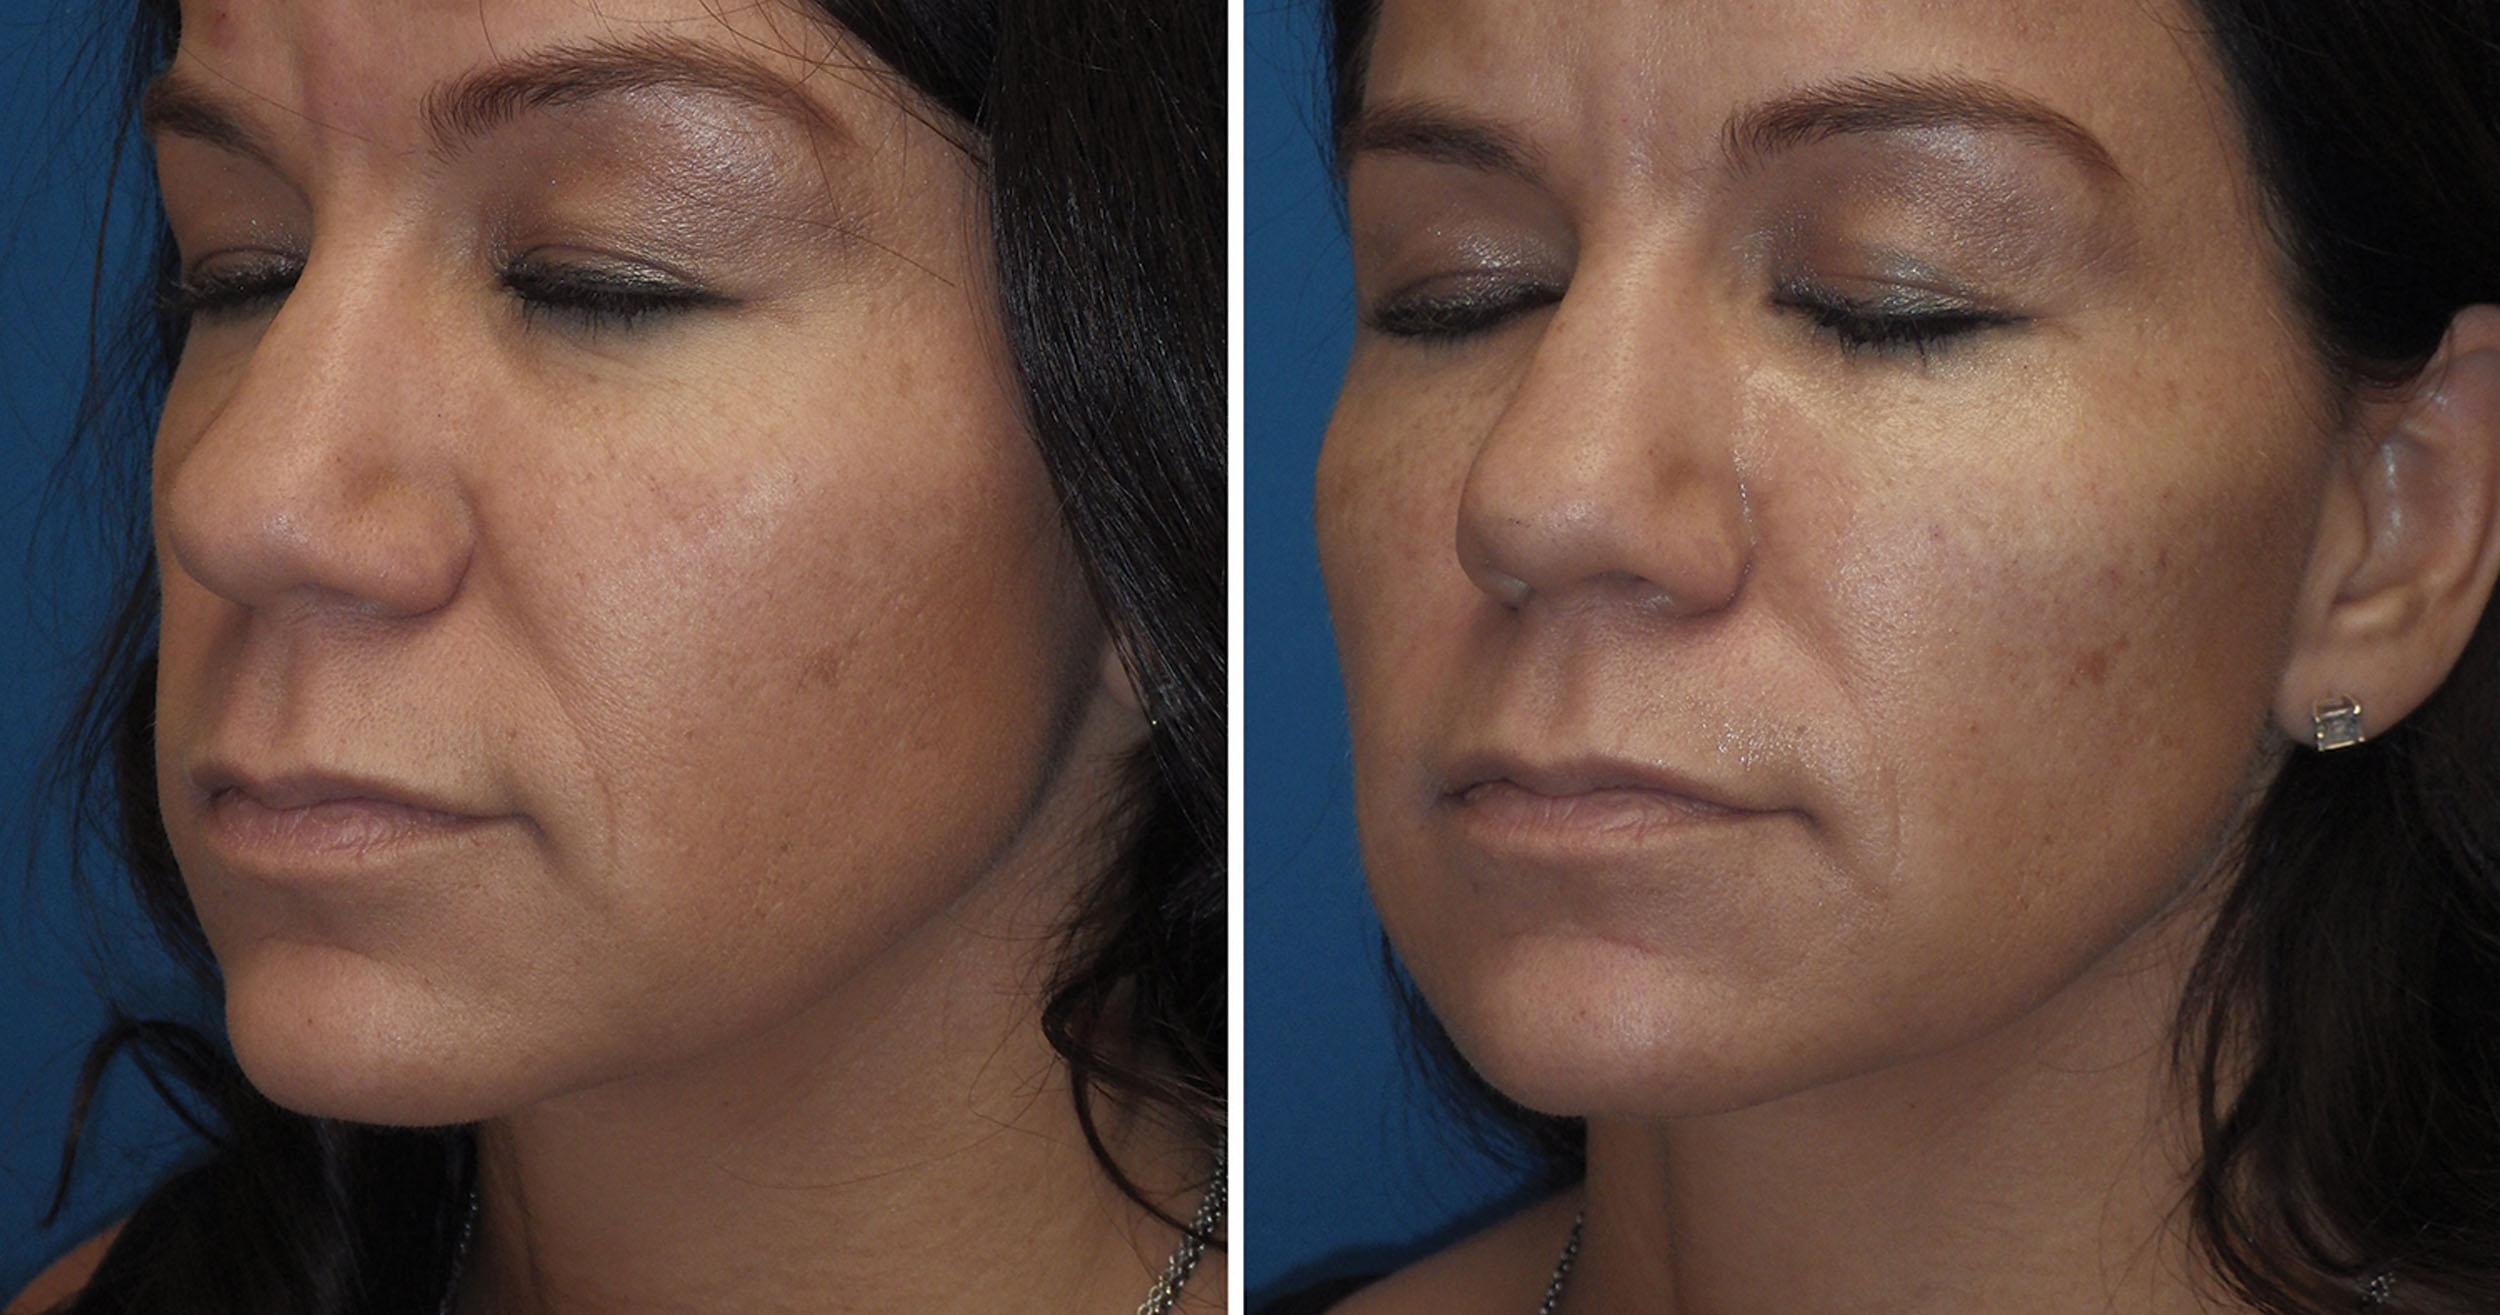
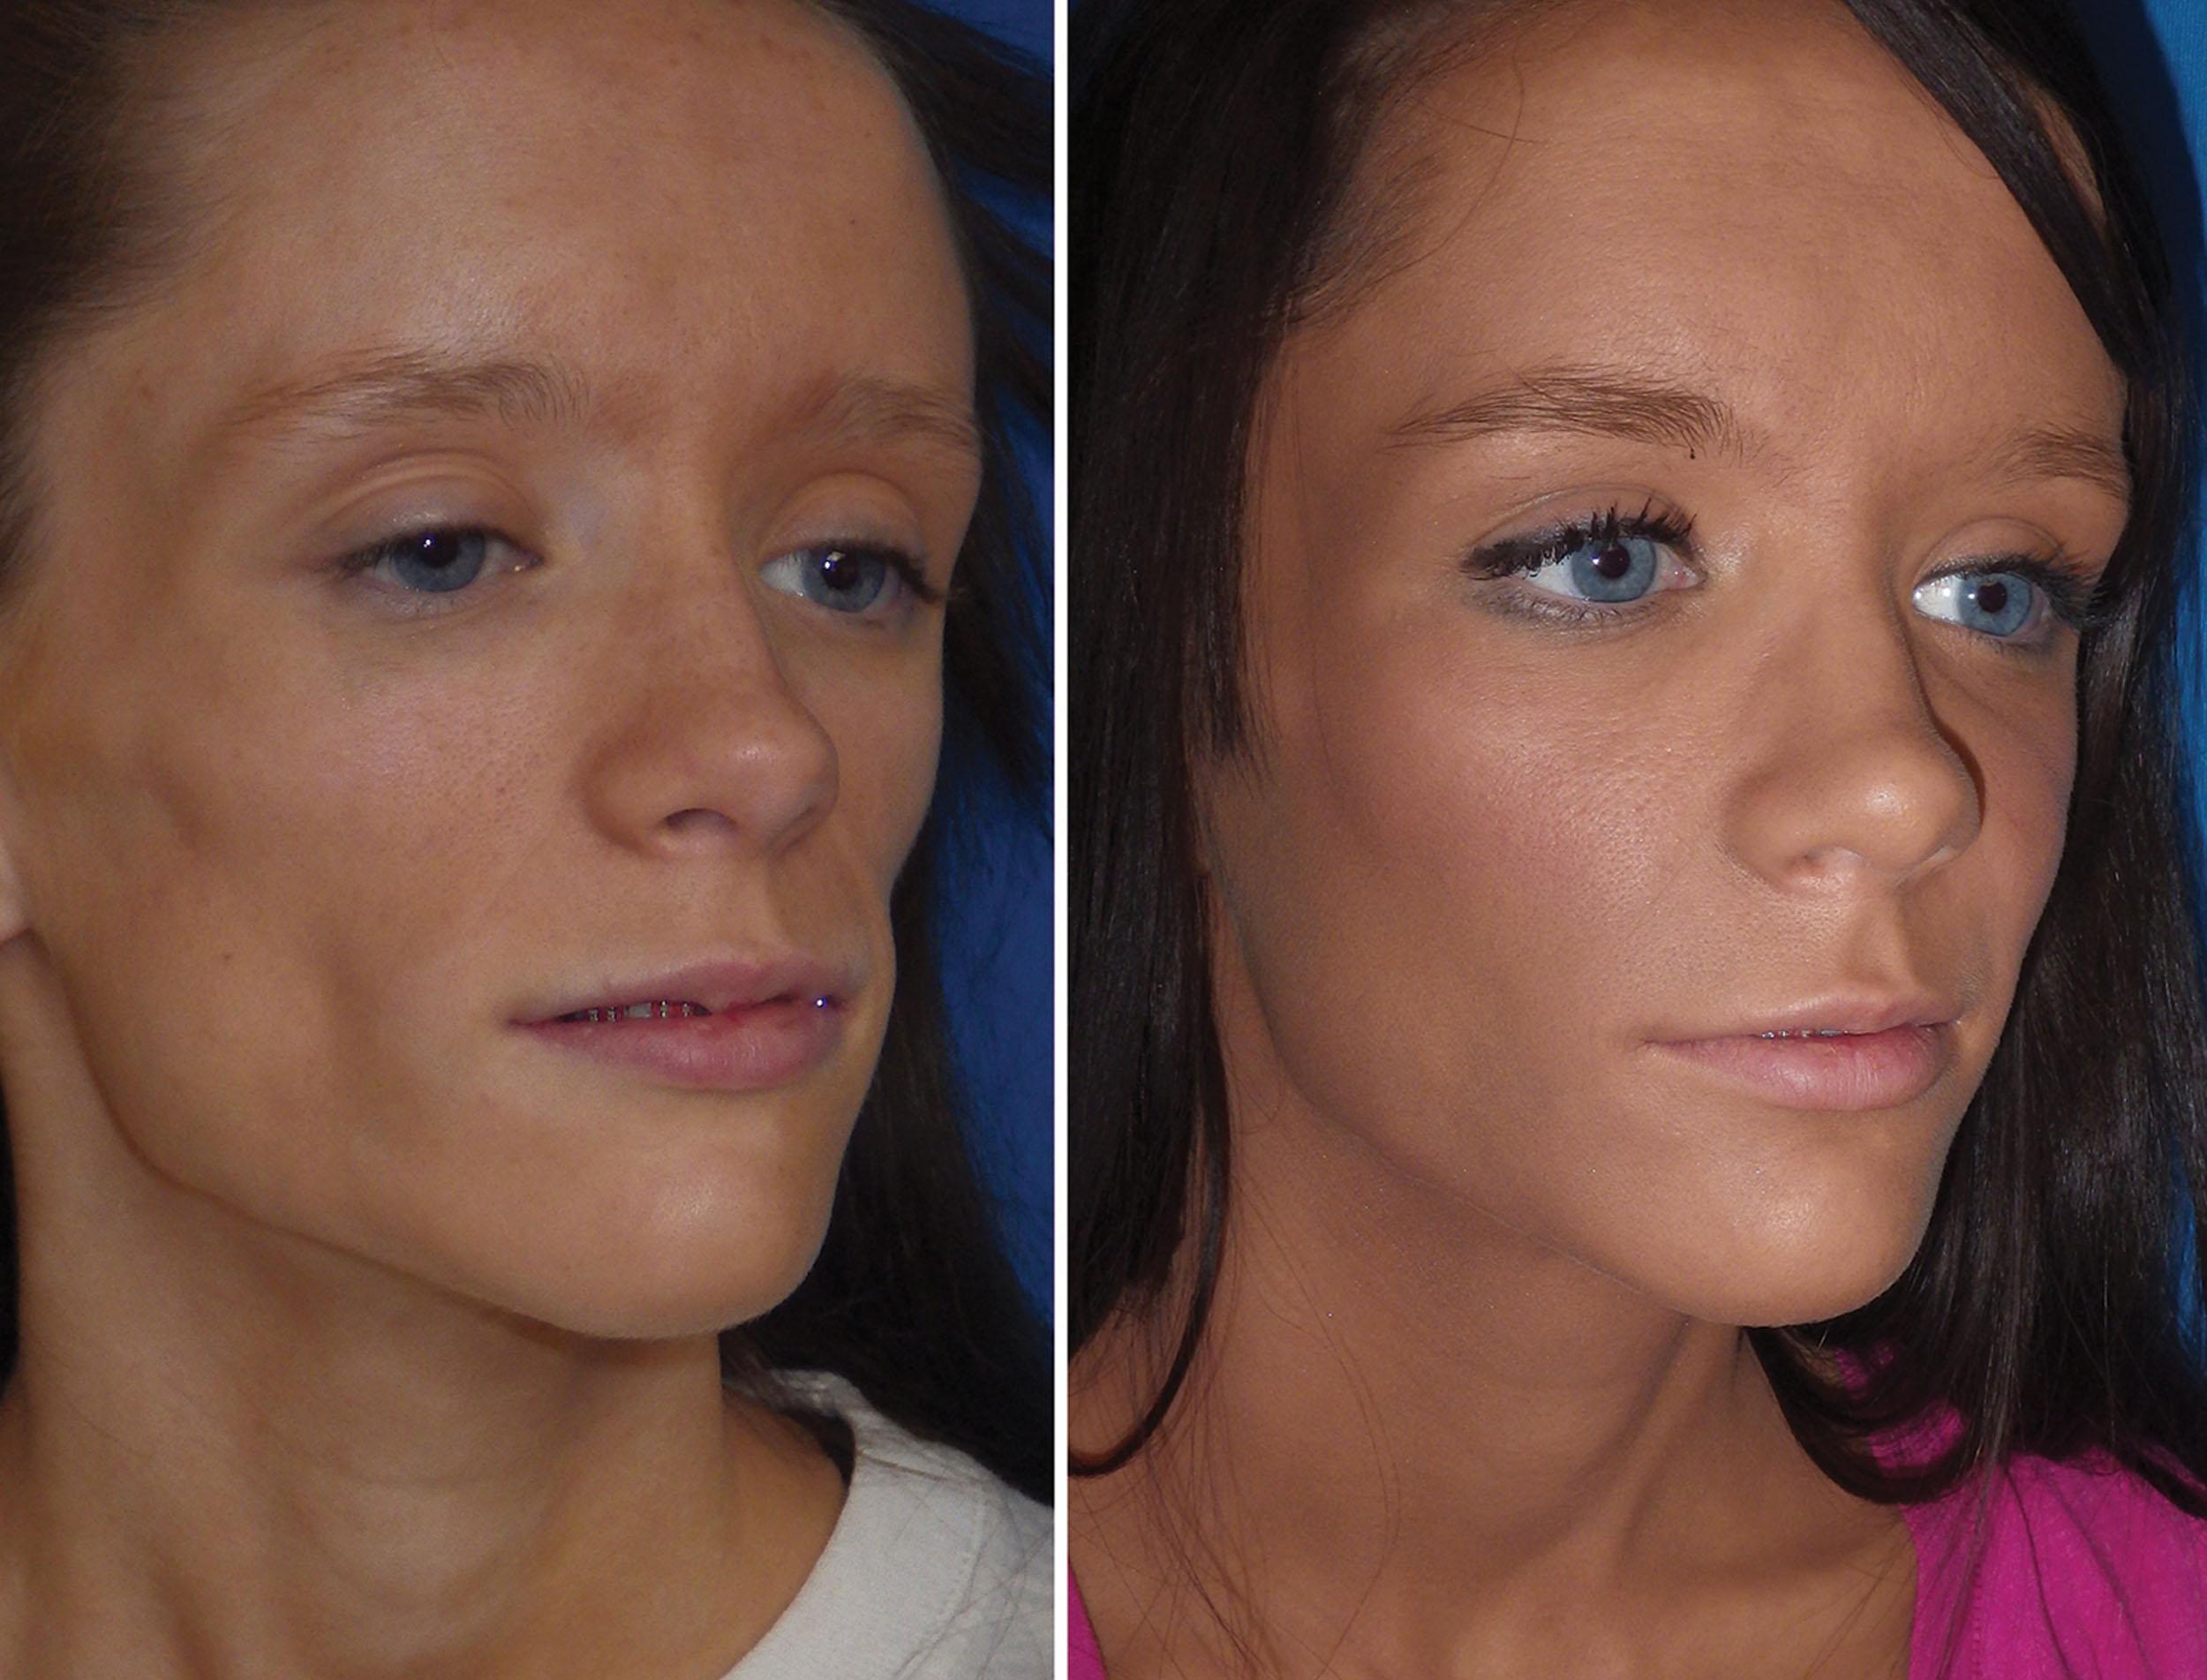
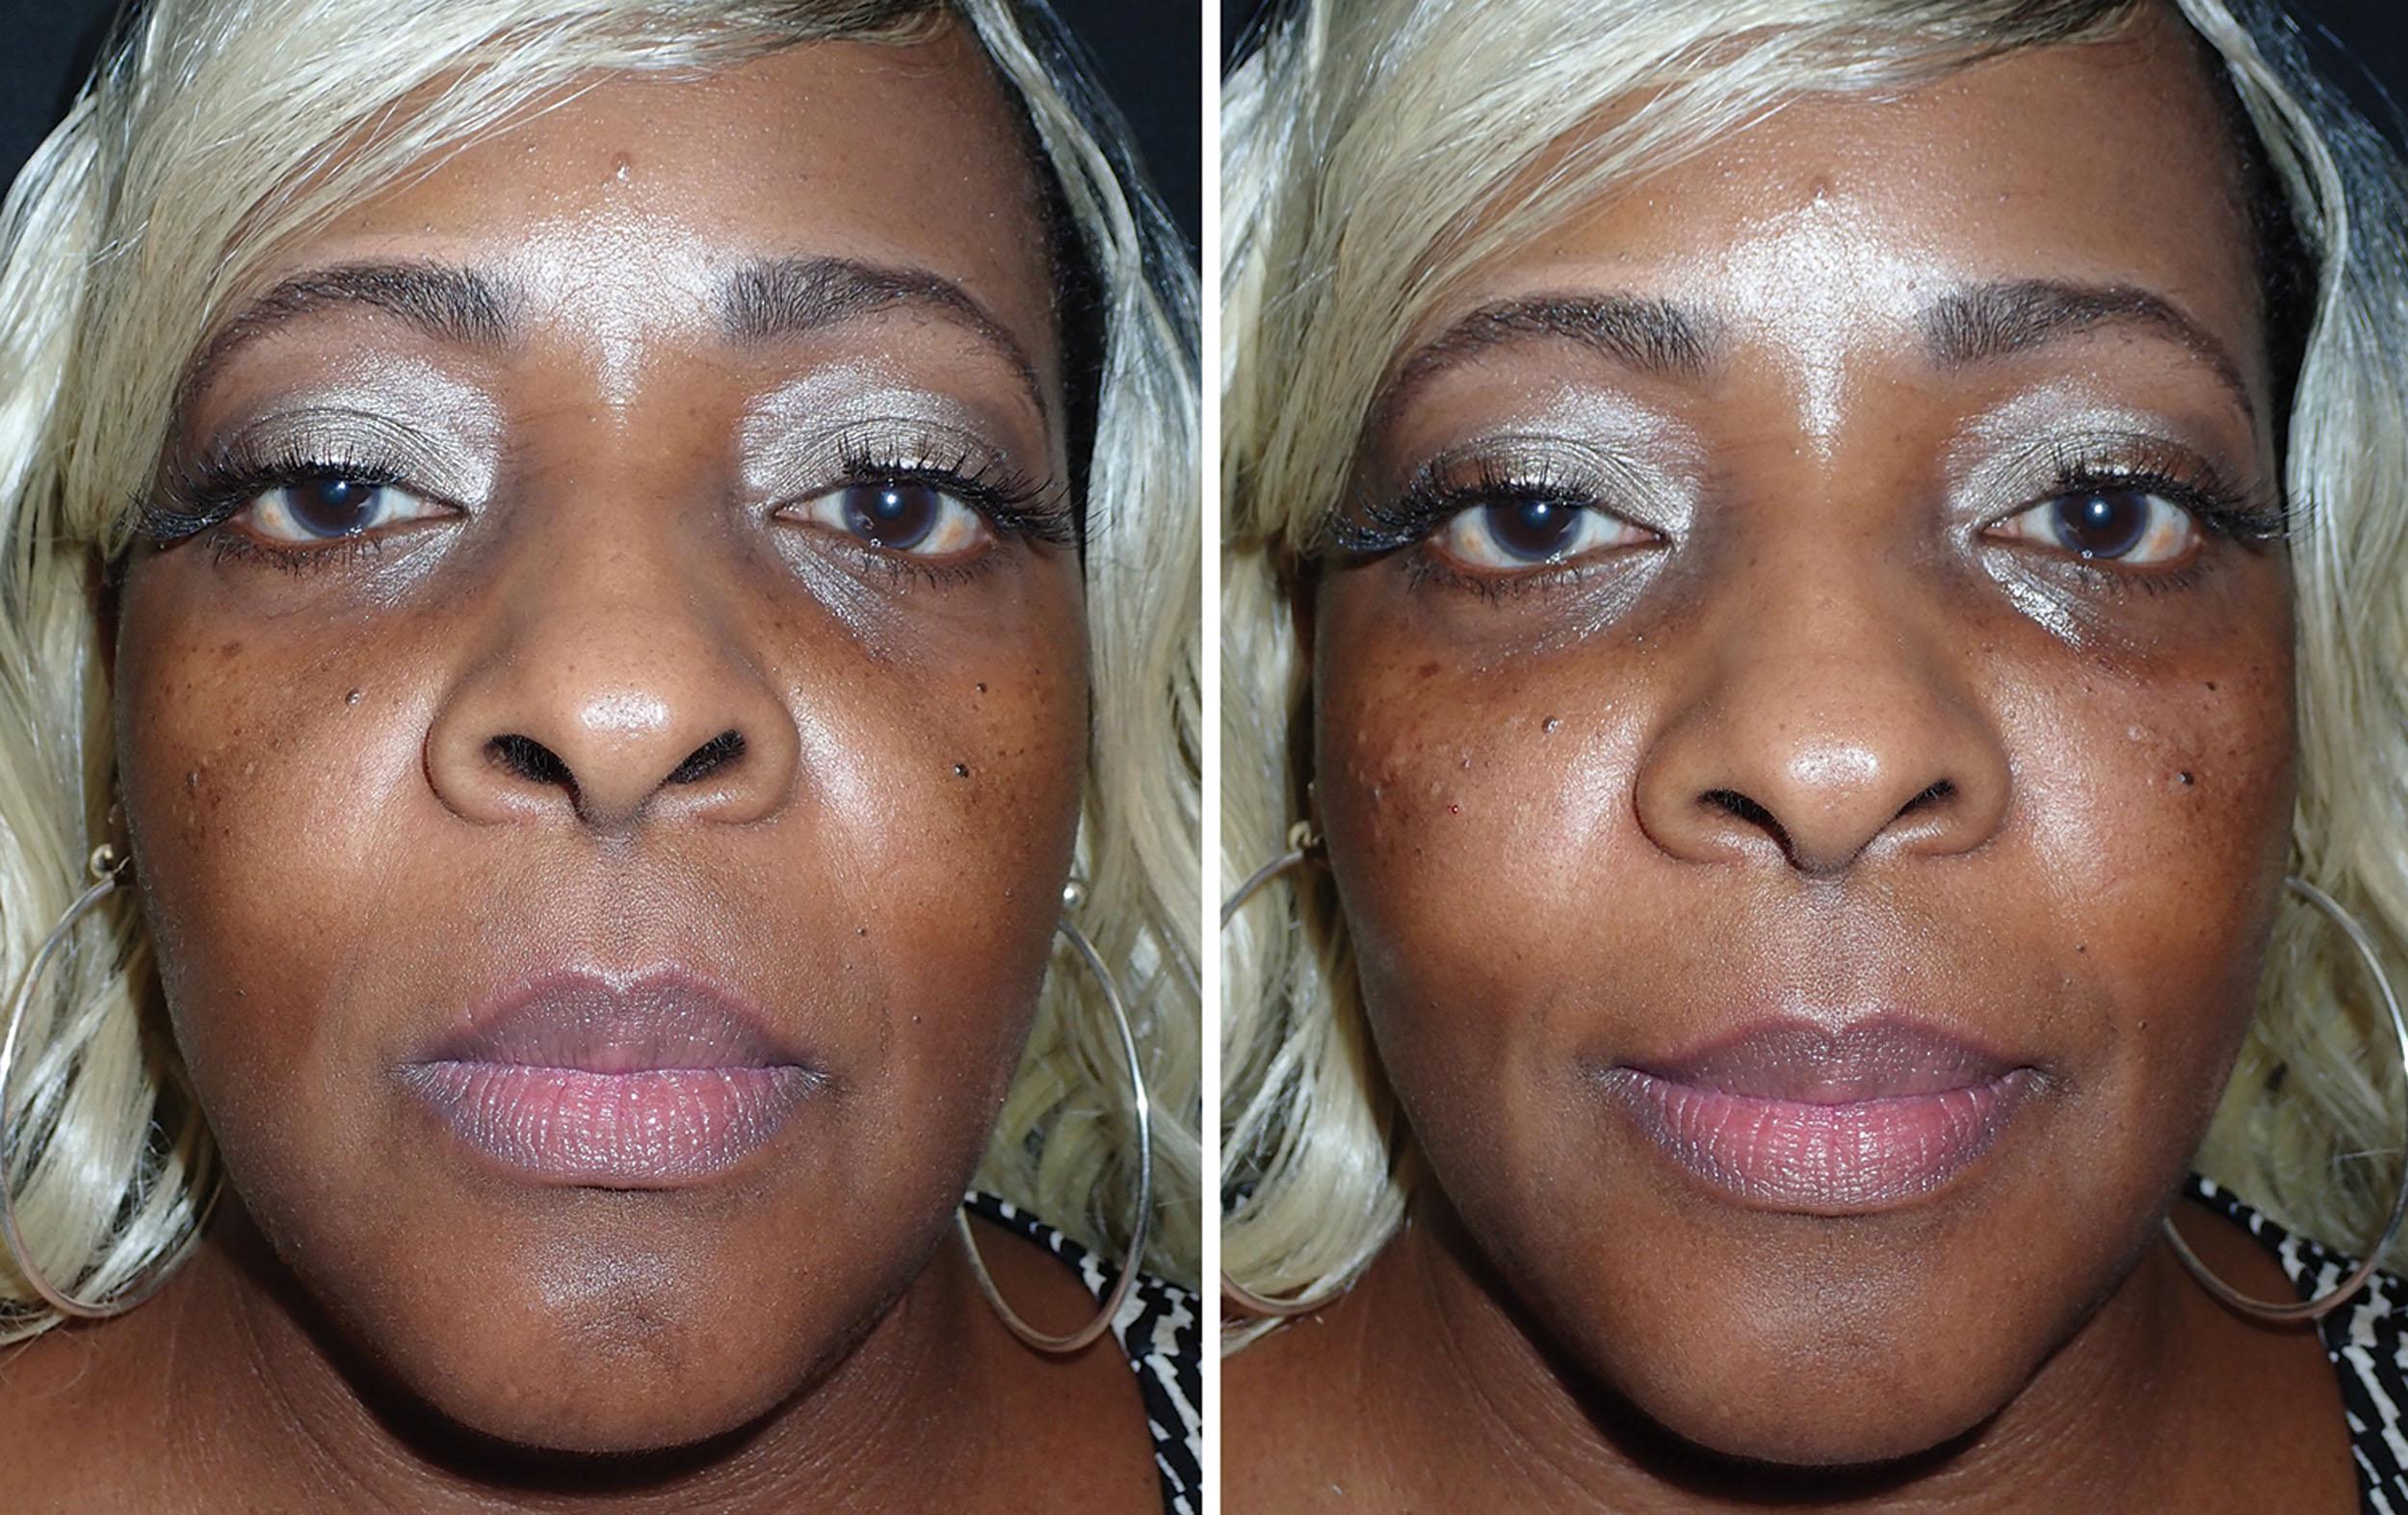
With the growing popularity of fillers and techniques, virtually all head and neck anatomy has some indication for augmentation. Continuing with midfacial filler treatment, the nose has become a contemporary treatment area. The nose is very vascular, and horrific complications with massive soft tissue loss can occur when treating nasal and paranasal areas. All one has to do is simply Google “filler complications” to see numerous photos of patients who have lost a significant part of their nose after filler rhinoplasty. This is definitely not a procedure for the novice injector and, in reality, is probably better suited for those who are intimately familiar with the nasal structures. This is another one of those areas where small boluses of filler placed in a retrograde manner with very low syringe pressure is imperative to avoid intravascular injection. Filler techniques can be useful in the nose to improve a multitude of deformities and are attractive to patients who are not surgical candidates, or as a “test drive” for how cosmetic rhinoplasty may improve them. They can also be used to fill voids or soft tissue depressions in post-rhinoplasty patients. The most common nasal indication in my office is filling dorsal hump deformities. The purpose of this technique is to fill the depression above and below the actual bony prominence to give the illusion of a smaller hump ( Fig. 10.99 ). The tissue planes in the nose are very defined, and filler flows extremely well in the subcutaneous and periosteal planes. When filler is injected at the radix, the injector can watch it flow all the way to the tip.
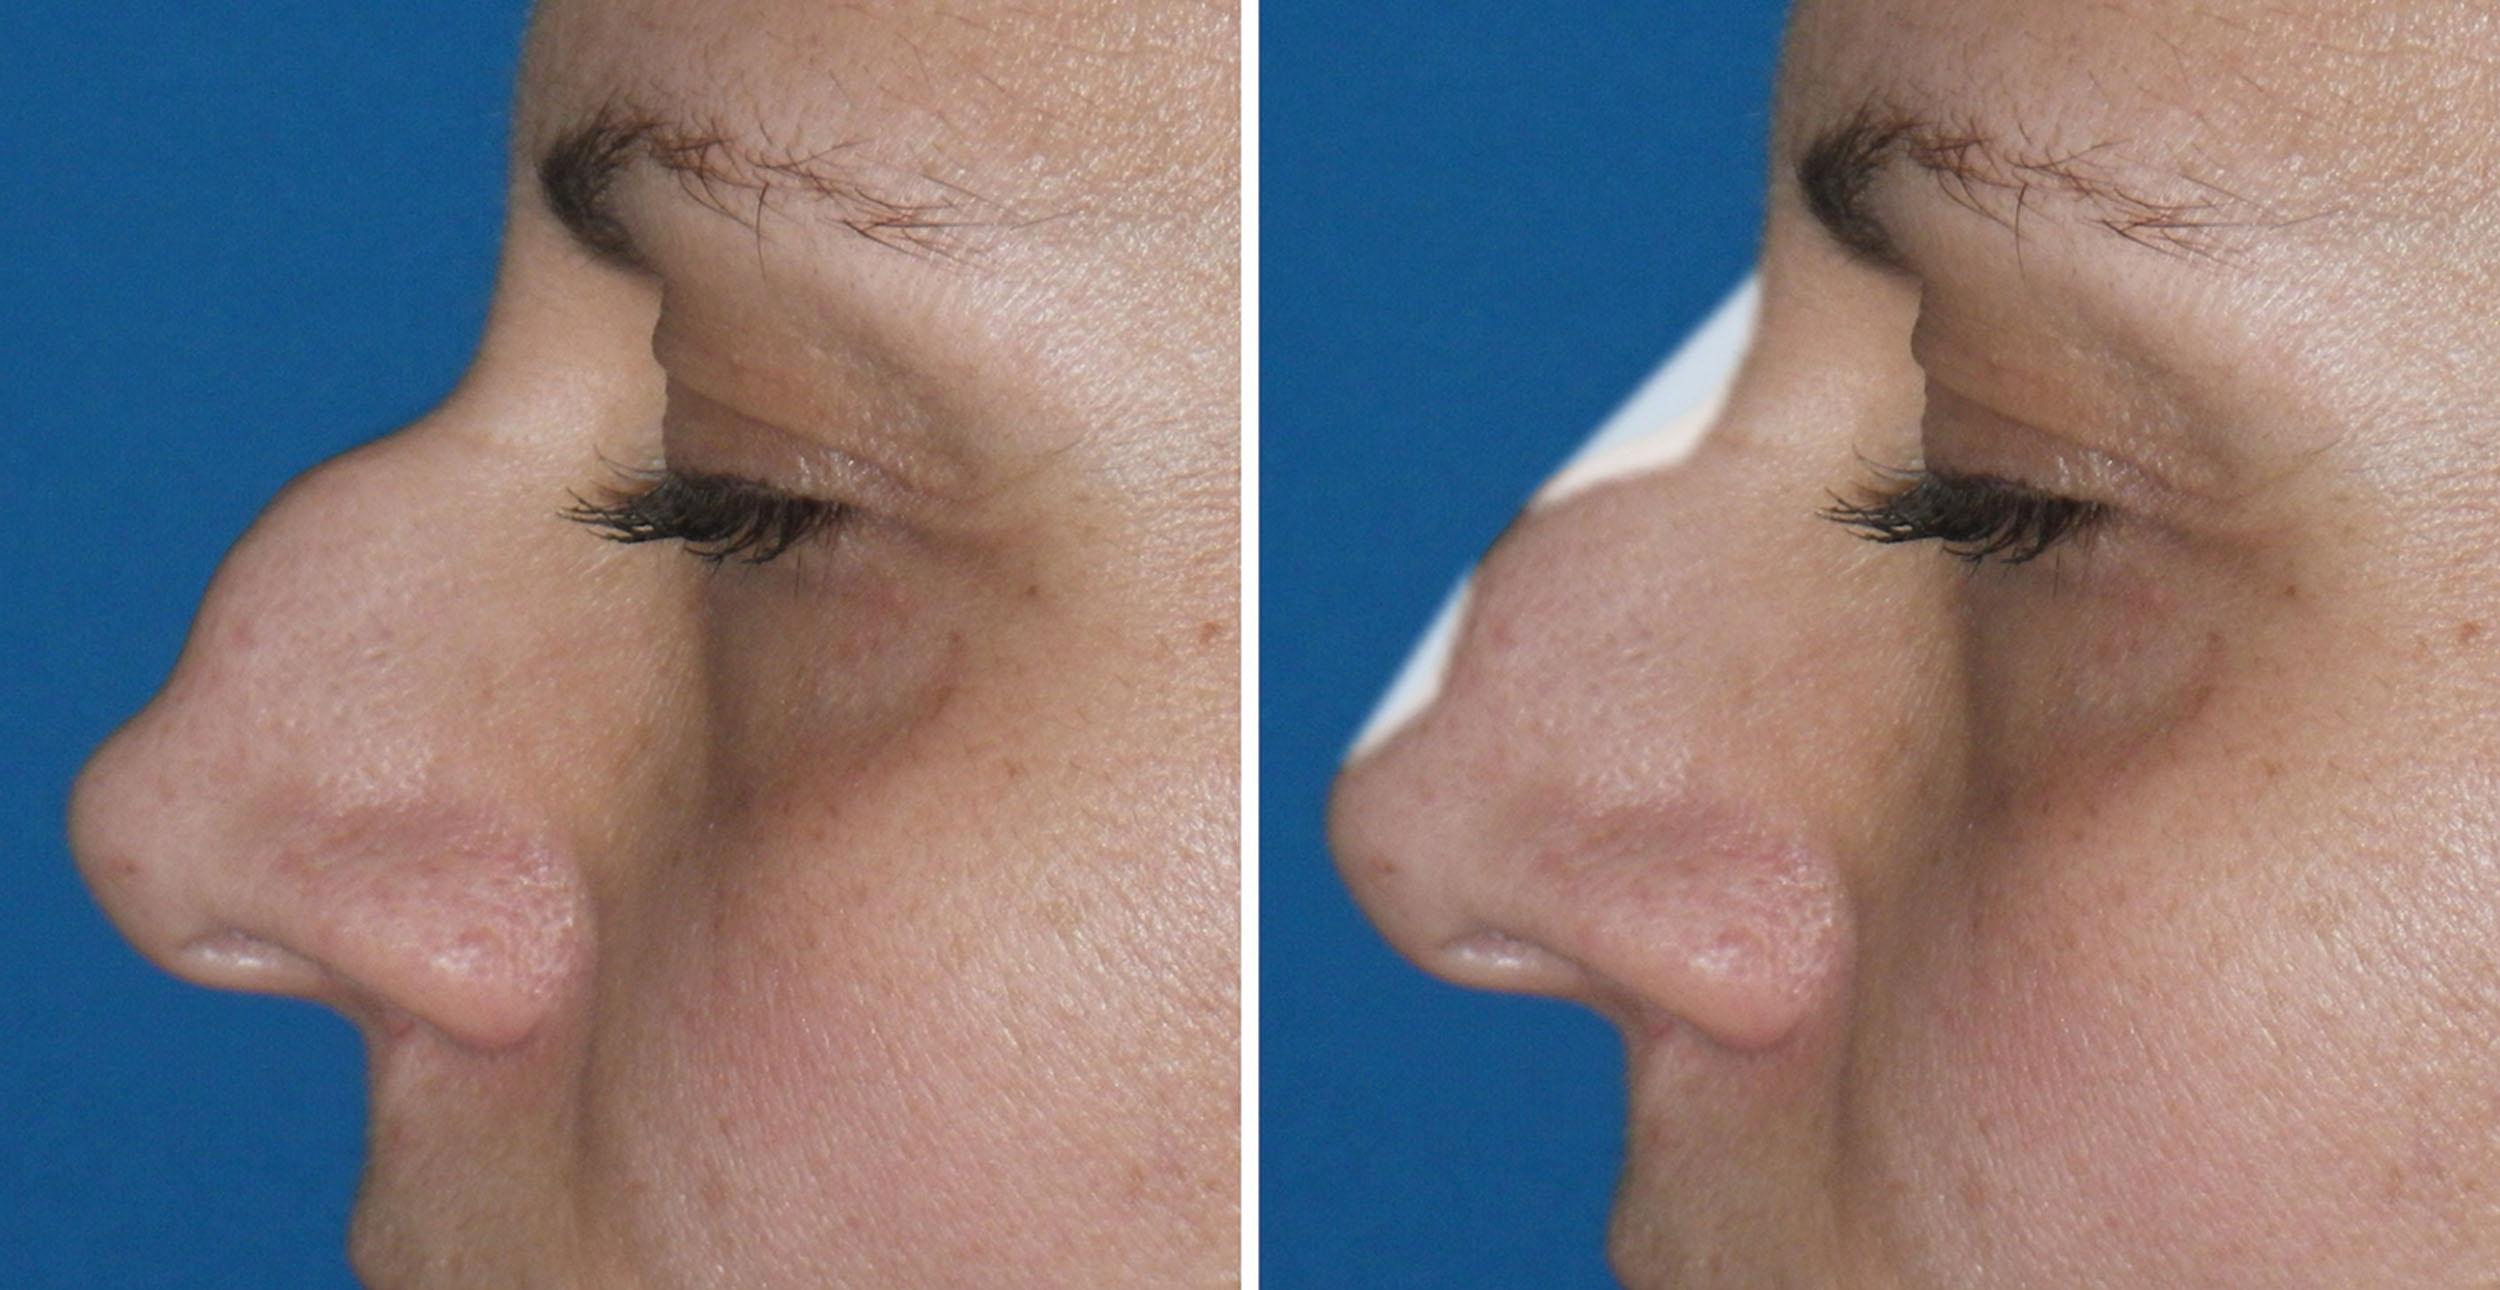
In my preferred method for treating a dorsal hump, the filler is first injected deep over cartilage or bone to form a base, and then a more superficial subcutaneous layer is injected. Intradermal injections can also be used to refine the anatomy and create a peak. Small depressions can be directly filled, and patients requiring restoration of the tapering nasal bridge are treated by pinching the tissue between the thumb and forefinger to mold the filler into a more raised and rounded nasal bridge ( Fig. 10.100 ). Nasal bridge filler augmentation in Asian or African-American patients aids in aesthetics and/or eyeglasses support.

Tip elevation can be performed by direct injection on the nasal tip to add substance, and by directing the level and height of the augmentation, the tip can be filled, rounded, or given the appearance of rotation ( Fig. 10.101 ). Injecting the columella can also assist in tip elevation and columellar lengthening ( Fig. 10.102 ). Combining tip augmentation and columellar augmentation can have a dramatic effect on the nasal tip that can rival rhinoplasty. The nasal tip is probably the most dangerous region of the nose to inject, and injections in this area should be at the cartilaginous level.

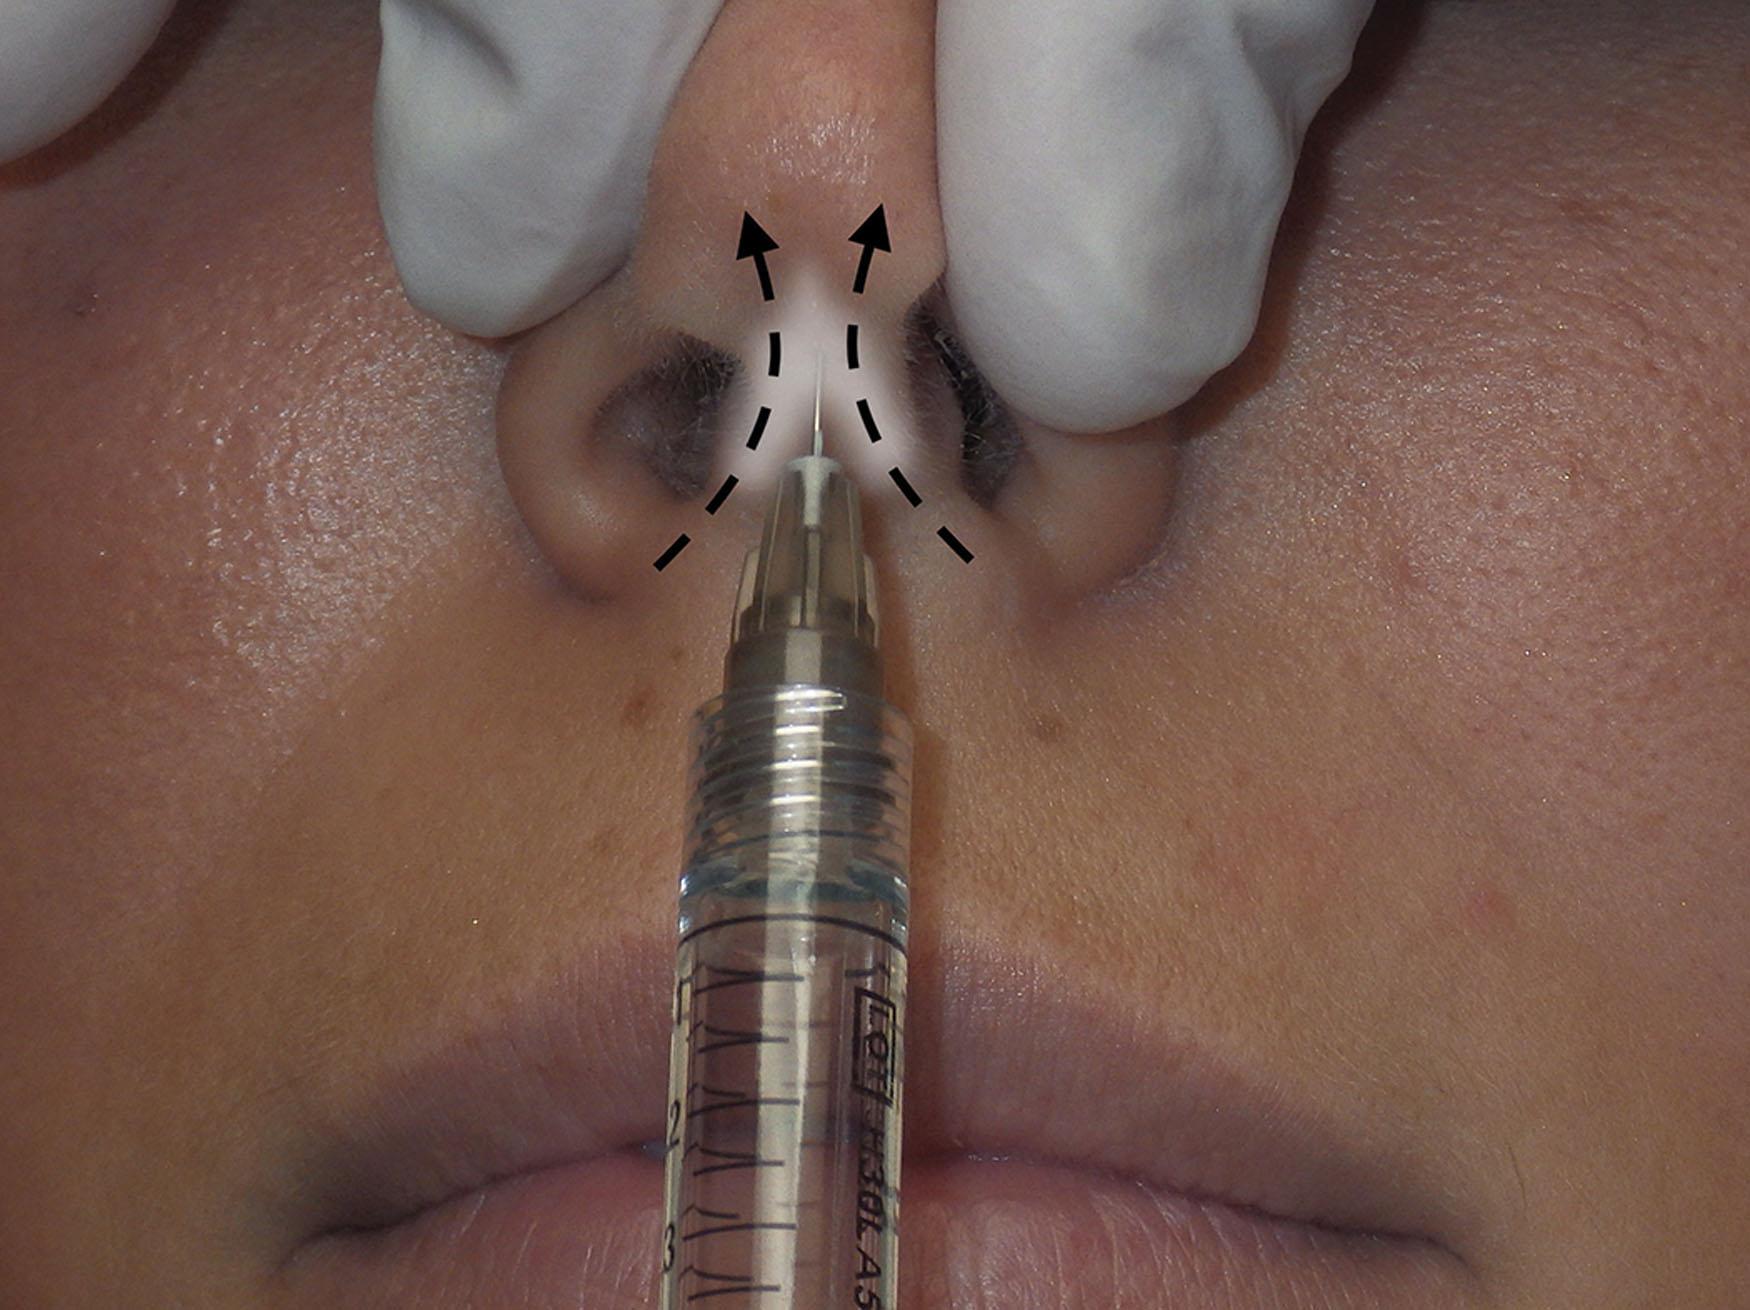
Patients who present with lateral depressions on the alar cartilages can be injected in the depressions to even out the nasal tip ( Fig. 10.103 ). The two nasal tip–defining points are commonly overpronounced, and patients often desire a softened-appearing nasal tip. Filling the depression between the extremely prominent lower lateral tip cartilages improves the harsh appearance created by a deep nasal tip cleft.
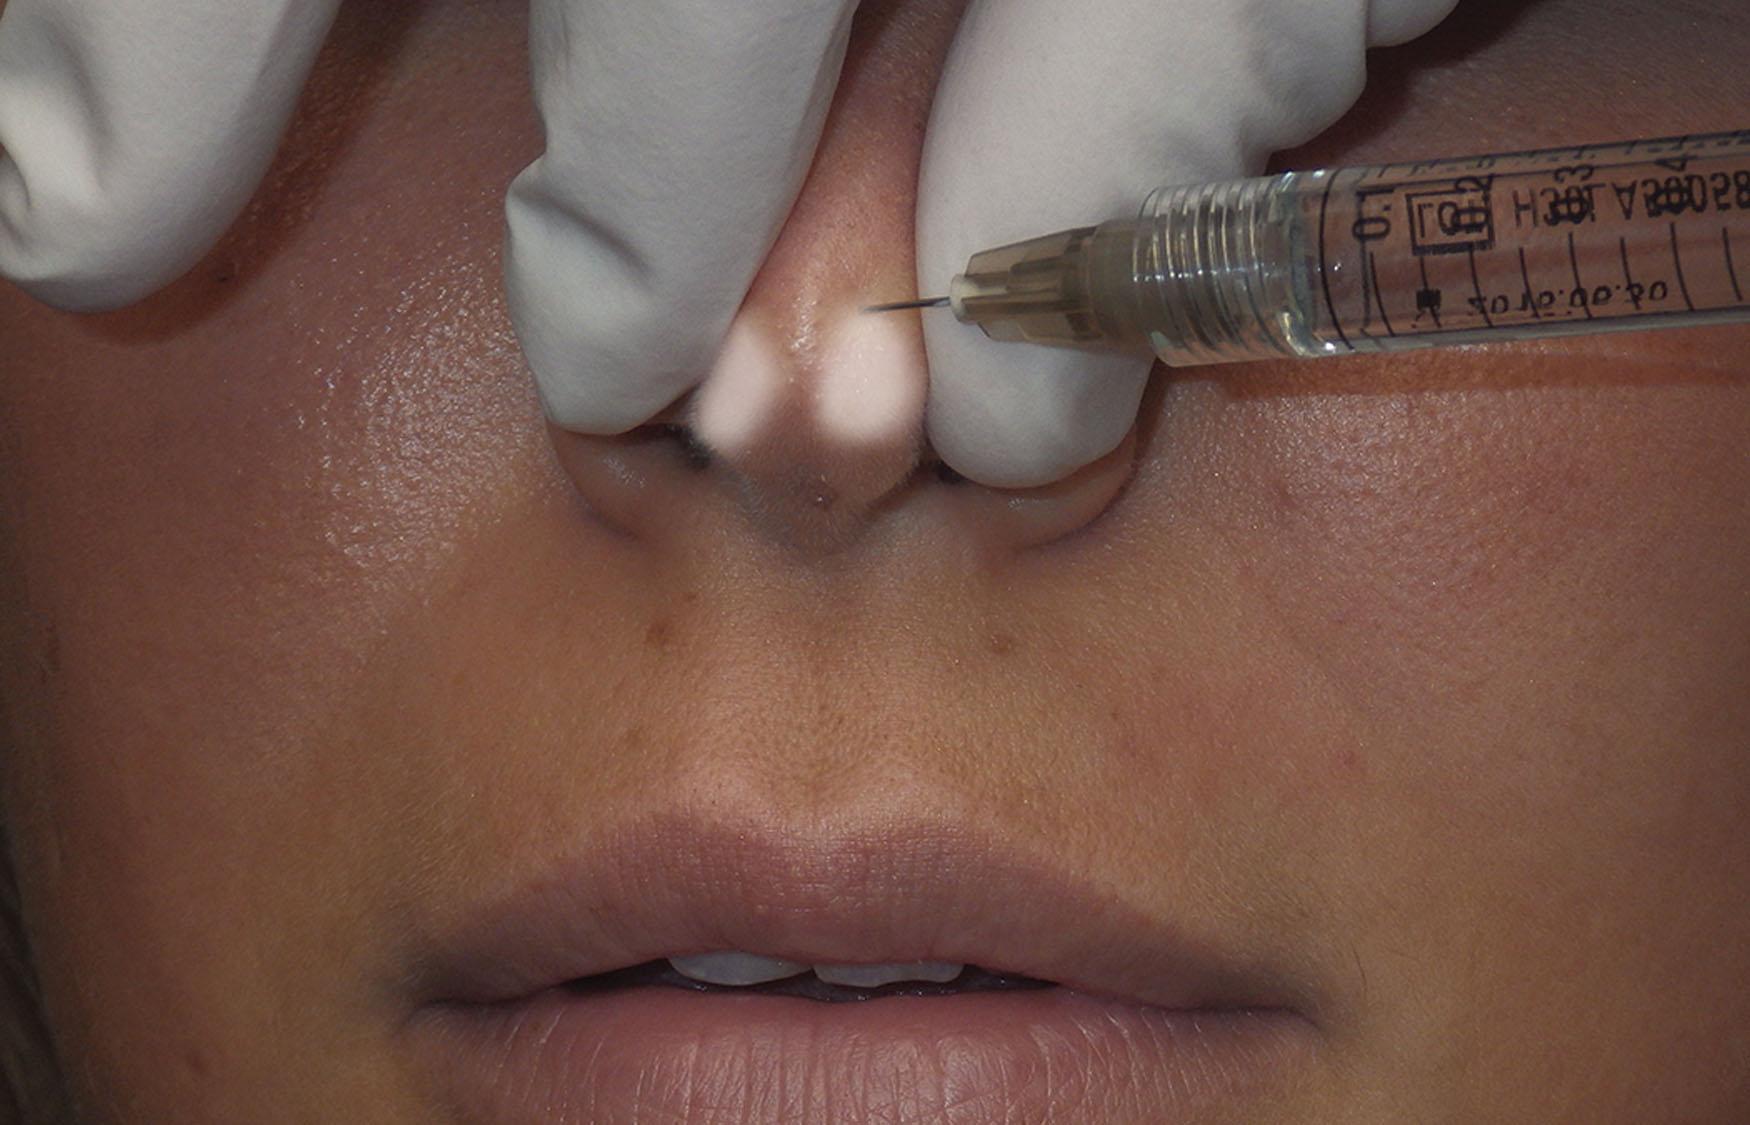
Sometimes filler rhinoplasty patients are best treated in two appointments, as swelling and settling of the filler can lessen the result. Having the patient back for a final touch-up can improve the result and longevity.
Small changes to nasal architecture can make patients elated by improving an insecurity that they have had for years in a nonsurgical manner in a matter of minutes. Figs. 10.104–10.108 show various cases of filler rhinoplasty.
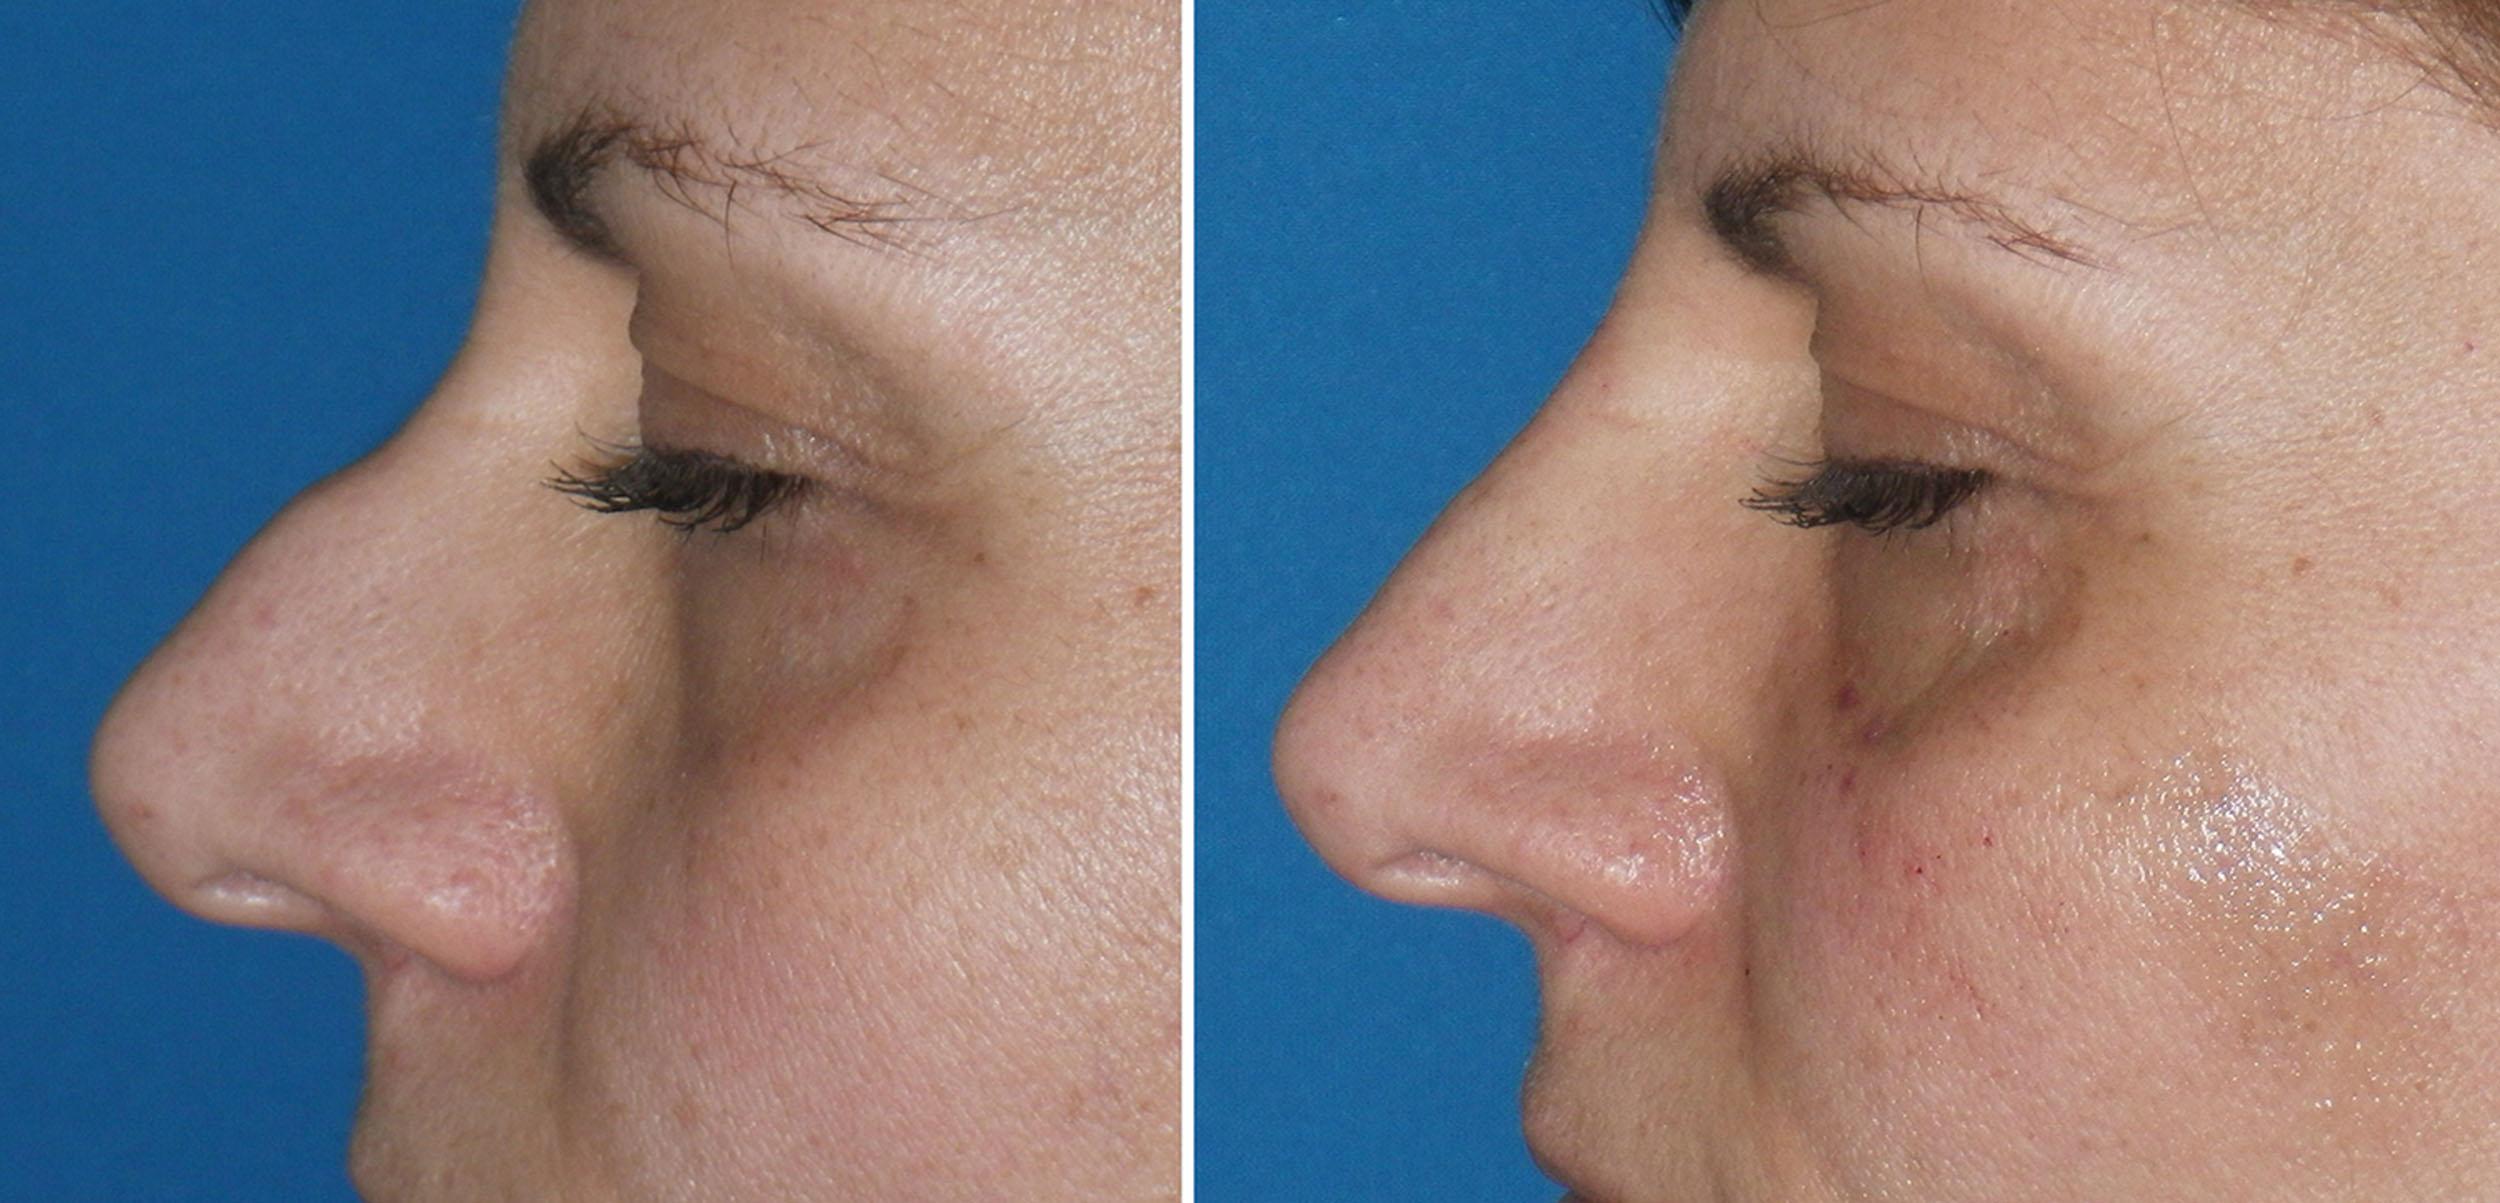
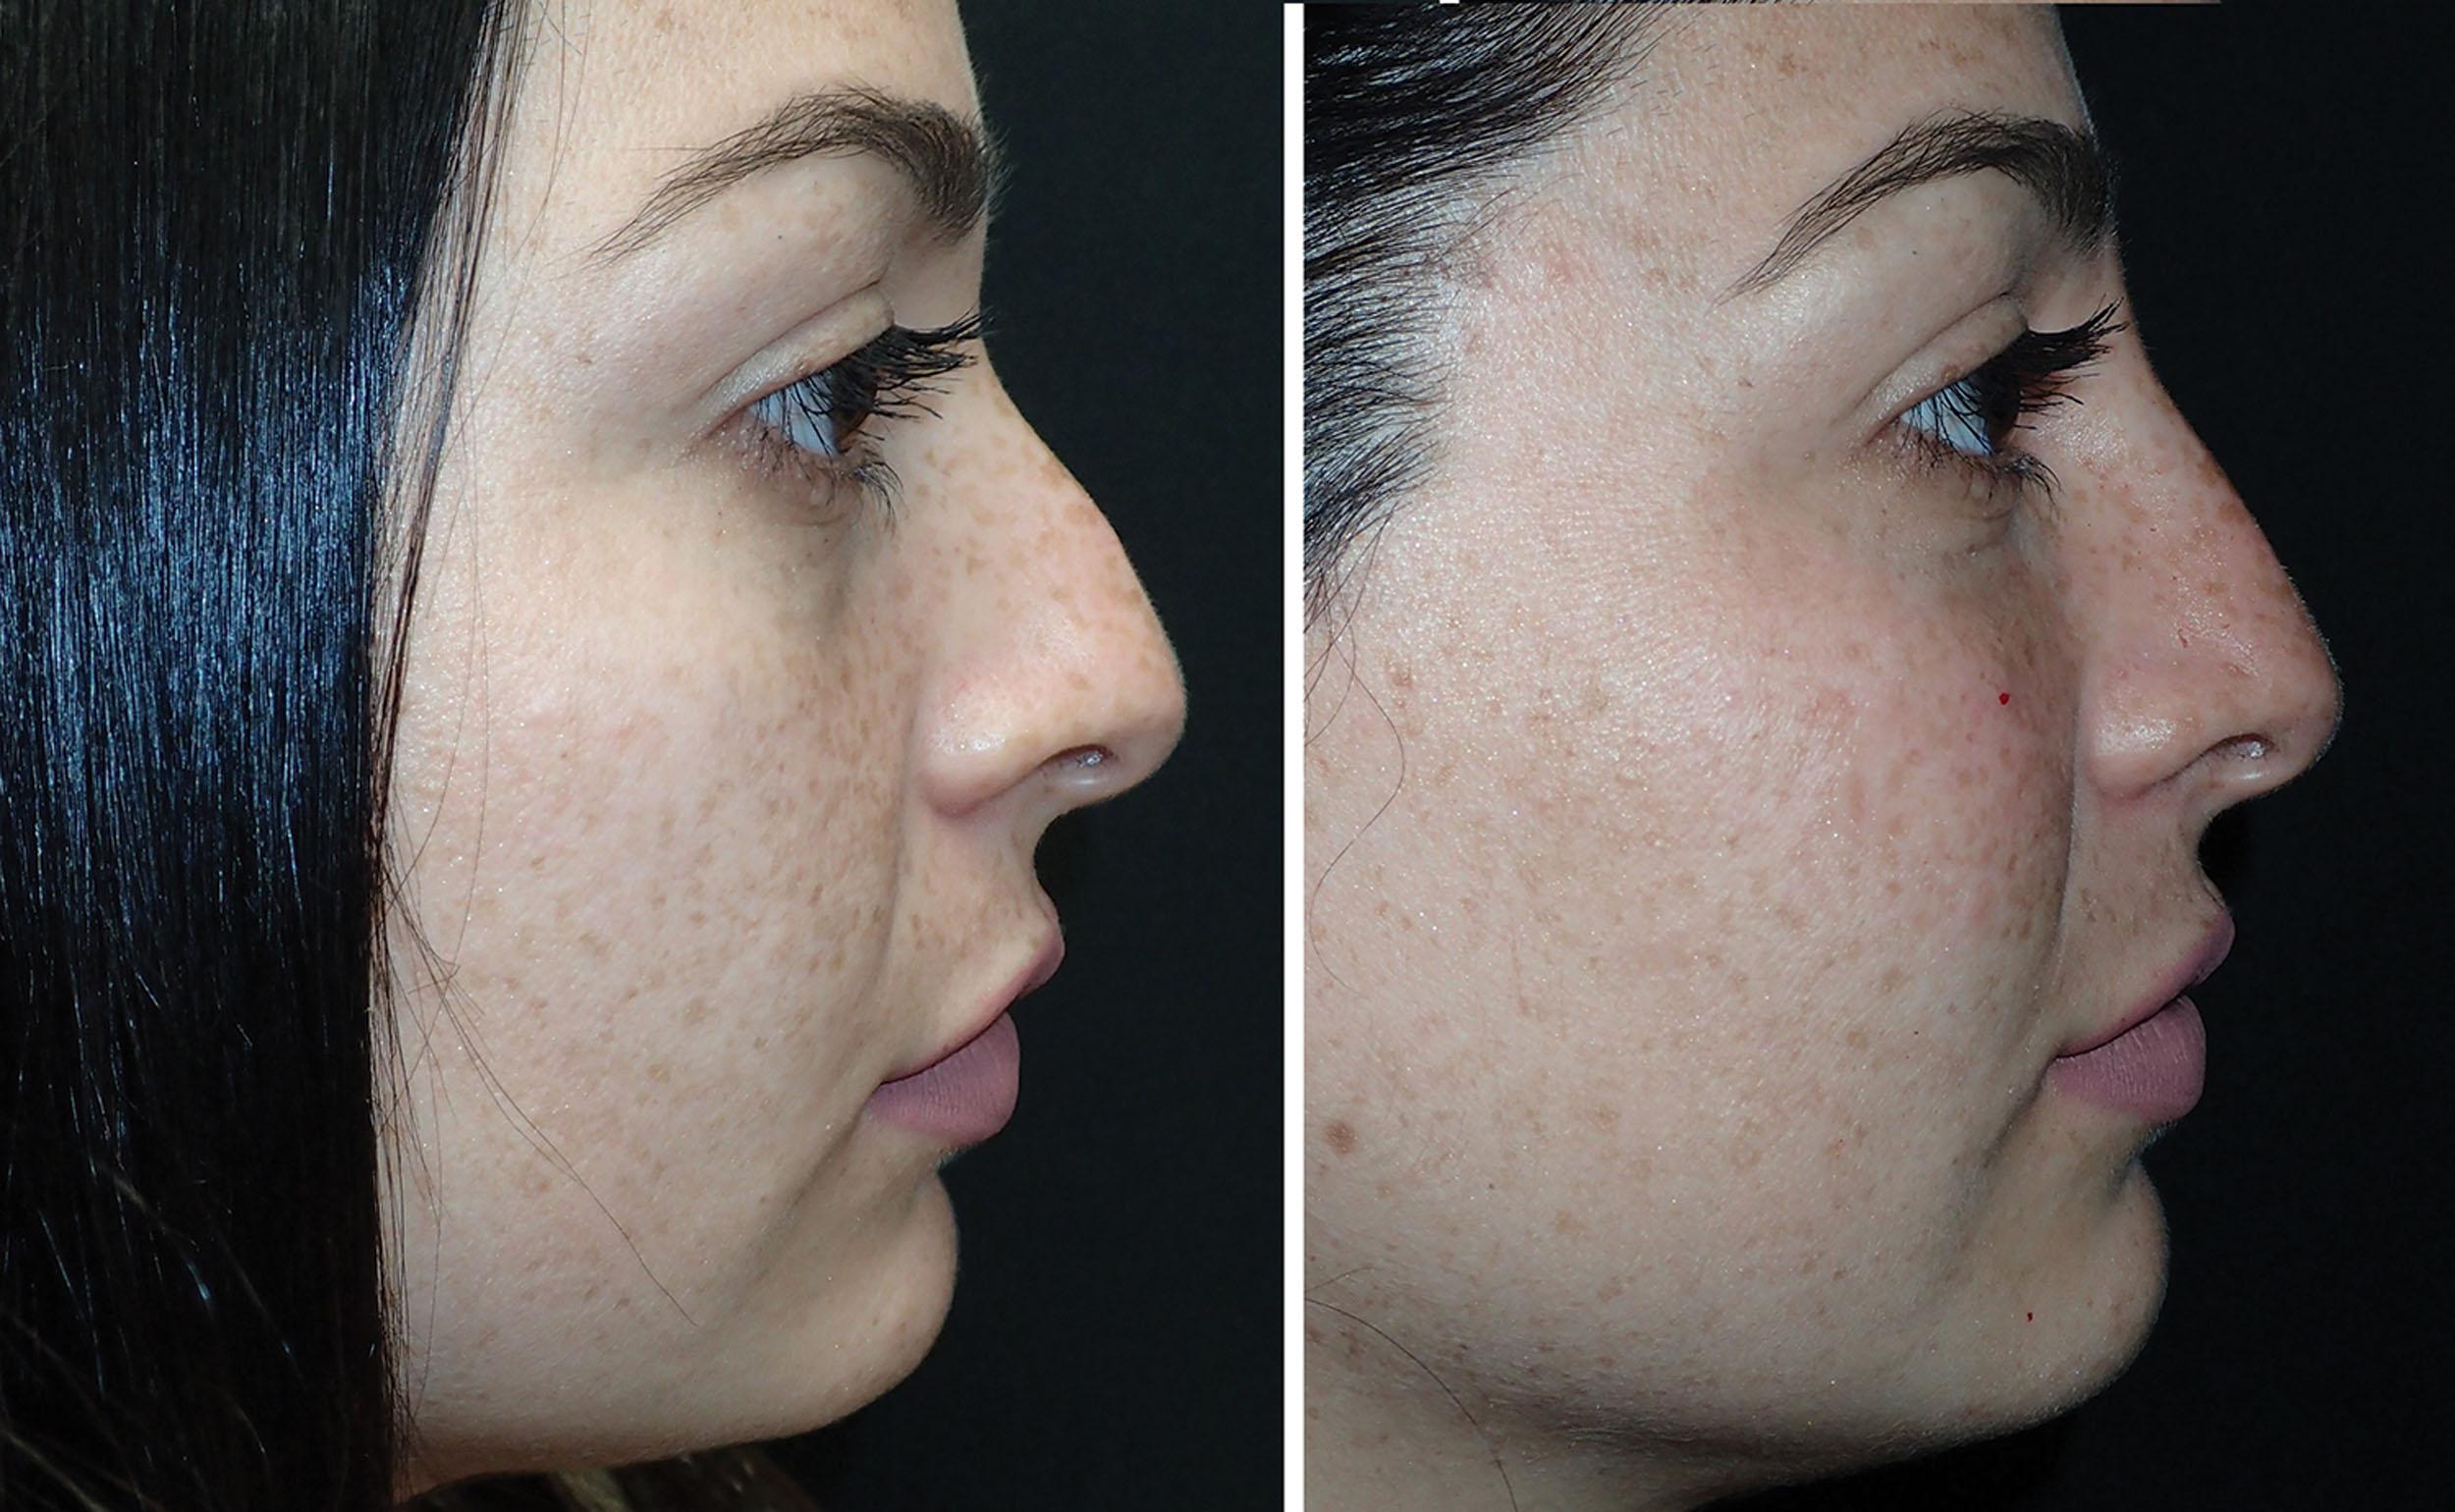
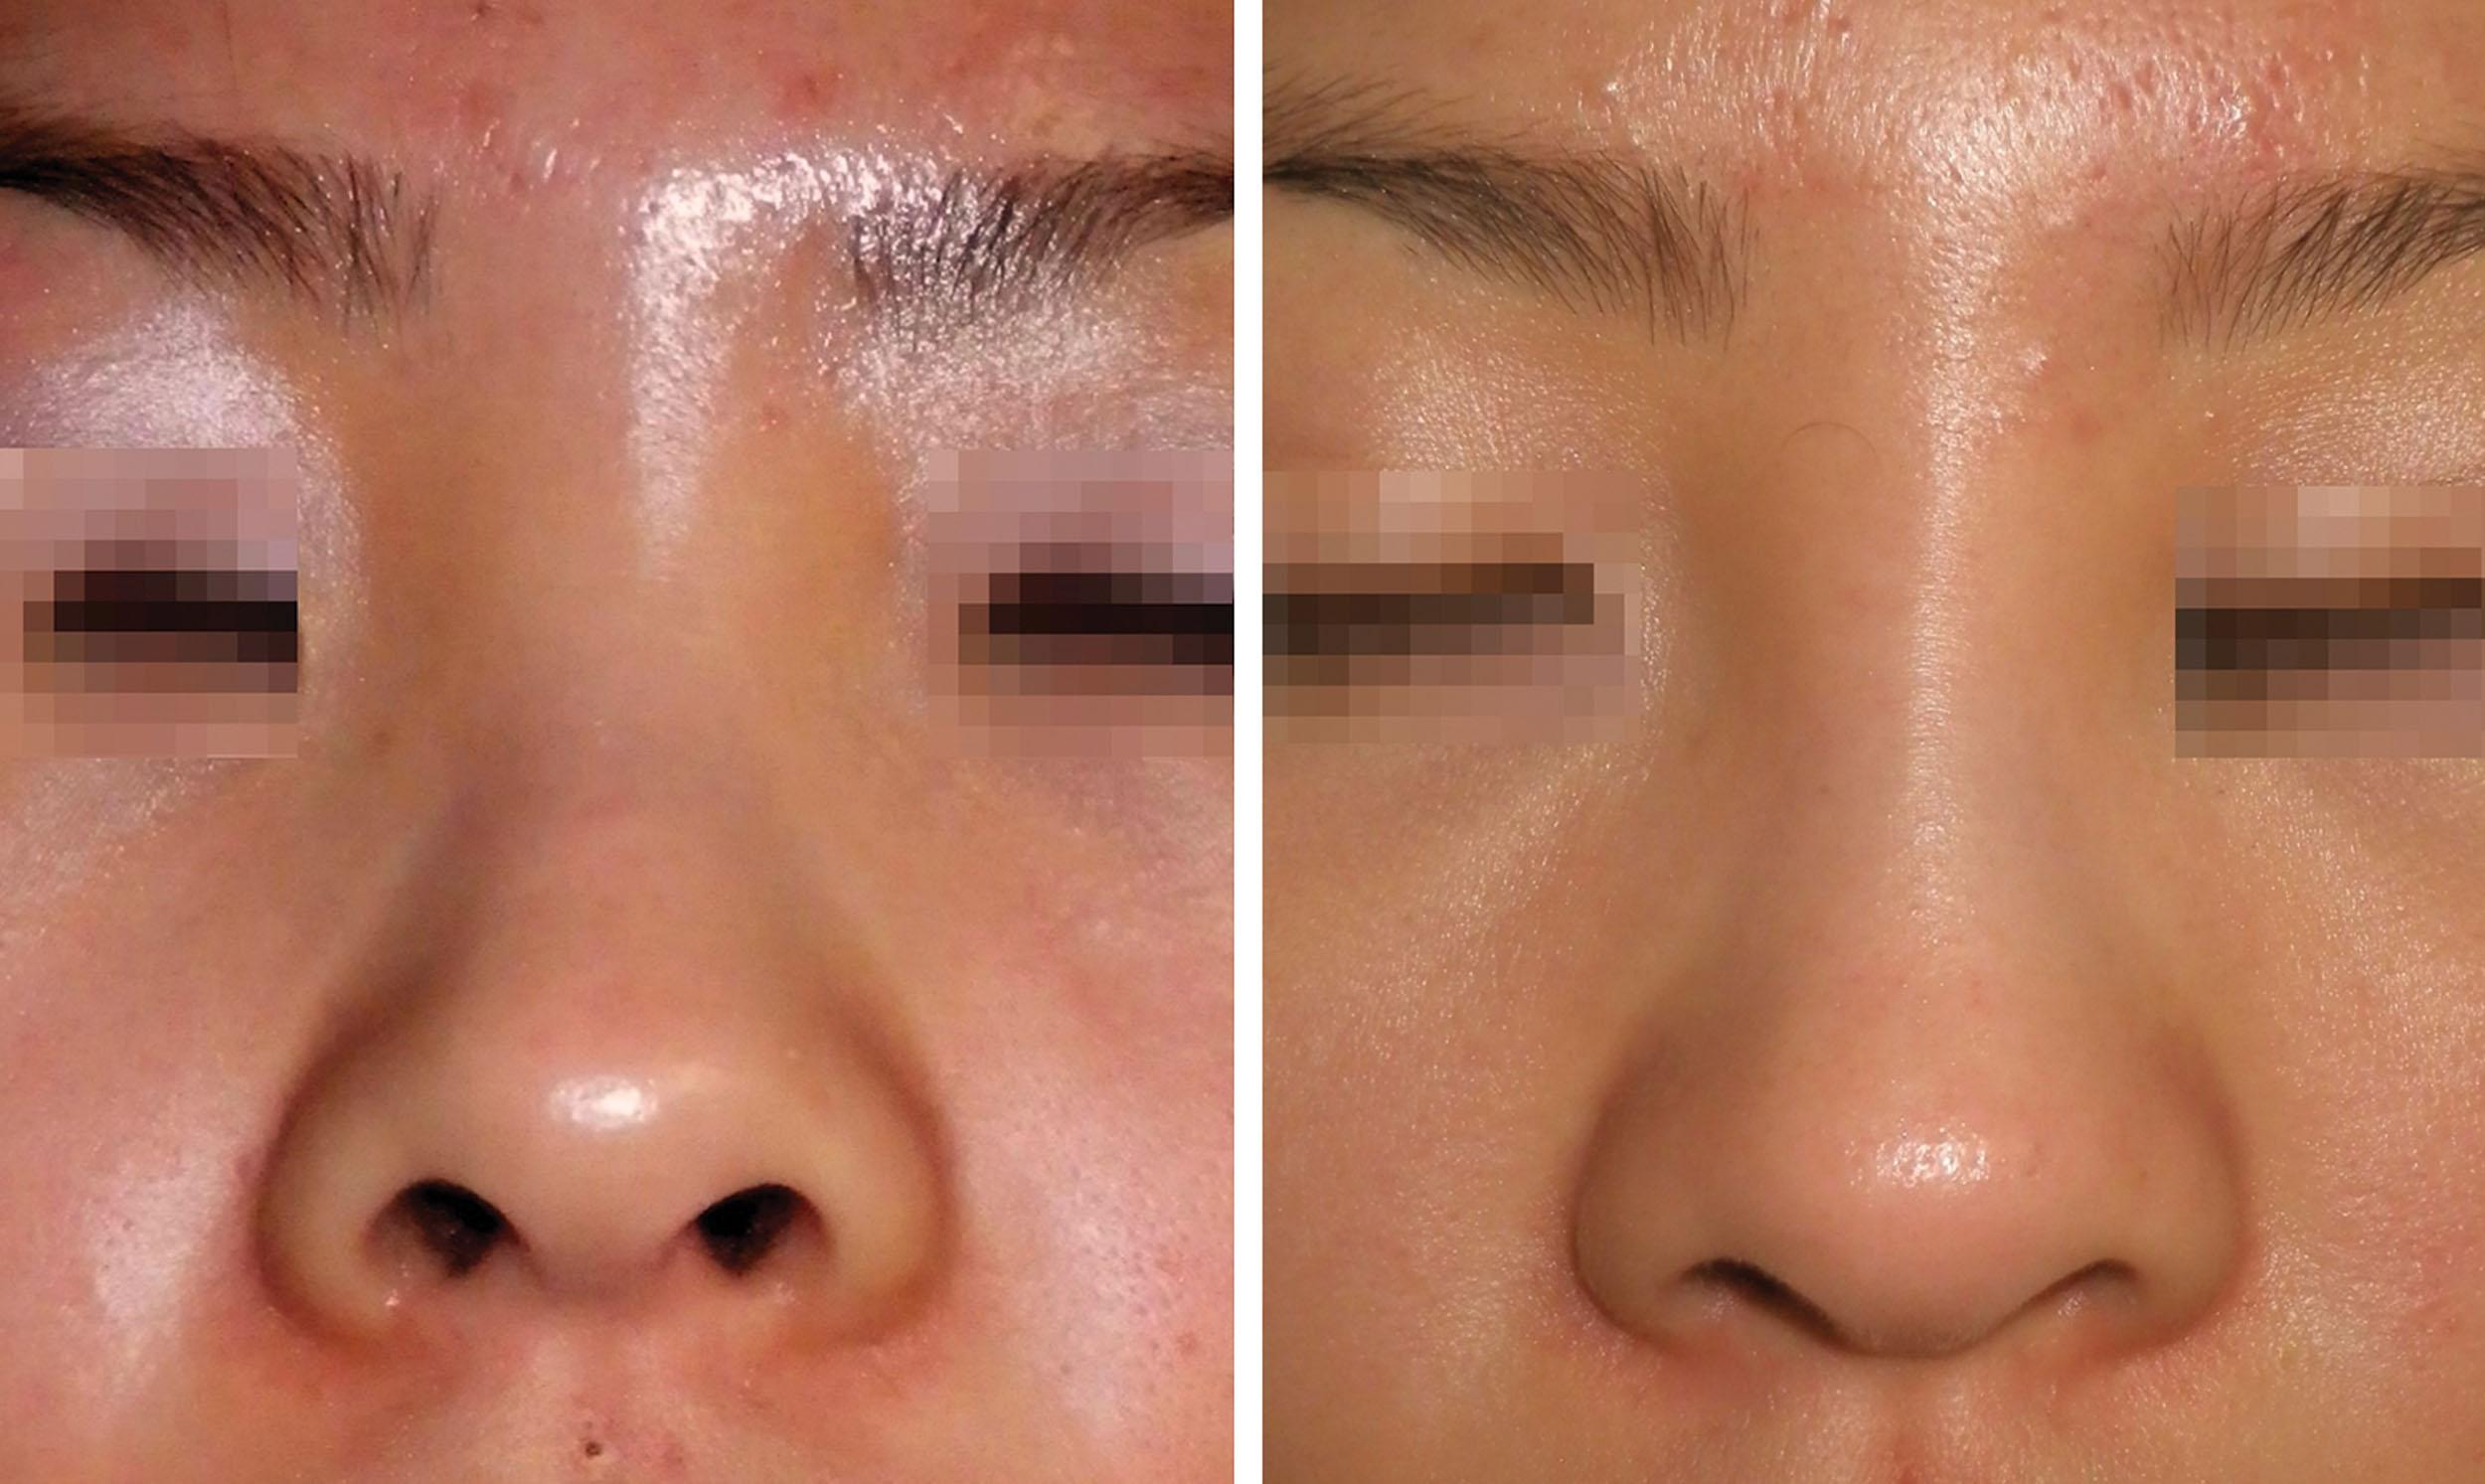
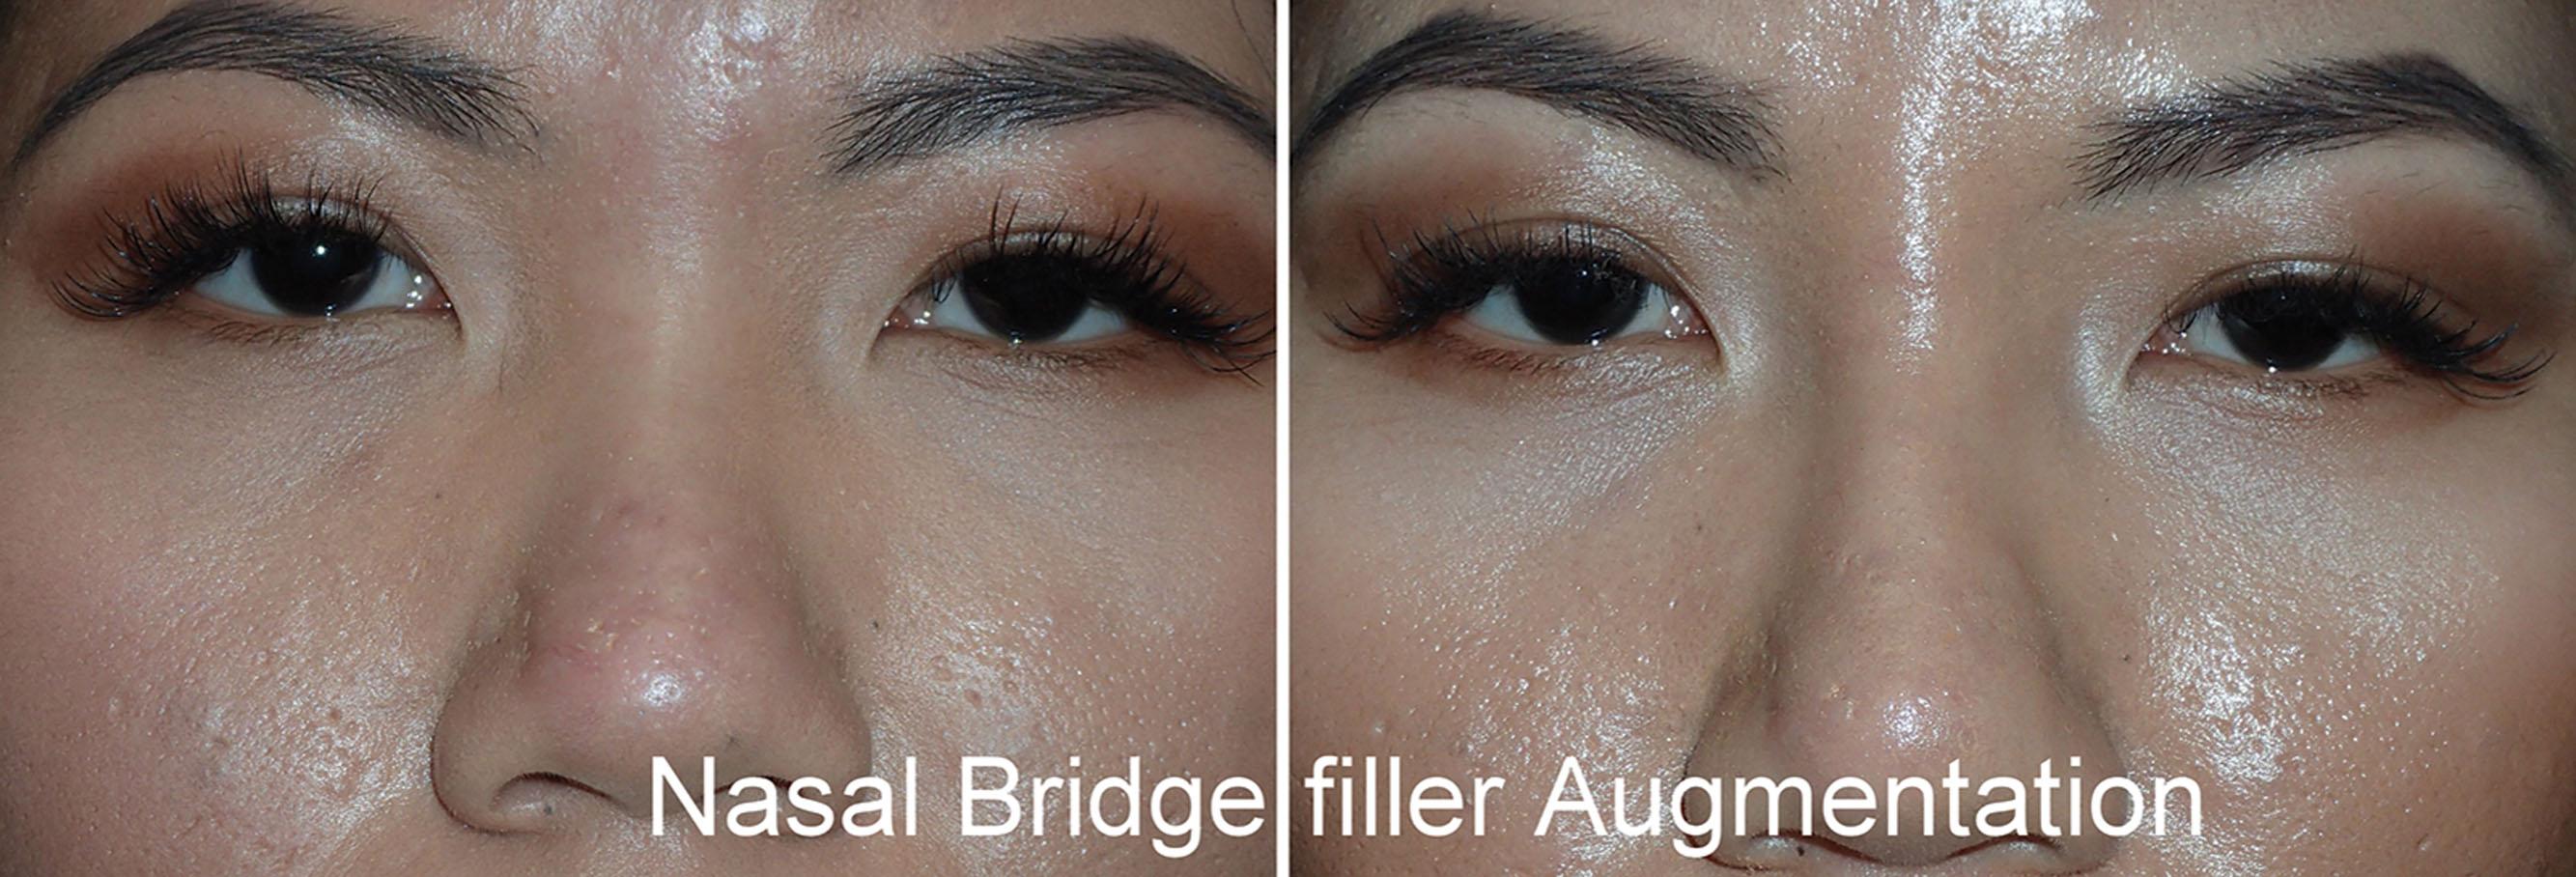

Alexander Rivkin
Surgical rhinoplasty remains one of the most popular cosmetic procedures performed on the face. Statistics from the American Academy of Facial Plastic Surgery and the American Society of Aesthetic Plastic Surgery put the number of rhinoplasties performed in the United States in 2018 at around 213,000. This number is relatively unchanged from what it was in 1997, before the FDA approval of cosmetic botulinum toxin and HA fillers. As with any surgical procedure, patients undergoing rhinoplasty are subject to risks, recovery time, and expense. Until recently, patients who wanted to avoid surgery have never had a viable alternative procedure that could accomplish the cosmetic goals of rhinoplasty noninvasively. With the advent of long-lasting injectable fillers, however, physicians and patients have finally embraced a nonsurgical surrogate.
I first performed primary nonsurgical rhinoplasty (NSR) using calcium hydroxyapatite injectable filler in 2003, before the publication or report of such a procedure being done in the United States. The novelty of the procedure caught the attention of the media, and I performed it on several prominent national news programs and shows. This sparked the interest of the public, and doctors around the country began to offer NSR to their patients. Because of the simplicity and efficacy of NSR, it has steadily grown in popularity over the past decade and a half. Since 2003, I have had the privilege to perform over 5000 of these procedures in my clinic, using a variety of injectable fillers, with great success. NSR is not a replacement for rhinoplasty, but it provides a more accessible and often more precise means of accomplishing aesthetic goals for the appropriate patient.
The idea of injecting substances under the nasal skin to improve cosmesis is not new. Corning and Gersuny first described injecting liquid paraffin into the nose to correct saddle nose deformity at the beginning of the nineteenth century. The practice was quickly embraced, but just as quickly abandoned because of the severe long-term adverse effects of paraffin. In 1919, Bruning tried to correct postoperative cosmetic nasal imperfections with fat injection, but the technique was ultimately not well accepted because the fat grafts showed poor survival duration. In 1986, Webster presented a 20-year retrospective study of microdroplet silicone injection into the nasal bridge to correct postsurgical nasal defects. The study reported mostly positive results, but many physicians, aware of horrific reports of complications from the 1960s and 1970s, have remained wary of silicone injections.
The first modern study of NSR was published by Han et al. in 2006. It was an 11-patient pilot study looking at the safety and efficacy of dorsal augmentation NSR using HA (Restylane, Medicis, Scottsdale, AZ) mixed with autologous fibroblasts. HA is a glycosaminoglycan that is a major component of connective, dermal, and neural tissue in most mammals. Cross-linked HA has been widely used as an injectable filler since it was FDA approved in 2003. Because of its biocompatibility, no allergy testing is required. The HA in Restylane is produced by bacterial fermentation. The author injected an average of 0.8 cc into the nasal dorsum of the patients. Of the six patients who provided follow-up data, there were no adverse events.
Also, that year, Laryngoscope published a report by Nyte in which he successfully injected calcium hydroxyapatite (Radiesse, Merz, San Mateo, CA) to correct collapse of the internal nasal valve in 23 patients. Radiesse is a suspension of 30% of microspheres, 25 to 45 µm in size, in a mix of glycerin, carboxymethyl-cellulose, and water. It is fully biocompatible because it is identical to the mineral portion of human bone and teeth. Radiesse was first approved as a radiologic marker and for use in vocal fold augmentation. FDA approval for cosmetic use came in 2006.
Many papers documenting the safety and success of NSR with a variety of filler materials followed these initial studies, and the procedure has become a staple of the expert aesthetic injector’s practice all over the world. However, a number of case reports were also published, documenting the rare, but devastating complications that can occur with NSR. By this point, most injectors are aware that the nose is the riskiest area to inject filler. Ischemia, necrosis, and blindness are very real risks in the nose because of the relative paucity of dermal blood supply in some subunits and the proximity of the ophthalmic vasculature to other subunits. I believe that the only practitioners who should be injecting the nose are those with extensive experience injecting fillers. The popularity of this procedure on Instagram is undoubtedly a temptation for new injectors to “jump start” their practice. This would be a grave mistake. Every injector who contemplates NSR must ask themselves if they are comfortable managing ischemia correctly and expediently before it could develop into necrosis. Causing ischemic skin changes is not a matter of “if” with NSR; it will happen if you do enough cases. Each potential NSR injector also must ask themselves if they know what to do in case of blindness. Of the cases of filler-induced blindness reported globally, the nose is the most common site of injection.
This chapter is an attempt to present the possibilities of this technique as well as the critical measures that must be taken to optimize safety.
NSR corrects mild to moderate cosmetic nasal irregularities. I perform this procedure to achieve the following cosmetic goals:
Raise and better define an underdeveloped nasal dorsum. This is most popular among my Asian and African-American patients.
Raise and better define a ptotic tip.
Straighten an upturned nose.
Camouflage a dorsal bump. The dorsum is leveled by injecting filler above and below the bump.
Correct asymmetry of the tip or dorsum by subtly augmenting the weaker side.
Correct post-rhinoplasty contour defects. Most commonly, these present as:
saddle nose deformity or other type of dorsal cartilage collapse
pollybeak deformity
cartilage or graft skeletonization
foreshortened nose
dorsal asymmetry caused by asymmetric scarring
overrotated tip
asymmetry of the tip caused by postsurgical scarring or cartilage overresection
alar retraction
lateral crura collapse
columellar retraction
Make the nose appear smaller. These aesthetically undesirable elements attract attention to the nose and make it appear larger. Correcting them makes the nose attract less attention, blend into the rest of the face, and appear smaller. Figs. 10.109 and 10.110 illustrate the aesthetic power of NSR.
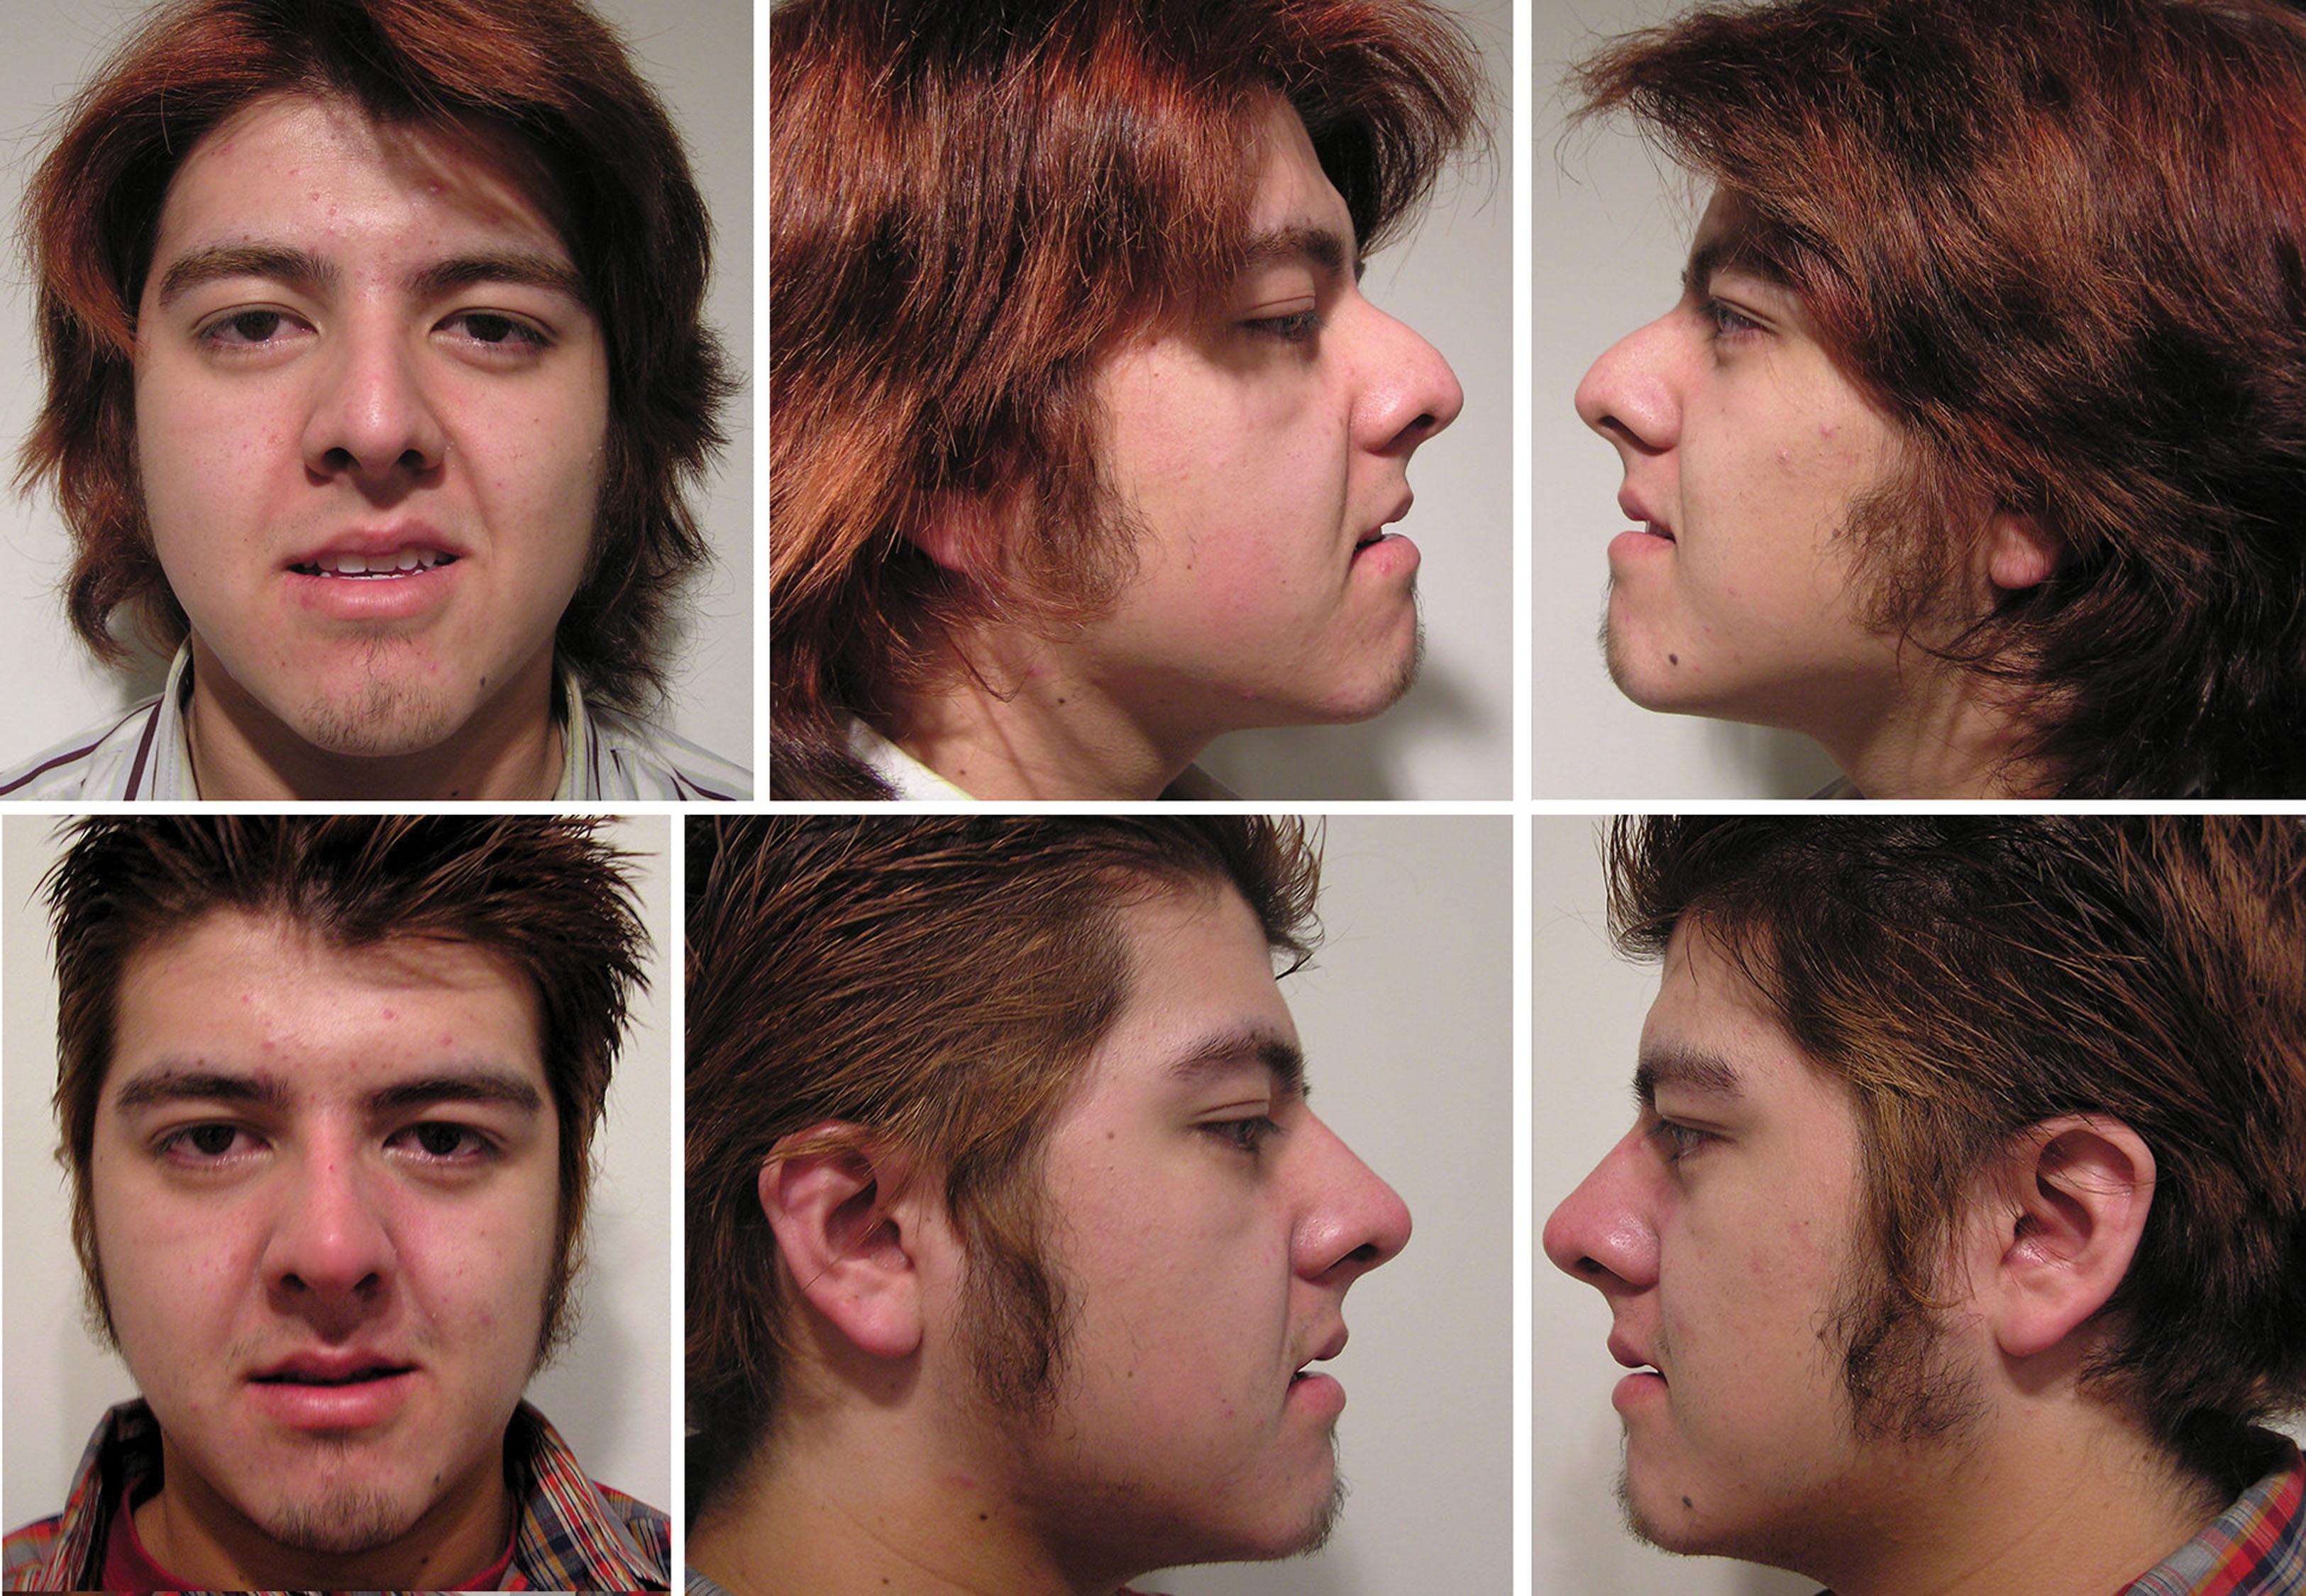
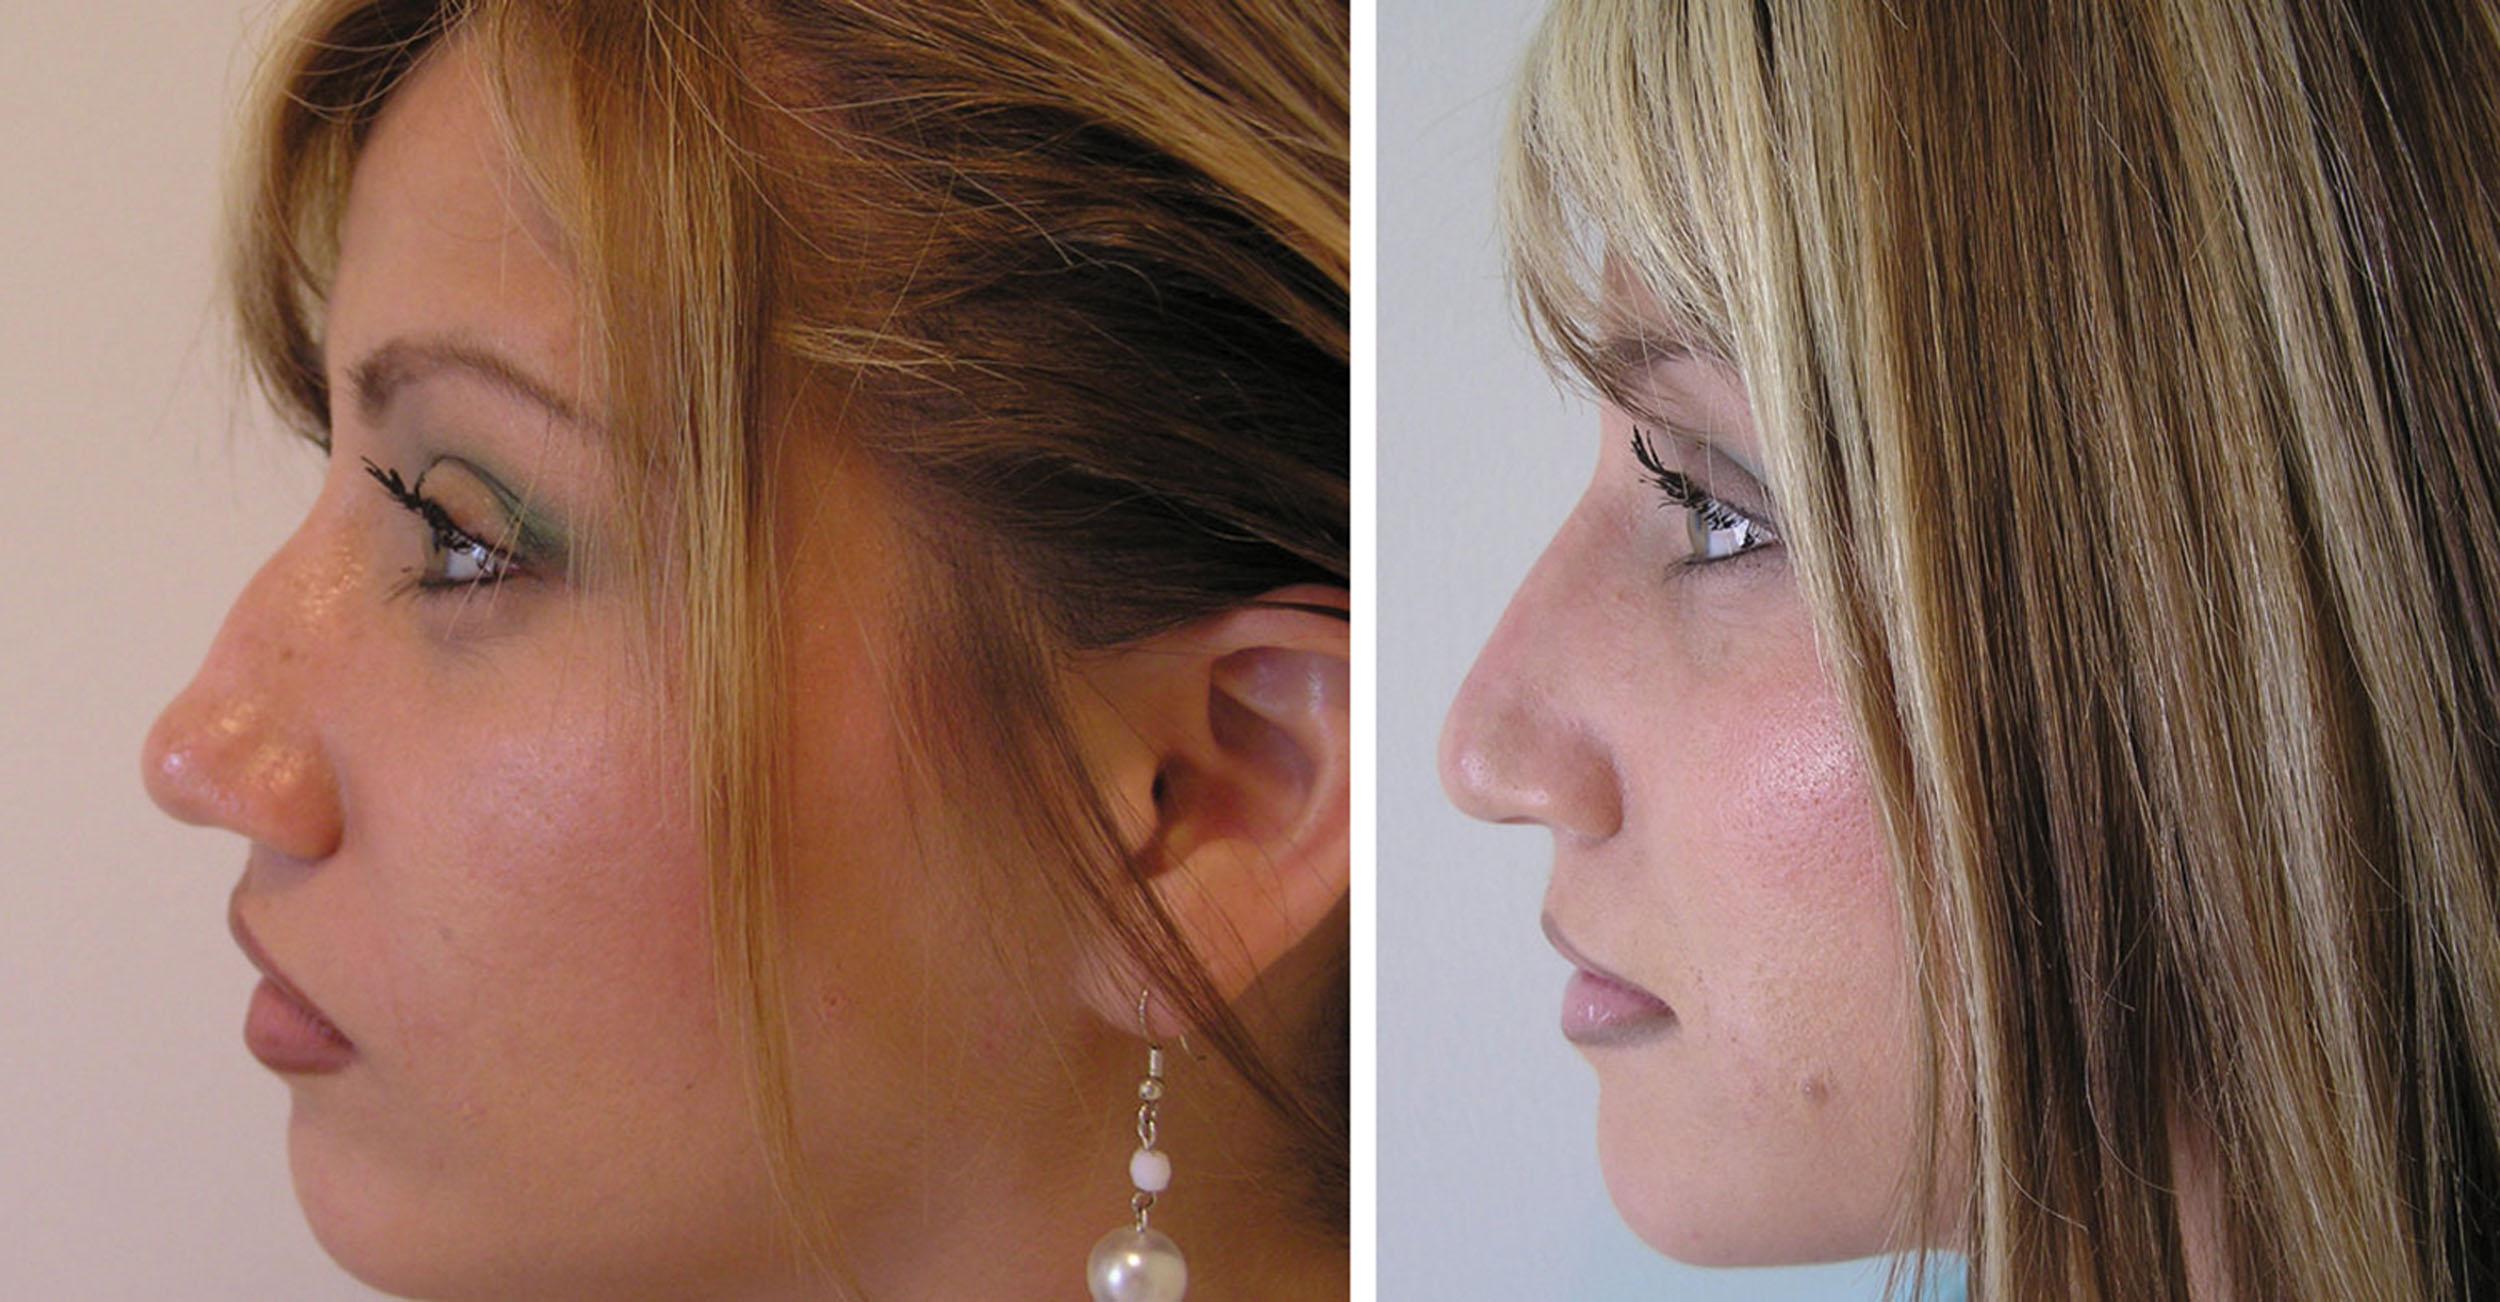
Injectors around the world have used a variety of materials to achieve the aesthetic recontouring of NSR. Currently, HA is the most popular filler material because of its smooth contour, relative longevity, and reversibility (via injection of hyaluronidase).
I consider HA, in its most common formulations of Juvéderm and Restylane, to be the best material for the novice or occasional injector of the nose. The ability to dissolve HA is a critical safety feature for all injectors, especially those who are not yet expert in the technique, and these two fillers in particular can be easily and quickly dissolved. Juvéderm and Restylane are effective for basic NSR goals, such as augmenting the bridge and camouflaging minor dorsal bumps. These fillers struggle to perform, however, in the more advanced applications of this technique. Juvéderm and Restylane are relatively soft materials. They can only provide moderate augmentation of the dorsum; they cannot significantly lift a drooping tip, and they are poor at sculpting defining points of the tip and the sidewall of the nose. In my experience, the aesthetic effect of these HA fillers lasts no longer than 6–8 months.
Restylane Lyft (formerly Perlane) is a formulation of HA that is an improvement over Juvéderm and Restylane for NSR. Its increased density permits the advanced injector to sculpt more effectively. It has less of a tendency to spread, so better definition can be achieved. The aesthetic effect of Lyft also lasts somewhat longer in the nose than Juvéderm (about 8 months in my experience).
Before Voluma was FDA approved, I was using it in most of my NSR procedures for a decade. As a non-HA filler, it is not reversible. The advantages are its relative persistence of effect (average of 9–10 months in my experience, but quite variable between 6–12 months) and its high density. This last quality allowed me to effectively sculpt noses to my patients’ satisfaction. It is possible to significantly elevate a droopy tip without excessive rounding. In fact, it often makes it possible to precisely create aesthetically pleasing tip-defining points in patients with rounded, poorly defined tips. This is quite difficult, if not impossible to do with an HA filler. It also makes it possible to significantly raise and add real definition to an underdeveloped dorsum, a quality that my Asian patients particularly appreciate.
Hypersensitivity reactions are extremely uncommon, and reports of other adverse events do not differ significantly from reports for HA fillers. Side effects noted include the following:
Nodules (generally associated with lip augmentation or injection in areas with little subdermal space, e.g., the infraorbital area) (Smith, 2007; Tzikas, 2008)
Granulomas (Lee, 2008)
Skin necrosis (Dayan and Arkins, 2011)
Redness, erythema, and swelling (Siclovan, 2009)
With the FDA approval of Voluma in October o2013, injectors gained a valuable new tool that seems to confer longer duration of effect than any other filler. Voluma is more cross-linked than other HA fillers and has a higher percentage of low-molecular-weight HA, making it exceptionally smooth, viscous, and cohesive. Increased cross-linking makes the filler more resistant to enzymatic degradation. Under study conditions, duration of effect was up to 2 years. In my experience, the cosmetic effect of Voluma lasts for about 12–18 months, and this can be prolonged to about 2 years with a touch-up treatment at 6 months. Most rhinoplasty surgeons who have operated on previously injected noses report that the filler material is still present under the skin for a long time after the cosmetic effect has faded. This is why I recommend always performing hyaluronidase injection before rhinoplasty on an NSR nose, even if seems that the effect of NSR has completely disappeared. It is easier to dissolve the HA via injection then scoop it out intraoperatively. Because of the duration of effect and its reversibility, I have been using Voluma for the majority of my NSR cases over the past 7 years. The filler performs well for most patients, except those who need significant elevation of their dorsum or tip and those who need the creation of sharp tip-defining points in the context of a rounded nasal tip. Radiesse is still the only filler thick enough to provide the desired lift and definition in these situations. For these patients, my NSR usually combines Voluma and Radiesse.
The other filler that I commonly use for NSR is Bellafill ( Fig. 10.111 ). This is a nonbiodegradable, nonreversible filler consisting of 20% polymethyl methacrylate (PMMA) suspended in 80% bovine collagen. A skin test for bovine collagen allergy must be performed 2 weeks before the procedure. Bellafill achieves its cosmetic effect via PMMA-mediated collagenesis. Over time, the patient’s potential for collagenesis changes, as does the thickness of the skin and underlying tissues, so the cosmetic effect of the filler fades some after 7–10 years, even though the PMMA itself is still present. At this point, many patients need a touch-up injection. Most patients opting for PMMA NSR have undergone the temporary procedure and, pleased with the results, desire a longer duration of effect.
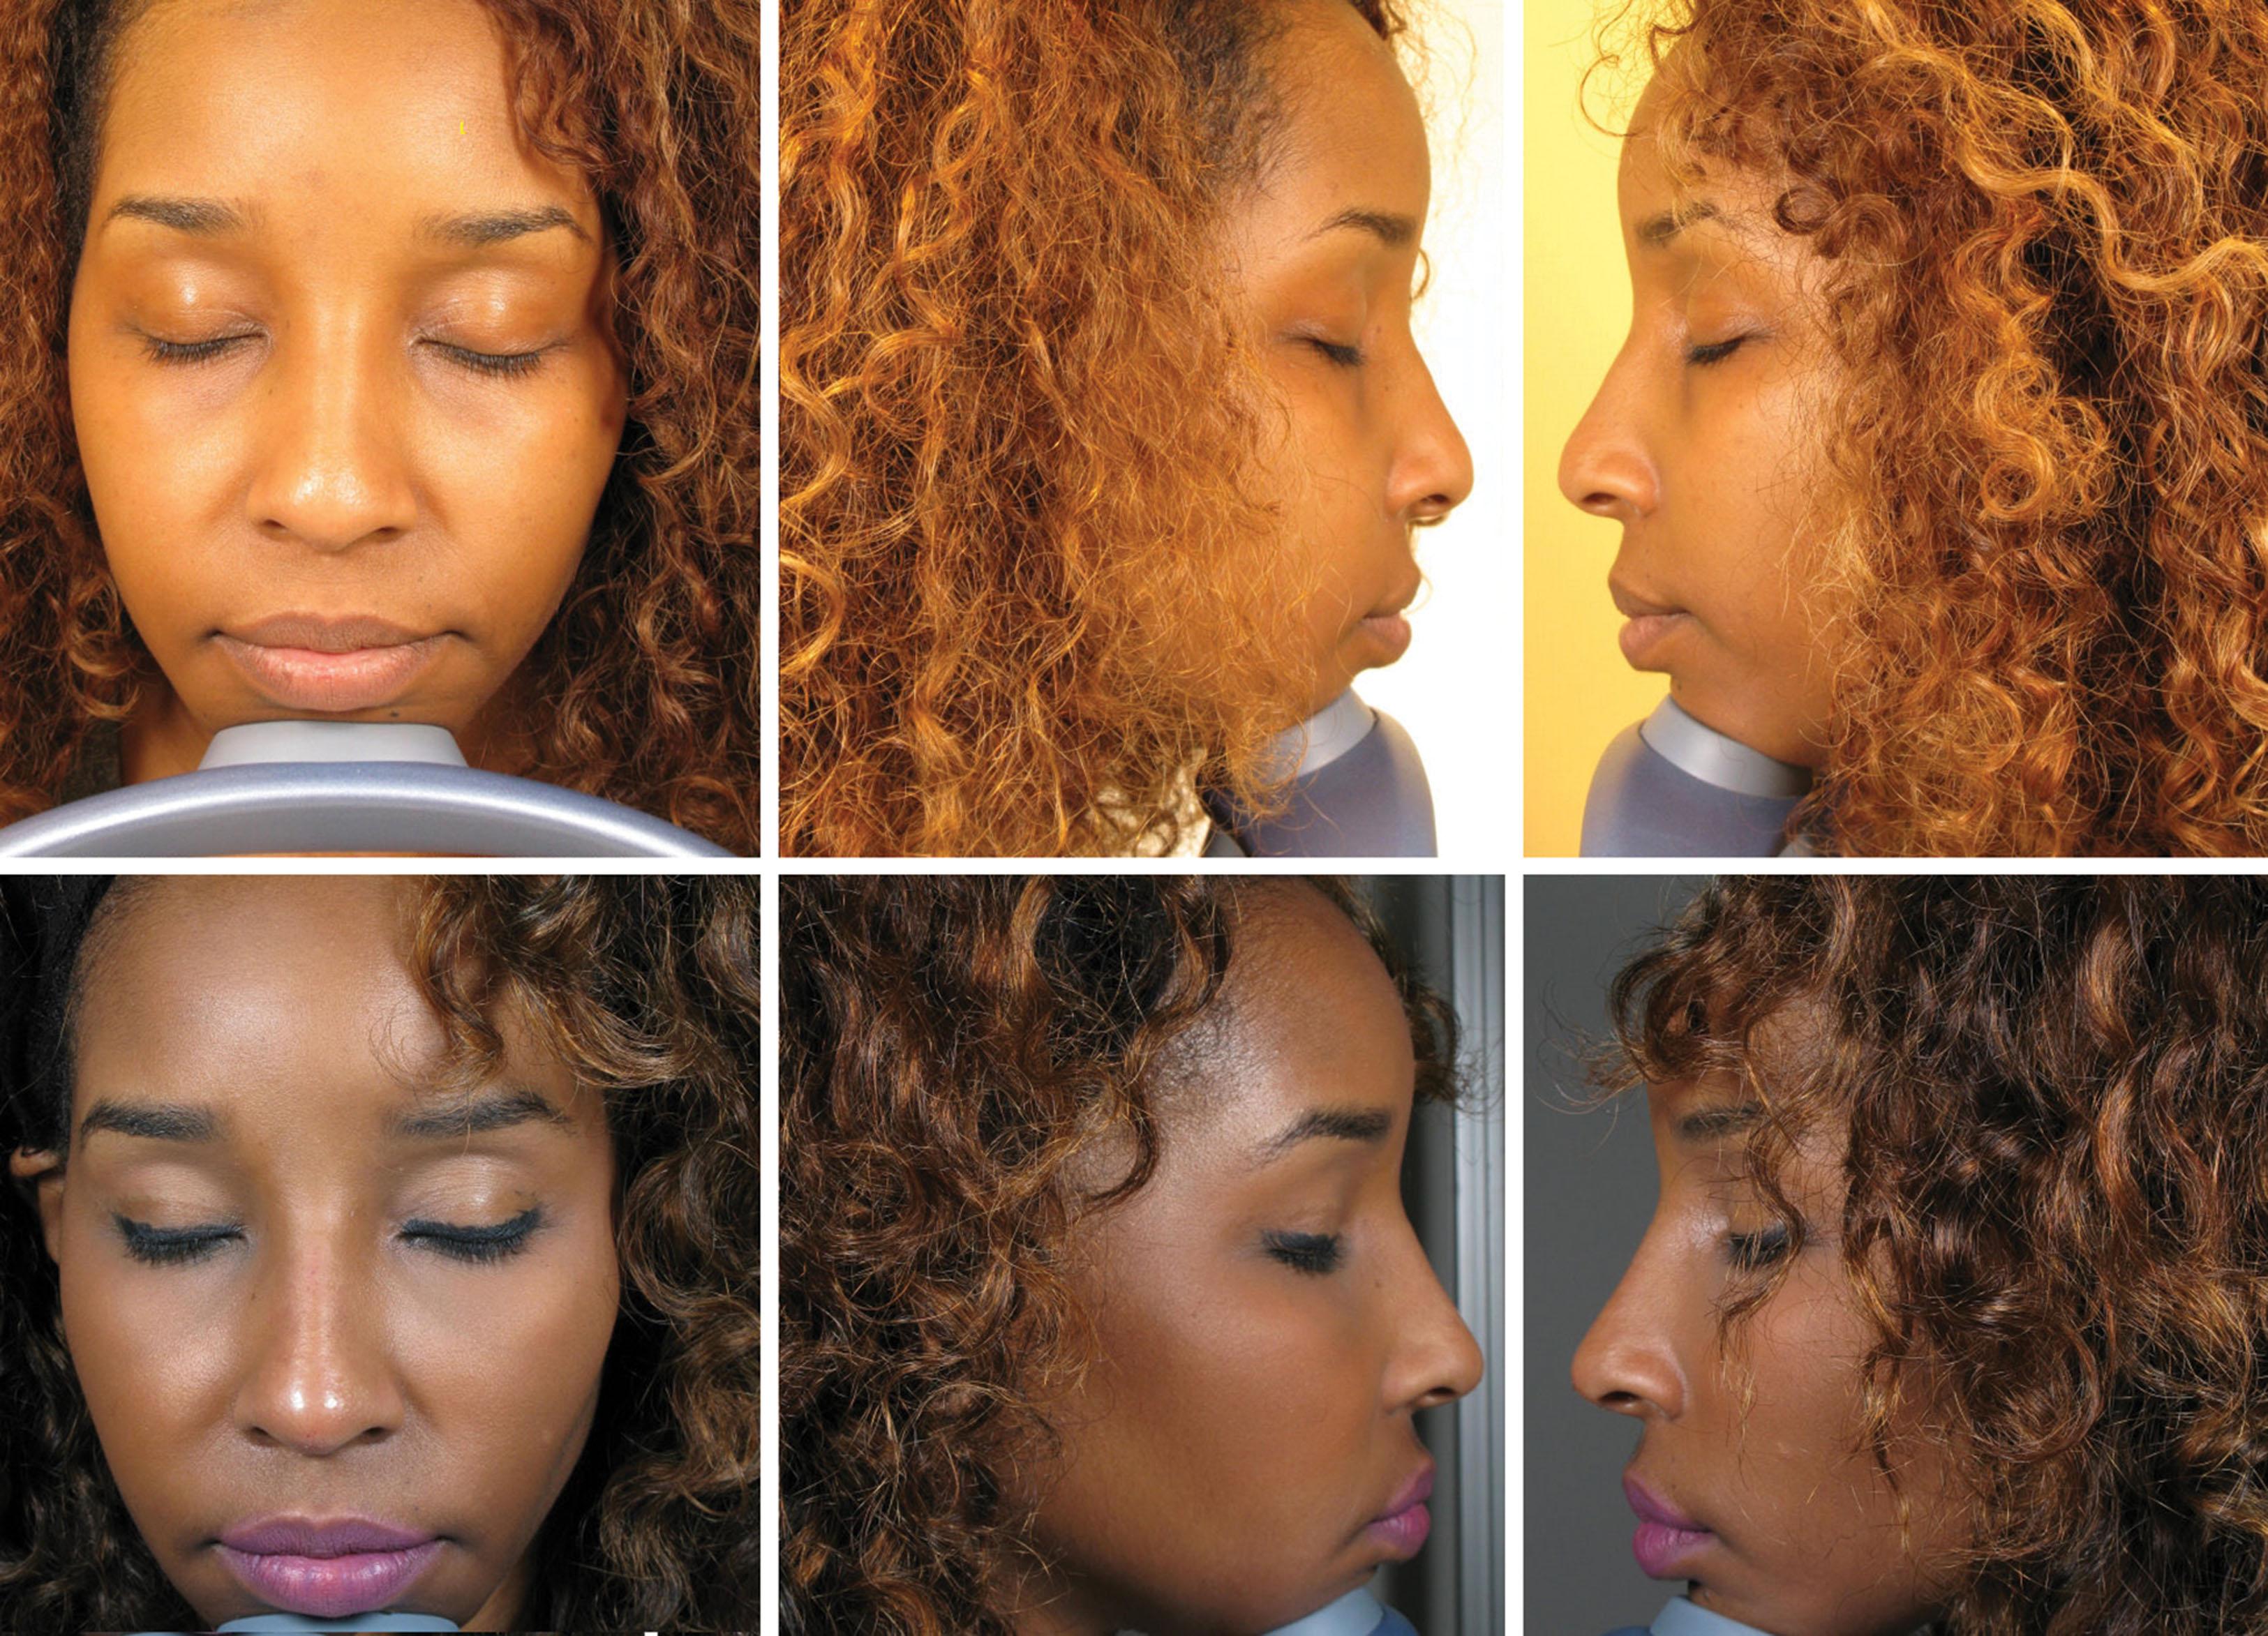
The NSR procedure should be performed with the patient sitting up straight in the chair and leaning their head against a headrest to minimize movement ( Fig. 10.112 ). The injector should be positioned in front of the patient, permitting injection from the front and from the side. This positioning lets the injector continuously assess the cosmetic effect of the injections from the most critical views: front, profile, and oblique. The injector can walk around the patient, making tiny adjustments to the contours of the nose so that the relationship of the nasal subunits and the overall aesthetic outcome is optimal from every angle. This positioning also allows the injector to involve the patient in the procedure. They can pause midway through and hand the patient a mirror, pointing out what they have done and are planning to do. The patient then has an opportunity to provide valuable input and feedback.
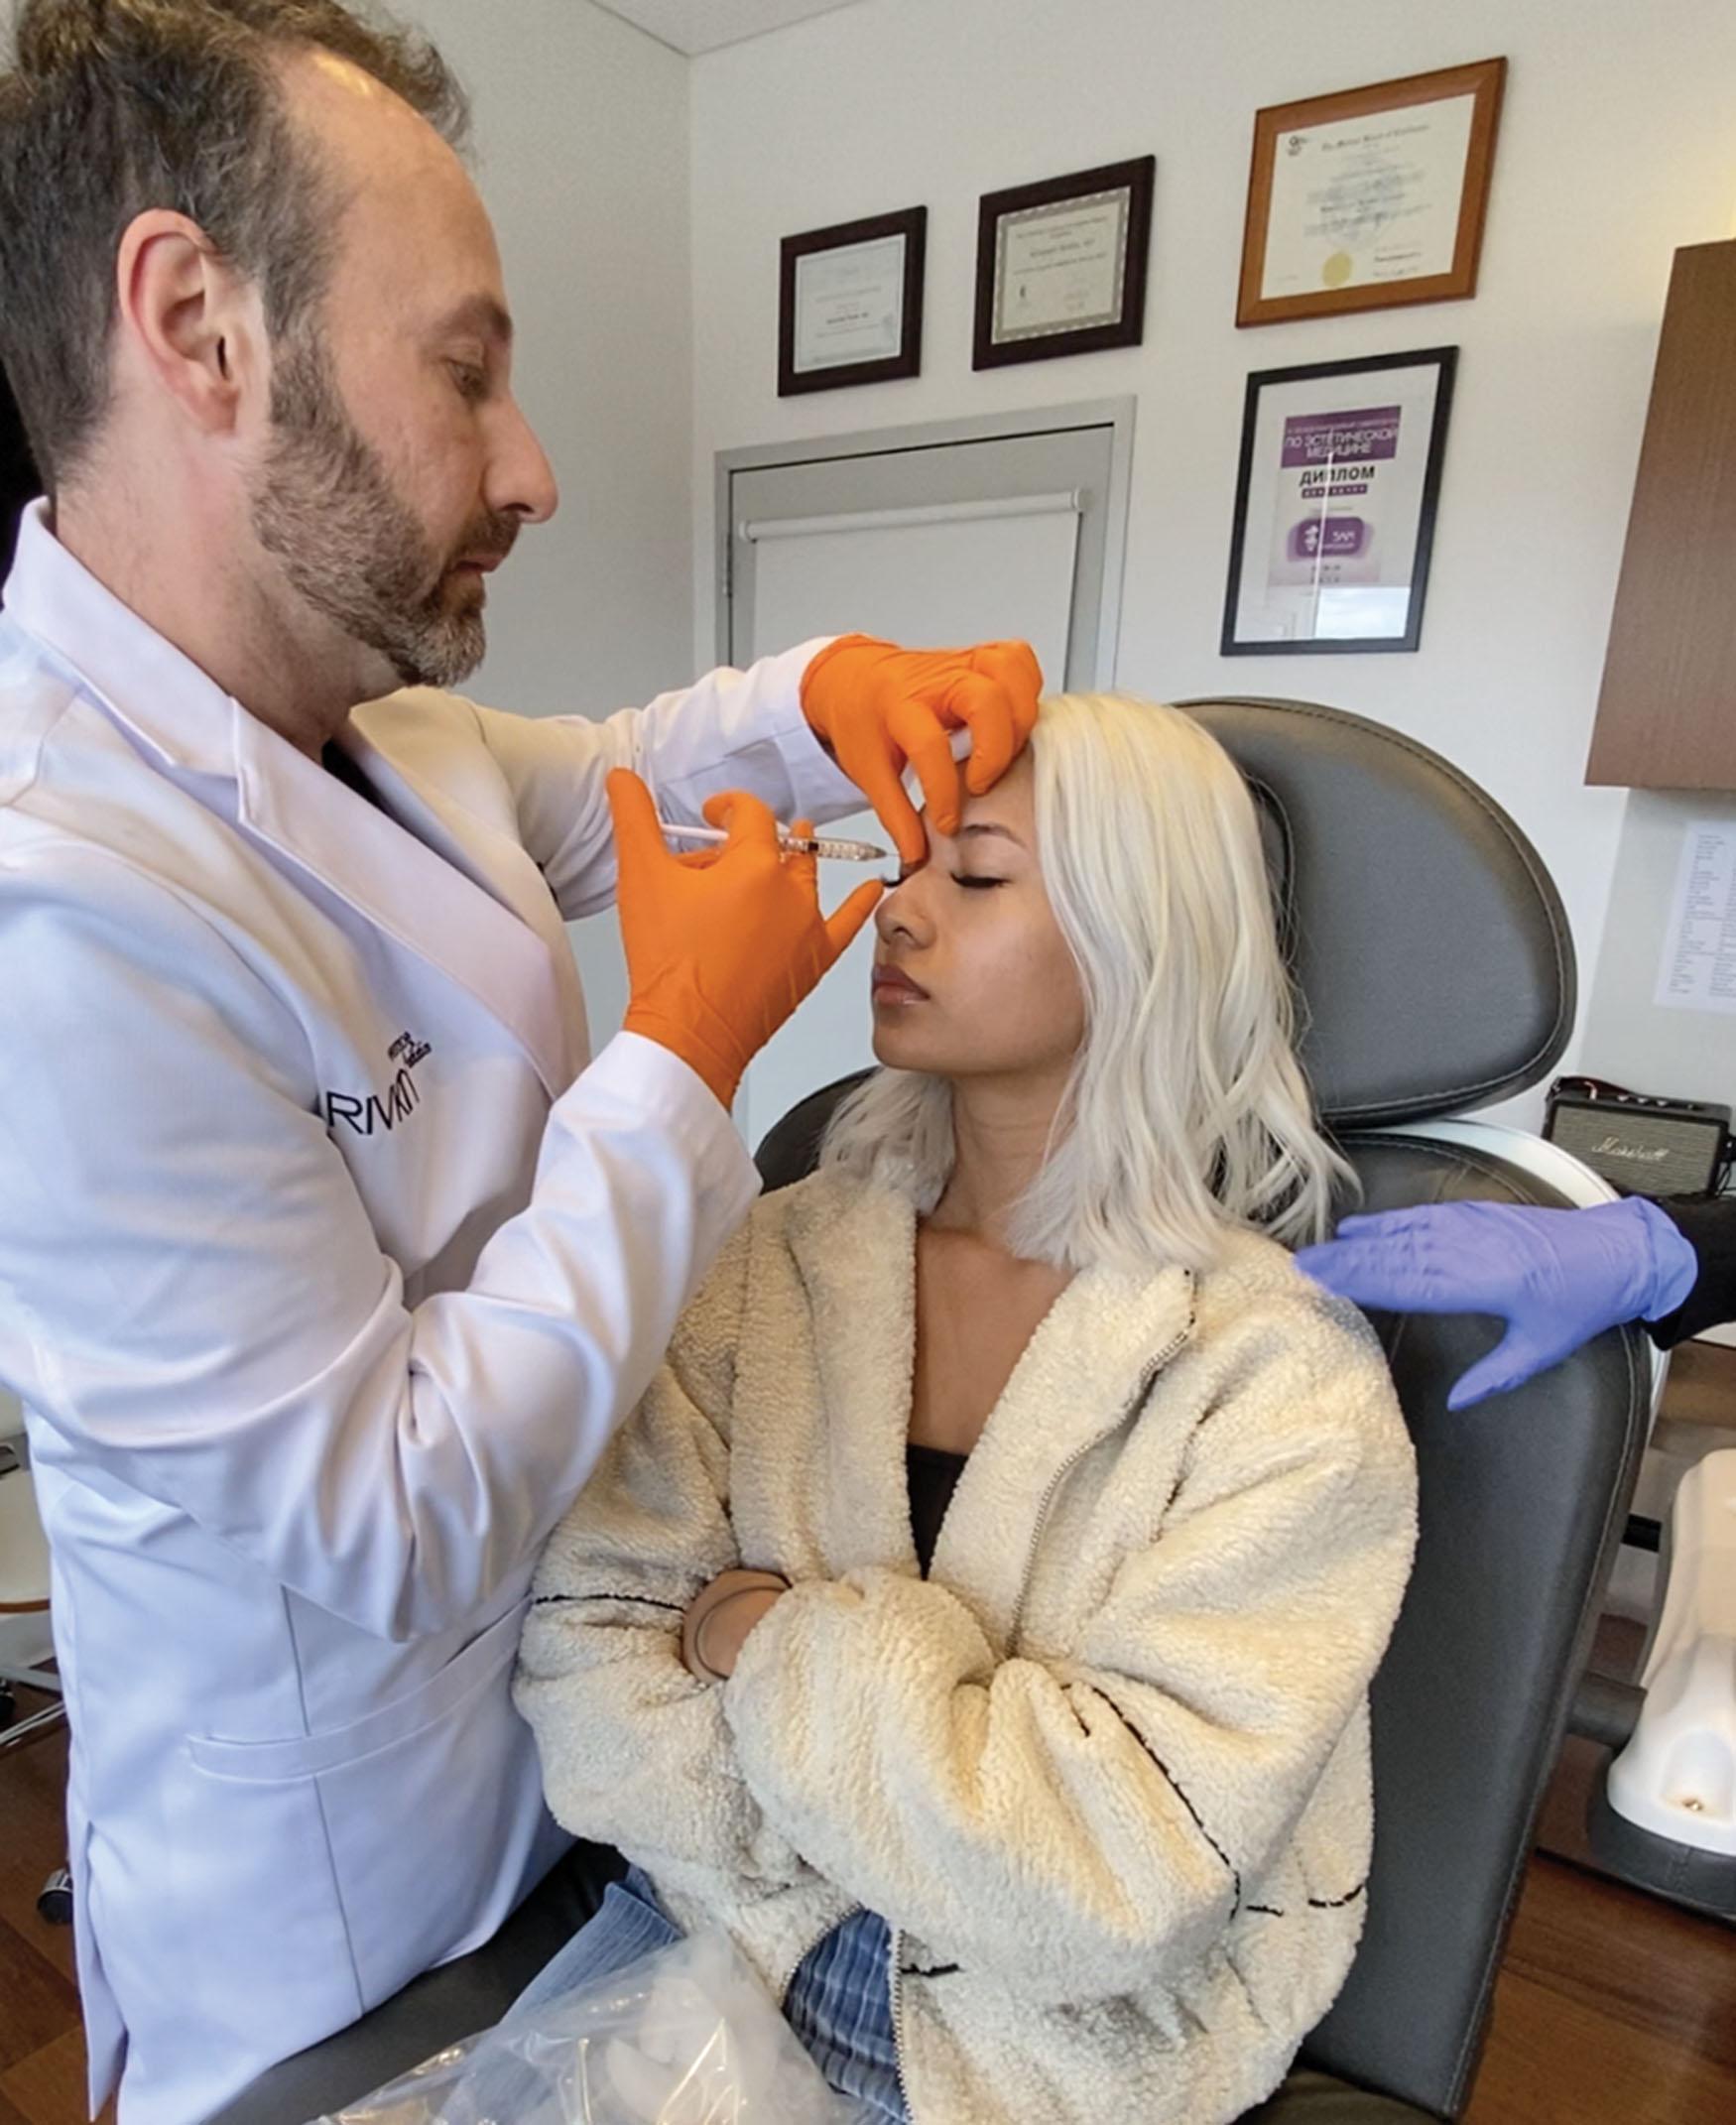
Standardized photos should be taken before every NSR, but this is easier said than done. We photograph people using an iPad with an adequate camera. Patients stand in one specific spot with the same background. Because we use natural light, we take care to optimize and match light conditions to their previous photo (if applicable) as much as possible. Usually this means opening the window shades fully, but if their before photo was in the afternoon, we try to match the light by adjusting the shades. Because so much of my practice marketing involves before and after photos on social media, I like natural light for the photo quality it permits. That being said, the lighting in the before photo must match the lighting in the after photo as much as possible so people can make a valid visual comparison.
If done in the manner outlined here, NSR is a procedure with minimal discomfort. If patients are worried about pain, I offer a compounded triple anesthetic cream for 15 to 20 minutes before the procedure, but I tell them that their chances of avoiding bruising and my ability to see the nasal contours well (because of lidocaine-mediated vessel dilation and tissue swelling) are both improved if we skip this step. Most patients forgo numbing cream. The area of the nose to be injected is iced for 1 minute or so. This constricts the blood vessels in the area and reduces the chance of vessel perforation and embolism. Post-rhinoplasty patients in whom dermal blood supply is a concern should not ice. During the injection, my assistant taps the patient’s contralateral shoulder to distract attention from the needle. Nitrous oxide gas is another effective method of anxiety and pain control for NSR.
The skin is cleansed with chlorhexidine 2%–4% or 70% alcohol. Frequent re-application of the antiseptic is advised to avoid contamination and maintain a clean field. Fig. 10.113 shows a typical tray setup for NSR. This includes injection comfort:
Numbing cream: lidocaine 23%, tetracaine 7%
Ice before injection to reduce the risk for bruising and increase comfort
BD syringe with a 31-gauge needle to transfer in filler such as Voluma. The smaller needle decreases the risk for bruising and adverse events and helps with comfort.
Nitrous oxide to help with patient anxiety
Assistant’s hand to help distract the patient during injection by tapping on the contralateral shoulder
Arnica gel to soothe skin after injection
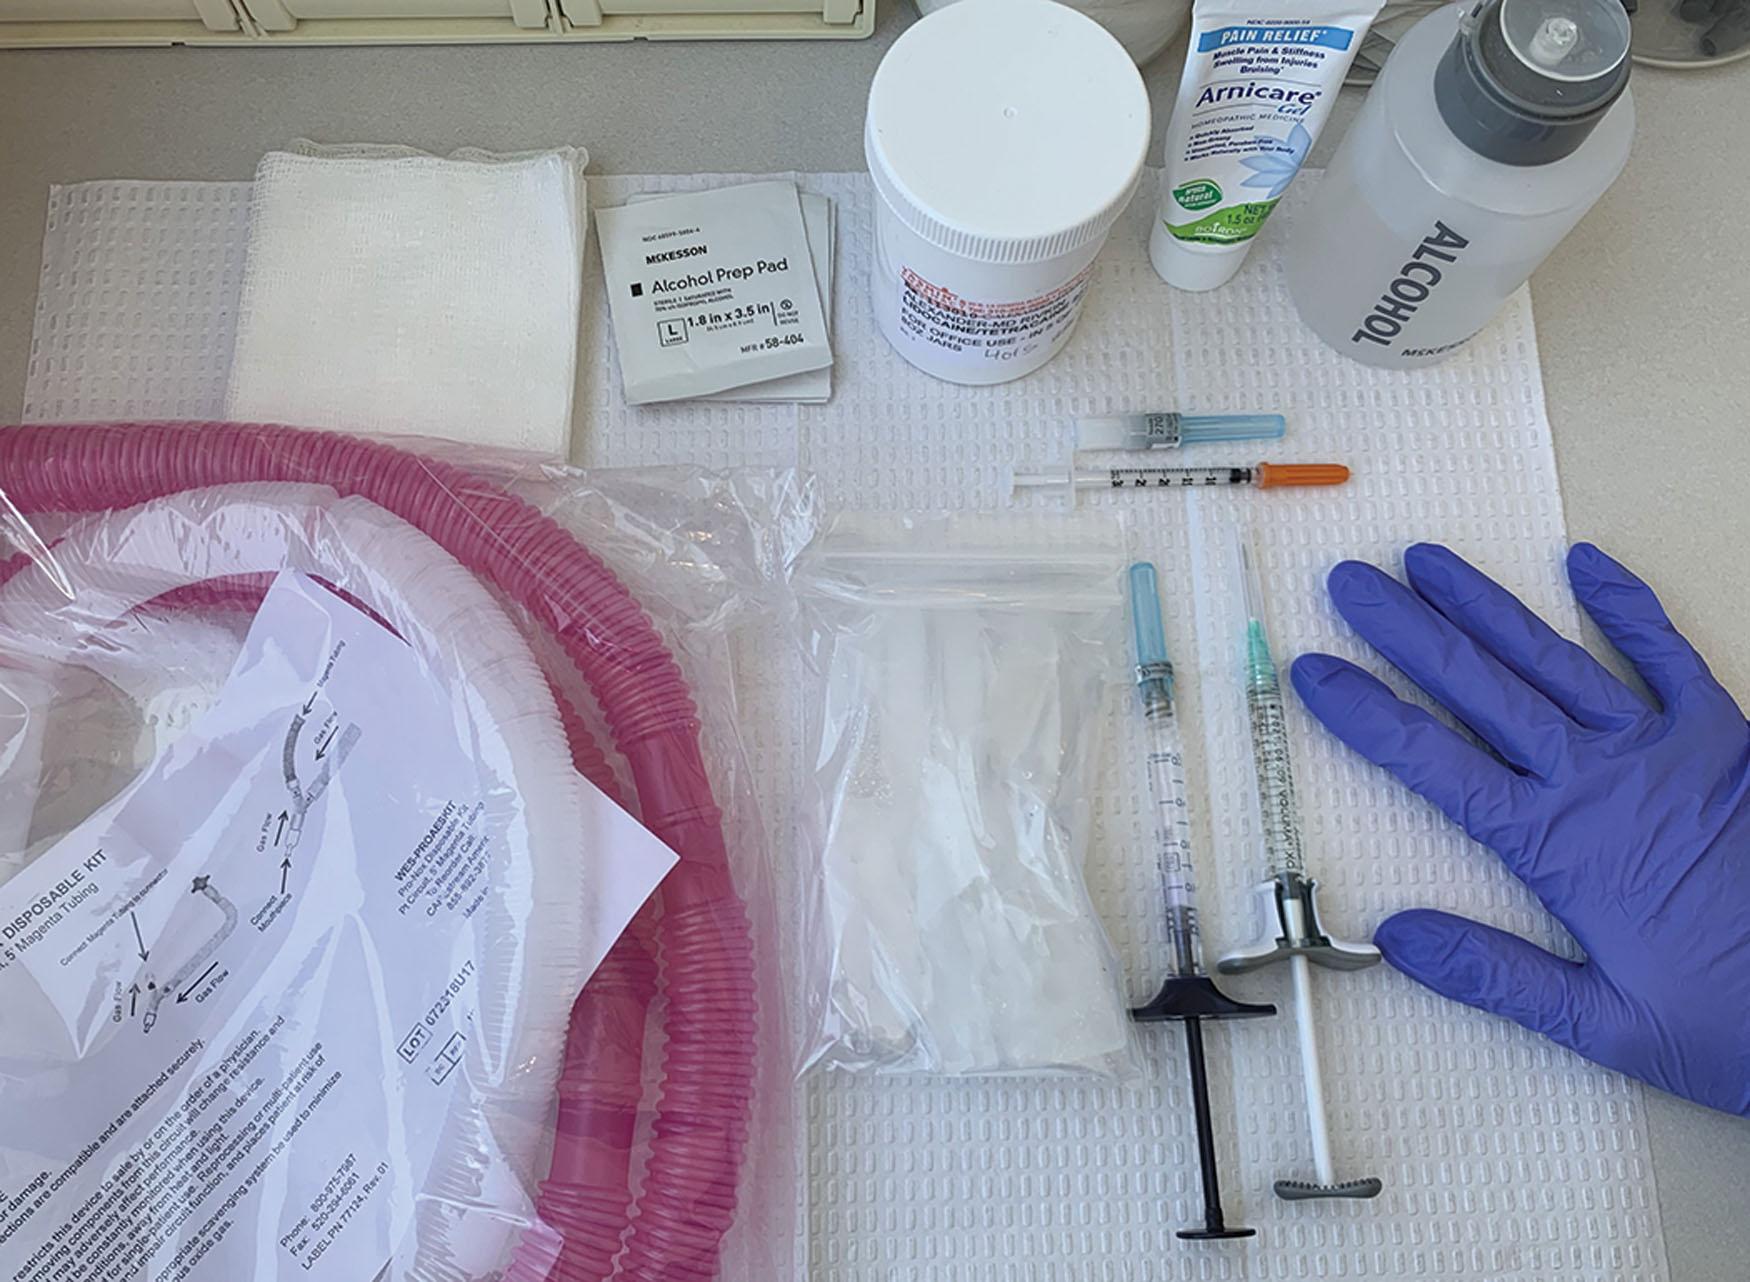
For maximum patient comfort and safety, HA filler can be transferred into a 0.3-mL, 31-gauge diabetic syringe in a sterile manner by carefully removing the plunger of the smaller syringe, placing 0.2 mL of filler into the syringe and replacing the uncontaminated plunger. 21-Gauge 1.5-inch needles work well for transfer. The rheology of the small syringe permits all FDA-approved HA fillers (including Voluma) to flow through the 31-gauge needle at reasonable injection pressures. These small syringes have three major advantages over the regular sized ones with the main advantage of being safer. The amount of product with each injection is smaller, less than 0.1 mL, thus significantly decreasing the chance of large volume embolization occluding a vessel. Second, they permit better precision by providing the ability to inject boluses as small as 0.02 mL at a time. The injector is able to smooth contours and create and blend edges in a way that is undetectable by the eye of the observer. This is important in creating a natural appearing contour. Third, these needles hurt less because of the size of the needle and the size of the syringe. The latter is important because a smaller syringe is handled more gently, and there is less force with each injection.
The diabetic syringe transfer technique works well for all HA fillers, but other fillers such Radiesse or Bellafill will not go through a 31-gauge needle. These fillers should be injected with great care (low pressure, small boluses, slow and gentle movements) to preserve precision and comfort as well as to ensure safety.
Filler is placed into the necessary areas at the perichondral or periosteal level as a small bolus or as a short linear thread. Areas such as the radix, dorsum, sidewall, tip, columella, and ala are injected as needed to correct each individual irregularity. The filler is then massaged and molded to blend into the desired contour. The patient goes home with instructions to avoid NSAIDs, alcohol, and strenuous exercise that day as well as heavy sunglasses for 2 weeks. The volume effect of most fillers decreases by about 25% within the first month. For this reason, I recommend including a complementary follow-up visit 3–6 weeks after the initial injection to touch up the results.
For Bellafill NSR, patients should return to the office 4–6 months after the initial injection for a second session. The PMMA collagenesis is usually not quite enough to replace the resorbed bovine collagen, so what looked good right after the first session will need more material after a few months. The second session should not happen earlier than 4 months to give ample time for collagenesis to take place. Injecting too soon runs the risk for overcorrection if collagenesis is still in process.
Because this is such a long lasting and nondissolvable filler, injectors must avoid overcorrection. In my experience, several types of patients seek NSR.
The younger patient who cannot afford the time or resources required for postsurgical recovery. They hear about the procedure through friends, the Internet, and social media. They mostly present with mild or moderate cosmetic irregularities. Having studied the before and after photos and read about the procedure, they understand that it is not a technique that can physically reduce the size of the nose, so I rarely see younger patients with concerns that cannot be solved with NSR.
About one-third of my NSR patients are Asian. These patients commonly desire an increase in the height and definition of their dorsum and radix as well as improvement in the definition and projection of their nasal tip. These patients are usually young and cannot afford surgery. They are also often wary of unnatural surgical results, describing people with visible or overly large dorsal grafts that they have seen in the Asian community. Like many patients who opt for this procedure, they want to see the cosmetic change they desire, but only if their nose retains a natural appearance and no one can tell that they have had an aesthetic procedure.
Patients who are afraid of surgery. Most of these people have desired cosmetic improvement in their nose for a long time but have been afraid of surgical and anesthesia risks. These patients present with a variety of aesthetic complaints. Most are appropriate for the NSR technique, but some require reduction and must be turned away.
Patients who consider their aesthetic complaint to be too minor to undergo surgical correction. They are bothered by their small bump or mild asymmetry but feel that surgery exacts too high of a price (both financial and temporal). These patients are mostly ideal candidates for NSR. A small amount of contour correction to restore symmetry or camouflage a small bump makes them very happy.
Post-rhinoplasty patients who have ruled out revision surgery, whether because of expense, fear of complications, or fear of looking unnatural. These patients are often quite specific about what they want to correct and are very happy with their outcome.
NSR in postsurgical noses warrants a specific discussion. Anyone who performs NSR must be aware that post-rhinoplasty patients present with noses that are particularly technically challenging and risky. Postsurgical scarring stiffens the skin and limits the lift that can be achieved with filler injection. Injectors must take care not to overpromise these patients. Most importantly, postsurgical skin has a more tenuous blood supply, especially around the tip and ala. The risk for ischemia and necrosis are significantly increased in these patients. Lastly, scarring under the skin can limit vessel motion and increase the risk for an embolic event. Only the most experienced NSR injectors should treat postsurgical noses. Fig. 10.114 shows an Asian patient before and after NSR. Fig. 10.115 shows a patient before and after NSR with Artefill.
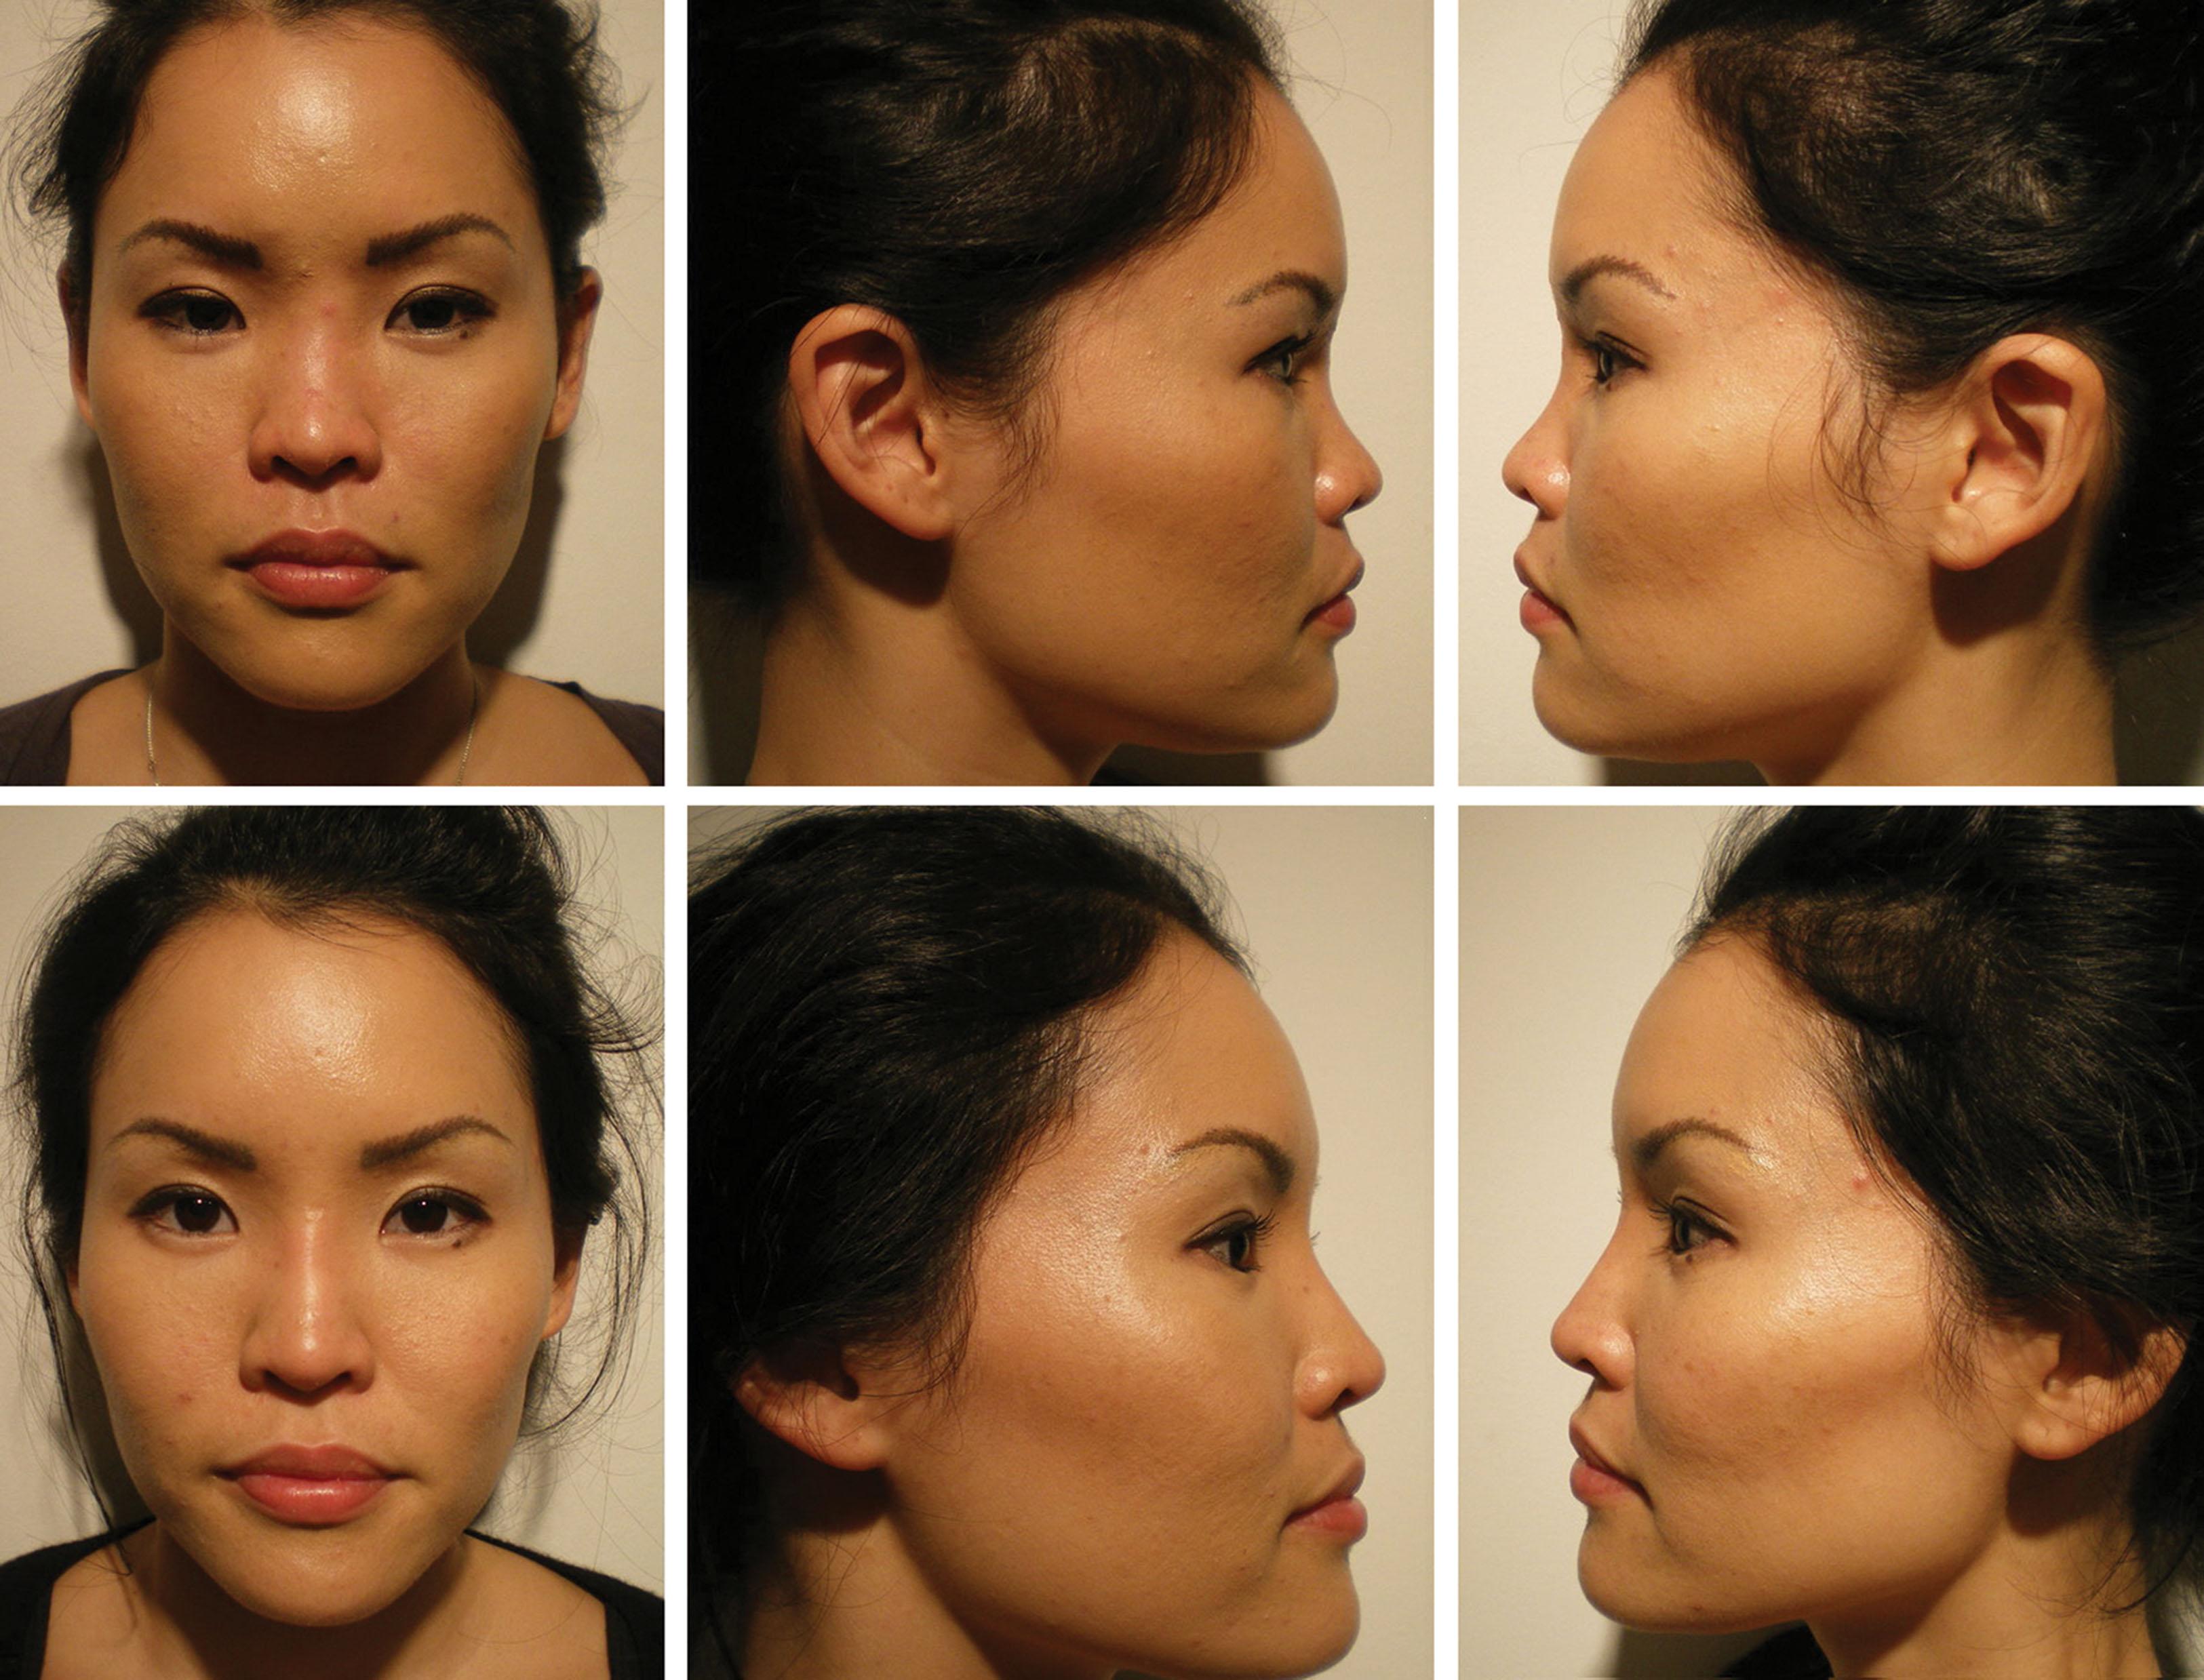
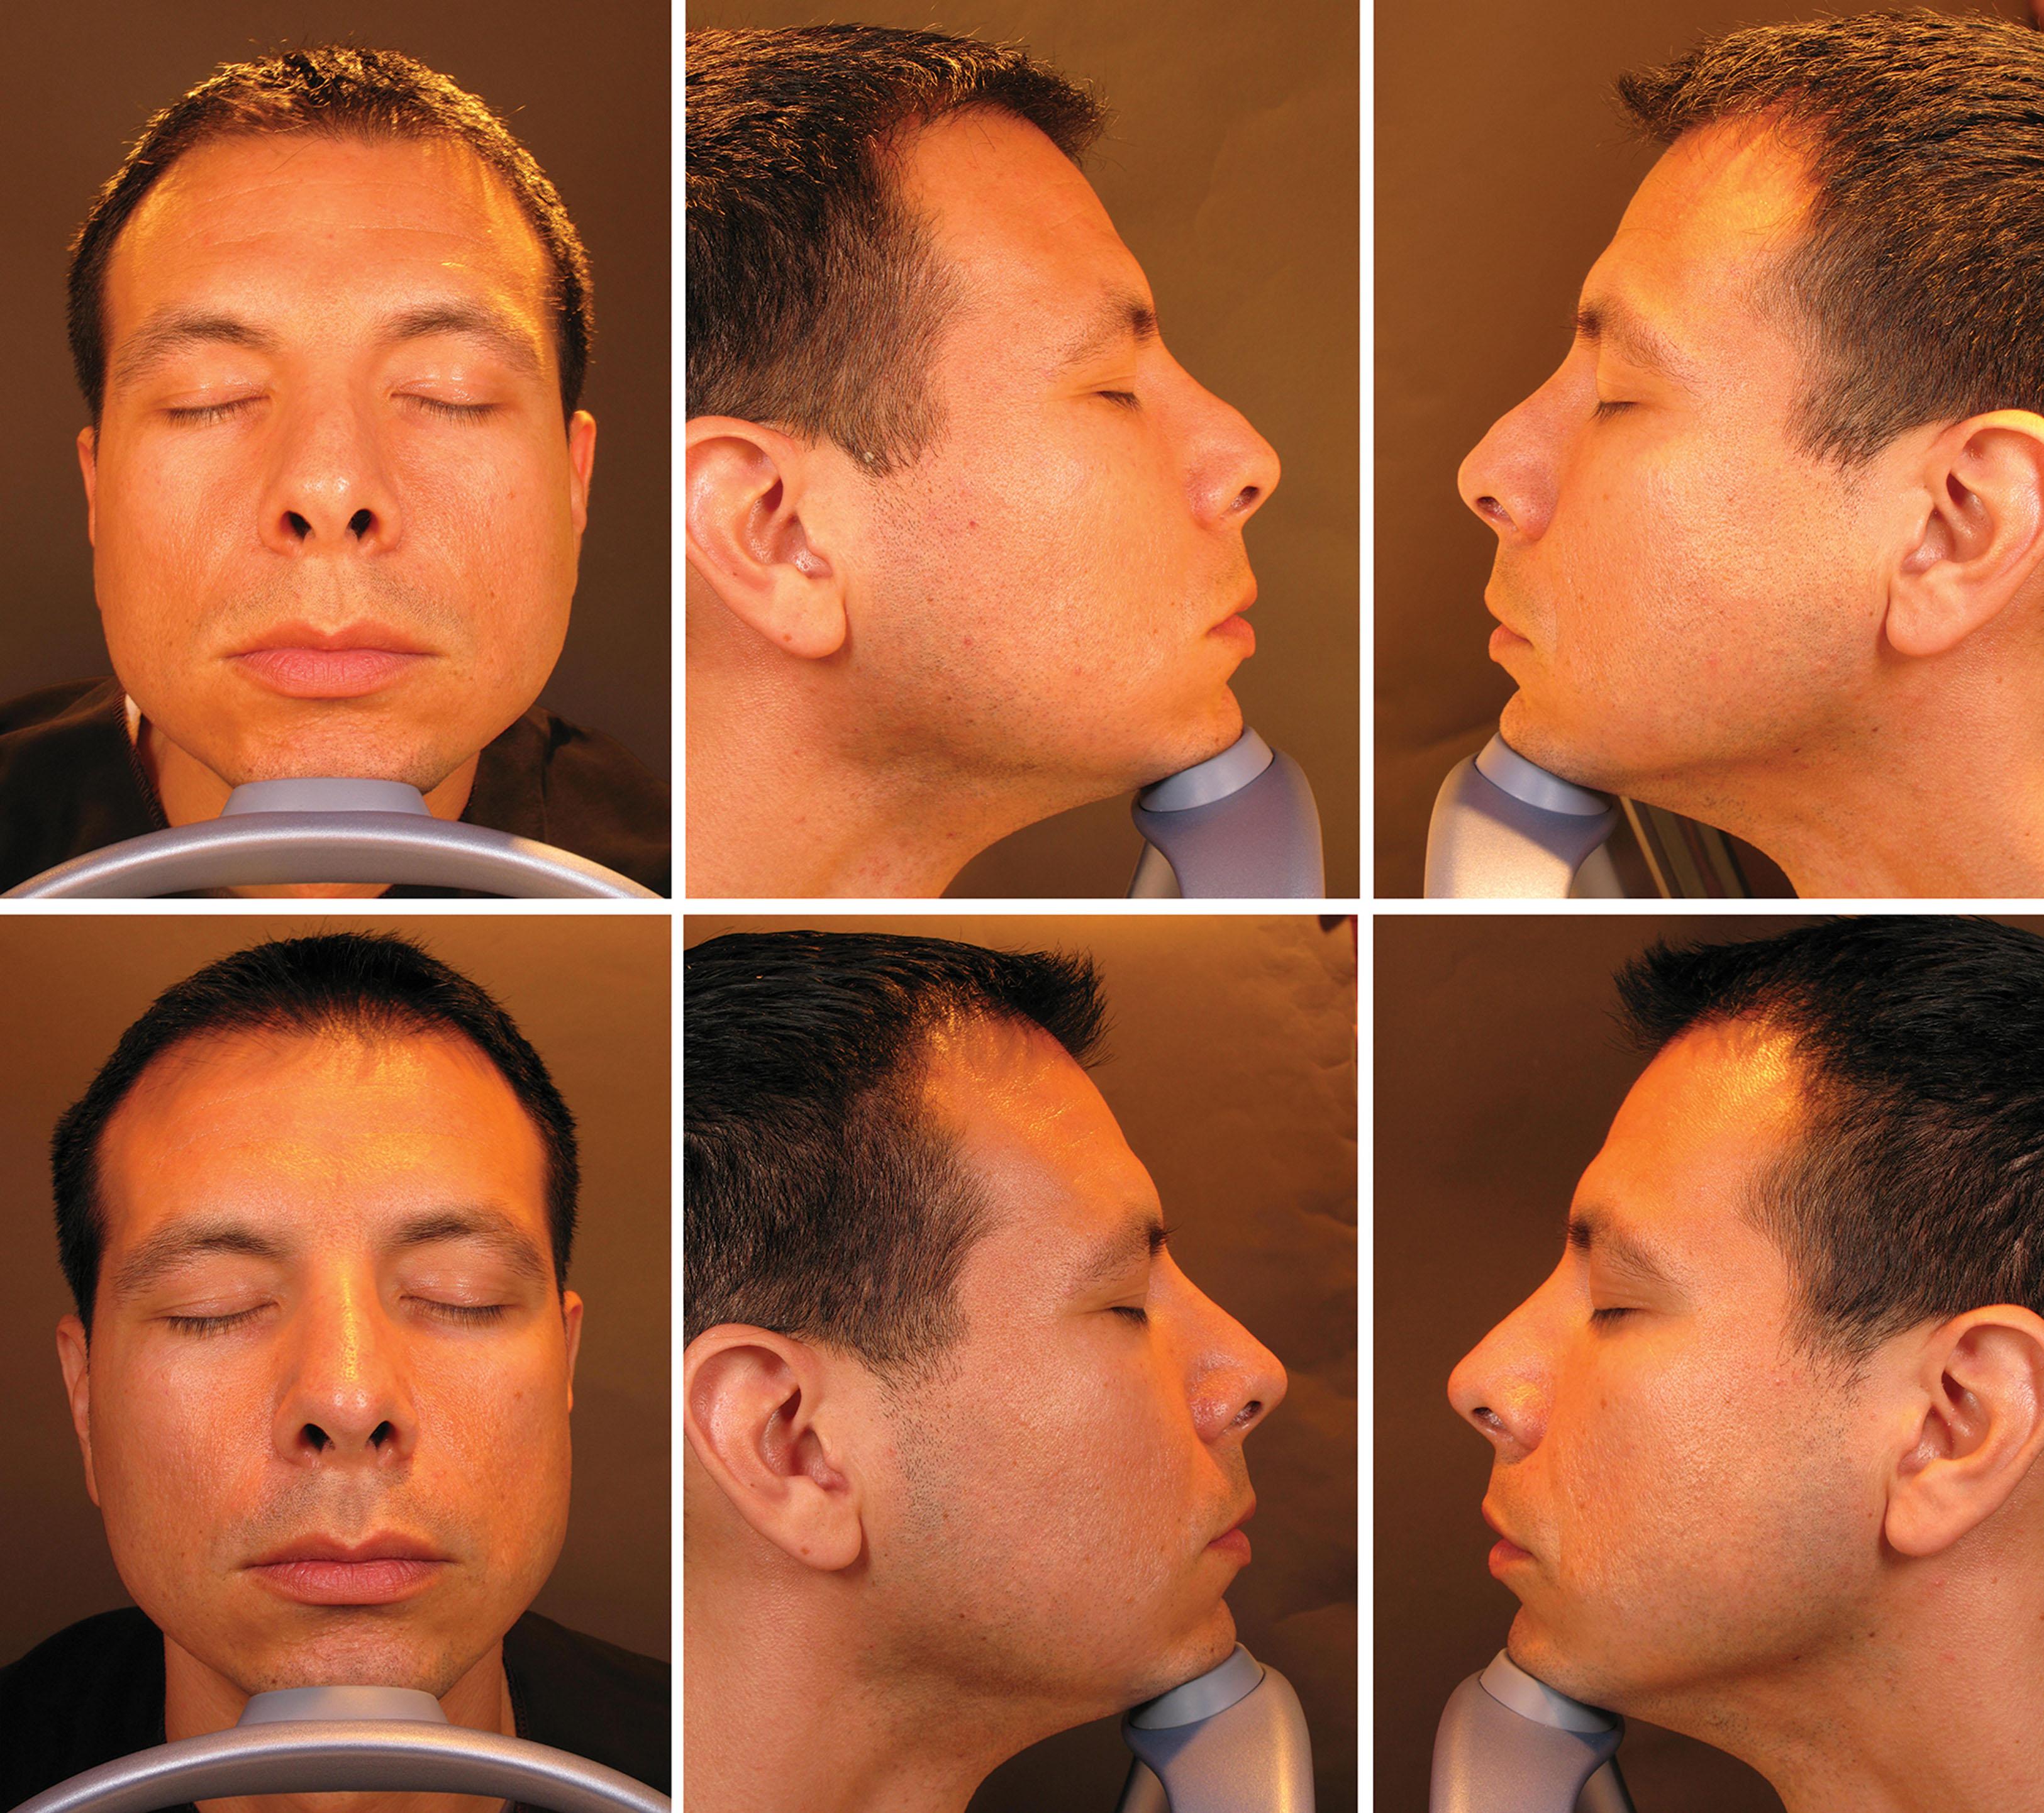
The basis of NSR is to inject and inspect ( Fig. 10.116 ). This should be done in a methodical manner in the correct plane with low syringe pressure while continually mentally visualizing the associated anatomy.
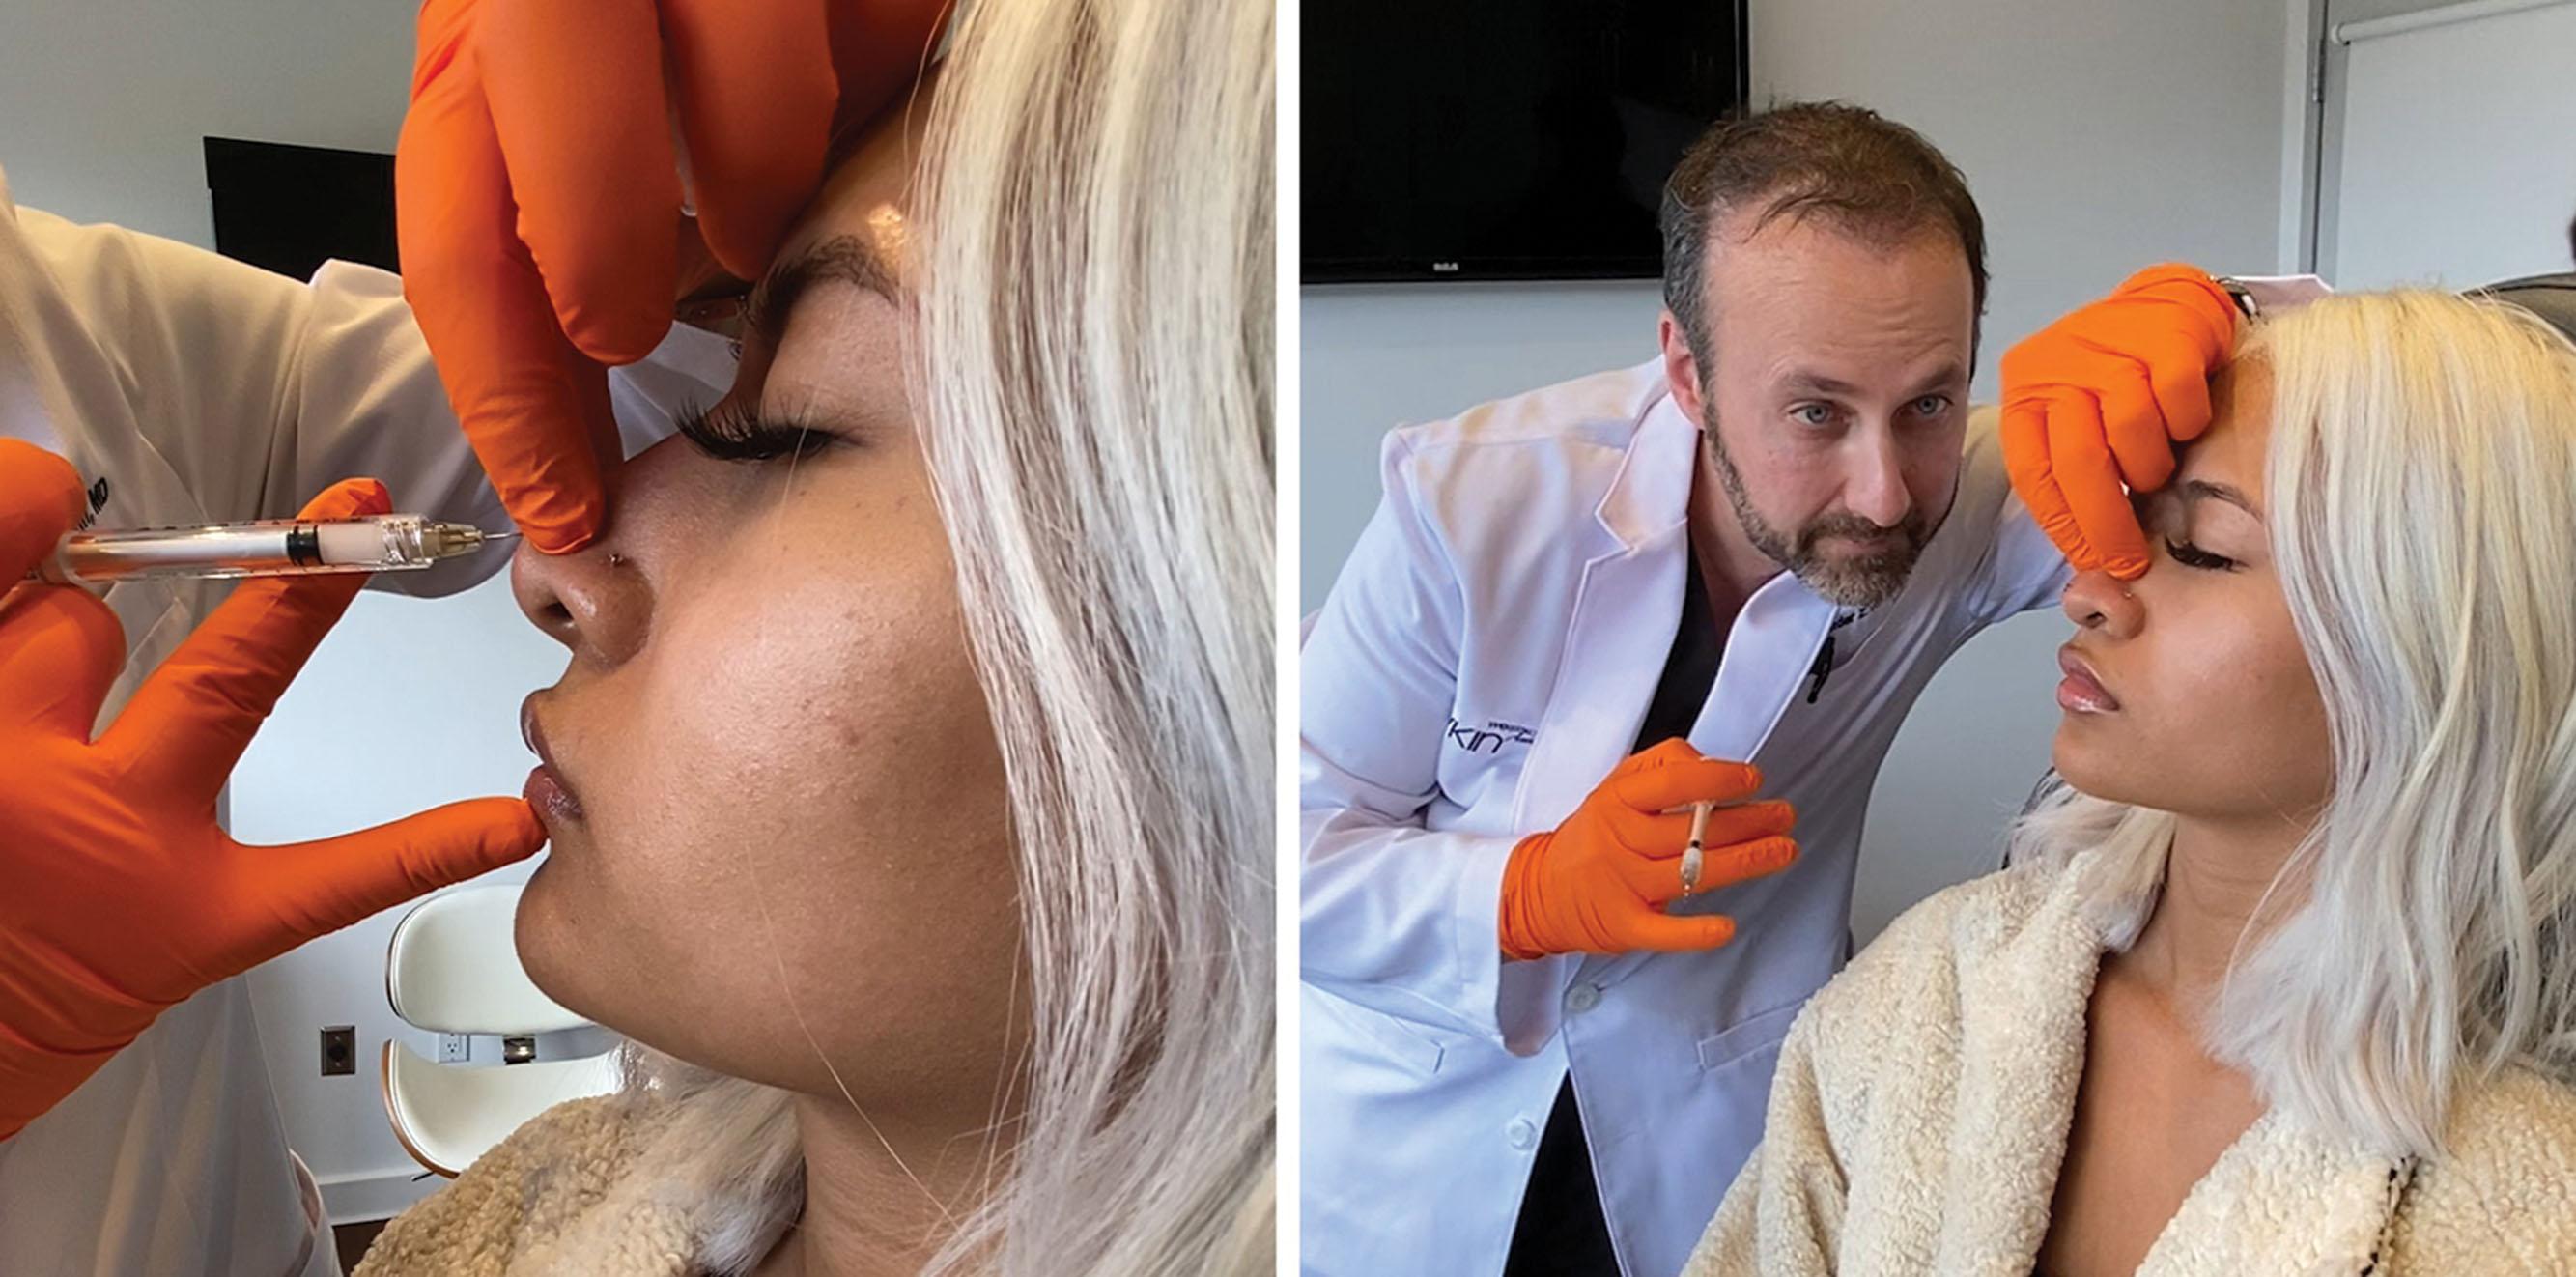
Complications of NSR are relatively rare. This is not surprising because the overall major complication rate for filler injections has been estimated to be less than one hundredth of one percent. Most published studies are relatively small, but they report few serious adverse events. Bruising, transient erythema, and short-term swelling represent most of the issues documented. The exceptions are the disturbing case reports that detail blindness and major necrosis of nasal tissue. Because the doctors treating the complications, not those who injected the patients, write most of these reports, conclusions about needle type, injection technique, and even material used are often difficult. Of the reports published by the actual injectors, we know that sudden pain, blanching, duskiness, and ecchymosis in the area being injected are all danger signals for ischemia and necrosis. Compromise of the blood supply to the skin in cases of filler injection can be caused by either intravascular embolism or small vessel compression by the filler.
Ophthalmalgia and visual loss within minutes are signs of retinal artery embolism. Other signs of ophthalmic vasculature embolism include immediate diaphoresis, nausea, headache, ophthalmoplegia, and ptosis.
The best chance of avoiding these complications is to understand the anatomy, to always practice safe injection technique, and to have well-prepared protocols ready to launch at any sign of danger. Our traditional understanding of the vascular anatomy of the external nose is illustrated in Fig. 10.117 .
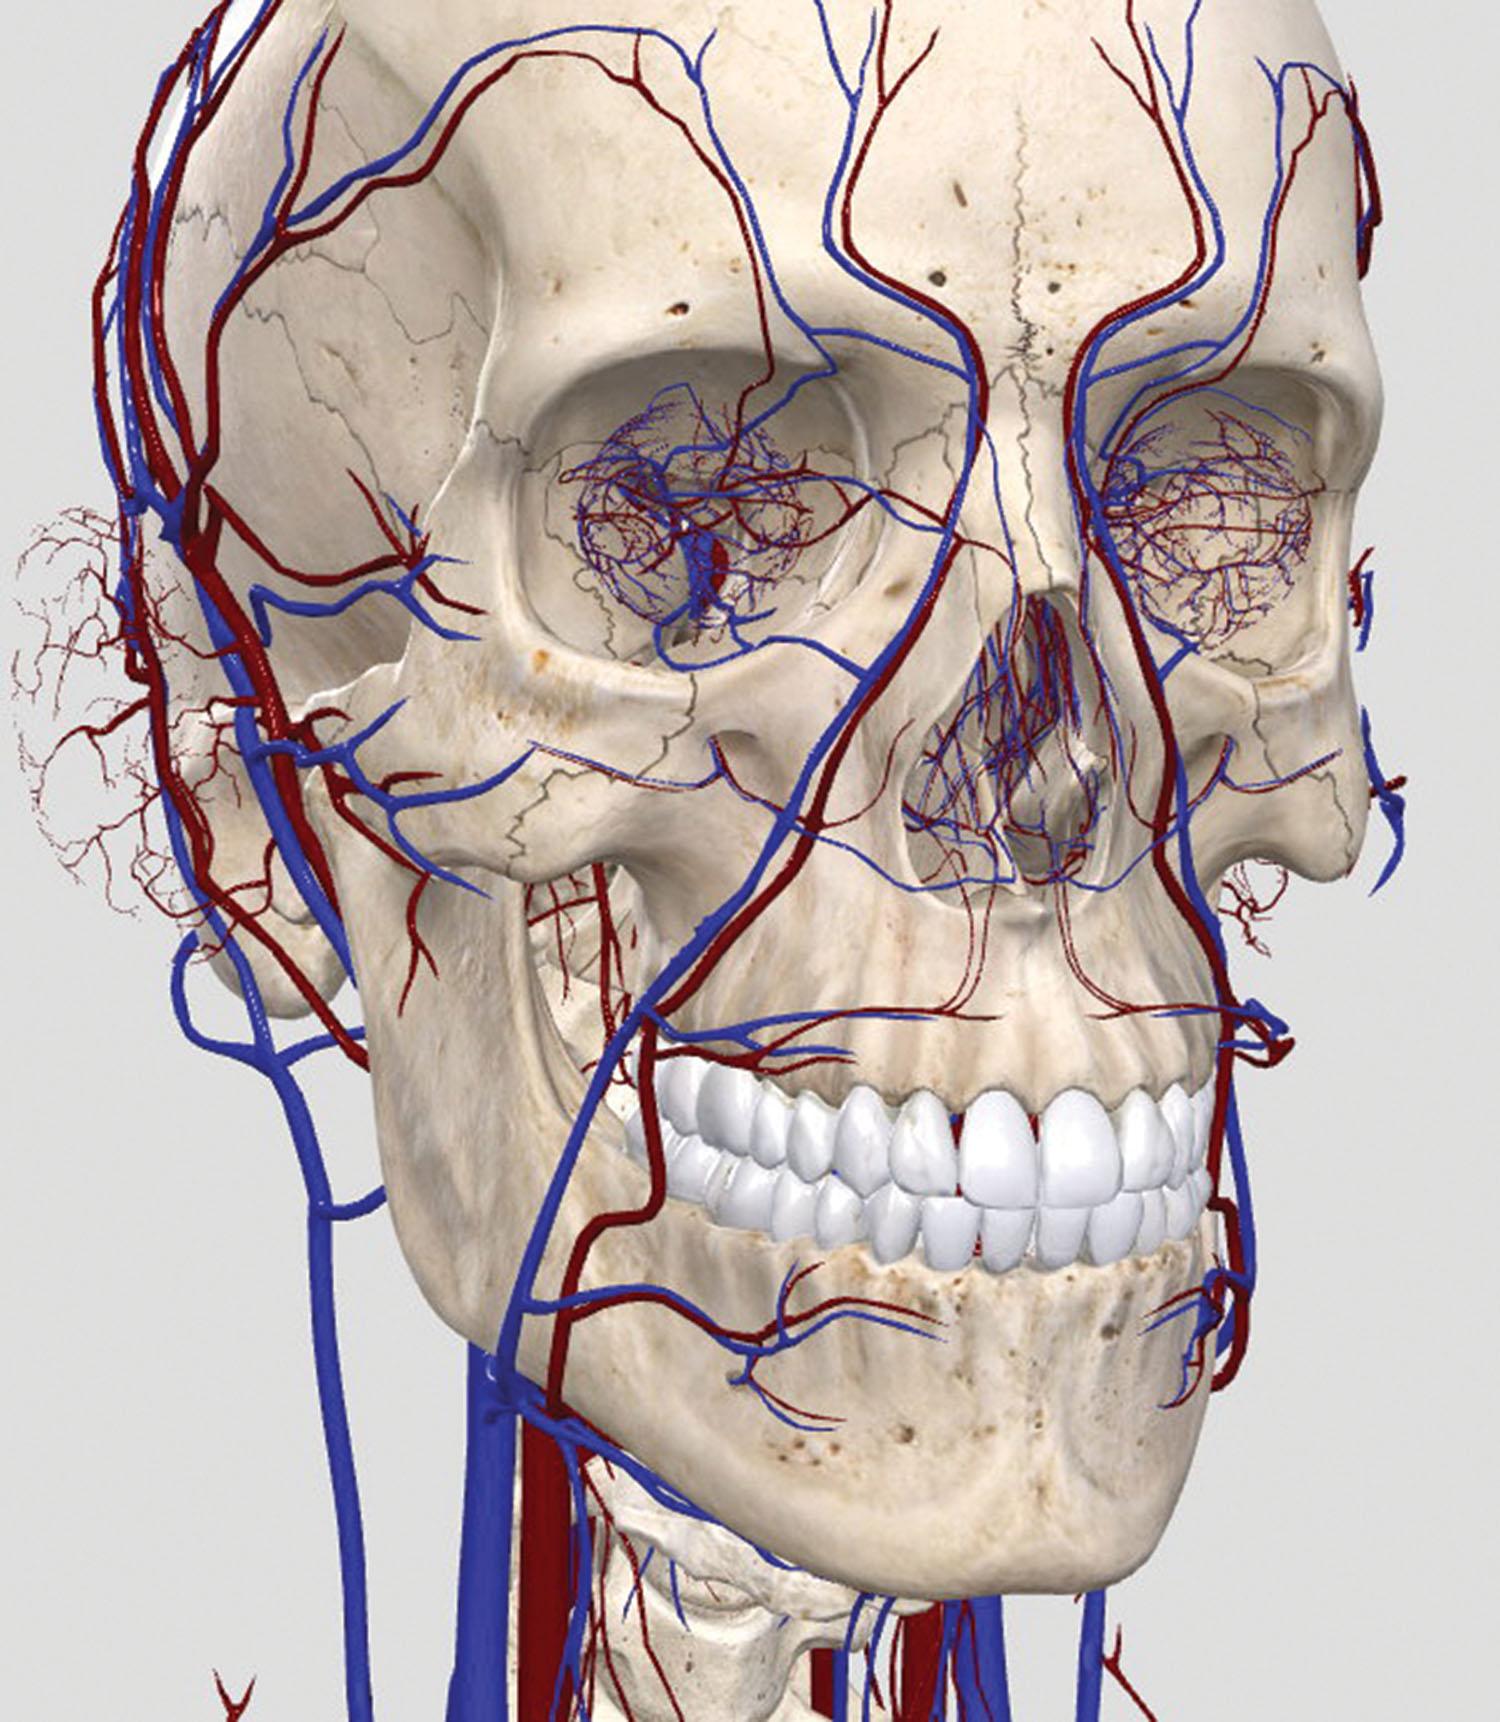
A competent injector is especially careful to avoid the dorsal nasal and angular branches when injecting the radix and nasal sidewall, respectively. Based on Fig. 10.116 , keeping the injection points in the midline seems to ensure an increased margin of safety. This is surely true to some degree, but more recent research demonstrates that the branches of the external and internal carotid system in the nose are very much interconnected in the superficial musculoaponeurotic system (SMAS) layer. There are no safe injection zones in the face, and this is especially true in the nose. Safe injection technique should therefore focus on keeping the needle deep instead of trying to avoid specific vessels.
Some clinicians have recommended aspiration before injection of filler to avoid vascular embolism. In my experience, this is a cumbersome practice with questionable benefits. Most fillers are thick gels. Building up enough negative pressure for aspiration of blood takes a lot of hand force and in any case is not possible with diabetic syringes. Even in experienced hands, by the time one aspirates and then injects, the needle is no longer in the same place, rendering the test useless.
Rather than aspirating, I believe following accepted best practice standards for injecting filler is a more reliable way of preventing complications.
Needles should be as small as possible so filler flow rate is low.
Fillers should always be injected slowly and under low pressure, especially in the nasal area. The blindness complications in the literature occurred because a filler embolus was injected with enough force to overcome systolic blood pressure and travel up into the ophthalmic vasculature. Gentle injection technique should prevent this complication.
The needle should be advanced through the skin slowly, and filler should only be flowing when the needle is moving out of the skin. This way, even if the tip of the needle is inside the lumen of a vessel at some point, only a tiny amount of filler will enter the vessel, as the needle will be out in the next moment.
Small volumes of filler should be introduced with each injection.
We always ice before injection. Ice decreases pain and shrinks blood vessels, making them less likely to be punctured.
Some authors advocate blunt-tipped cannulas for all filler injections as a way to reduce complications and discomfort. I do not favor these in the nose. The weakness of cannulas is precision. It is much easier to know the exact location of a needle tip than the tip of a cannula that bends easily as it is advanced through the tissue. The aesthetics of the nose are particularly sensitive to the smallest contour asymmetries. A 1-mm fullness difference between two sides of the tip is clearly noticeable. A 1-mm deviation from the midline when augmenting a dorsum makes the nose appear off-center.
The literature contains reports of severe complications from every type of filler available. I have successfully used a variety of materials in the nose, and I do not believe that there is a material contraindicated for nasal injection. It is the skill and knowledge of the injector that is paramount to the success of the procedure.
Although not really a complication, vasovagal episodes can be disturbing to the novice injector. Diaphoresis, sudden pallor, and a sensation of nausea are all warning signs of an impending episode. It is more likely to happen if the patient has not eaten much before the appointment. In the setting of cosmetic injections, patients become vasovagal primarily because they are holding their breath in anticipation of pain. The frequency of these episodes dropped dramatically once we began to routinely remind our patients to breathe. Distraction shoulder tapping also helps them tolerate the injections without excessive anxiety. If the patient does become vasovagal, our routine is to immediately place them in the reverse Trendelenburg position, increasing blood flow to the brain. We place an ice bag behind their neck and give them something sweet to drink like orange juice or cola. We monitor their pulse and blood pressure manually. Most patients will recover fully within a few minutes.
Complication management starts with the preventive measures outlined in this section. If, however, the clinician suspects that an ischemic event is unfolding (blanching of the skin, dark discoloration of the skin, mottled discoloration of the skin known as livedo reticularis , sudden pain), there are immediate steps that he or she should be ready to take.
Stop injecting.
Massage vigorously.
Apply warm compresses to the area.
Administer aspirin 325 mg.
If the skin does not pink up within 5 minutes, hyaluronidase should be injected throughout the area involved. The size of the area involved determines the dose, which ranges from 50–300 units. The enzyme injection should be repeated hourly until the skin pinks up.
Even if a non-HA filler has been used, hyaluronidase is useful because it dissolves some native HA and decreases interstitial pressure, easing blood flow.
Topical 2% nitroglycerin paste may help as a fast-acting vasodilator to use while awaiting the effect of the hyaluronidase.
If the skin becomes pink again and remains so after a period of observation of 15 minutes or so, I would feel comfortable sending the patient home on aspirin every 4 hours for a day, warm compresses, and periodic massage of the area.
If the skin becomes dusky, I would repeat the hyaluronidase and nitropaste hourly several times. I would observe the patient in the office for the next hour or so, applying warm compresses and massaging the area. At this point, the patient should begin oral steroid therapy and oral antibiotics. I would give them a Medrol dose pack and ensure that they take the first dose right away. At this point, the patient should be seen in the office on a daily basis to monitor the progression of tissue damage. If damage continues to unfold, the injector should consider hyperbaric oxygen therapy and referral to a plastic surgeon. My in-room safety kit, also known as an injectables “crash cart” is illustrated in Fig. 10.118 . The contents of the emergency tray include the following:
Antisepsis with Hibiclens, Microcyn, and alcohol prevents infection and biofilm formation.
Assistant hand massages the area upon first noticing ischemia in effort to restore blood flow and capillary refill.
Warm compress are used to improve blood flow.
Aspirin 325 mg two tabs daily for anticoagulation.
If capillary refill is still slow and skin is starting to look dusky, hyaluronidase 100 to 300 units every hour until capillary refill is restored and skin looks pink again.
Nitro-Bid cream topically while waiting between hyaluronidase injections.
Medrol Dose Pack: first dose in the clinic to stop inflammation from compounding ischemia via compartment effect.
Juice for vasovagal episodes.
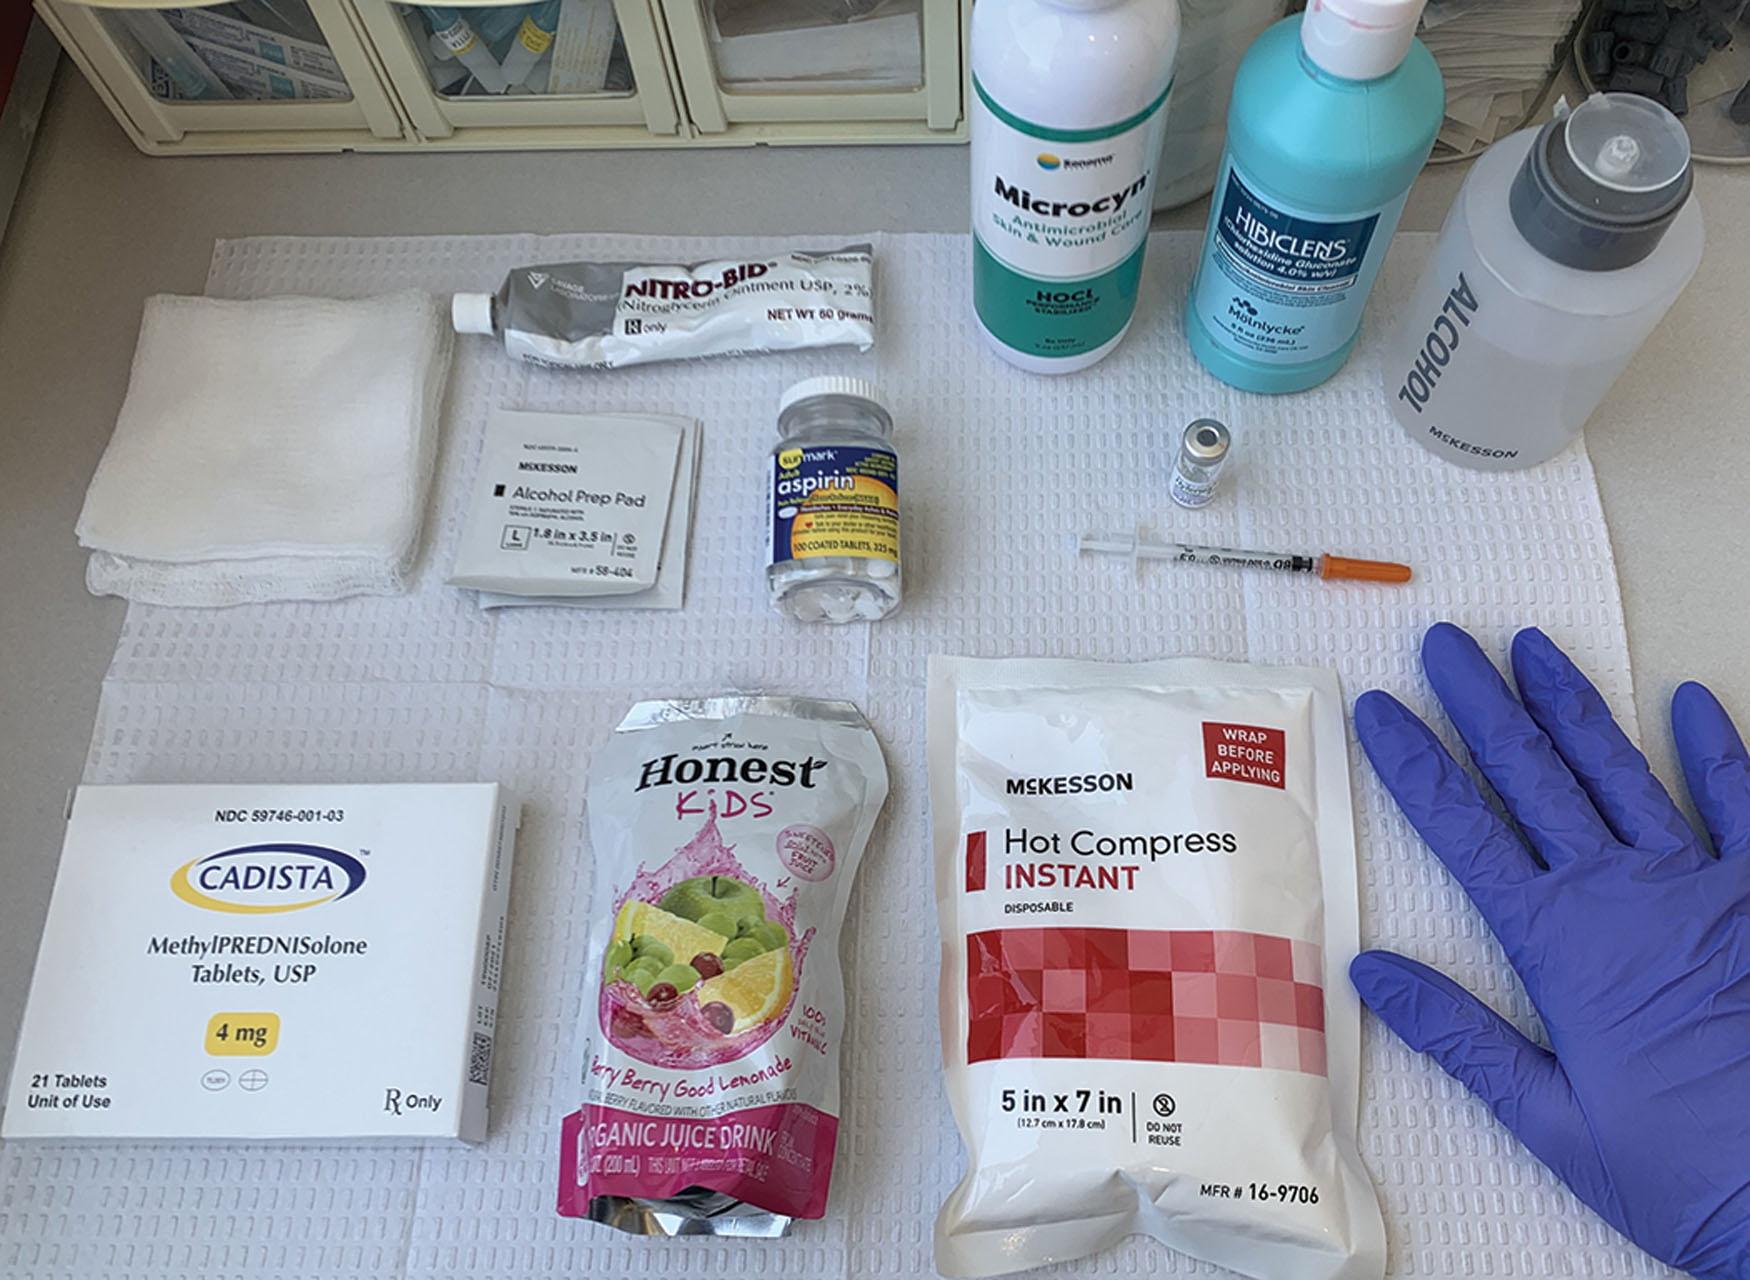
When performed safely and correctly by an experienced and well-trained injector, NSR is a procedure that yields excellent patient satisfaction. It is not a replacement to rhinoplasty for all patients, and I continue to refer those who are not candidates (mostly patients who need significant reduction) to my surgical colleagues. This procedure does, however, provide a valuable alternative to traditional surgery. It increases the pool of people wanting cosmetic correction of the nose, bringing in a significant population of patients who would never have surgery. For the patients who are candidates, it saves them expense, risk, and downtime. Finally, the precision of filler injection means that this procedure is in some cases superior to surgery in accomplishing patients’ cosmetic goals. I have built a large practice on this procedure and continue to receive many referrals from happy patients.
The author would like to thank Mimi Lam for her assistance with the layout and proofreading of this chapter.
Alexander Rivkin
Correction of the tear trough deformity or periorbital hollowing is one of the most common advanced injection procedures performed at my clinic. Patients are thrilled with the results of this 15-minute procedure that makes them look younger and dramatically less tired and has good longevity. This chapter will detail how I evaluate and treat the periorbital hollows, with an emphasis on avoidance and management of complications.
First, a word about nomenclature. The term tear trough was coined by Flowers in 1993 and is currently used by laypeople and many injectors to refer to the entire periorbital hollow. This gives the impression that the medial and lateral aspects of the periorbital hollow are anatomically the same, which they are not. Because there are subtle differences between the two, it is best to refer to the medial aspect of the hollow from the mid-pupillary line to the medial canthus as the tear trough and the lateral aspect from the mid-pupillary line to the lateral canthus as the lid-cheek junction or palpebromalar groove .
Most of my patients are not asking me to correct their tear troughs. They want to get rid of the dark circles under their eyes, believing, correctly, that smoothing the dark demarcation between the lower lid and cheek will make them look younger and less tired. Evaluating the aesthetic etiology of their complaint is not always straightforward. Is the issue, as the patient often calls it, an eye bag ? Is it a hollow? Is it pigmentation?
What causes the appearance of under-eye circles?
Thinning of the skin and underlying subcutaneous fat in the area of the tear trough and palpebromalar groove exposes the junction of the palpebral and orbital portions of the orbicularis muscle, which is marked by the orbicularis retaining ligament. These depressions are most commonly seen with age but can be seen in younger patients as a result of genetic propensity.
Age and genetic-related weakening of the orbital septum and pseudoherniation of the orbital fat through the orbital aspect of the orbicularis muscle. The bulging of the orbital fat accentuates the depression just underneath.
Hyperpigmentation of the skin of the lower lid and tear trough area. This can be caused by age, genetics, or repetitive trauma such as frequent eye rubbing in allergy patients. When there is a sharp color contrast between these areas and the malar cheek skin, it gives the appearance of a shadow caused by a hollow and accentuates any actual hollowing already present.
Fine-line formation in the lower lid caused by age, environmental, and solar-related skin thinning and repetitive creasing caused by expressive muscle motion or eye rubbing.
What correctable lifestyle choices or chronic medical conditions contribute to the appearance of dark under eye circles?
Stress
Pregnancy
Hormone replacement therapy
Menopause
Sleep deprivation
Alcohol overuse
Smoking
Illicit drug use (e.g., cocaine, heroin)
Dehydration
Salty diet
Solar skin damage
Oral contraceptives
Bimatoprost use for glaucoma
Low thyroid
Anemia
Kidney disease
During the consultation, the injector must accurately evaluate the patient, point out what is contributing to the impression of dark circles, and explain what can and cannot be corrected nonsurgically. Evaluation begins with careful observation of the periorbital area. Some questions that the injector should be asking when evaluating the patient are as follows:
Is the patient’s complaint caused by indentation in the periorbital area, or are other factors involved?
If there is an indentation, is it mild to moderate and amenable to correction with injectable filler? I consider a depth of about 3 mm or less to be amenable to complete correction. Any more than that and the patient may need to be satisfied with improvement or partial correction, or they may want to consult with a surgeon for surgical treatment.
If there are other factors involved, what are they, and to what degree are they contributing to the aesthetic impression of dark circles?
Is there pseudoherniation of orbital fat? This happens because of weakening of the orbital septum with age as well as descent of the globe and pushing of the infraorbital fat pads anteriorly. To me this is a relative but not an absolute contraindication to filler injection.
Is it mild enough to be camouflaged with filler in the periorbital area? If so, then very careful placement of filler can blend the transition between the lower lid and the malar cheek, hiding the bulge and eliminating the shadow that is causing the appearance of dark circles. If the bulge is too severe, attempts to camouflage it by placing filler underneath the convexity would give the entire under-eye area a puffy, aesthetically undesirable appearance. These patients are better candidates for surgical blepharoplasty with orbital fat repositioning.
Does the patient have periorbital hyperpigmentation (POH)? If so, is there also an indentation? If it is difficult to tell pigmentation from shadow, spreading the skin of the periorbital area apart with two fingers should help. If the darkness resolves, the issue is probably more indentation than pigmentation, and the patient is a good candidate for filler.
If there is no indentation, the pigmentation can be treated in a variety of ways, although no treatment has been conclusively shown to improve POH.
Topical hydroquinone by itself or in combination with Retin A and topical steroid. Results of treatment should be evaluated no earlier than 3 months after initiation. Hydroquinone and the following two agents work by inhibiting tyrosinase activity and decreasing melanin production.
Azelaic acid
Kojic acid
Sunscreen
Chemical peels
Lasers: Q switched ruby and Nd:Yag
If there is an indentation, the injector can fill it with favorable results but must warn the patient during the consultation that the filler will not help the pigment. Neglecting to do so can lead to patient dissatisfaction with a technically excellent result. Filler in this situation would, however, make the pigmentation much easier to cover up with makeup. Most of these patients have a hard time covering up pigmentation because the makeup collects in the hollow and looks unsightly. A smooth contour makes camouflage of the pigment much easier.
Does the patient have dynamic or etched expression lines in the lower lid?
Neurotoxin injection can help reduce dynamic expression lines in doses of 2 to 3 carefully placed units per orbicularis oculi muscle (jelly roll area). Dynamic lines must be clearly identified and differentiated during the consultation because reduction of these lines is easy with toxin, but elimination of etched-in fine lines of the lower lid skin is extremely difficult. A patient who does not understand that etched-in lines may remain even if the hollows are gone could wind up dissatisfied with the procedure.
It is possible to improve etched lines with laser, radiofrequency, or ultrasound energy treatments.
Is there skin laxity in an older patient?
The injector should be aware that more product will need to be injected to lift the periorbital skin than would be necessary in a younger patient.
The injector should communicate to the patient that filler can only elevate skin, not smooth it significantly (although the elevated skin will be a bit smoother because the area will be less deflated). The patient will still have fine lines in the periorbital area, although the hollows and dark shadow will be improved.
Treatment for these patients should be split into two sessions to avoid injecting the periorbital area with large volumes of filler in one visit. This will decrease the chances of posttreatment edema and bruising. Older patients are more predisposed to severe bruising than younger ones and have a higher risk for hemosiderin staining complications.
What is the position of the globe relative to the surrounding structures?
Does the patient have significant exophthalmos, and does the eye protrusion cast a shadow on the lower lid area, giving the aesthetic impression of dark circles?
If this is mild, it is possible to blend the contours with filler, eliminating the shadow in a similar fashion as when blending the bulge of pseudoherniation. Care must be taken in these cases to ensure that filler is being injected on top of orbital bone and not into the lower eyelid. This point will be explained in the section on technique.
If the patient has moderate to severe exophthalmos, injection of filler to try to eliminate the shadow will not be successful or will cause the periorbital area to appear puffy and aesthetically undesirable.
Does the patient have enophthalmos?
Similarly to the management of dark circles secondary to exophthalmos, mild cases can be treated with filler, and the demarcation between the lower lid and cheek can be blended. However, the temptation to inject the lower lid with filler is even greater if the patient has deep-set eyes, and this should be avoided for all but the most expert periorbital injectors.
Does the patient have malar volume loss?
Patients who have malar volume loss in addition to periorbital hollowing should have the malar area corrected when correcting the under eye area. The malar hollowing contributes to shadowing under the eye and the impression of fatigue. As discussed earlier in this chapter by Dr. Niamtu, failure to restore volume to the malar area may result in dissatisfaction, despite excellent correction of the tear trough or palpebromalar groove. For mild cases, a robust HA filler should suffice. If the malar volume loss is extensive, the injector should consider using volumizing fillers, either a collagen-stimulating agent like PLLA or calcium hydroxyapatite. Malar volume loss must be noted and discussed with the patient during the consultation because correction will add cost to the treatment. Proposing unexpected, expensive treatment to an unsatisfied tear trough correction patient after the fact is a good way to get a bad Yelp review.
Past medical history significant to this procedure would be as follows:
History of reaction to HA, epinephrine, or lidocaine
History of thyroid disease
History of blepharoplasty, facial trauma, or surgery around the eye
Scarring of the periorbital tissue makes filler injection in the area more challenging. Only expert periorbital injectors should attempt correction of these patients because elevation of the skin with a smooth contour in these patients can be quite difficult technically.
Medications or supplements that must be discontinued 7 days before treatment to reduce the chances of bruising include the following:
NSAIDs
Other anticoagulants (assuming they do not pose a health risk)
Ginkgo biloba
Vitamin E
Fish oil
Turmeric
Ginger
Garlic
Cinnamon
Cayenne pepper
The physical examination for this procedure includes the following:
Observation of the tear trough through the range of motion of the eye. As the patient looks up and the eye rotates superiorly, the periorbital hollows will become exaggerated. It is important to note this and ensure that there is improvement of the hollows on upward gaze after the procedure, otherwise the patient may complain that they still see excessive hollowing in certain photos.
Observation of the thickness of the periorbital skin and underlying tissues. The thicker the skin and tissues, the easier it is to get the necessary flawless result. If this area is very thin, it presents increased technical difficulty to the procedure. The risk for Tyndall effect is increased, as is the risk for an uneven contour after injection. Because the eyes are the focal point of the face and the periorbital area is so close, any discoloration or contour irregularity is particularly noticeable and aesthetically undesirable in this area.
Pinch test of the periorbital skin to evaluate for skin laxity.
Observation for concavity in the area of the lateral canthus. This is a common area for volume loss around the eye and can contribute to an appearance of age. It is advisable to make the patient aware of it and discuss any added expense to correction before the procedure. This area is also technically quite difficult to correct with a smooth contour and should be tackled by experienced injectors only.
Goals of treatment include the following:
Elimination of the shadow caused by periorbital hollowing
Elimination of shadowing in the areas surrounding the tear trough and palpebromalar groove
Flawless contour without visible discoloration because of the Tyndall effect
Smooth transition between the lower lid and a well-volumized malar cheek
Avoidance of severe bruising to ensure that the patient does not develop hemosiderin staining of the periorbital tissues
Avoidance of complete obliteration of the lower lid–cheek junction. This usually looks unnatural and makes the patient appear overfilled.
The concavity of the periorbital hollow corresponds to the junction of the palpebral and the orbital parts of the orbicularis oculi muscle as well as the location of the orbicularis-retaining ligament. There is very little subcutaneous fat in this area, in contrast with the infraorbital fat above the junction and the medial cheek fat pad below. The appearance of the periorbital hollows become more pronounced with age as a result of changes in the area as well as what happens above and below it. As the lower lid skin thins and the darker color of the orbicularis and underlying vessels become more visible, the tear trough and palpebromalar groove appear darker and more noticeable. Superiorly, the orbicularis muscle and orbital septum thin, providing less resistance to orbital fat that starts to bulge as the globe moves inferiorly over time. The orbicularis-retaining ligament is stationary because of the ligamentous attachment of the skin to the periosof the orbital rim. Because of this fixated structure atrophy and descent of the medial cheek pad exposes the area inferior to the tear trough.
The vascular supply of the periorbital area originates from the angular artery, the ophthalmic artery, and the infraorbital artery with their accompanying veins. The plane that the vessels run in varies along the periorbital area. Medially, the vessels are most commonly superficial to the orbicularis muscle, whereas laterally the vessels are mostly submuscular.
The periorbital area is variably well hydrated (depending on time of day and patient physiology) and nonmobile. These properties have implications on which fillers to choose for augmentation as well as what are reasonable expectations for results of the procedure. The particular variability of hydration in the area means that it can be difficult to predict the final contour of filler placed. What looks good right after injection can generate edema and swell over time to an aesthetically undesirable result. Which patient will experience edema and which patients will not is difficult to predict before injection and can change over time. A patient can look good for 1 year or more and then develop edema as the product starts to break down. Any filler used in this area must be reversible or adjustable so it can be treated successfully if edema is encountered. This is the reason HA products should be exclusively injected into the periorbital area.
Of the available HA fillers, only the more hydrophobic ones should be used. Fillers such as Vollure, Volbella, Restylane, Lyft, Belotero, Versa, Refyne, and Defyne all work well to augment the periorbital hollows, although the more cross-linked fillers like Lyft and Defyne may be more difficult to reverse than the others if the need arises. The skin and subdermal tissues of the periorbital area lift up easily with filler. There is no need for the G prime of the more robust fillers like Voluma, Defyne, or Lyft. Rather, a soft and smooth filler would be best. Having used all of these fillers, I prefer Vollure in the area. It flows very smoothly, resists edema, and is easily reversible. Vollure is also soft and moldable once injected, a quality that is essential in achieving the flawlessly smooth contour that this area demands. I find that, with my injection technique, laying down fine, smooth, and precise threads of filler is easiest with this product. Hydrophilic fillers like the Hylacross line from Allergan should be avoided because of the risk for edema.
Over the years, I and most of my colleagues have noticed that the tear trough and palpebromalar groove are areas where HA fillers tend to last for an extremely long period. Duration is variable, but most patients get several years out of a filler that, in any other area of the face, lasts for 5 to 7 months. This is great news for successful procedures, but problems can last a very long time as well. Patients who have swelling should be discouraged from “waiting it out.” They should be reassured that hyaluronidase injection, if performed carefully, will not dissolve all of their filler and will not lead to a change in the texture of the skin of the lower eyelid. Patients who develop periorbital swelling, even several years after a filler procedure, can still be corrected with a simple enzyme injection.
Become a Clinical Tree membership for Full access and enjoy Unlimited articles
If you are a member. Log in here