Physical Address
304 North Cardinal St.
Dorchester Center, MA 02124
In group 1 patients, the brachioradialis (BR) is available for tendon transfer to provide wrist extension.
After restoration of wrist extension, tenodesis can create passive lateral key pinch, leading to significant improvement in a patient’s independence and ability to manipulate objects.
In addition to thumb interphalangeal (IP) flexion, restoration of key pinch may require adjunctive procedures, including thumb carpometacarpal (CMC) joint fusion (see Chapter 45 ), thumb metacarpophalangeal (MCP) capsulodesis, extensor pollicis longus (EPL) tenodesis, split flexor pollicis longus (FPL) to EPL transfer for IP stabilization, and index finger lasso for flexion tenodesis, to optimize key pinch.
Moberg described the original technique for restoration of passive key pinch. First, BR to extensor carpi radialis brevis (ECRB) tendon transfer for wrist extension is performed, followed by FPL tenodesis and thumb IP arthrodesis. In patients with a mobile thumb, MCP, EPL, and extensor pollicis brevis (EPB) tenodesis are also performed.
Alternatively, the following procedures can be performed for passive key pinch to maximize stability and increase strength:
FPL tenodesis to the volar radius to provide passive key pinch during wrist extension.
Split FPL-to-extensor pollicis longus (EPL) transfer to stabilize the thumb interphalangeal (IP) joint during flexion to avoid the flexed IP joint posture that is not functional.
EPL and abductor pollicis longus (APL) tenodesis to the dorsal and lateral radius, respectively, to allow the thumb to abduct and extend during wrist flexion for the release phase of key pinch.
Flexor digitorum superficialis (FDS) lasso procedure if the index finger metacarpophalangeal (MCP) joint flexion is deemed inadequate for key pinch.
Setting tension in the procedures optimizes result. The surgeon must pay attention to the posture of thumb and digits with the wrist in neutral, flexion, and extension at the time of surgery.
Patients capitalize on the tenodesis effect and use wrist extension to increase the passive tenodesis force on the finger flexors that promotes strong finger flexion.
A comprehensive examination of the entire upper extremity is performed. See Chapter 69 for details.
The thumb is examined for resting position and stability. Passive flexion and extension of the thumb is tested at the IP, MCP, and CMC joint.
The position and stability of the index finger are examined. The goal is to determine whether the index finger can serve as a good opposing surface for key pinch.
The relevant anatomy is illustrated ( Fig. 73.1 ).
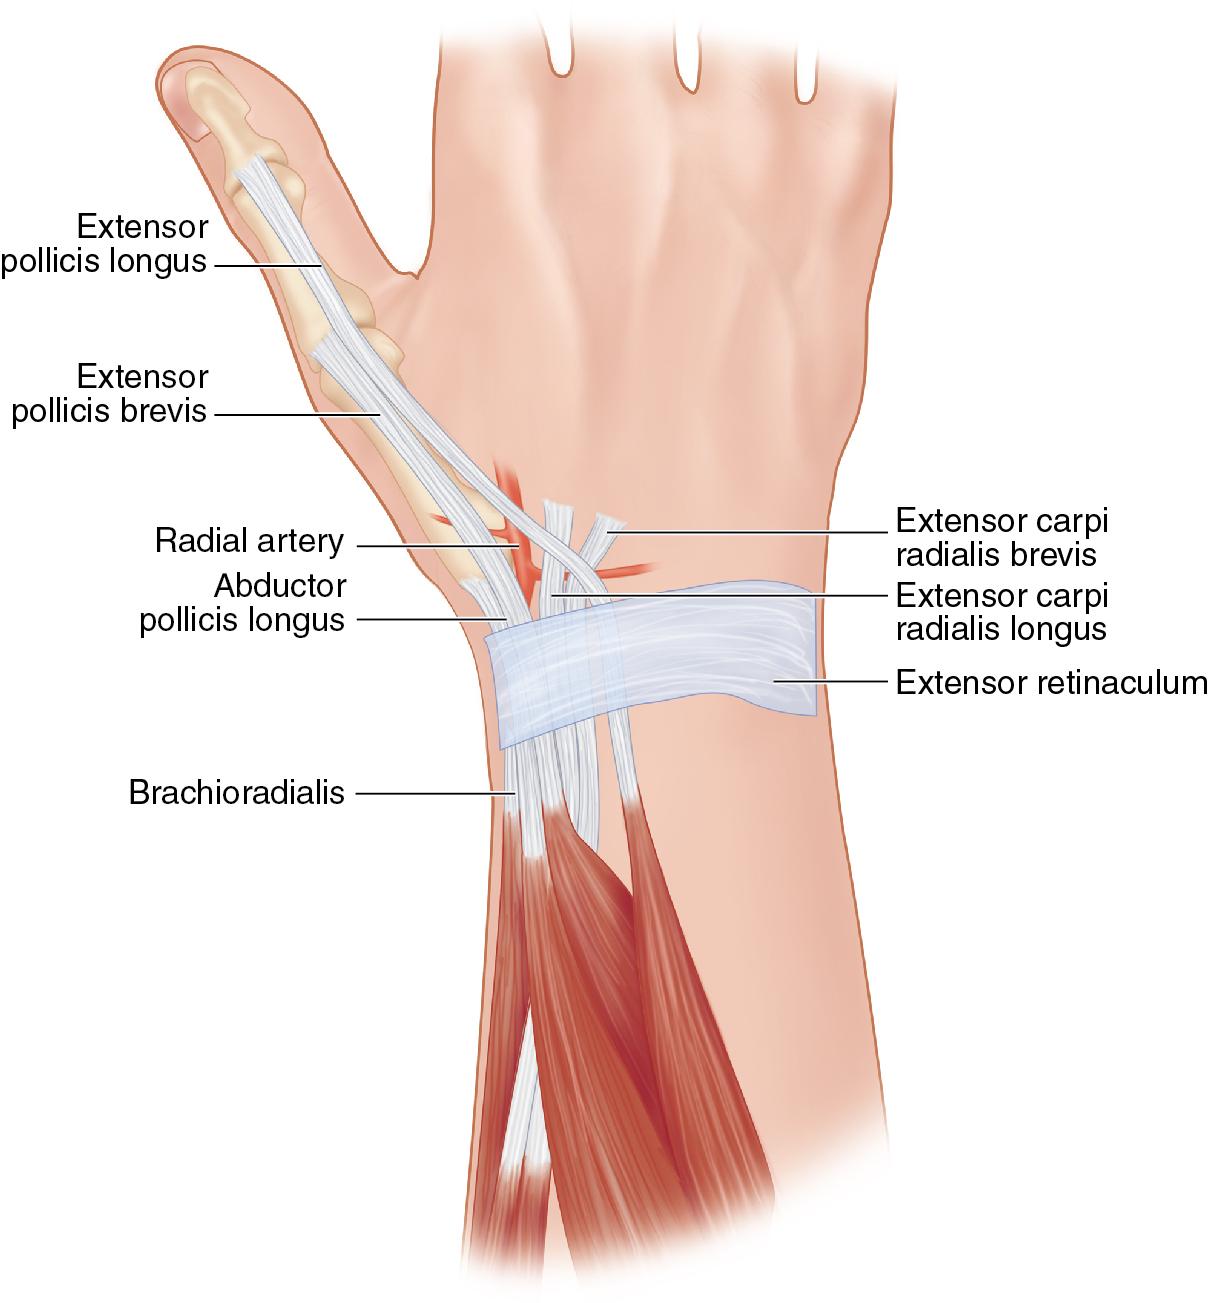
The FPL, which originates from the volar radius, travels through the carpal tunnel, enters the thumb tendon sheath, and inserts on the base of the distal phalanx.
The APL radially abducts the thumb and originates from the posterior radius, travels through the first dorsal compartment, and inserts on the base of the thumb metacarpal.
The EPL originates from the middle one-third of the dorsal ulna, travels through the third dorsal compartment ulnar to the Lister tubercle, and inserts on the dorsal surface at the base of the distal phalanx.
The patient is placed in the supine position and the affected arm is extended on the hand table.
A tourniquet is applied to the upper arm.
A midaxial incision on the radial aspect of the thumb is made from the MCP joint to the IP joint ( Fig. 73.2 ).
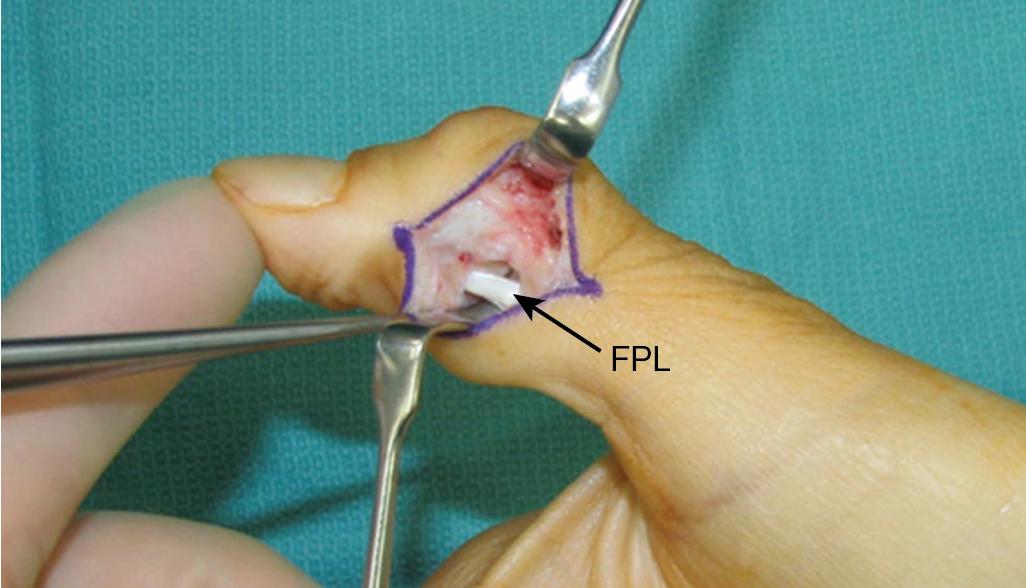
The radial neurovascular bundle is protected and retracted volarly exposing the flexor tendon sheath.
Dissect toward the volar surface of the thumb and identify the FPL insertion onto the distal phalanx. Identify and release the A2 pulley ( Fig. 73.3 ).
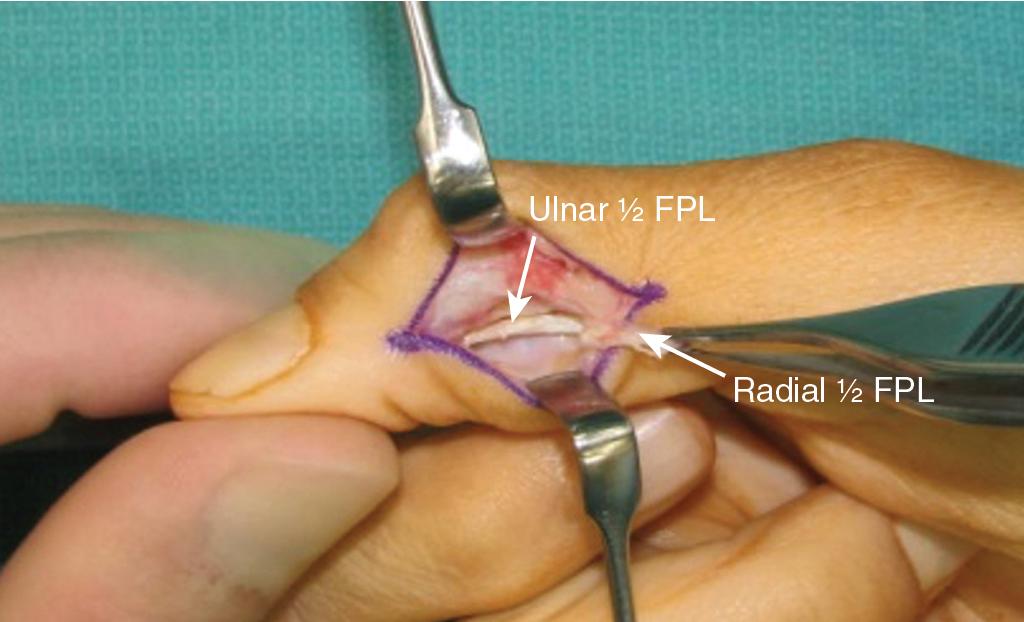
The FPL sheath is incised longitudinally, and the radial half of the FPL tendon is detached at its insertion on the distal phalanx and dissected proximally for adequate length to reach the EPL dorsally at the IP joint ( Fig. 73.4 ).
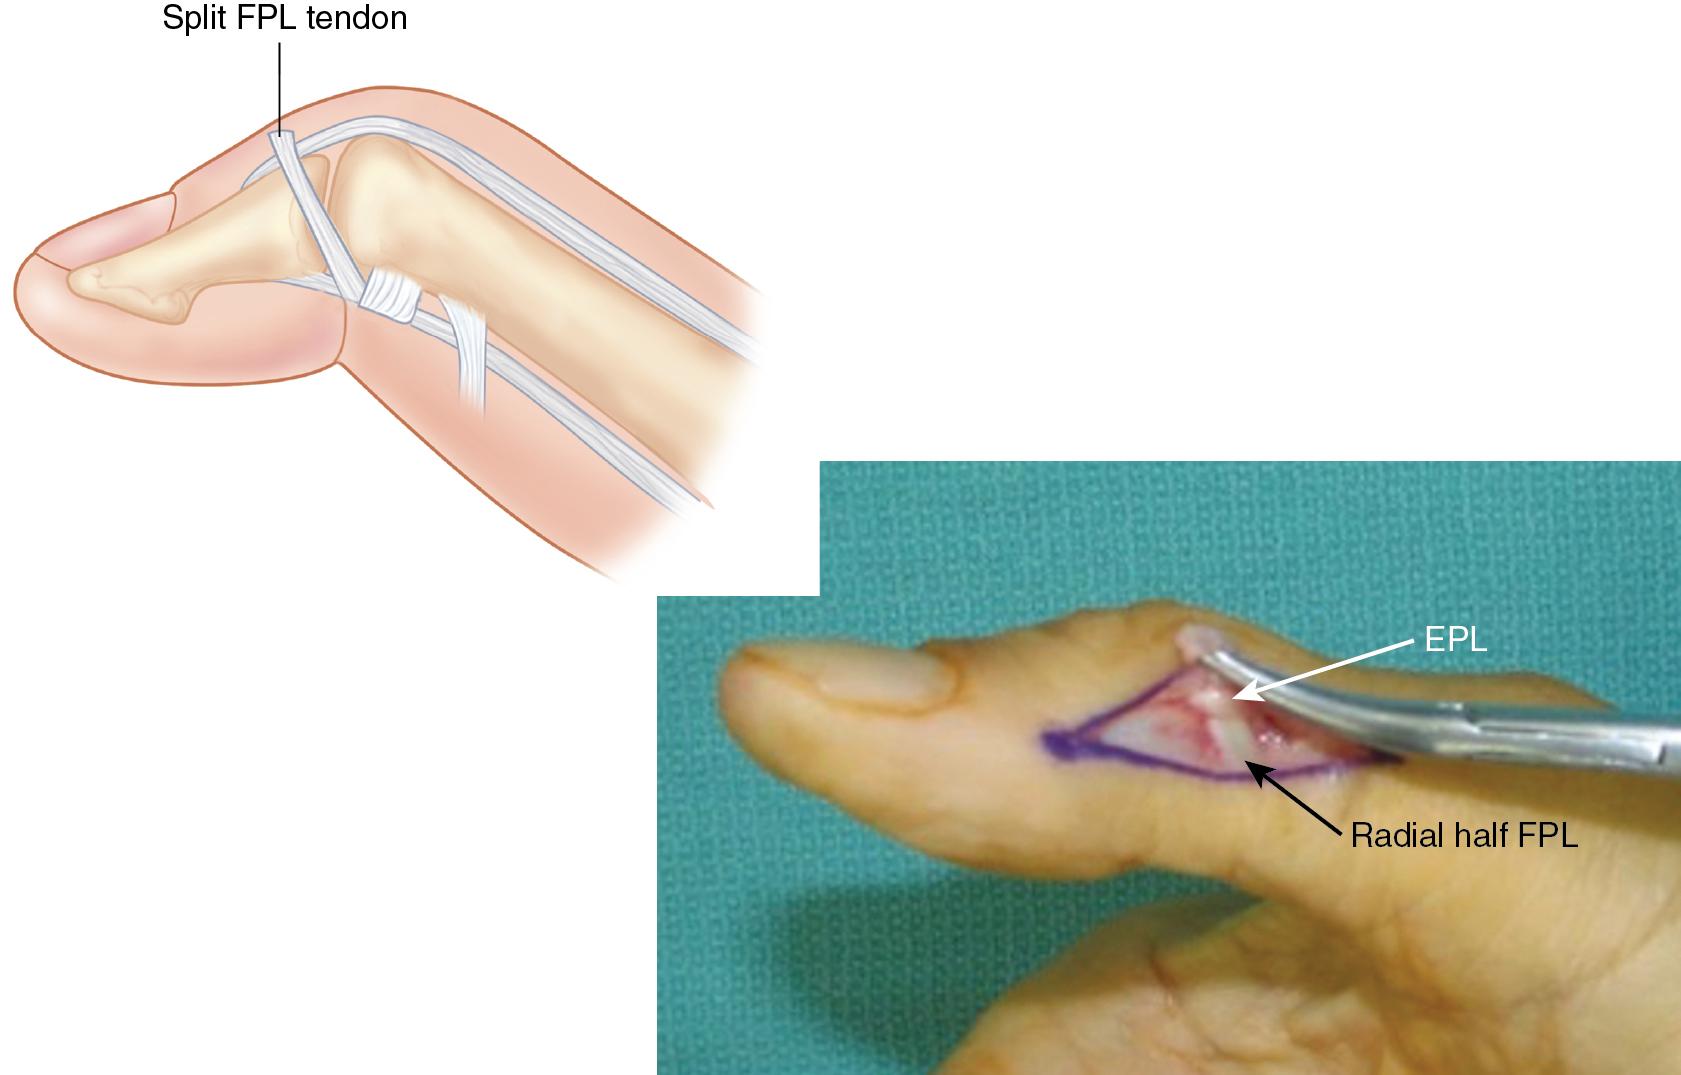
The IP joint can be flexed to provide access to the distal FPL tendon.
Identify and protect the thumb radial neurovascular bundle (NVB), keeping them with the volar skin flap.
Preserve the thumb oblique pulley to prevent bowstringing of remaining tendon.
If enough FPL length is not achieved, the tendon can be split to a more proximal level and brought out between the interval of the A2 and oblique pulleys.
From the midaxial incision, dissect dorsally toward the EPL or make a separate dorsal incision on the dorsum of the IP joint to expose the extensor hood.
Make a longitudinal slit in the radial side of the EPL tendon.
Tunnel the harvested FPL tendon slip subcutaneously to the dorsal side of the thumb and perform a tendon weave of the split FPL-to-EPL twice over, using 3-0 braided nonabsorbable suture ( Fig. 73.5 ).
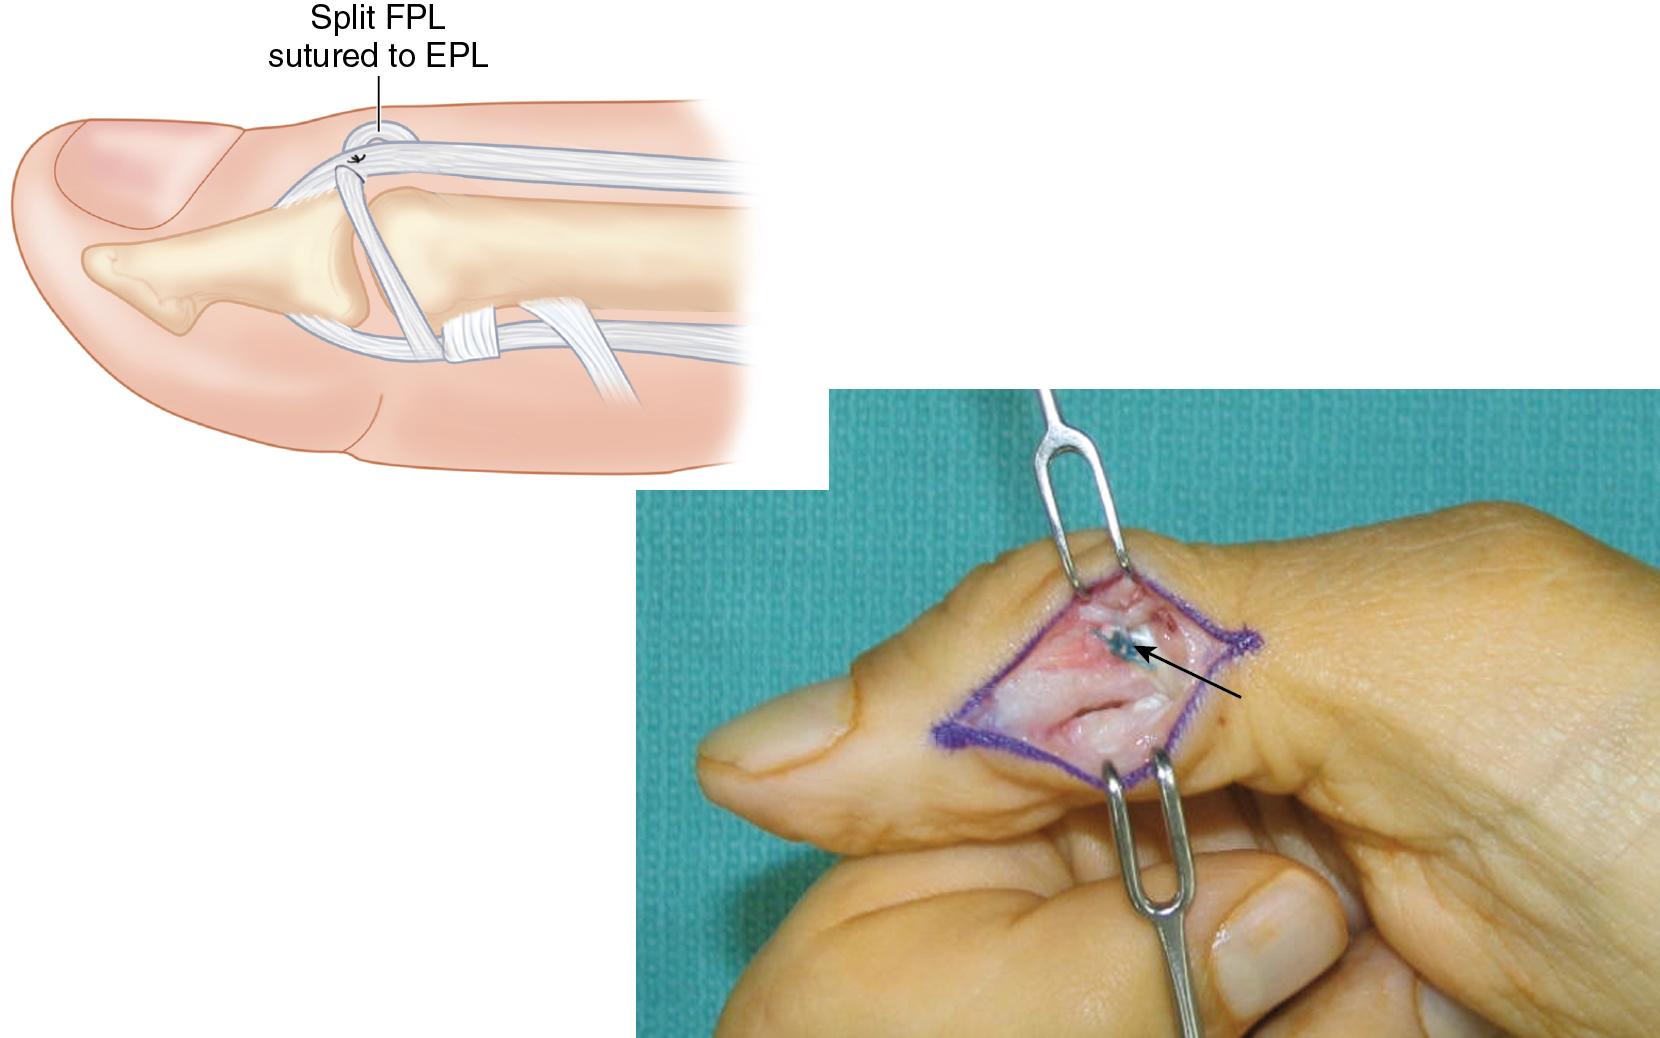
Aim for neutral IP position when setting tension.
FPL-to-EPL transfer is performed before FPL tenodesis or functional transfers such as BR to FPL. The FPL-to-EPL sets the tension for the IP joint and aids in setting tension for proximal transfers that will affect the MCP joint in addition to the IP joint.
Exposure of the FPL tendon in the distal forearm is necessary for simultaneous procedures, such as FPL tenodesis or BR-to-FPL tendon transfer. Exposing the FPL tendon in the distal forearm aids in setting tension for the split FPL tendon transfer at the IP joint. The surgeon can place traction to the proximal FPL tendon and watch IP motion to ensure that there is enough tension on the transfer to keep the thumb IP joint neutral during FPL activation and key pinch.
Become a Clinical Tree membership for Full access and enjoy Unlimited articles
If you are a member. Log in here