Physical Address
304 North Cardinal St.
Dorchester Center, MA 02124
We would like to acknowledge and thank previous contributors, including Jose N. Fayad.
Sophisticated micro-otosurgical techniques mandate that the otologic surgeon and surgical team have an in-depth understanding of the operating room (OR) layout and surgical instrumentation. This chapter describes in detail the different surgical procedures and the necessary OR setup and instruments. Appendix 1.1 provides a comprehensive list of the necessary instruments and equipment.
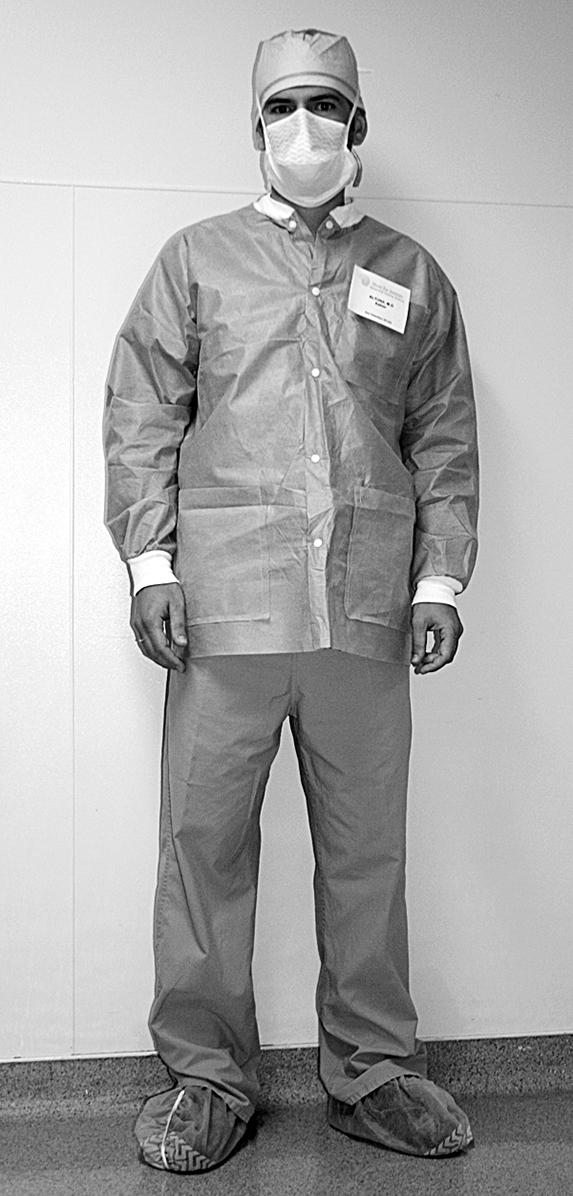
The OR for otologic surgery requires features that differ from those used for nonotologic surgery. The following sections elaborate on the general environment of the OR designed for ear surgery. A word about the sterile field is in order. Respecting the sterile field is vital during routine otologic surgery and takes on special significance during neurotologic procedures. Maintaining the proper sterile environment means limiting the traffic through the OR and keeping the number of visitors to a minimum. It is preferable for observers to be in a remote room watching the procedures on video. Individuals allowed in the OR should be experienced in the sterile technique and should wear jackets over their scrubs so that all the skin surfaces are covered ( Fig. 1.1 ).
Before entering the OR, the operative site is confirmed with the patient. The correct ear is marked with a marking pen. As many otologic procedures are performed on awake patients under local anesthesia, an OR environment conducive to their psychological wellbeing is imperative. Members of the surgical team and visitors must use discretion when making comments during surgery performed under local anesthesia.
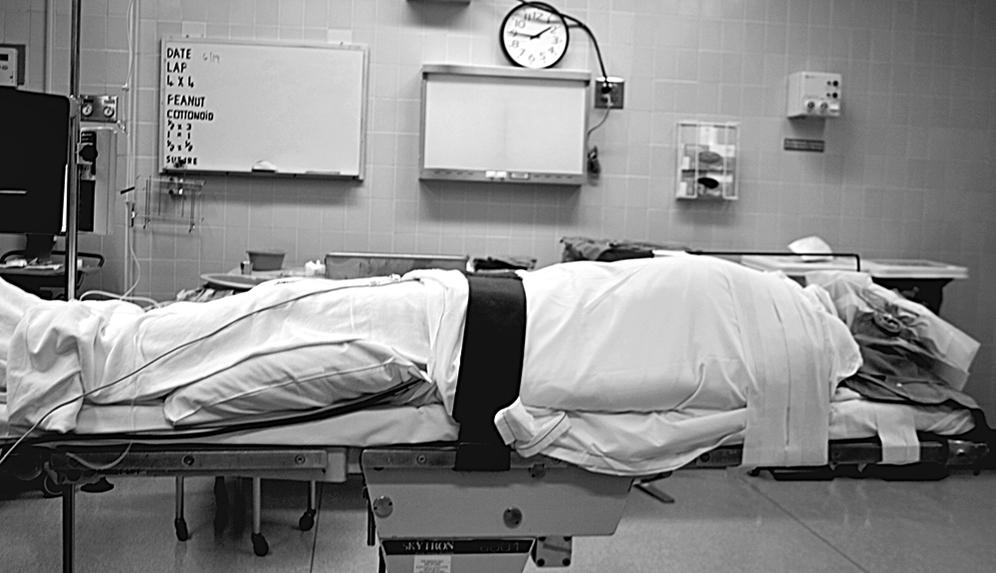
The first piece of OR equipment to be discussed is the operating table. The surgeon must be comfortable while performing microsurgery. Adequate leg room under the table can be achieved with older OR tables by placing the patient 180 degrees opposite the usual position; in other words, the patient’s head is where the feet would normally be ( Fig. 1.2 ). The newer electric tables easily accommodate the patient and surgeon. Because most otologists spin the OR table 180 degrees after the induction of anesthesia, the new tables can be spun without being unlocked. Nonetheless, after the patient is properly positioned, the table must be firmly locked in place.
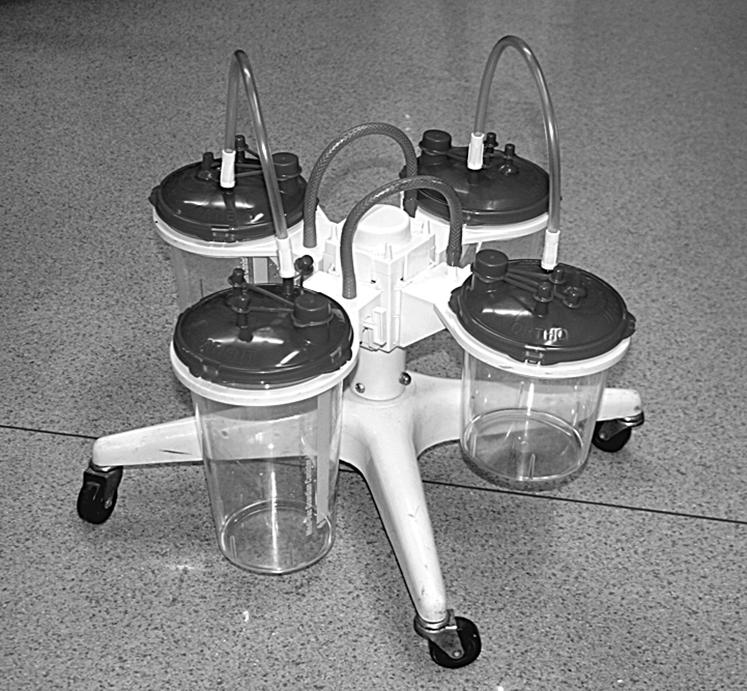
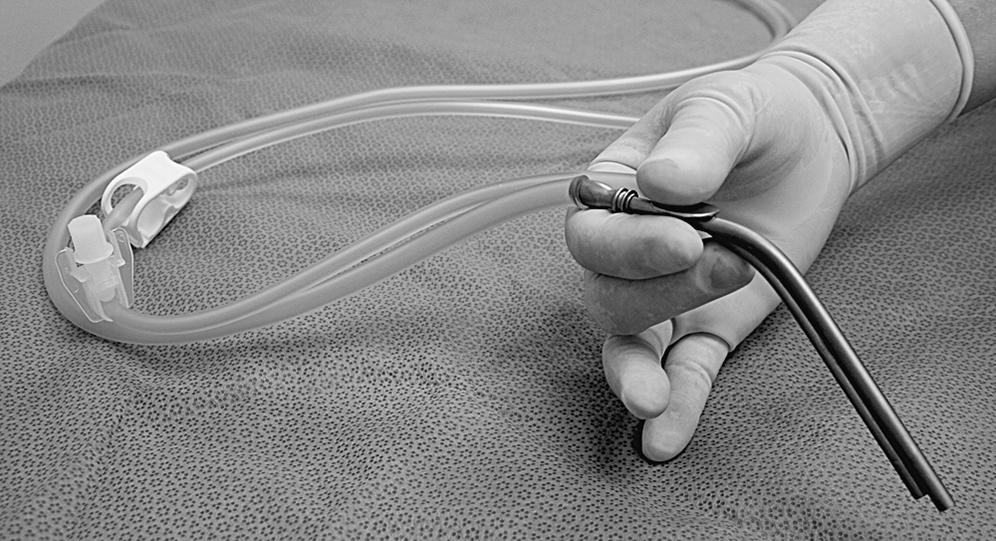
All ORs are equipped with wall suction. The standard suction devices are acceptable for otologic surgery; however, it is preferable to use a multiple-canister suction setup, minimizing the number of times the bottles must be emptied ( Fig. 1.3 ). Suction systems have several locations where the amount of suction can be varied, but the surgeon should also use a control clamp on the suction tubing in the sterile field ( Fig. 1.4 ).
The tubing that is attached to the suction tips and suction-irrigators should be highly flexible. The readily available disposable suction tubing is not flexible enough for microsurgery and places awkward torque on the surgeon’s hands. Suction setup problems are common in every OR. The prudent team troubleshoots the system in advance and has access to backup equipment.
Electrocautery equipment should be in a ready-to-use state for all procedures, except perhaps stapes surgery. The patient must be properly grounded. It is advantageous to have monopolar and bipolar cautery on the field for all chronic ear and neurotologic procedures. To minimize the risk to an implanted device such as a cochlear or auditory brainstem implant, monopolar cautery should be avoided after an implant has been placed. Nonadherent tips are available for most cautery devices and are desirable. Surgeons have at their disposal a wide array of safe cautery devices, but they must be thoroughly familiar with these electric instruments before use.
The surgical drill is another essential piece of equipment for otologic surgery. The vast array of available drills precludes an in-depth discussion of each system. In general, otologic drills fall into two categories: air-driven and electric. There are advantages and disadvantages to each type, and most surgeons have a distinct preference based on training and experience. For surgeons using air-driven drills, it is preferable to use a central source of nitrogen to power the drill instead of tank-supplied gas within the OR. A central source eliminates the need to change tanks during long procedures.
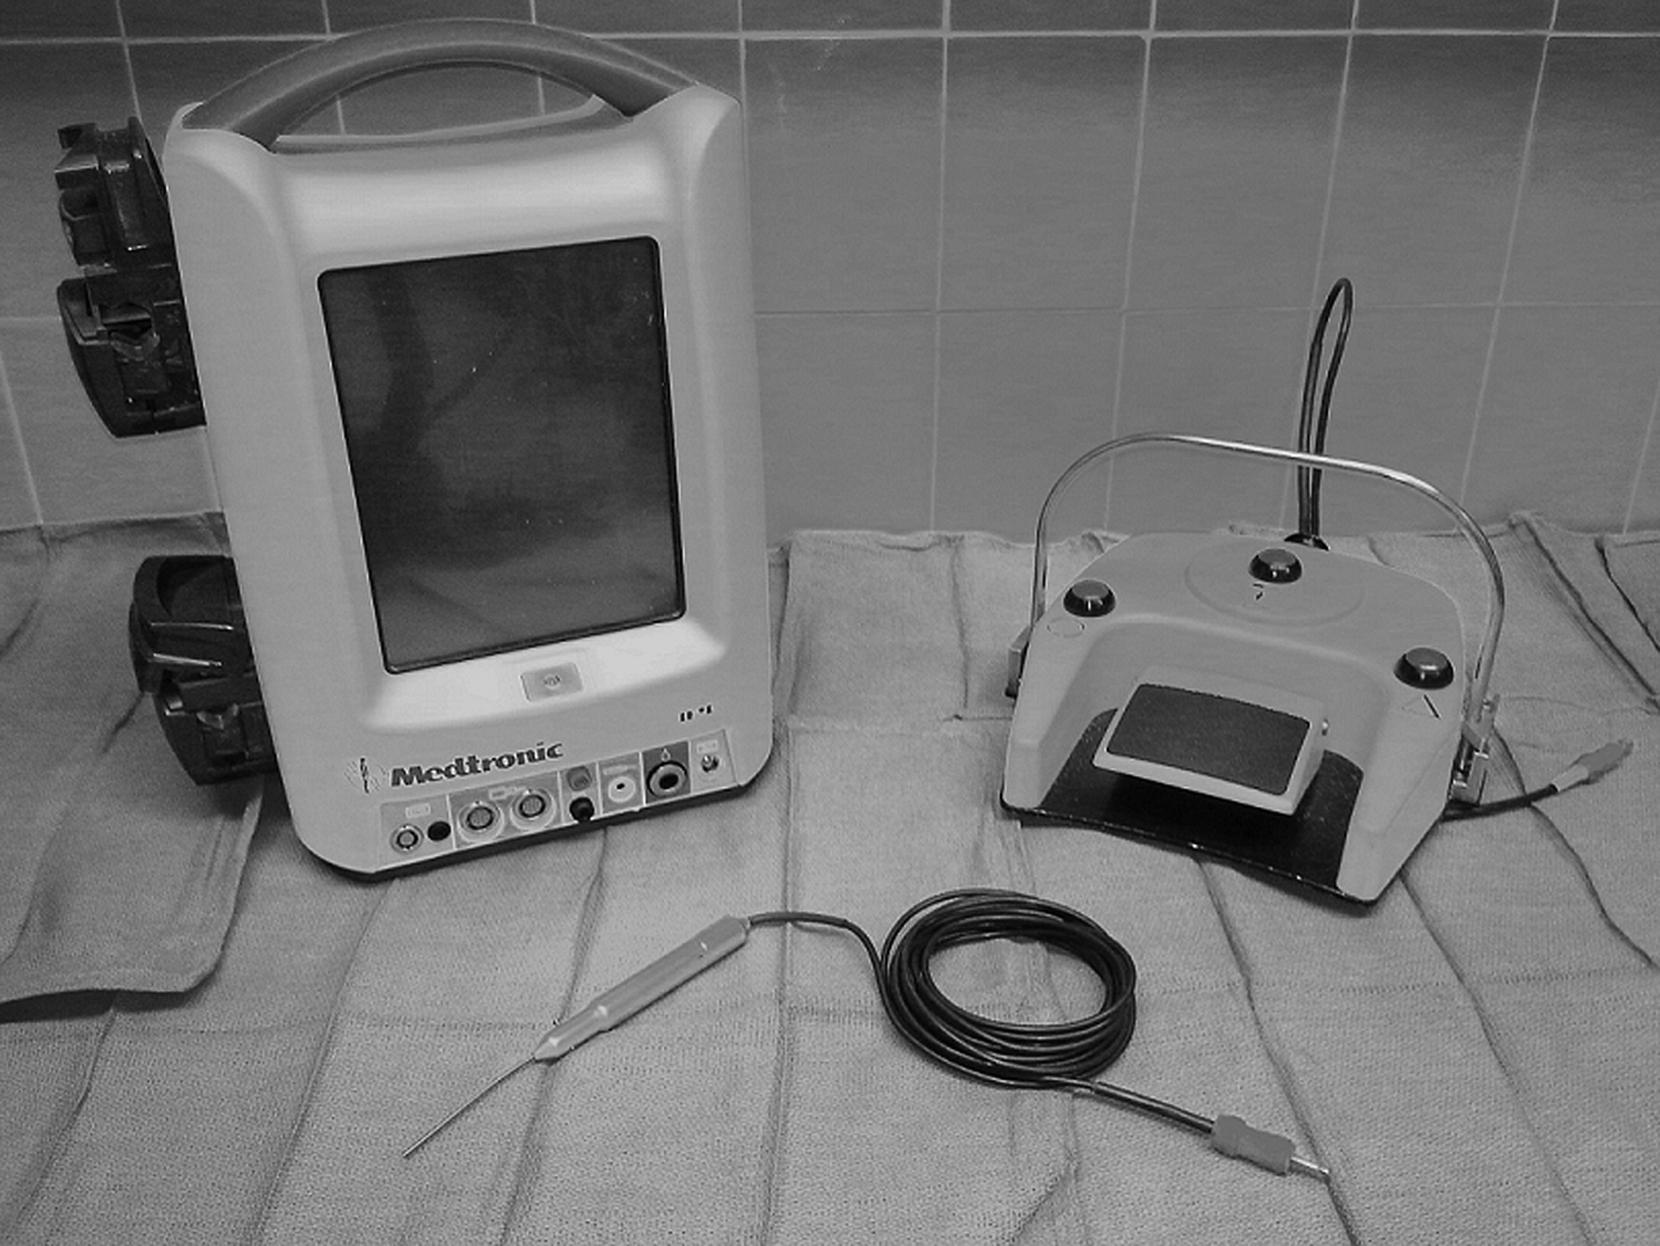
The high-speed drills capable of doing most of the bone work in the temporal bone include the Fisch, Medtronic, and Anspach drill systems. These drills are generally unsuitable for work in the middle ear, especially around the stapes footplate. For the latter purposes, a microdrill, such as the Skeeter drill or Bien-Air, is suitable ( Fig. 1.5 ). Whichever drill is used in the middle ear must have a variable speed control and a wide array of drill bits.
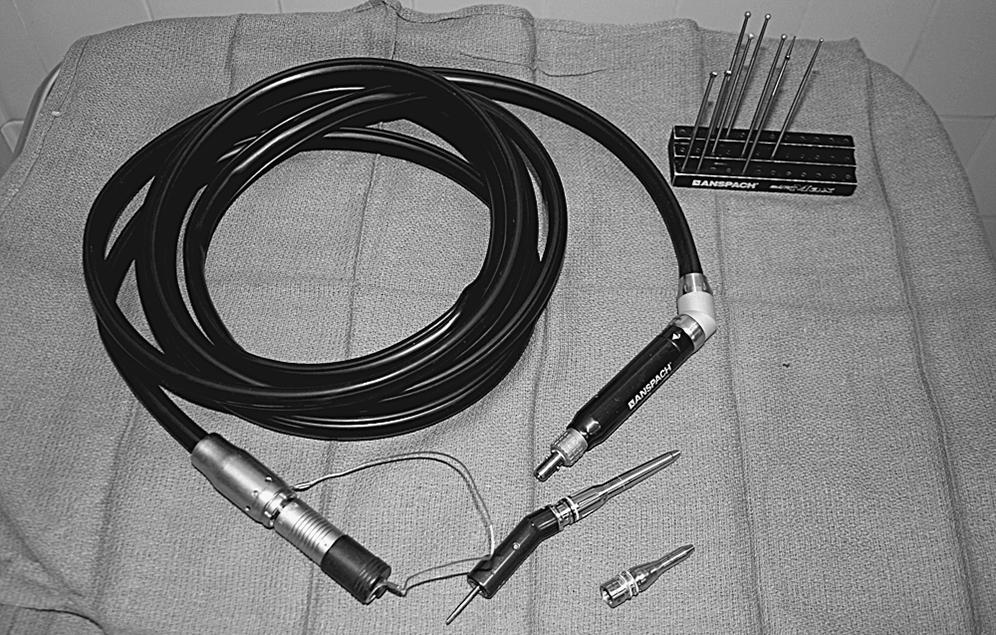
Most larger otologic drills are equipped with straight and angled handpieces. Most surgeons prefer straight handpieces for the early gross removal of the mastoid cortex, switching to angled handpieces for working deeper in the temporal bone. The Anspach drill system has a handpiece that can be converted from straight to angled simply by rotating the connection. A full complement of cutting and diamond burrs is mandatory. Fig. 1.6 shows the Anspach drill system. Most drill systems have attachments that vary in shape, diameter, and length. It is the surgeon’s responsibility to be intimately familiar with the drill system and to have all of the attachments and burrs that might be needed.
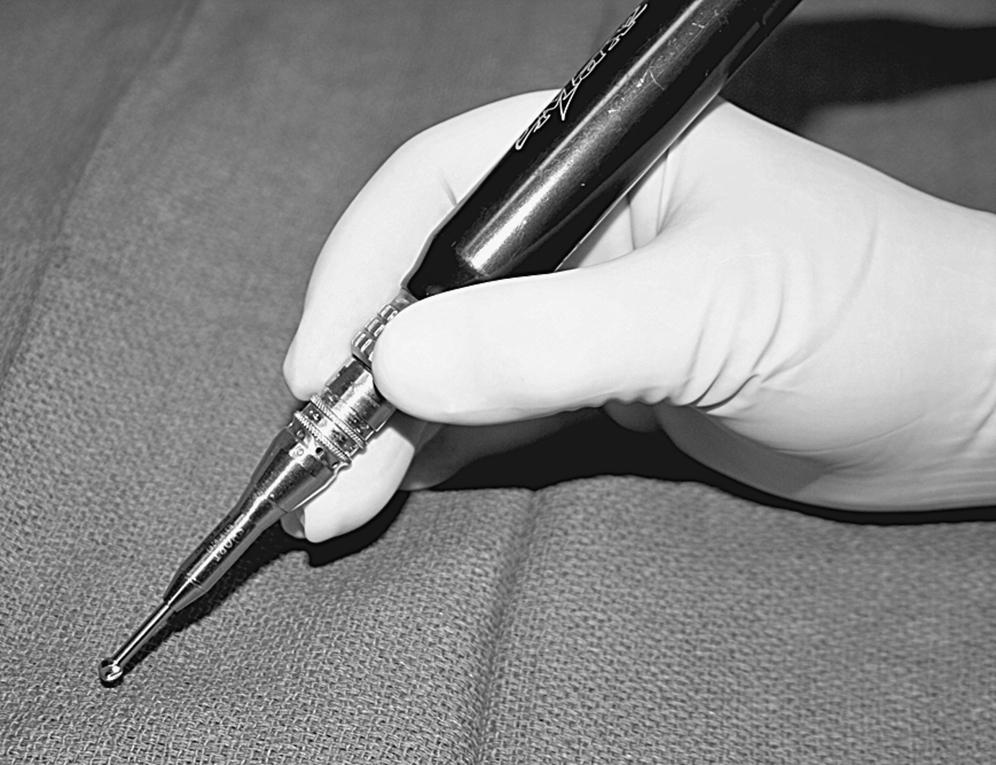
The otologic drill should be held in the hand like a pencil, with the hand resting comfortably on the sterile field. The side of the burr should be used to provide maximum contact between the bone and the flutes of the burr, affording safer and more efficient drilling ( Fig. 1.7 ). The newer drills are remarkably reliable, but, similar to other tools, may malfunction. Drill systems require proper care and inspection before use and a backup system should be readily available.
The introduction of the operating microscope revolutionized otologic surgery. Most otolaryngologists are familiar with the microscope. Several brands of optically superior instruments are available; most are sufficiently similar to share the same general principles.
The otologic surgeon must be familiar with the adjustments on the microscope and must be prepared to troubleshoot the problems that may arise with the scope. The focal length of the objective lens is a matter of personal preference. Most otologists use a 200- or 250-mm objective. If a laser is attached to the microscope, one might consider a 300-mm objective. The objective lens should be selected, confirmed, and properly mounted before draping the microscope. Other adjustments, such as the most comfortable interpupillary distance, also should be performed before the scope is draped. Parfocal vision should be established so that the surgeon can change the magnification without having to change the focus. This is accomplished by first setting the diopter setting of both eyepieces to zero. The 40× magnification (or the highest available setting) is selected. The locked microscope is focused on a towel using the focus knob only. Without disturbing any of the settings, the magnification is now set at 6× (or the lowest available setting). The eyepieces are individually adjusted to obtain the sharpest image possible. The diopter readings are recorded for future use. The surgeon should have parfocal vision when these appropriately adjusted eyepieces are used.
The microscope should move easily. All the connections should be adjusted so that the microscope does not wander by itself, but that movement to any position is possible with minimal effort. Wrestling with the microscope during microsurgery is an extreme distraction.
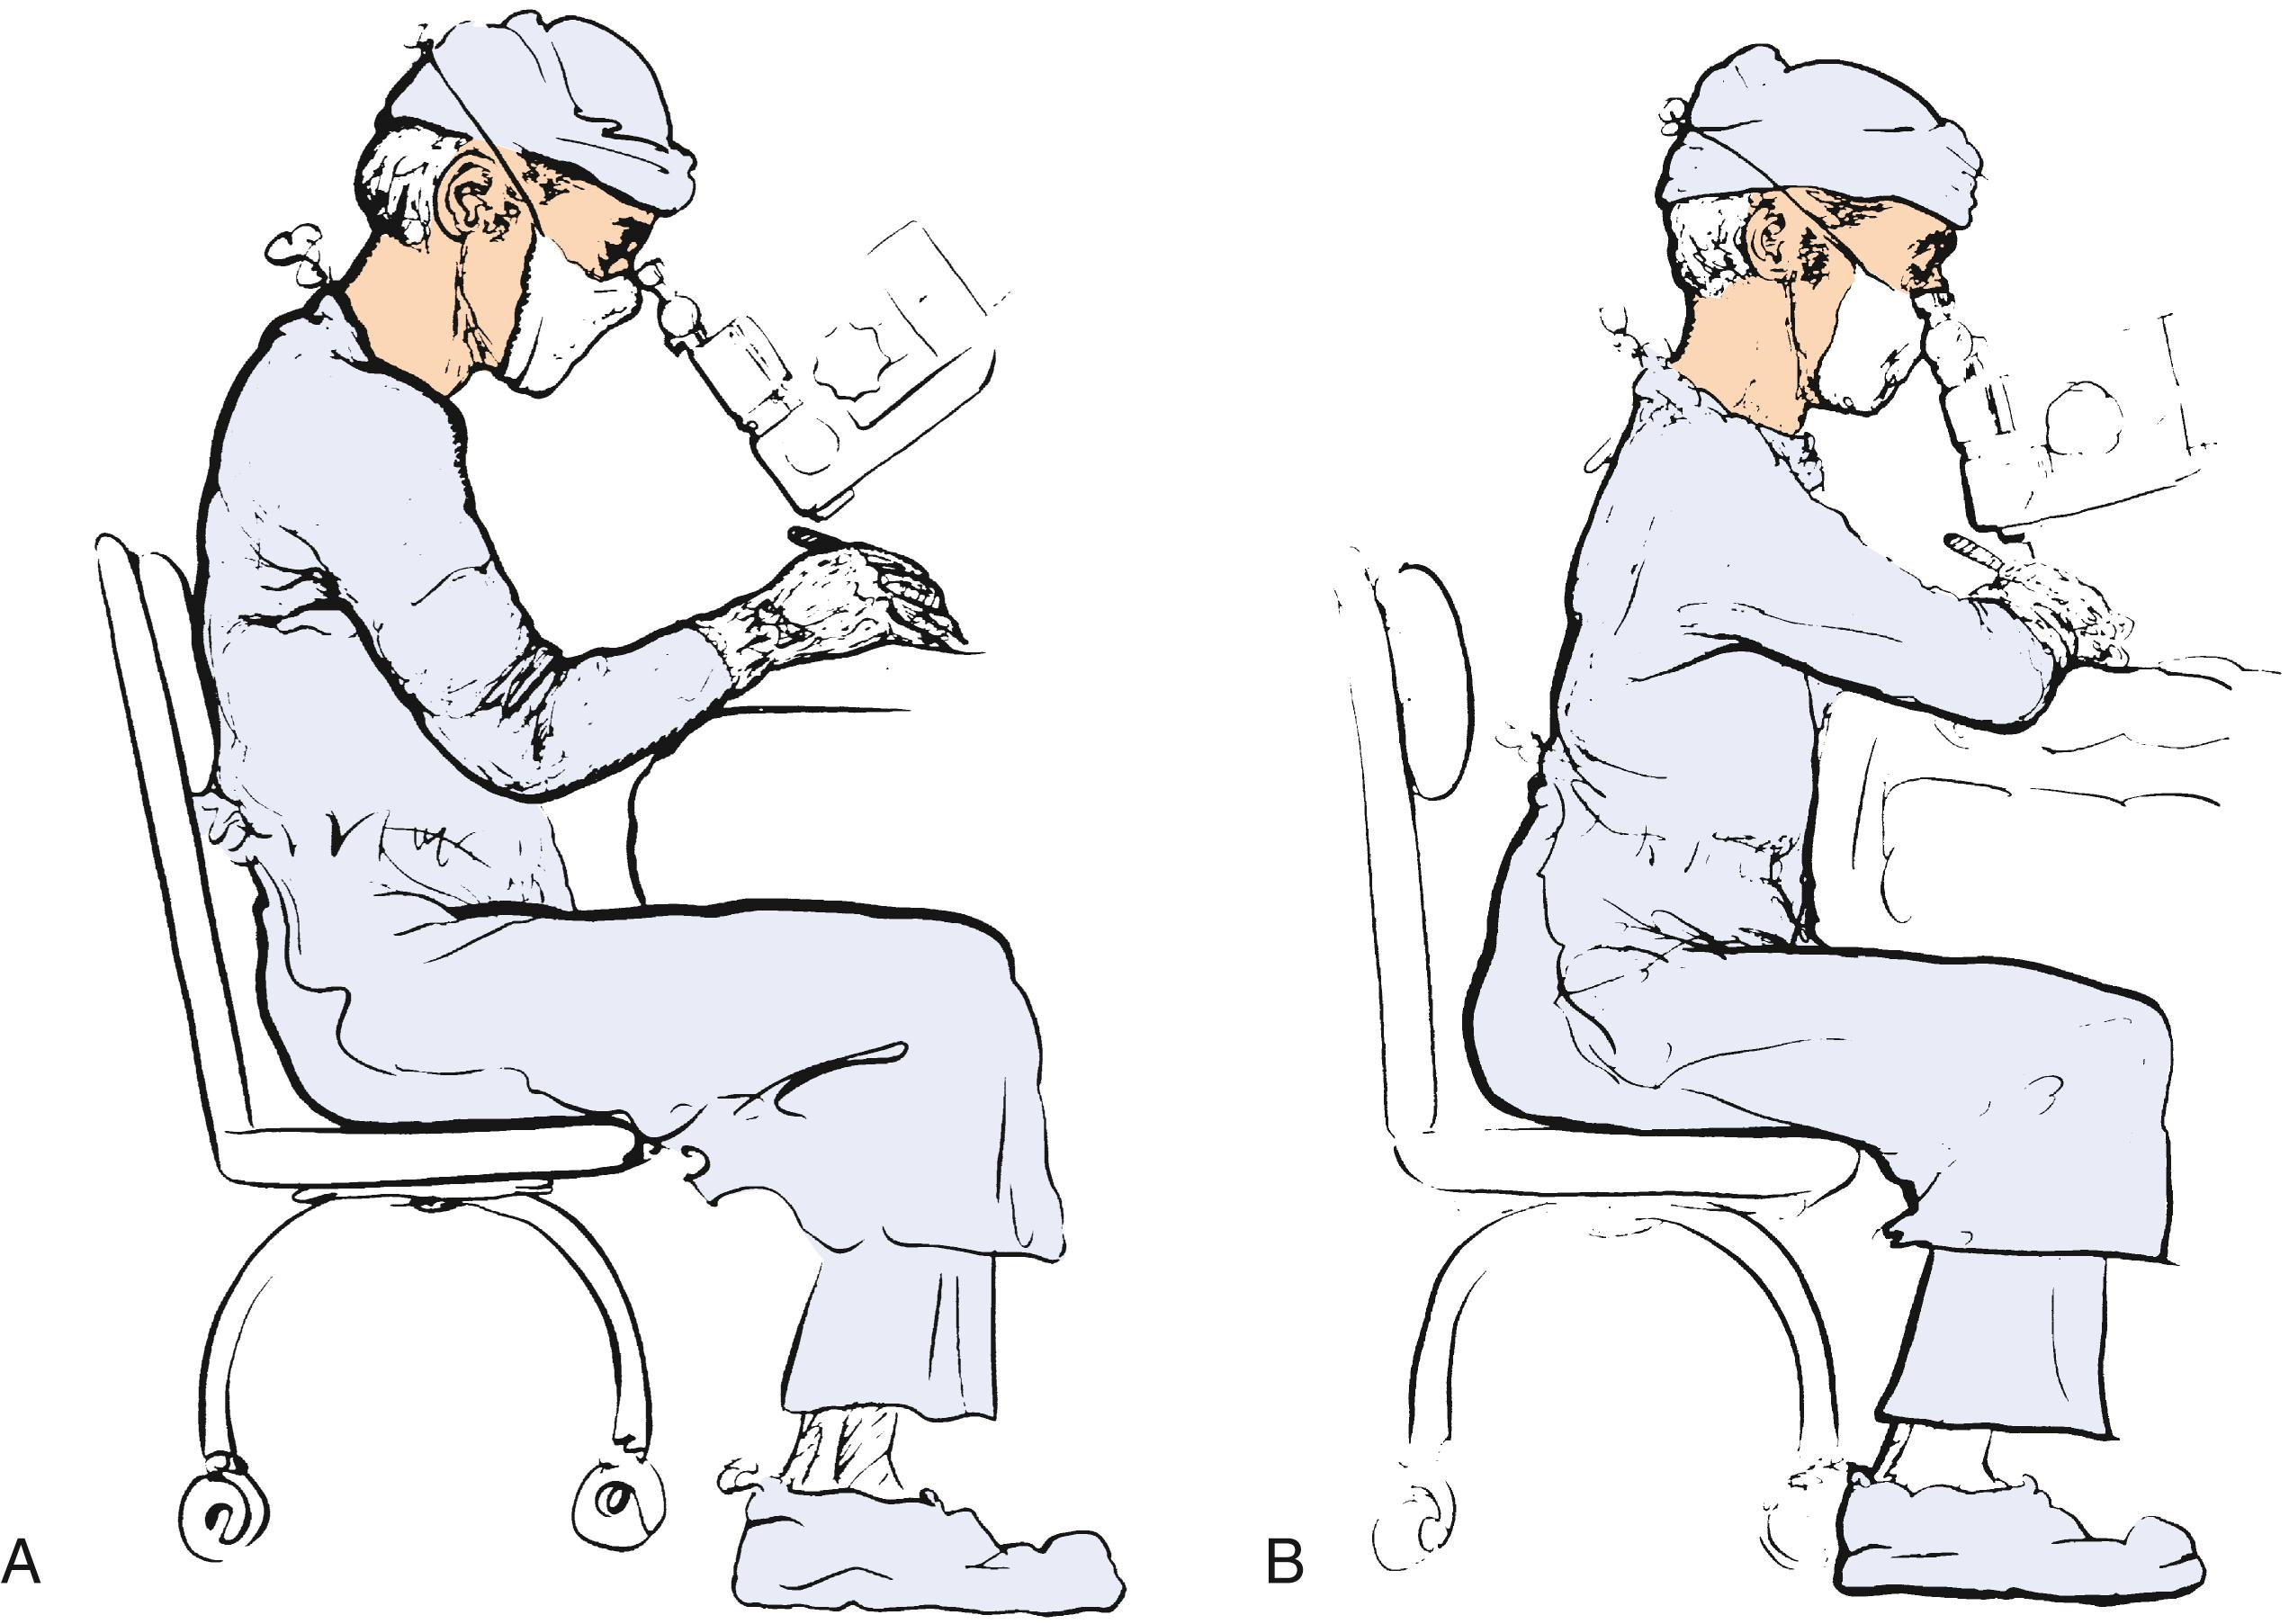
The proper posture at the operating table is crucial. To perform microsurgical procedures, the first rule is that the surgeon must be comfortable. The surgeon should be seated comfortably in a proper chair with the back support at the correct height. Both feet should be resting comfortably on the floor. Fatigue is avoided by assuming a restful position in the chair, rather than a rigid upright posture ( Fig. 1.8 ).
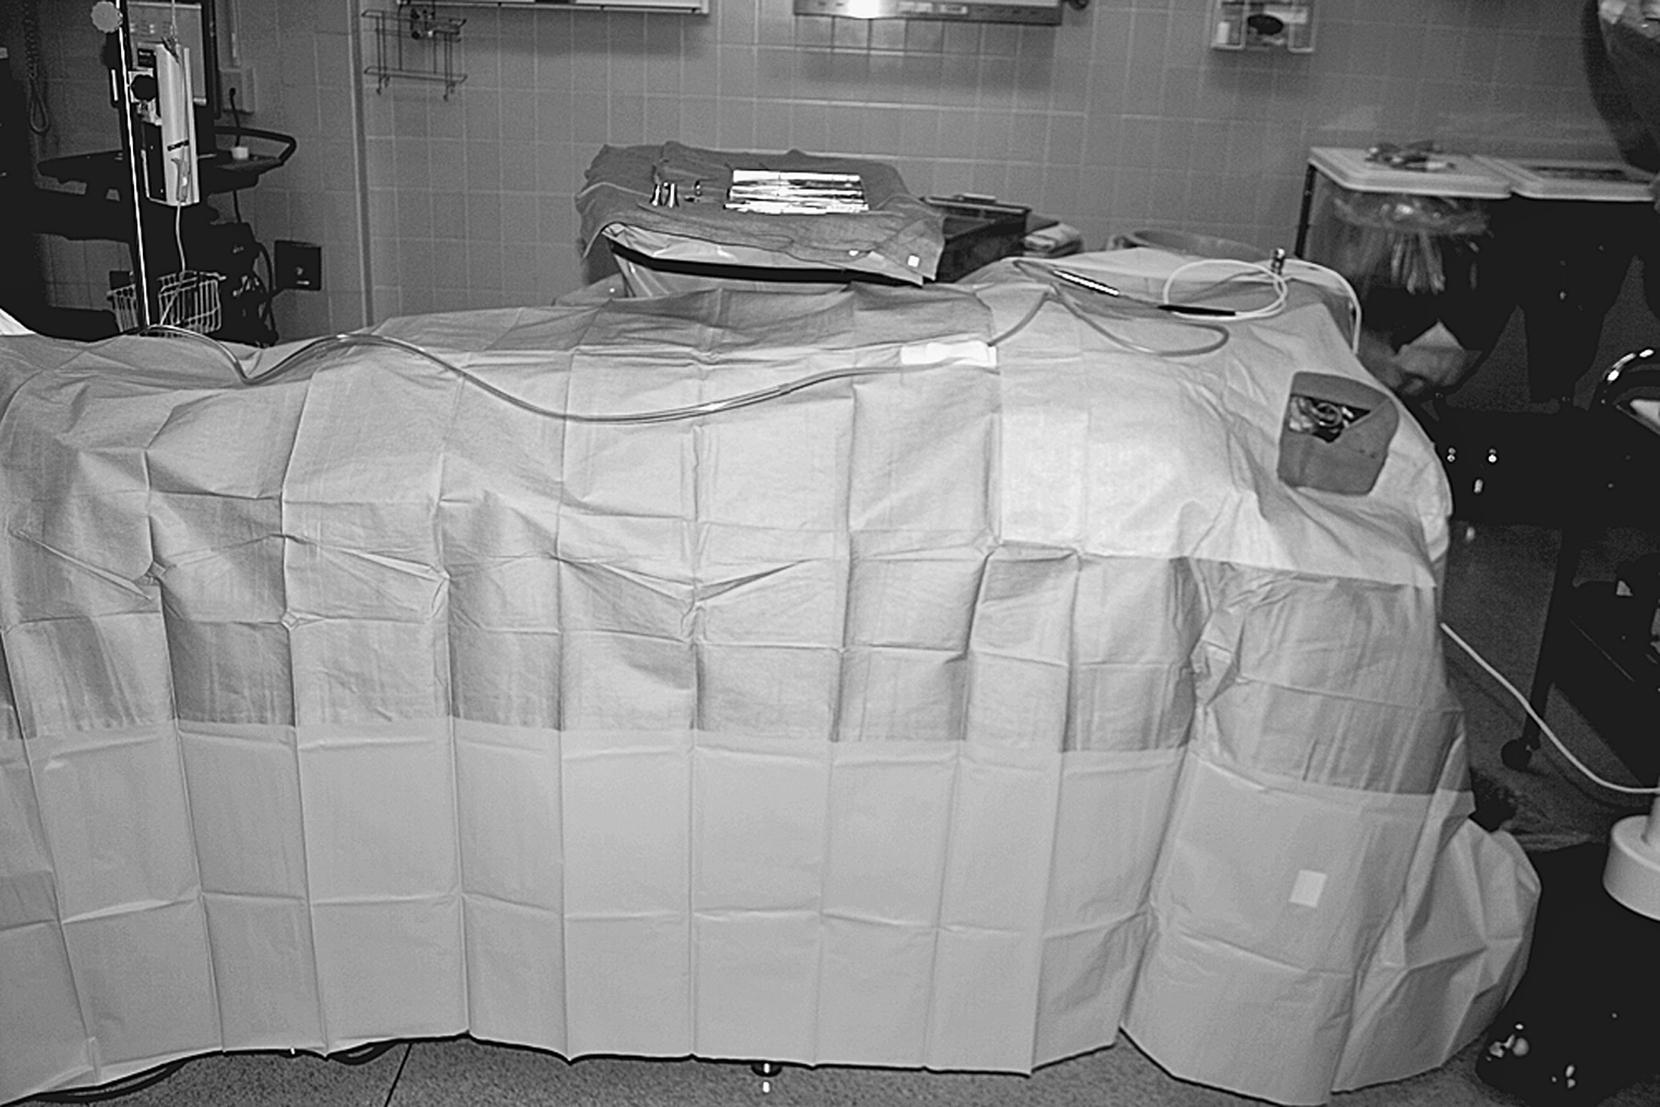
The overall OR setup for routine otologic surgery is shown in Fig. 1.9 . For neurotologic surgery, more space must be available for additional equipment. Middle cranial fossa procedures require some modifications to the OR setup ( Fig. 1.10 ). The essential modification entails the surgeon and the microscope trading places such that the surgeon is seated at the head of the table. Cooperation and careful orchestration among the surgeon, nursing personnel, and anesthesiologist are required for otologic surgery. The needs of the otologist are best served by having the anesthesiologist at the foot of the bed and the scrub nurse opposite the surgeon. Video feed of the procedure to the OR team members helps facilitate the anticipation of surgical needs. Space for additional equipment, such as the facial nerve monitor and/or laser, and the personnel necessary for their operation, should be considered.
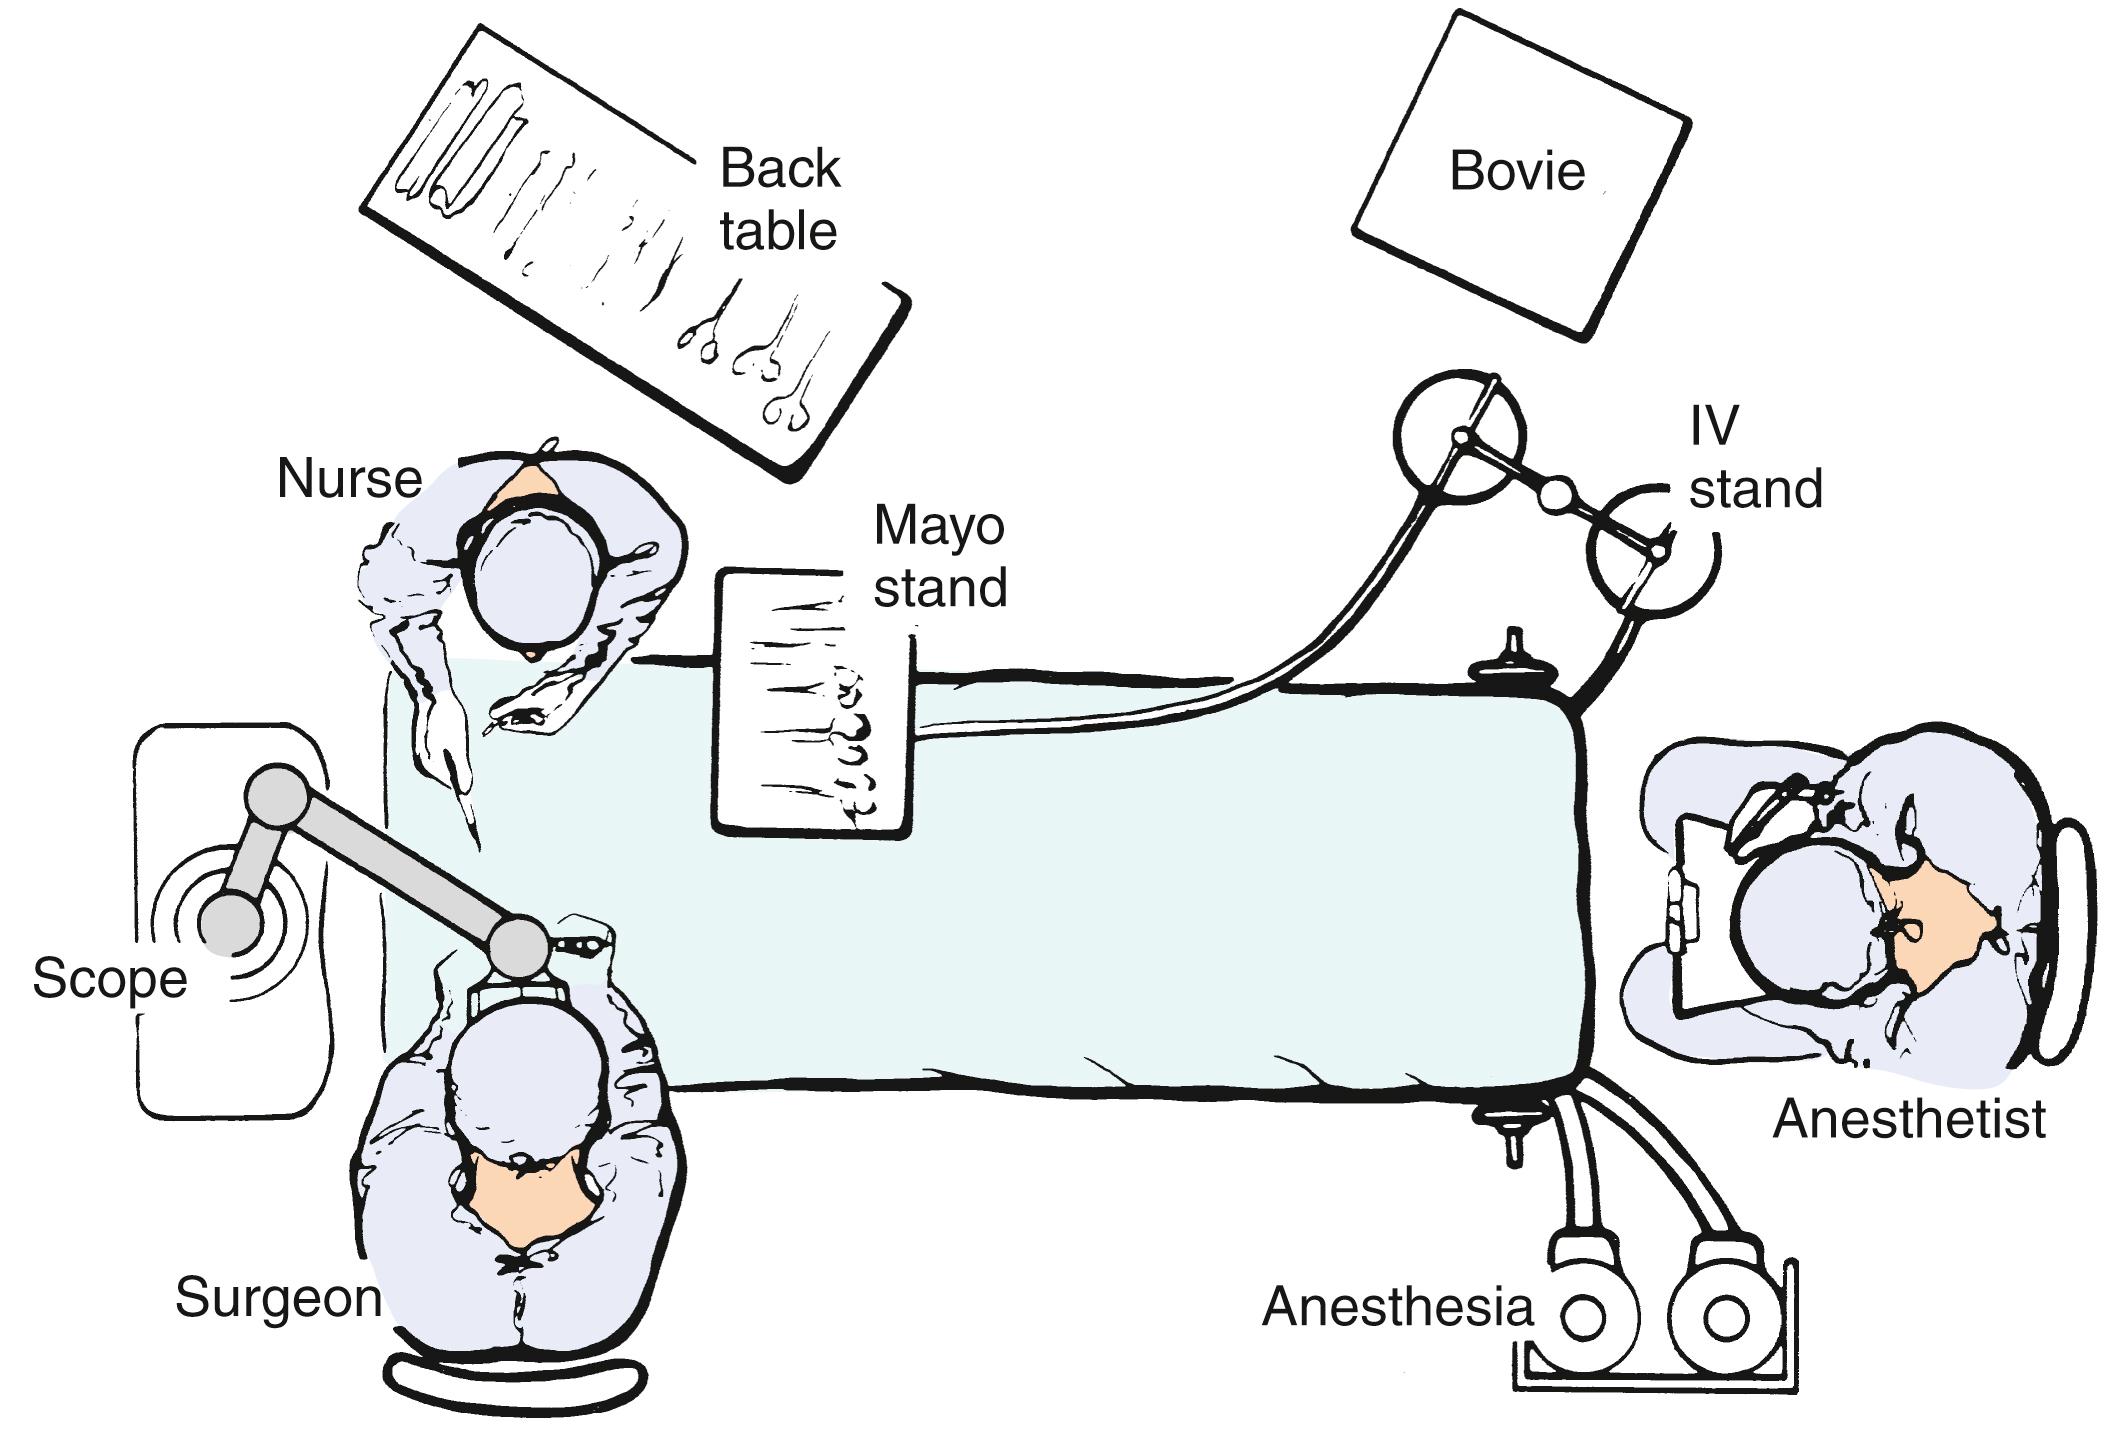
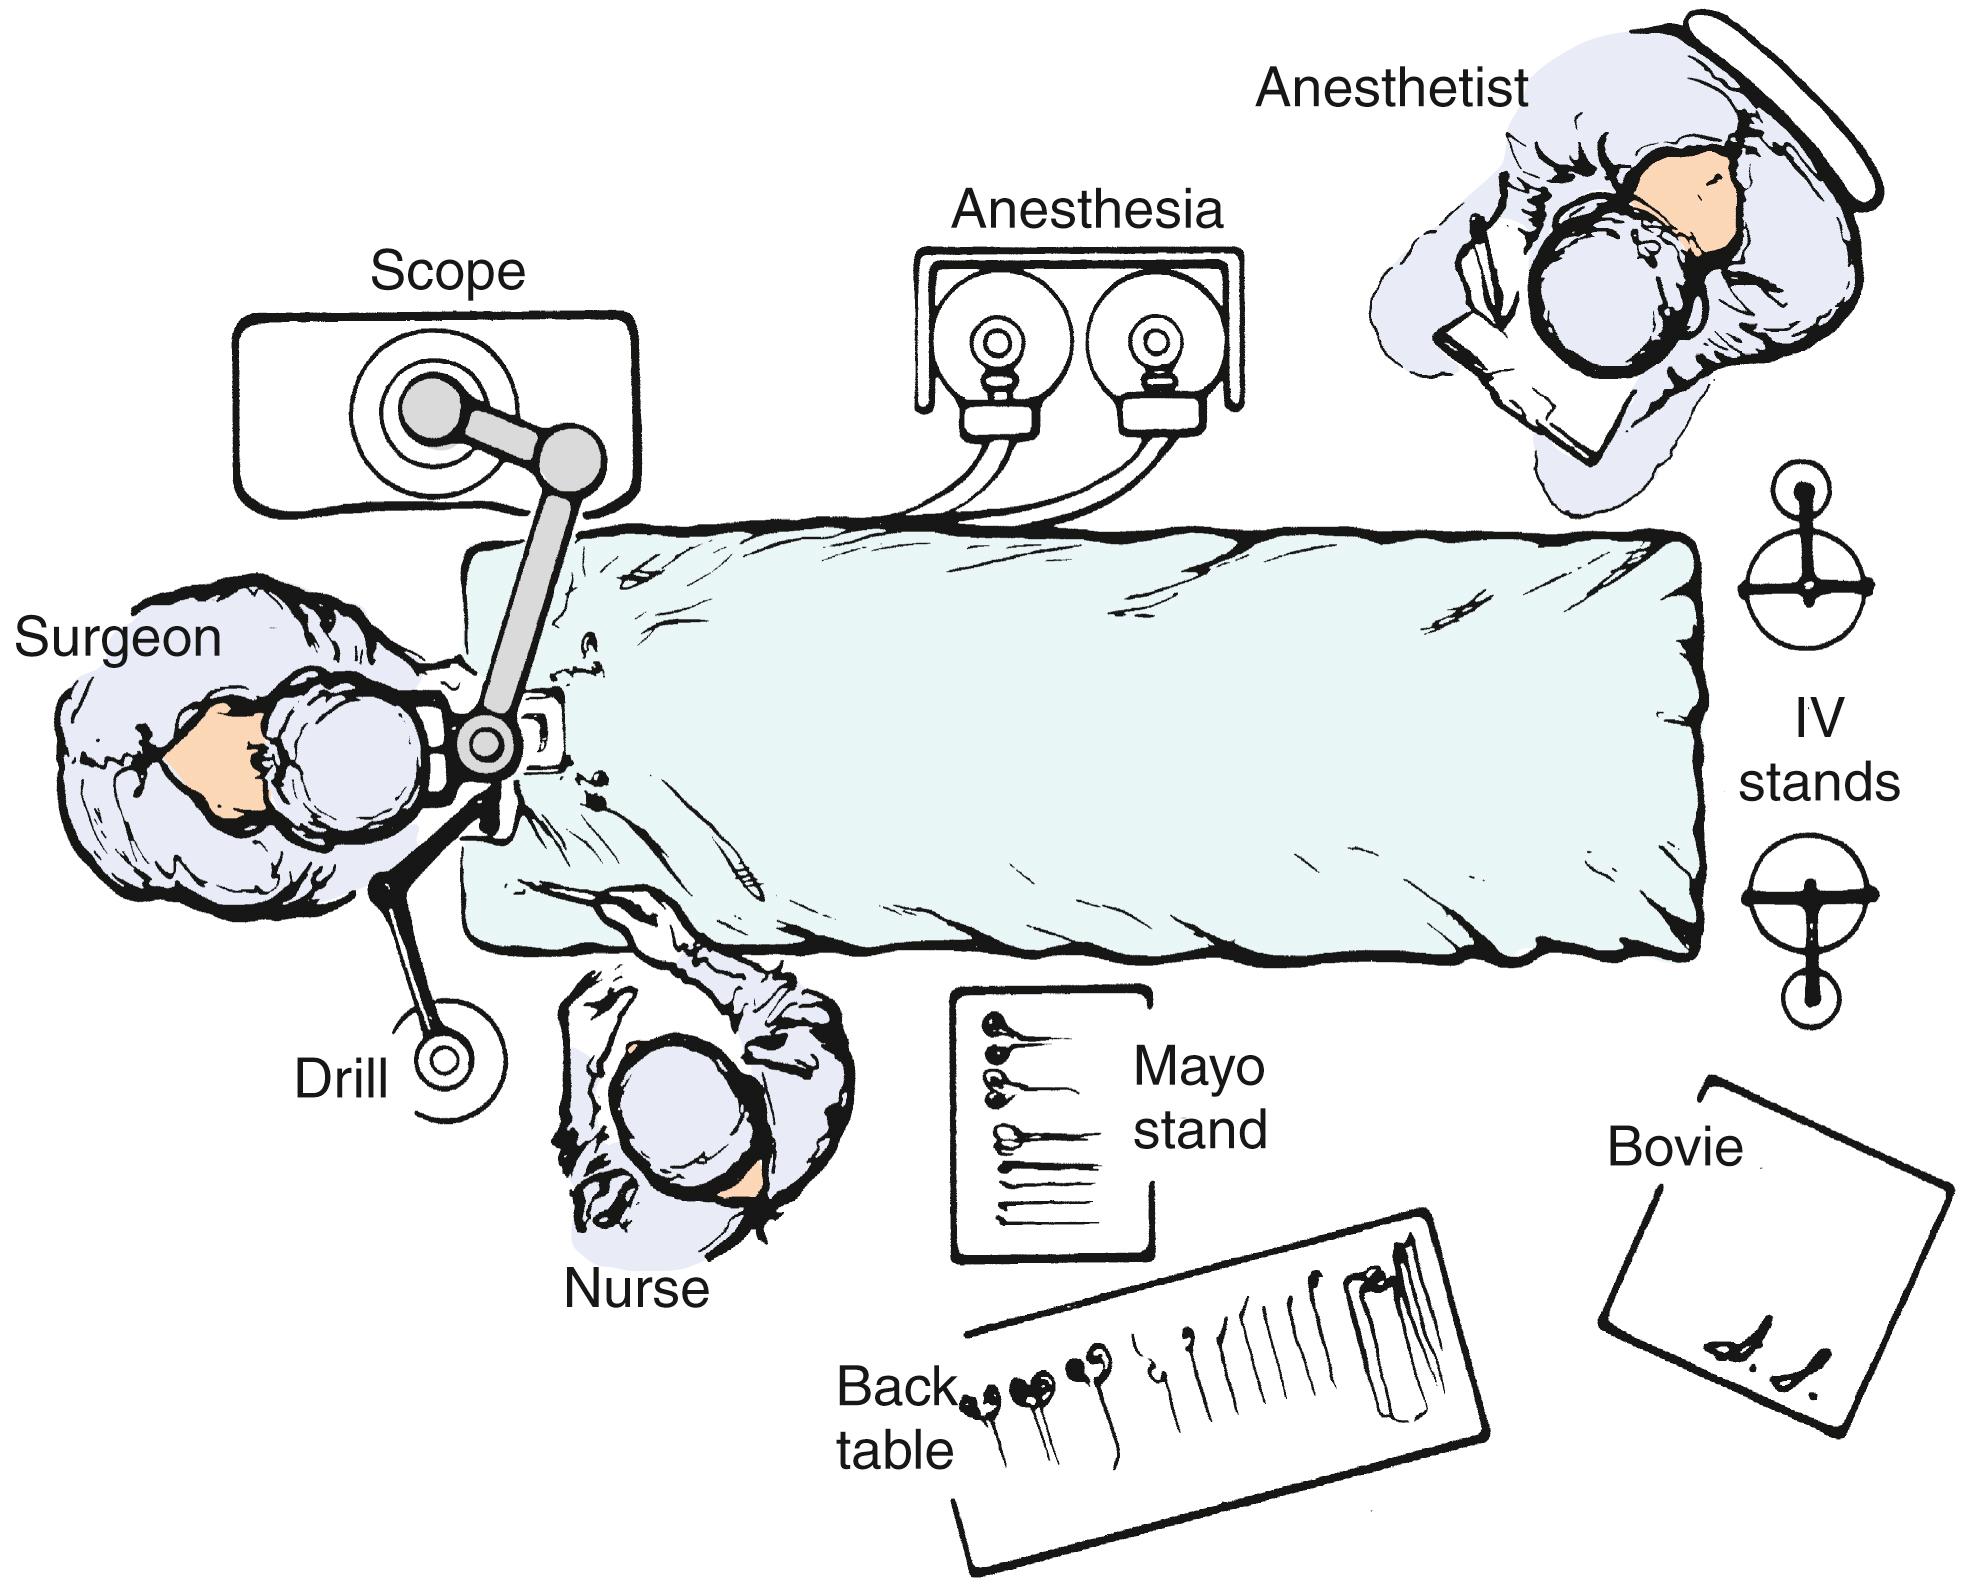
The following description of the instrumentation and operative setup for stapes surgery also provides useful information for other middle ear procedures. Under most circumstances, it is preferable to perform stapes surgery under local anesthesia, and surgeons who do so usually use some type of preoperative sedation. Numerous regimens are available, and their description is beyond the scope of this text. If sedation is administered by the surgeon or nursing personnel without the assistance of an anesthetist or anesthesiologist, the agents used should be short-acting and reversible.
It is far safer for the patient to be psychologically prepared for the procedure than to be oversedated. Monitored anesthesia care may also be performed. This approach requires the presence of anesthesia personnel in the OR to sedate the patient as required and to monitor the vital functions. The surgeon is relieved from this duty, allowing total concentration on the microsurgery.
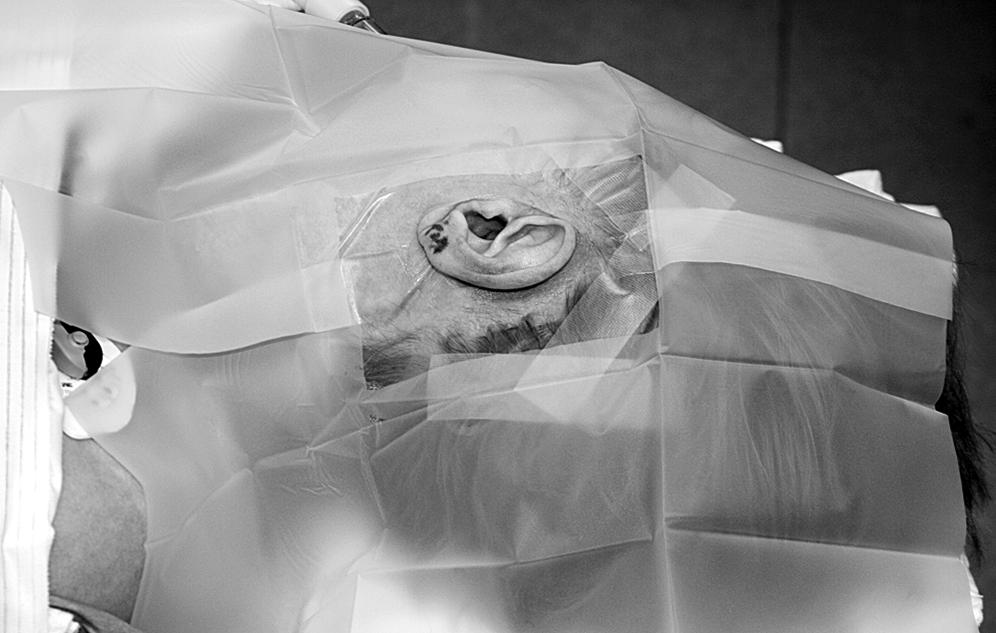
Approximately 30 minutes before the operation, the patient is brought to the preoperative holding area. If the surgeon routinely harvests a postauricular graft, this area is now shaved. A plastic aperture drape is applied to the operative site and trimmed so as not to cover the patient’s face ( Fig. 1.11 ). An intravenous line is initiated, and the patient is now ready to go to the OR. When the patient is on the OR table, the monitors are placed on the patient by the nursing or anesthesia staff. The minimal monitoring includes pulse oximetry, an automatic blood pressure cuff, and electrocardiogram electrodes. The ear and plastic drape are scrubbed with an iodine-containing solution, unless the patient is allergic to iodine. A head drape is applied and the ear draped with sterile towels so as not to cover the patient’s face; this can be facilitated by supporting the drapes with a metal bar attached to the OR table, or by fixing the drapes to the scrub nurse’s Mayo stand ( Fig. 1.12 ).
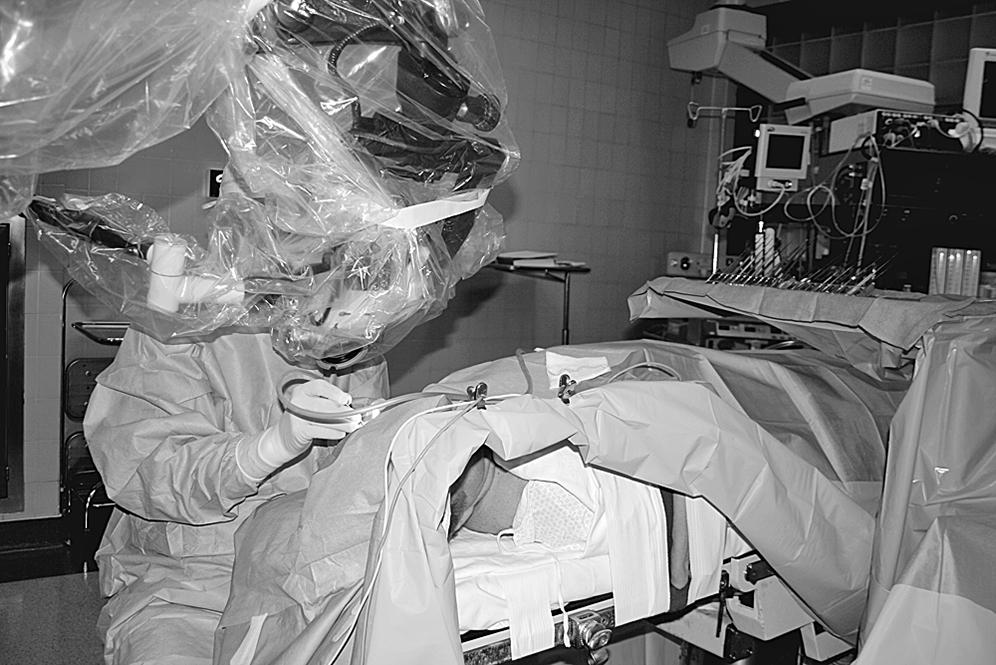
The patient’s head is now gently rotated as far away from the ipsilateral shoulder as possible, and the table is placed in slight Trendelenburg and rotated toward the surgeon. These maneuvers increase the surgeon’s working room and obtain a straight view of the posterior superior aspect of the external auditory canal (EAC). The EAC is irrigated gently with saline heated to body temperature. Vigorous cleaning of the canal is avoided until the ear is anesthetized. The local anesthesia is administered with a plastic Luer-Lok syringe. A 1.5-inch (3.81-cm), 27-gauge needle is firmly attached to the syringe. If the ear is injected slowly and strategically, excellent anesthesia and hemostasis can be achieved with a solution of 1% lidocaine with 1:100,000 epinephrine. When using stronger concentrations of epinephrine (e.g., 1:40,000), the patient’s blood pressure and cardiac status must be considered, in addition to the possibility of mixing errors.
The canal is injected slowly in four quadrants starting lateral to the bony-cartilaginous junction. The final injection is in the vascular strip. If one routinely harvests the fascia or tragal perichondrium, these areas are now injected.
Before describing the stapes surgical instruments, a few general comments are in order. All microsurgical instruments should be inspected periodically to ensure sharp points and cutting surfaces. The instruments for delicate work should have malleable shanks, enabling the surgeon to bend the instruments to meet the demands of the situation.
If the surgeon prefers a total stapedectomy to the small fenestra technique, an oval window seal must be selected. If fascia is used, the tissue is harvested before exposing the middle ear. The tissue is placed on a Teflon block or fascia press to dry. If the perichondrium is preferred, this may be harvested immediately before footplate removal. For the small fenestra technique, a small sample of venous blood is obtained when the intravenous line is inserted. This blood sample is passed to the scrub nurse and placed in a vial on the sterile field.
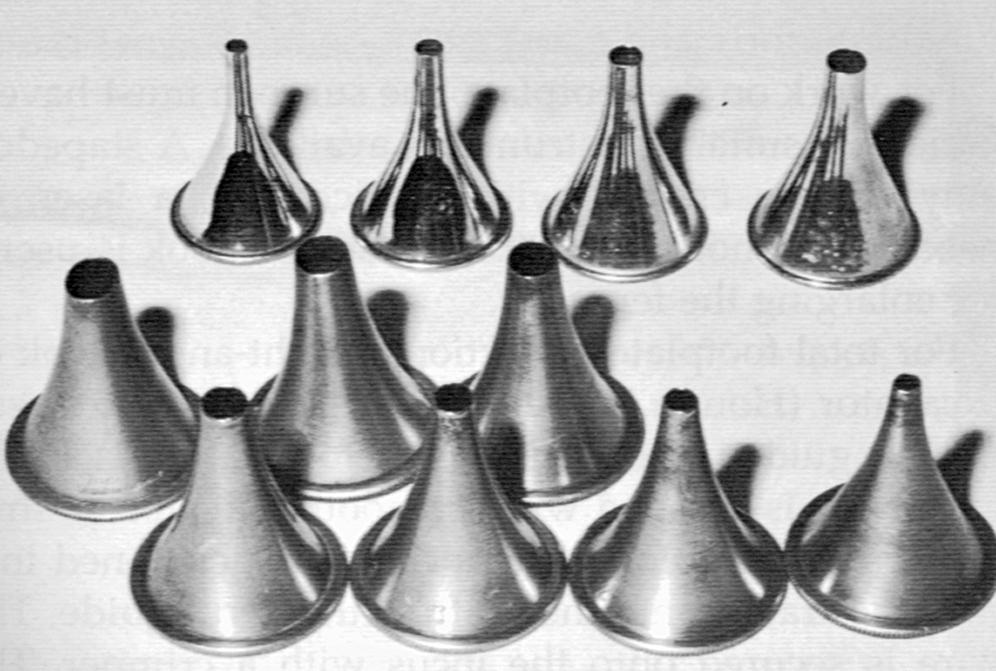
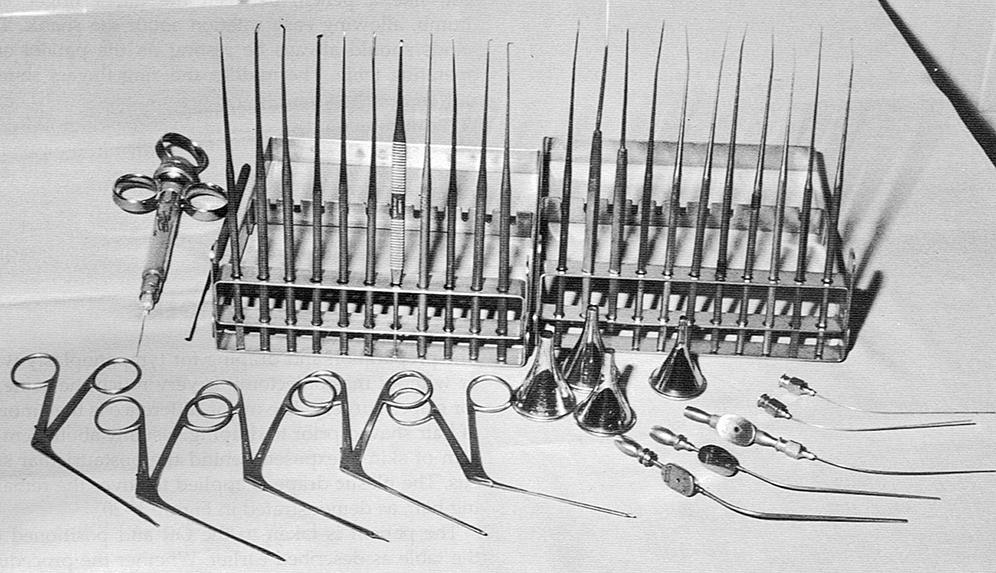
Various ear specula should be available in oval and round configurations, with sizes typically ranging from 4.5 to 6.5 mm ( Fig. 1.13 ). It is always desirable to work through the largest speculum that the meatus permits without lacerating the canal skin. Some surgeons prefer to use a speculum holder for stapes and other middle ear procedures. The tympanomeatal flap is started with incisions made at the 6 and 12 o’clock positions with the No. 1, or sickle, knife. These incisions are united with the No. 2, or lancet, knife. This instrument actually undermines the vascular strip instead of cutting it. The strip is cut with the Bellucci scissors. The defined flap is elevated to the tympanic annulus with the large round knife, known as the large “weapon.” When properly identified, the annulus is elevated superiorly with the Rosen needle and inferiorly with the annulus elevator, or gimmick. Fig. 1.14 shows a typical set of stapes instruments, including suction tips.
Adequate exposure usually requires the removal of the bony ledge in the posterosuperior quadrant. This can be initiated with the Skeeter microdrill and completed with a stapes curette ( Fig. 1.15 ).
From here, the steps differ depending on the technique preferred by the surgeon. The diagnosis of otosclerosis should be confirmed on entering the middle ear and a measurement should be taken from the long process of the incus to the stapes footplate with a measuring stick. The next step is to make a control hole in the footplate with a sharp pick-needle (Barbara needle) or the laser. The incudostapedial joint is separated with the joint knife or small right angle hook, the tendon cut with scissors or a laser, and the superstructure fractured inferiorly and extracted.
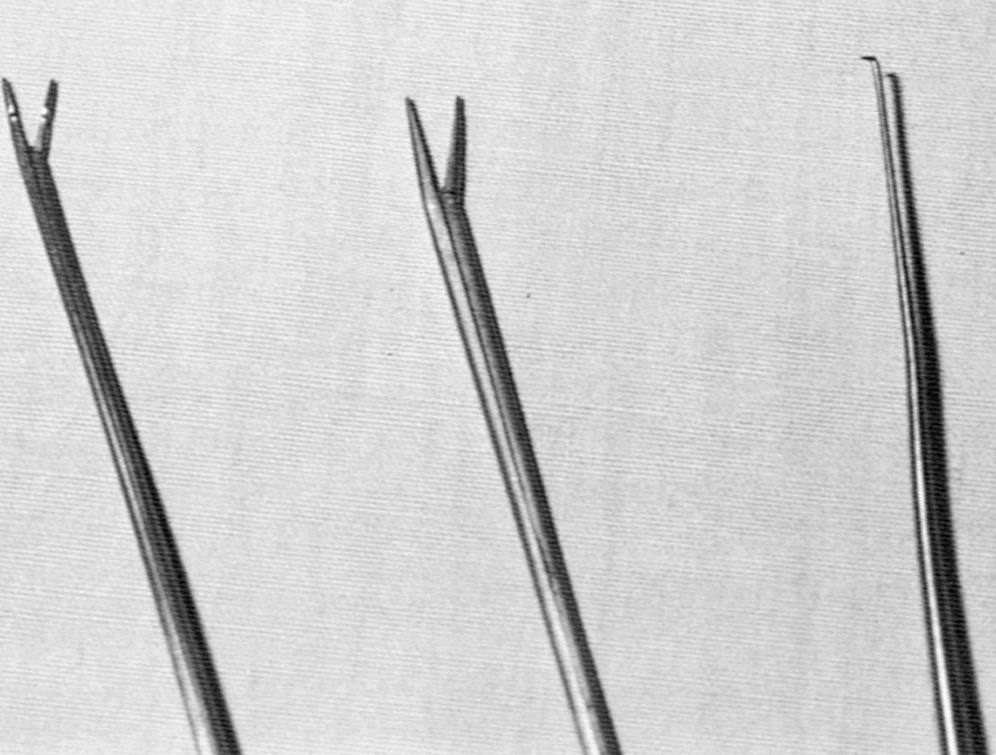
For work on the footplate, the surgeon must have a variety of suitable instruments available. A stapedotomy can be created with a microdrill, laser, or needles and hooks. The 0.3-mm obtuse hook is useful for enlarging the fenestra. For total footplate extraction, a right-angle hook or excavator (Hough hoe) is used. If a graft is to be placed over the oval window, it is guided into place with a footplate chisel.
The prosthesis is grasped with a smooth alligator or strut forceps and placed on the incus. It is positioned on the graft or into the fenestra with a strut guide. A small right-angle hook may be necessary to fine-tune the position of the prosthesis ( Fig. 1.16 ). The wire is secured onto the incus with a crimper or wire-closing forceps. The McGee crimper is useful, especially if followed by a fine alligator forceps for the last gentle squeeze. Nitinol is a metal alloy of nickel and titanium used in stapes prostheses because of its unique ability to secure itself to the incus upon heating. Once the wire is maneuvered into position on the incus, a pulse of laser energy or a brief pulse of heat from a microheating electrode applied to the wire causes the wire to close around the incus. Nitinol is found in prostheses such as the SMart piston (Olympus) or the Eclipse piston (Grace Medical).
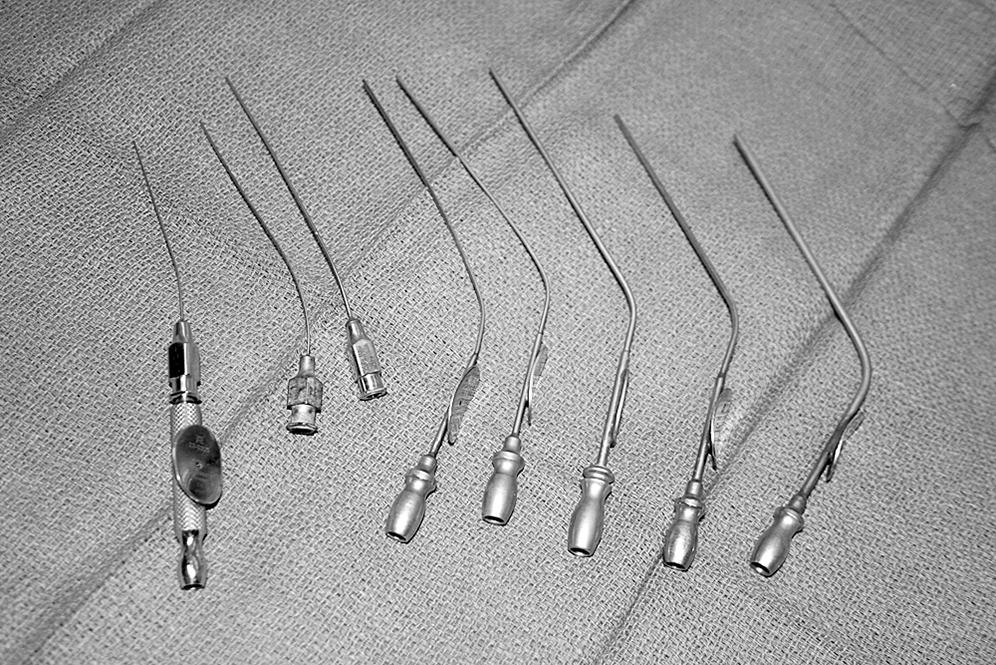
The suction tubes for stapes surgery include Nos. 3 to 7 Fr Baron suctions, plus Rosen needle suction tips (18 to 24 gauge) with the House adapter ( Fig. 1.17 ). The Rosen tips are useful when working near the oval window with the surgeon’s thumb off the thumb port.
Excessive ear packing material after stapes surgery is not necessary. Absorbable gelatin sponge may be placed across the flap incisions to secure the flap in place. Antibiotic ointment may also be instilled to hold the flap in place. A piece of cotton suffices as a dressing, unless a postauricular or endaural incision has been made, in which case a mastoid dressing is applied.
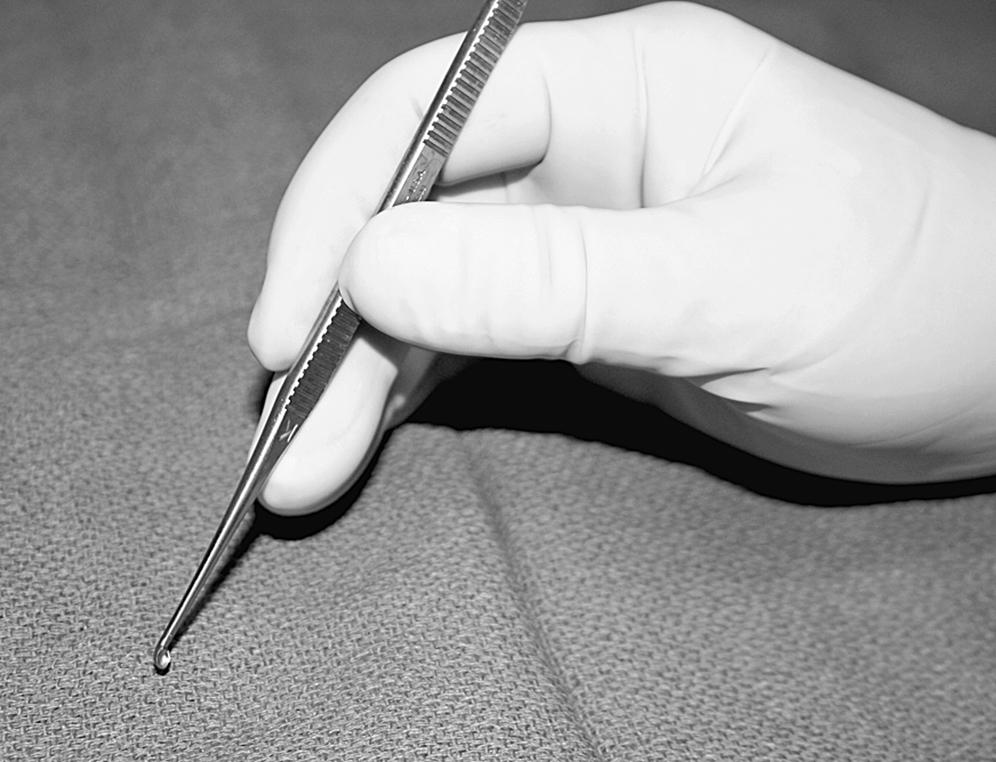
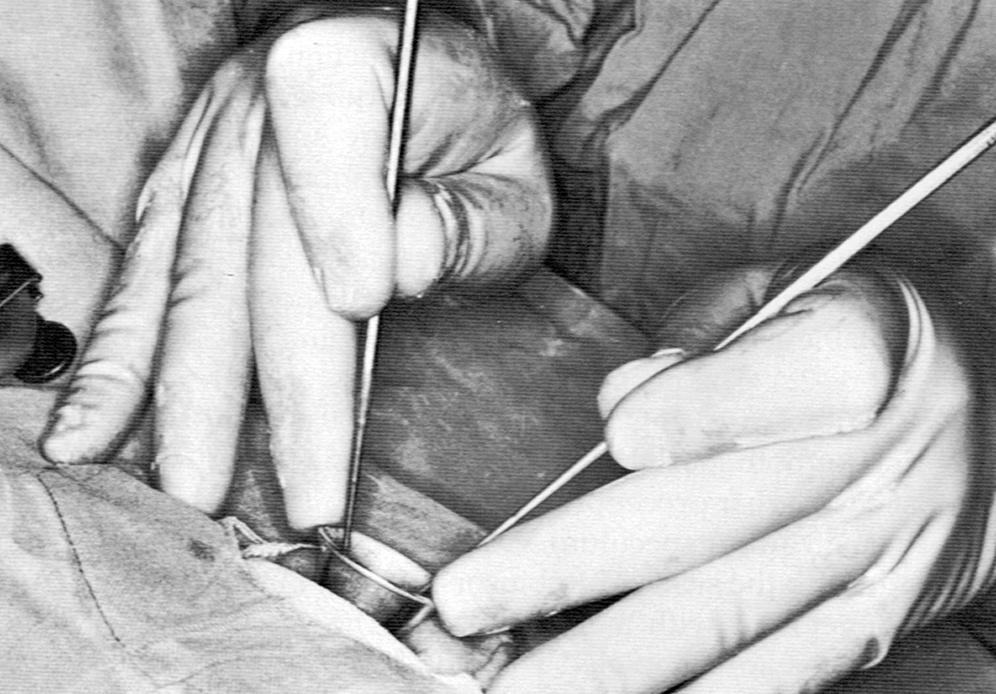
For all middle ear procedures, the surgeon should hold the instruments properly. The instrument should rest like a pencil between the index finger and thumb, allowing easy rotation around the shank. The fingers and hands should always be anchored on the patient or the OR table. The middle and ring fingers should rest on the speculum so that the hand moves as a unit with the patient. Proper hand position and holding of the instruments should afford the surgeon an unimpeded view ( Fig. 1.18 ).
The preparation and draping for tympanoplasty with or without mastoidectomy are much the same as for stapes surgery. The major difference is the amount of hair shaved before draping. Usually, enough hair is shaved to expose approximately 3 to 4 cm of skin behind the postauricular sulcus. The plastic drape is applied to cover the remaining hair (see Fig. 1.11 ).
The patient is positioned on the OR table as described earlier. Whether the procedure is performed under local or general anesthesia depends on the extent of the surgery, the surgeon’s preference, and the desire of the patient. After appropriate sedation or induction of the anesthesia, the ear and plastic drape are scrubbed with the proper solution or soap. Some surgeons place a cotton ball in the meatus if a perforation exists, preferring not to allow the preparation solution to enter the middle ear. The field is draped as described earlier, the head is rotated toward the contralateral shoulder and the table is placed in slight Trendelenburg position ( Fig. 1.19 ). The postauricular area, canal, and tragus (if necessary) are injected with 1% lidocaine with 1:100,000 epinephrine for local and general anesthesia cases.
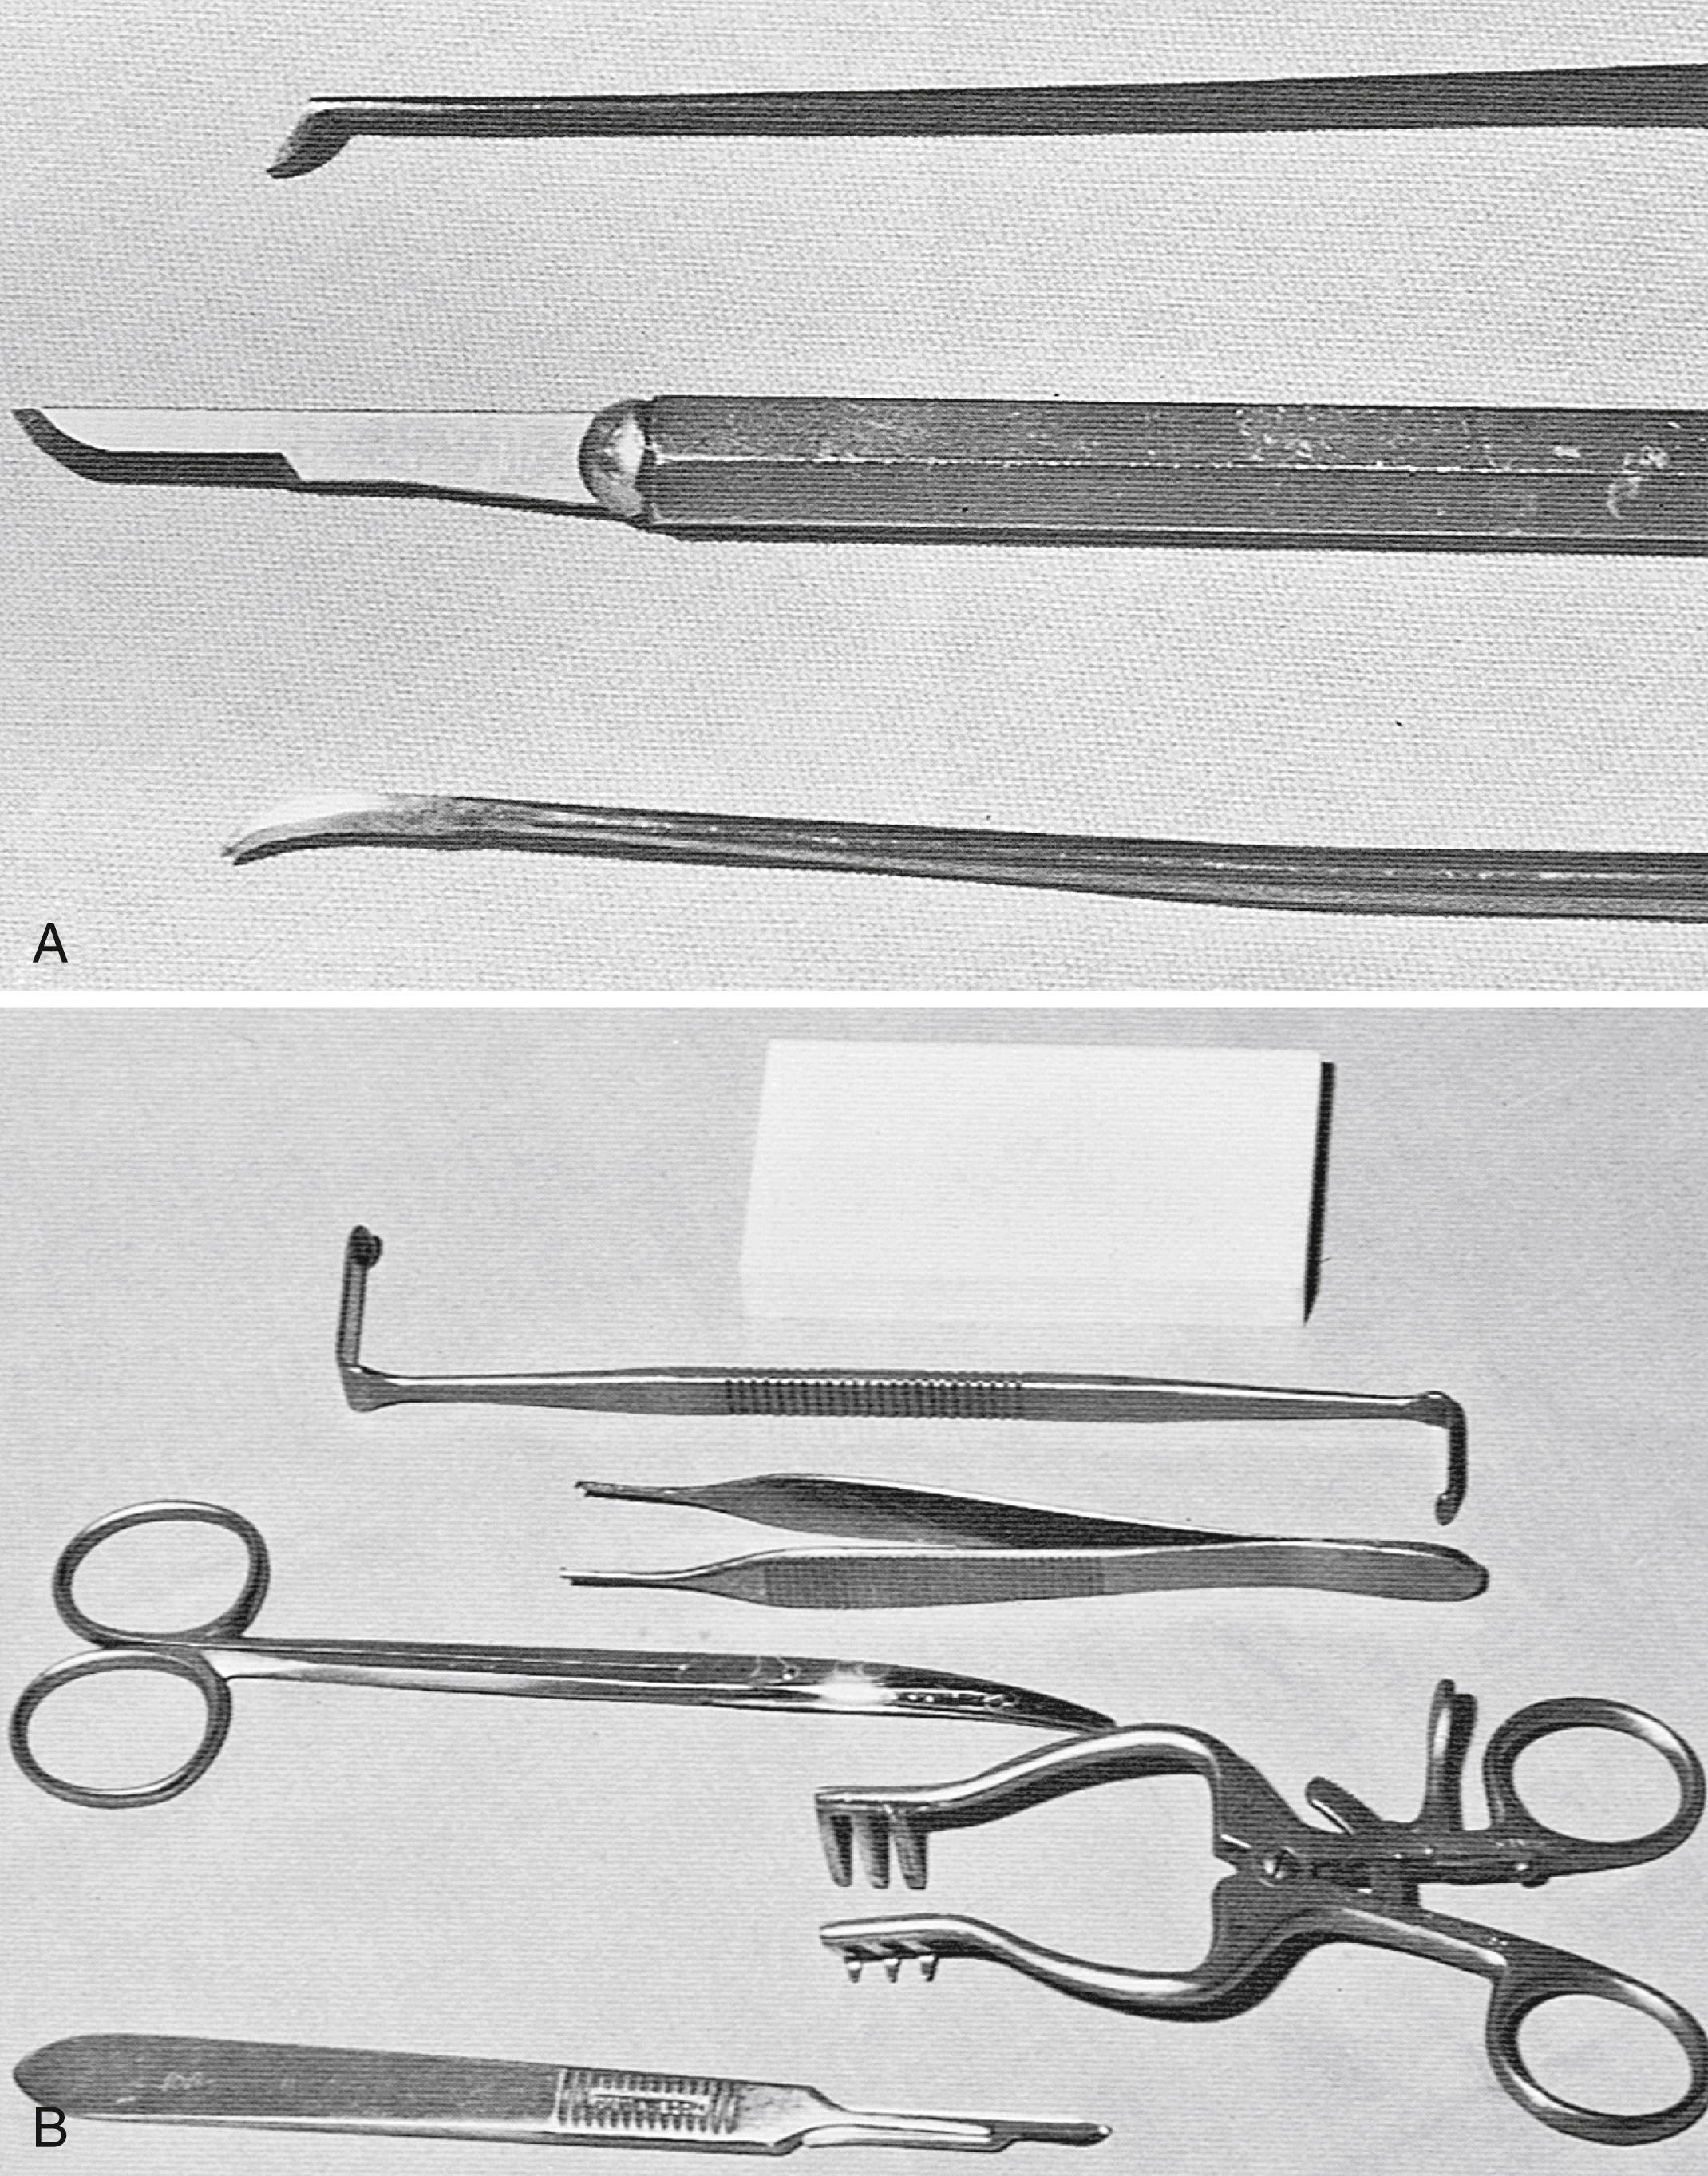
Most chronic ear procedures begin in a similar fashion. Through an ear speculum, vascular strip incisions are made with the sickle or Robinson knife and united along the annulus with the lancet knife. The vascular strip incisions are completed with a No. 64 or 67 Beaver blade. This same blade can be used to transect the anterior canal skin just medial to the bony-cartilaginous junction. The postauricular incision is made with a No. 15 Bard-Parker blade behind the sulcus. The level of the temporalis fascia is identified, and a small self-retaining (Weitlaner) retractor is inserted. The fascia is cleared of areolar tissue and incised. A generous area of fascia is undermined and removed with Metzenbaum scissors. The scrub nurse can assist by using a Senn retractor to elevate the skin and soft tissues away from the fascia. The fascia is thinned on the Teflon block and dehydrated by placing it under an incandescent bulb, carefully monitoring its progress. The fascia may also be dehydrated by placing it on a large piece of Gelfoam and compressing this complex in a fascia press. Fig. 1.20 shows the instruments used in the initial stages of chronic ear surgery.
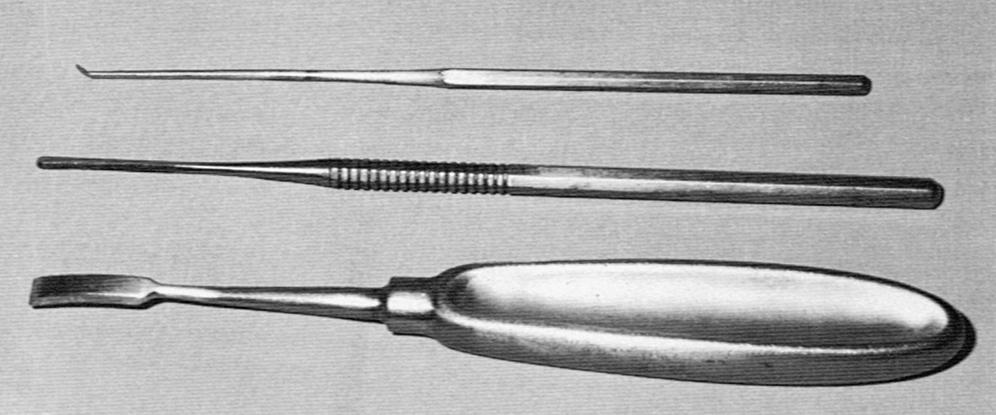
Continued postauricular exposure is obtained by incising along the linea temporalis with a knife or the electrocautery. A perpendicular incision is made down to the mastoid tip. The soft tissues and periosteum are elevated with a Lempert elevator ( Fig. 1.21 ), the vascular strip is identified, and a large self-retaining retractor is inserted. A very large retractor, such as an Adson cerebellar retractor with sharp prongs, is preferred.
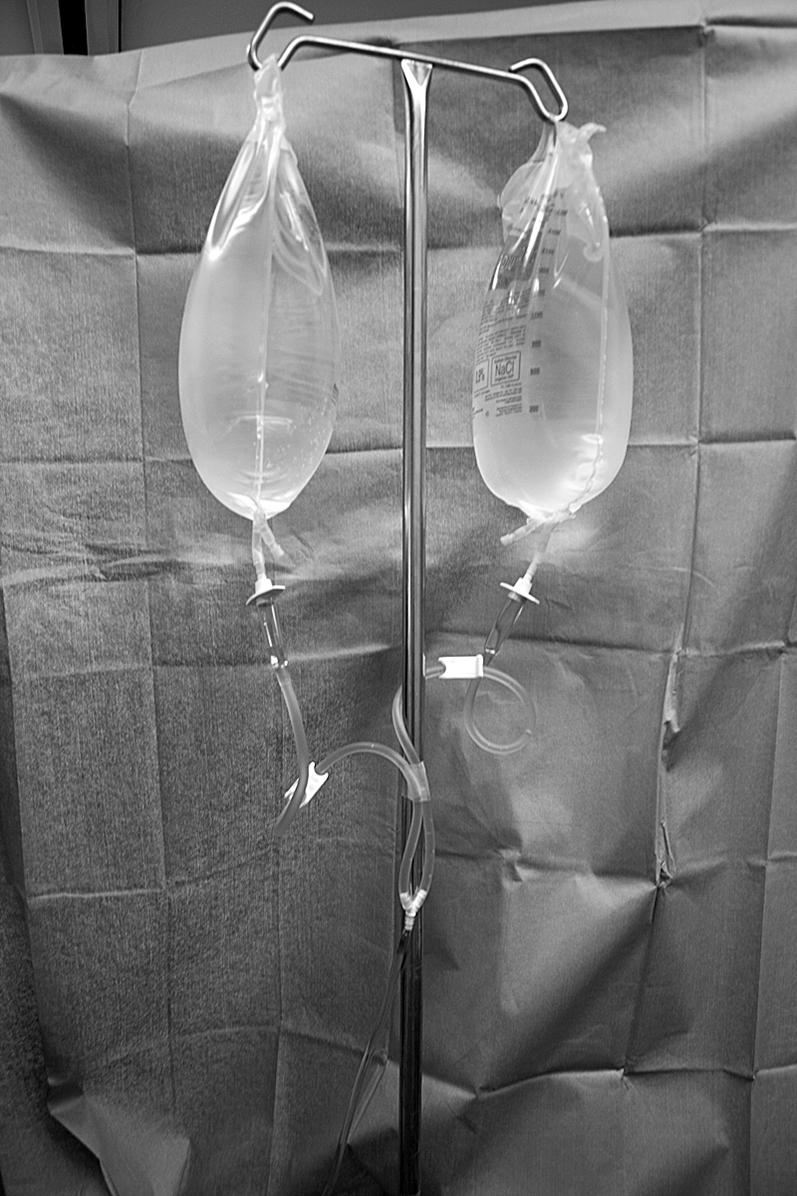
Next, under the microscope, the remaining anterior and inferior canal skin is removed down to the level of the annulus with the large weapon. The plane between the fibrous layer of the drum remnant and the epithelium is developed with a sickle knife, and the skin pulled free with a cup forceps. The canal skin is placed in saline for later use as a free graft. The ear canal is enlarged with the drill and suction-irrigators. An angled handpiece and medium to small cutting burr are used. Irrigation through the suction-irrigators is done with a physiologic solution such as Tis-U-Sol, lactated Ringer, or saline. Two large (3000 mL) bags of irrigant are hung and connected by way of a three-way stopcock to the delivery system ( Fig. 1.22 ).
For mastoidectomy, the surgeon must have a full array of cutting and diamond burrs, and a complete set of suction-irrigators. It is advisable to have bone wax and absorbable knitted fabric (Surgicel) readily available. Cholesteatoma removal can be accomplished with middle ear instruments such as the gimmick, weapon, and fine scissors.
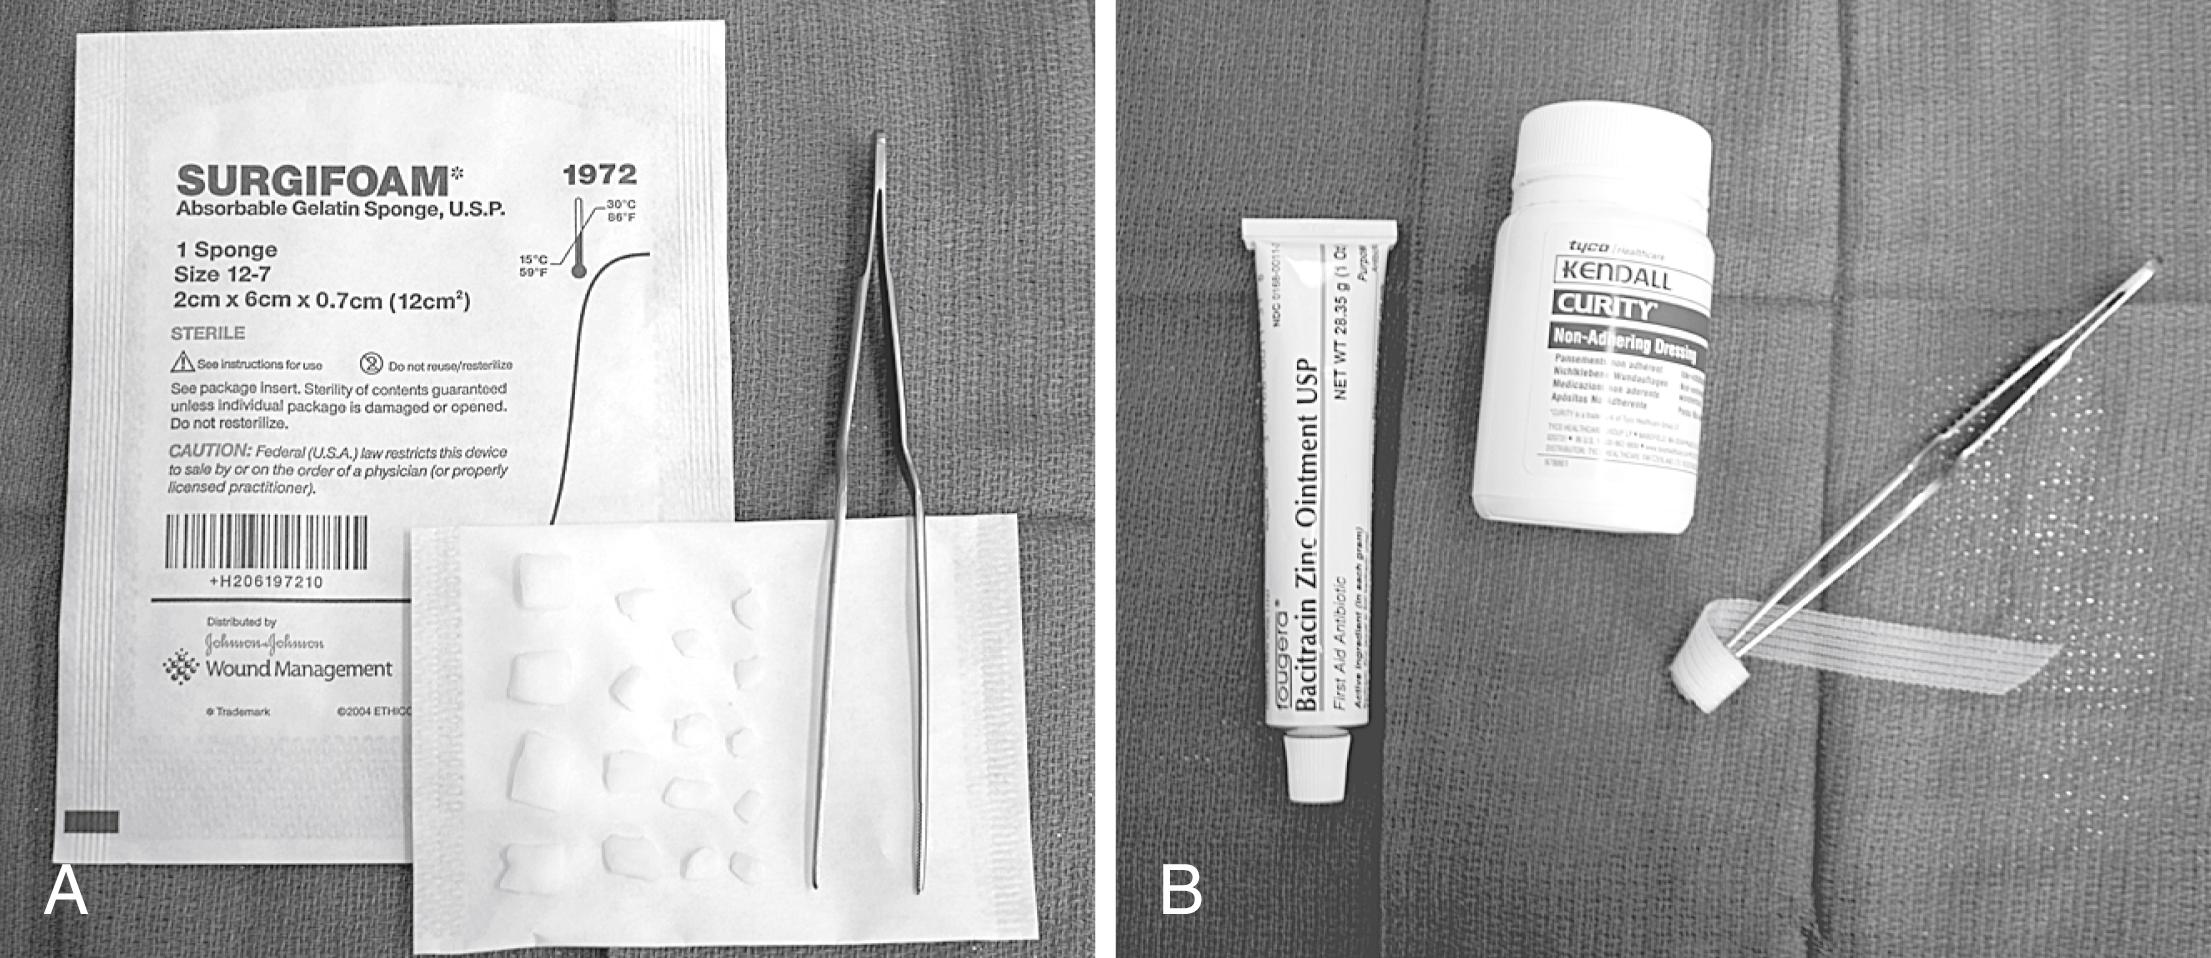
Although the setup for closing and packing after chronic ear surgery varies with the specifics of the situation, a few generalities should cover most situations encountered by the otologist. To maintain the middle ear space, silicone elastomer (Silastic) sheeting works well and is readily available. This sheeting comes in various thicknesses, with and without reinforcement. For middle ear packing, absorbable gelatin sponge (Surgifoam) is the usual choice, soaked in saline or an antibiotic otic preparation. Surgifoam is also used to pack the EAC, although some surgeons prefer an antibiotic ointment, as described in the section on stapes surgery. For meatoplasty packing, a 1-inch (2.54-cm) nonadhesive Curity packing strip or nasal packing gauze is saturated with antibiotic ointment and rolled around the tip of a bayonet forceps; this creates a plug that conforms to the new meatus and is easily removed ( Fig. 1.23 ).
Wound closure is accomplished by closing the periosteal layer and placing deep dermal interrupted absorbable sutures. The skin does not typically require a separate suture closure as Steri-Strips provide adequate approximation for healing. The wound is finally covered with a standard mastoid dressing.
Some additional instruments that prove handy in many chronic ear procedures include an ossicles holder, Crabtree dissectors, Zini mirror, right-angle hooks, and the House-Dieter malleus nipper. It is impossible to describe instruments for every conceivable situation, but the foregoing should cover most of the needs of the otologist.
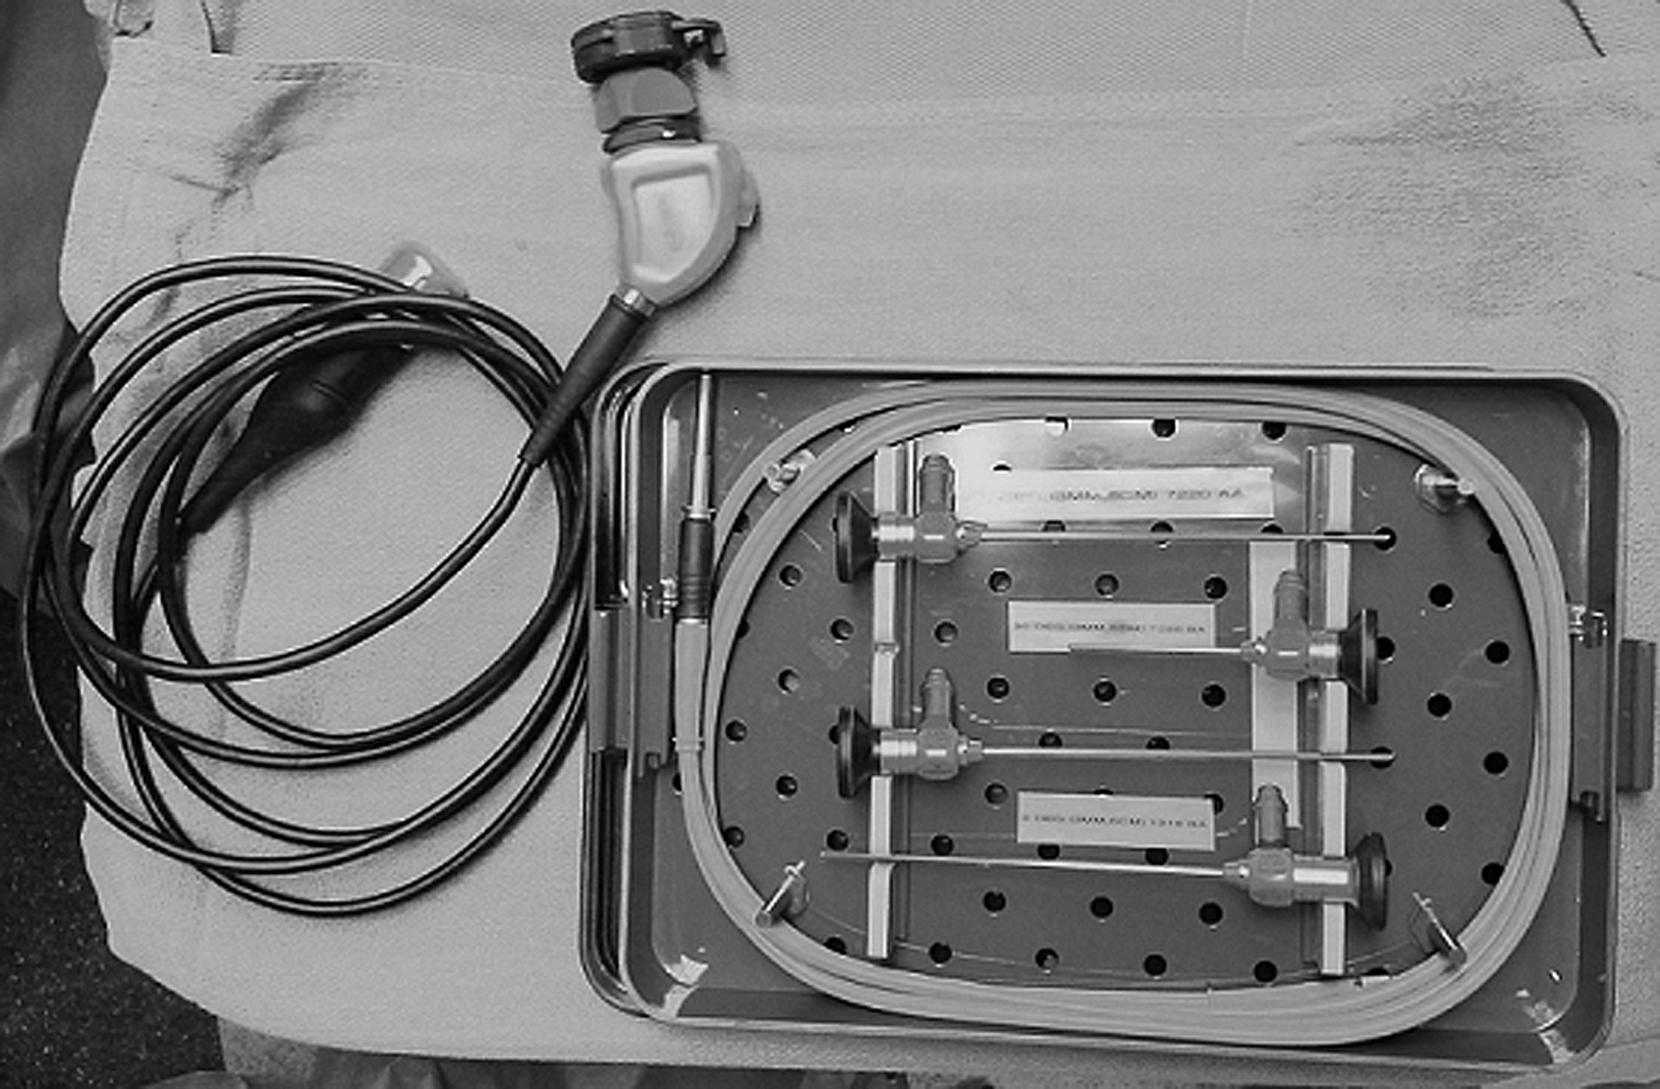
Endoscopic tympanoplasty is a novel technique for surgically addressing tympanic membrane perforations, cholesteatomas, and other middle ear issues. The transcanal endoscopic view may afford a wide view of the middle ear, encompassing areas that are not possible to visualize with the traditional operating microscope. Specialized endoscopes ( Fig. 1.24 ) and instrumentation have been developed for endoscopic middle ear surgery. Many of the same instruments used in standard otologic tympanoplasty may be used; however, instruments with single and double curvature and microtips have been found useful. We have found that a curved suction, Thomassin dissector, and suction round knife are particularly useful during endoscopic cases. An endoscopic tower with a monitor, camera input, and light source is positioned across the operating table from the surgeon for ergonomic viewing by the surgical team. Apart from these aspects, the patient is positioned in the room as in traditional otologic surgery and prepared and draped similarly.
Become a Clinical Tree membership for Full access and enjoy Unlimited articles
If you are a member. Log in here