Physical Address
304 North Cardinal St.
Dorchester Center, MA 02124
The eyelids have two lamellae – an anterior lamella of skin and orbicularis muscle and a posterior lamella of tarsal plate and conjunctiva.
Partial-thickness defects of the lid or periocular region require reconstruction of only the anterior covering layer. This is achieved with a skin graft (separated from its blood supply) or a skin flap (with its blood supply intact).
Full-thickness eyelid defects require the reconstruction of the posterior lining layer ( Ch. 16 ) as well as the anterior covering layer. When both of these layers have to be reconstructed at least one of them must have a blood supply. This means combining an anterior (skin) flap with a posterior graft, or an anterior (skin) graft with a posterior flap. Alternatively, both may be flaps. A free graft placed on another free graft will fail.
The reconstructed lid needs support at both ends. This is particularly true in the lower lid. If either canthal tendon has been disrupted it must be reconstructed to restore attachment to the normal anchor points on the orbital rim – the posterior lacrimal crest medially and the lateral orbital rim, in the region of Whitnall's tubercle, laterally.
In planning the method of reconstruction avoid excess tension or distortion. Design the flap so that any tension is parallel to the lid margins – horizontal rather than vertical. Try to match a skin graft colour accurately with careful choice of the donor site.
The techniques described in this chapter may be used alone to reconstruct the anterior covering lamella in partial-thickness defects of the periocular region, or within the lids if the posterior lamella is intact. They may also be used in combination with techniques described in Ch. 16 to reconstruct both lamellae in full-thickness lid defects.
Skin grafts
full thickness
split thickness
Skin flaps
advancement
rotation
transposition
Unlike most skin flaps, where some tension is inevitable, skin grafts fill a defect with no residual tension. The risk of distortion of the lid margin is therefore minimal providing the graft is of adequate size.
A skin graft must be placed on vascularised tissue. See Ch. 2 , Sect. C , p. 37 for donor sites, techniques of fixation of grafts and their complications.
In the preseptal area of the upper lid thin skin is required. This should be full-thickness skin from the opposite upper lid if possible, or a split skin graft for larger defects. The best colour match is eyelid skin.
Full-thickness grafts contract very little and are preferable to split-thickness grafts whenever possible. The colour match and mobility are also superior.
Excise the area to a depth sufficient to clear the lesion. Make a template of the area and prepare a suitable graft (see 2.8–2.10 ). Upper lid skin is ideal for the upper or lower lids, if available.
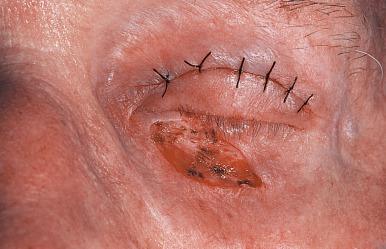
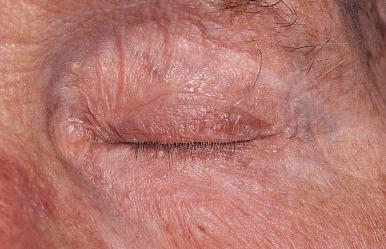
Place the graft and fix it with a bolster (see Figs 2.12a , b , 15.4b , c ) because the upper lid is more mobile than the lower lid. Quilting sutures are an alternative method of fixation (2.14).
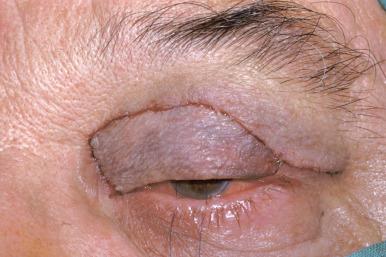
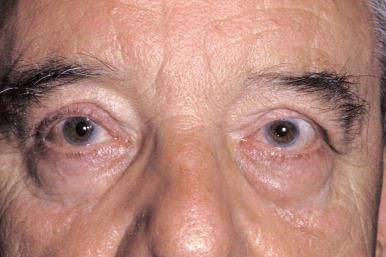
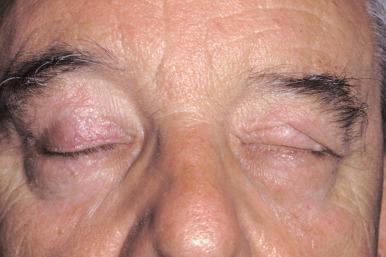
Defects superior to the medial canthal tendon may be reconstructed with a glabellar or other local skin flap (15.13–15.15). Inferior to the tendon a skin graft is usually preferable.
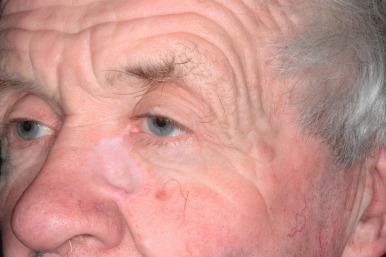
Split-thickness grafts contract more than full-thickness grafts but for larger eyelid defects, particularly in the upper lid, they are preferable if insufficient skin is available from the opposite upper lid, in which case alternative donor sites have to be considered.
Excise the lesion and harvest a split skin graft of suitable size (see 2.11 ). Suture the graft into the defect without tension, allowing a small overcorrection to compensate for later contraction.
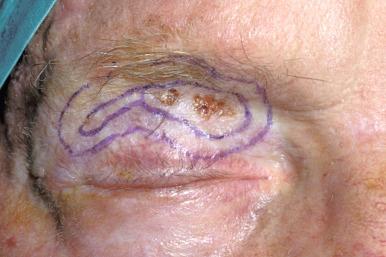
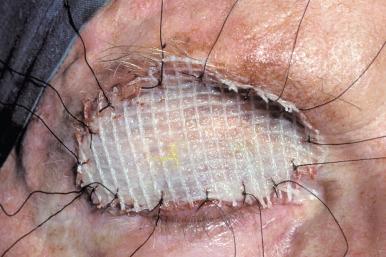
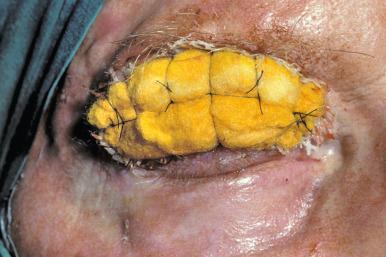
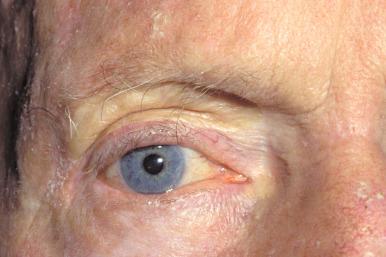
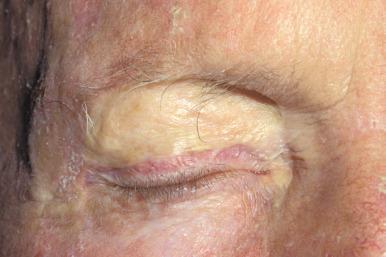
See 2.11 .
Skin flaps used to reconstruct the periocular tissues are almost always local flaps with a random pattern blood supply. Flaps with an axial pattern blood supply are used occasionally. The general rule that random pattern flaps should have a length/breadth ratio of 1 : 1 can be relaxed in reconstruction of the face because of the rich blood supply compared with the skin of the trunk or limbs. Because skin flaps have an intact blood supply it is not essential for the posterior lamella to be vascularised (see Introduction to Chs 15 and 16 ). Skin flaps are undermined within the layer superficial to the facial muscles (usually the subcutaneous fat or fascia) to allow movement to their new site with a minimum of tension. If the skin is very thin both the support and the blood supply of the flap are improved if the dissection is just deep to the orbicularis muscle layer.
There are three basic patterns in the design of skin flaps – advancement, rotation and transposition flaps. These are described later in this chapter. All skin flaps create inherent tension. This is because, unlike skin grafts, no extra tissue is added to the area to allow closure of the primary defect. The transfer of the flap into the primary defect creates a secondary defect which requires closure separately.
In an advancement flap or a rotation flap the secondary defect is ‘virtual’ – the base of the flap is stretched to allow closure of the primary defect without the creation of a true secondary defect. It is made possible by wide undermining of the skin around the flap. The disadvantage of these flaps is that they tend to pull back toward the origin of the flap, creating tension at the site of the primary defect. This demands particular care in their design close to the lid margins. Tension must be strictly horizontal, not vertical, if lid margin distortion is to be avoided.
A transposition flap, by contrast, creates little tension across the primary defect after closure. There is tension, however, in the closure of the secondary defect. The vector of tension is across the line of the secondary defect. This is reduced by adequate local undermining.
Guidelines for the use of each flap are given with the description of each procedure.
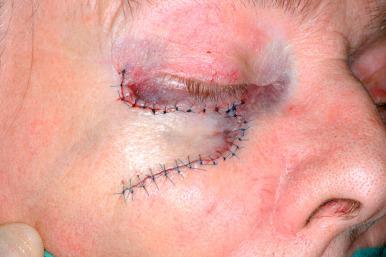
Small defects may be reconstructed simply with an advancement of local skin. The design should ensure that tension through the flap is horizontal, not vertical, in the upper cheek to reduce the risk of distortion of the lid margin.
Close the primary defect in two layers with 4/0 absorbable sutures to the subcutaneous fat layer and with 4/0 or 6/0 sutures to the skin. Close the edges of the flap in the same way. If dog-ears form either side of the base of the flap when it is advanced, they may be excised by carefully cutting around the base of each triangle. Stay within normal skin to avoid compromising the blood supply to the flap.
Become a Clinical Tree membership for Full access and enjoy Unlimited articles
If you are a member. Log in here