Physical Address
304 North Cardinal St.
Dorchester Center, MA 02124
Make sure that the potential complications of applying and maintaining a cast or splint are less severe and are less likely than the complications of an untreated injury.
A poorly made splint/cast can result in pressure sores, compression neuropathies, joint stiffness, and complex regional pain syndrome.
Never place a circumferential rigid dressing (cast) over an increasingly edematous limb because this can result in compartment syndrome.
Elastic bandages such as an all-cotton elastic (ACE) bandage should be loosely applied so that the elasticity can accommodate any future swelling.
The elbows, forearms, and the lower leg and foot have the highest risk of compartment syndrome after cast application. Use caution when applying a cast in the acute setting.
Because plaster can expand, it is better to use plaster rather than the more rigid fiberglass cast in the acute setting.
Plaster and fiberglass cure with an exothermic reaction; thus, inadequate padding, lack of exposure to ambient air (under a blanket), or use of water that is above room temperature can result in thermal injuries, including second-degree burns.
For intraarticular or periarticular fractures, the bone proximal and distal to the joint involved should be included (one above and one below).
For extraarticular fractures, immobilize one joint above and one joint below.
Immobilizing more joints than is necessary can result in permanent iatrogenic loss of joint motion.
Immobilization of fewer joints than is necessary can result in fracture displacement, neurovascular injury, and unnecessary pain and suffering.
Examples of correct immobilization:
Wrist fracture (distal radius):
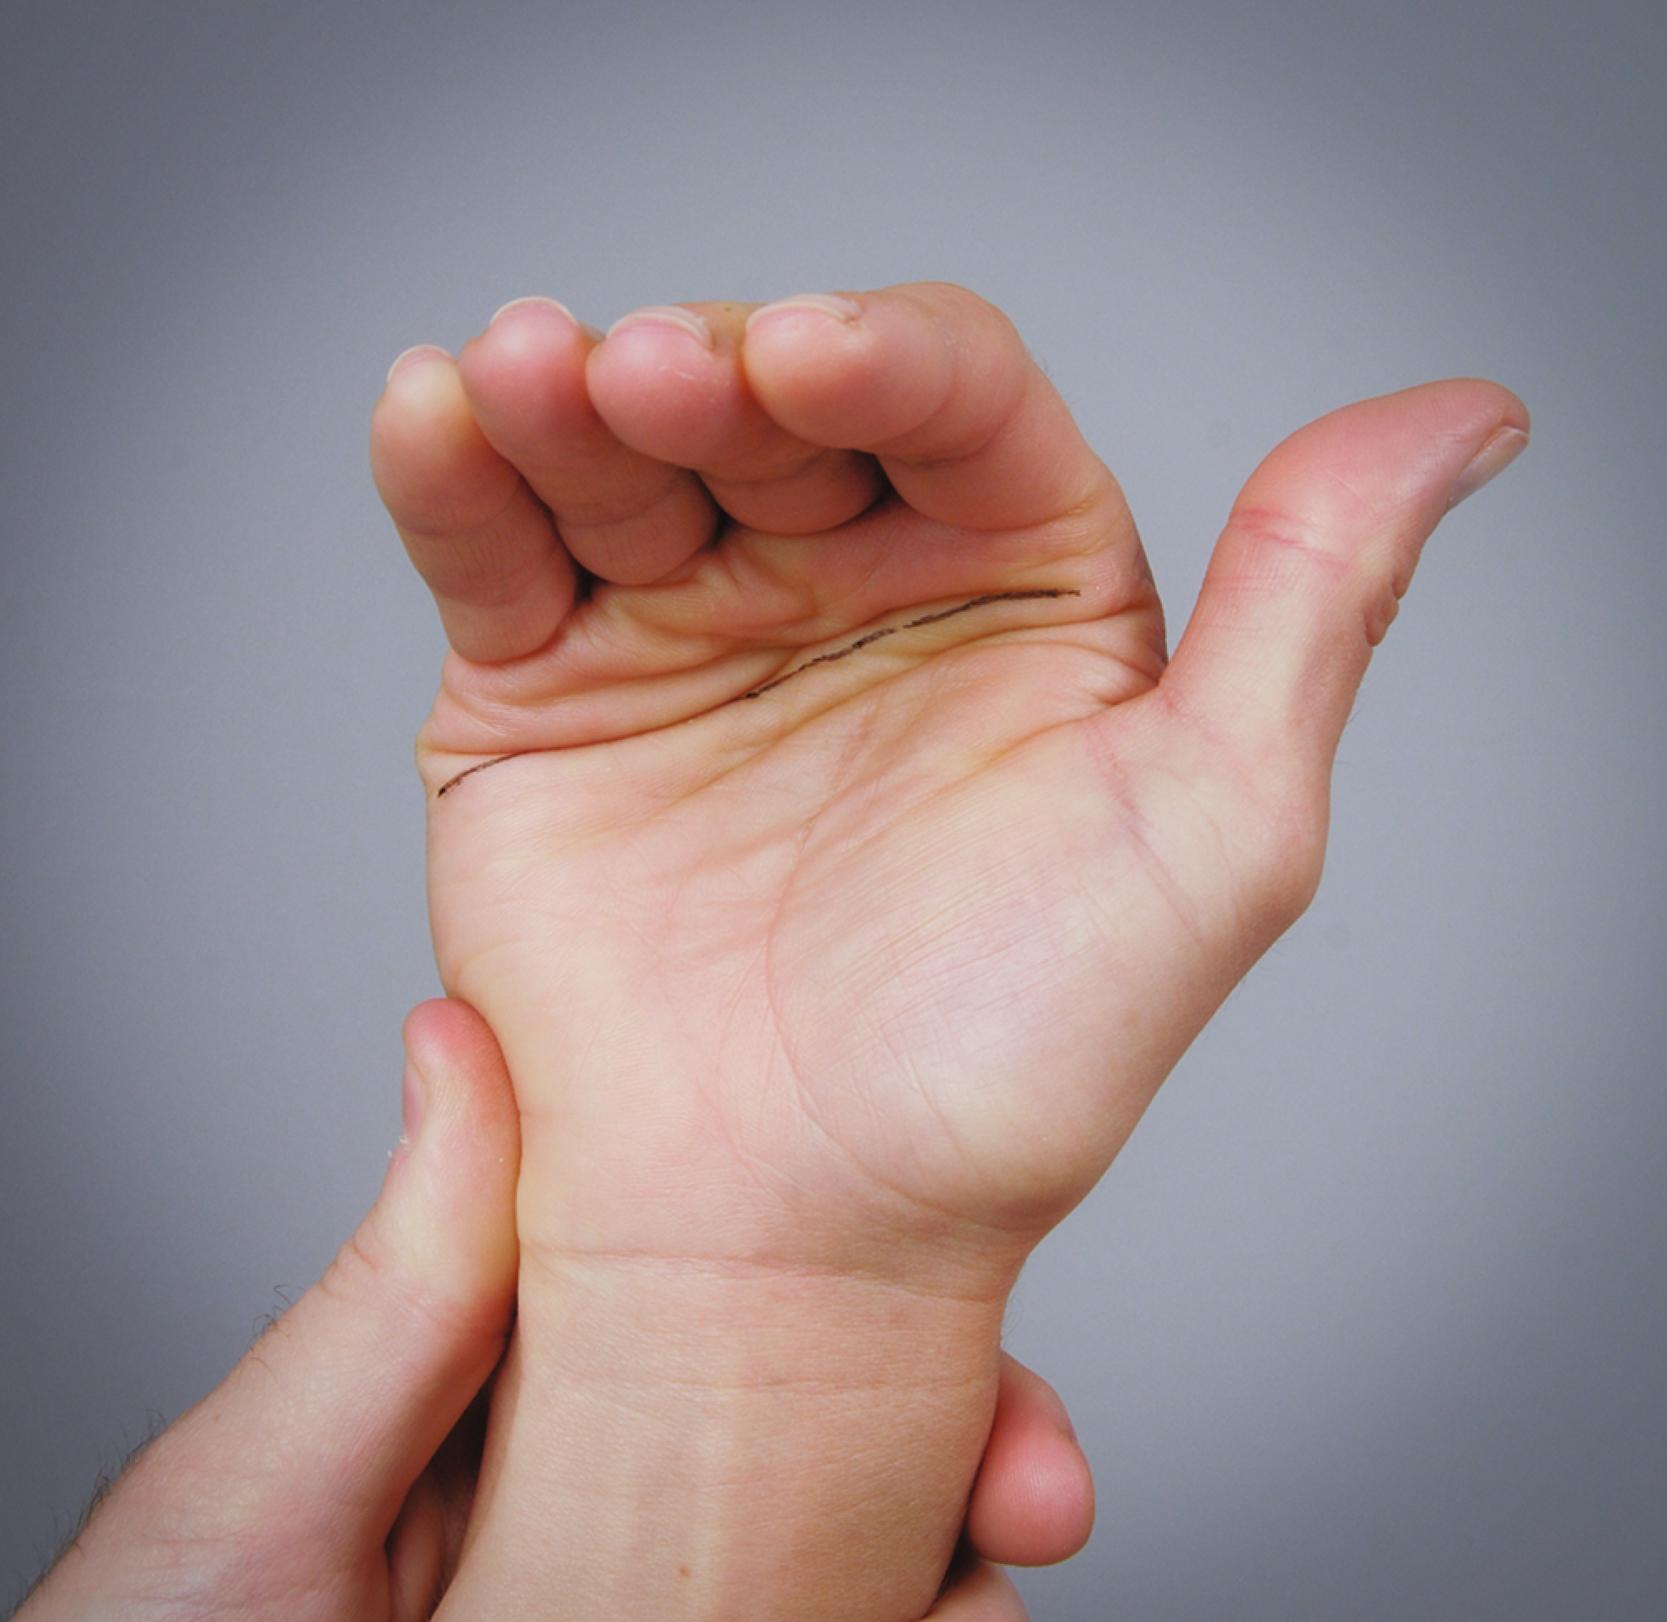
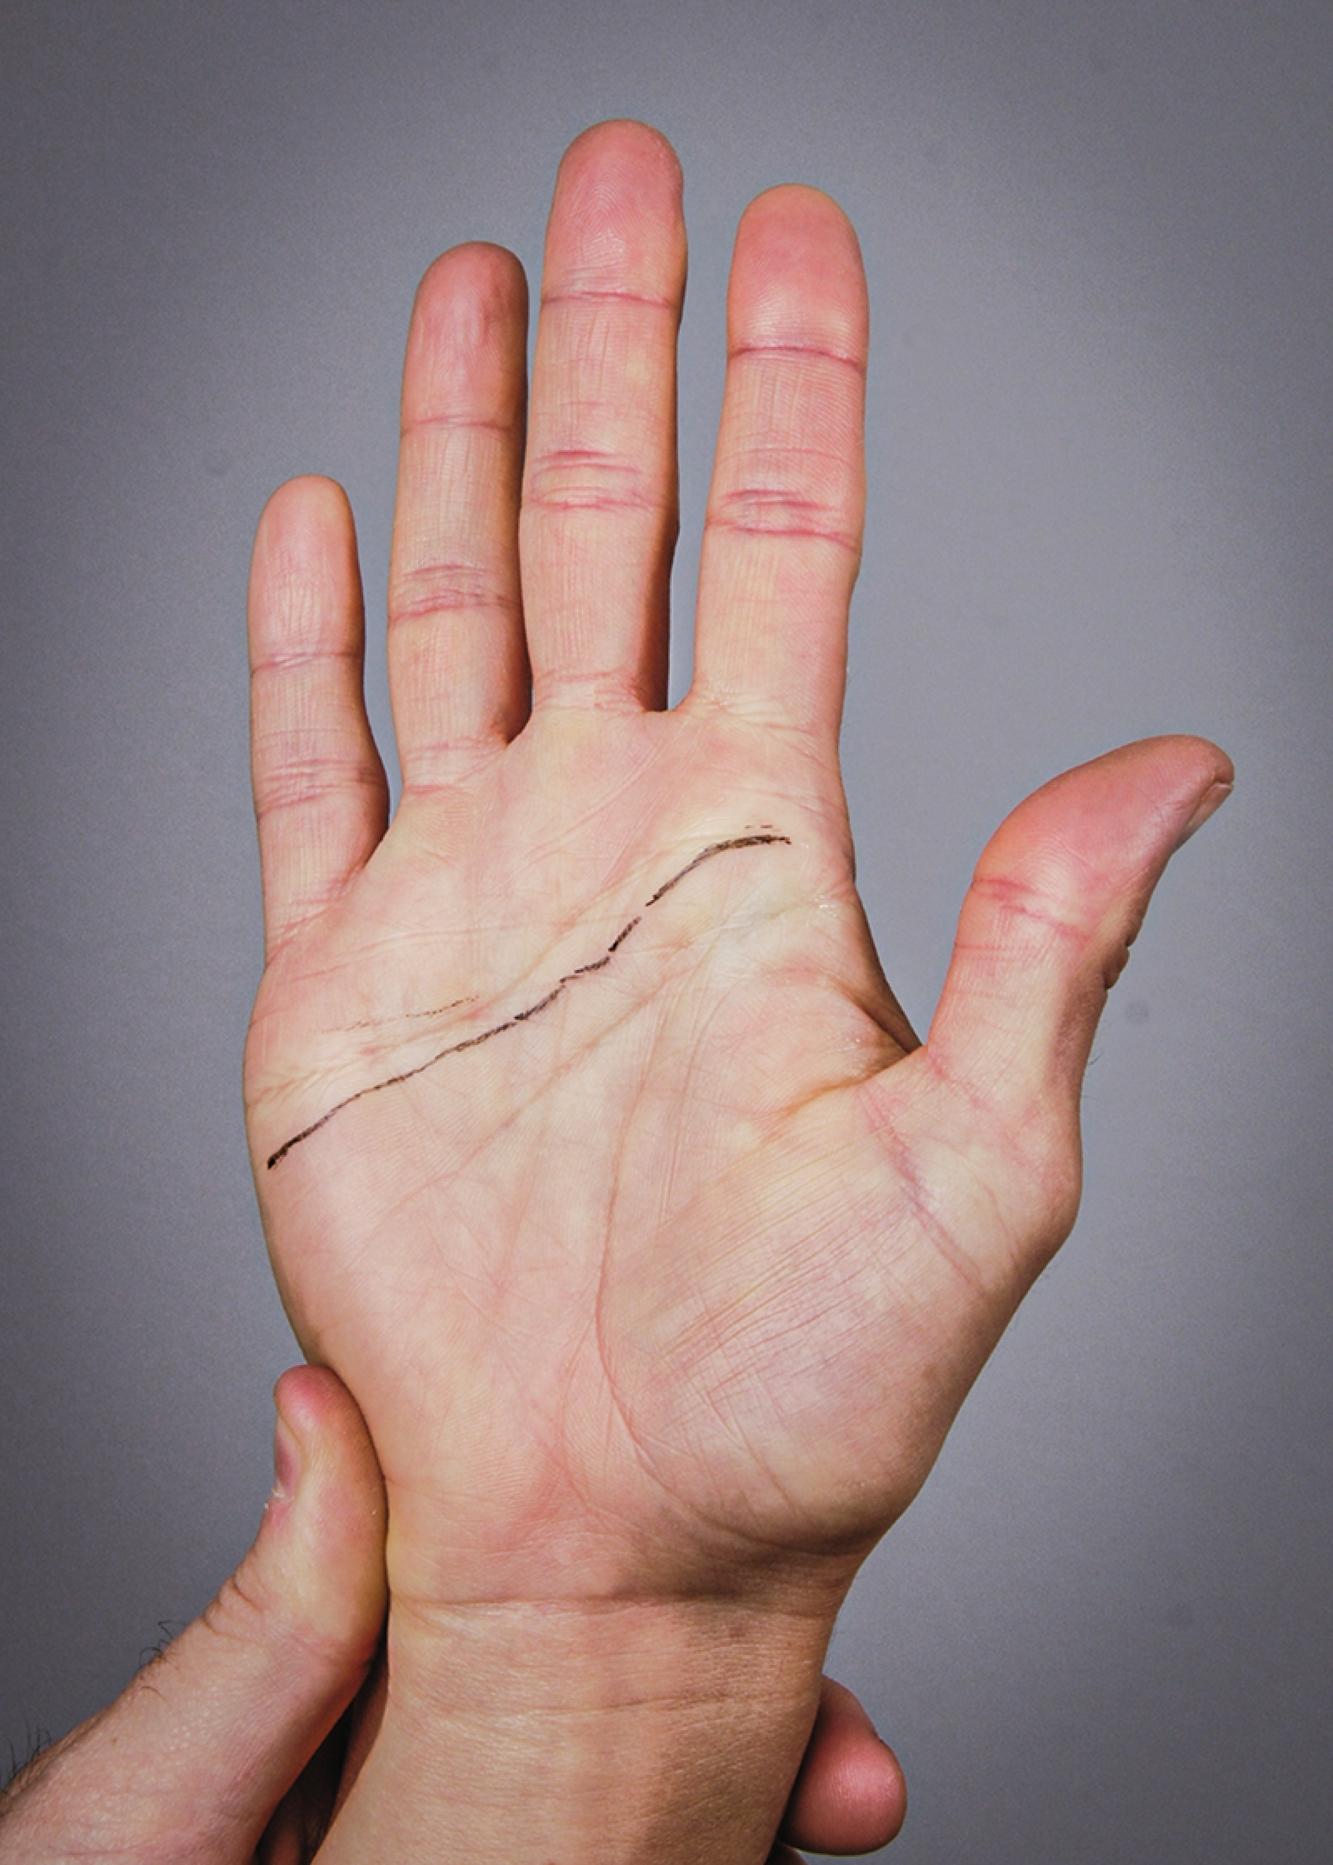
Bone above = the radius; begin the cast/splint above the elbow to prevent forearm (radial) rotation at the wrist.
Bone below = the carpals; end the cast/splint just proximal to the metacarpophalangeal joints ( Figs. 12.1 and 12.2 ).
Tibial shaft fracture:
Joint above = the knee; begin the cast/splint as high up the leg as possible to limit knee motion.
Joint below = the ankle; end the cast/splint just proximal to the toes to limit ankle motion.
Ankle fracture (distal fibula/tibia):
Bone above = the fibula + tibia; begin the cast/splint just distal to the knee joint.
Bone below = the talus; end the cast/splint just proximal to the toes.
Unless a pressing reason exists to do otherwise, each joint should be immobilized in the optimal position to retain joint mobility after the cast/splint is removed.
Specific positions:
Shoulder: adduction and internal rotation ( Fig. 12.3 )
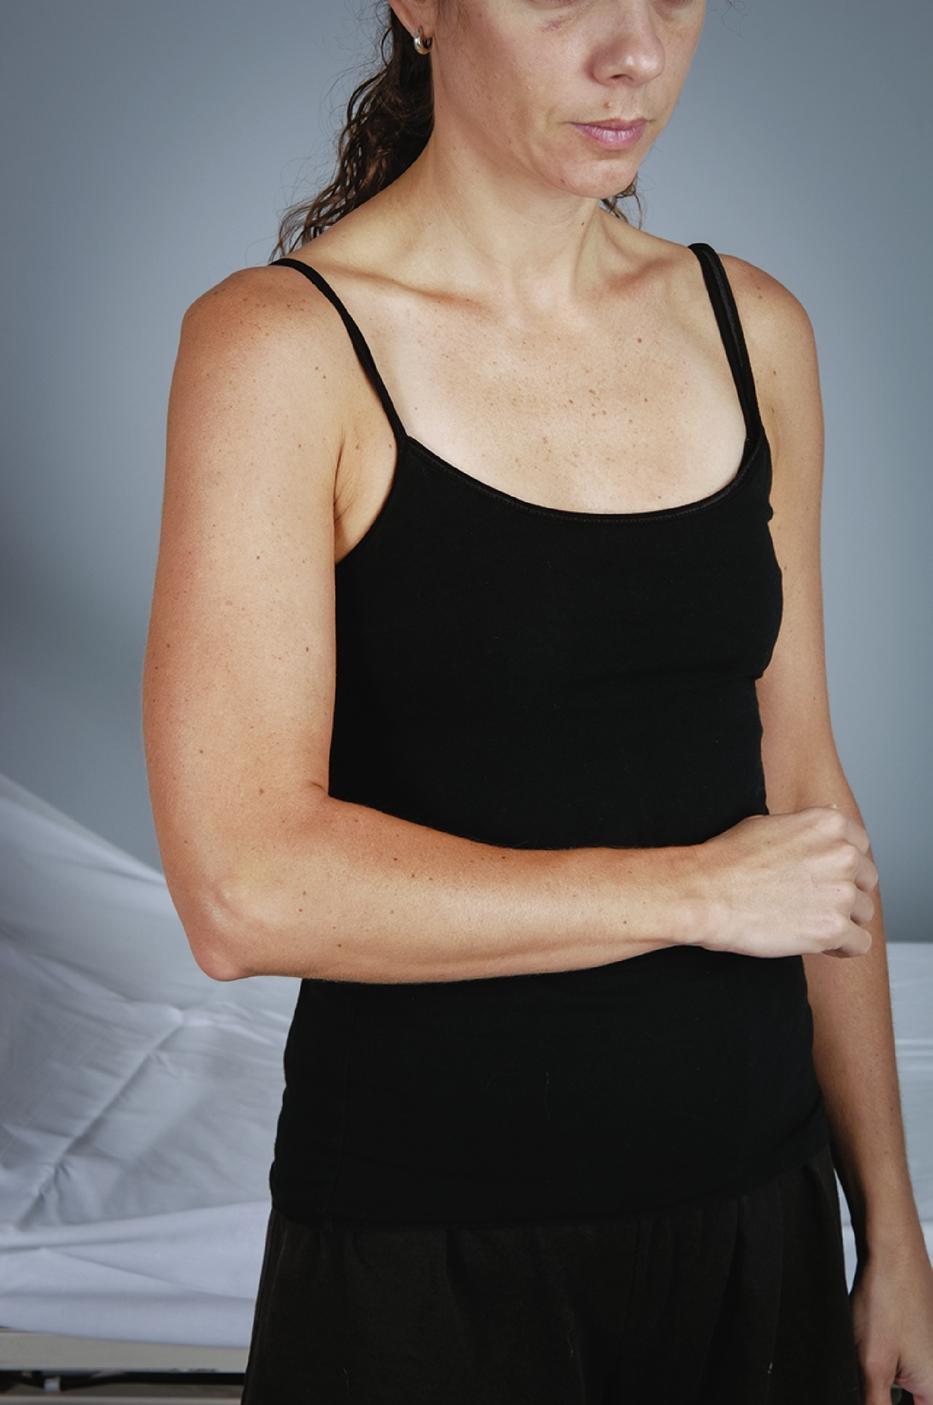
Elbow: 90 degrees of flexion (see Fig. 12.3 )
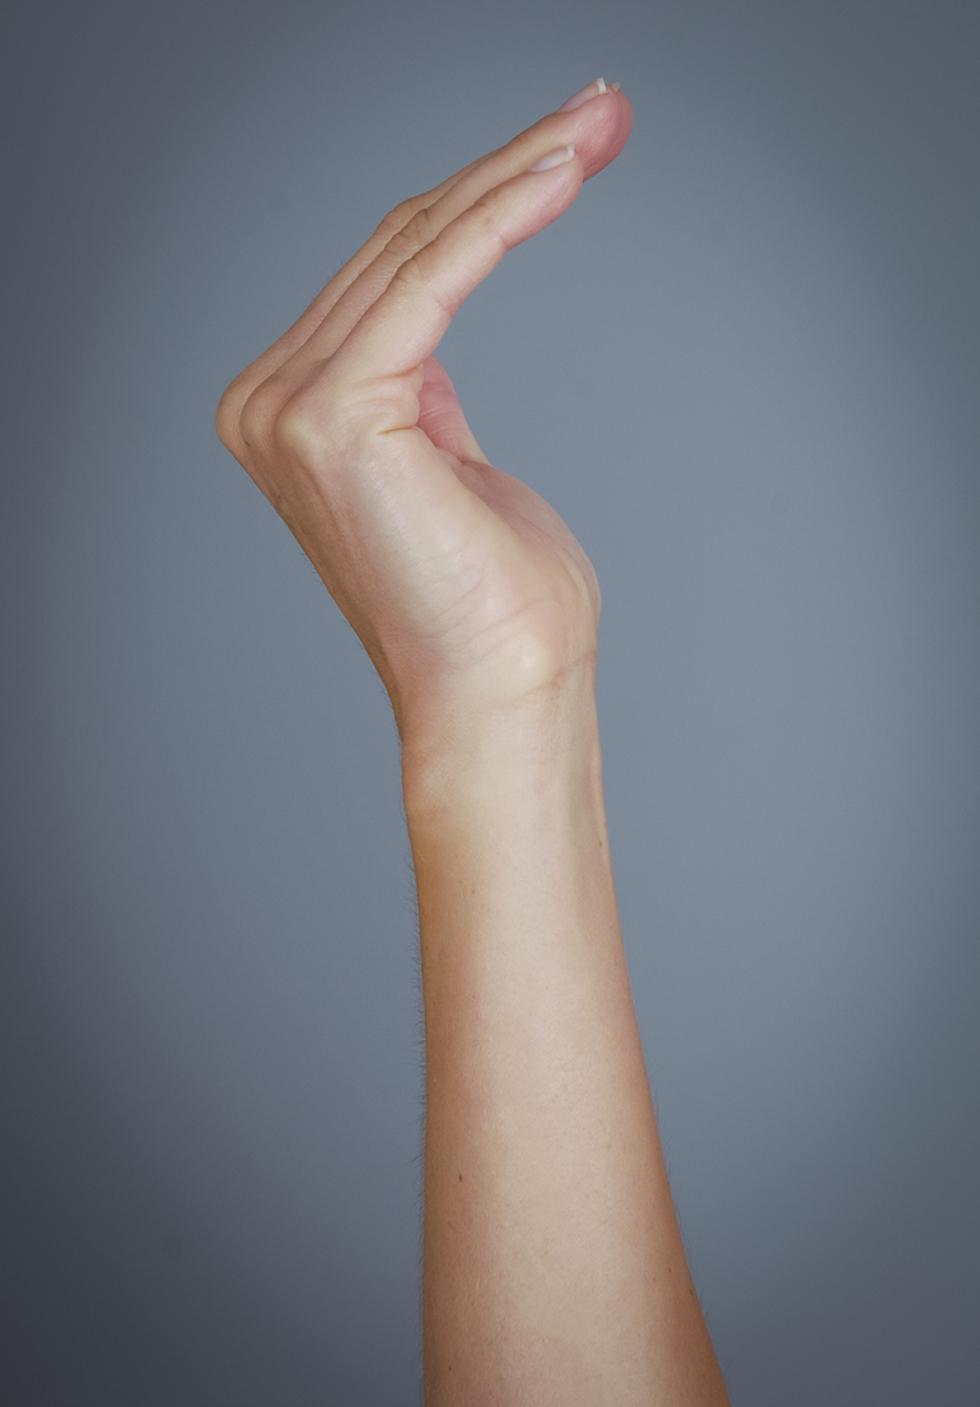
Wrist: 30 degrees of extension ( Fig. 12.4 )
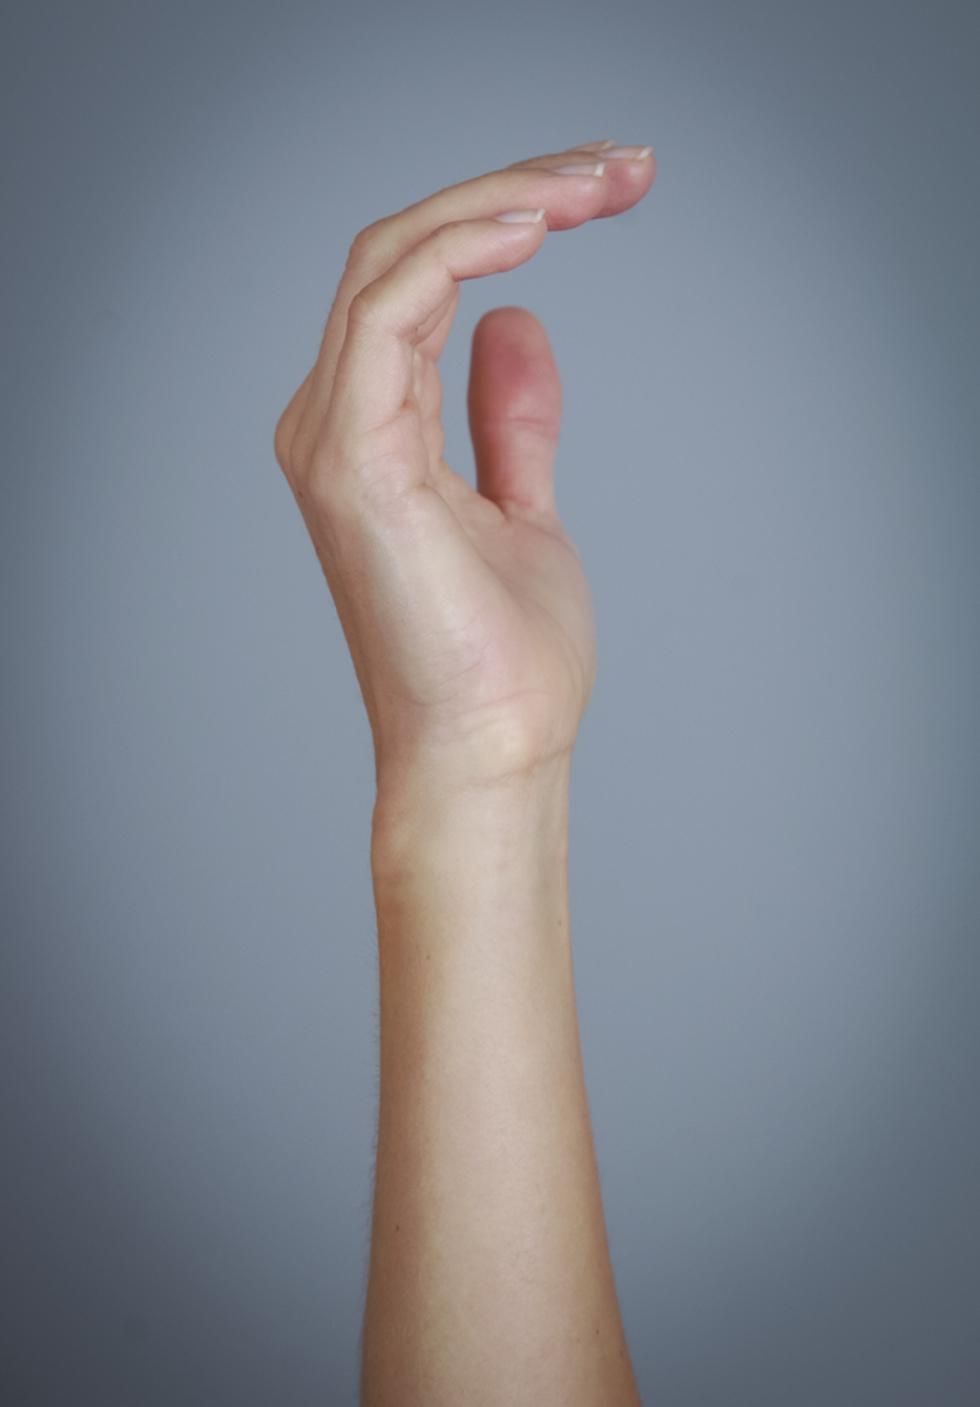
Thumb: midway between maximal radial and palmar abduction ( Fig. 12.5 )
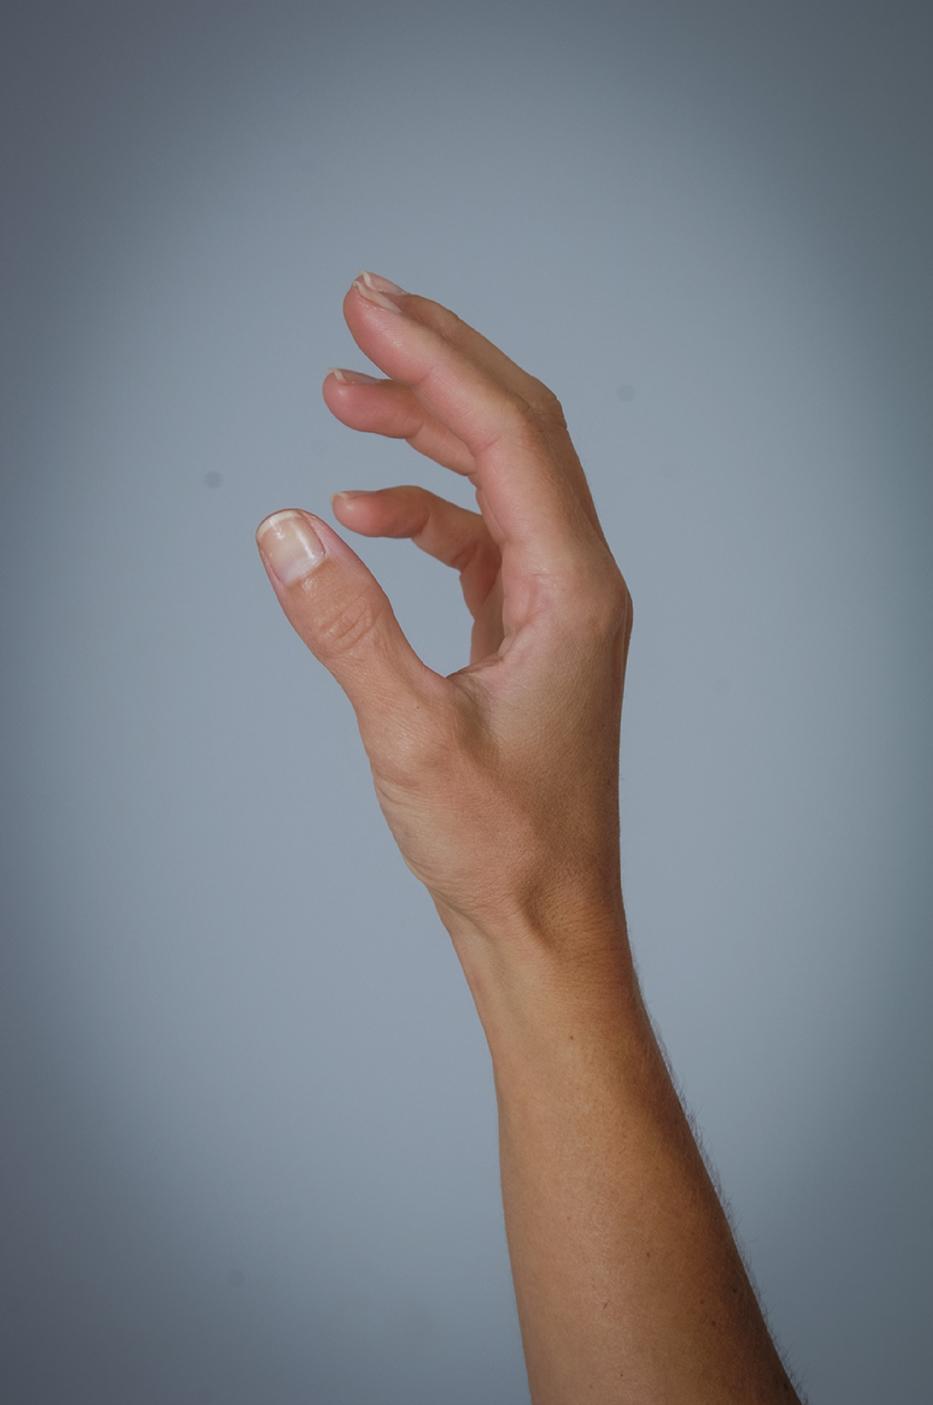
Hand: intrinsic plus (metaphalangeal joints in at least 70 degrees of flexion and interphalangeal joints in extension) ( Fig. 12.6 )
Hip: 10–30 degrees of abduction, 20–45 degrees of flexion, 15 degrees of external rotation
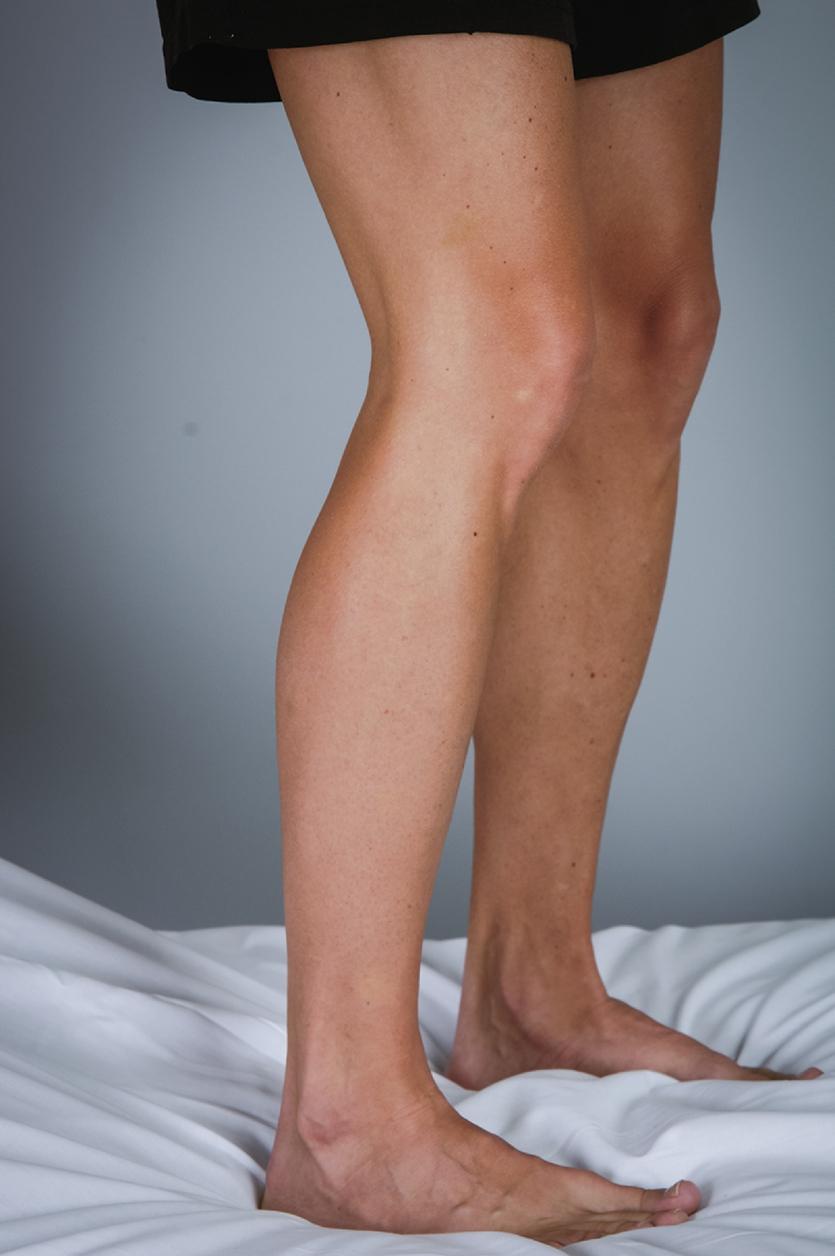
Knee: 15–30 degrees of flexion ( Fig. 12.7 )
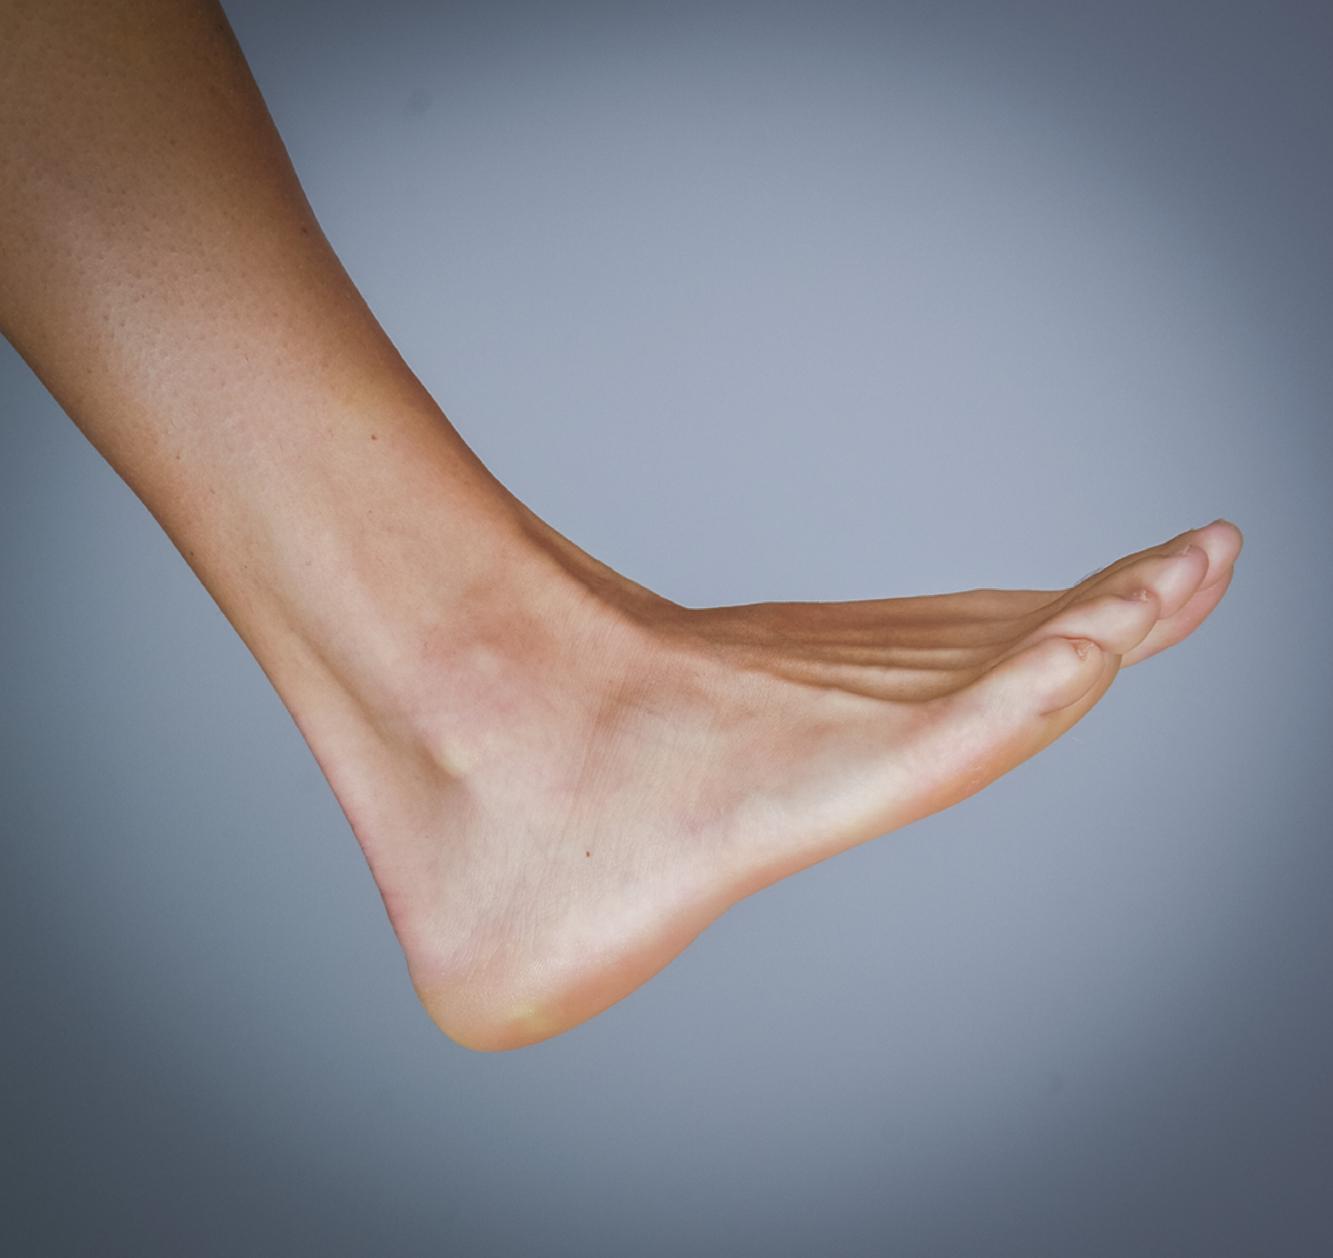
Ankle: neutral dorsiflexion ( Fig. 12.8 )
If a cast is placed in the acute setting and swelling is a concern, then the cast can be longitudinally split along two sides (bivalving).
Splitting the cast material and the cast padding provides the most decompression.
Split the cast in a way such that divergence of the two cast “halves” does not compromise fracture reduction. For example, for distal radius fractures, split the cast directly dorsally and volarly ( Figs. 12.9 and 12.10 ).
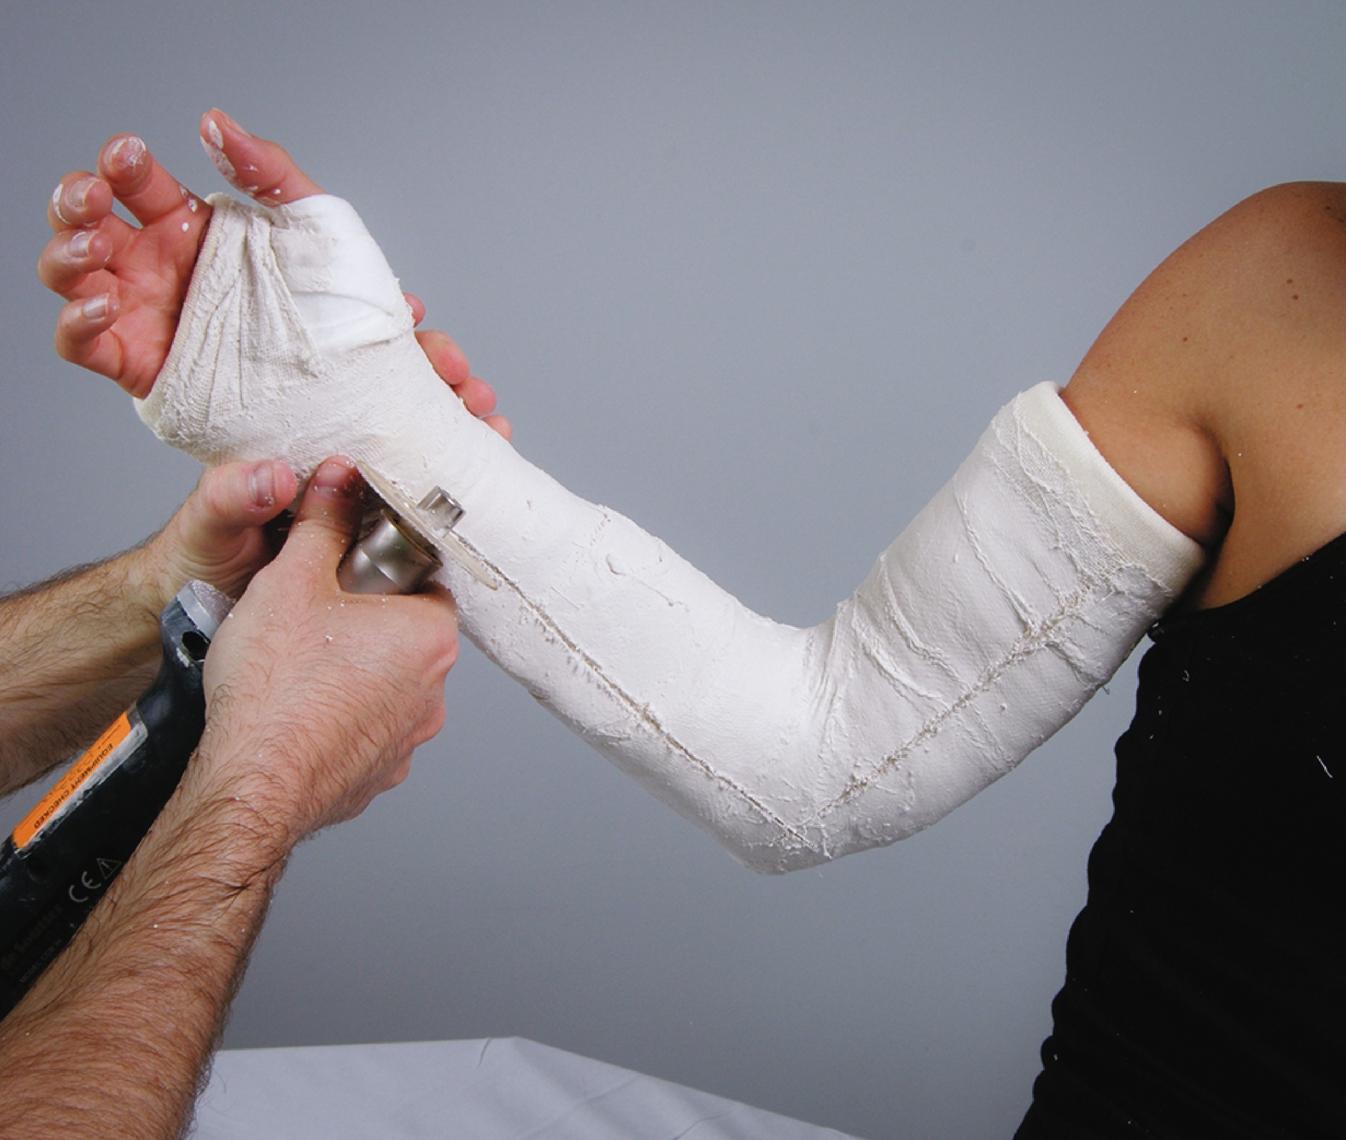
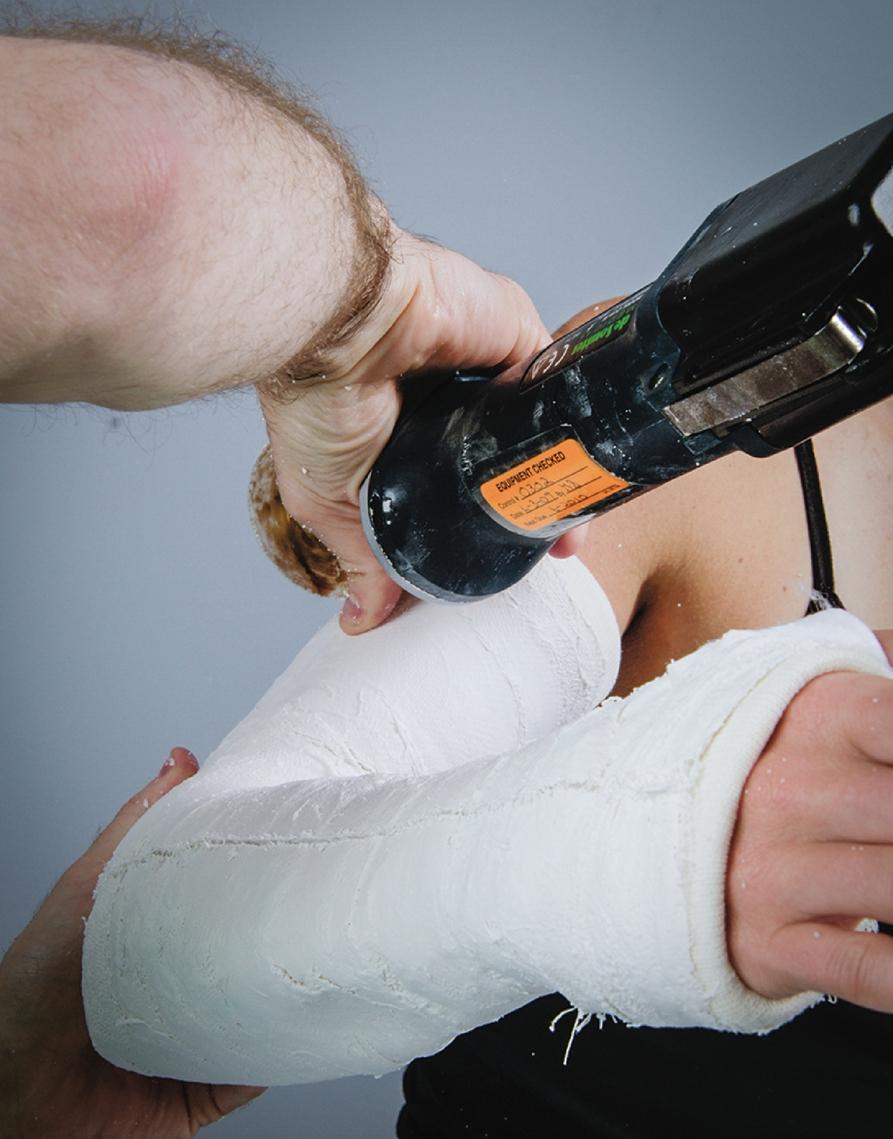
For minimal edema or swelling, a single split can be performed (monovalving).
After the cast is split, overwrap it with either self-adhesive or elastic bandages.
If the fracture reduction is acceptable in translation but not in angulation, then the cast can be transversely cut on the acute angle of the malreduction and a wedge inserted to change the angle of the cast ( Fig. 12.11 ).
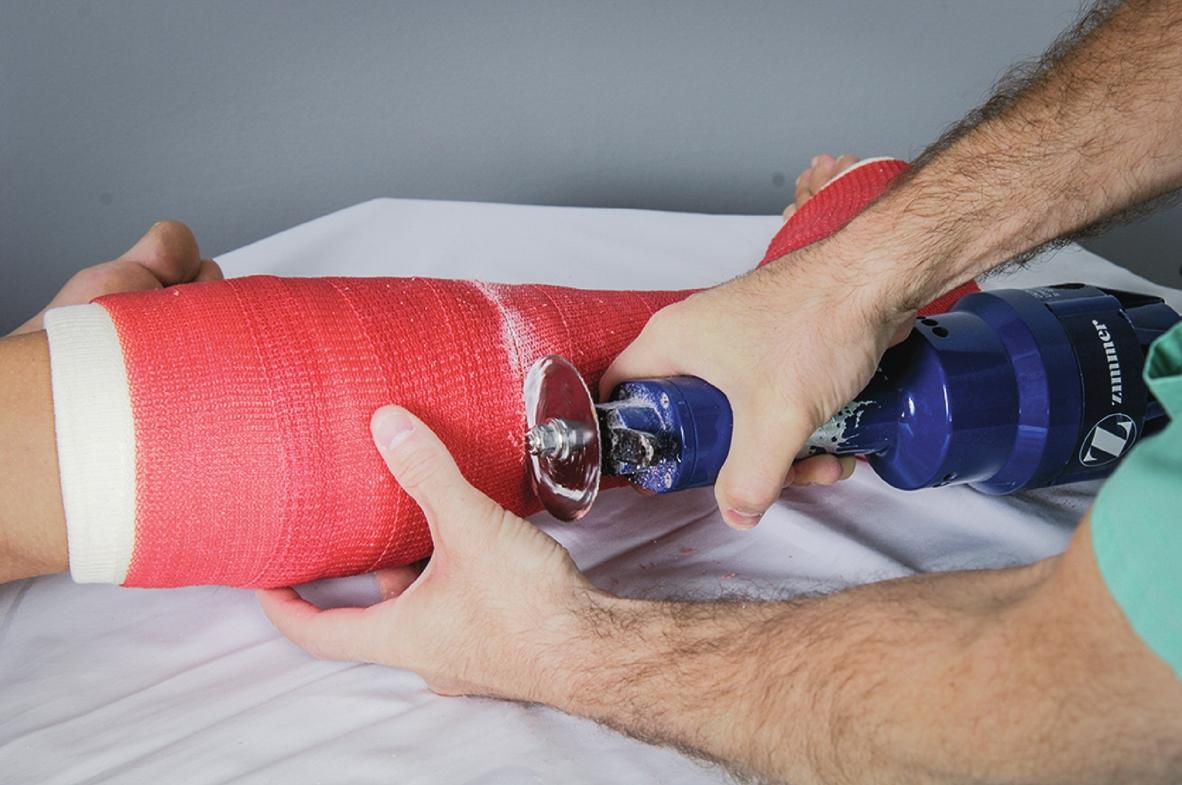
Because it is difficult to calculate the size of the wedge, it is best to apply a temporary wedge while radiographs are taken, followed by definitive wedge placement. Tongue depressors can be used as temporary wedges ( Fig. 12.12 ).
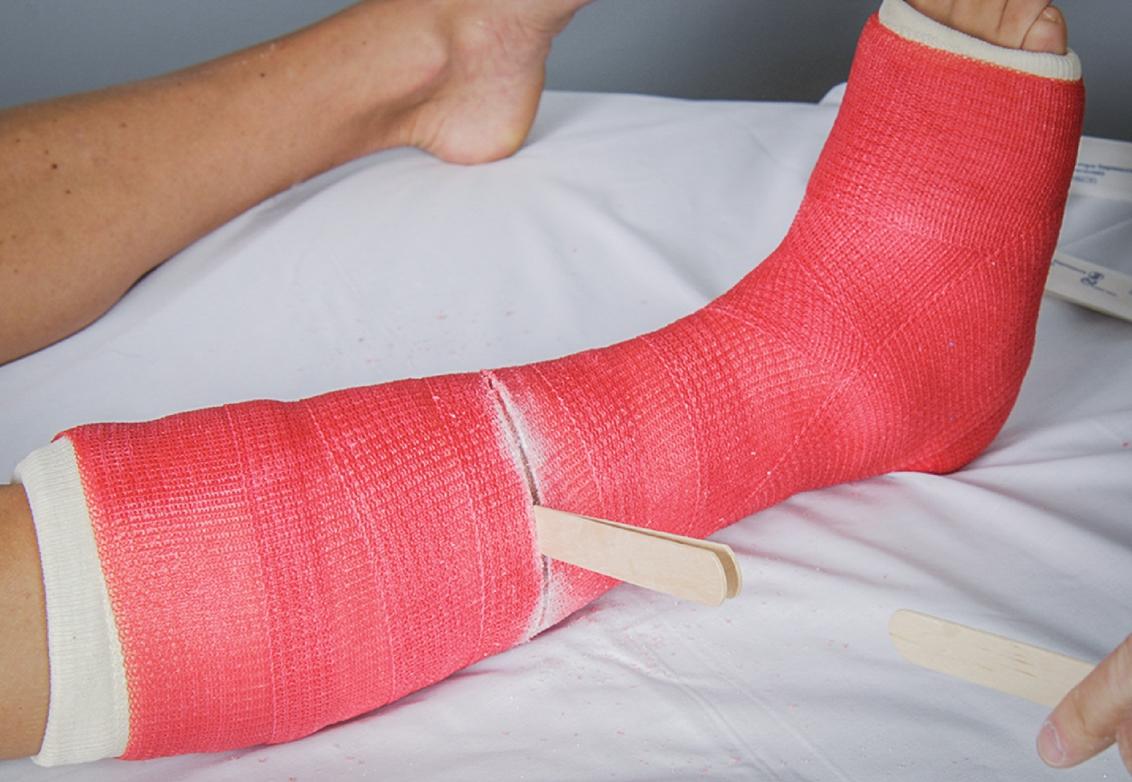
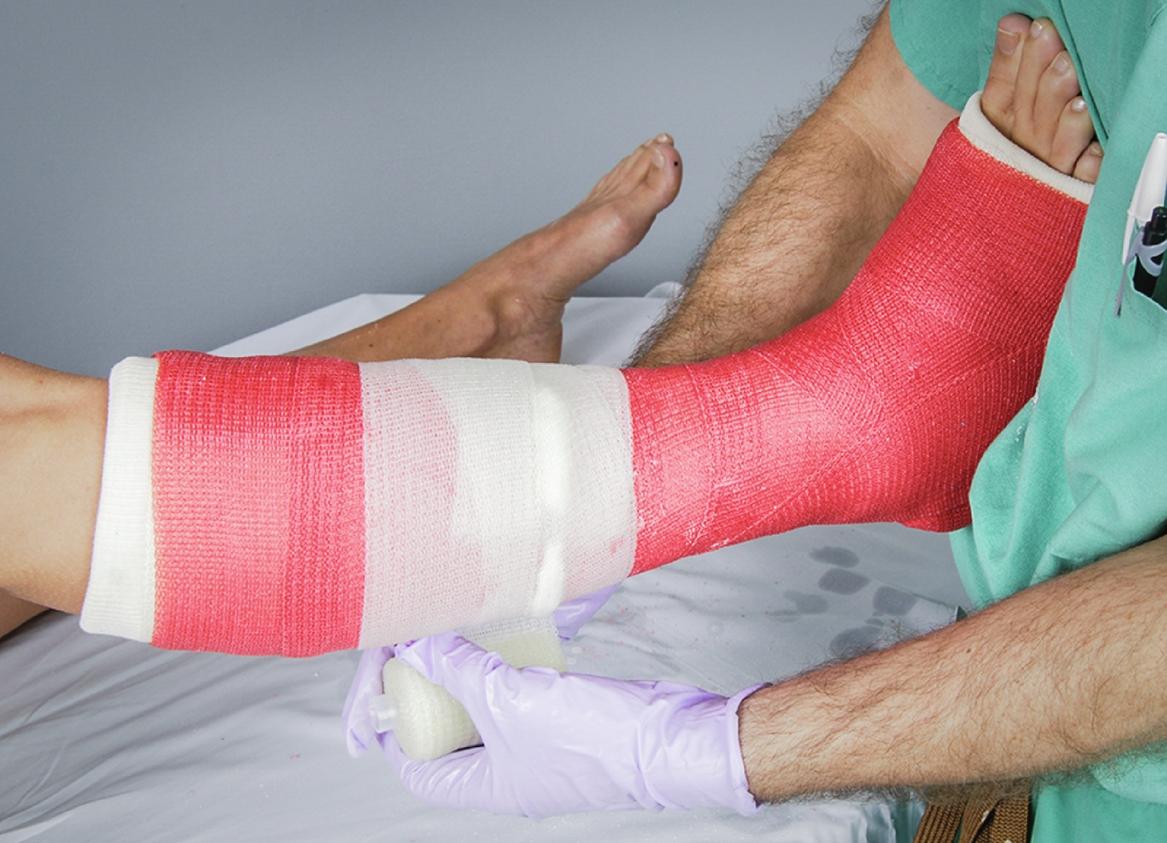
Wedges should be made out of plaster even if the cast is fiberglass ( Figs. 12.13 and 12.14 ).
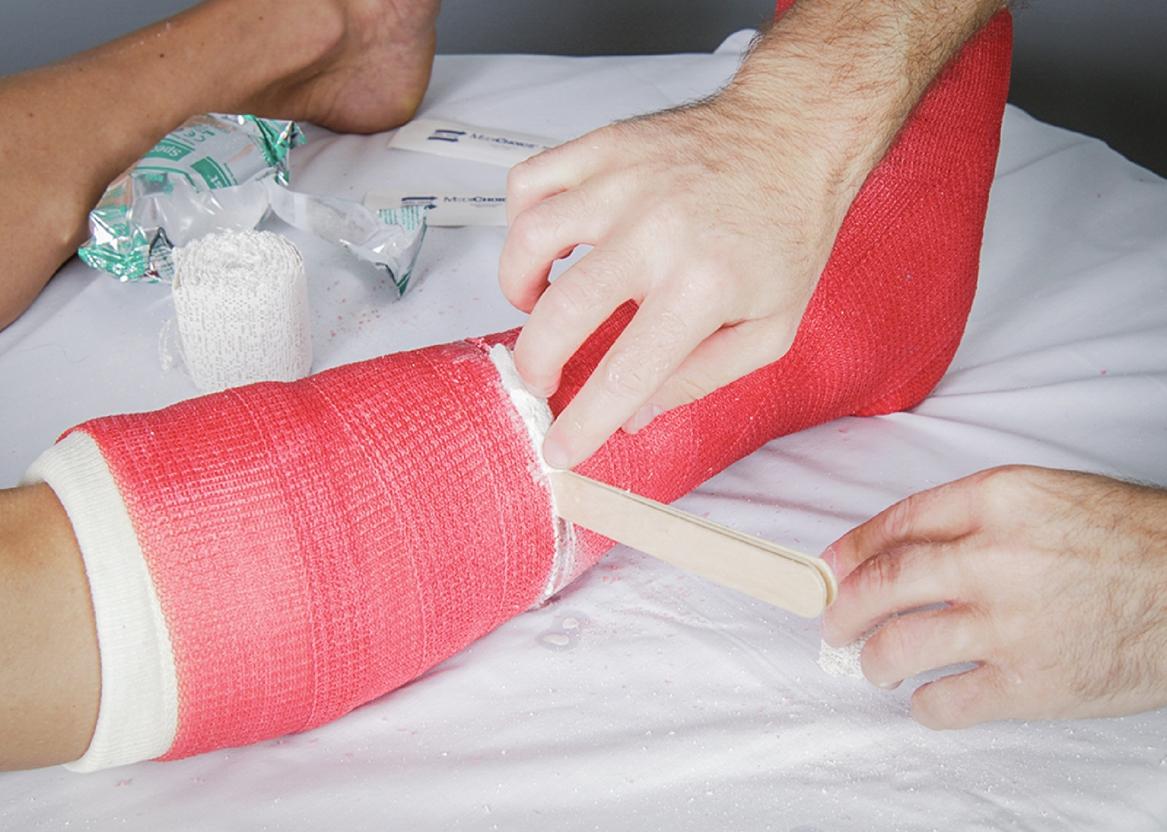
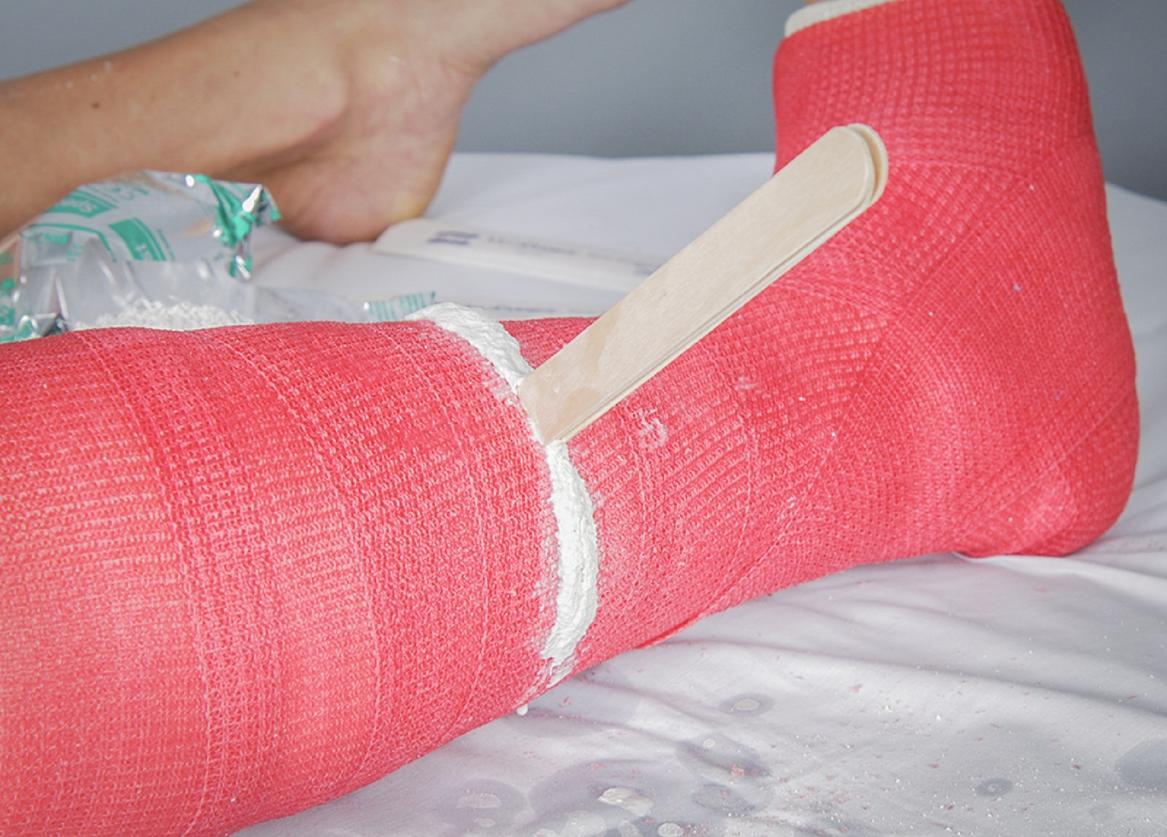
Overwrap with the same material as the remainder of the cast ( Fig. 12.15 ).
Overview
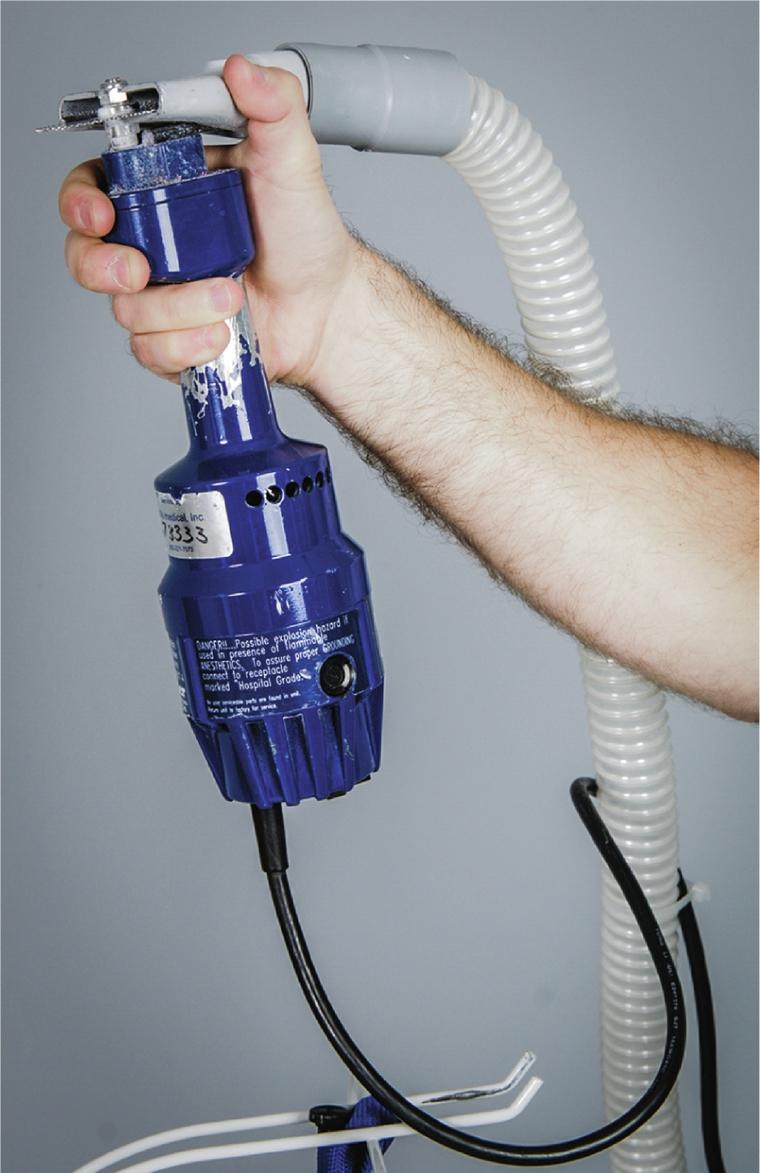
A cast saw is an oscillating saw designed to cut hard cast material while minimizing trauma to soft material, such as cotton padding and the skin.
The oscillations generate significant heat and can easily burn a patient.
Approximately 1% of cast removals are associated with a cast saw burn ( Fig. 12.16 ).
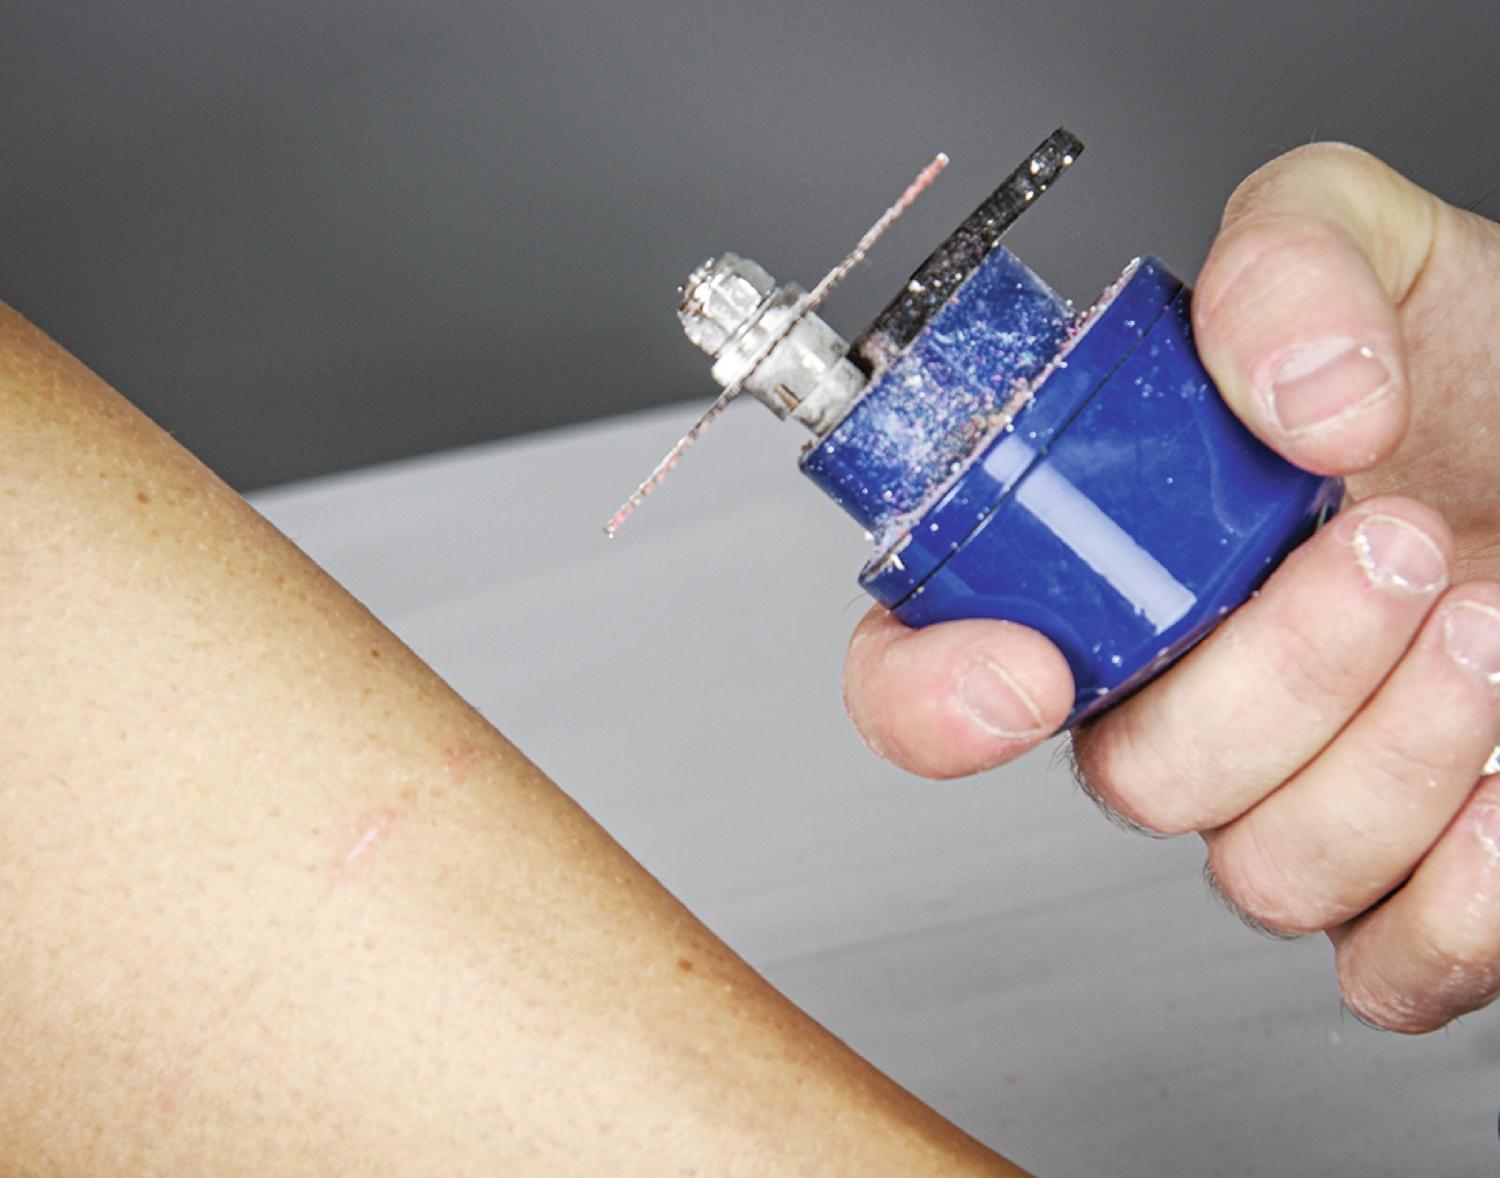
A cast saw is necessary for removal of fiberglass casts ( Fig. 12.17 ).
Plaster casts can be unraveled after they are soaked in water for several minutes; however, finding the leading end of the plaster strip can be difficult.
Do not attempt to place any cast if a cast saw is not available because emergent removal or trimming of the cast may be necessary.
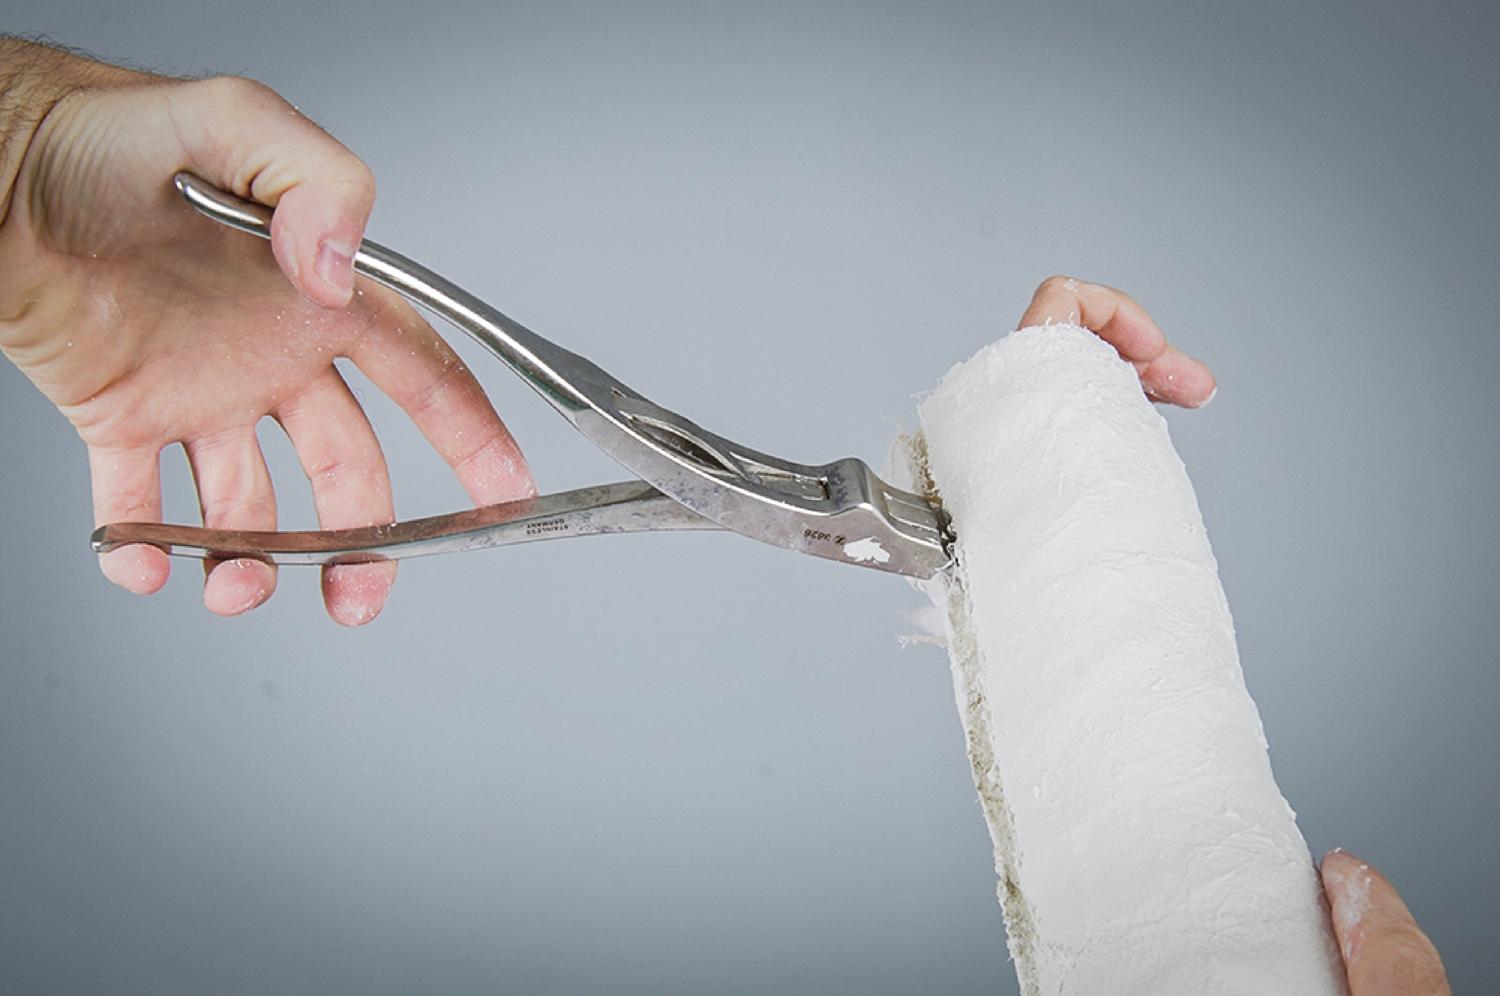
A cast spreader can be extremely helpful in separating the two halves of a cast after they have been split ( Fig. 12.18 ).
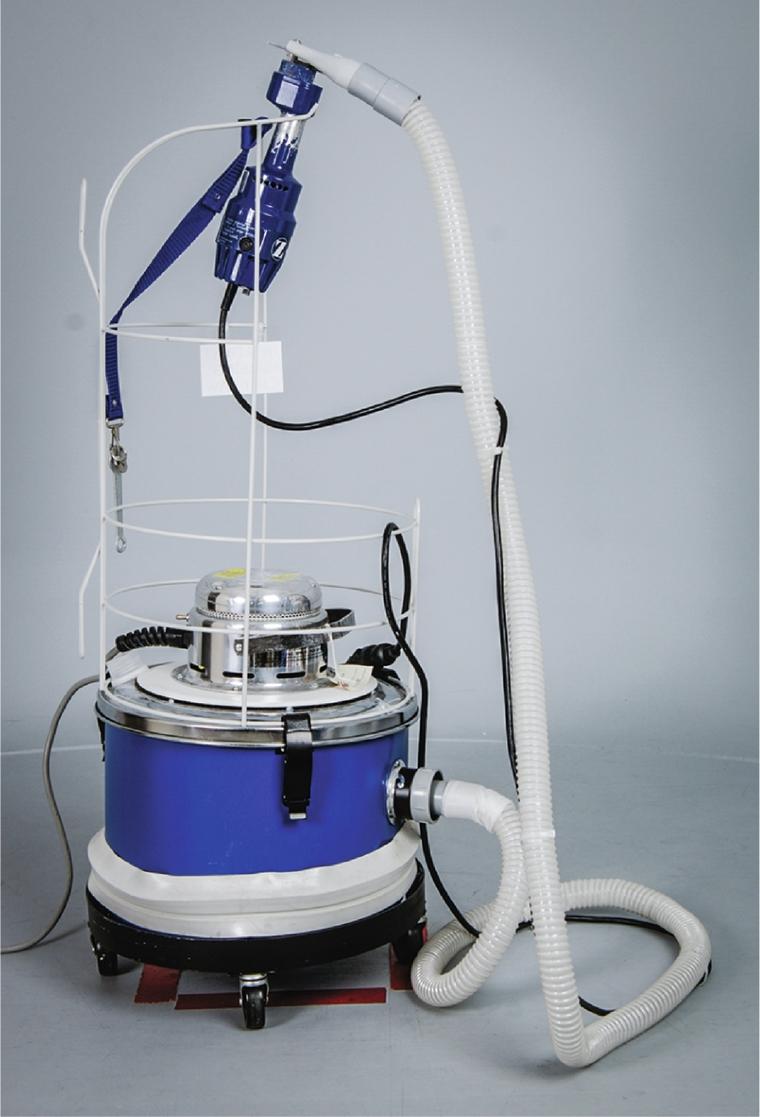
We recommend that a cast saw be attached to suction to limit the volume of aerosolized particulate debris on clothes and in your lungs ( Fig. 12.19 ).
Removal of waterproof casts is associated with a higher risk of cast saw burns because the padding is less heat-resistant and thinner than is conventional cast padding.
Technique
It is important to use an “up, over, down” technique when cutting a cast.
The cast saw should be directly pushed down into the cast ( Fig. 12.20 ). Your index finger should rest on the cast to limit the excursion of the cast saw.
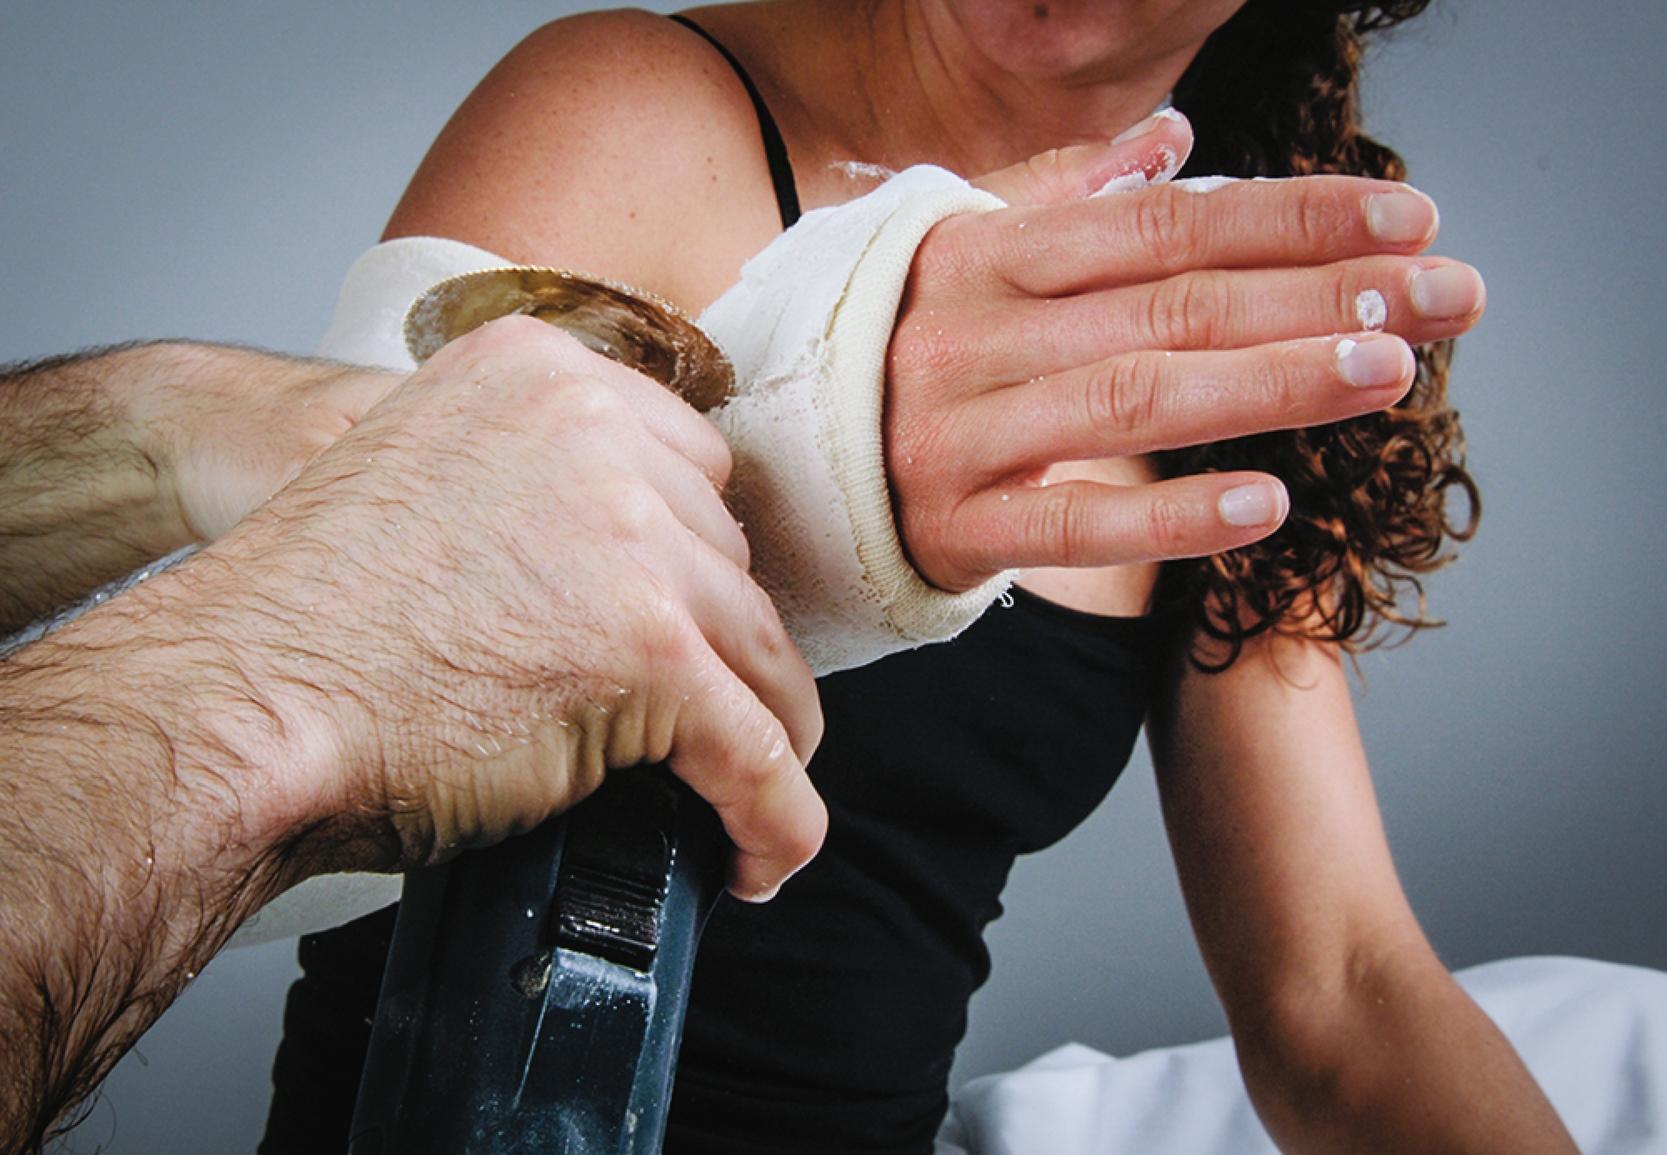
The saw should then be removed by coming straight back up.
The saw should then be longitudinally moved to the next point on the cast.
The saw is then reinserted using the same technique.
Intermittently check the temperature of the blade. The blade can be cooled with an alcohol wipe.
Never drag the cast saw along the cast. This technique significantly increases the risk of a cut or a burn.
Become a Clinical Tree membership for Full access and enjoy Unlimited articles
If you are a member. Log in here