Physical Address
304 North Cardinal St.
Dorchester Center, MA 02124
Today, the extraction of 3D models of internal human body organs from a high-resolution series of CT scan images can be accomplished with the use of appropriate software that often accompanies the instrument of the CT scanner. Appropriate software connected directly to the CT scanner processes images stored in a specific file format created for proper storage, transport, and visualization of medical imaging data well known as DICOM (Digital Imaging and Communications in Medicine).
DICOM is the standard for the communication and management of medical imaging information and related data. DICOM is most commonly used for storing and transmitting medical images, enabling the integration of medical imaging devices such as scanners, servers, workstations, printers, network hardware, and picture archiving and communication systems (PACS) from multiple manufacturers. It has been widely adopted by hospitals and is making inroads into smaller applications like dentists' and doctors' offices .
Traditionally the main steps of medical image processing are:
Enhancement
Segmentation
Quantification
Registration
Visualization
The current document purposes are beyond the description of the above-mentioned processes to analyze and edit DICOM images. More information on the above-mentioned image processing steps can be retrieved from relevant literature .
To produce a printed 3D model from tomography images, the usual processing steps are:
Enhancement
Segmentation
Extraction model (usually semiautomatic techniques)
Noise removal and smoothing
Slicing
3D printing
Although the processing of a series of CT scan images is, at least in the initial stages, common to the processing of individual images (e.g., enhancement, segmentation), there are two parameters that cannot be ignored:
Direct georeferencing (registration) of each pixel of displayed pixel positions. The technology of CT scans is able to directly define a local coordinate system in each image by defining the step between slice thickness and pixel dimensioning (x and y pixel spacing information)
Each image is connected and has continuity with the next and the previous one and the imaging of the sections can produce any other projection (axial, collateral, lateral)
The first stage of the processing involves the enhancement (usually in gray values) of the image that can define the boundaries between the different tissues depicted in each separate DICOM image. This technique involves transformations of the original image through filters (low-high and bandpass filters, edge detection-enhancement filters, etc.)
In the second step, some transformations are applied, and the goal is to group together the pixels in each DICOM image so that each group gathers pixels depicting the same material (bones, muscles, fat, vessels). The process is often called classification, and simple filters or advanced statistical analysis techniques (k-means clustering, supervised classification, support vector machine classification, etc.) can be used. It is the most important and difficult step of processing since the success of the grouping of pixel in separate volumes belonging to different organs will define the success of the 3D model production.
The third processing step involves connecting all pixels of the same group from successive DICOM images in a file describing the 3D information of an object.
Again, it is necessary to apply methods of enhancing and noise removal (normalization, generalization, etc.) in the final 3D model object. This is implemented within the task of the fourth processing step.
The final model can be visualized in appropriate software and sent to a 3D printer for the creation of the tangible object.
In the fifth stage, the 3D model file will again be processed (converted from 3D) into sequential 2D layers (representing a horizontal section-layer of the object). This process is called slicing and breaks the 3D model into 2D slices using appropriate software (Slicer).
In the sixth and final stage, printing with the appropriate printer and the appropriate material (described below) will take place. The printing may need a small number of days to finish.
As it was described earlier the most important stage of processing to extract the 3D model of a specific part of the human body and specially to perform its isolation from adjacent tissues is an easy process and quite automated in some cases, whereas in other cases the process requires manual operations that often require a one by one image processing approach for the complete set of CT scan images.
For example, if it is necessary to create a model of a bone or a surface area that are very well separated from the soft tissues (skin, muscle, fat, and so on), the process is simple and easy. All that is required is the determination (usually manual or sometimes with a predetermined value) of the threshold density above which a tissue is designated as bone, or blood vessel. Below this threshold value, the pixel (or better voxel—volume element) is indifferent and should not be included in the geometry of the model.
Any software that connects and drives a CT scanner is accompanied by appropriate software that can be produced by applying all of the above techniques for noise removal, enhancement, segmentation, and visualization of the results for extracting internal human body organ, but within the basic configuration only threshold and simple image enhancement procedures are installed. Frequently, there is no capability to extract from specialized CT scan software the complete 3D models of complicate internal human body organs (for example, liver, pancreas).
The following paragraphs are dedicated to the two best practice approaches to extract from DICOM images 3D models of either bones or internal human body organs (in our case the liver). Our study is concentrated to open-source generic software applications since our study is addressed to people who may not have access to commercial software applications that are probably attached to CT scanners, performing special algorithms on the produced images.
3D Slicer is an open-source software platform for medical image informatics, image processing, and three-dimensional visualization. Built over two decades through support from the National Institutes of Health and a worldwide developer community, Slicer brings free, powerful cross-platform processing tools to physicians, researchers, and the general public .
The software has very good documentation of both basic and specialized functions and specifically to produce models for 3D printing .
A typical flowchart of image processing for creating semiautomatic processes for producing a model for printing is the following:
Import images in DICOM format
Load images
Definition of clipping area (defined as crop volume process)
Perform segmentation (add segments)
Set the isolation threshold
Removing noise in speckle and islands
Cut off unwanted structures
Visualization of results
Save to a suitable 3D print file
The software has a lot of features and ways to visualize both different projections of a CT or MRI scan and is also available for researchers to contribute providing their own solution.
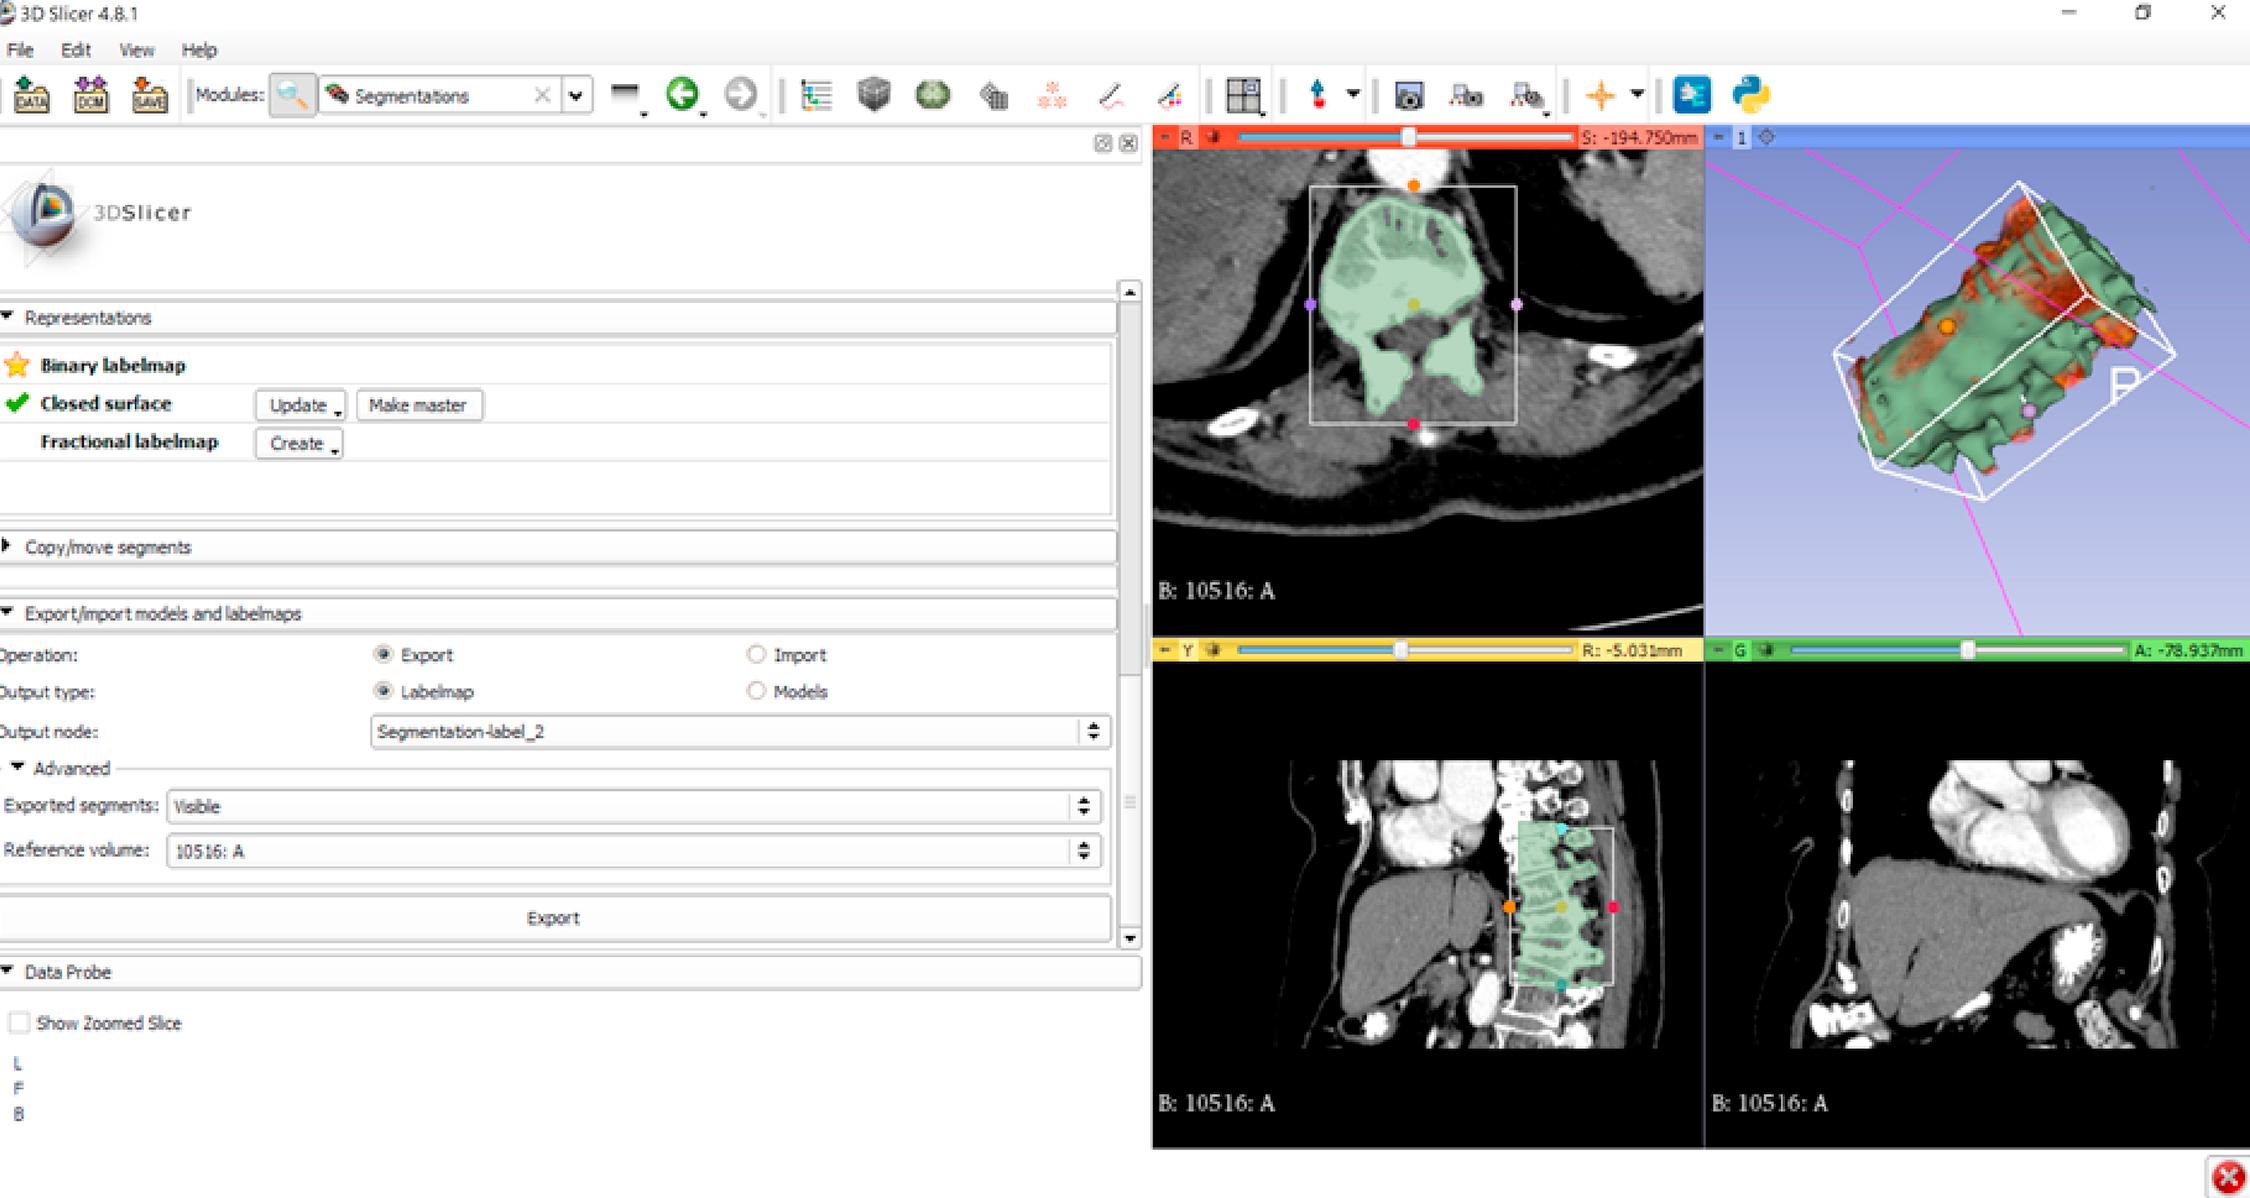
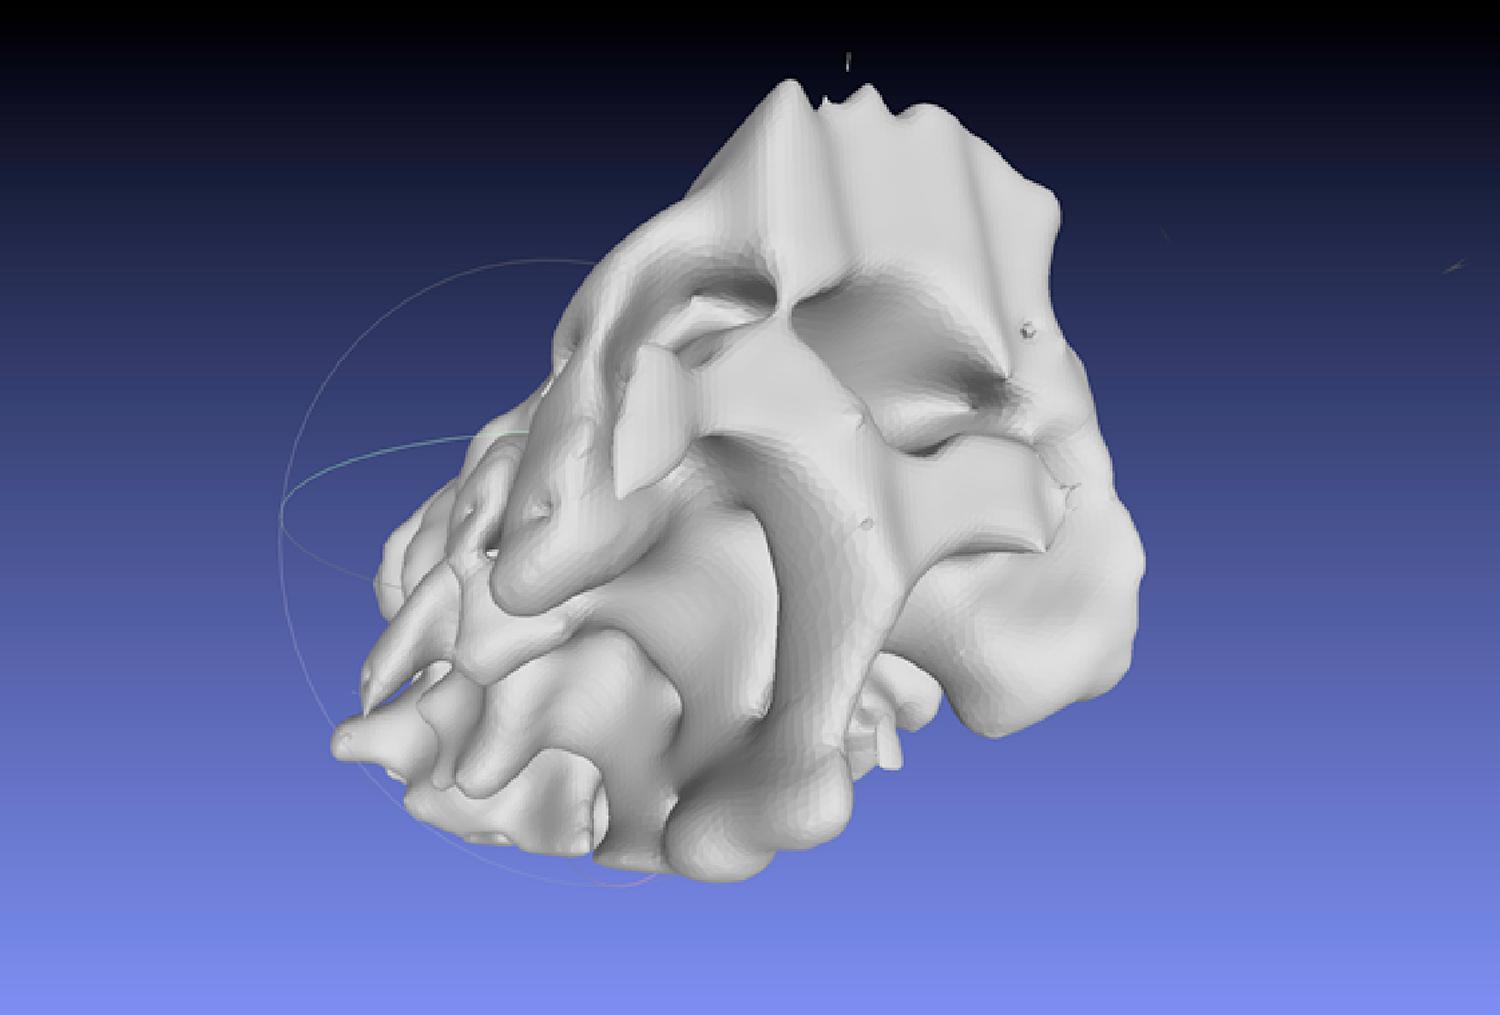
To produce a spine part model the processing did not take more than 10 minutes interaction with the system ( Figs. 2.1 and 2.2 ). Of course, it depends on the complexity of the model to be generated how much time it will take to provide the final model.


The Medical Imaging Interaction Toolkit (MiTK) is a free open-source software system for development of interactive medical image processing software. MiTK combines the Insight Toolkit (ITK) and the Visualization Toolkit (VTK) with an application framework. As a toolkit, MiTK offers those features that are relevant for the development of interactive medical imaging software covered neither by ITK nor by VTK; see the Toolkit Features for details .
In fact, this is a DICOM image data processing library that can be embedded in software designed and implemented using different programming languages (C/C++, python) and on different operating systems (Windows, MacOs, Linux). In addition to the ability to integrate features from the toolkit, there exists a distribution offering an integrated processing environment with the brand name MiTK WorkBench. A very recent development of this Toolkit platform and the WorkBench is the integration of Artificial Intelligence (AI) algorithms to export models of volumes from CT images and to produce the 3D models of internal human body organs. The problem of isolating the tissues of an internal human body organ lies in its vague geometry (shape, size) that an individual can have and in the proximity to other body parts that may have similar characteristics and therefore same density and gray scale value in DICOM images.
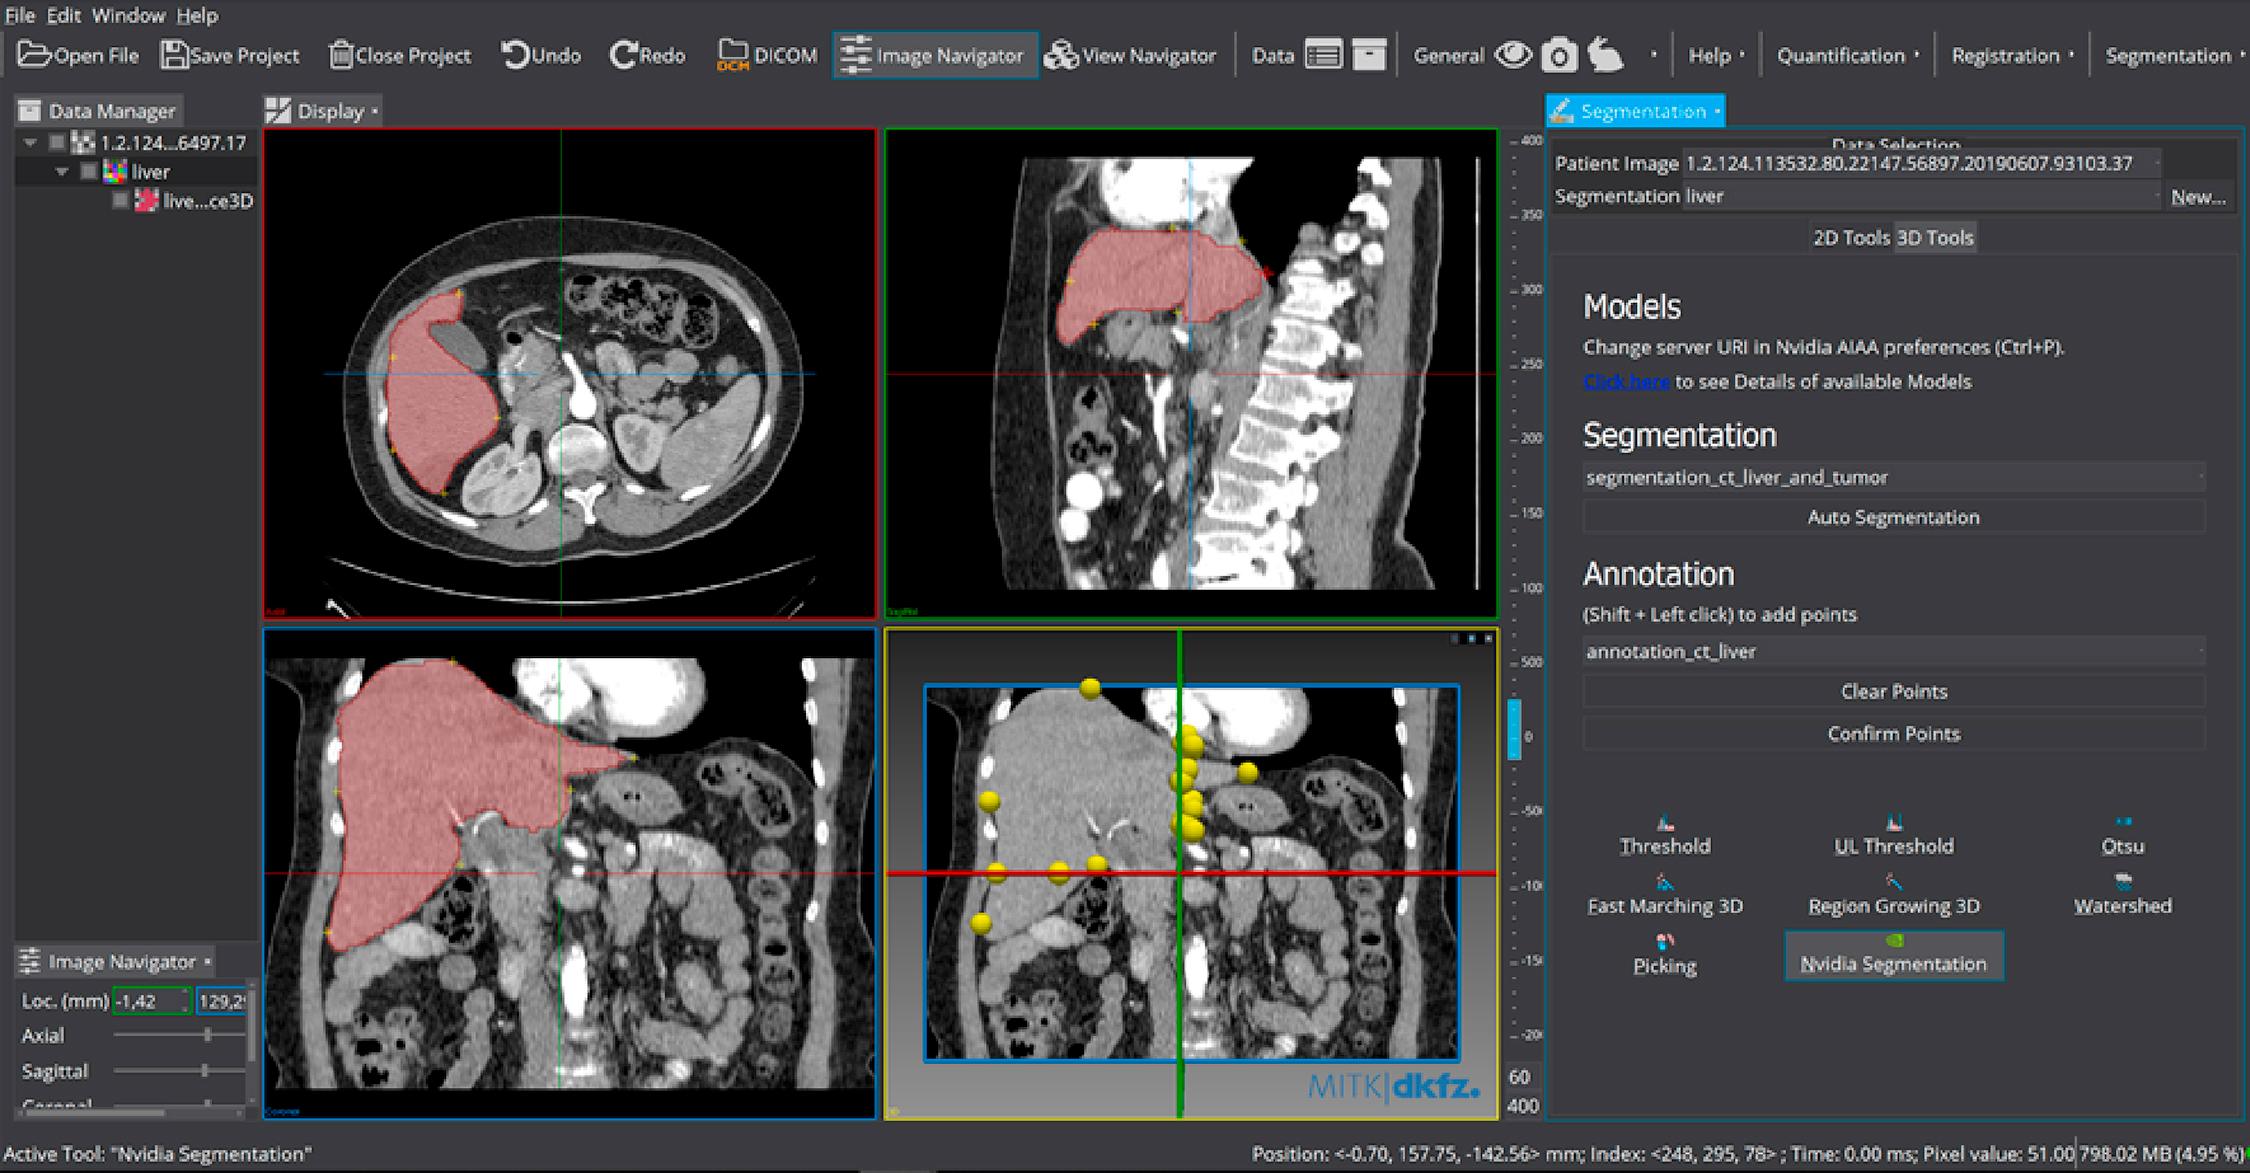
To perform the determination of an internal human body organ model, with the minimum interaction, the process is quite easy to follow ( Fig. 2.3 ). The software just needs the collection of at least six points covering its most extend the boundaries of the human organ with other parts of the body. It is also feasible to follow proper corrections and revisit the solution with a better approach.

The software is also supported with the detailed documentation and tutorials .
Artificial intelligence features have been developed and built into NVIDIA graphics cards, and specific NVIDIA AGX and DGX Systems are not only capable of using predefined function algorithms to extract 3D and other information from DICOM images, but also to be “trained” (following a proper training procedure) to extract the appropriate and customized data from a CT scanned image series .
Become a Clinical Tree membership for Full access and enjoy Unlimited articles
If you are a member. Log in here