Physical Address
304 North Cardinal St.
Dorchester Center, MA 02124
In this chapter the direct closure of defects of the eyelid margin is described. Smaller defects may be closed directly without additional tissue. Larger lid margin defects may be closed directly with the addition of extra tissue from beyond the lateral canthus.
Lid margin defects that are too large to be closed directly require separate reconstruction of the anterior covering lamella and the posterior lining lamella. The following chapters describe reconstruction of these larger lid margin defects and closure of periocular defects that do not involve the lid margins.
Chapter 15 describes reconstruction of the anterior covering layer in larger defects of the eyelids or periocular region.
Chapter 16 describes reconstruction of the posterior supporting layer of the eyelids, including support at the canthi.
Chapter 17 describes reconstruction of full-thickness defects with full-thickness flaps which include both anterior and posterior layers.
Eyelid defects, up to one-fourth of the lid length or up to one-third in elderly patients, can usually be closed directly without the addition of tissues from elsewhere ( 14.1 – 14.3 ). This is described in Sect. A. Defects up to about half the lid length can be closed directly with the release of tissues beyond the lateral canthus. These techniques are described in Sect. B. They are lateral cantholysis ( 14.4 ), lateral advancement flap ( 14.5 , 15.5 , 15.6 ), the Tenzel semicircular skin flap ( 14.6 ) and the McGregor cheek flap ( 14.7 ).
A good general rule is to plan closure in such a way that the overall tension in flaps is parallel to adjacent free borders – in this case the lid margins. This minimises the distortion of the lid margin due to the reconstruction. Tension should therefore be horizontal instead of vertical and scars ideally placed within the relaxed skin tension lines (see Chapter 2 , Section A).
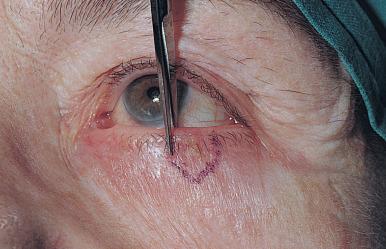
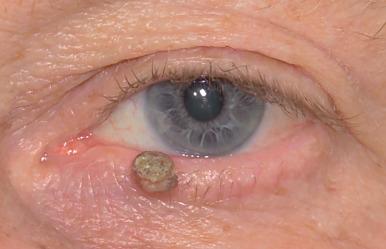
Excision of lid margin tissue is needed to excise abnormal lid tissue or to tighten a lid horizontally. Two cuts are made at right angles to the lid margin. The distal ends of the cuts can be joined either with a V -shape cut ( 14.1 , 14.2 ) or with a transverse cut ( 14.3 ).
Direct closure of the lid margin aims to restore the lid margin without a notch. The principles also apply to repair of a lid margin laceration.
Mark the first two cuts at right angles to the lid margin. Join them to form a pentagon of lid tissue to be excised. Use scissors to make the cuts. Bleeding will be mainly from the tarsal arcades which lie on the tarsal plates, close to the lid margins, in the upper and lower eyelids. In the upper lid a second arterial arcade lies just superior to the upper tarsal border. Pinch the full thickness of the lid gently with forceps close to the wound to control the bleeding while the vessels are cauterised.
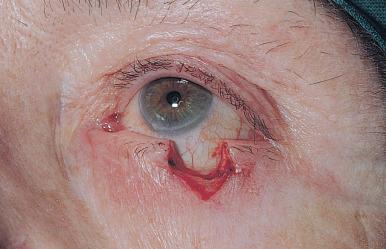
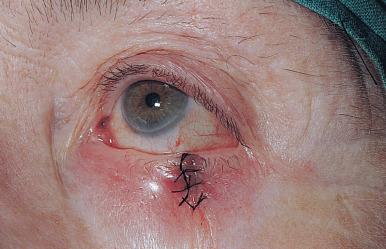
Close the orbicularis muscle with three 6/0 or 7/0 absorbable sutures. Close the skin with interrupted 6/0 nonabsorbable sutures starting at the lash line. Use the uppermost suture to tie down the long end of the grey line suture.
Remove the skin sutures and the grey line suture at a week.
Exactly the same steps are followed for lid margin excision and repair in the upper lid.
Become a Clinical Tree membership for Full access and enjoy Unlimited articles
If you are a member. Log in here