Physical Address
304 North Cardinal St.
Dorchester Center, MA 02124
The goal of any rotator cuff repair technique is to relieve pain, improve strength, increase range of motion, and restore function. An arthroscopic rotator cuff repair can be demanding and requires a sound understanding of biomechanics and tear patterns as well as attention to details. Yet, the credibility of the arthroscopic technique for rotator cuff repair has advanced so dramatically over the past two decades that it is now considered to be the new “gold standard” by most shoulder surgeons in the developed world. The evolution and increase in popularity of the arthroscopic technique has paralleled modern advancements in arthroscopic technology, fixation methods, instrumentation, and surgeon experience.
The positive long-term outcomes of arthroscopic rotator cuff repairs have been well documented in the literature and are equivalent to or better than outcomes associated with mini-open repair techniques.
Arthroscopic rotator cuff repairs display good to excellent outcomes in 90% of cases, with 85% to 95% of patients having improved pain and restoration of function.
These favorable results were seen not only in short-term follow-ups but also in long-term follow-up beyond 5 years.
The arthroscopic technique also provides exclusive advantages not possible in the open and mini-open repair techniques, including an ability to evaluate and treat concomitant intraarticular pathology and to provide better evaluation of tear patterns, better visualization of larger tears, and reduced morbidity and postoperative stiffness.
In particular, one randomized, prospective, controlled trial showed earlier return of motion in the first 12 weeks, although the authors reported that the final outcome was not clinically significant. This may be due to less soft tissue and deltoid dissection, leading to less initial postoperative pain and stiffness.
An arthroscopic cuff repair can be as successful and predictable for large tears as for small- and medium-sized tears, with possibly more biomechanical benefit than the open technique.
The arthroscopic technique provides better visualization of subscapularis and posterior cuff tears. It is imperative to repair the subscapularis and infraspinatus tendons in order to restore balanced force couples ( Figs. 14.1 and 14.2 ). In contrast, the open technique may provide limited visualization and force the surgeon to think only in a mediolateral direction.
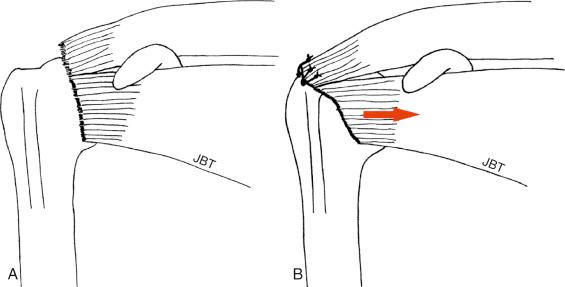
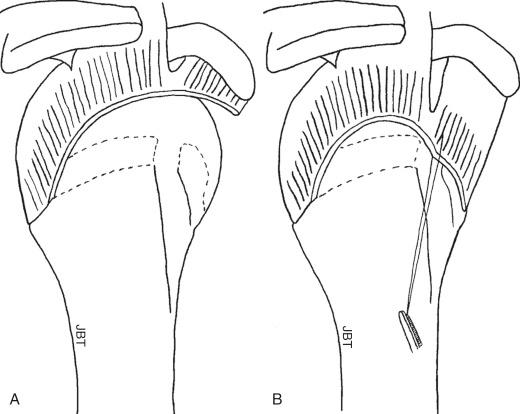
In massive, chronically retracted tears, the arthroscopic technique may be the only method to obtain a successful repair.
With advances in arthroscopic techniques and instrumentation, the learning curve for an all-arthroscopic rotator cuff repair has been and continues to be gradually shortened. A direct leap to an all-arthroscopic rotator cuff repair may be inappropriate and frustrating for the inexperienced surgeon (especially concurrent with an inexperienced team), with added risk for otherwise avoidable complications. A candid discussion regarding the possibility of converting to an open or a mini-open repair should be held with the patient before surgery. It is important to recognize that success and patient satisfaction rates in rotator cuff surgery are higher in patients with intact repairs.
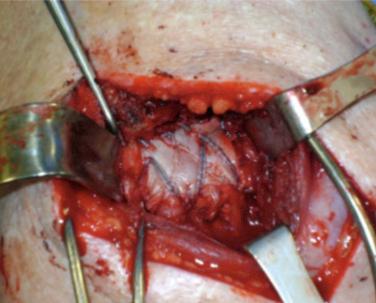
The traditional mini-open technique is a logical approach to transitioning in a systematic and incremental fashion while circumnavigating issues regarding deltoid takedown. The transitioning surgeon should work at his or her pace and comfort level, not become frustrated or overwhelmed, and have a low threshold for converting to a mini-open repair ( Fig. 14.3 ). Multiple studies have shown good to excellent outcomes with the mini-open technique.
The surgeon can begin with simple arthroscopic subacromial decompression and gain experience with visualization, control of bleeding, and removal of the subacromial bursal veil that covers the rotator cuff tendon when transitioning to the all-arthroscopic technique. The next step in the transition may include debridement of tendon edges, recognition of tear patterns, and lysis of adhesions from both the articular surface (superior to the glenoid labrum) and the bursal surface (bursal leaders). At a more advanced level, release of adhesions at the base of the coracoid with mobilization of the superior glenohumeral and coracohumeral ligament complex may need to be done. However, this is performed for large or massive retracted tears. The first author recommends that the transitioning surgeon begin with a small (1–2 cm in length) single-tendon (supraspinatus), nonretracted, mobile, crescent-shaped tear ( Fig. 14.4 ).
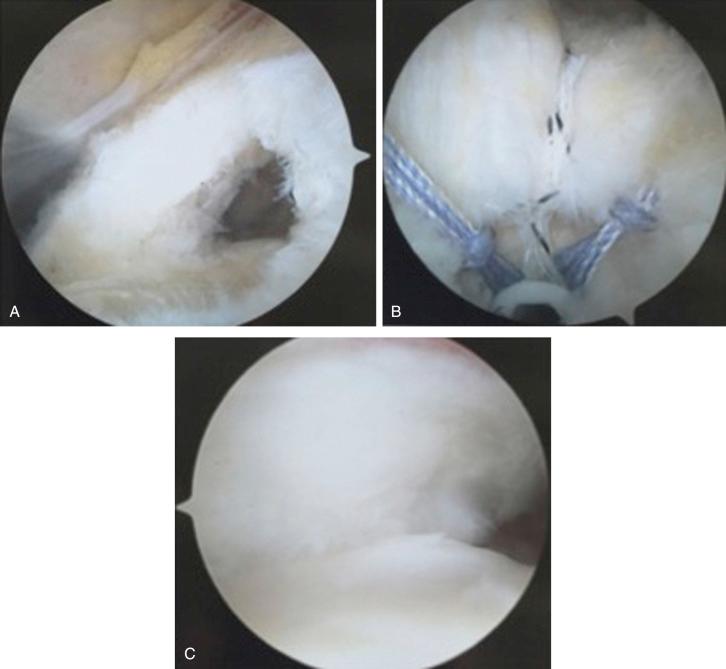
The subsequent step in the transition involves placing sutures through the tendon to assess mobility. If difficulties are encountered in this step, one can convert to the mini-open approach by extending the portal 2–3 cm to gain access for a stable tendon–bone fixation. With more experience, sutures can be incorporated with the suture anchors. At the same time, the greater tuberosity footprint is prepared, and bone tunnels are made for anatomic placement of the anchors.
Nondeliberate systemic hypotensive general anesthesia with all bony prominences well padded; must also pay attention to protecting the common peroneal nerves with either position.
Arthroscopic rotator cuff repair can be performed from either the lateral decubitus or beach chair position ( Fig. 14.5 ).
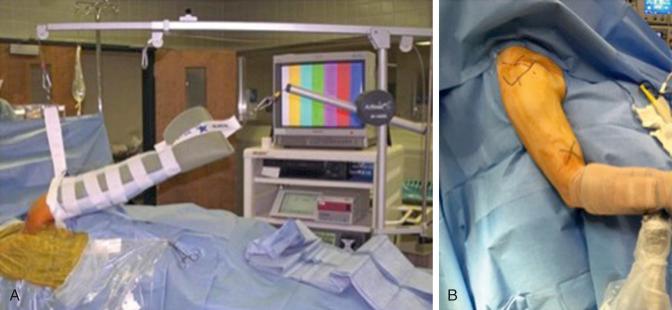
The beach chair position with the arm prepped free and wide exposure to the anterior and posterior shoulder may allow for easier conversion to an open or mini-open procedure ( Fig. 14.6 ).
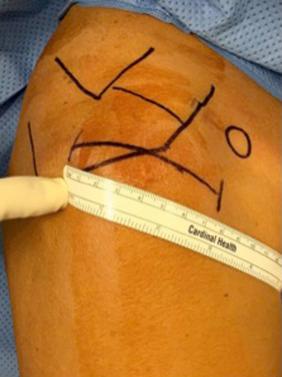
The lateral decubitus position may allow for increased working space and visualization of both the glenohumeral and subacromial compartments.
See Table 14.1 .
| Position | Advantages | Disadvantages |
|---|---|---|
| Lateral decubitus | Traction increases space in the glenohumeral joint and subacromial space | Nonanatomic orientation (i.e., glenoid is parallel to the floor) |
| Traction accentuates labral tears | Must reach around arm for anterior portal | |
| Operating room table and/or patient’s head not in the way of posterior and superior shoulder | May need to reposition and redrape to convert to open procedure | |
| Cautery bubbles move laterally out of view | Not ideal for patients who cannot tolerate regional anesthesia | |
| No increased risk of hypotension/bradycardia | Traction can cause neurovascular and soft-tissue injury | |
| Better cerebral perfusion | Increased risk of injury to axillary and musculocutaneous nerves when placing anteroinferior portal | |
| Beach chair | Upright, anatomic position | Potential mechanical blocks (e.g., the head) to the use of arthroscope in posterior or superior portals |
| Ease of examination under anesthesia and ability to stabilize the scapula | Increased risk of hypotension/bradycardia causing cardiovascular complications (i.e., cerebral ischemia) | |
| Arm not in the way of anterior portal | Cautery bubbles obscure view in the subacromial space | |
| No need to reposition or redrape to covert to open procedure | Fluid can fog camera if there is a leak in the attachment or in certain cameras | |
| Can use regional anesthesia with sedation | Theoretically increased risk of air embolus/pneumothorax | |
| Mobility of surgical arm and ability to set up arm holder to the operating room table | Expensive equipment if using beach chair attachment with or without mechanical arm holder |
See Table 14.2 .
| Beach chair | Lateral decubitus |
|---|---|
| Reference systolic pressures at level of brain | Use of safe shoulder positions when arm is placed in traction |
| Attentive care to intraoperative head positioning | 45 degrees of forward flexion with 90 degrees of abduction |
| Consider use of hypotensive bradycardic episode prophylactic measure when using interscalene block | 45 degrees of forward flexion with 0 degrees of abduction |
| Proper padding of the common peroneal nerves | Placement of anterior inferior portal out of traction |
| Consider use of general anesthesia for longer cases Proper padding of the common peroneal nerves |
Standard arthroscopic shoulder equipment.
Become very familiar with one or two companies’ arthroscopic shoulder sets.
May consider contacting an experienced colleague to discuss any caveats or pearls in order to keep out of trouble with particular instruments.
In general, arthroscopic cannulas are useful for glenohumeral joint work.
In the subacromial compartment, cannulas may limit one’s mobility and direction of suture-passing instruments.
However, cannulas for arthroscopic rotator cuff repair are particularly useful during knot-tying in order to avoid soft-tissue incarceration/bridging.
Not all instruments will fit through all cannulas; therefore cannulas ranging from 5.5 to 10 mm of various types (e.g., fully threaded, smooth, distal cleat) should be available ( Fig. 14.7 ).
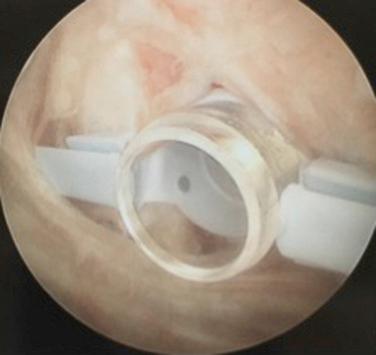
Clear cannulas can help with visualization of instruments, suture passage, and knot-tying.
Both 30- and 70-degree arthroscopes are useful.
Gain familiarity with the 70-degree arthroscope in the subacromial space.
The 70-degree scope provides an acute angle to allow the surgeon to “look around the corner” ( Fig. 14.8 ).
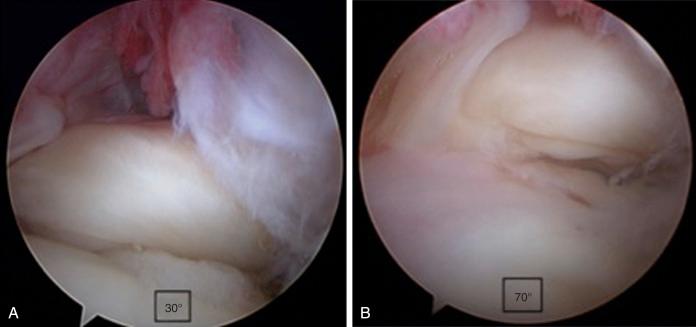
Can be useful for the small anterior supraspinatus tears (often less than or equal to 1 cm) while viewing through a posterior portal by allowing one to obtain an excellent view of the footprint for preparation and anchor placement.
It is particularly useful for more advanced procedures such as subscapularis tendon release and repair, subcoracoid decompression, and double-interval slides.
4.5-mm arthroscopic shaver and a 90-degree radiofrequency device to debride bursal tissue, maintain hemostasis, and improve mobilization of the arthroscope and instruments.
Arthroscopic burrs and ringed curettes are useful for footprint preparation by allowing for light decortication and clearance of the articular margin for procedures such as a transtendon rotator cuff double-row double-pulley repair for partial articular surface tendon avulsion (PASTA) lesions) that are greater than 50% of the tendon width ( Fig. 14.9 ).
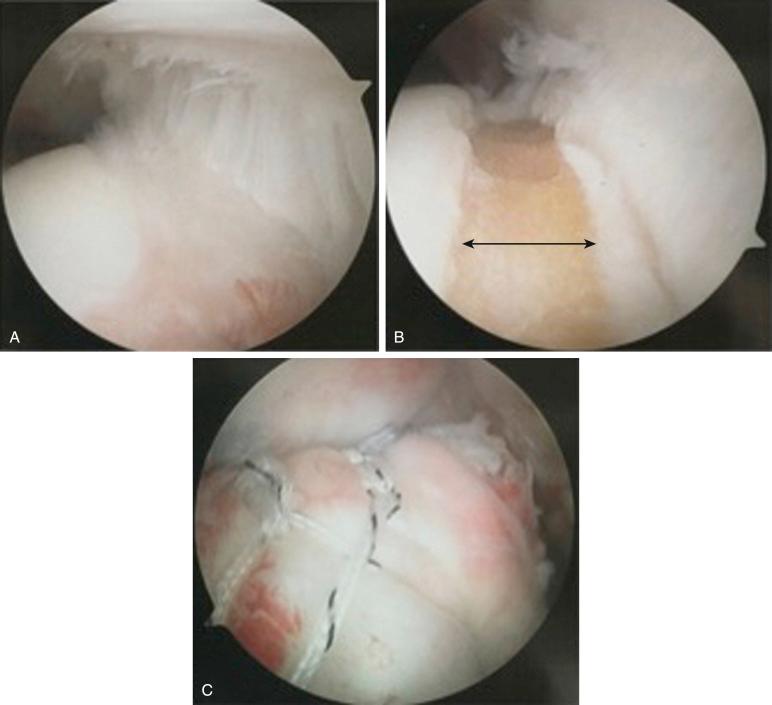
An arthroscopic microfracture instrument can be used to promote a bleeding bone bed and create a nidus for entry of growth factors and blood marrow products (crimson duvet as described by Stephen J. Snyder, MD) ( Fig. 14.10 ).
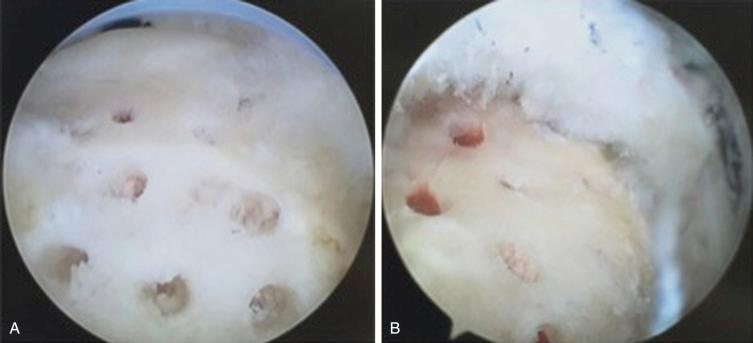
Obtaining adequate proprioceptive or tactile feedback while passing sutures is crucial for the transitioning arthroscopic surgeon.
Many commercially available devices exist for suture passage through tendon. One should become familiar with each technique before attempting arthroscopic repairs.
Useful for delaminated tears of the rotator cuff tendon to ensure that each layer is incorporated anatomically into the repair site ( Figs. 14.11 and 14.12 ).
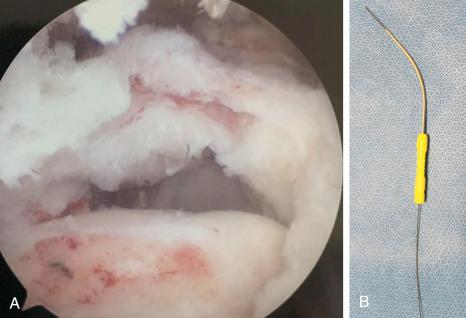
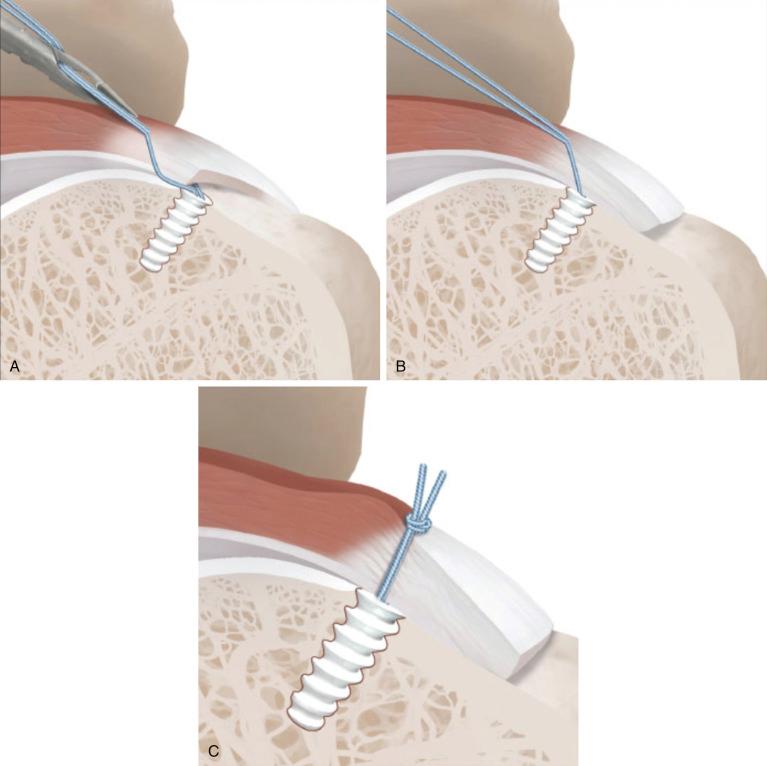
The suture can be passed vertically through the torn tendon and retrieved in one step without creating a muscle-tendon mismatch ( Figs. 14.13–14.15 ).
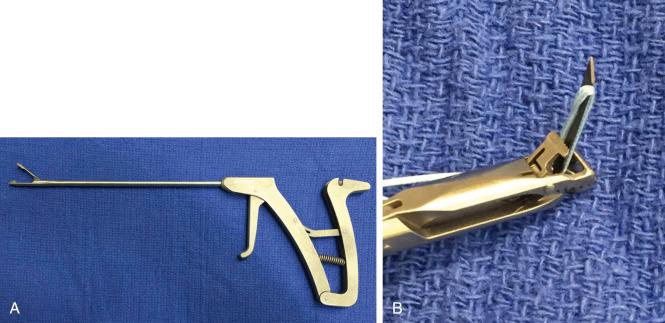
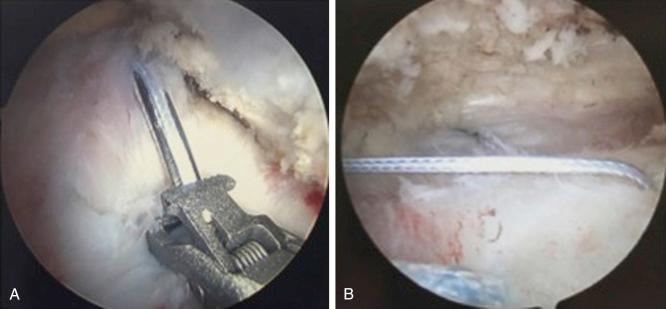
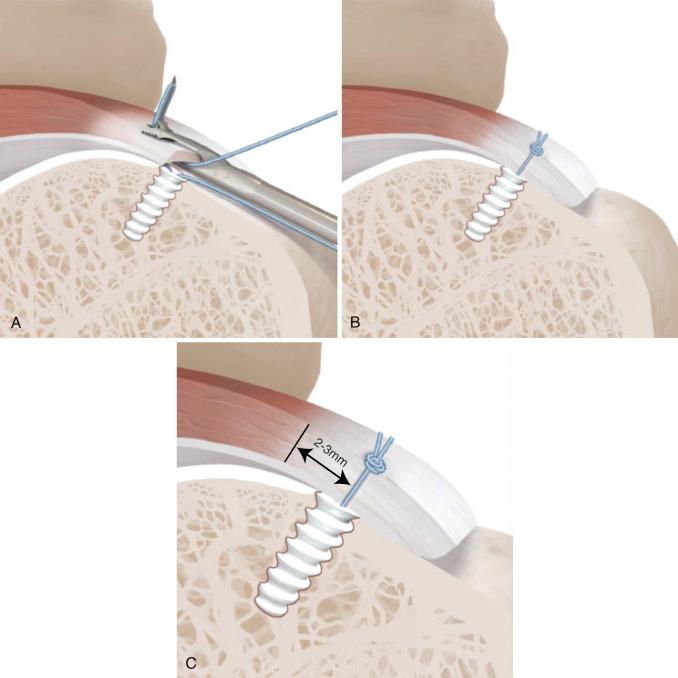
These instruments come in left and right with different radii of curvature ( Fig. 14.16 ).
The instrument penetrates the soft tissue first, and then the suture-shuttling loop or wire is retrieved through a separate portal. Subsequently, the designated suture limb is placed through the shuttle loop or wire outside the shoulder. The shuttle loop or wire then is pulled back into the shoulder, through the tendon, and out the other portal.
This device is particularly useful for margin convergence and U- and L-shaped tears. Please refer to Step 4 for further details on margin convergence.
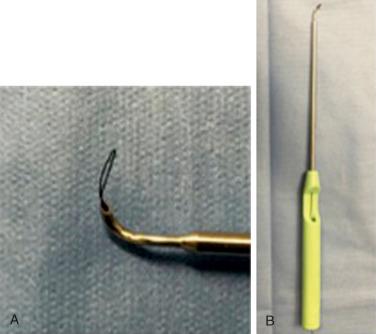
Anchors vary significantly in size, shape, composition, and insertion technique.
One should become familiar with the steps necessary for anchor placement for each device used.
Choose anchors that have sufficient pullout strength and suture cutout: those that are double- or triple-loaded or can accept at least two sutures to maximize footprint restoration.
Consider threaded screw-in anchors.
Choose anchors that are strong enough for in vivo forces and cause minimal suture abrasion.
Suture characteristics should include being nonabsorbable, thereby minimizing the effect of suture abrasion and allowing for ease of knot-tying.
For the last two decades, metal anchors were the mainstay. More recently, nonmetallic anchors (e.g., polyglycolic acid, poly- l -lactic acid, polyether ether ketone, tricalcium phosphate, and hydroxyapatite) are being used due to capability of bone integration and ease of revision, if necessary.
Knotless suture anchors are also available and should have the same characteristics.
Become a Clinical Tree membership for Full access and enjoy Unlimited articles
If you are a member. Log in here