Physical Address
304 North Cardinal St.
Dorchester Center, MA 02124
Controlling the shape of the nasal tip can be one of the most challenging problems rhinoplasty surgeons face in practice. Prior to the advent of suture techniques, the cartilages of the nose were largely controlled, by excision, crushing, and scoring. At the time, these methods were thought to be the easiest method to create a new nasal shape. Unfortunately, they all potentially damaged the cartilage and consequently often led to instability, collapse, contour irregularities, and a host of secondary problems including alar retraction, pinched tips, retracted alae, and external valve collapse.
In the late 1980s, Tardy et al. used what is now called a transdomal suture to narrow the tip cartilages in a closed (endonasal) rhinoplasty, and soon Daniel began using this technique in the open approach, which was described as the “dome-definition suture.” Emphasizing the need for nondestructive methods of controlling cartilage shape, Tebbetts provided a comprehensive approach to suture techniques, including his lateral crural spanning suture that reduced tip convexity and narrowed the overall width of the nasal tip. Since that time, a wide variety of suture techniques have been proposed to control the width and position of the tip and to reduce lateral crural bulbosity. Rohrich et al. provided an algorithm for the boxy tip, and most recently, Guyuron et al. used sutures to control the shape of the foot plates and reviewed the entire subject of suture techniques. Over the past decades, suture techniques have gradually come into vogue and now represent a quantum leap in the ability to control the shape of the nasal architectural framework. However, suture techniques should not be considered as an all-encompassing substitute for cartilage grafting. When there are major changes to be made in the nasal region, cartilage grafting may be necessary as an adjunct to suturing techniques. The choice of suture techniques chosen here represents the personal favorite of the authors.
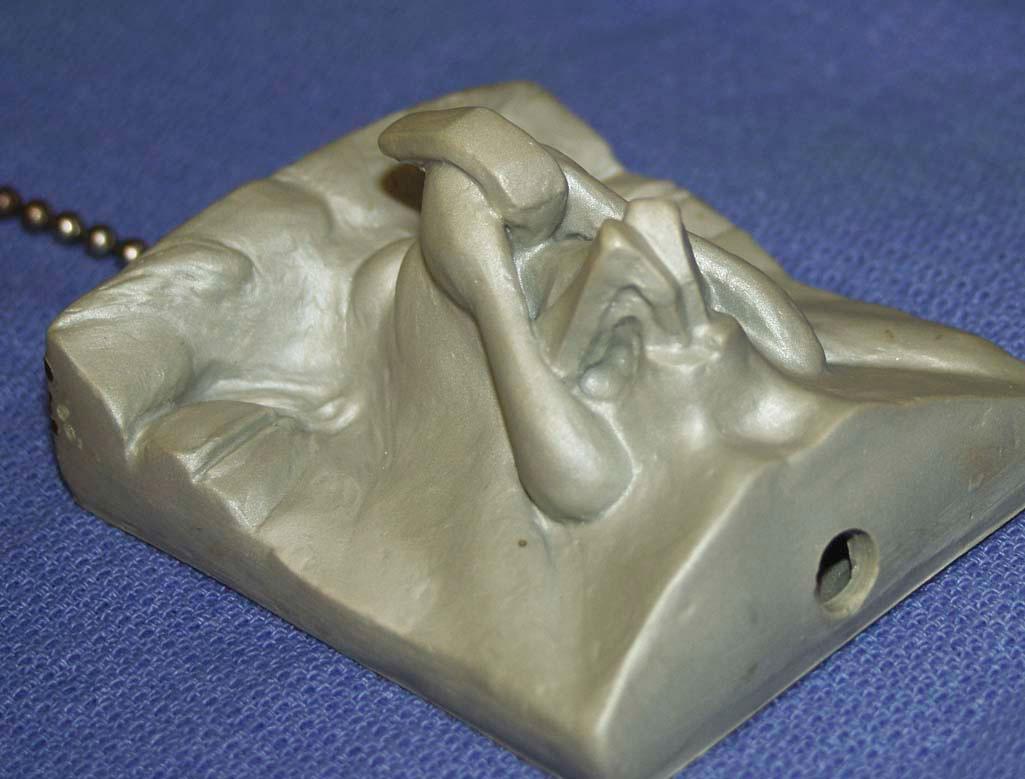
Models facilitate sculpting
In planning what could be termed “suture tiplasty,” it is important to have a structural shape and goal in mind ( Figure 14-1 ). A generic tip would consist of the following: the lateral crus should be fairly flat (not convex or concave) and at least 5 to 6 mm wide. The tip cartilages resemble McDonald's arches. The actual domes are separated from one another at the cephalic end by about 3 mm. Each dome has an axis, and the two axes form the “angle of domal separation” approximating 70 to 90 degrees. On lateral view, one will note that the angle formed by the medial/middle crus is anywhere from 15 to 30 degrees. The tip will commonly lie 6 to 8 mm above (anterior) to the dorsal septum. Commercially available anatomic models can aid the novice surgeon in sculpting the tip cartilages to these dimensions. As any commercial artist will tell you, copying is much easier than creating from memory.
Cephalic resection of the lateral crus
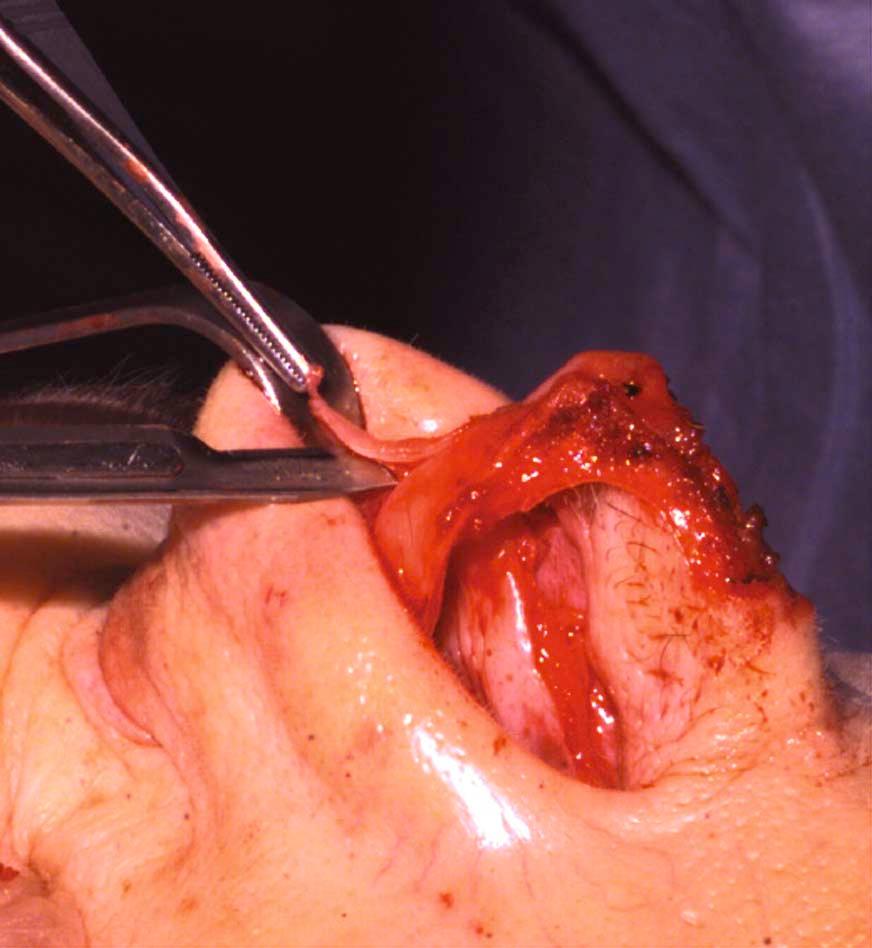
Before implementing the suture techniques to control the shape of the nasal tip during a primary rhinoplasty, the cephalic component of the lateral crus is typically trimmed. Cephalic resection should result in a lateral crus that is never narrower than 6 mm wide ( Figure 14-2 ). There are two reasons for carrying out this maneuver in this fashion: (1) the shape of the lateral crus can more precisely be controlled to reduce its convexity and (2) the integrity of the lateral crus (which effectively constitutes the external valve) is maintained. After the cephalic trim is performed, one can use suture techniques to reduce any remaining convexity or concavity. Even if the lateral crus is cephalically oriented, as is commonly the case, the convexity of the entire lateral crus can and should be converted to a normal flat orientation with the aid of suturing techniques.
Suture choice
We have not found the suture type and size to be critically important factors. However, we routinely use 5-0 or 4-0 polydioxanone (PDS) sutures to control cartilage shape. We previously used nylon, but experience has demonstrated that the alar cartilage retains its new shape even after the PDS dissolves. Moreover, the potential problems of suture exposure in the nasal cavity are avoided given the dissolvable nature of the PDS suture. Suture color does not seem to be a critical issue either. Tapered needles are preferable because they are less likely to “cut through” the cartilage. However, cutting needles will work satisfactorily if round needles are not available.
Intraoperative delayed suturing effect
Cartilages will sometimes change their shape slightly after sutures are placed. This can be attributed to the local anesthetics diffusing through the soft tissues or to the gradual change of the shape of the cartilage over time. Whatever the cause, it is helpful to plan to reassess the effect of the sutures that have been applied intraoperatively before completing the case. Minor warping changes can occur anywhere up to 45 minutes after a suture is placed in the cartilage. Fortunately, undesired changes are almost always reversible by removing and replacing the suture if the intended effect is not accomplished.
It is helpful to have a suture algorithm for the tip cartilages. In the senior author's experience, four types of sutures can control the entire tip shape in most cases (hemitransdomal, interdomal, lateral crural mattress, and columellar-septal). A few others are occasionally used.
Until recently, the senior author's first line and most commonly used suture was a transdomal suture to narrow the domal width. However, a modification of that technique developed by Tardy for the closed (endonasal) approach and further adapted by Daniel for the open (external) approach has become our first suture choice. The hemitransdomal suture is intended to narrow the cephalic end of the dome, thereby causing a small amount of eversion of the lateral crus and minimizing the chance of a collapsed marginal rim of the lateral crus.
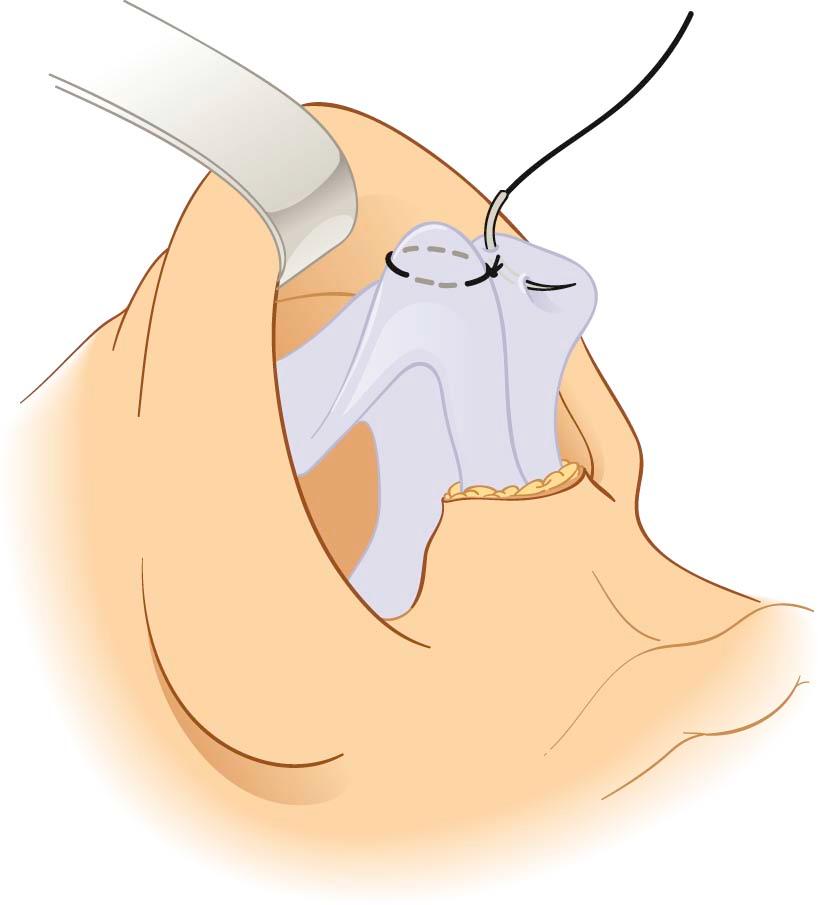
The vestibular skin of the dome is infiltrated with local anesthesia to avoid needle penetration into the vestibular skin. A hemitransdomal suture (5-0 PDS) is then placed in the cephalic end of the dome. In essence, the cephalic end of the middle crus ( posterior or deep to the dome) is pinched to the cephalic end of the lateral crus ( posterior or deep to the dome) ( Figure 14-3 ). The needle enters the cartilages parallel to the surface of the dome. The suture is usually located 2 to 3 mm below dome level. The lower the suture is placed from the dome, the more it tends to evert the lateral crus. Also, a more generous purchase into the cephalic dome will reduce the dome width. Typically, a short learning curve is involved before one corrects the dome with one attempt only.
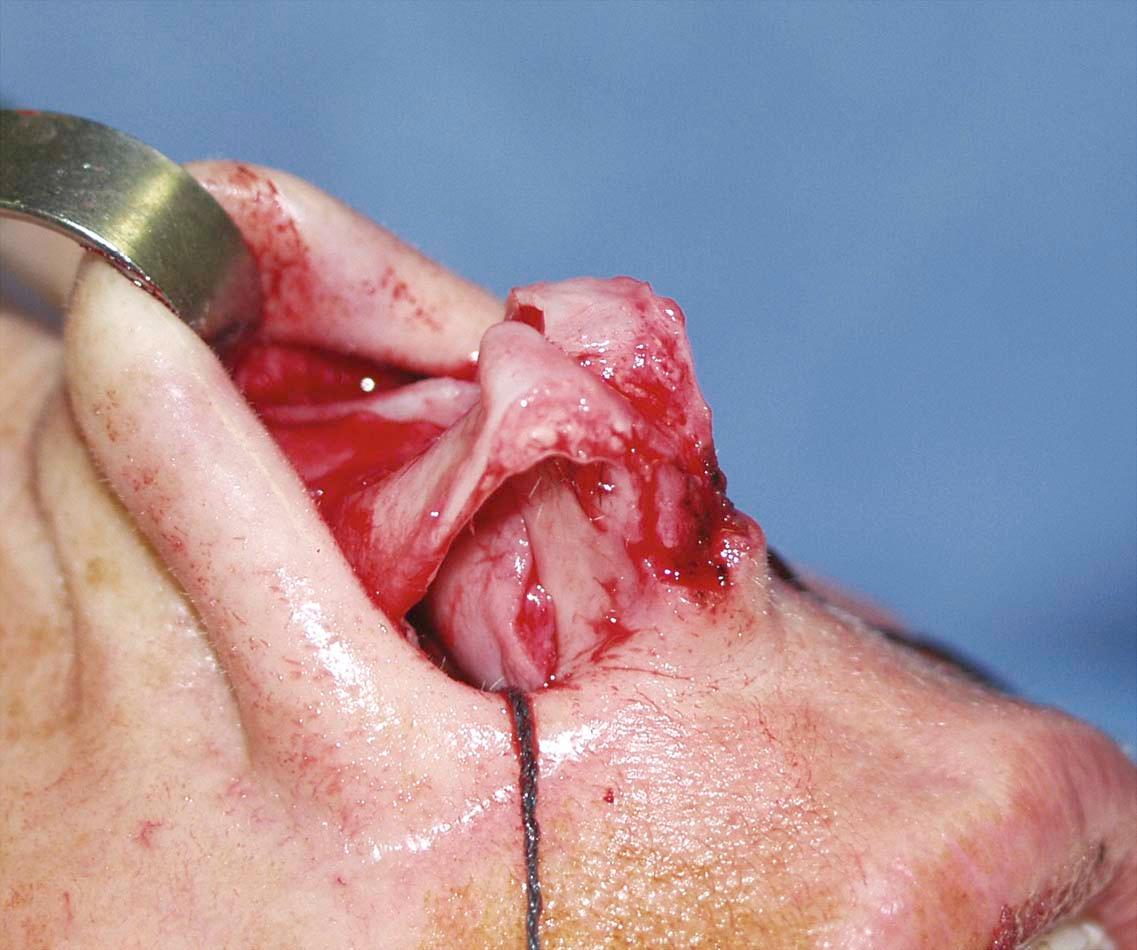
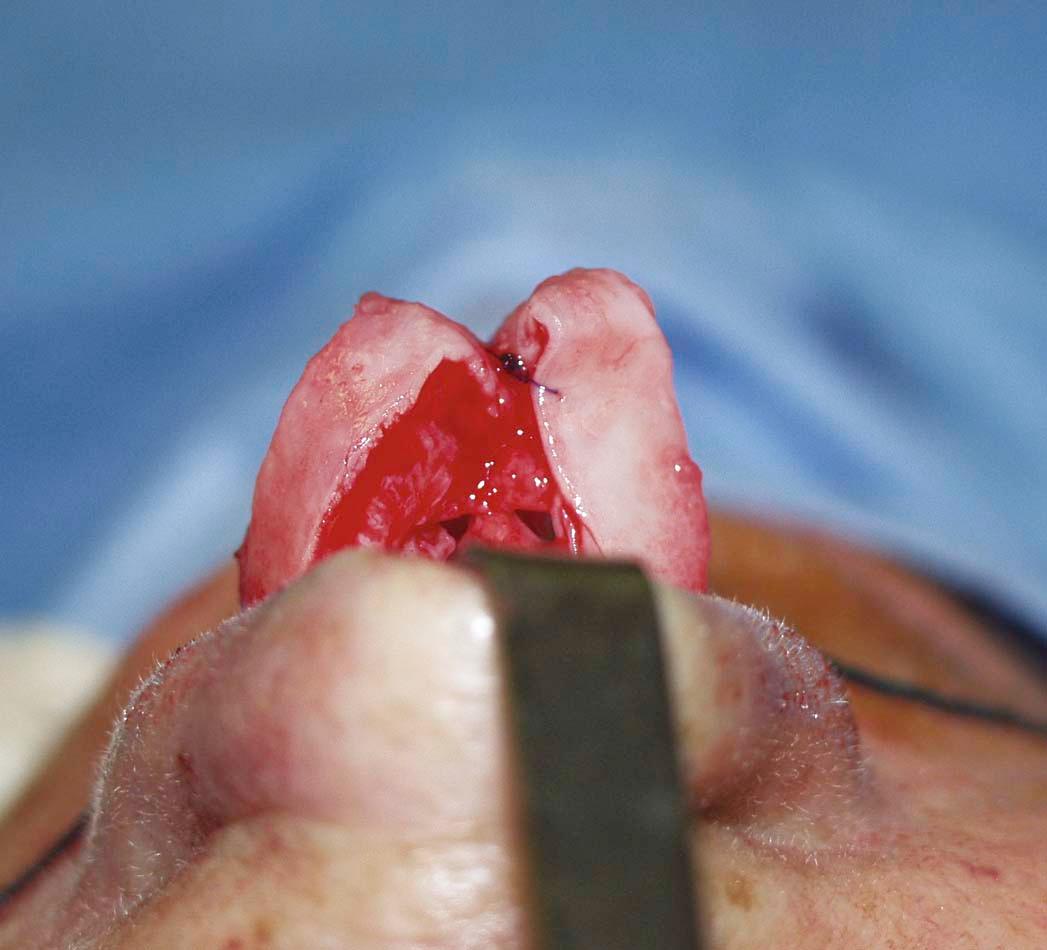
Figures 14-4 and 14-5 demonstrate the effect of a hemitransdomal suture intraoperatively. Note that the cephalic part of the dome is narrowed but the caudal part of the dome is not narrowed much, if any. You can also notice that the caudal edge of the lateral crus is more everted, or at least not inverted, and that the caudal edge of the rim is not forced into concavity. A single hemitransdomal suture is usually all that is required to reshape the dome; however, some patients with a very broad or thick-walled dome may also require a transdomal suture as well.
The classic transdomal suture may inadvertently result in a pinched appearance that exhibits slight concavity of the alar rims. This suture may also unintentionally cause twisting of the lateral crus such that the alar rim is turned medially or inverted. Guyuron and Daniel suggested placing the transdomal suture at the cephalic end of the dome to minimize this side effect. Toriuimi warned that tip sutures can displace the caudal margin of the lateral crus well below the cephalic margin resulting in a pinched nasal tip. He suggested correcting this with the use of an alar rim graft. However, in our experience, eversion of the lateral crus often times cannot be achieved by just putting the transdomal suture at the cephalic end. Thus, the final result may on occasion still be a pinched nasal tip. One solution to this problem is to place the suture posterior (deep) to the very cephalic end of the dome and let it fully evert the lateral crus while narrowing the cephalic end of the dome.
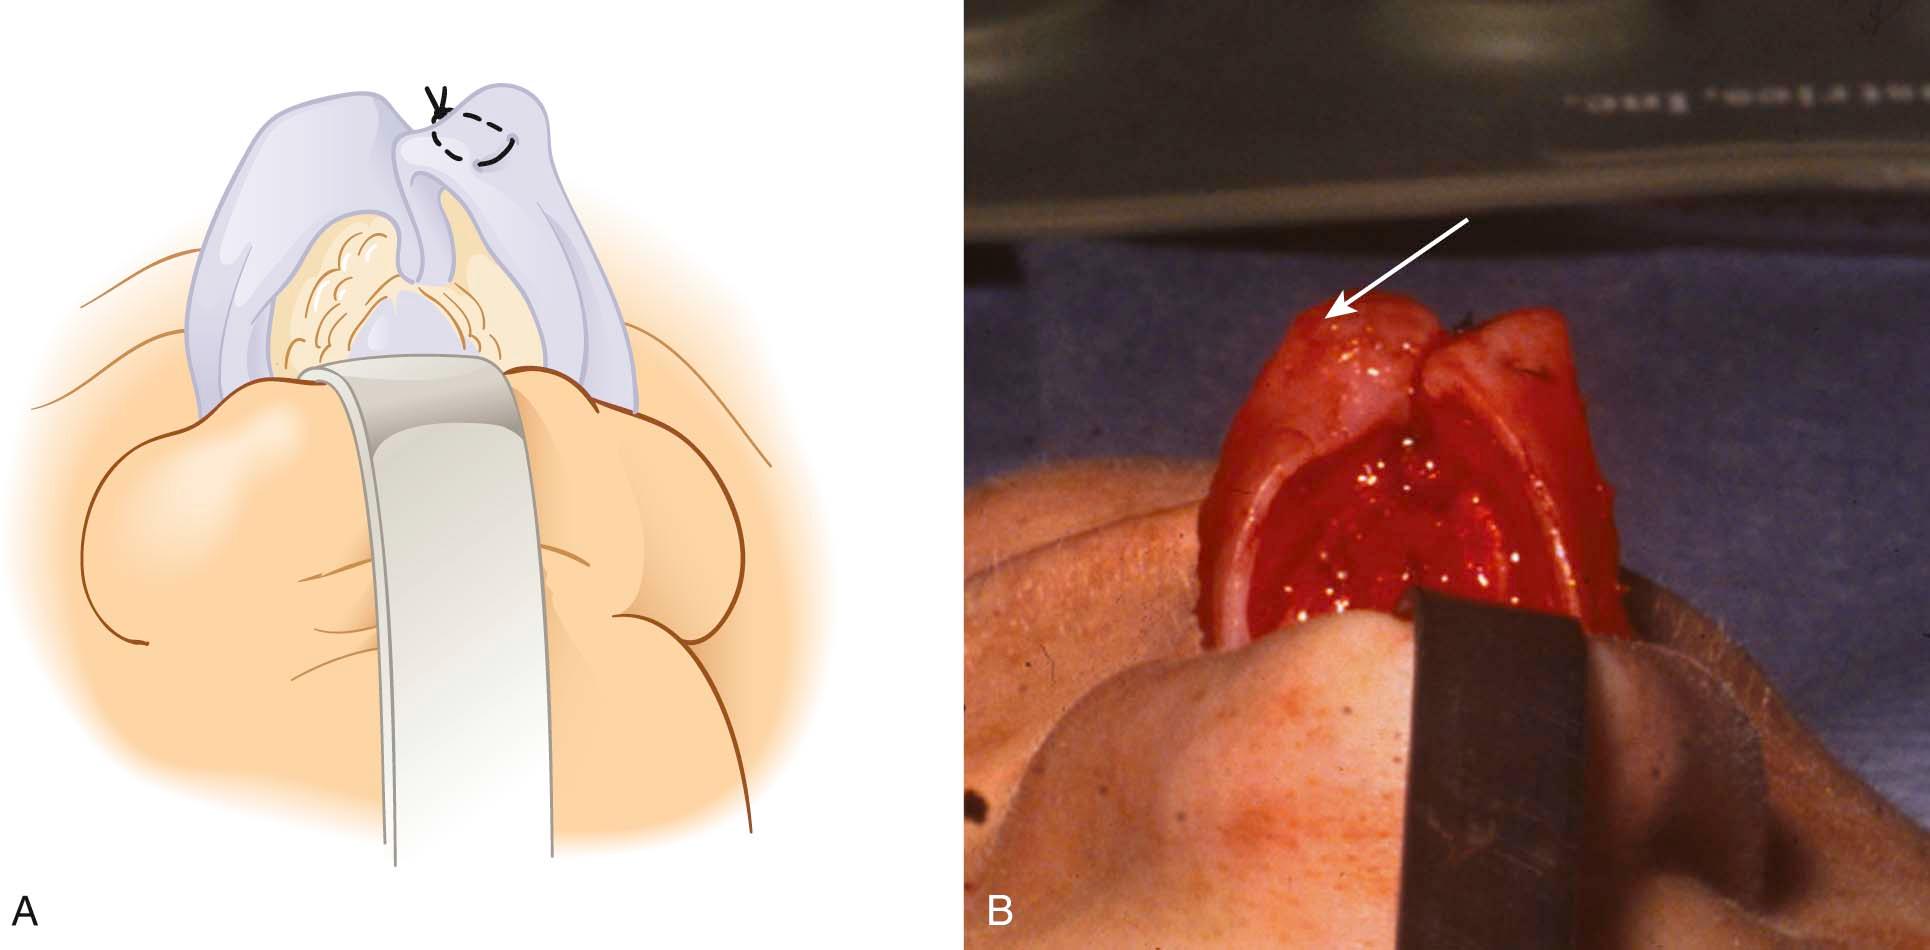
When the transdomal suture is needed it is executed as follows ( Figure 14-6 ): The vestibular skin of the undersurface of the dome is first infiltrated with local anesthesia to thicken that layer temporarily to prevent the needle from penetrating the underlying epithelial surface. Usually a 5-0 PDS (sometimes 4-0) mattress suture is applied such that the knot is on the medial side of the dome. To verify that the needle did not penetrate the vestibular skin, the needle is momentarily left sitting in the cartilage after taking a bite of it. The needle holder is then used to palpate the undersurface of the lateral crus for metal.
Become a Clinical Tree membership for Full access and enjoy Unlimited articles
If you are a member. Log in here