Physical Address
304 North Cardinal St.
Dorchester Center, MA 02124
On completion of this chapter, the reader should be able to:
Discuss nonscanning aspects of being a sonographer
Define patient-centered care
Describe patient transfer techniques
Demonstrate proper placement of a blood pressure cuff on the arm
Discuss the importance of proper disinfection of the transducer and ultrasound equipment
Discuss Spaulding’s classification system and how it relates to ultrasound
List various types of patient isolation
Sonography is a profession that is more than just creating diagnostic images. A sonographer will have a patient under their care while they are performing the exam and will need to know some basic patient care skills as well as understand how to keep the patient, as well as themselves, safe. Understanding and mastering these nonscanning skills will make you a well-rounded sonographer. The goal of this chapter is to provide you with the knowledge needed to provide care and a safe environment for patients under your care.
A good sonographer understands their commitments to their patient, the sonologist, their employer, their coworkers, to the sonography profession, and to themselves. What exactly are these commitments? Our patients expect us to have the skills and knowledge to produce a diagnostic sonographic exam, to keep them safe while in our care, and to be understanding of their needs.
The sonologist is the interpreting physician of the sonographic study. There are a variety of sonologists but the most common physicians that a sonographer will work with are radiologists, cardiologists, vascular surgeons, and obstetricians. Sonography is a very unique imaging modality as it involves trust between the sonographer and the sonologist. Breaking this trust (by too often missing pathology or frequently trying to cover up your mistakes) can take a long time to repair before the sonologist gains confidence in your studies. The commitment of the sonographer to the sonologist is to produce diagnostic studies, to be trustworthy, and to have good interpersonal and communication skills.
The commitment to the employer will enable the sonographer to be seen as a valuable employee. Such commitments include punctuality, protecting and respecting the work environment, adhering to policies and guidelines, being a positive representative of the institution to the outside world, and taking care of the patient.
The commitments to your coworkers are important to promote a healthy work environment. This includes maintaining good work habits, following and adhering to both the policies and guidelines of the ultrasound department, supporting each other during difficult times as well as celebrating the good times, and being respectful to one another.
As a sonographer, there is a need to educate our patients about the profession of sonography, to follow the SDMS Sonographer Code of Ethics, to support the ultrasound community and its professional organizations with our membership, and to attain national registration in the field of ultrasound in which you are practicing.
We should have the desire to help all people; to use our skills and knowledge to obtain the best diagnostic exam on every patient; to be a good team player; to constantly advance our knowledge of anatomy, physiology, and pathology; to utilize ergonomics; and to maintain good physical and mental health. A positive attitude brings with it a sense of pride in your work.
Florence Nightingale advocated focusing on the patient, rather than on the disease, as a way to recognize the patient’s basic needs by improving hygiene practices. By distinguishing patient care from medicine, Nightingale established the value of nurses and created the earliest patient advocates.
Patient-centered care ensures that the patient and/or their family is involved in all clinical decisions for their care and treatment. To a sonographer this means being respectful if the patient refuses the exam, or part of the exam, such as the endovaginal aspect of a pelvic sonogram, or wants the exam terminated early. As a sonographer, you should not force the patient to do anything they are uncomfortable with; however, it would be appropriate to ask the question “Why?” Ask the patient why they are refusing the exam or want the exam stopped early. You may discover their fears or concerns, which may help you understand their refusal . You may be able to address their concerns, and they will consent to the exam or to finish the exam. For example, the patient may say that they do not want the ultrasound as they just had a CT scan, that they feel like a “guinea pig” and the hospital is just trying to make money off of them. Discussing the differences between these two imaging modalities may be enough to relieve their concerns and allow you to perform the exam.
Due to the ultrasound imaging from the entertainment industry, many patients believe that a physician will be performing their exam and may get upset when you tell them that you will be taking care of them. This situation should lead to a conversation about the roles and misconceptions of sonography, sonographers, and sonologists. Allowing the patient to voice their concerns and to ask you questions shows that you respect them. Be sure that you address their concerns and answer their questions and not brush them off.
The most important facet of being a sonographer is seeing the patient as a person, not as an appointment or a type of study. We need to treat the patient with respect, empathy, and compassion. You must put aside personal feelings and prejudices and be considerate of many factors such as patient’s age, sex, gender identification, sexual orientation, race, religious beliefs, ethnicity, language spoken, occupation, disabilities, and socioeconomic status. Good patient care is more than your sonography skills and includes open communication with the patients, which will allow them to express their concerns, fears, and frustrations.
The patient-centered approach encourages sonographers to relate to patients as people with needs, who are to be respected and cared for in a mature and dignified manner. They should be listened to and their concerns not dismissed. A common phrase a sonographer may hear is, “But it hurts here. Aren’t you going to look there?” The knee-jerk reaction is to say, “I can only scan the area ordered by the physician” instead of explaining things such as referred pain or the limitations of ultrasound. A good solution is to place the transducer over the area of pain and take a few images labeled as “area of pain.” This makes the patient feel heard and their concerns addressed. I remember being called in to do a right upper quadrant sonogram on a patient with an indication of right-sided pain. The patient asked if I could scan where she felt the pain. I put the transducer there and found a 20 cm complex ovarian mass despite a normal pelvic exam a few days earlier. I called the emergency department physician and told them of my findings and if they would order a pelvic ultrasound, to which they agreed. The surgeon came to see me the next day and told me that I had saved her life as the mass was ready to rupture any moment and would have spread the cancer throughout her body. You can imagine how I felt especially when the patient and her husband came and thanked me for saving her life when she was being discharged. (A few tears of joy were shed by all.) This is one of many joys of being a sonographer, and I will never forget that patient. Just think of the consequences if I had refused to put the transducer where she had pain.
Sonographers must remember that the patients’ needs come first, despite how it will affect you personally. You cannot let the patient know how upset and frustrated you are for having to stay over to do their exam. This frustration may manifest itself as being curt with the patient or maybe even treating them a little rough. Never take your frustrations out on the patient. After all, the patient did not ask to have a swollen leg at 5 pm on a Friday. You are working in a profession in which you may need to put yourself second to the needs of the patient. Remember, they are the reason that we have a job.
You have chosen a profession that is challenging in many ways. It will test you technically, physically, mentally, and even emotionally. As a student or staff sonographer, you will need to focus on many things at once as you are scanning including your knowledge of anatomy, physiology, pathology, imaging protocols, and techniques. You may be faced with pressures from physicians, time restraints, challenging personalities, or even your own personal issues. What is important is to provide caring attention to your patient who is not focused on the same things as you. They are worried about what you are going to do to them, will it hurt, and what the results are going to be. As a sonographer, you need to constantly provide a level of care similar to that which you would want provided to you or a loved one. You have to challenge yourself to make every patient experience one in which your patient can sense that you really care. You can do this through the practice of compassion, sympathy, and empathy.
Empathy is the ability to understand and share the feelings of another usually as a result of you having experienced similar circumstances. Sympathy refers to your ability to feel sorry about their situation even though you have not had a similar experience. In health care, empathy or sympathy toward your patient will enable you to understand what they need from you as you perform their exam. For example, maybe you had a urinary tract infection (UTI) in the past, and you remember how cold you were from the fever caused by the UTI. This might cause you to get the patient a blanket without them asking for one. This may surprise the patient at your thoughtfulness. This is an example of empathy as you have experienced something similar. By contrast, if you had never had a UTI, you would show sympathy to the patient by asking if them if they would like a blanket.
Compassion is when we are moved by someone’s pain or suffering and are motivated to help them. Compassion for your patient is what drives you to do something for them. Maybe your patient has had other tests that have not diagnosed why they are in pain. This may motivate you to go that extra mile to try to find the cause of their pain, if it can be seen with ultrasound. You can show compassion by asking the patient if they need to talk when you sense that they are upset. Even if they do not want to talk, the patient will sense your compassion for them.
There is so much misinformation out there about sonography thanks to the entertainment industry. Some patients will assume that a doctor will perform their exam and are surprised and maybe even concerned to discover that you will be performing the sonogram. This is an educational moment to correct any misconceptions that the patient might have. Ask them if they have ever had an ultrasound before. If not, you can help patients understand how ultrasound works by saying something like, “I will be using soundwaves to create images of your uterus and ovaries,” followed by a variation on the following explanation, “I will be exposing your stomach area and will be putting some gel on your skin to help the soundbeam get into your body. There is no radiation, and it should be painless. If you feel any pain, please let me know.” Let them know if they will need to be in different positions: “I will start you out on your back and will also have you turn up on your side facing away from me.” Do not forget to tell them that they will need to hold their breath if needed. I used to say, “Sometimes I get involved scanning and may forget to tell you to breathe. When you need to breathe, please go ahead and breathe.” Always give an idea on how long they will be with you: “The ultrasound should take about 30 minutes. I then need to have the images checked by the radiologist before you leave to make sure that they don’t want any additional images. The whole process takes about 40 minutes from start to finish.” At the end of the exam explain that their physician will be the one giving them the results. Give them an estimation of the typical time it takes the physician to obtain the results. In this electronic world physicians typically have their patients’ ultrasound results in 8 to 24 hours. Before you start, it is important to ask the patient if they have any questions. You have your spiel that you usually tell patients, but every patient is different, and you may need to address any specific questions that that patient may have.
Consent means giving permission to have something done, in this case an ultrasound study. Hopefully, the patient’s physician has already informed the patient that they need to have an ultrasound exam, the reason why, and that the patient has verbally consented to their physician to have the test. If the patient is awake, alert, and legally responsible for their own health decisions, you will obtain their permission to perform the ultrasound exam through verbal communication. This is called verbal consent and typically is not documented. This is the case for any ultrasound whether it is external or internal, although some places may require a written consent for a transvaginal study. Transvaginal ultrasounds will always require the consent of the patient or the person that is legally responsible for their health care decisions, when the patient is unable to give consent or when the patient is a minor. When another person gives consent on behalf of the patient it may need to be in the form of a written consent , or the name of the person documented in the patient’s medical records. If it is a medical emergency the physician taking care of the patient may give consent, based on hospital policy which may require two doctors to give consent. This would need to be documented as per hospital policy. As a staff sonographer you will need to know and follow these policies. For a written consent it is appropriate for the sonographer to witness the signature on the consent form. If you are asked to witness a consent when you did not see the patient sign it, show the patient the consent form and ask them to verify that that is their signature before you sign.
Consent is mandatory when the patient is having any invasive procedure such as a biopsy or fluid tap. The consent needs to list the benefits, potential complications, and alternative options to the procedure which might include doing nothing. The patient or a person legally responsible for the patient must sign the consent form, which will become part of the patient’s permanent record. The consent must be witnessed and signed (which can be the sonographer as previously discussed) ( Fig. 2.1 ). A student typically is not allowed to witness the consent since they are not an employee of the hospital. Some hospitals are transitioning into electronic consents with everyone signing on an electronic signature capture pad which will transfer everything into the patient’s electronic medical record.

As discussed, an ultrasound should not be performed if the patient refuses the exam or asks you to stop. If you cannot persuade the patient to finish their exam, then the reading physician or the ordering physician should talk to the patient and address their concerns. If the patient agrees, you may finish the exam; if not, the exam will be terminated. Whatever the reason, you should remain respectful to the patient and not be rude or condescending to them.
Performing an ultrasound study will involve exposure of part of the patient’s body, and you should assume everyone is modest. In fact, you may come across some cultures or religions where people cannot expose their skin in public, especially to someone they perceive as the opposite sex. The sonographer must honor if a patient specifically requests a male or female to perform their study. Before beginning each ultrasound examination, be sure to close the door and pull any curtains for the patient’s privacy. Inform the patient that you are going to be lifting their shirt or gown, uncovering only the parts of the body that are necessary to perform the exam. You will want to explain to the patient why you are tucking a towel into their pants or shirt to protect their clothes from the gel. Sometimes the patient will put the gown on with the opening in the front. This can make it difficult to keep their breasts covered so place a towel, sheet, or another gown across their chest explaining that you want to keep their chest covered.
Always allow the patient privacy when they are changing their clothes. Knock on the door before entering, crack it just a little and ask if they are finished changing before entering. Do not assume that they are finished changing and barge into the room.
If you need to go into a room where a patient is being scanned, for example, looking for a certain transducer, always knock on the door and ask for permission to enter. Be respectful when entering the room, maintaining the privacy of the patient. Just imagine the patient’s embarrassment if the door is flung open while they are having a vaginal, scrotal, or breast ultrasound, and have now been exposed to “the world.”
Another aspect of privacy is to not discuss the patient’s information in public places such as an elevator or in the hallway. Do not ask questions about their medical history where others can easily overhear you. Not only can this make the patient uncomfortable but it is also a violation of their protected health information. Your place of employment or ultrasound program will train you about the Health Insurance Portability and Accountability Act (HIPAA) of 1996, which established national standards for protection of patient medical information (or as it is commonly called, PHI). You must comply with the regulations involved with this act and be aware of ways that patient information can be compromised, especially in social media. A student may be excited when they see pathology or perform a good exam or a sonographer when they have unusual findings. However, writing about your patient on your social media account even though their name is not mentioned can be considered a violation of HIPAA. People have lost their jobs talking about patients on their social media accounts.
Some patients may want a friend or family member with them for support and at other times they may want privacy during their exam. The preference of the patient, whether an inpatient or outpatient, must always be considered. In a patient’s hospital room, if the patient would like visitors or family members to stay with them, you should try to honor this request. Depending on the situation, you will communicate that it is either fine for them to stay, or that it is preferred that they wait somewhere else and the reason why. At times you may get more cooperation if you allow their visitors to stay.
When performing a portable ultrasound, the nurse is another person that may be in the room. The nurse in the room can also help make your job easier by providing you with information about the patient, helping to position the patient, providing comfort to the patient during the exam, and communicating as needed with the patient and their visitors. There may be times that the nurse or other hospital staff will have to interrupt the ultrasound to address a patient care issue, such as giving important meds. Usually, you can manage to work around each other but if not, you should step away from the bed until they have finished.
When a patient comes to the ultrasound department you have a little more control over who comes into the room with the patient. Consider their wishes on deciding if the visitor should wait outside. If the patient is a minor, in most cases you will have the parent come into the ultrasound room with you. A teenager may be uncomfortable having their parent in the room for an ultrasound, especially if it is a breast, pelvic, or testicular exam. A good solution is to ask the patient if they prefer to have their parent with them or to wait outside. This may be a difficult conversation with the parent explaining the reason why they should wait outside. If they are going to stay, try and position the parent so that they cannot see their child.
There may be times when you need to leave a patient alone in a room. This can be a concern for a very ill patient or someone with a risk of falling. If you need to leave the patient alone in a room, be sure to lower the bed height, raise the bedrails, and leave your patient with a call button ( Fig. 2.2 ). If necessary, find someone to sit with your patient until you return or move them into a place where they can be observed. If a family member is waiting outside, invite them in to stay with the patient. Remember patient safety first.
Certain types of ultrasound exams may require a chaperone. A chaperone is an employee that is present during a sensitive clinical exam or procedure in which a patient may feel uncomfortable. A chaperone also protects the sonographer from being falsely accused of inappropriate behavior by the patient. A chaperone is required for a vaginal ultrasound, even if the sonographer is female since a variety of sonographers have been successfully sued. This is a serious subject, and you need to know the policy of the institution and question if they do not require a chaperone for a female sonographer performing an endovaginal exam. The legal department can be a good resource as usually there is a blanket policy that involves any employee, including doctors, who is performing any type of vaginal exam. Having a chaperone protects not only the patient’s concerns, but legally protects the sonographer from any false accusations of sexually molesting or abusing the patient. The name of the chaperone is documented in the patient’s medical record. If a patient ever makes a legal claim that a sonographer acted unprofessionally, the documented chaperone will serve as a witness. Sometimes you may want a chaperone to protect you if you feel threatened or perceive unwanted advances from the patient. For example, a patient may keep exposing their penis, which has an erection, to the sonographer while they are scanning their scrotum, despite multiple attempts to keep the penis covered. If you feel threatened, you need to have another person in the room. You never want to put yourself at risk, either physically, emotionally, or legally.
Timing of the ultrasound is a very important aspect of patient care. When speaking to the nurse before the exam, you will want to ask if it is a good time to perform the ultrasound. The patient may have other tests ordered that may have priority over the ultrasound, such as an endoscopy. At times you will need to work with the nurse to find the best time to get the ultrasound done, especially if it is a portable exam. Communication and planning with the nurse are crucial for efficiency and good patient care.
A patient should be off of their unit for a limited amount of time in order to receive the best care. They will typically have other tests that need to be performed, need to be available to see doctors, and will have visitors. This will require being prepared for the patient’s arrival by having the room ready, inputting their identification information into the ultrasound unit, and investigating the pertinent patient history before they arrive to the department. Working efficiently will help your patients have good experiences.
Unfortunately, there will be times when the patient will need to wait. Emergent situations will happen that will need to be addressed immediately, causing patients to wait. Here communication is vital. The patient should be informed as to the reason for the wait and the expected amount of time that they will have to wait. Inpatients should be given the option to return to their unit to be called later and outpatients the chance to reschedule, especially if the wait time may exceed 30 minutes. Patients should be offered any comfort that you can provide while they wait. Any further delays will also need to be communicated to the patient. For safety, do not leave an inpatient alone for an extended period of time. They should be where other employees can watch or help them as needed. Leaving a patient alone increases the risk of the patient trying to get out of their wheelchair or off of their stretcher causing them to fall, pull out their IV, or even wander off. Critically ill patients should never be left alone. What if they code and no one is around to call the code and start cardiopulmonary resuscitation (CPR)? It is important that all safety measures are being used when a patient has to wait, which includes but is not limited to having the brakes applied, side rails up, and that they have a call button. Failure to do so may cause the patient to harm themselves and for you to be disciplined.
Vital signs are a group of measurements that give an idea of the body’s life-sustaining functions. They are used to help assess the general physical health of a person and to potentially alert the possibility of a disease process. The four most common vital signs that are taken are pulse rate, respiratory rate, body temperature, and blood pressure. The readings of the vital signs will vary with the age, sex, weight of the patient, and their overall health. The normal range for vital signs is constantly being evaluated, and these values may change. The reader is encouraged to be familiar with current normal values.
Sonographers do not routinely assess the vital signs of a patient unless performing specific ultrasound studies, such as an ankle-brachial index (ABI) or assessing for a subclavian steal. Vital signs are always part of a complete echocardiogram procedure. It is possible to be asked to help in an emergency situation, so learning how to properly take a pulse, count respirations, or to properly put on a blood pressure cuff can be helpful for the care of the patient. Automatic blood pressure pumps may have a pulse oximeter attached and the sonographer may have to place the sensor on the patient’s finger so that the oxygen levels can be determined as well.
The pulse is used to measure the heart rate, or the number of times the heart beats per minute. When the heart pumps, blood is forced into the arteries during contraction of the left ventricle. The amount of force that is created when the blood hits the arterial walls will produce an advancing pressure wave that causes the arterial walls to expand. This expansion produces the feeling of a pulse. The pulse can be felt in the wrists (radial artery), the neck (carotid artery), the inside of the elbow (brachial artery), the ankles (posterior tibial artery), the top of the foot (dorsalis pedis), behind the knee (popliteal artery), and in the groin (femoral artery). The place where the pulse is measured is named after the artery that is palpated, with the radial and carotid arteries being the most common places to assess the patient’s pulse.
The pulse offers an easy and effective way to measure heart rate and is recorded as beats per minute. The beat of the pulse should be evaluated for rate, rhythm, and regularity, as well as for strength. Normal adult pulse rates should be between 60 and 100 beats/min with a regular rhythm. However, there are some normal variations. For example, rates in children, women, and the elderly are slightly higher, whereas rates in athletes are slightly lower.
A normal pulse will have strong palpitations, whereas a weak pulse will feel faint. No discernible pulse is suggestive of arterial occlusion. An irregular pulse and therefore heartbeat is termed an arrhythmia or dysrhythmia. Among the most common arrhythmias are tachycardia and bradycardia.
Tachycardia is defined as a heart rate of more than 100 beats/min. This finding may only be temporary, caused by exertion or nervousness, or it may be secondary to disease.
A heart rate of fewer than 60 beats/min is bradycardia and may arise from disease in the heart’s electrical conduction system or with the sinoatrial node. These patients may have a sinus node dysfunction or heart block. Remember that athletes can have heart rates less than 60 beats/min, which would be normal for them.
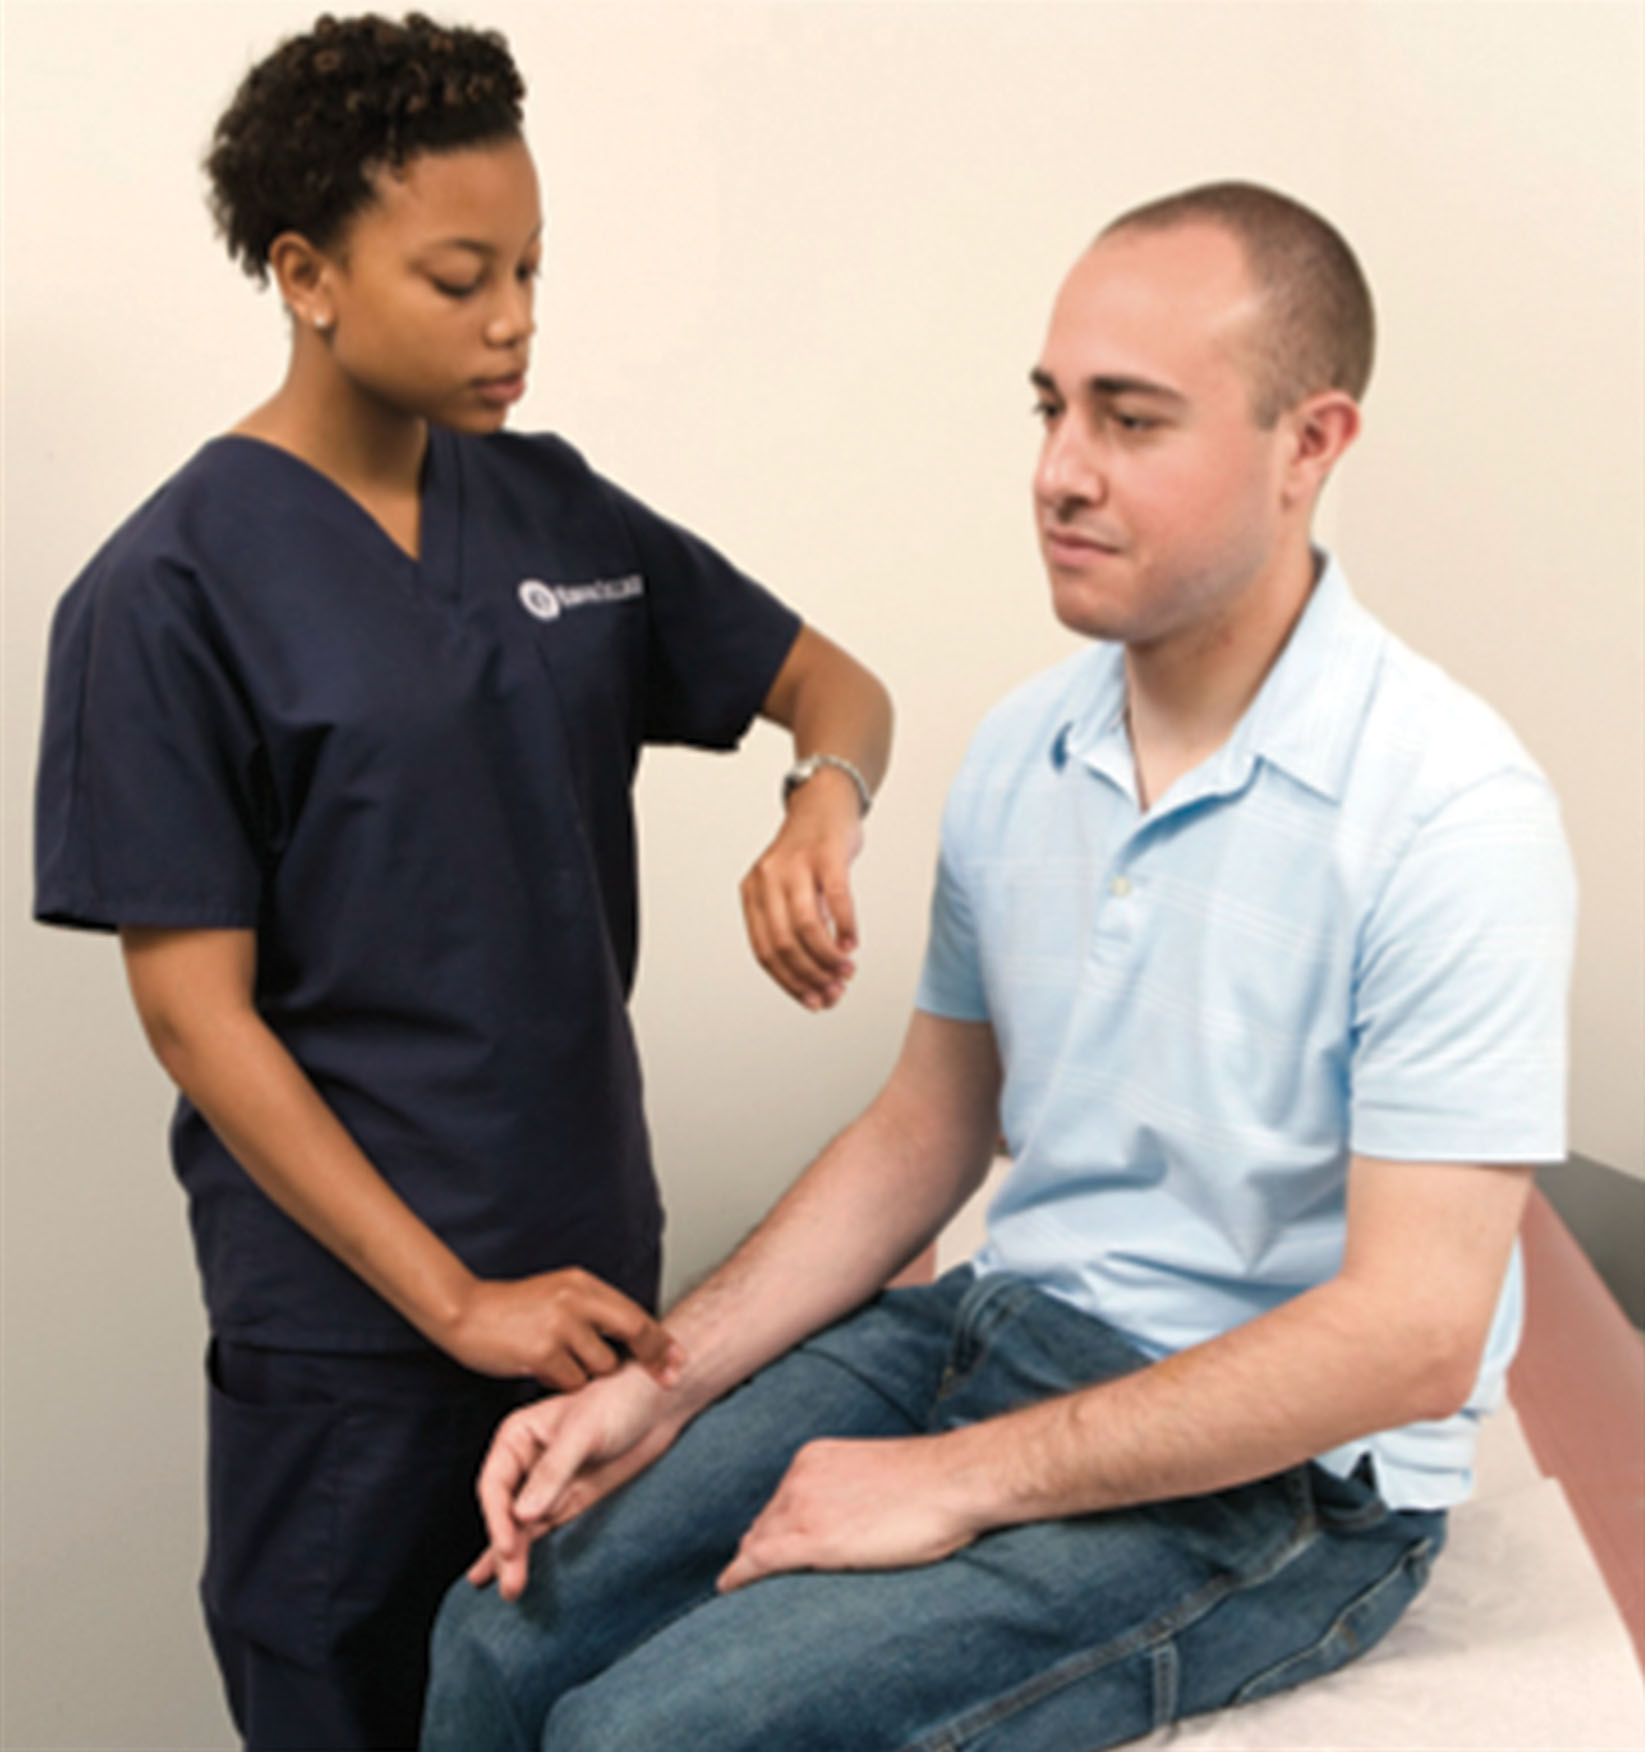
When taking a pulse, first explain the procedure to the patient and then have them place their arm straight palm side up. The radial artery can be located by placing the index and middle fingers at the base of the wrist on the thumb side. Never use your thumb to take the patient’s pulse, as the strong pulse within your own thumb may be confused with that of the patient’s. Using your finger, gently feel for the radial artery on the inner side of the wrist ( Fig. 2.3 ). If no abnormalities are detected, the pulse should be counted for 30 seconds and multiplied by 2. If irregularities are noted, the pulse should be counted for a full minute. Record the pulse rate and anything you notice about the pulse, such as its being weak, strong, or missing beats. If an irregularity is detected, determine whether it occurs in a pattern or is random. If the radial pulse is difficult to palpate, try the carotid artery. To find the carotid artery, place your fingers just below the angle of the patient’s mandible ( Fig. 2.4 ).

In the vascular lab the vascular sonographer may assess the pulses at the ankles to evaluate the legs for arterial disease. As part of a lower extremity arterial evaluation the pulse rate is typically not measured but the quality and strength of the pulse is assessed using a number from 0 to 2 with a normal strong pulse written as 2 + , a weak pulse that is barely felt as a 1, and no pulse as a 0.
One of the most important and common vital signs assessed is blood pressure. Blood pressure is the pressure or force exerted by circulating blood against the walls of the arteries. Blood pressure is expressed as two numbers. The first number is the systolic measurement, when the pressure is at its highest when the heart beats, and the second number is the diastolic measurement, when the pressure is at its lowest as the heart relaxes between beats. Blood pressure is written as follows, 120/80, and would be expressed verbally as 120 over 80. Although these numbers appear to be a fraction, they are not nor are these numbers a ratio. Blood pressure is measured in millimeters of mercury (mm Hg).
The blood pressure is typically obtained from the brachial artery in the arm. Blood pressure may be taken manually or with an automatic unit. Typically, the automatic units will also measure the pulse, and some will have accessories such as a pulse oximeter and a thermometer. These units can obtain multiple readings to get an average blood pressure, which is a more accurate measurement as our blood pressure can fluctuate.
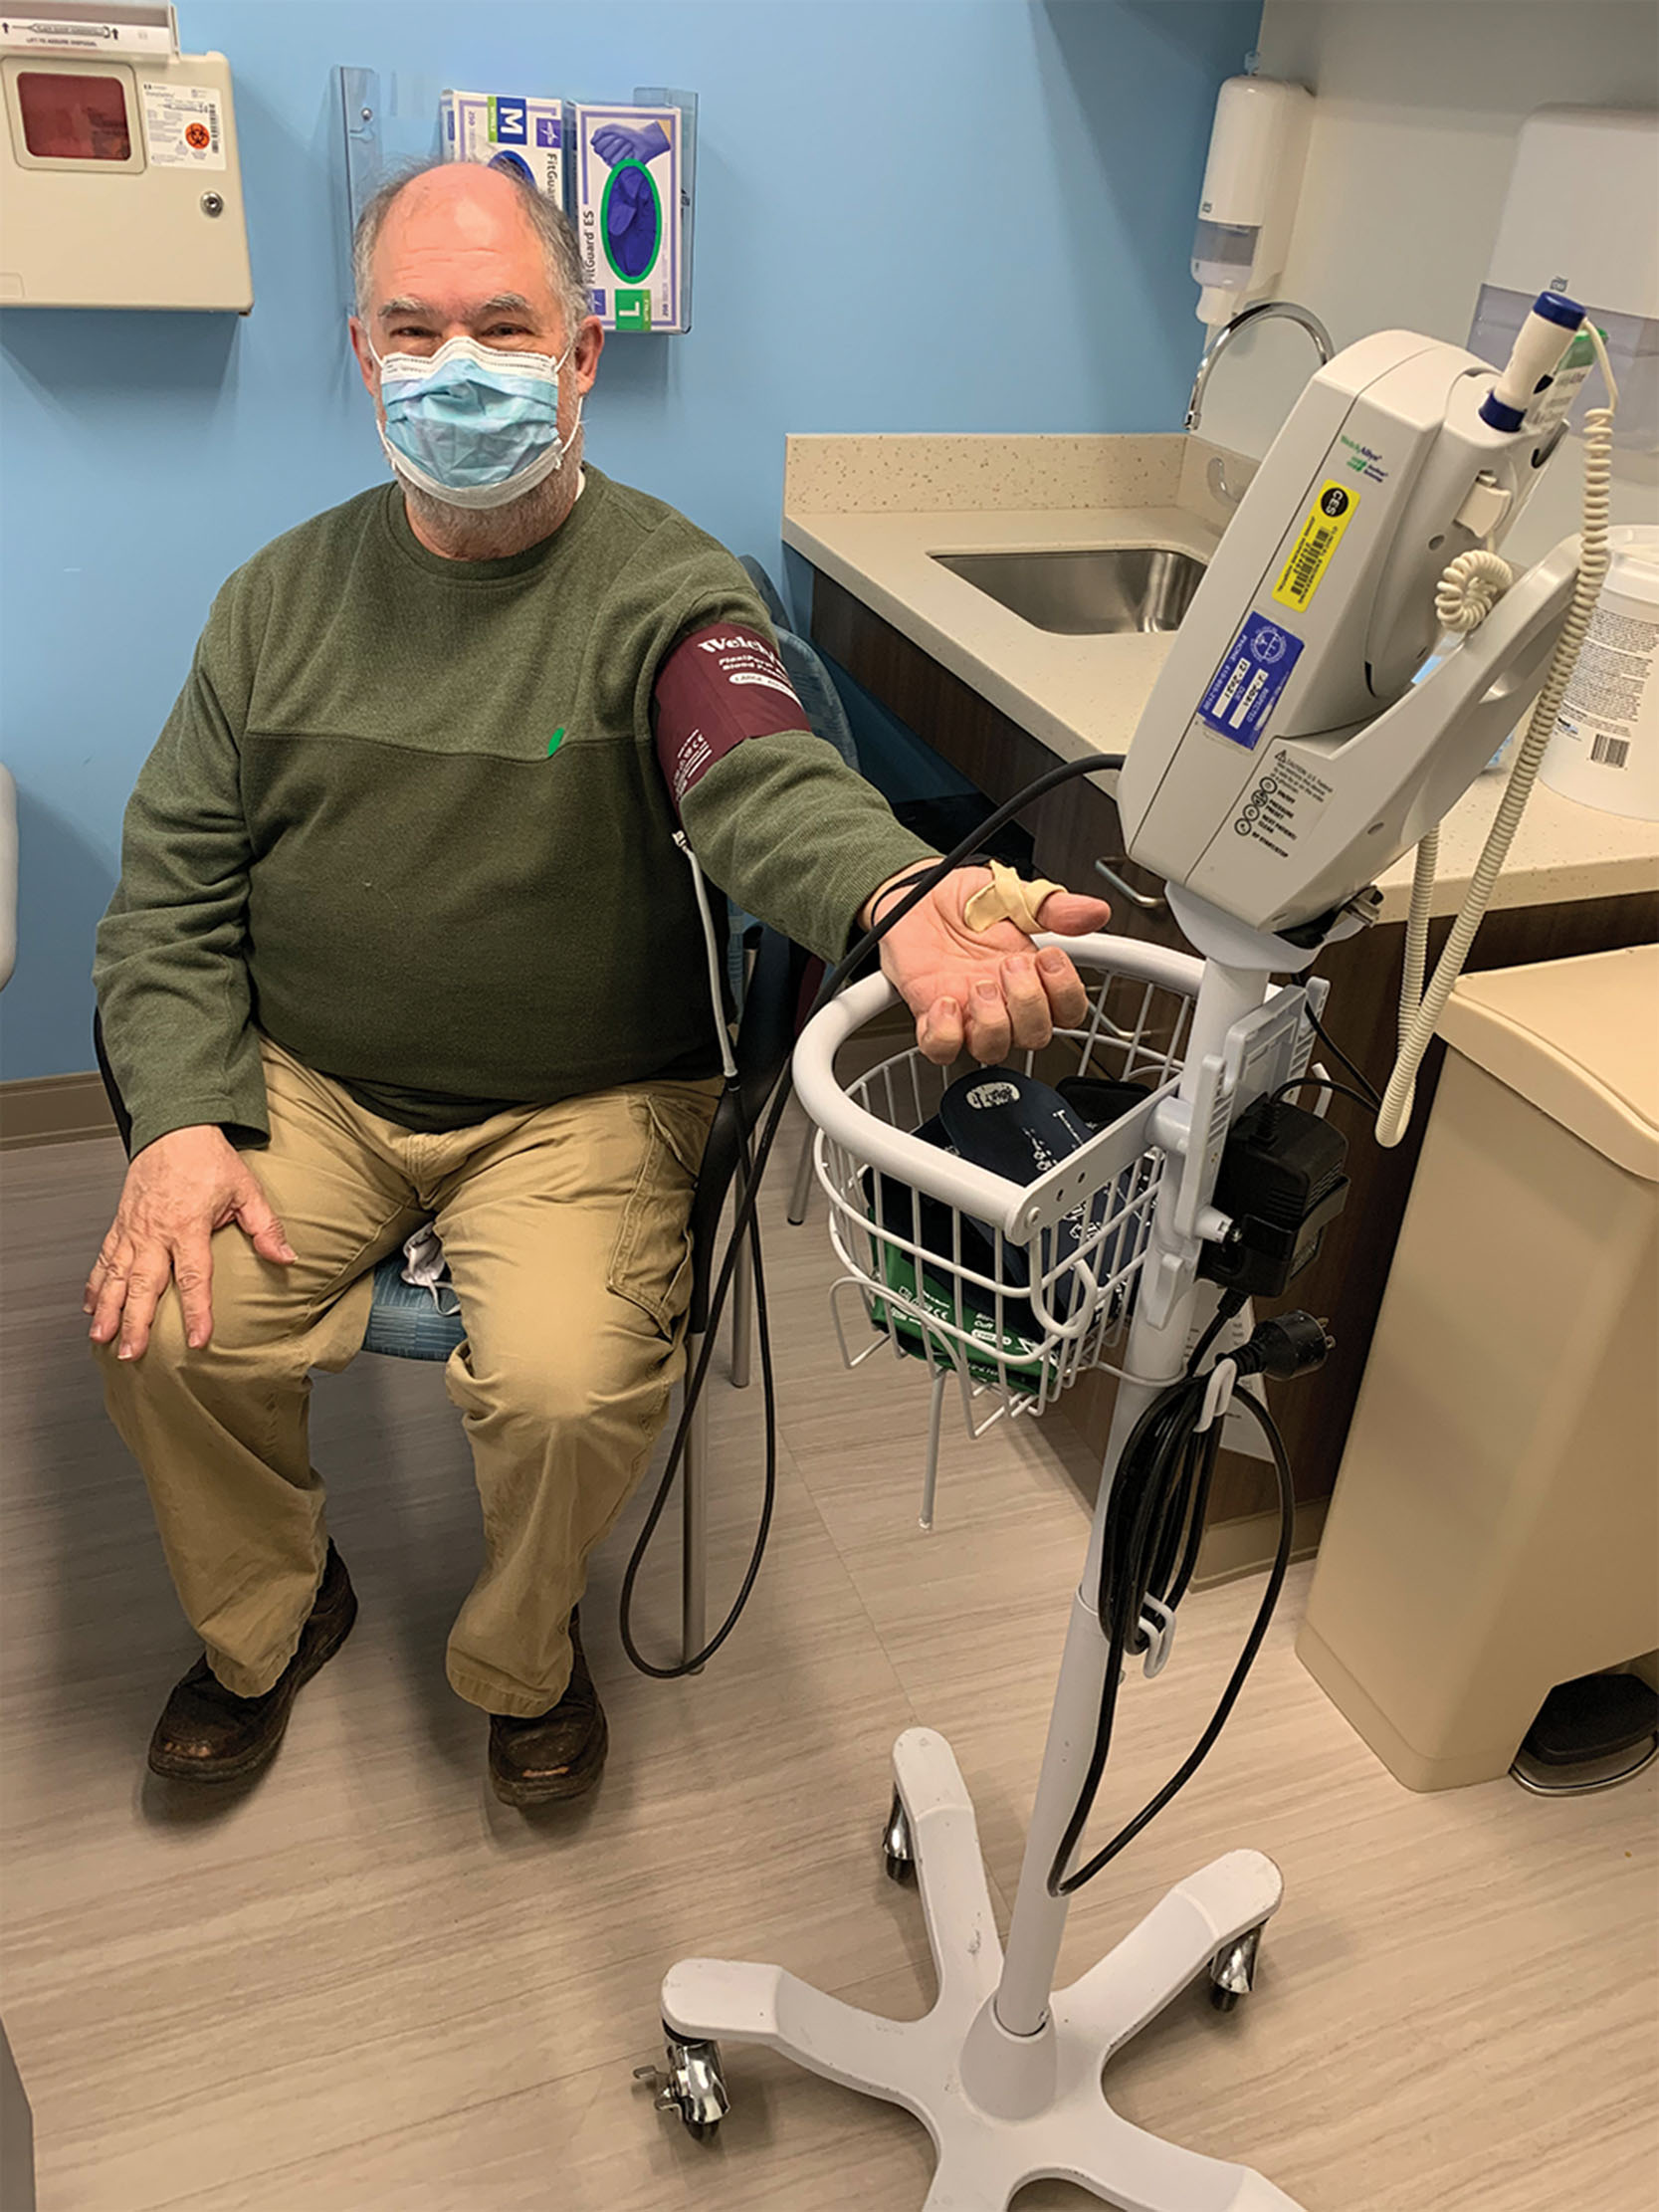
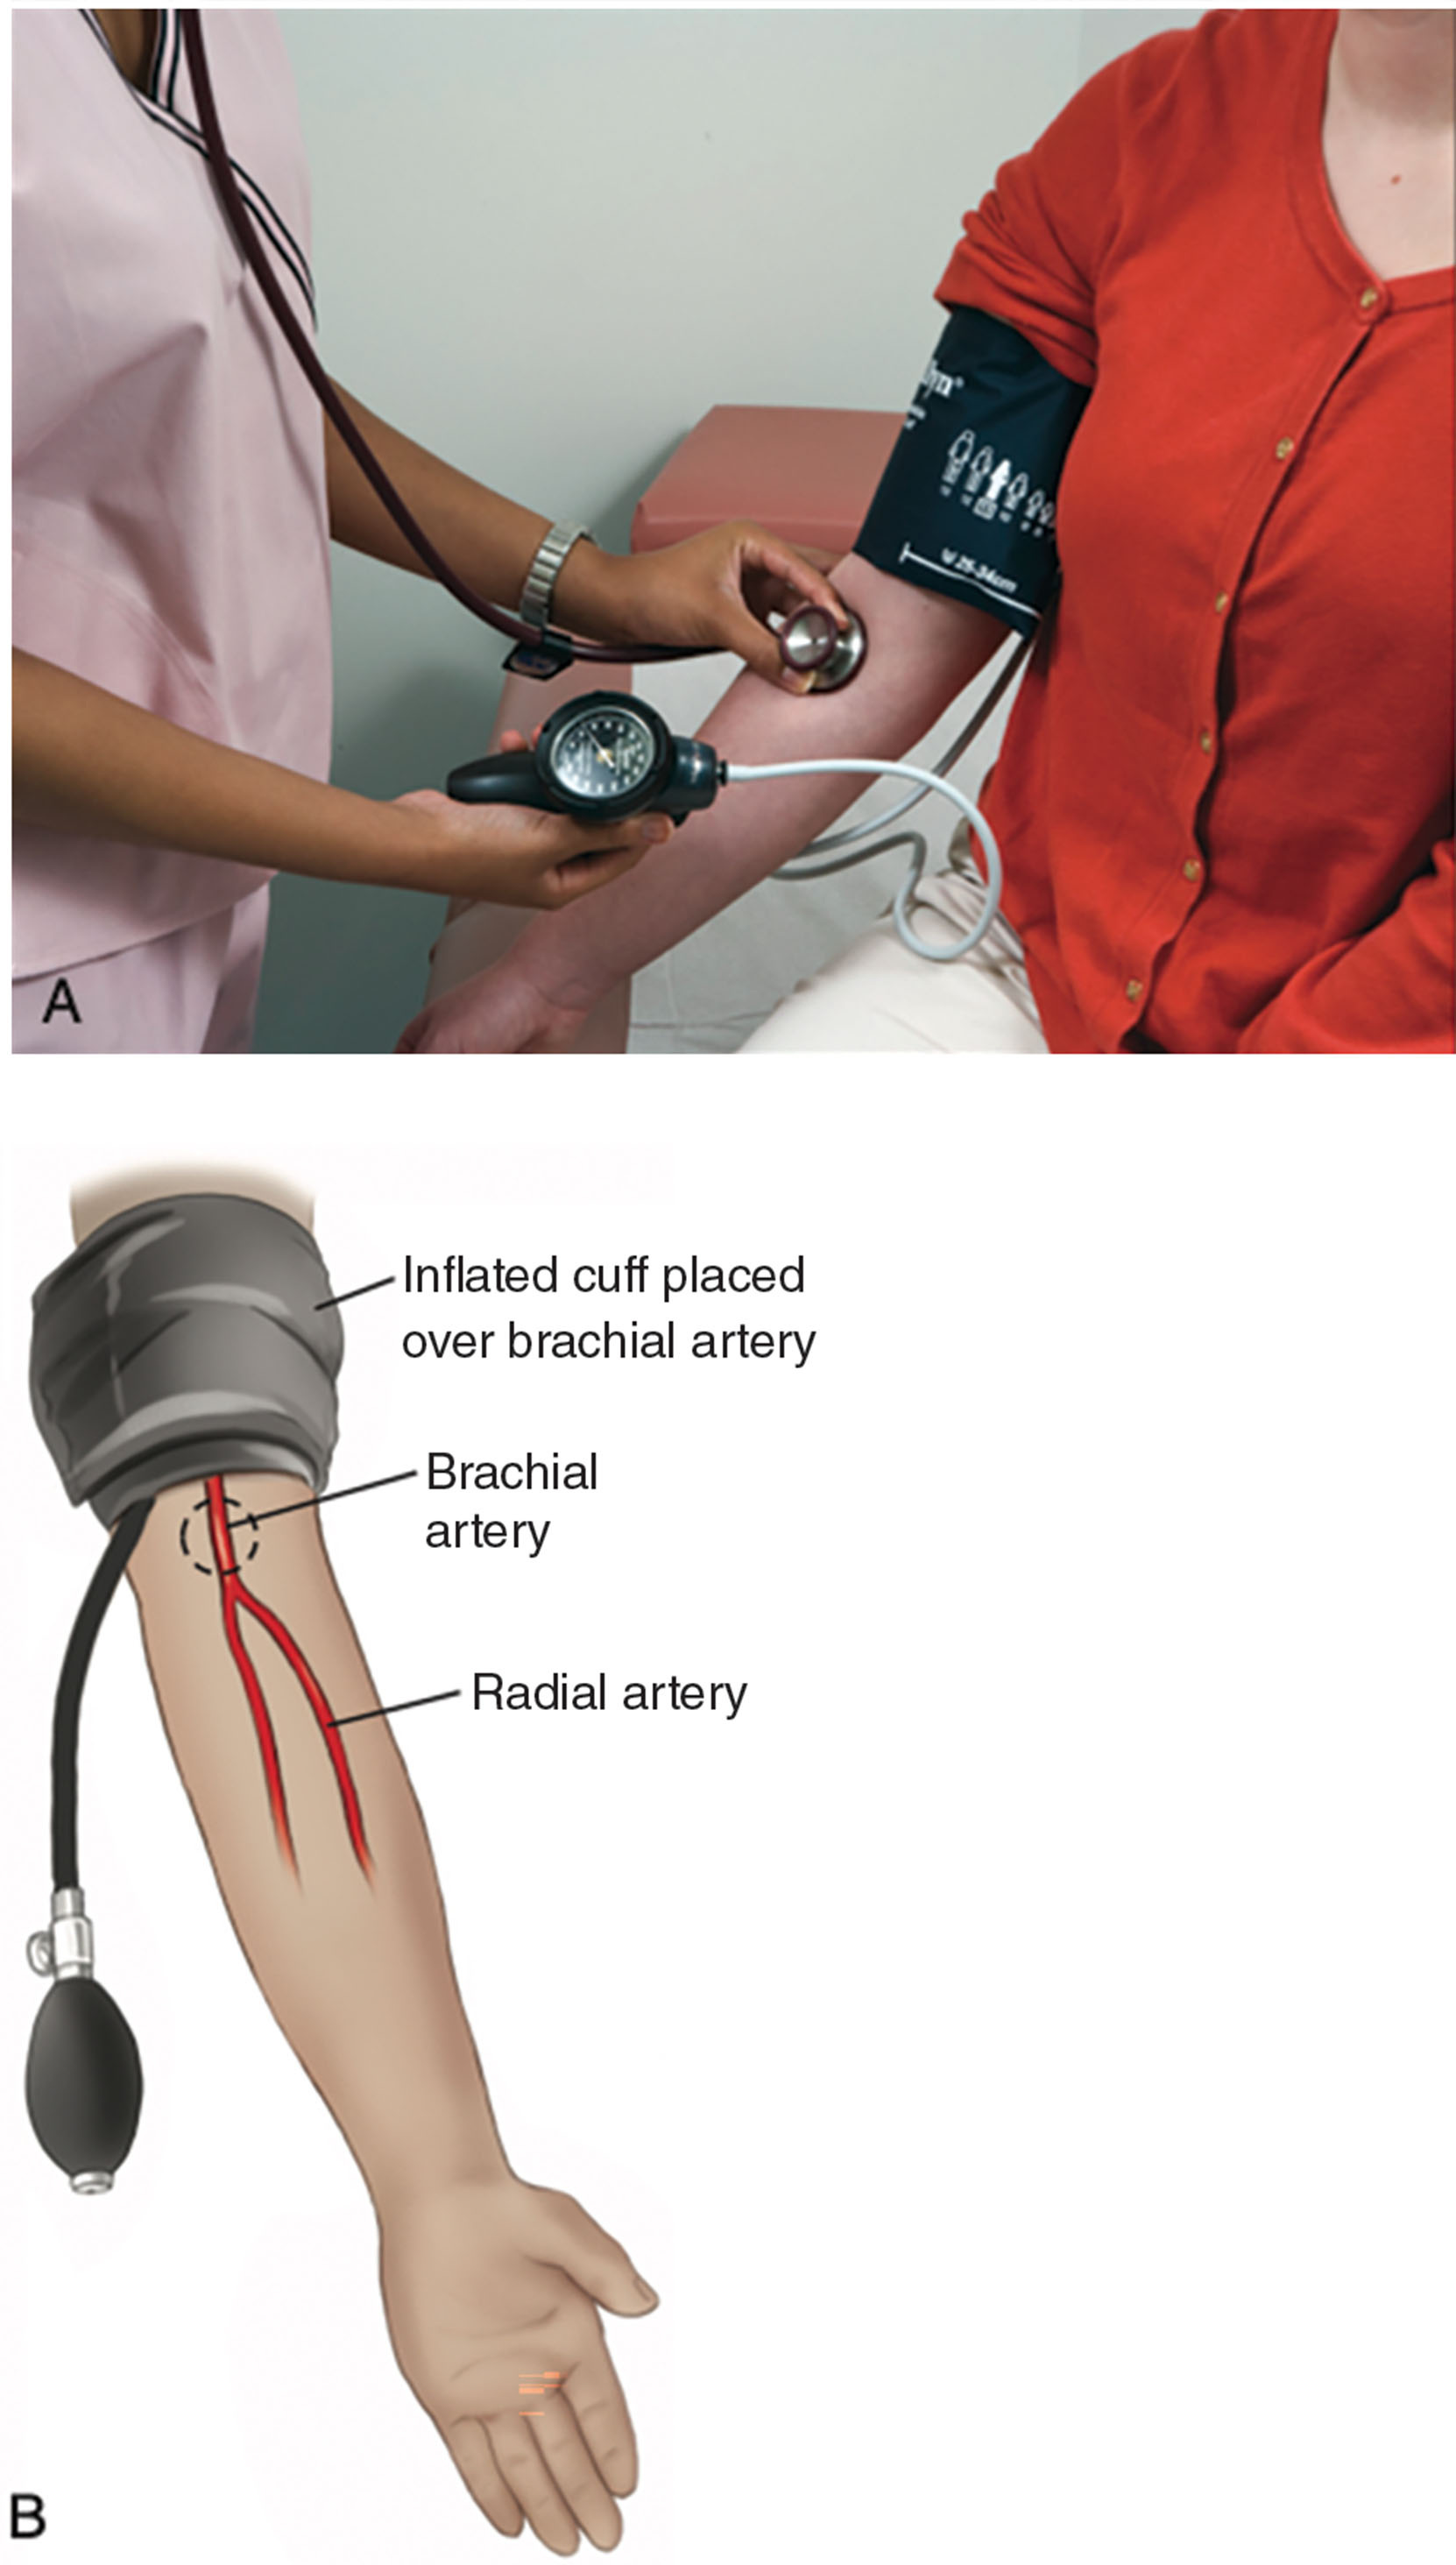
Cuff placement and patient position are the same whether the blood pressure is being obtained manually or automatically. In a perfect world the patient should rest for five minutes before their blood pressure is taken, and they should not have a full bladder as this can cause a falsely elevated reading. The patient should sit in a chair with their back supported, feet flat on the floor and with their arm supported so that the cuff is at the level of the heart. The hand should not be clenched ( Fig. 2.5 ). The bottom edge of the cuff should be one to two inches above the elbow and should encircle the patient’s upper arm with about 80% of the cuff ( Fig. 2.6 ). If the cuff is too small it will give a higher reading, and if it too large it will produce a lower reading. Before beginning, verify that the patient has not crossed their legs as this will increase the blood pressure. The patient should be instructed not to talk while their pressure is being taken. To obtain a manual blood pressure follow the steps in Box 2.1 .
Have the patient sit with their arm supported and with the arm at the level of the chest or heart.
The bottom edge of the cuff should be one to two inches above the elbow and should encircle the patient’s upper arm with about 80% of the cuff.
Squeeze the pump to rapidly inflate the cuff to about 200 mm Hg, or until no sound is heard with the stethoscope over the brachial artery.
Loosen the valve slowly, about 5 mm Hg/sec, to let out air while listening for the sound of the return of the heartbeat. When it returns check the measurement on the manometer as this is the systolic reading.
Continue deflating the cuff slowly until you can no longer hear the heartbeat. This last audible sound is the diastolic reading.
Record both readings as a fraction (e.g., 136/88).
The manual measurement of blood pressure is performed with a sphygmomanometer, blood pressure cuff, and a stethoscope. The blood pressure cuff consists of an air pump, a pressure gauge, and a rubber cuff ( Fig. 2.7 ).
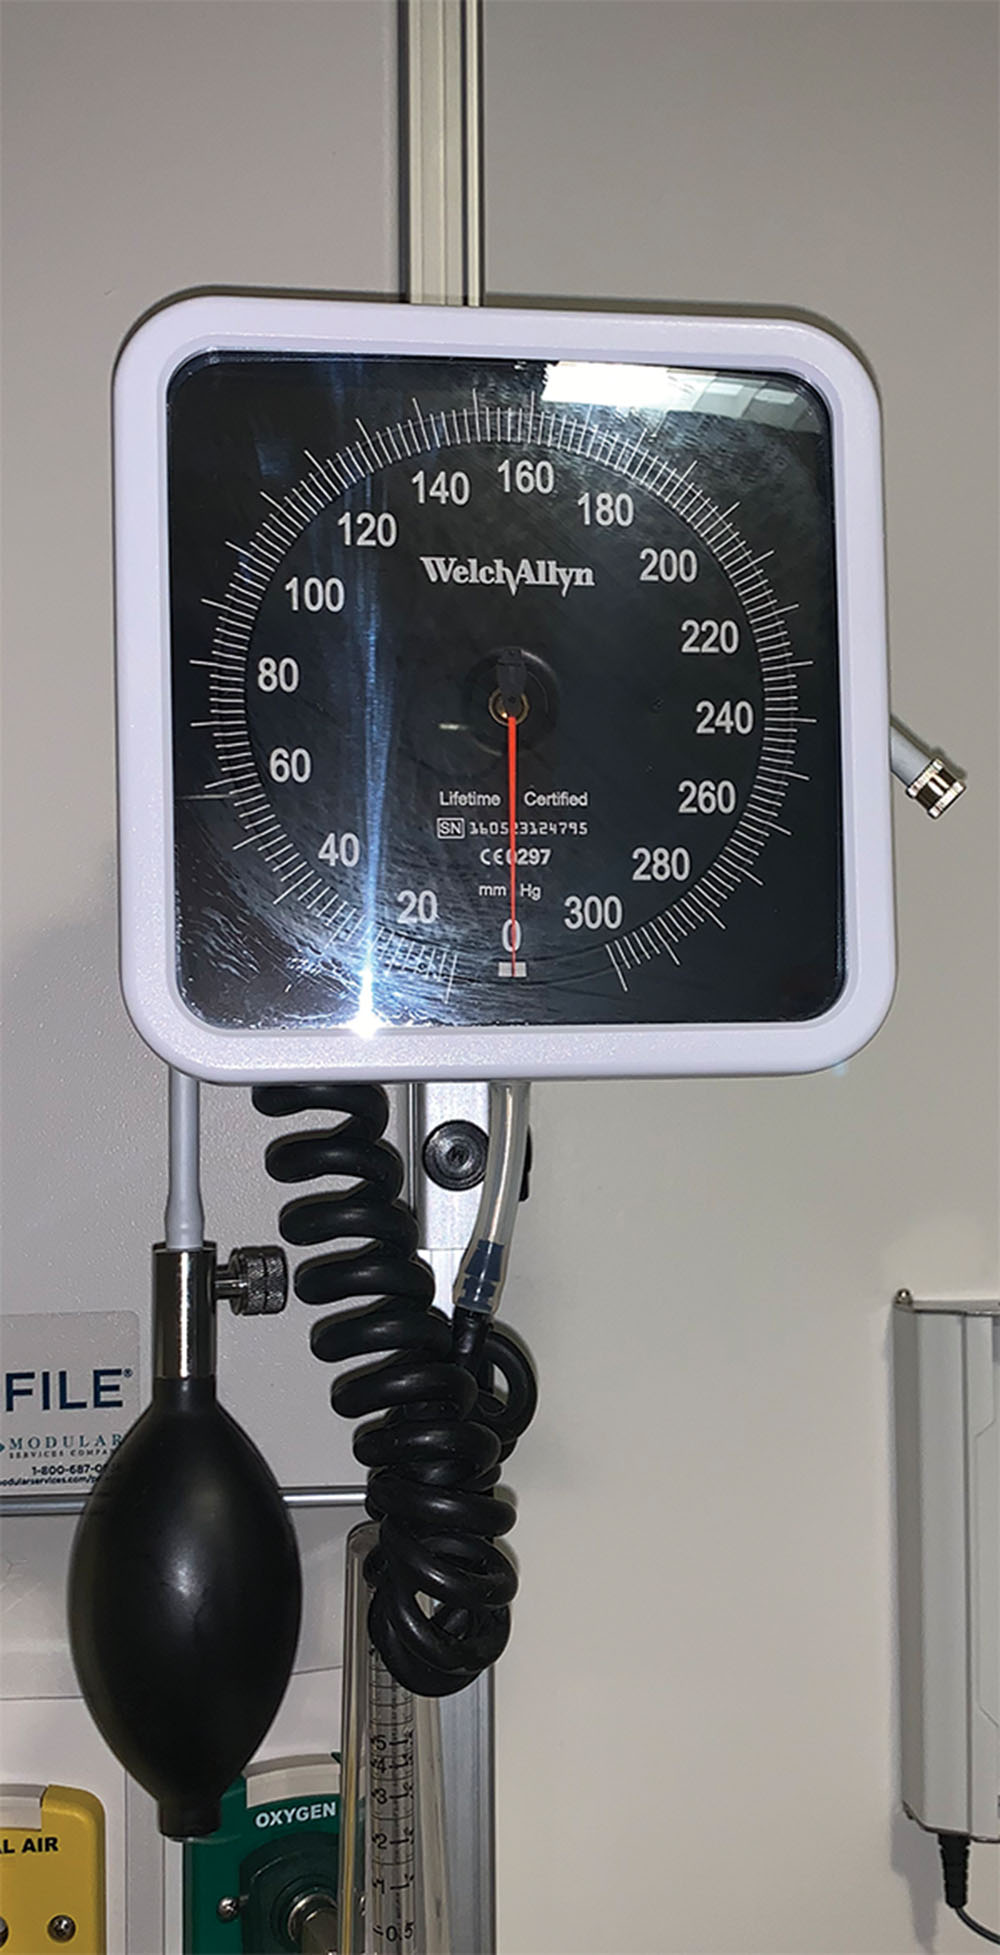
Blood pressure readings can be affected by a variety of factors, including cardiac disease, nervousness about seeing the doctor (called white coat hypertension ), obesity, smoking, stress, drinking alcohol or caffeine 30 minutes before the reading, being cold or chilly, and some medications and herbal supplements. The reader is encouraged to do a search on medications and herbs that affect the blood pressure. If the first blood pressure reading is higher than normal, a second reading should be taken after 2 to 3 minutes allowing the patient time to relax.
The vascular sonographer may use a manual system for taking brachial and ankle pressures required to determine the ABI. To measure the ABI, the systolic readings are obtained using Doppler, as opposed to a stethoscope. The cuff is placed above the ankle for the ankle readings and above the elbow for the brachial reading. A reading is obtained from both arms and ankles using the brachial, dorsalis pedis, and posterior tibial arteries. Find the artery with the continuous wave Doppler transducer. Inflate the cuff until the Doppler signal is no longer heard. When the signal returns take note of the reading as this is the systolic number. Repeat for the other arteries. Note that the Doppler signal will always be present, so a diastolic reading cannot be obtained.
Oximetry is a convenient, noninvasive method of monitoring blood oxygen levels. This information is useful to determine whether the heart, lungs, and blood are working synchronously to deliver oxygen to various parts of the body. A low blood oxygen reading can be a sign of an illness or injury.
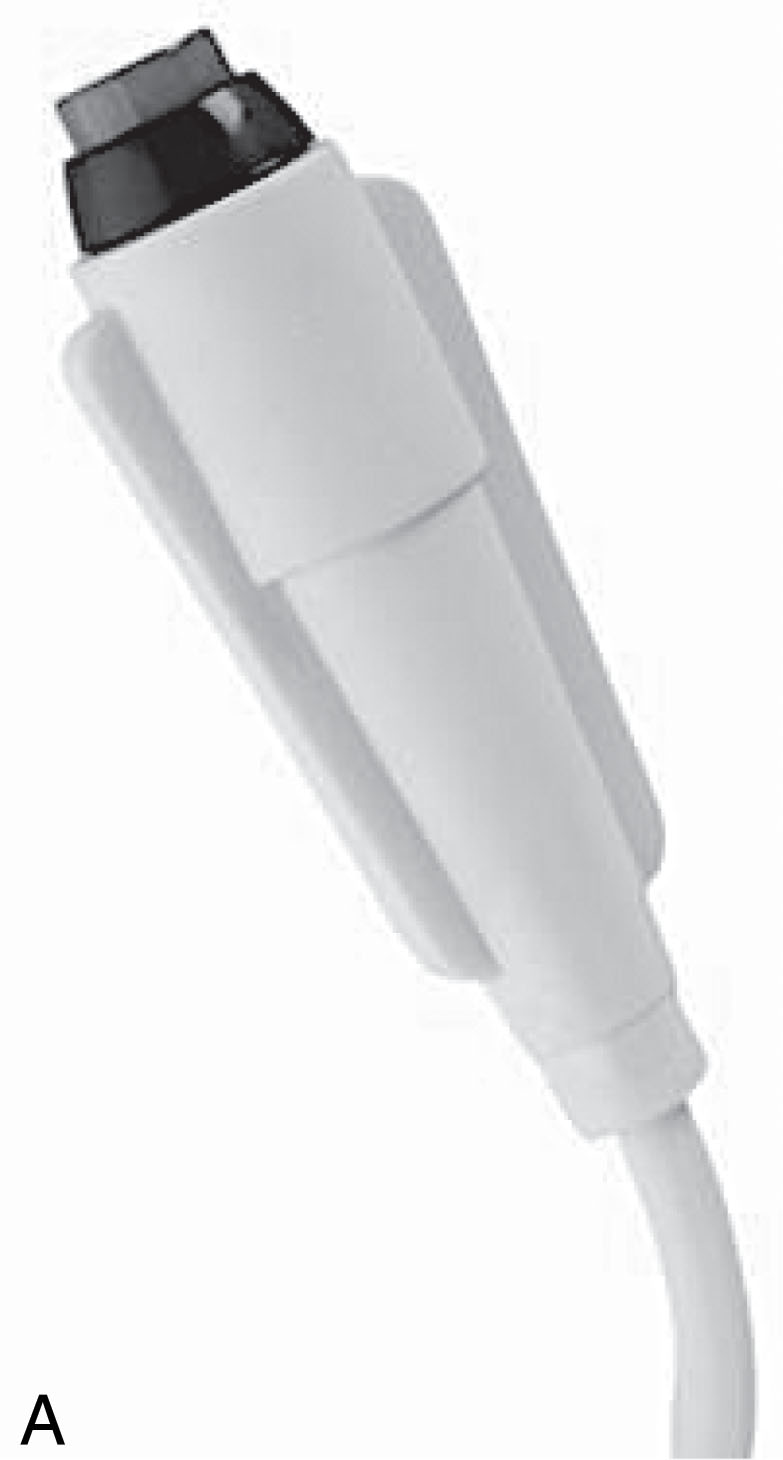
The test is performed by using an oximeter, a specially designed photoelectric device, which measures the difference between levels of the red pigment hemoglobin, which carries oxygen in the blood. The most commonly used oximeters are called pulse oximeters because they respond to the pulsations of the capillaries in the area to be tested. One end of the device is attached like a clothespin to the end of the patient’s index finger ( Fig. 2.8 ). The other end of the oximeter is attached to a monitor so that the patient’s oxygen level can be seen at all times.
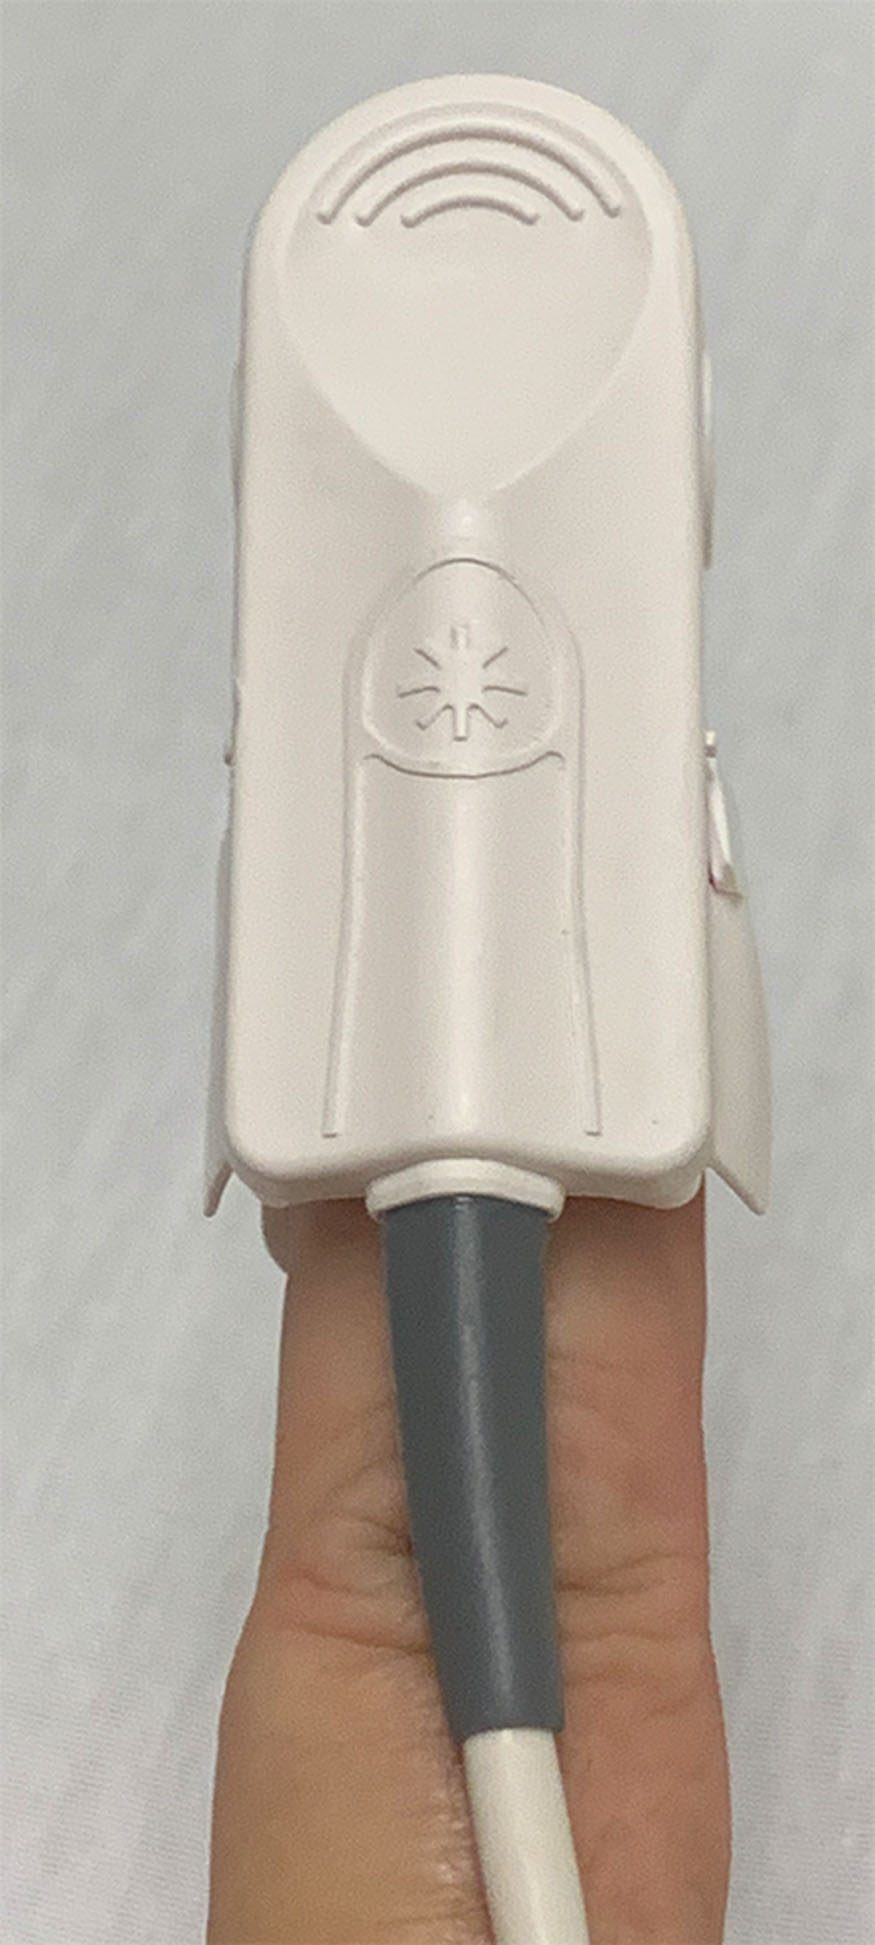
The amount of oxygen in the blood is given as a percentage. A normal reading for a person breathing room air is in the high 90 s. A reading of 90% or less will trigger visual and audible alarms, requiring immediate action. Asking the patient to take in a couple of deep breaths will help raise the oxygen levels. If the levels keep falling, the patient will be given oxygen to help maintain good levels. The oximeter acts as an indicator that something is interfering with the oxygenation of blood levels and that further investigation is required. It does not diagnose what is interfering with the patient’s oxygen levels.
A patient that is having a lung or chest biopsy under ultrasound guidance will have their pulse ox monitored as a sudden drop can be a sign that the lung has been punctured.
Respiration , or breathing, is the process of inhaling and exhaling air. Its primary function is to obtain oxygen for use by the body’s cells and to eliminate carbon dioxide. Normal breathing is quiet, effortless, and has a regular rhythm. In an adult at rest, respiration occurs at a rate of 12 to 20 breaths/min. Measuring respiration for less than a full minute may lead to inaccuracies.
When assessing a patient’s respiratory rate, the rhythm, depth, and character of the respiration should be noted. Any injuries to the lungs, chest muscles, or diaphragm will affect breathing. Note whether the patient needs to sit up to breathe easily as opposed to lying down. Any difficulty in breathing, dyspnea , or changes in the patient’s color, pallor, or cyanosis , should be noted.
To count respirations, note the number of inhalations per minute. Counting respirations is often done while continuing to hold the patient’s wrist, after the pulse has been counted, to prevent patients from being aware that you are monitoring their breathing, as sometimes the patient may change how they are breathing in response to being observed.
It is uncommon for a sonographer to measure and qualify respirations. However, the sonographer should be aware of the patient’s breathing and quality, reporting any sudden changes while performing the ultrasound exam.
Patient safety is a prime component of patient care. Equally important is sonographer safety. Some of the most common injuries among members of the health care team are musculoskeletal (MSK) strains or injuries. Sonographers can avoid injuries with a conscious use of body mechanics in their everyday activities, work activities, and especially when performing patient transfers . By protecting themselves from injury, they are also protecting their patients.
Body mechanics is the coordinated effort of muscles, tendons, joints, and the nervous system to complete a task safely without undue strain on any joints or muscles. Because back pain or joint injuries are frequent complaints among sonographers, you must prevent self-injury while positioning, lifting, and transferring patients as well as while performing an ultrasound study. Good body mechanics protects you from injury, reduces fatigue, and allows you to use your body more effectively. An added bonus is that the use of good body mechanics also protects patients from injury. Initially, sonographers may find that it requires a conscious effort to maintain proper body alignment especially while scanning, but when practiced on a daily basis, it will become second nature. When the sonographer is exposed to ergonomic risk factors, they become fatigued and risk MSK injury.
Lifting should be done using the strong leg muscles and not the muscles of the back, lifting straight upward in one smooth motion. When reaching, stand directly in front of the object and avoid any twisting or stretching motions. One of the most common causes of MSK injuries is stooping by bending at the waist.
The following are suggestions for sonographers on the use of good body mechanics:
Maintain a stable center of gravity by keeping your center of gravity low, keeping your back straight, and bending at the hips and knees.
Maintain a center of gravity by keeping your back straight and keeping any objects that are being lifted close to your body.
Maintain a strong base of support by keeping your feet apart, placing one foot slightly ahead of the other with toes pointed in the direction of activity, and then flexing your knees and turning with your feet, instead of your hips.
Maintain proper body alignment through good posture: Tuck in your buttocks, pull your abdomen in and up, keep your back flat, your head up, and your chin in as you keep your weight forward and supported on the outside of your feet.
Sonographers benefit greatly from using correct body mechanics when lifting and reaching. Their first consideration should be whether the object or patient is too heavy to lift alone. The potential for injury to themselves and their patients can be avoided by enlisting the help of another person.
Always evaluate a situation and whether help is needed.
Remove any objects or hazards before moving or during the transfer of patients.
Be sure your feet are a shoulder width apart to provide a strong base of support. Distribute your weight evenly, standing with one foot slightly forward for balance.
Never bend sideways from the waist or hip for any activity.
When turning, always pivot your feet and never twist your body.
Do not attempt to lift a heavy load alone.
Always position yourself as closely as possible to whatever is being lifted and never reach for a load.
Lift smoothly and avoid jerky movements.
If lifting with the help of another person, prearrange a signal, such as lifting on the count of three.
Always lower your body to the object being lifted by bending your knees, not your back.
Straighten your legs while lifting the object.
If you must start a lift with a slightly curved back, the large muscles of your legs should take over.
Whenever possible, push, pull, or roll an object instead of lifting it.
It is important to know the method of transport for patients who will be coming to the ultrasound department. Ask the nurse if the patient is able to get up on a stretcher on their own or with minimal assistance. This will help determine if the patient should come to the department on a stretcher or in a wheelchair. When a patient is not able to get in and out of a wheelchair with minimal assistance, it is not only a potential risk to the patient for falling, but it also poses a threat to the safety of the sonographer. If it is difficult for two people to get the patient onto the stretcher, the patient should be sent back to the unit to be put onto a stretcher. Inform the floor that you are sending the patient back to the unit to be put on a stretcher and why. Some nurses may give you a hard time as they were able to get the patient in a wheelchair by themselves. Tell them that it is a patient safety issue as you need the patient to step up on a step stool with minimal assistance, turn 180 degrees while on the step stool, and then sit on the stretcher. Some stretchers may lower to the floor in which case it may be possible to get them onto the stretcher. Do not jeopardize the patient or yourself and get help when needed.
When working with patients in wheelchairs, the sonographer should make it a practice to lock the brakes and lift the footrests. Use proper body mechanics when transferring patients to and from wheelchairs and the scan bed. If the patient has limited mobility and came to the department in a wheelchair, it may require two people to safely get the patient onto the scan bed. If the patient has a very difficult time standing or is “dead weight,” do not risk injuring the patient or yourself by trying to physically lift them up onto the stretcher. As stated previously, it may not be ideal, but send the patient back to their floor to be sent back on a stretcher. If you do succeed in getting the patient up on the scan bed, consider sending the patient back on the stretcher if possible, for both the patient’s and your own safety.
If a patient is transported to the department on a stretcher or in their bed, they do not need to be moved to the scan bed. If the patient has arrived by stretcher, the wheels should be locked, and the side rails should be in an upright position until the examination commences. If the patient needs to get off of the stretcher, you and possibly a coworker will need to assist the patient off of the stretcher. If they need to use the restroom and require too much assistance, offer them a bedpan or urinal. Preventing injury and falls should be your primary concern.
For patients who arrive by wheelchair, lower the scanning stretcher to its lowest position so that the patient can easily get up onto the stretcher. Have the side rails up on the opposite side of the stretcher. Be careful with any IV lines, tubes, drains, or the urinary catheter and bag when helping your patient in and out of the wheelchair. Always be next to the patient to be there to support them as needed when moving from wheelchair to the scanning stretcher and vice versa. Only use step stools that have a handle for the patient to grip ( Fig. 2.9 ).
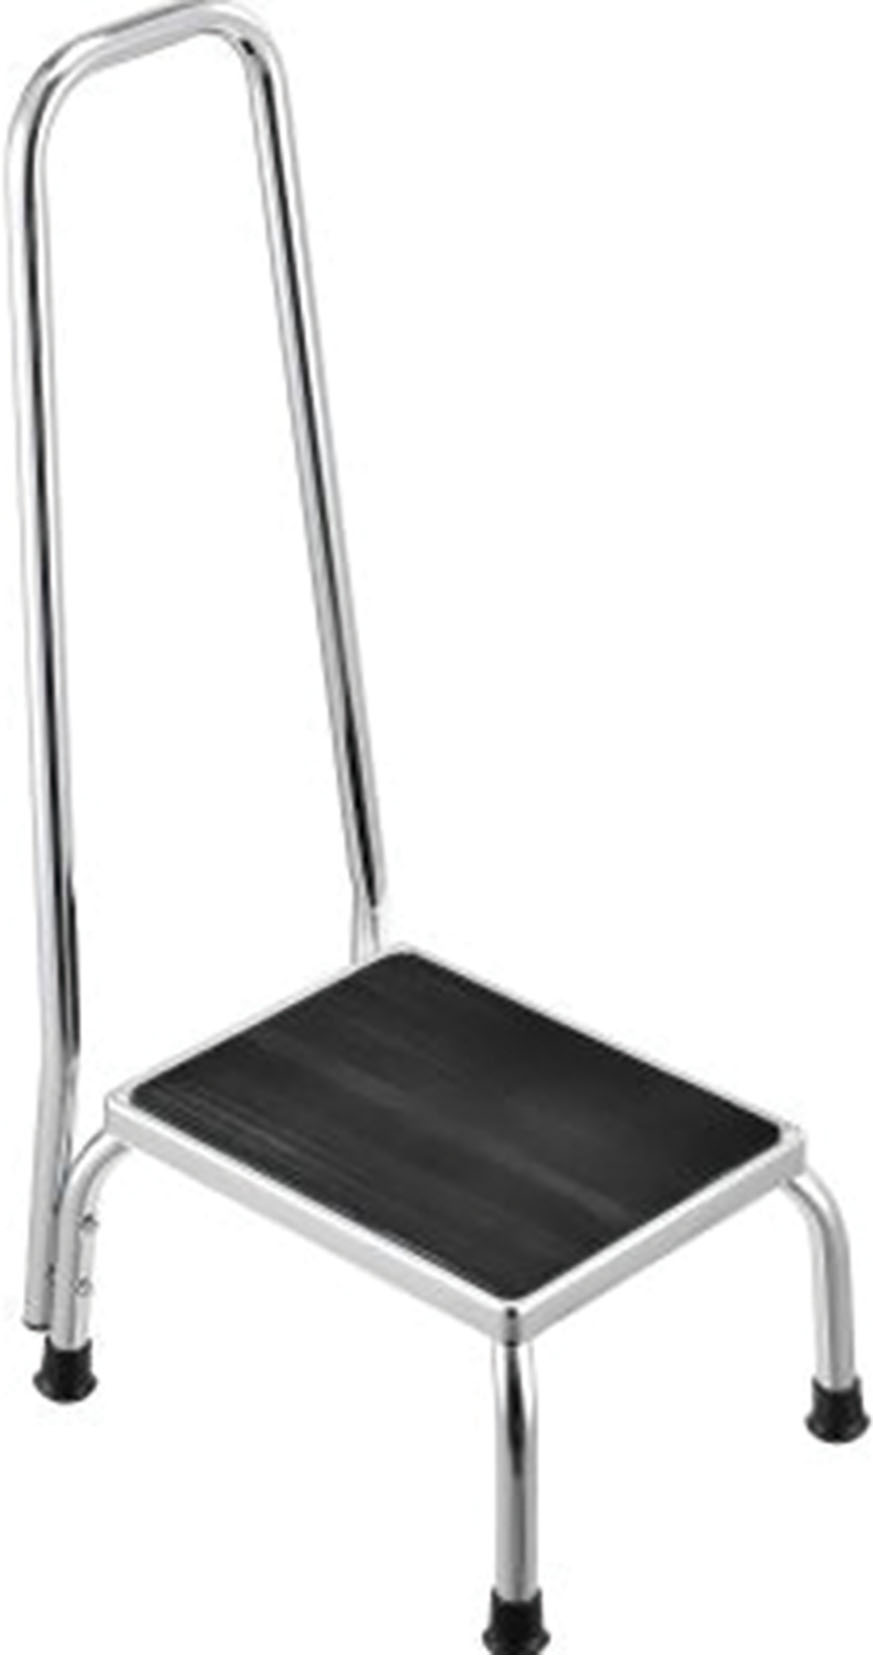
When moving a patient onto a scanning stretcher from a wheelchair try using the following strategies to ensure a safe outcome for you and the patient:
Make sure that the table is locked so that it will not slide.
Adjust the bed to the lowest position.
Relate what you plan to do and give instructions on how the patient can help.
Lock the wheels on the wheelchair and lift the feet rests.
On your count of three, ask the patient to push with their feet to stand while you support them with one hand in their armpit and your other arm around their back ( Fig. 2.10 ).
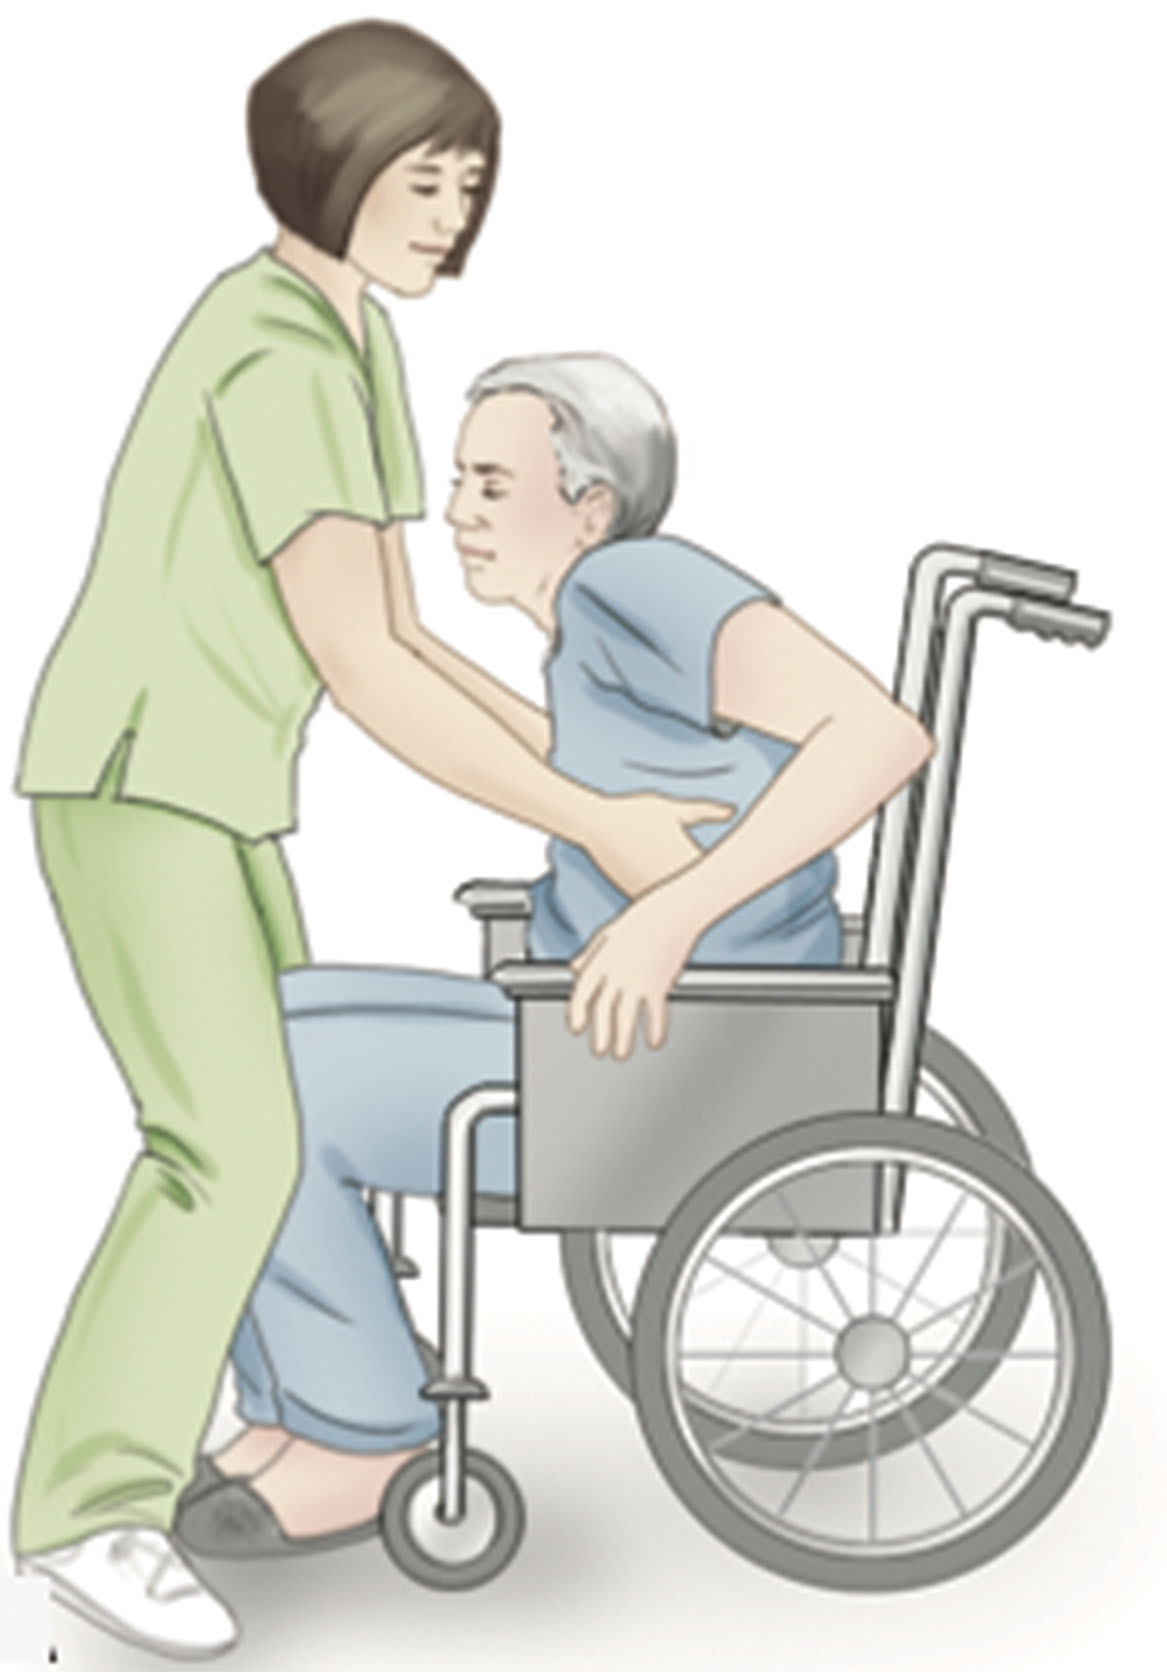
Help the patient to turn around and sit down on the stretcher.
Help them to lie on their back by lifting their legs.
Make the patient comfortable and begin the examination.
If the patient is unable to cooperate or has mobility issues, ask a colleague for help.
First assess the patient’s size and condition. If the patient is alert and cooperative and you are confident that you do not need help, follow these steps:
Explain to the patient that on the count of 3, you are going to shift them up in bed.
Lower the side rails to the level of the patient’s shoulders.
Move close to the side of the bed, keeping your back straight, knees bent, and one foot forward to provide a base of support.
Ask the patient to bend their knees with feet placed firmly on the stretcher.
Place your hand under their shoulder.
Count to 3 and help pull the patient up to the head of the bed, while they push with their feet.
Another method would be to slide the patient by using the sheet they are lying on and the help of another person:
Grasp the sheet, pointing one of your feet in the direction in which you are moving the patient.
Lean in the direction of the move, using your legs and body weight.
On the count of 3, both of you slide the sheet toward the head of the stretcher.
Reposition the patient comfortably and raise the bedside rails.
Turning patients can lead to injury if proper body mechanics are not observed. To turn patients toward you, perform the following:
Stand as close to the stretcher as possible.
Check to see that the patient has ample space to turn.
Ask the patient to bend the knees slightly by placing their far leg over the one nearest to you. Now place one of your hands on the patient’s far shoulder and the other on their far hip and pull the patient toward you. For patients who are able to pull themselves up, raise the side rails for them to hold onto.
If the patient has difficulty in turning on their side, get a coworker to stand on the other side of the stretcher to pull the sheet under the patient toward them as you try to turn the patient on their side.
Maintain the patient’s position by placing a pillow or a wedge behind their back to prevent them from rolling back.
To turn patients away from you, perform the following:
Raise the side rails on the side of the bed that the patient will turn toward.
Stand at the side that the patient is turning from with the side rails down on this side. Ask the patient to bend their knees slightly, placing one leg over the other so that their feet point away from you.
Slip one of your arms under the patient’s back and shoulder farthest from you. Your other arm should be placed on the patient’s hips nearest you. Gently push the patient’s hip while pulling their shoulder toward you until the patient is on their side.
For patients who can turn themselves, raise the side rails so that the patient can grab onto them to turn.
Maintain the patient’s position by placing a pillow or a wedge behind their back to prevent them from rolling back.
Sit the patient up by putting one arm under the patient’s neck, with your hand supporting their shoulder blade and putting your other hand under the patient’s knees.
Swing the patient’s legs over the edge of the bed, helping them to sit up, instructing them to “dangle” their legs over the side.
Always stand facing the patient, while supporting your weight evenly on both feet. Ask the patient to slide to the edge of the stretcher with their feet flat on the floor or on the step stool. Allow the patient a few seconds to adjust to this upright position.
Ask the patient to hold onto your shoulders or your arms. Place your hands under the patient’s arms, and on the count of three, pull the patient forward, while shifting your weight from the forward foot to the backward foot ( Fig. 2.11 ). The wheelchair should be parallel or at a slight angle to the stretcher, with wheels locked and footrests up and out of the way.
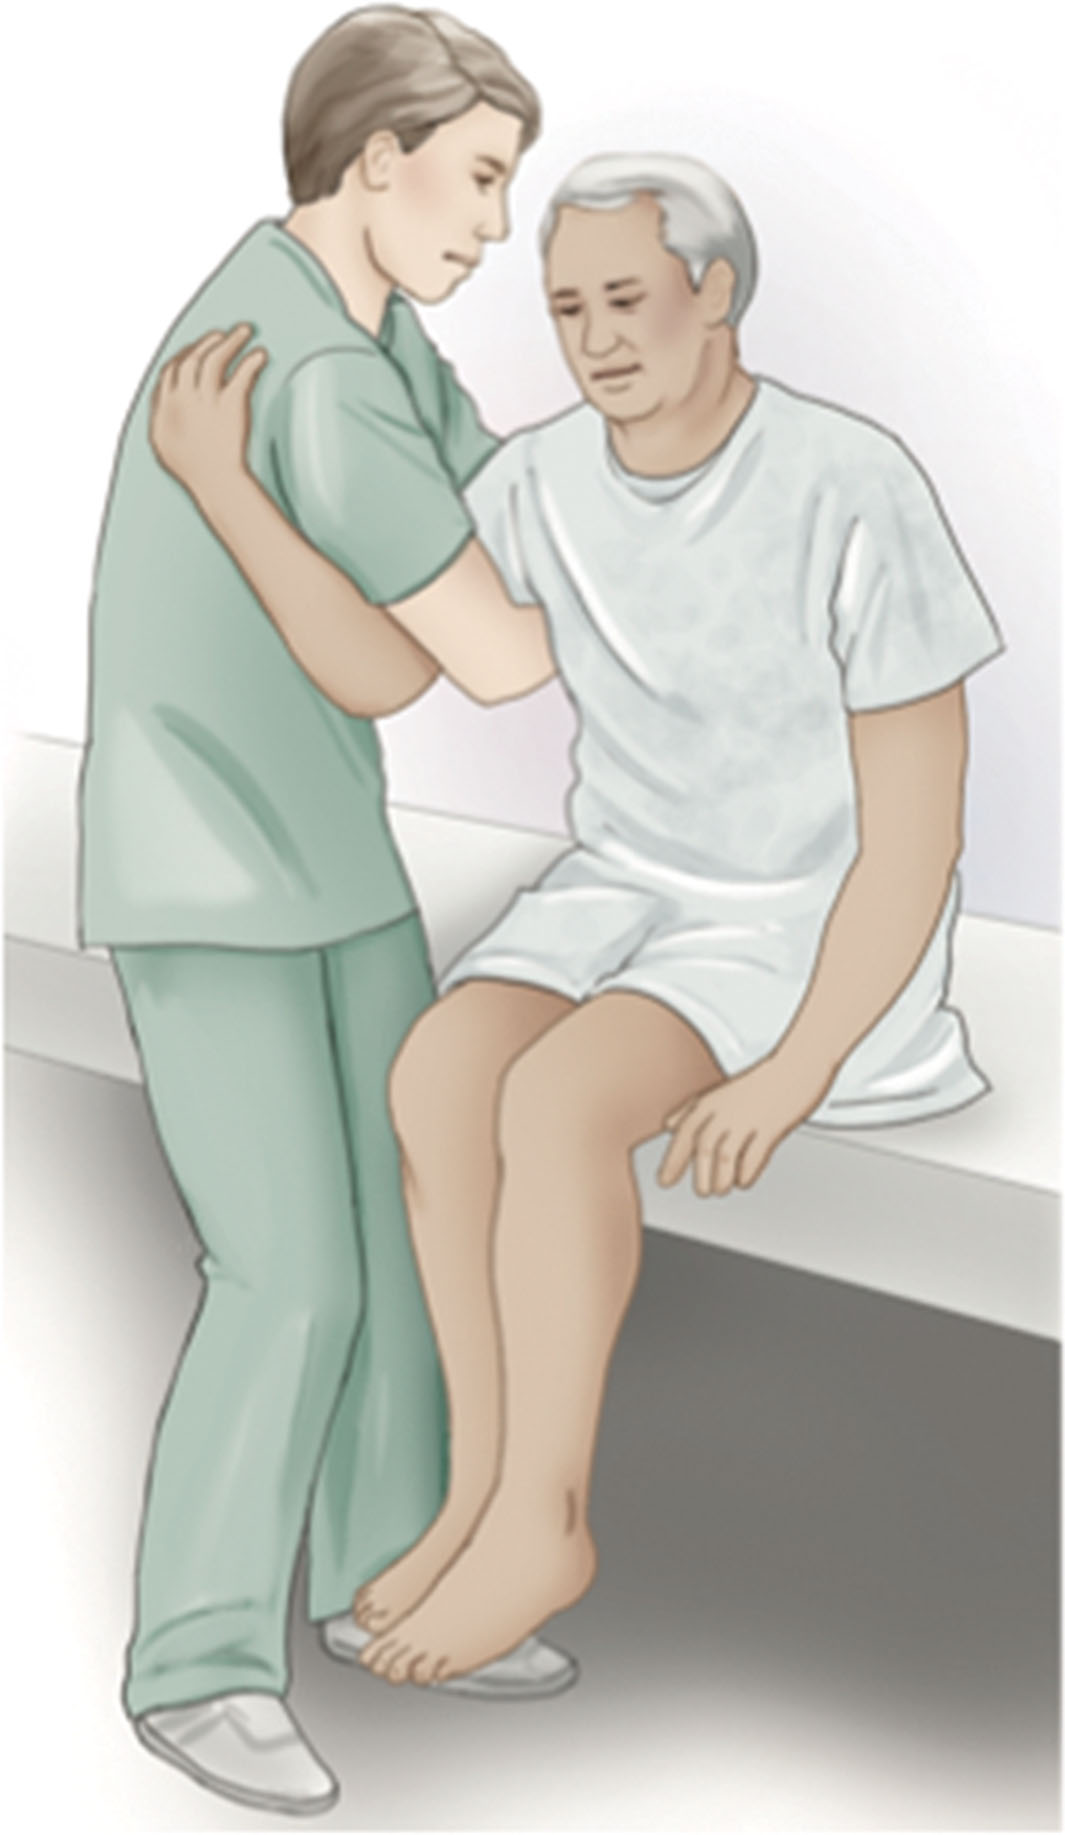
Help the patient to turn and sit in the wheelchair.
Lower the footrests and help place the patient’s feet on them.
Do not attempt to transfer patients who are unable to bear any of their own body weight; instead, ask for help.
The most common types of tubing that the sonographer will encounter when working with hospital patients are the following:
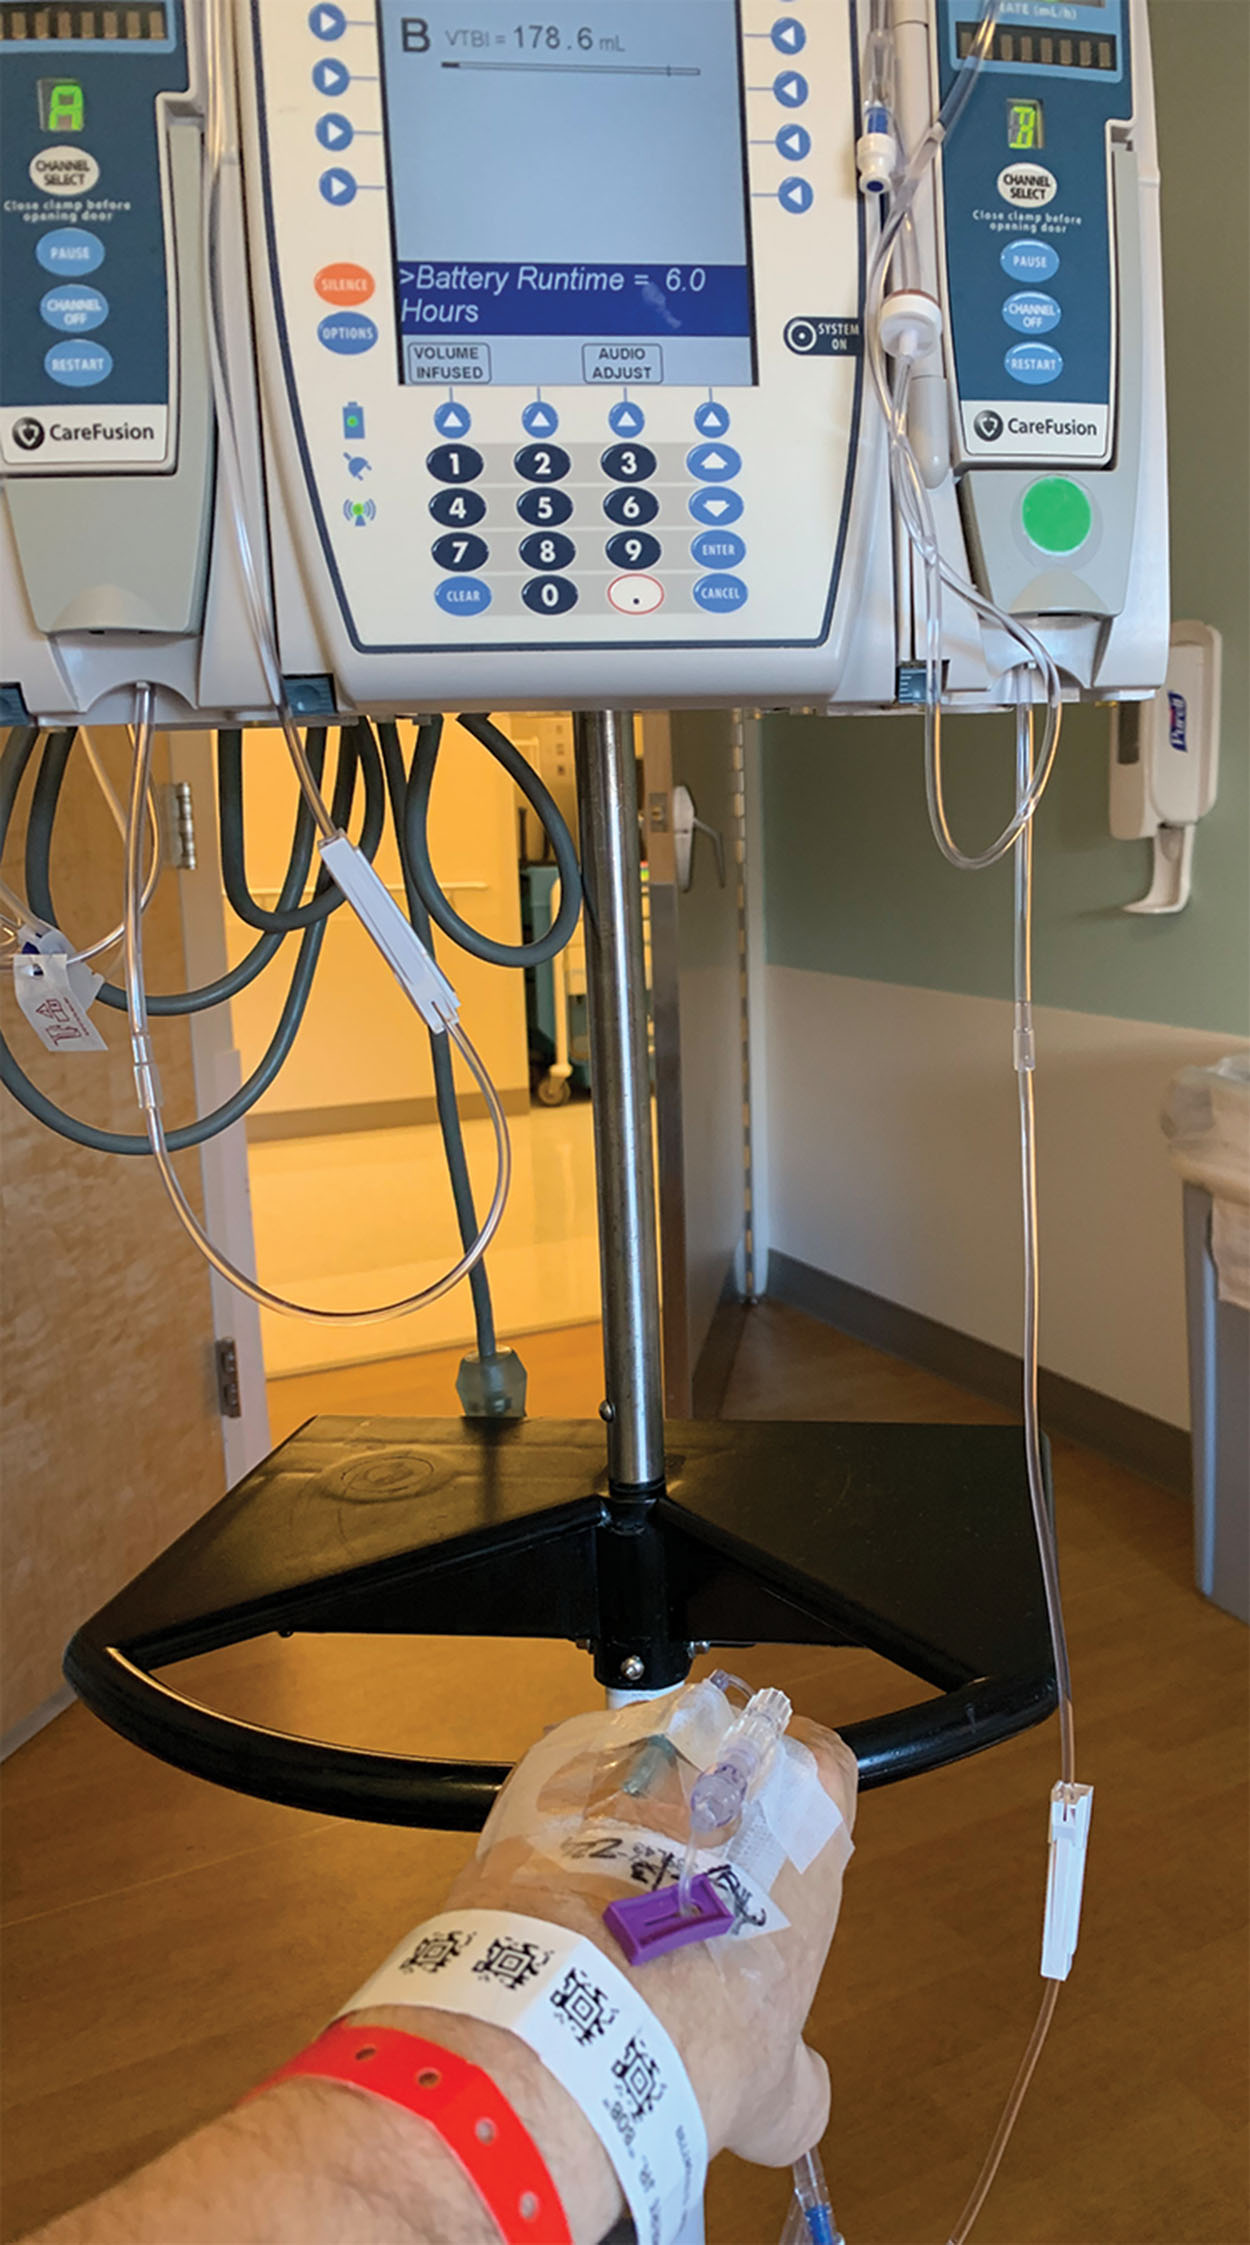
Intravenous (IV) tubing ( Fig. 2.12 )
Nasogastric
Urinary catheter
Oxygen
Sonographers need to know how to properly move and care for patients who have tubes in place.
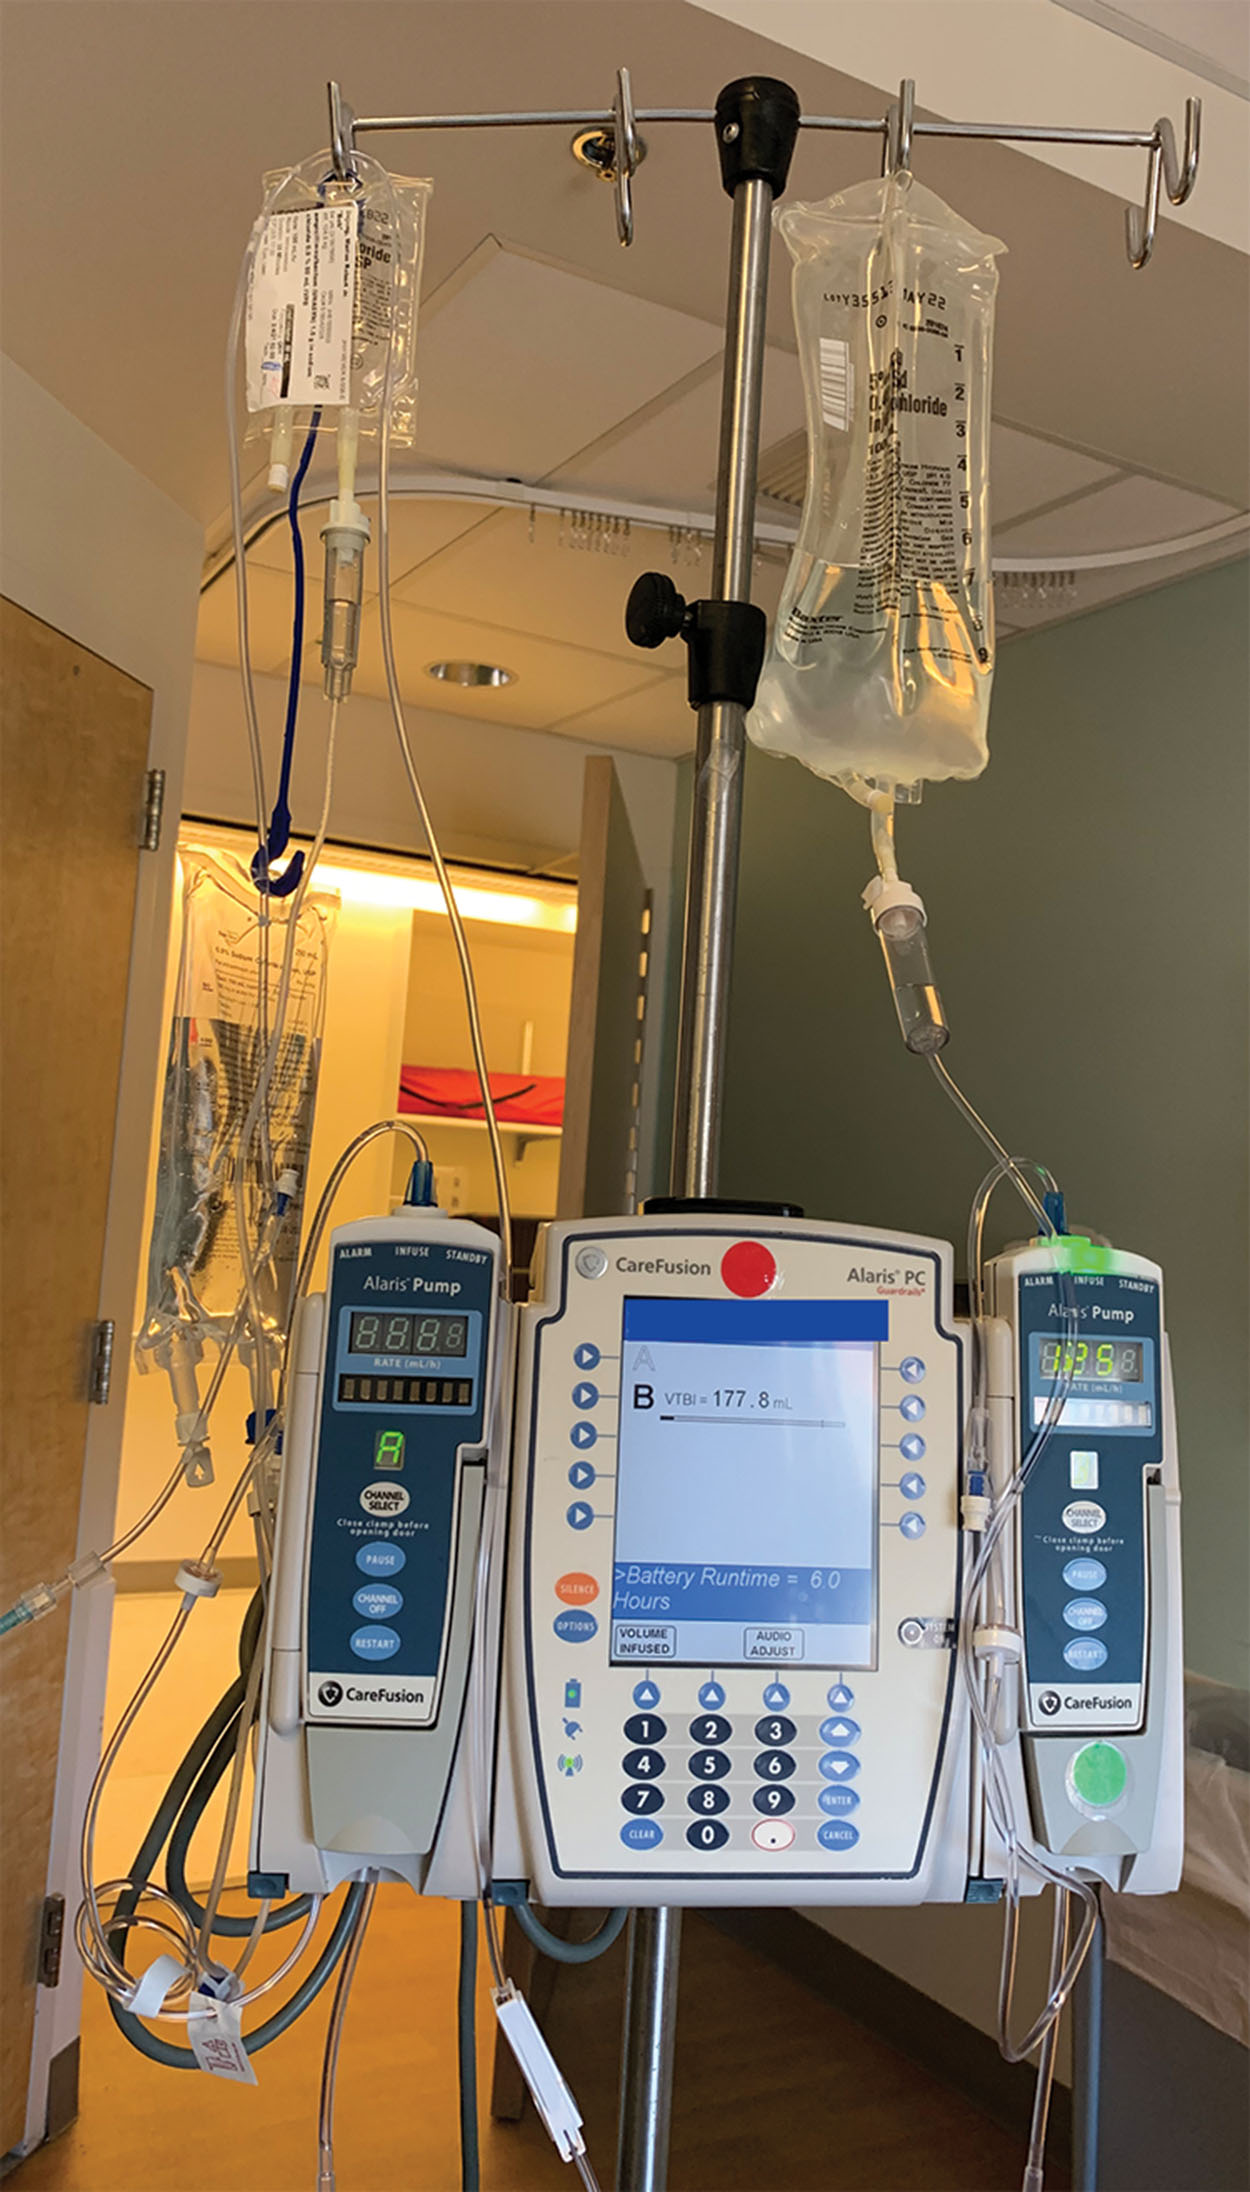
The intravenous (IV) therapy route is the fastest way to deliver fluids and medications. IV tubing connects a plastic bag that contains fluid to infuse into the patient’s body via a catheter inserted into a vein. The chief components of a gravity IV infusion set are a prefilled, sterile plastic bag of fluids, an attached drip chamber ( Fig. 2.13 ) that makes it easy to see the flow rate and that the IV is working, a clamp to shut off flow ( Fig. 2.14 ), a regulator to adjust the flow rate ( Fig. 2.15 ), and a long sterile tube that leads from the drip chamber to the insertion site of the IV. A gravity IV uses the pull of gravity to deliver the fluids to the patient, so it is important to keep the IV bag above the patient’s arm. Blood will flow back into the tubing when the bag is lower than the patient’s arm and if the bag is not raised above the patient’s arm there is a risk that the IV will form a clot and will need to be replaced. For adult patients, arm and hand veins are commonly used and for newborn infants, the scalp veins are usually used. While moving the patient up on or down from the stretcher, it is important to take care that the tubing is not pulled as this could cause the IV to come out of the vein. If the needle is accidentally dislodged, the IV fluid may enter the surrounding tissue rather than the vein, which is called infiltration. The patient may complain of discomfort, and you may observe swelling or redness or discoloration of the tissues around the IV site. Clamp off the flow and notify the nursing staff for instructions. If this happens before you start the study, call the patient’s nurse to determine whether you can continue the study.


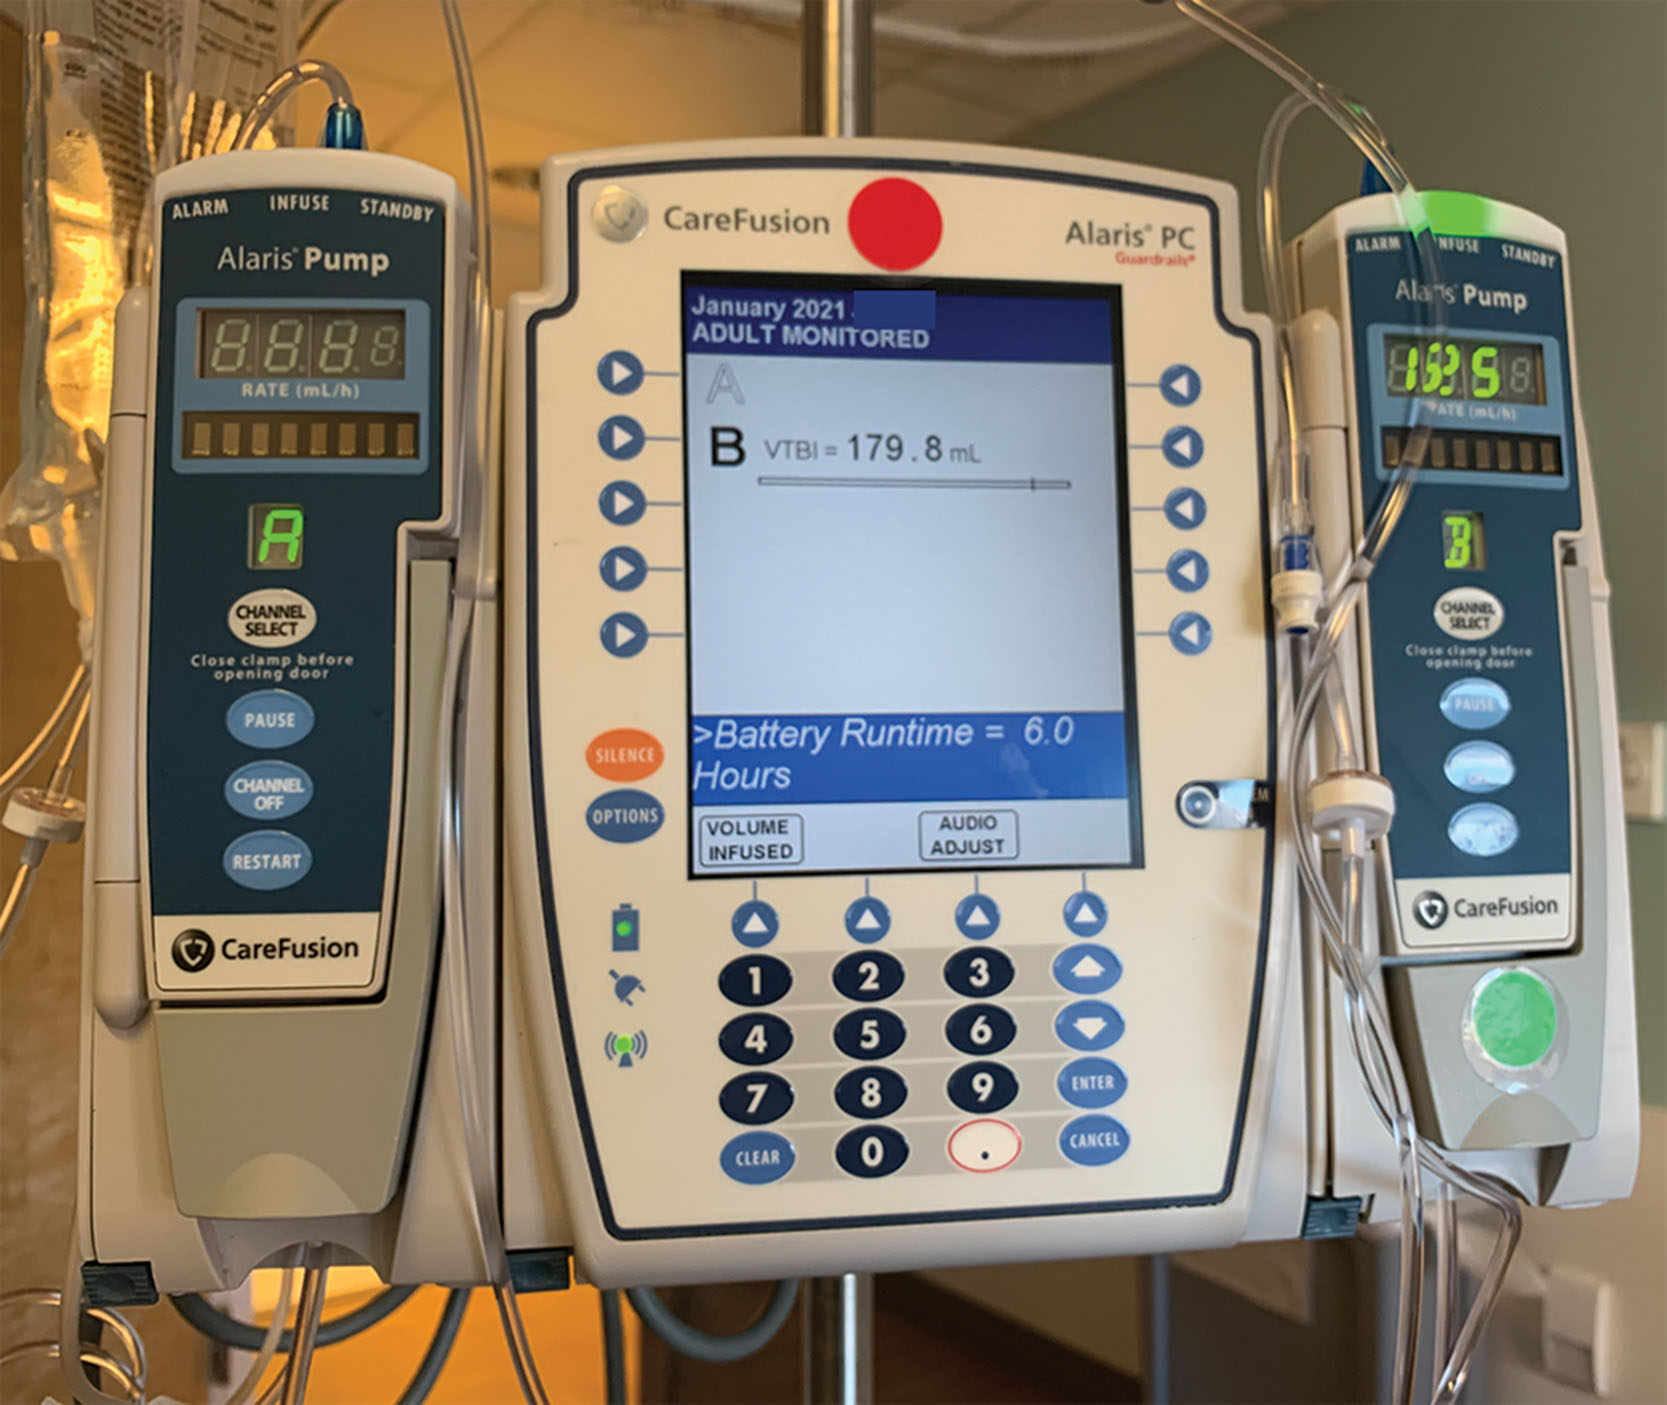
Modern infusion pumps are computerized and can regulate the drip rate so that a measured amount of fluid is given over a period of time ( Fig. 2.16 ). They also have alarms to alert that a problem has occurred, such as the bag is empty, infiltration within the patient’s tissues, a low battery, or there is obstruction to flow. To minimize the risk of the battery running out while scanning, always plug the IV into a wall outlet. A sonographer does not have training on these devices and should only press the silence button when an alarm goes off. The patient’s nurse should be notified and given any messages, such as infusion complete. If the pump has two chambers, A and B, make sure to tell the nurse which side .has the error ( Fig. 2.17 ). If it is a simple fix, they may walk you through what to do. If you have to change the fluid bag, make sure you read back to the nurse accurately what type of fluid is in the bag. It is easy not to pay attention to the percent of the product in the fluid such as dextrose 10% versus 20% and administer the incorrect fluid type. If the fluid type that is needed is not available ask the nurse what can be used to keep the IV open until the patient returns to the floor, such as normal saline. If there is a nurse that works out of the area, it would be appropriate to get them to help. If the warning is “tube occluded” follow the tubing from the unit to the patient as it is possible to pinch the tubing when lowering the side rail. If the problem is because the patient has bent their arm and obstructed flow, help them straighten out their arm to resume flow. Usually once the obstruction is cleared the alarm will stop. If flow does not resume, talk to their nurse. Unless you are familiar with the type of pump that the patient has do not press any button unless you know what it does. It is possible that a nurse will write someone up for jeopardizing patient care for attempting to fix an IV pump alarm without proper training. Do not just keep pressing the silence alarm button until you are finished with the exam, as the problem could cause the line to clot and the patient to lose their IV and they will need a new IV to be placed. This is not good patient care and a good reason to be written up. As a sonographer you can be trained to perform some basic functions as well as learn to troubleshoot issues so that you can better communicate with the nurse.
The following guidelines should help in working with patients with IVs:
If the needle has been inserted in the patient’s elbow, help the patient keep the arm straight.
Watch for and immediately report any of the following:
No solution is passing from the bottle into the tubing, even though solution is still in the bottle.
Blood appears in the tubing at the insertion site.
The bag is empty. On gravity drip IVs there is no alarm, so the sonographer needs to keep an eye on the bag especially if there was less than one-third to one-half volume of fluid remaining.
The needle has accidentally been pulled out.
The patient complains of pain or tenderness at the needle insertion site, which may be a sign that the solution is infiltrating into the adjacent tissues.
The tubing becomes disconnected, and the patient is bleeding freely from the connection site. Wear gloves and reconnect the line.
You will need to help your patient maneuver around the IV pump as they get up from the wheelchair and onto the scanning stretcher and vice versa. Have them turn so that they do not become tangled in the tubing. Usually this would be counterclockwise if the IV is in the patient’s left hand and clockwise if it is in the right arm. Another way to think of how to turn the patient is that the patient should turn toward the IV pump. Beware of tubing that is shorter in length than usual, because you could accidentally pull the IV out of the patient’s hand or arm.
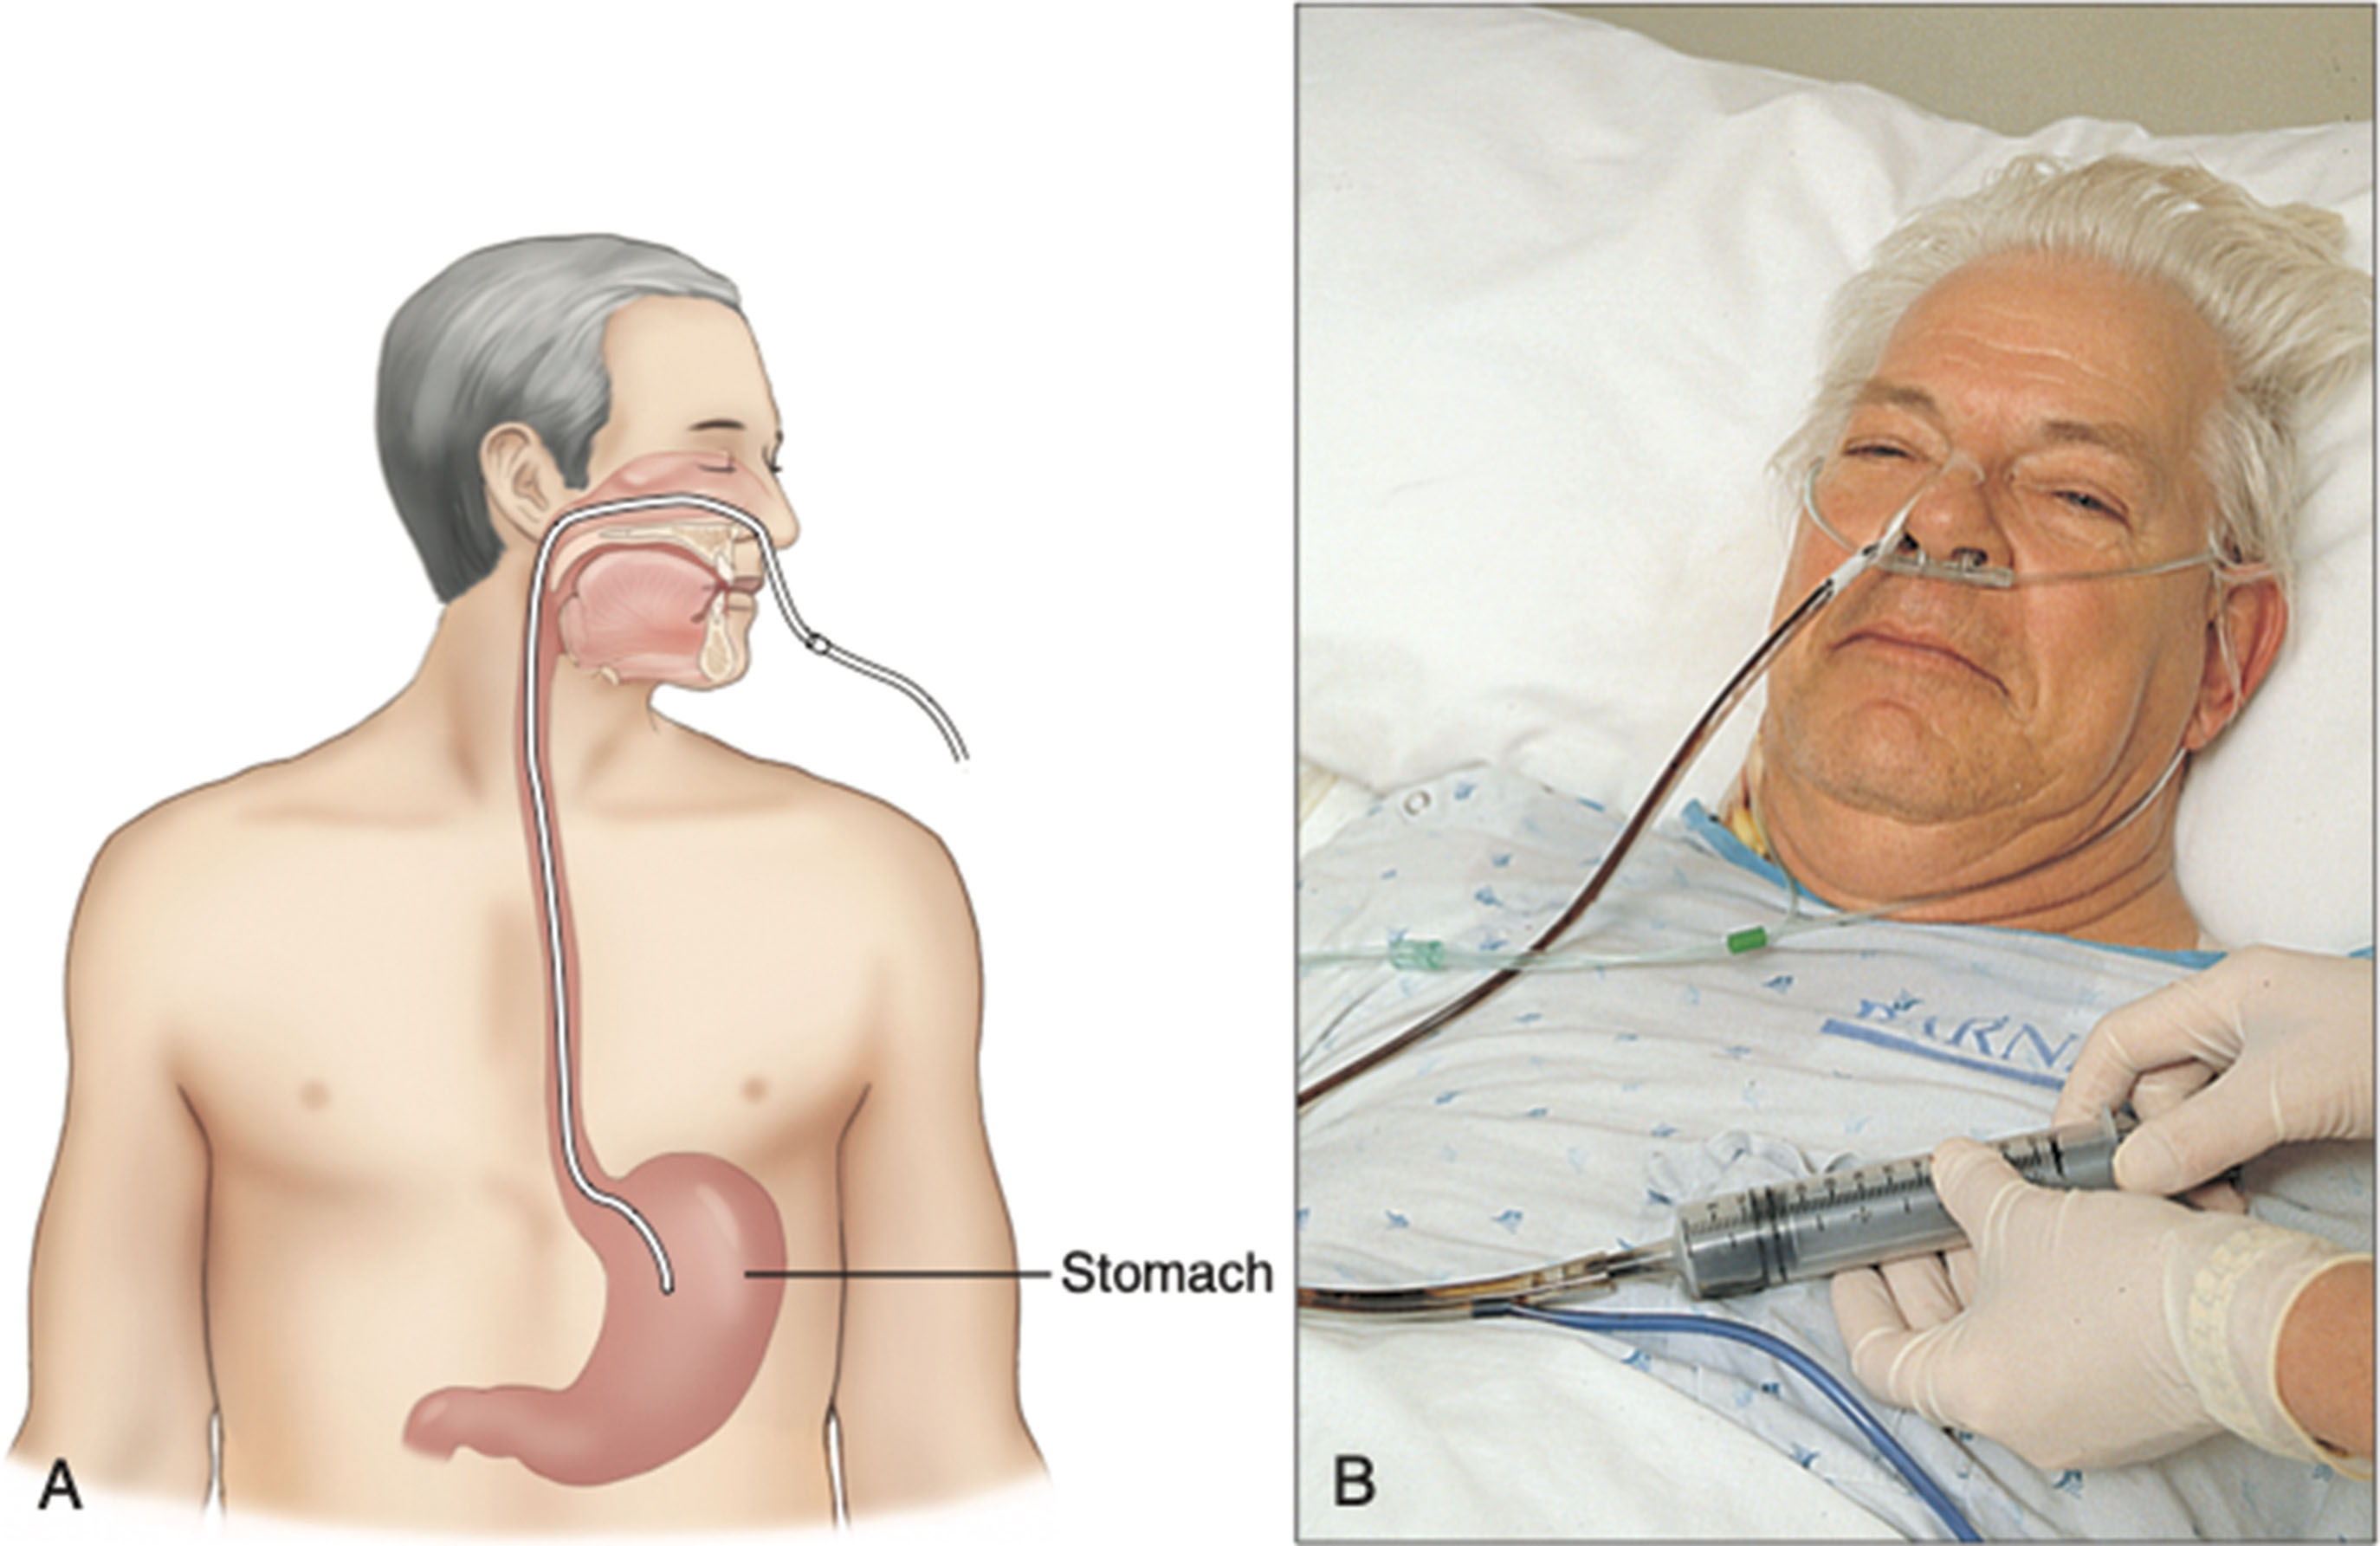
A nasogastric tube, commonly called an NG tube, is a flexible tube inserted through their nostril, down the nasopharynx, and terminating in the patient’s stomach or duodenum ( Fig. 2.18 ). The NG tube is taped to the nose and attached to the patient’s gown to prevent the tube from moving, coming out, or ending up in a lung. NG tubes can be used for feeding or to remove gastric contents to prevent vomiting or gastric distension, or to wash the stomach of toxins. The tube may be connected to a suction device to empty the contents. The tube can be disconnected from the suction machine and attached to the patient’s gown with a clamp or catheter tip syringe so that fluid does not leak out. Some patients may come to the department with their suction machine which will need to be plugged in. It is important to be conscious of the tube as you move the patient as it can be uncomfortable or painful when the tube is moved as it irritates the nasal mucosa. These patients cannot lie flat, and any scans will need to be performed with the bed or stretcher raised to at least 30 degrees. If the patient while under your care begins to have respiratory symptoms such as coughing, choking, or the pulse ox alarm goes off, immediately contact their nurse as this is an emergent situation.
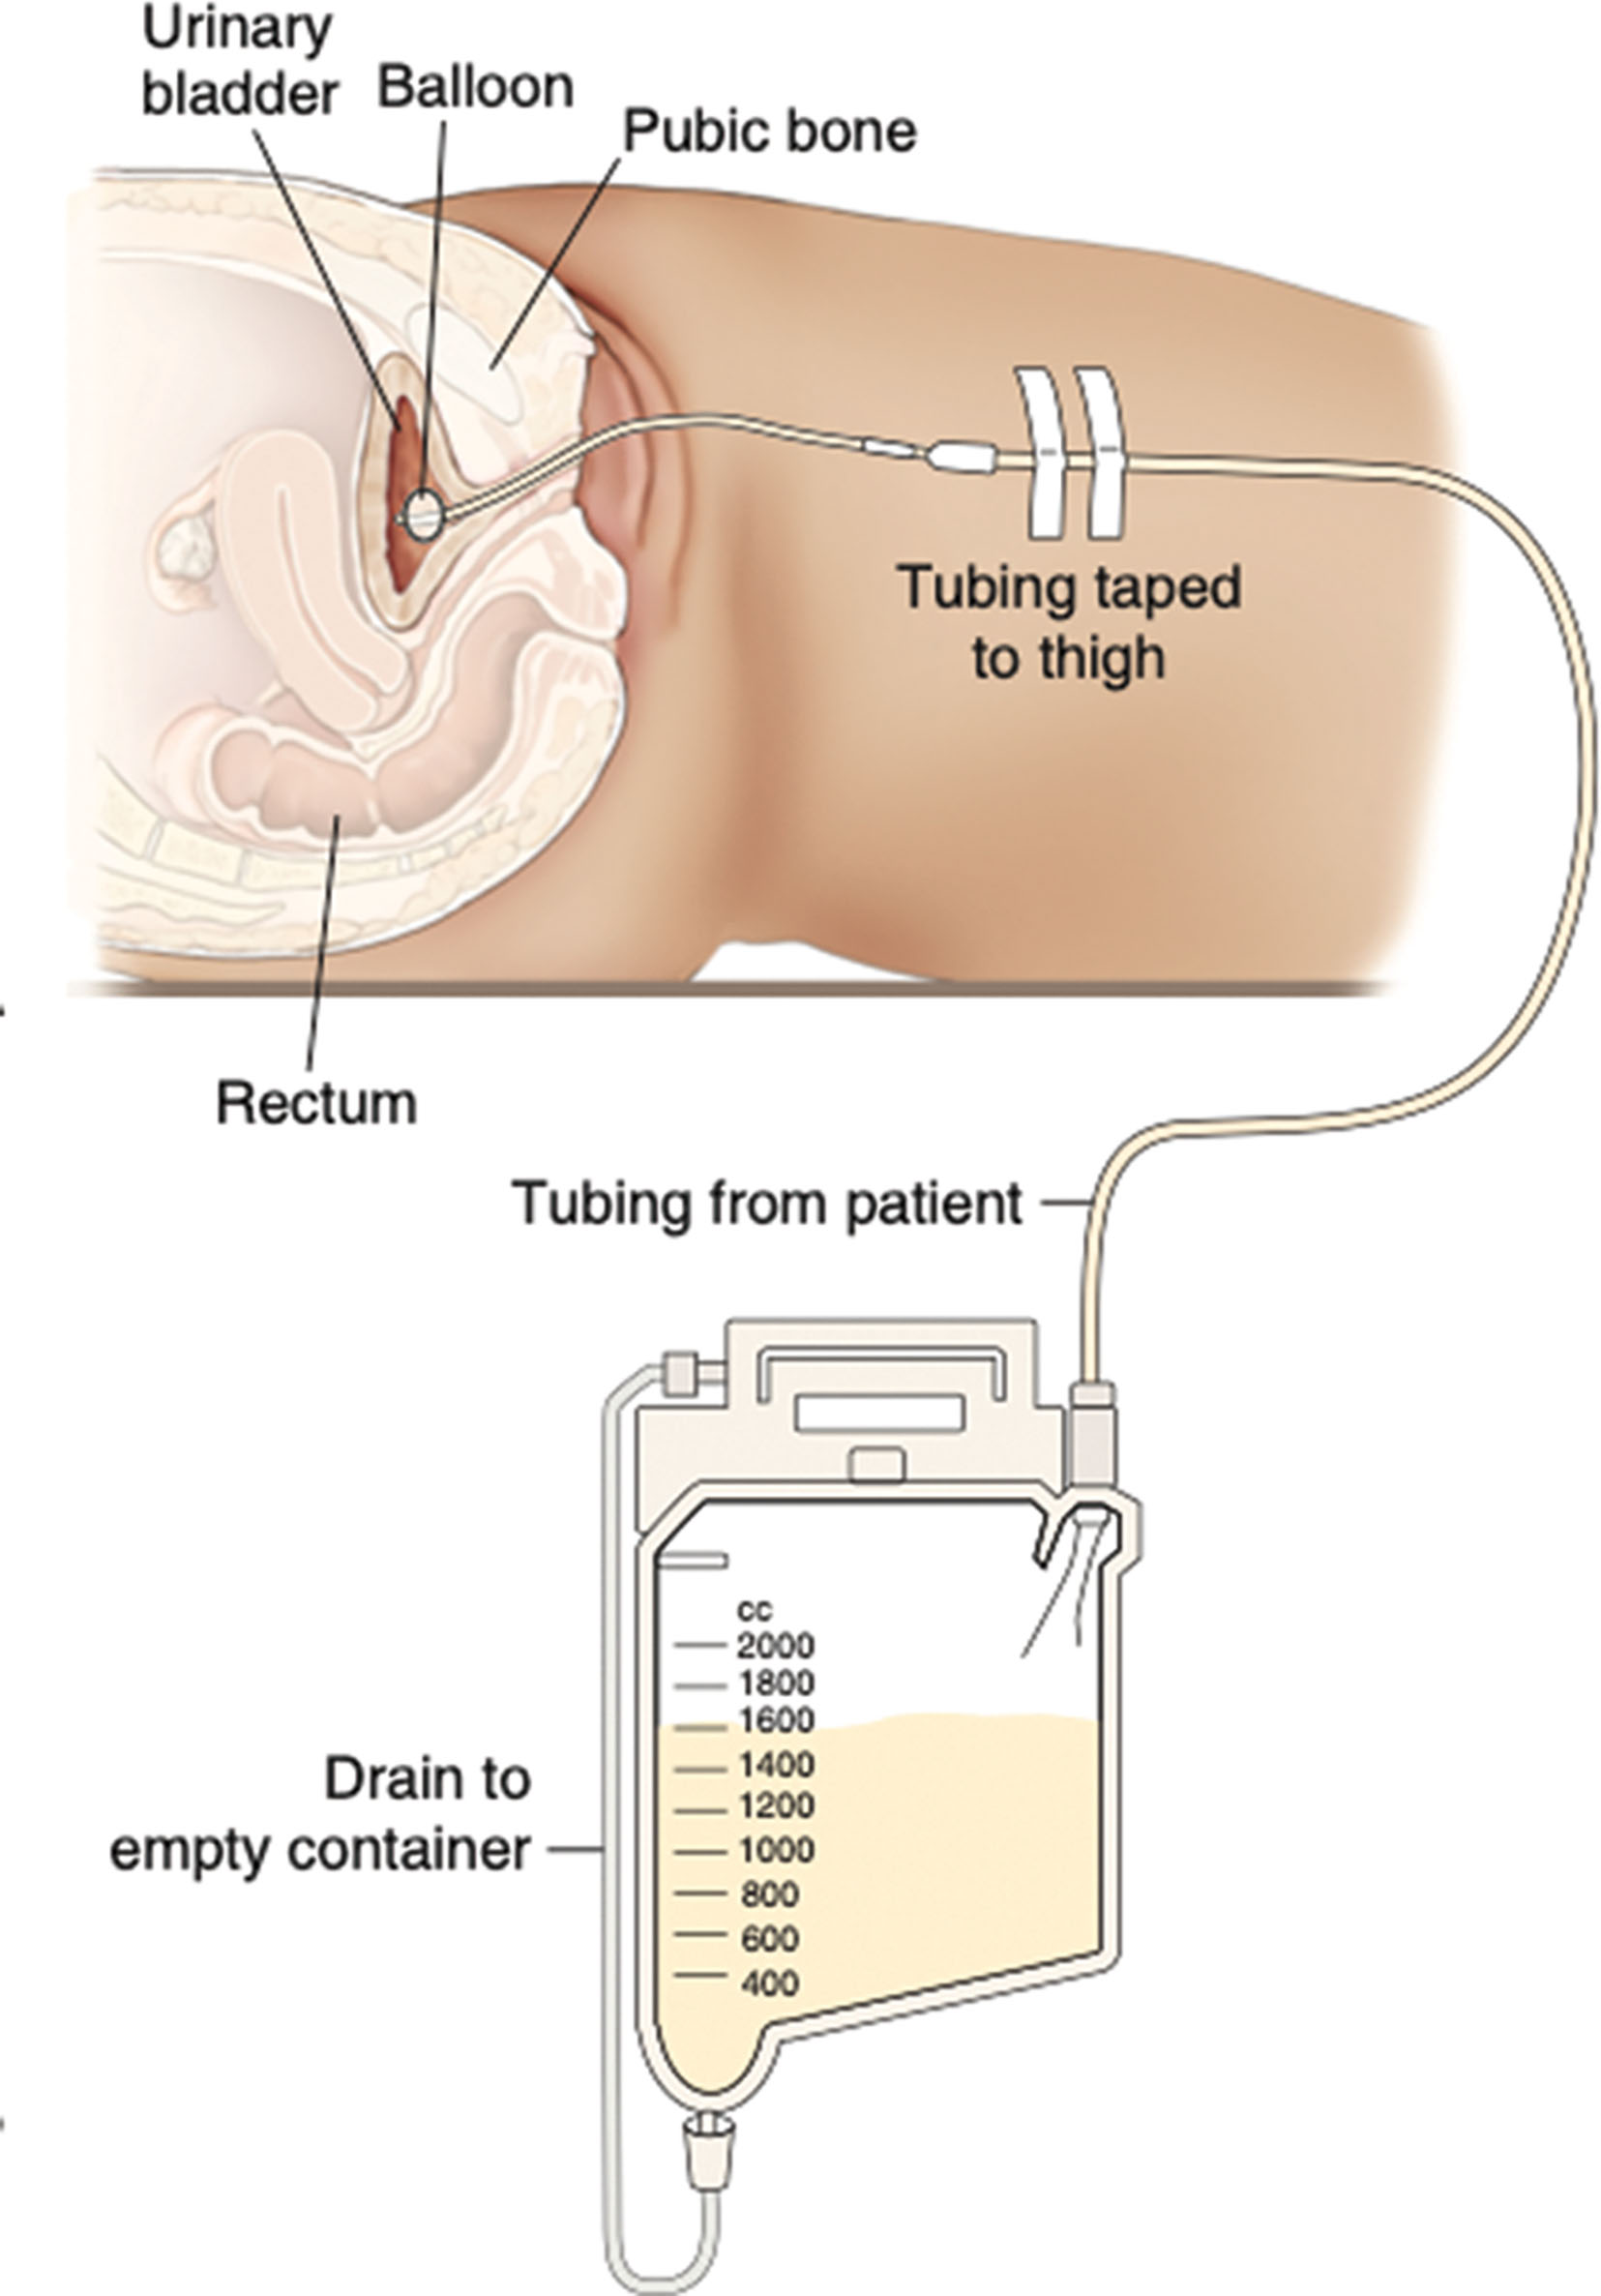
A urinary catheter is inserted through the patient’s urethra and into their bladder to provide temporary drainage of urine. A common indwelling catheter is the Foley catheter, which is a specially designed catheter with two tubes, one inside the other. One tube ends at a small balloon which will be inflated to keep the catheter from slipping out. The other tube is open on both ends to drain the urine. Catheters are available in different sizes according to their diameter and are described in French units, which is a gauge system. The number assigned to the catheter corresponds to its diameter and goes from a 6 French catheter, the smallest diameter at 2 mm, to a 26 French catheter, the largest diameter at 8.7 mm. After the catheter has been inserted, the balloon is filled with fluid so that the catheter cannot be pulled out through the patient’s urethra ( Fig. 2.19 ). If the balloon is filled with air, it will cause artifacts and obscure the patient’s pelvic anatomy on an ultrasound exam. The sonographer should ask the nurse to remove the air from the balloon and fill it with fluid. Urine drains from the bladder and collects in a container attached to the patient’s bed or table. The catheter bag must always be positioned at a level lower than the patient’s urinary bladder. The catheter may be taped to the inner thigh to prevent accidentally pulling on the catheter. When moving the patient, get the wheelchair as close to the stretcher as possible and move the bag from the chair to the stretcher before moving the patient. The patient should turn to avoid getting tangled in the tubing. When the examination is finished move the bag first and then the patient, always being careful not to pull on the catheter as this will cause some discomfort. Although difficult to do, the catheter may be pulled out with enough force. Catheters left in too long can cause the patient to have a UTI. Some men will have a Texas catheter if they are incontinent. This type of catheter has a condom-like sheath that goes over the penis with an opening that leads to the tube. This type of catheter needs to be changed frequently, as often as daily.
When a catheter has been inserted into the bladder but is not draining urine, the sonographer may be called on to scan the bladder to assess the location of the tip of the catheter and the balloon, especially in male patients, where the insertion of the catheter may be impeded by an enlarged prostate gland. The balloon is usually found in the urethra that is going through the prostate. The nurse or physician will deflate the balloon, insert the catheter more, inflate the balloon and have the sonographer verify that the balloon is located in the bladder.
Become a Clinical Tree membership for Full access and enjoy Unlimited articles
If you are a member. Log in here