Physical Address
304 North Cardinal St.
Dorchester Center, MA 02124
This information is adapted with permission from the SAM Splint User Guide. SAM Splints (Sam Medical Products) are available in the following sizes:
Standard—4 ¼ inches × 36 inches; 4 oz; roll or flatfold
Junior—4 ¼ inches × 18 inches; 2.4 oz; flatfold
Wrist—4 ¼ inches × 9 inches; 1.1 oz; flat
XL—5 ½ inches × 36 inches; 5.9 oz; flatfold
Finger—1.8 inches × 3 ¾ inches; 0.2 oz; flat
The standard SAM Splint has a thin core of aluminum alloy and is closed-cell foam padded, reusable, not affected by ambient temperature or altitude, cuts with regular scissors, and is waterproof. Radiographs (X-rays) can be taken through the SAM Splint. The strength of the applied splint is derived from how it is shaped with proper angles and bends by the user.
The closed pore foam will not flash when exposed to flame but will begin to melt and eventually ignite after approximately 8 seconds. The SAM Splint is easily cut with ordinary scissors. Cutting exposes the thin aluminum core. Unless serrated scissors have been used, the now-exposed aluminum is usually not very sharp. To prevent any injury from the exposed edge, we recommend folding the edge on itself 1 to 2 times. Covering the edge with tape is also effective.
The closed-pore polyurethane foam does not absorb or allow passage of air or perspiration. This does not present a problem during short-term use. If, however, the splint is to be maintained for prolonged periods (hours to days), some absorbent material such as cotton cloth or cast padding should be placed between the splint and patient to prevent skin irritation and odor. Also, to prevent uncomfortable pressure points during prolonged use, place soft padding (such as gauze pads) around all bony prominences.
The splint is nonsterile. To reuse the SAM Splint, wash thoroughly with disinfectant before repacking. Whether cut or used intact, the splint can be cleaned with antiseptic soap and water or with almost any protocol cleaning solution, such as an inexpensive diluted mixture of commercially available bleach and water.
A SAM Splint without any bends (e.g., rolled in the package) is completely malleable. When a curve or fold is placed anywhere across its longitudinal axis, it becomes rigid and suitable for splinting almost any bone on the body. Always use curves to add strength and rigidity to the SAM Splint.
The basic C-curve ( Fig. 310 ) meets most splinting needs. To create the C-curve, place both thumbs in the center of the SAM Splint. Using your thumbs as a brace, pull the edges of the splint toward you to create a shallow C-curve. This curve immediately adds strength and rigidity to the splint. For greater strength, deepen the bend.
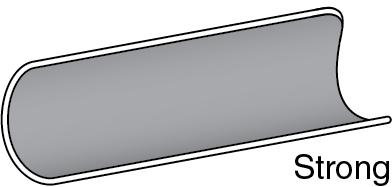
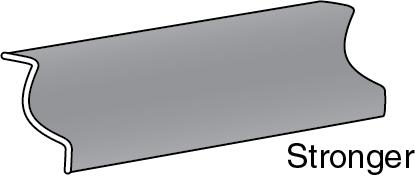
The reverse C-curve is stronger. First, form a C-curve. Then add additional strength by bending the edges of the C-curved splint back in the reverse direction ( Fig. 311 ).
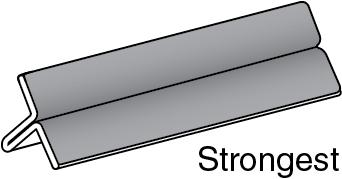
The T-curve is yet stronger. This bend adds exceptional strength to the splint. To create the T-curve, fold the outer edges of the splint together. Next, bend half of each side of the fold in the opposite direction to create a T-shaped beam ( Fig. 312 ).
Step 1: To create a simple finger splint or fingertip guard, first form a SAM Finger Splint into the C-curve ( Fig. 313 A).

Step 2: Place the finger in the curved surface of the splint. Squeeze the end of the splint to create a fingertip guard ( Fig. 313 B).
Step 3: Secure with your wrap of choice ( Fig. 313 C).
Step 1: Roll over the end of a 9-inch (for children) or 18-inch (for adults) SAM Splint to provide comfort for fingers ( Fig. 314 A).
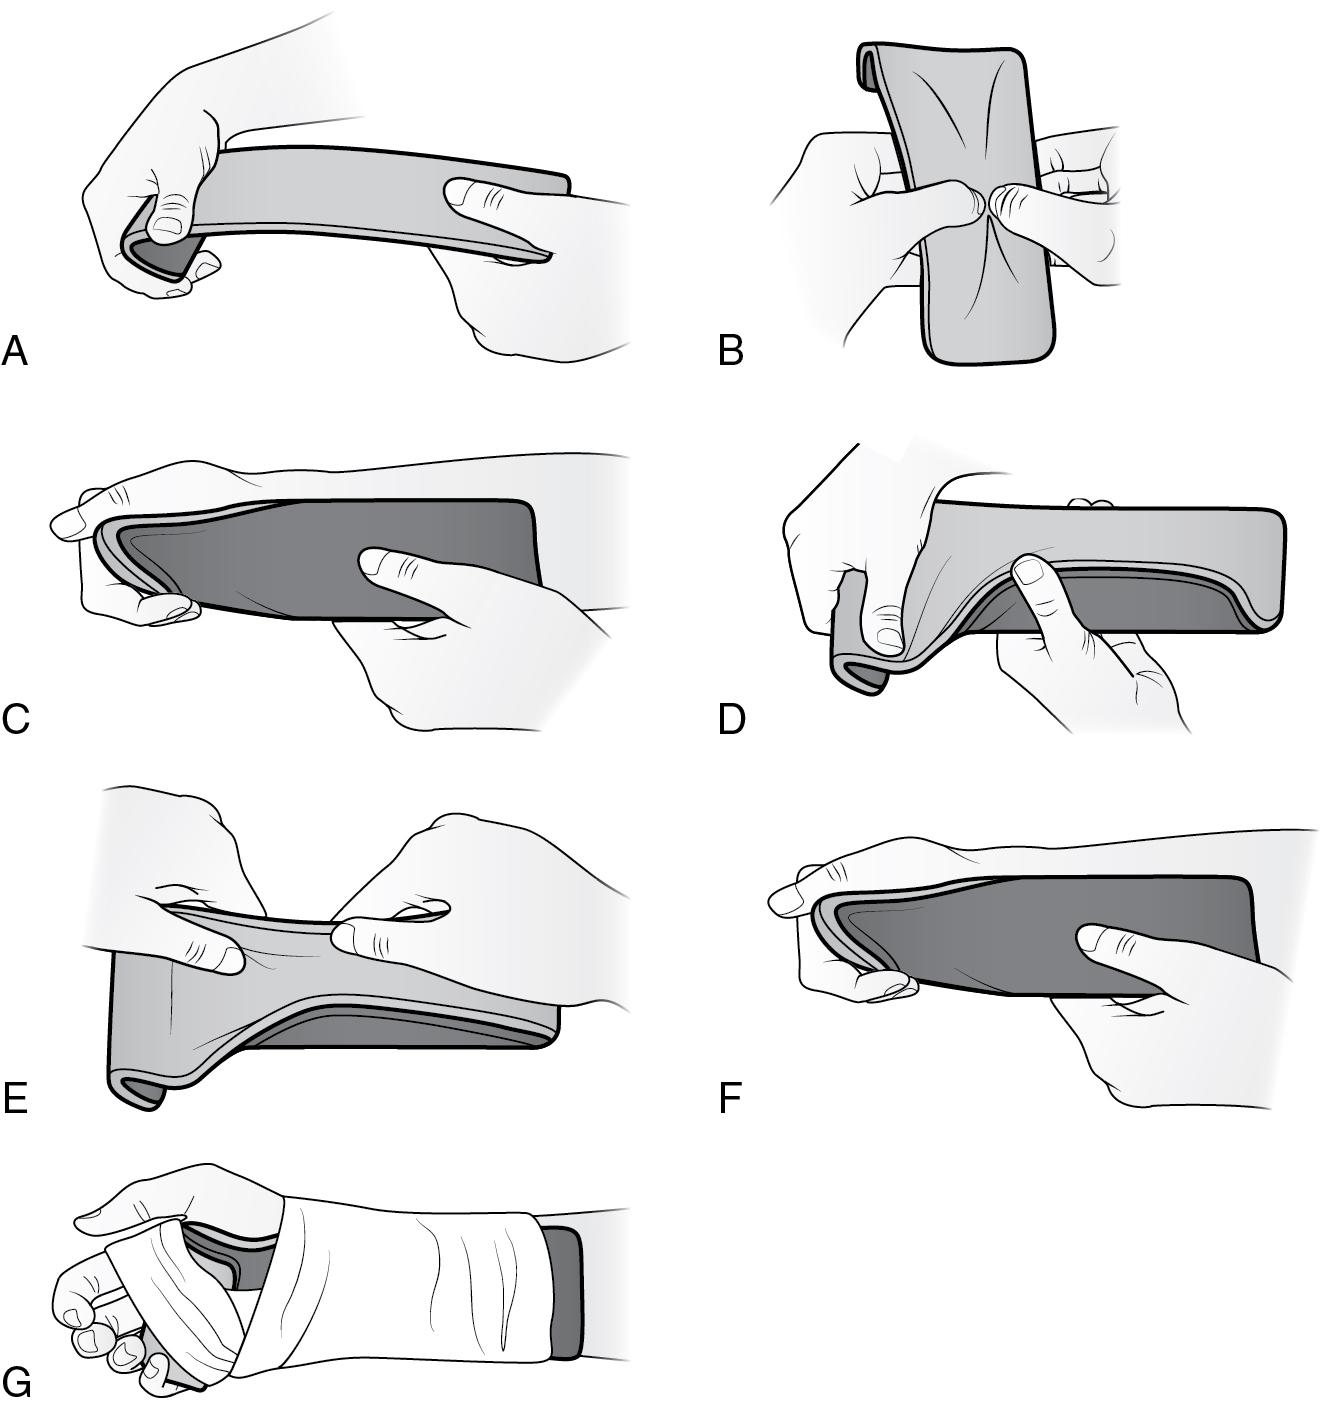
Step 2: Apply a C-curve ( Fig. 314 B).
Step 3: Using your own right or left hand and wrist as a template, mold the splint into the position of function ( Fig. 314 C).
Step 4: Be sure to create a generous curve for the base of the thumb ( Fig. 314 D).
Step 5: Obtain additional strength by folding up the ulnar (little finger) side of the splint ( Fig. 314 E).
Step 6: Apply to patient ( Fig. 314 F).
Step 7: Make fine adjustments as necessary. Secure with your wrap of choice ( Fig. 314 G).
Step 1: Using your own right or left thumb and wrist as a template, mold the thumb spica shape into the selected SAM Splint. A 9-inch splint works well for this ( Fig. 315A ).
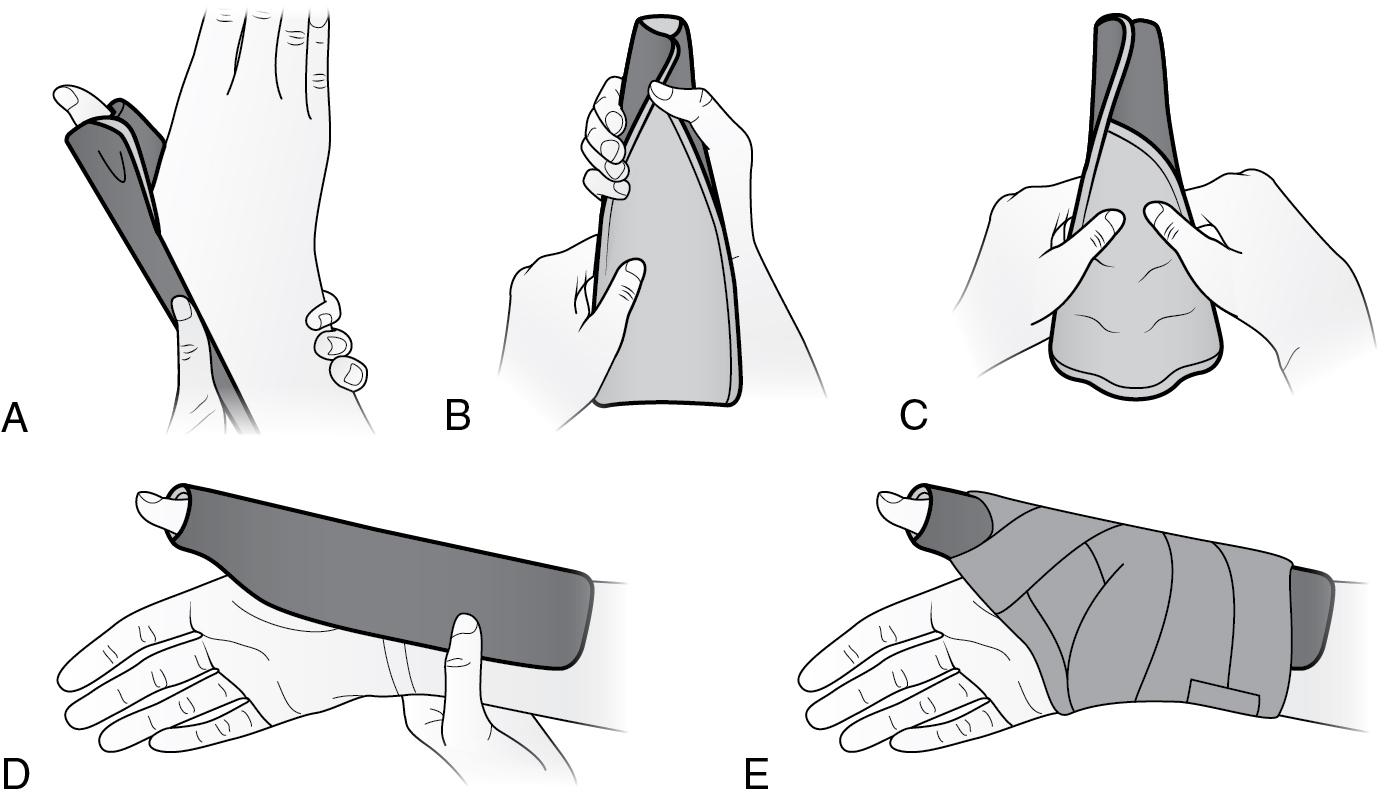
Step 2: Be sure to create a generous curve for the base of the thumb ( Fig. 315B ).
Step 3: You can add reverse C-curves on the edges as needed for additional strength ( Fig. 315C ).
Step 4: Apply to the patient. Make fine adjustments as needed ( Fig. 315D ).
Step 5: Secure with your wrap of choice ( Fig. 315E ).
Step 1: Fold a 9-inch SAM Splint lengthwise ( Fig. 316A ).
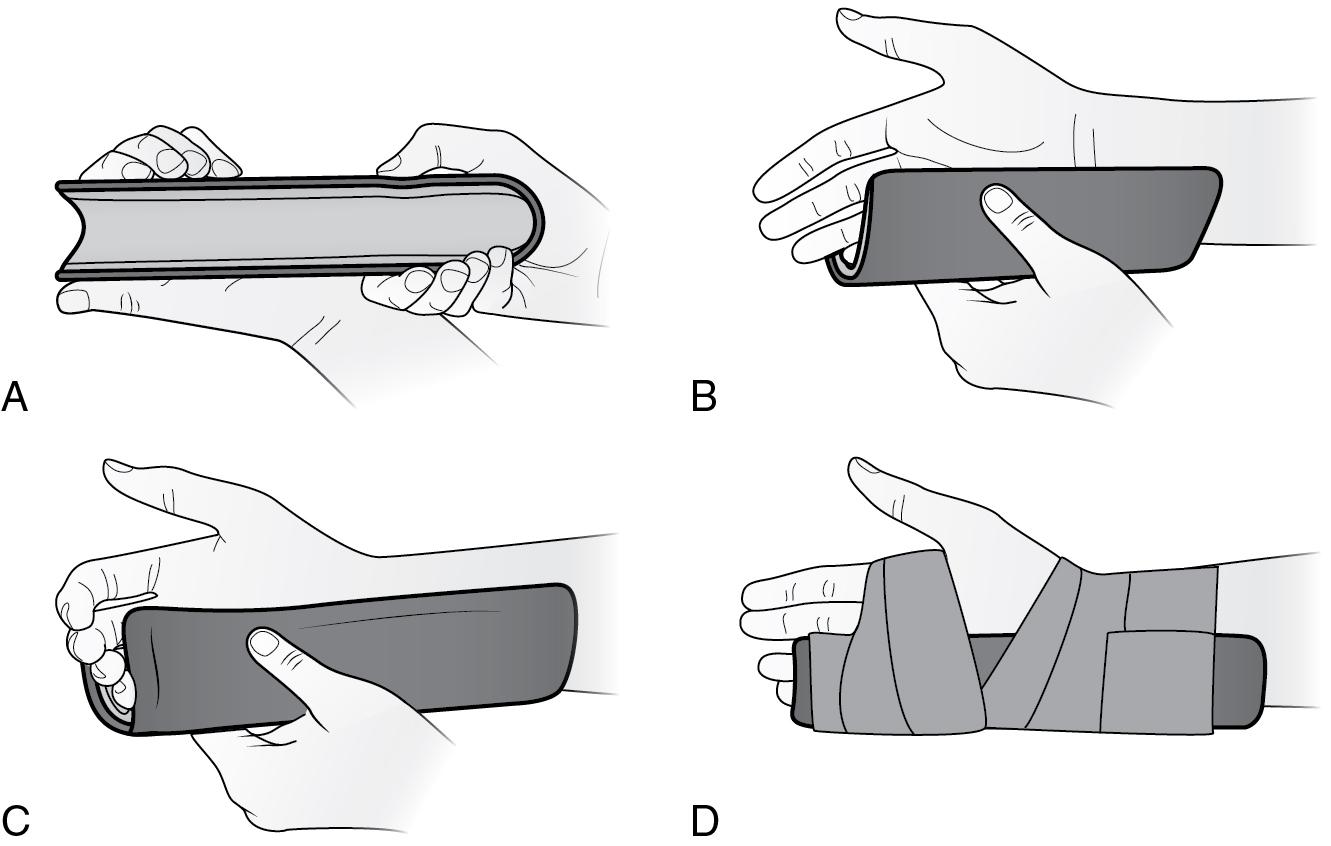
Step 2: Using the ulnar side of your own hand and wrist as a template, mold the splint into the desired shape ( Fig. 316B ).
Step 3: Apply to the patient ( Fig. 316C ).
Step 4: Make fine adjustments as needed and secure with your wrap of choice ( Fig. 316D ).
Become a Clinical Tree membership for Full access and enjoy Unlimited articles
If you are a member. Log in here