Physical Address
304 North Cardinal St.
Dorchester Center, MA 02124
The fingertip refers to the part of the finger that is distal to the insertion of the flexor and extensor tendons. Local flaps of the hand, including the palmar V-Y advancement flap, cross-finger flap, and thenar flap, are often used to cover the soft tissue defect of the fingertip to preserve the nail and distal interphalangeal (DIP) joint.
The V-Y flap is a random pattern advancement flap that is best suited for transverse or dorsal oblique fingertip amputations, within Tamai Zone I.
Ideal candidates present with exposed bone distal to the midportion of the nail bed ( Fig. 87.1 ).
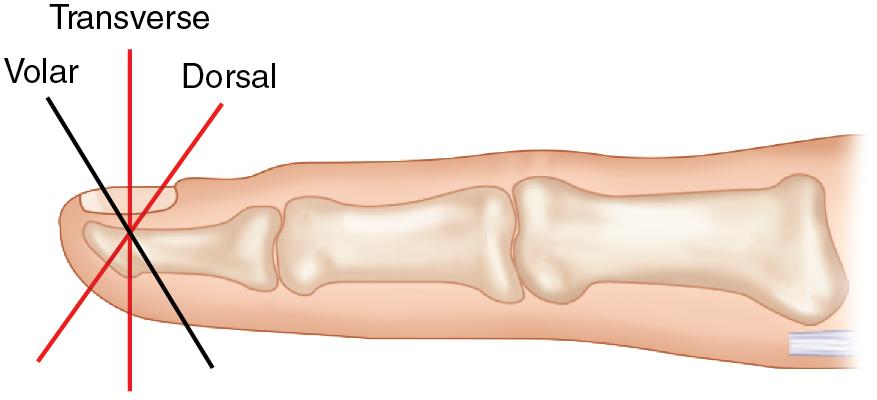
Contraindications include defects with volar skin and soft tissue loss and Tamai Zone II injuries that would require flap design that violates the DIP joint crease.
The flap should be used for defects that are free from infection.
The surgeon must define the defect and determine the adequacy of local flap coverage. The volarly based V-Y flap (Atasoy-Kleinert) has a maximum advancement of 10 mm.
The remaining adjacent soft tissue should not be affected by the initial injury or present with a disturbance of blood supply.
A radiograph of the injured finger is useful in patients with a posttraumatic defect to rule out any associated distal phalangeal fractures. Sometimes small residual fracture fragments that result from a crushing injury can be seen on a radiograph.
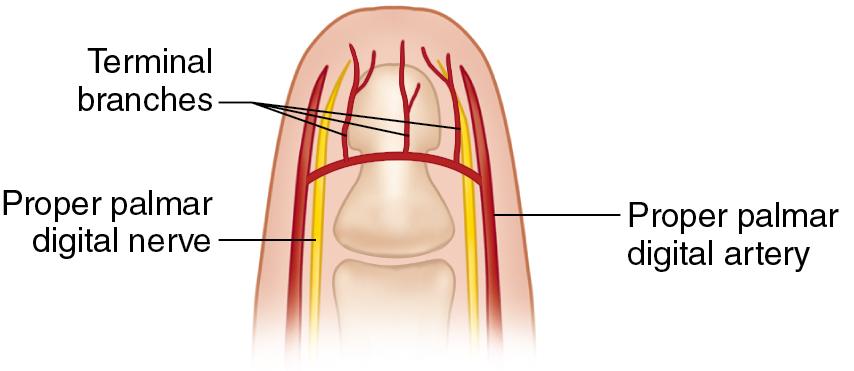
The volar digital neurovascular bundles and their terminal branches provide vascular and sensory supply to the flap ( Fig. 87.2 ).
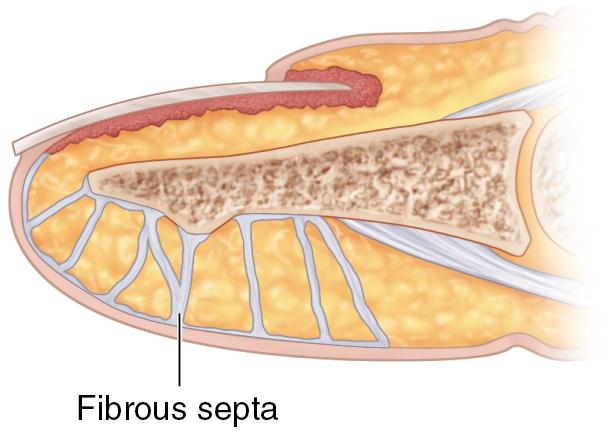
The fibrous septa that anchor the overlying skin to the periosteum of the distal phalanx and the flexor tendon sheath limit the movement of the pulp ( Fig. 87.3 ). To advance the V-Y flap distally, these fibrous septa must be divided.
The boundaries of the V-Y advancement flap are designed as a proximally-based V on the volar side of the distal phalanx ( Fig. 87.4 ). The apex of the flap is located at the DIP joint crease, and the base extends distally to the edge of the defect.
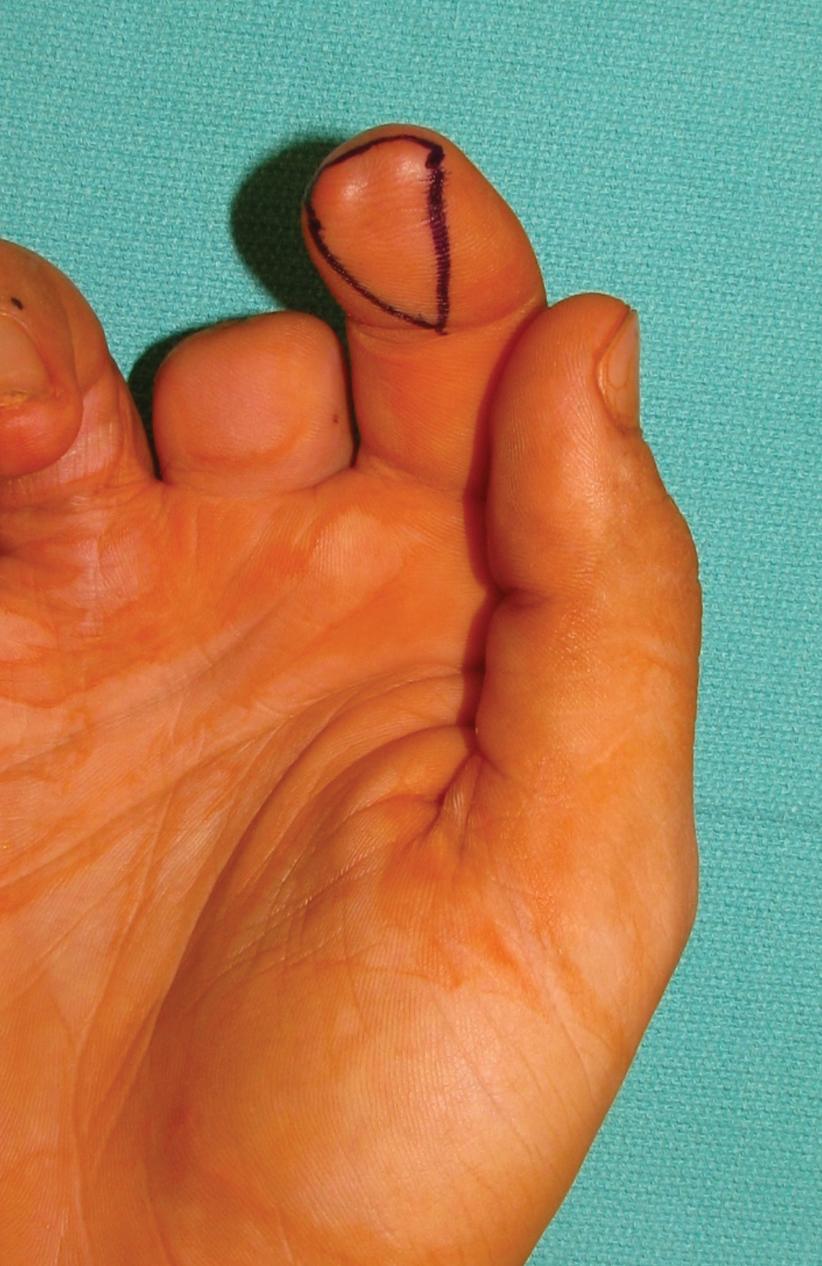
Avoid placing incisions proximal to the DIP joint crease. Subsequent scarring across the DIP joint may limit extension.
The distal aspect of the flap should be the same width or slightly narrower than the defect. Flaps that are too wide may result in a flattened tip.
The skin on the boundaries of the flap is incised, just through the dermis, until subcutaneous fat is visible.
A scalpel is used to divide the fibrous septa, from distal to proximal, extending to the deep margin of the flap, so that the flap is dissected off the periosteum and the fine blood vessels from the periphery of the flap are maintained ( Fig. 87.5 ).
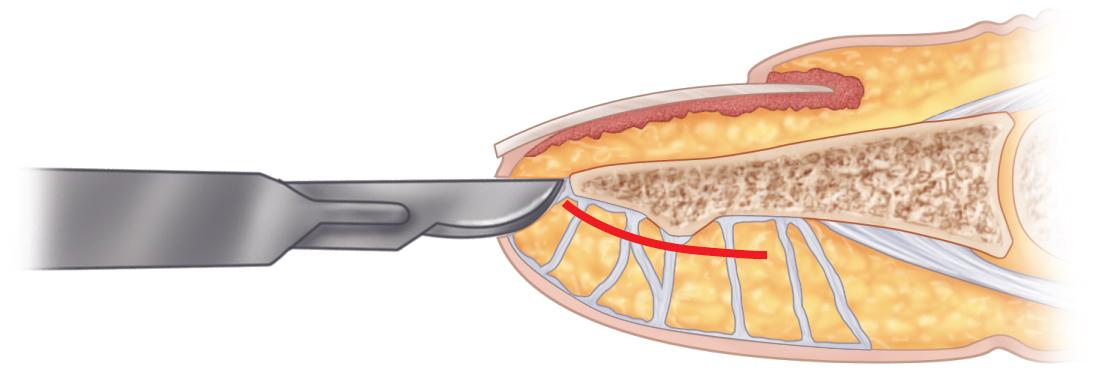
The skin incision should be placed through the dermis only. Be careful not to cut too deeply to avoid damaging the underlying vessels.
The flap is advanced distally using a skin hook, and the lateral subcutaneous tissues are carefully divided using microscissors until the flap can reach to cover the defect without tension ( Fig. 87.6A–B ).
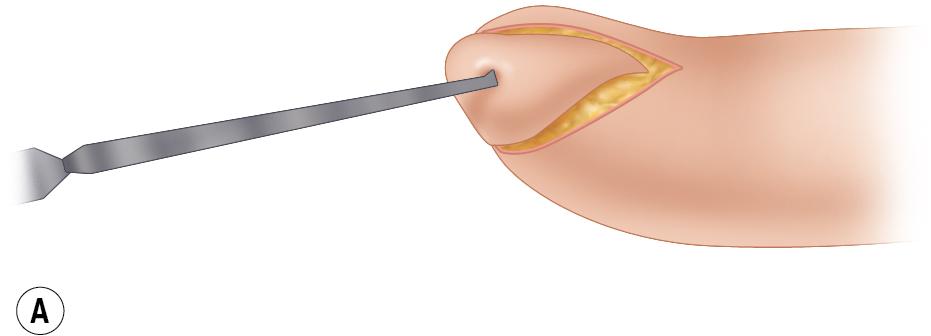
Poor perfusion is often attributed to excessive tension after flap inset. The flap should be advanced easily into place.
This step should be carried out under loupe magnification to avoid dividing the small neurovascular branches.
Do not compromise flap viability by attempting aggressive closure. A loose closure that heals secondarily is preferable to tension-induced flap necrosis.
The leading edge of the flap is sutured to the nail bed using a 5-0 chromic suture.
The lateral and proximal incisions are then closed in a Y shape with 4-0 nylon suture ( Fig. 87.7 ).
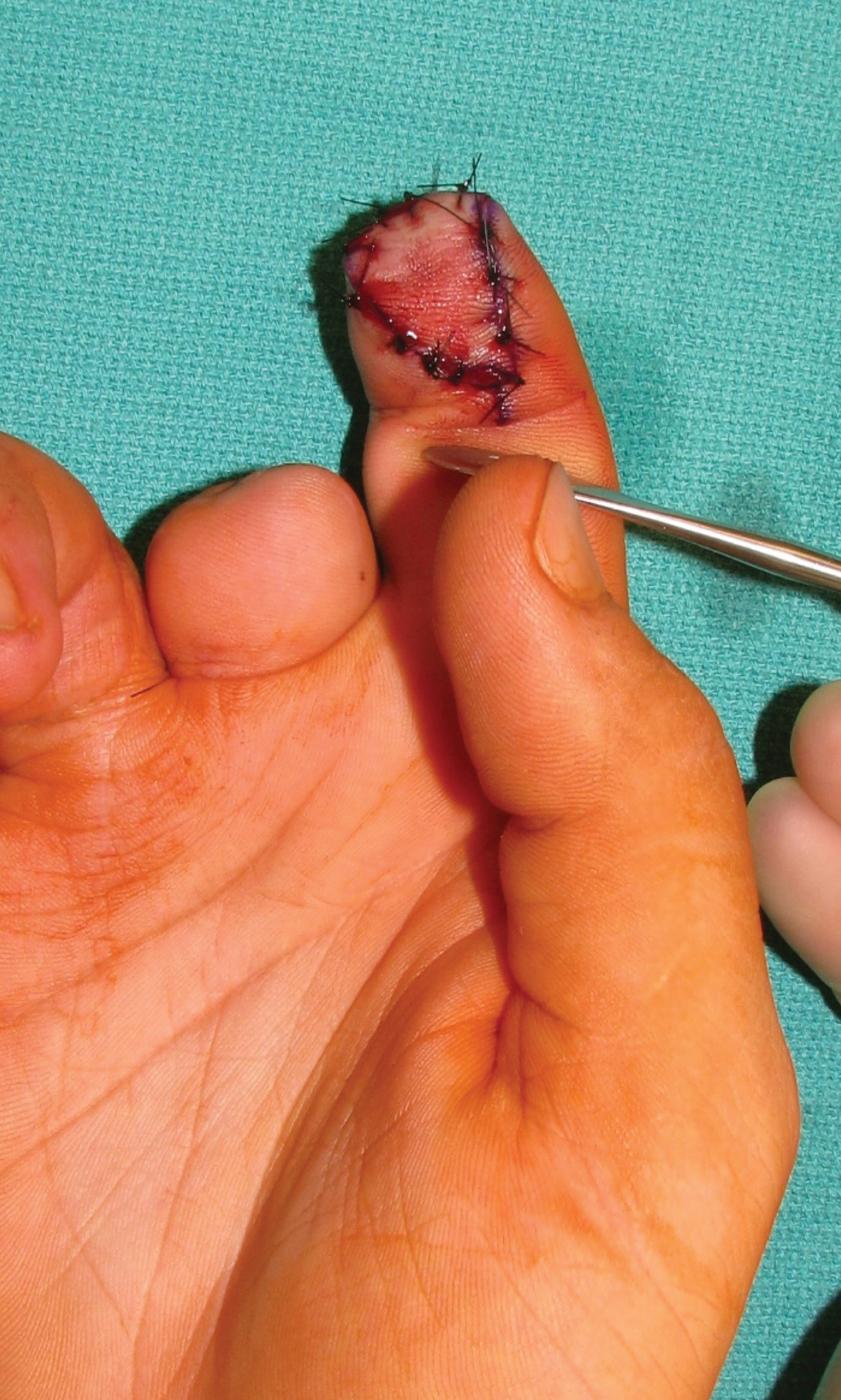
Only suture the skin to avoid suturing the underlying digital vessels.
About 0.5 to 1.0 cm of advancement can be obtained using the V-Y method.
The nail bed should not extend distal to the underlying bone. A hook nail deformity will develop if the nail bed is drawn volarly by the suture. All the tension of closure should be placed over the proximal flap advancement so that the flap is resting without tension over the tip of the digit.
The tourniquet is released and the perfusion of the flap is checked.
Reperfusion of the flap may be delayed for 5 minutes.
If perfusion of the flap is poor, check and remove the tight sutures. The subcutaneous tissue protruding between the flap and the defect can heal by secondary intention.
Do not shorten the remaining distal phalanx to decrease the tension unless it is absolutely necessary.
The finger is placed in a moist, petroleum-based gauze and soft dressing that should be changed 2 to 5 days after the procedure. Permanent sutures are removed 2 weeks after the procedure.
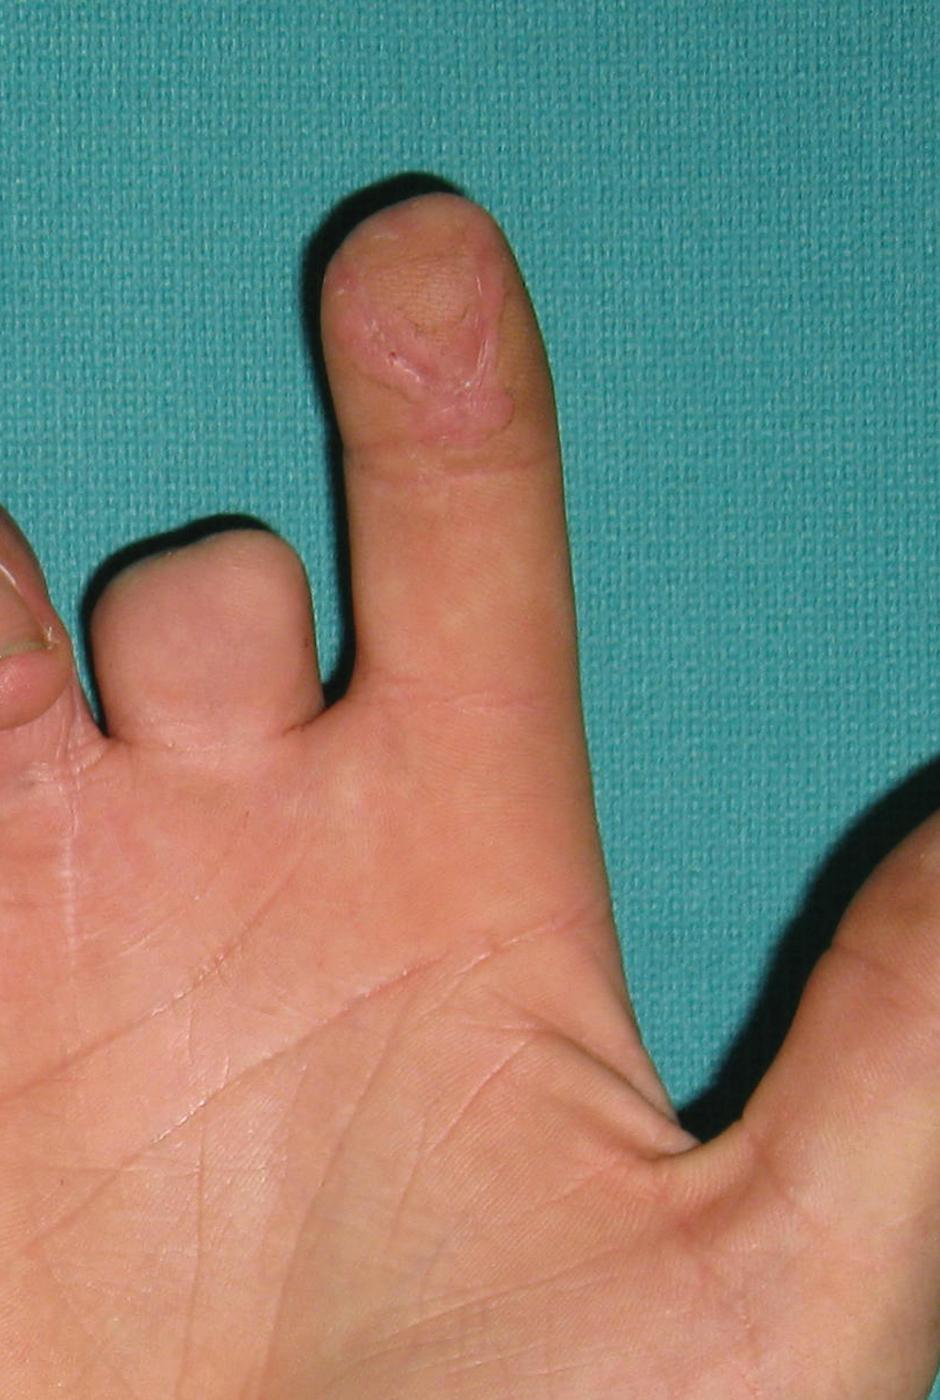
This flap can provide excellent soft tissue replacement with good contour and fingertip padding ( Fig. 87.8 ). Normal or nearly normal sensation of the fingertip can be expected postoperatively.
One indication is volar soft tissue defects involving the proximal, middle, or distal phalanx with exposure of tendon or bone ( Fig. 87.9 ).
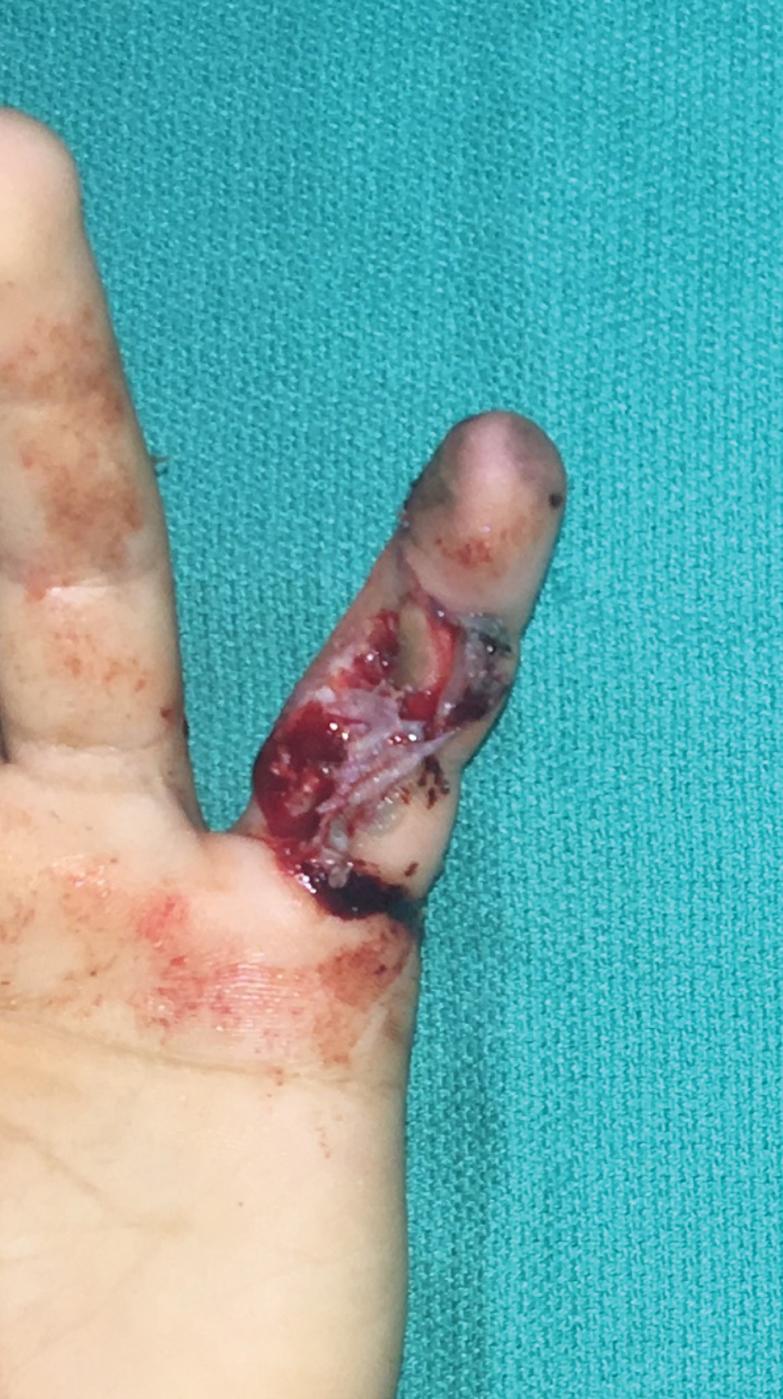
The crossing of a flap from the dorsum of the middle finger can repair a thumb tip injury ( Fig. 87.10 ).
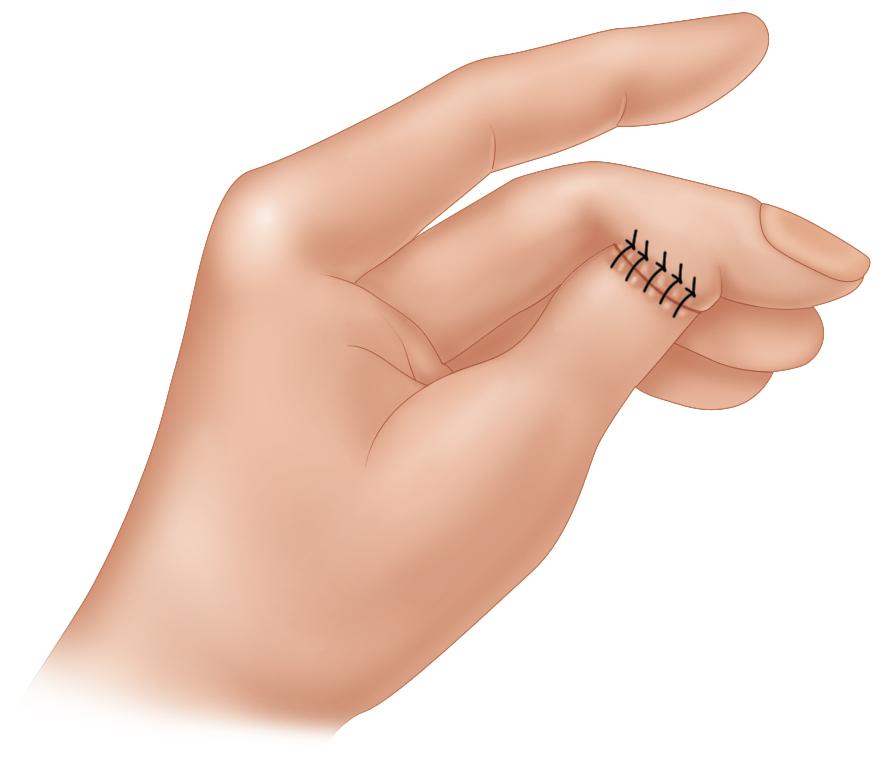
A contraindication is any patient at high risk for postoperative stiffness, including those with pre-existing arthritis or over the age of 40 years.
Flaps from the dorsum of the finger lack bulk and often have hair follicles. Transferring this tissue to the volar finger may produce a suboptimal aesthetic result. This flap option is relatively easy to conduct but does not replace glabrous tissue over the volar finger. The donor and recipient appearance are not ideal.
The posture of the injured finger against the donor finger should be checked before the operation to ensure that it can be positioned comfortably.
The planned donor digit should be assessed for stable, pliable skin with intact range of motion (ROM).
The cross-finger flap transfers thin, dorsal skin with minimal bulk. Other reconstructive options may be more suitable if the defect includes the distal fingertip with deficient pulp.
Patients should be selected carefully and need to be healthy enough to undergo two surgical procedures (one for initial inset and another for flap division). After the initial operation, the digits remain sutured to one another by the dorsal skin bridge and are immobilized for 2 to 3 weeks. This may result in proximal interphalangeal (PIP) joint stiffness because of joint flexion and immobilization. Patients should be screened and carefully counseled regarding the risk of postoperative stiffness.
In the setting of trauma, plain radiographs should be obtained to rule out underlying fractures.
The traditional cross-finger flap borrows skin and subcutaneous tissue from the dorsal finger to cover volar defects.
From superficial to deep, relevant dorsal structures include the skin, subcutaneous tissue, and the extensor apparatus.
Within the subcutaneous tissue lies the dorsal neurovascular network, which is made up of perforators from the proper digital arteries, the venous plexus, and sensory branches from dorsal radial or ulnar nerves.
The flap is raised in a plane just superficial to the paratenon of the extensor mechanism.
The flap is outlined as a rectangular or a rhomboidal shape on the dorsum of the middle phalanx of the adjacent finger. The side of the flap adjacent to the injured finger is designed as the hinge or pedicle ( Figs. 87.11 and 87.12 ).
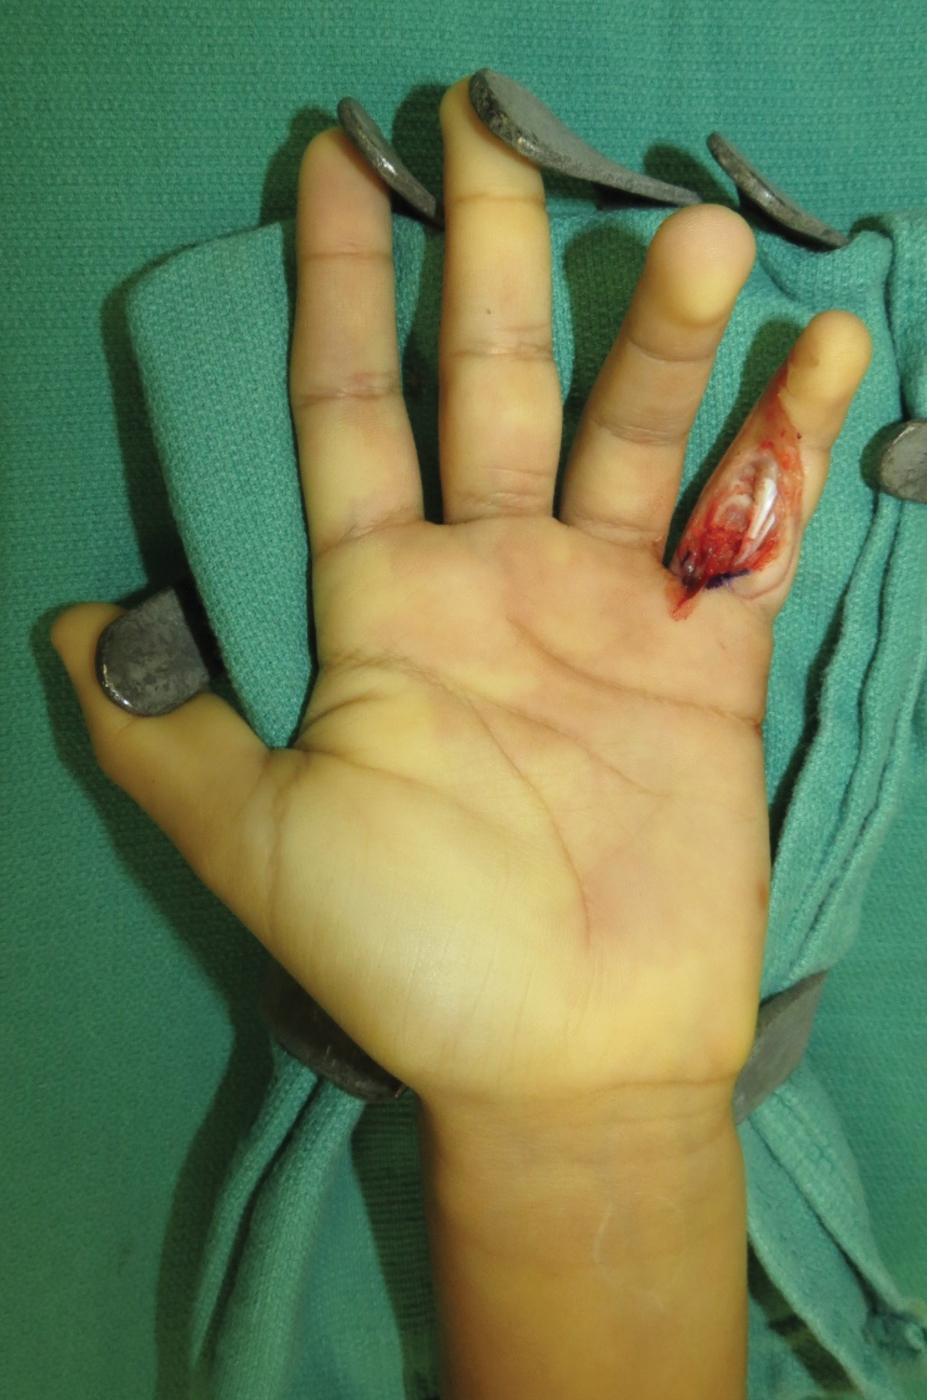
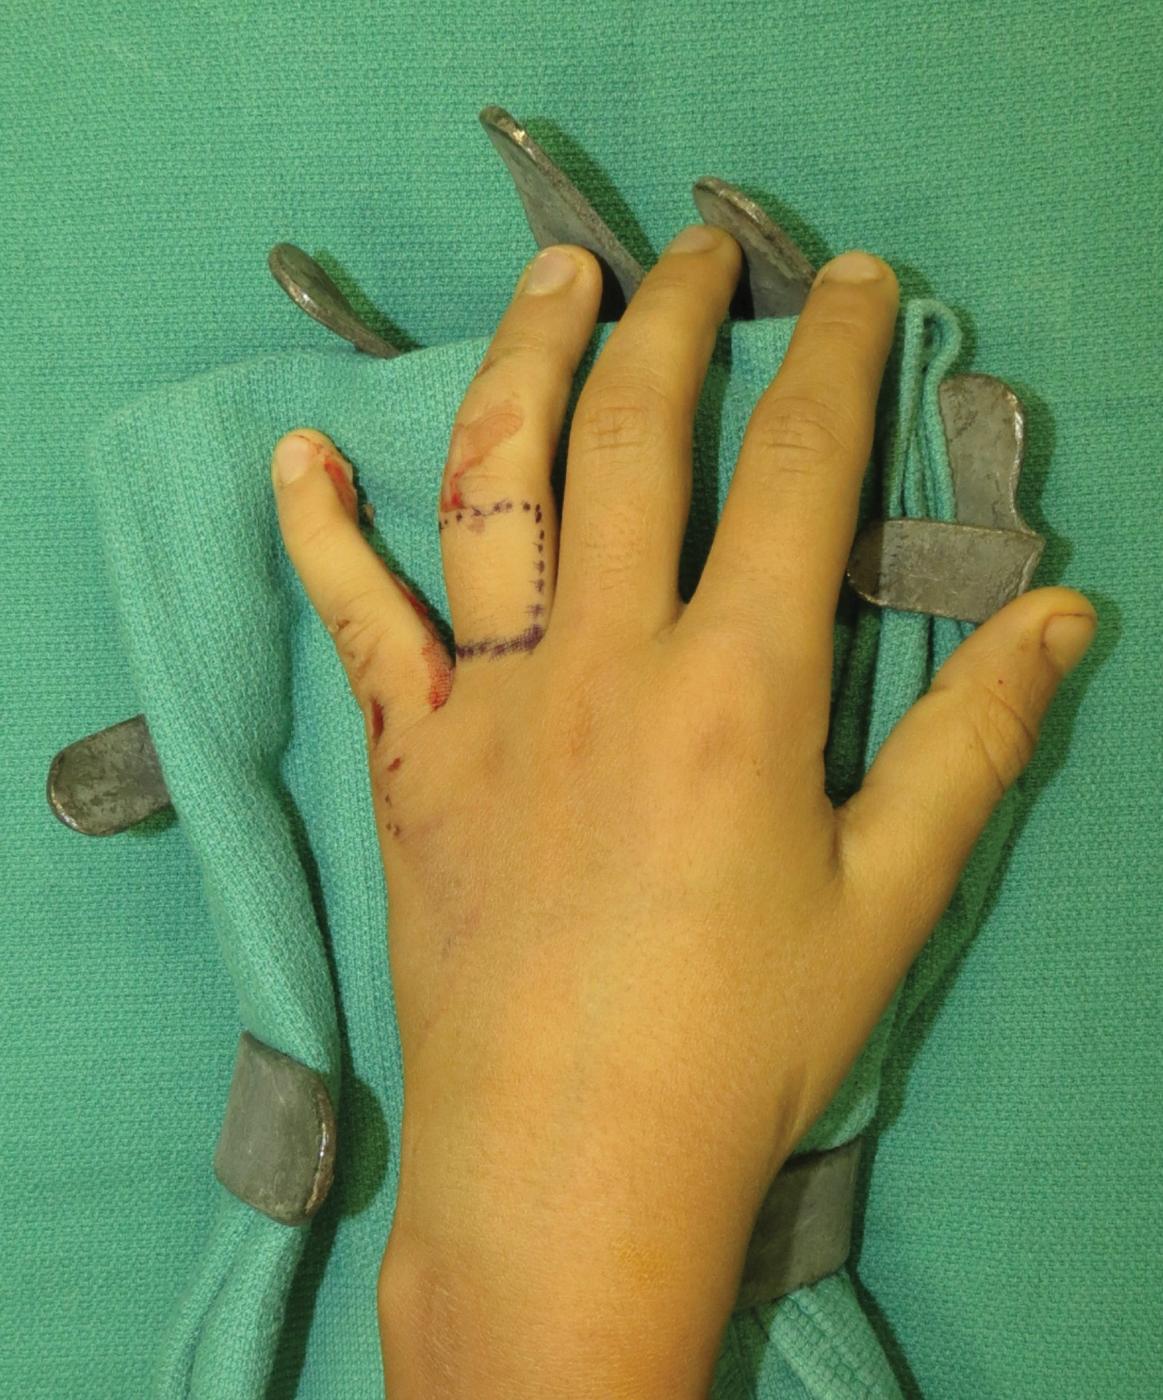
A precise pattern is helpful to estimate the size and location of the flap. A cut end of an Esmarch bandage can be used as a template.
If part of the defect is located on the lateral side of the finger, the pedicle should be designed long enough to ensure that this part is covered after flap division.
The cross-finger flap is a random pattern flap, and the flap length-to-width ratio should be limited to 2:1.
Flap design should not cross the interphalangeal (IP) joints; elevation distal to the DIP joint may damage the nail bed; elevation over the PIP joint may lead to extension contracture.
The flap should not be harvested from the palmar surface of digits because of the propensity for scarring and the development of flexion contractures.
Become a Clinical Tree membership for Full access and enjoy Unlimited articles
If you are a member. Log in here